Repository navigation
First‐time setup
This page walks through the browser installer that runs the first time you open a new RivetIT server. It is for the administrator who installs RivetIT. Everyone else can skip to Getting started.
| Where to find it | Your RivetIT address followed by /setup/. A brand-new install sends you there on its own. |
| Who can use it | Whoever can reach the server before it is set up. There is no sign-in yet, and none is needed. |
| Turn it on | Nothing to turn on. The installer switches itself off when you finish. |
The installer connects RivetIT to its database, creates the first administrator, records your company details and picks your language, currency and time zone. It takes about five minutes.
Before you start you need:
- A running RivetIT web server (Docker Compose or the
deploy/install.shscript; see Deployment). - An empty database and a database user that can create tables in it. The installer does not create the database for you.
- The address you will use to open RivetIT, ideally a proper host name with HTTPS.
If you prefer the command line, scripts/setup_cli.php does the same job without a browser, and deploy/full-restore-deploy.sh installs the server, restores a backup and hardens it in one interactive run. Both are described in Deployment. The rest of this page is about the browser installer.
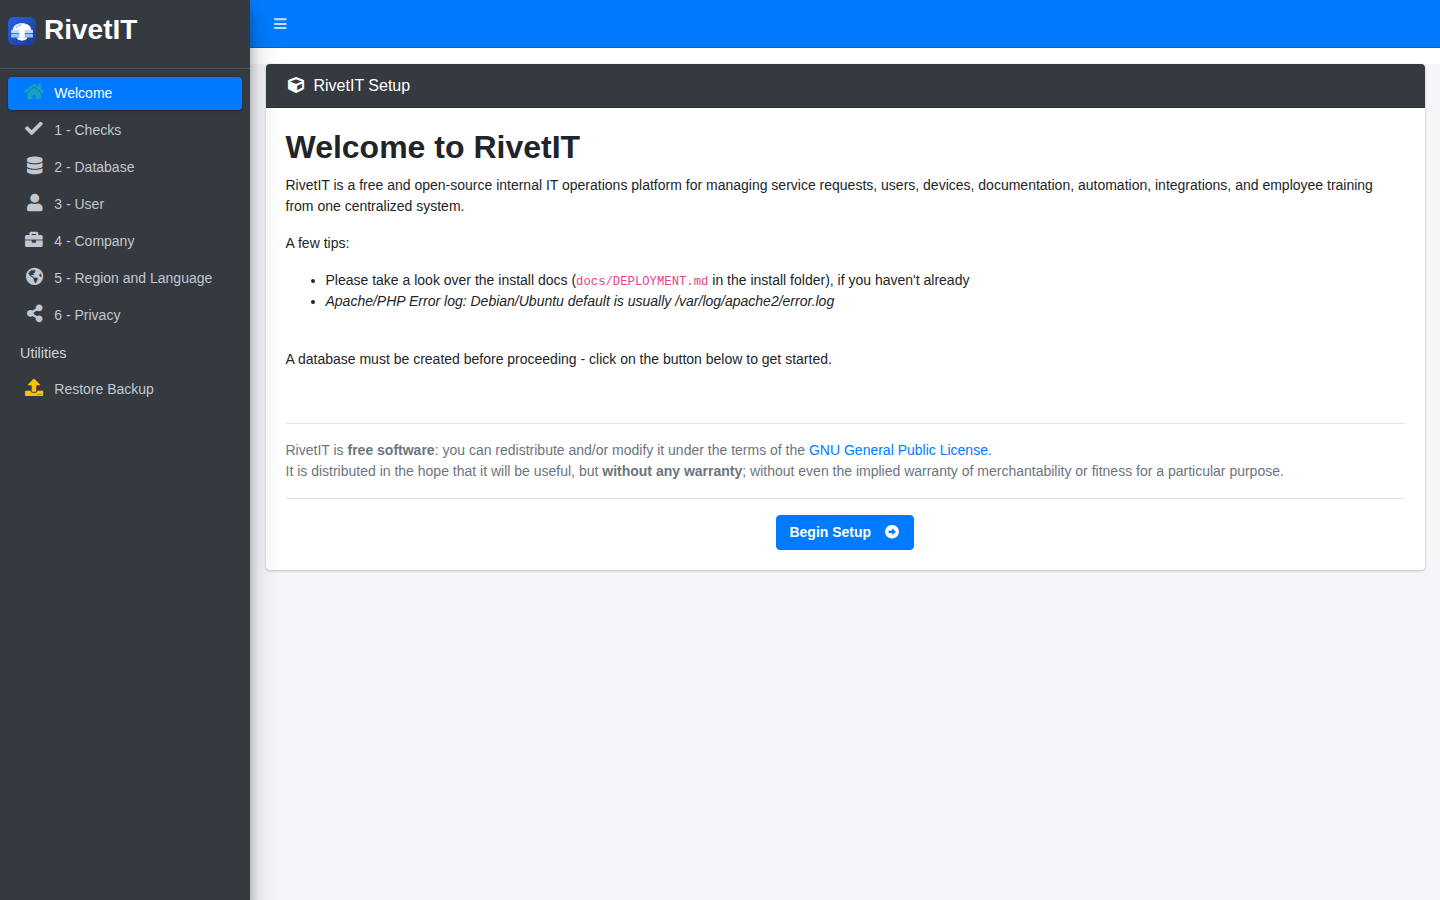
Figure 1 — The welcome page. The left menu lists the six steps. Click Begin Setup to start.
The left menu shows where you are: 1 - Checks, 2 - Database, 3 - User, 4 - Company, 5 - Region and Language and 6 - Privacy. Under Utilities, Restore Backup is for moving an existing installation onto this server (see Restore a backup instead).
You can leave the installer and come back. A step saves its answers when you press its Next button. The database and first-user steps refuse to run a second time, so a finished install cannot be overwritten by mistake.
Step 1 - Check the server
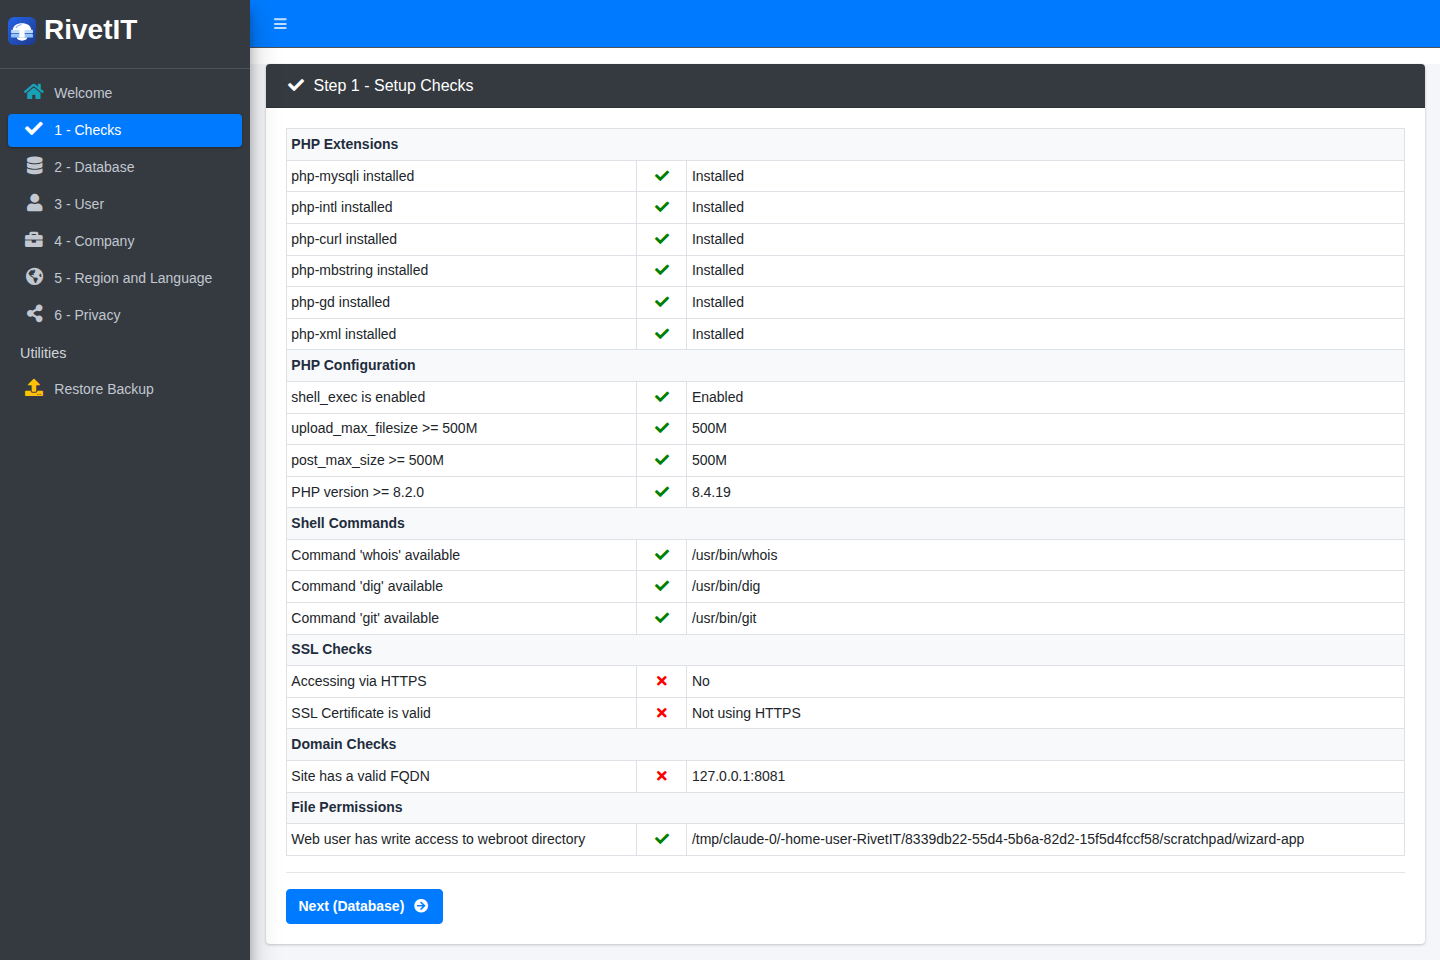
Figure 2 — Step 1, Setup Checks. Green ticks are good. Red crosses are worth reading, but none of them stops you from continuing.
- Click Begin Setup. The Setup Checks table lists what the installer looked at:
| Group | What it checks | Why it matters |
|---|---|---|
| PHP Extensions |
mysqli, intl, curl, mbstring, gd and xml are installed. |
RivetIT needs them. A missing one usually causes errors later. |
| PHP Configuration |
shell_exec is enabled; upload_max_filesize and post_max_size are at least 500M; PHP is 8.2.0 or newer. |
Large uploads and backups need the 500M limits. The version is a hard requirement. |
| Shell Commands |
whois, dig and git are available. |
Domain look-ups use whois and dig. Software updates use git. |
| SSL Checks | You opened the installer over HTTPS and the certificate is valid. | Sign-in is HTTPS-only by default (see If sign-in shows an HTTPS message). |
| Domain Checks | The address in your browser is a valid host name (for example it.example.com, not an IP address). |
Links in emails and portals are built from this address. |
| File Permissions | The web server can write to the RivetIT folder. | The installer has to write config.php there. |
- Fix anything you care about, reload the page to check again, then click Next (Database).
Step 2 - Connect the database
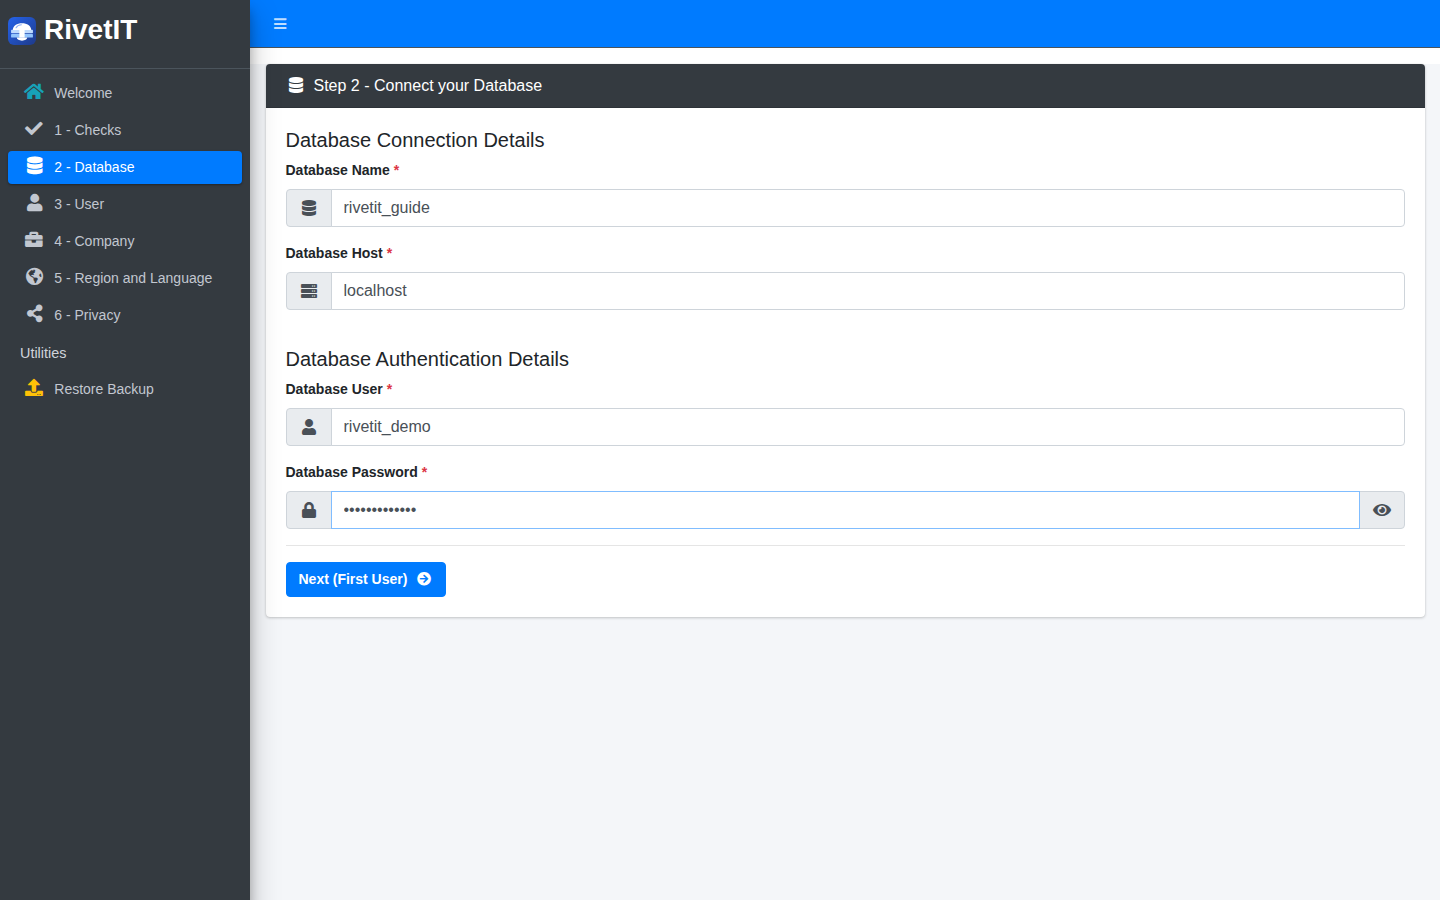
Figure 3 — Step 2, Connect your Database.
- Fill in Database Name, Database Host (usually
localhost; with Docker Compose it isdb), Database User and Database Password. The eye button shows the password as you type. - Click Next (First User).
The installer tests the connection first. If it fails, you see the database's own error message and can go back and correct the details. If it works, the installer writes config.php, creates every table and generates this installation's encryption keys. That can take a few seconds.
The database details live in
config.phpafter this step. To change them later, edit that file. Running this step a second time does nothing and sends you on to the next step.
Step 3 - Create the first administrator
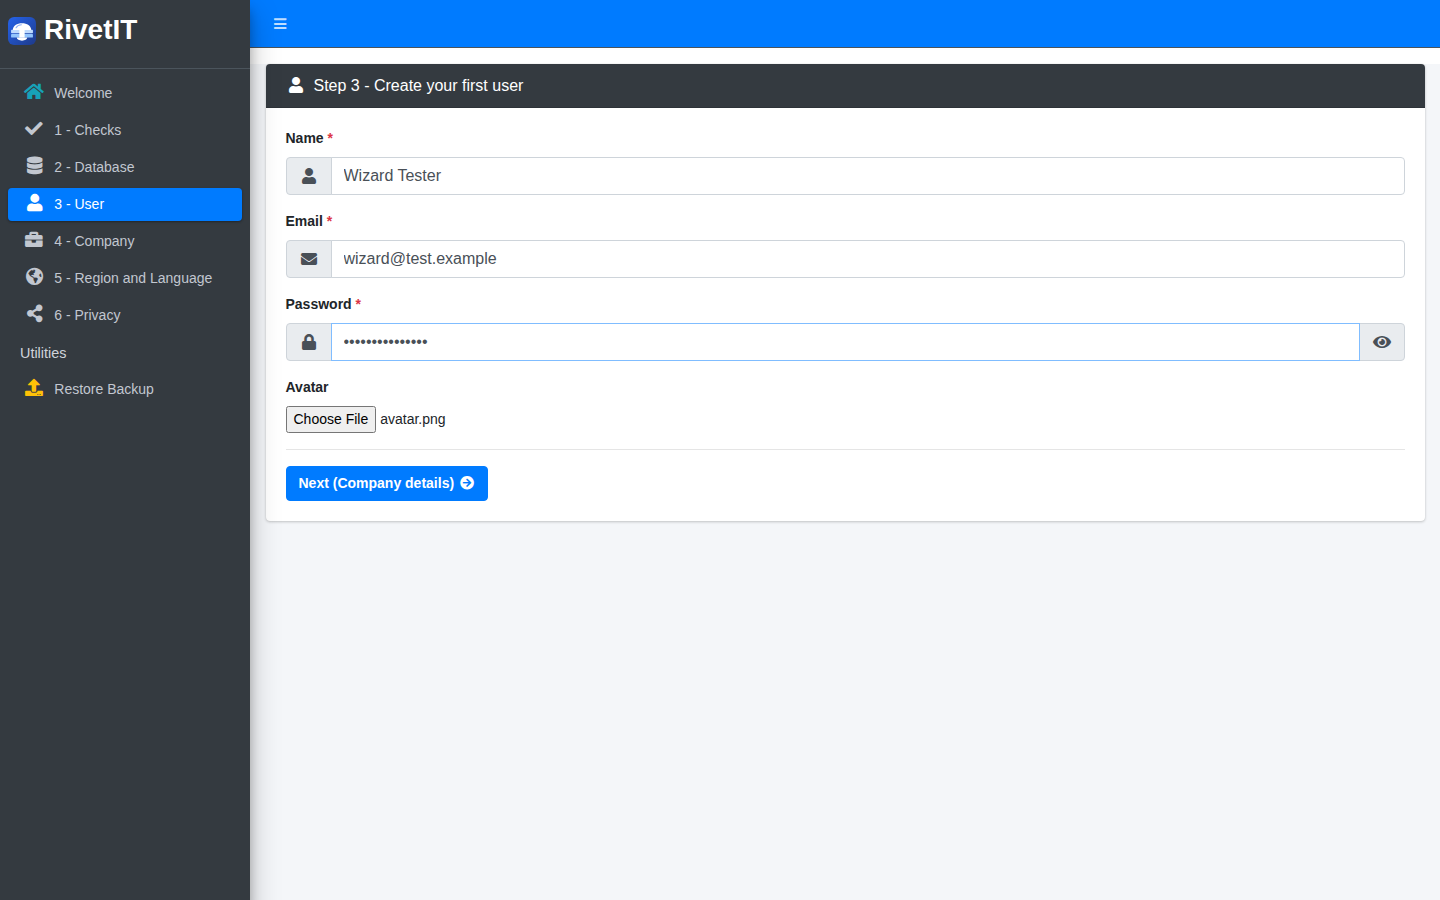
Figure 4 — Step 3, Create your first user.
- Enter your Name, Email and Password. The password needs at least 8 characters. Avatar is an optional picture.
- Click Next (Company details).
This person becomes the administrator and signs in with this email address and password. Your password also protects your personal copy of the key that locks the credential vault, so choose one you can keep and store it safely. The installer only creates a first user when the database has none; if users already exist it skips ahead.
Step 4 - Describe your company
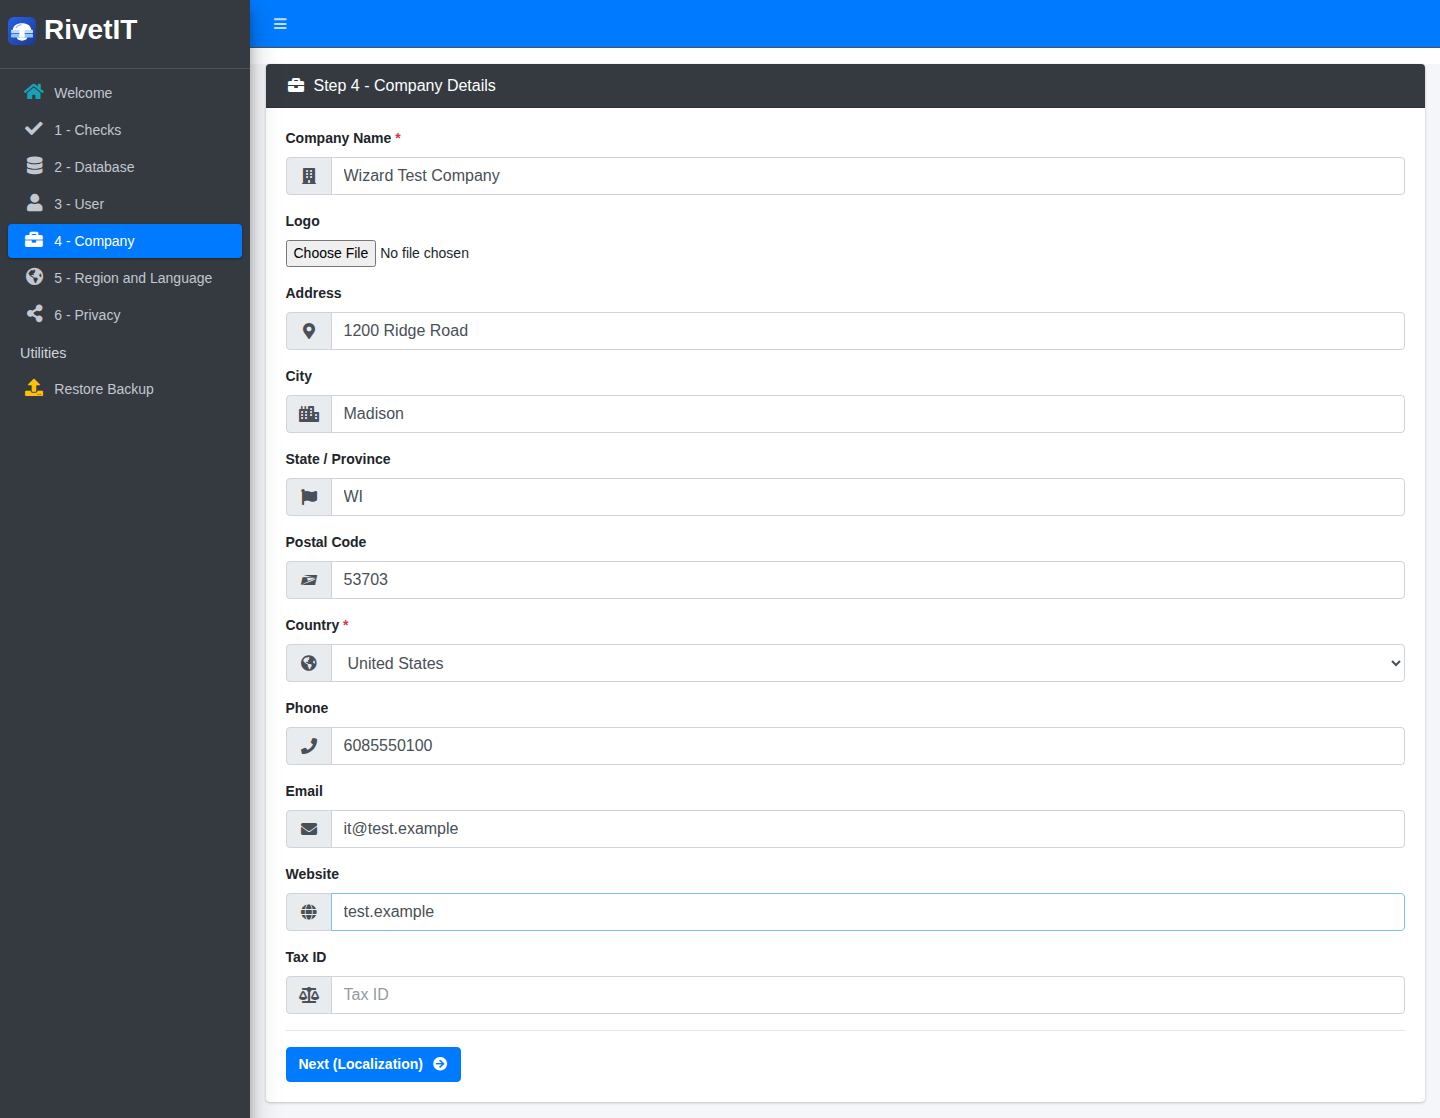
Figure 5 — Step 4, Company Details.
- Enter the Company Name and Country; both are required. Add a Logo, address, Phone, Email and Website if you want them. Tax ID is optional.
- Click Next (Localization).
These details appear on the company record and in emails. You can change all of them later in Administration → Settings → Company Details (see Administration: settings).
Step 5 - Choose region and language
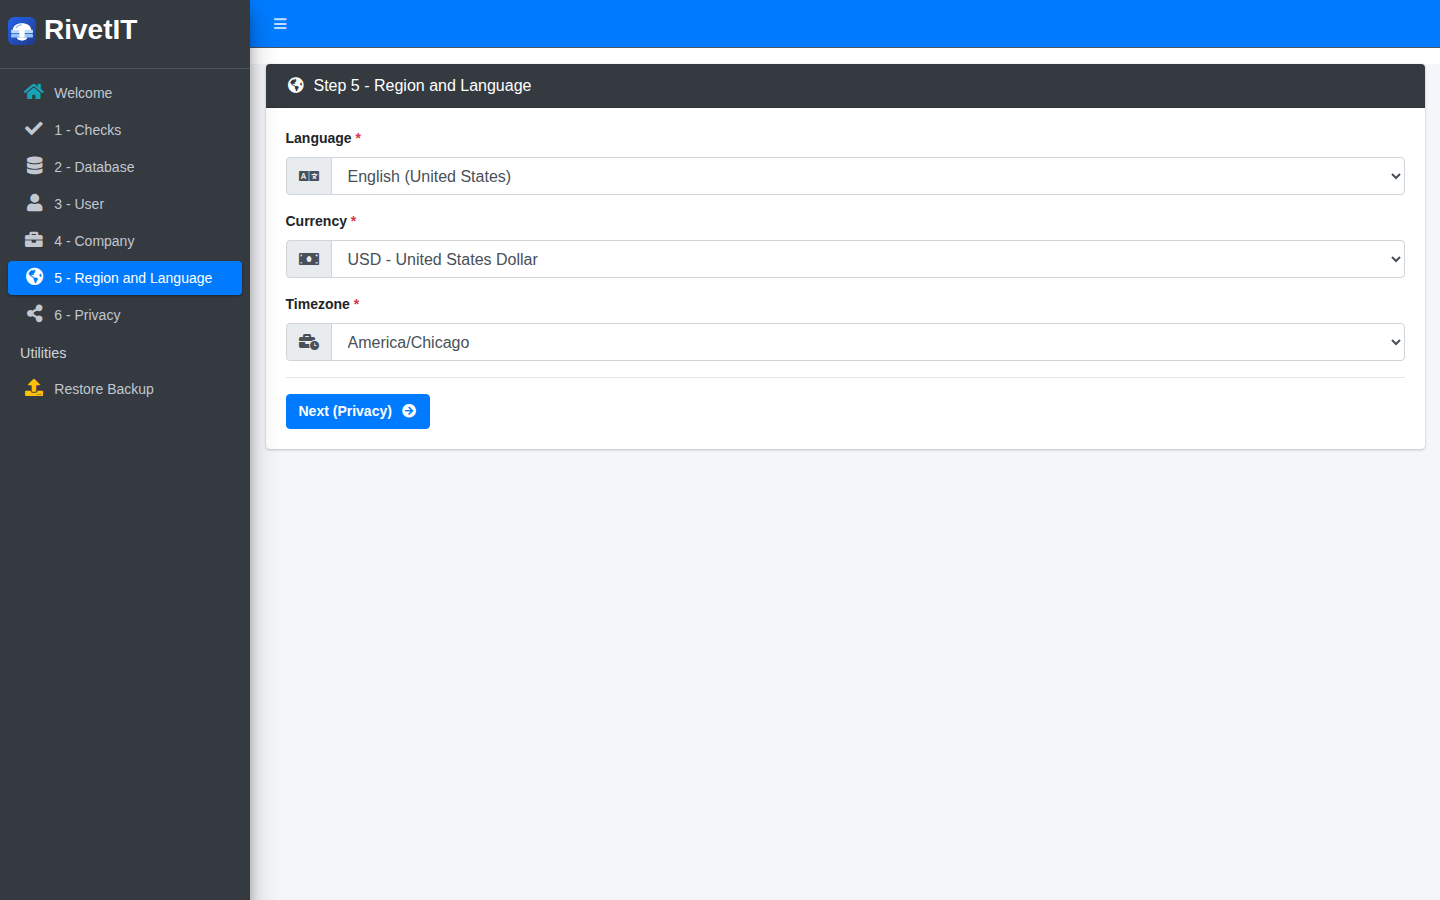
Figure 6 — Step 5, Region and Language.
- Pick the Language, Currency and Timezone. The time zone decides what time RivetIT shows on tickets, reminders and reports, so set it to where most of your staff work.
- Click Next (Privacy).
Step 6 - Privacy and finish
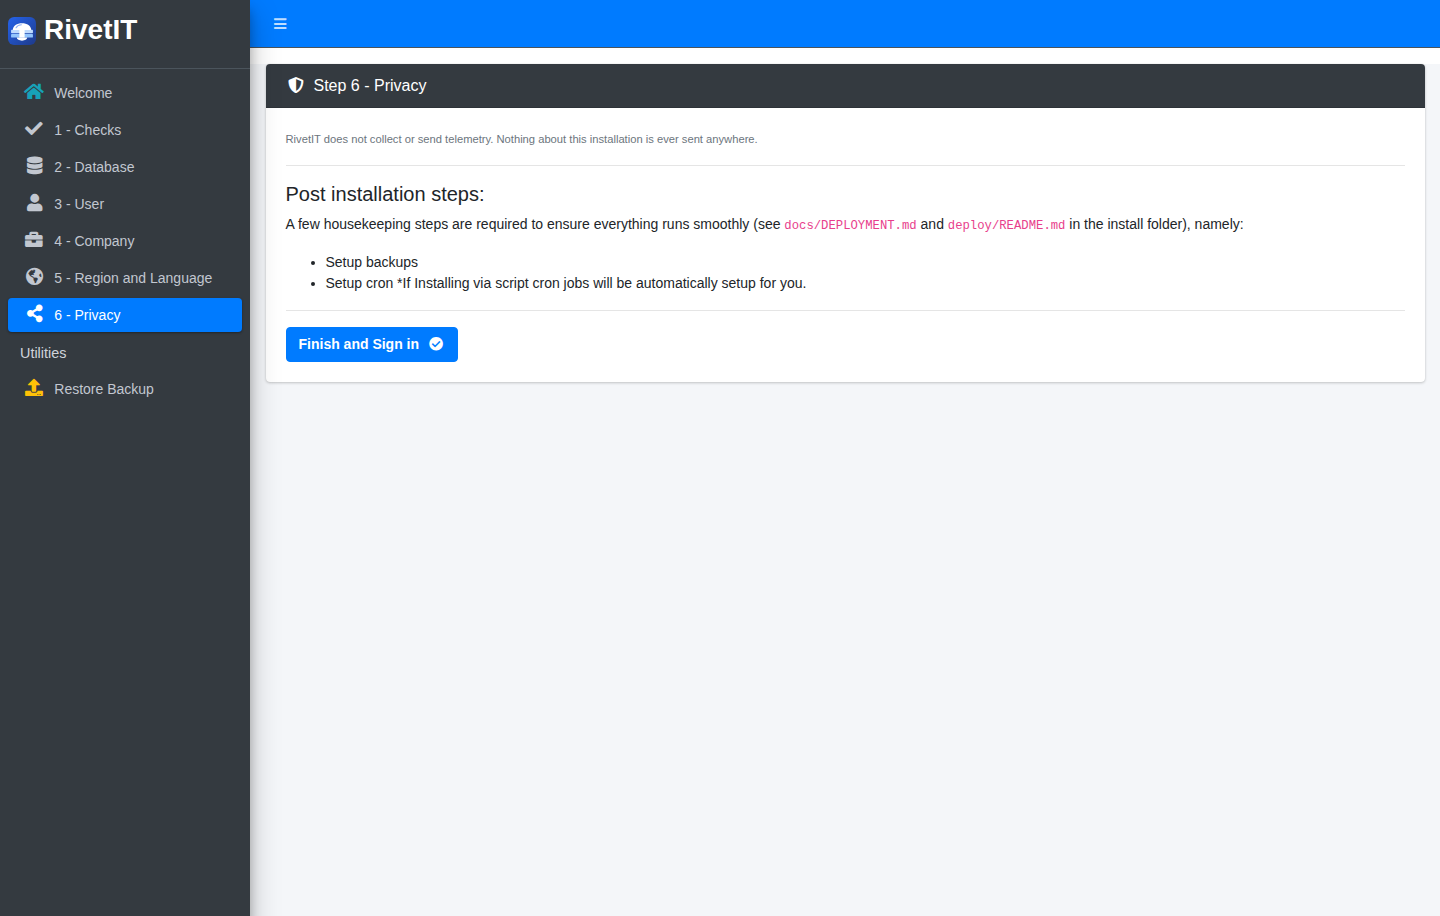
Figure 7 — Step 6, Privacy. The page confirms that nothing is sent anywhere, then lists the housekeeping still to do.
- Read the reminders, then click Finish and Sign in.
RivetIT collects and sends no telemetry. This step only reminds you what is left to do (see the next section) and turns the installer off. From now on /setup/ sends anyone to the sign-in page.
- Sign in. Go to the sign-in page and use the email and password from step 3. The page and its options are described in Getting started.
-
Turn on the scheduler. Installing does not switch on scheduled work. Both Docker Compose and
deploy/install.shrun RivetIT's cron job every few minutes, but the job does nothing until you open Administration → Settings → Notifications, tick Enable Cron Job and save. Email reminders, expiry alerts, recurring tickets, ticket automation and automatic backups all wait for this switch. See Keep scheduled jobs running. - Set up backups. Administration → Maintenance → Backup downloads, stores and schedules backups. Do this before you enter real data (see Back up RivetIT).
- Turn on the modules you will use. Ticketing, IT Documentation, Knowledge Base, Training, Live Chat and the Department Portal are switched on under Administration → Settings → Modules.
- Add your team. Create agent accounts under Administration → Users (see Administration: users and security), then your departments and people.
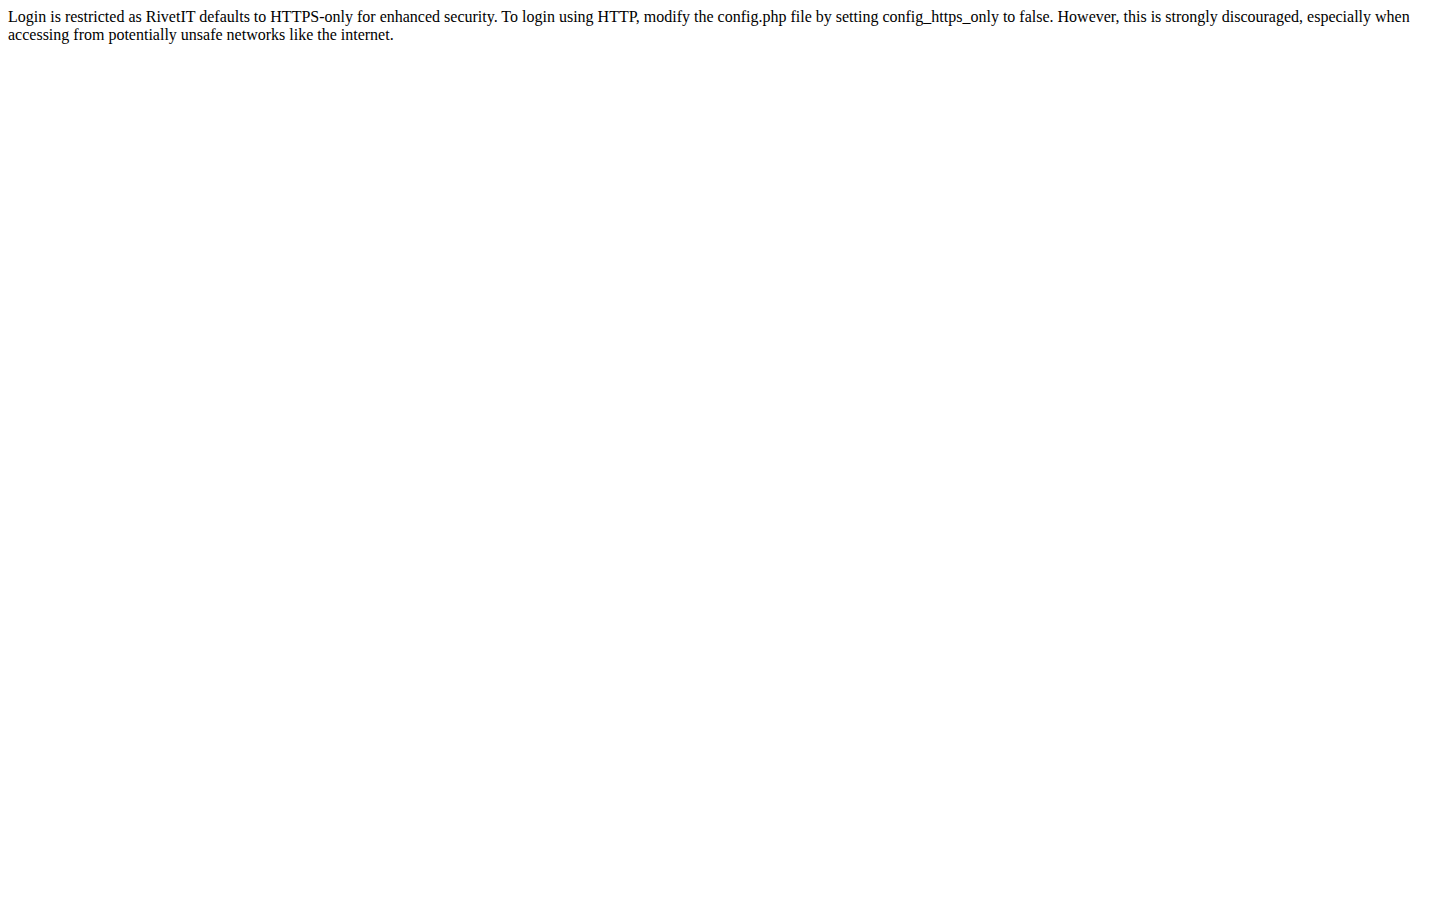
Figure 8 — What you see when you open the sign-in page over plain http:// on a default install.
RivetIT refuses to sign anyone in over plain HTTP, because passwords would cross the network unprotected. The installer writes $config_https_only = TRUE; into config.php. There are two ways out:
-
Use HTTPS (recommended). Put a certificate on the server (
deploy/install.shsets up Let's Encrypt for you) or put a reverse proxy that provides HTTPS in front of it, then open the site withhttps://. -
Allow HTTP on a private test server only. Edit
config.phpand set$config_https_only = FALSE;. RivetIT's own message says this is strongly discouraged on networks you do not control. Never do it for a server reachable from the internet.
If you are moving RivetIT to a new server, you can restore a backup instead of creating a fresh company.
- Do steps 1 and 2 above so the installer knows the (empty) database.
- On the welcome page (it now offers Restore from Backup) or in the left menu under Utilities, choose Restore Backup. Before step 2 is done, this page only tells you a database must be configured first.
- Choose the
.zipfile made by Administration → Maintenance → Backup (Download Backup or Save to Server) and click Restore Backup. - Wait. Large backups take several minutes; do not close the page. When it finishes you land on the sign-in page. Sign in with an account from the old server.
- Check the passwords RivetIT stores for outgoing and incoming mail, integrations and webhooks (see the note below).
The restore replaces everything. It drops every table in the database and empties the uploads folder before loading the backup, so only use it on an empty or disposable database. The uploaded files are checked as they are unpacked: files that look like scripts or executables are rejected and the restore stops with a list of the ones it refused. A .zip from the app's own backup screen is what this form expects. The encrypted backup-*.tar.gz.enc files made by the server's disaster-recovery timer are restored with deploy/restore.sh on the command line instead (see Deployment).
Stored secrets may need re-entering. Mail, integration and webhook passwords are encrypted with a key that lives in
config.phpon the old server, not in the database. The backup carries a copy of that key in itsbackup-manifest.json, but the browser restore does not apply it. A fresh install has its own new key, so those saved passwords may no longer decrypt. Re-enter them under Administration → Settings after a restore (mail under Mail, integrations and webhooks under their own settings pages; see Administration: settings).
| Step | Page | Required fields | Button |
|---|---|---|---|
| Welcome | /setup/ |
None | Begin Setup (or Create First User and Restore from Backup once a database is connected) |
| 1 - Checks | /setup/?checks |
None | Next (Database) |
| 2 - Database | /setup/?database |
Database Name, Host, User, Password | Next (First User) |
| 3 - User | /setup/?user |
Name, Email, Password (8+ characters) | Next (Company details) |
| 4 - Company | /setup/?company |
Company Name, Country | Next (Localization) |
| 5 - Region and Language | /setup/?localization |
Language, Currency, Timezone | Next (Privacy) |
| 6 - Privacy | /setup/?telemetry |
None | Finish and Sign in |
| Restore | /setup/?restore |
A backup .zip
|
Restore Backup |
- Open the installer using the final address people will use. RivetIT stores that host name as its base address, and links in emails are built from it.
- Use a strong, unique password for the first administrator, and add a second administrator soon so you are not locked out if one account has a problem.
- Keep
config.phpprivate and include it in your server backups. It holds the key that protects stored mail, integration and webhook passwords. The app's own.zipbackup does not containconfig.php; it carries only a copy of that key in its manifest, which is readable unless you set a Backup encryption passphrase (see Back up RivetIT). - If the installer is reachable after you finish, it is not a security problem: it only redirects to the sign-in page once
config.phpsays setup is complete.
- Getting started: sign in and learn the layout.
- Administration: settings: change company details, turn on the scheduler, set up backups and mail.
- Administration: users and security: add agents and set roles.
- Deployment: install options, backups and restore from the command line.