Home

CLITK (for Command Line Insight Toolkit) is a multiplatform toolbox for medical image processing and analysis. This set of solutions includes algorithms for pre-processing, segmentation, registration, analysis, evaluation of the results obtained as well as the VV visualization tool and more. This wiki presents you the installation steps of the tutorials for using these tools. This tutorial was done on Windows 10 and will be done soon on other OS.
- Pre-requisite sources and tools
- Download CLITK
- Compiling CLITK
- CLITKtools Wiki and examples
- Create a new tool for CLITK
To use CLITK, your system needs the following third party software (click on the link to get the download links a step by step installation instructions):
- Visual Studio 2022
- Qt 5.12
- ITK 4.13.3
- VTK 8.2.0
- Git 2.36.1 (only for contributers)
Other versions are compatible but not tested yet, we advise you to use the one indicated.
Create on your computer a folder “YOURCLITKFOLDER”. Depending on your use of CLITK there are 2 ways to download it:
- For users, simple download of the archive
- For contributors, use git to download and upload files
For users
Click on the link below: https://github.com/benpresles/vv
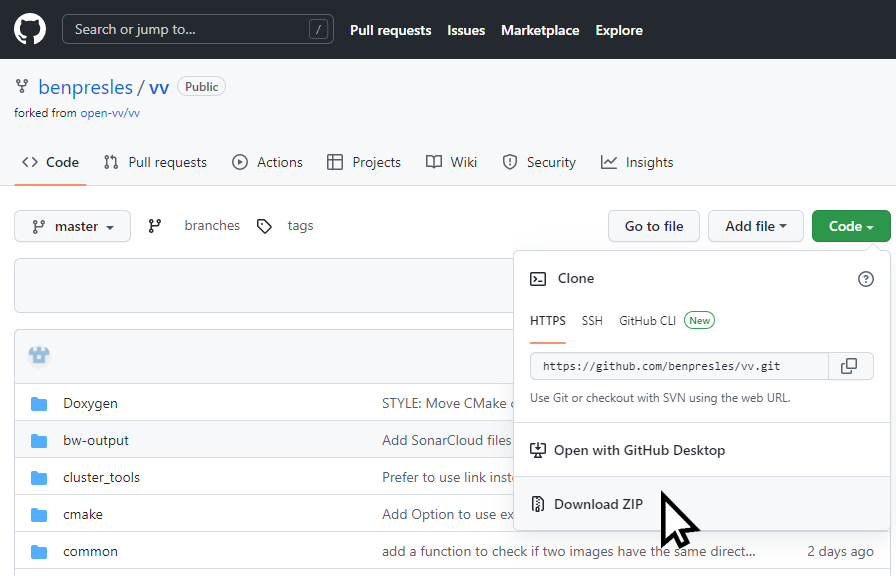
Click on “Code” button > “Download ZIP”:
Uncompressed the vv-master.zip files in the folder “YOURCLITKFOLDER\vv-master”.
For contributors
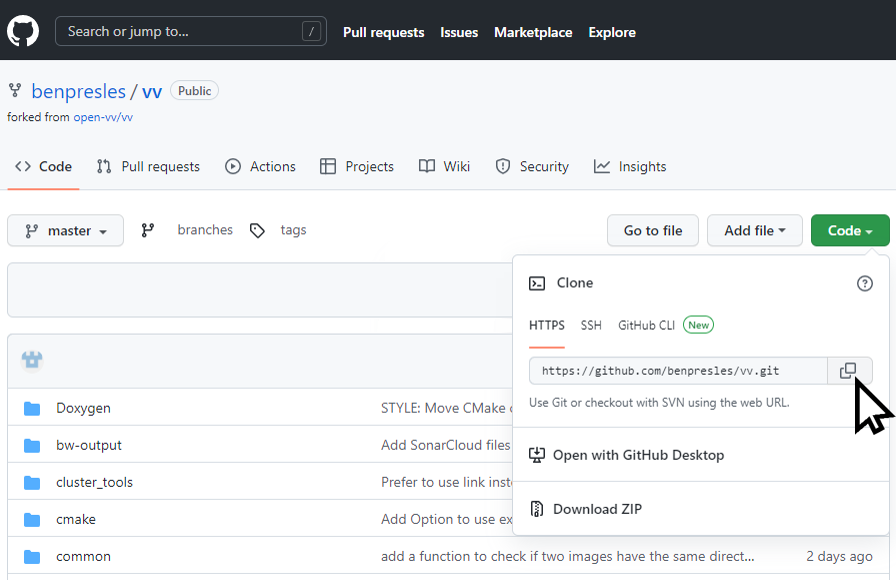
Click on the link below: https://github.com/benpresles/vv
Click on “Code” button and then click on the button next to the URL to copy it:
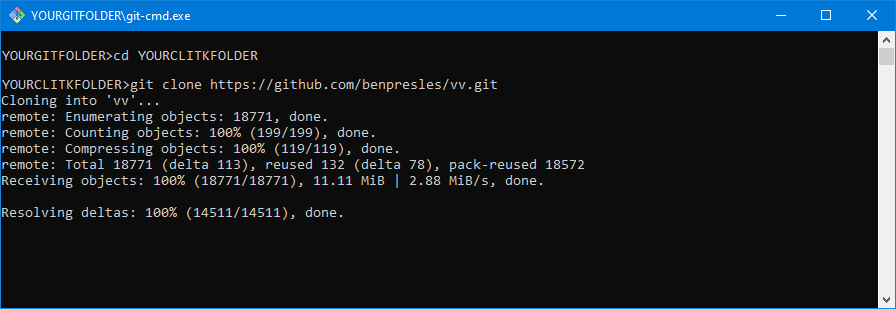
In your Git folder, launch “git-cmd.exe”.
Go to “YOURCLITKFOLDER” and enter the command “git clone + the copied URL" (https://github.com/benpresles/vv.git).
The CLITK project is now in “YOURCLITKFOLDER\vv”:
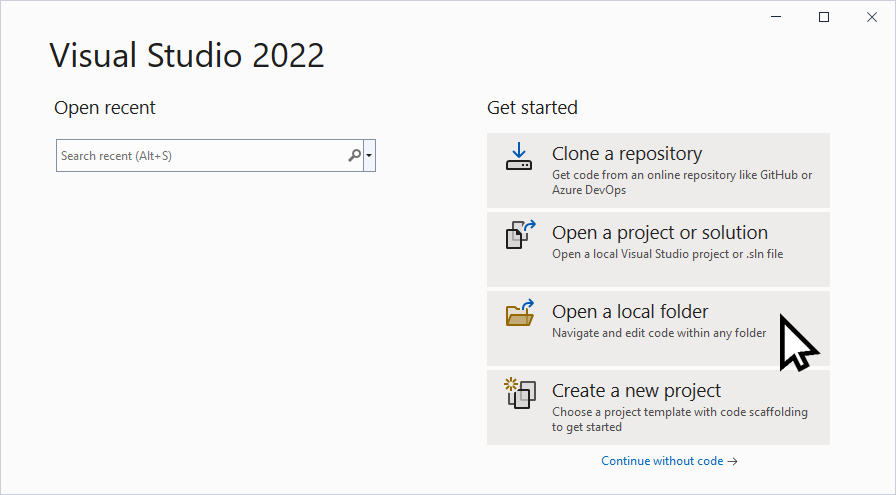
Open Visual Studio 2022 and click on “Open a local folder”:
For users only, select the folder “YOURCLITKFOLDER\vv-master”.
For contributors, select the folder “YOURCLITKFOLDER\vv”.
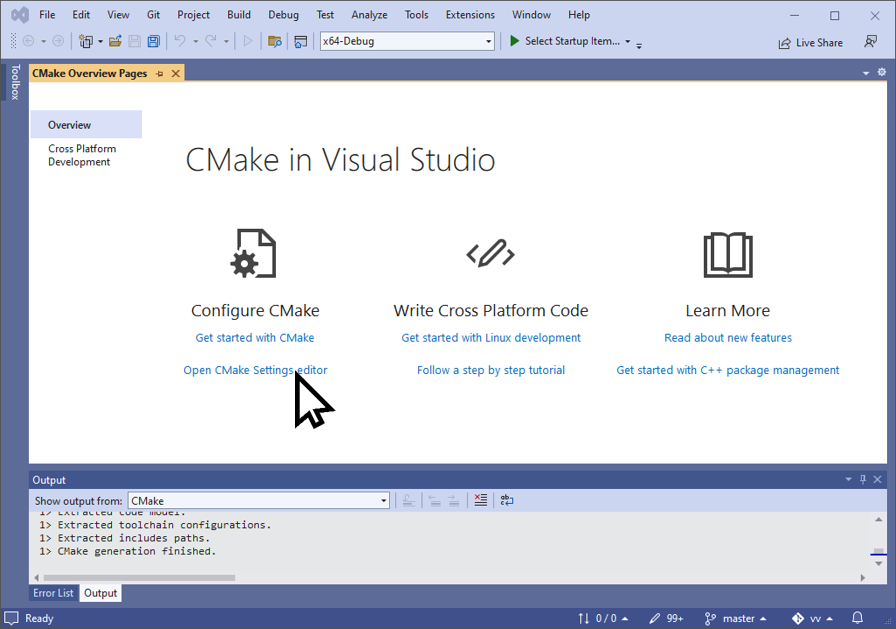
Wait the ending of CMake process (the output from CMake is displayed in the “Output” square in Visual Studio window). When the Cmake shows the message “CMake generation finished”, click on “Open CMake Settings editor” to edit the compilation parameters of CLITK:
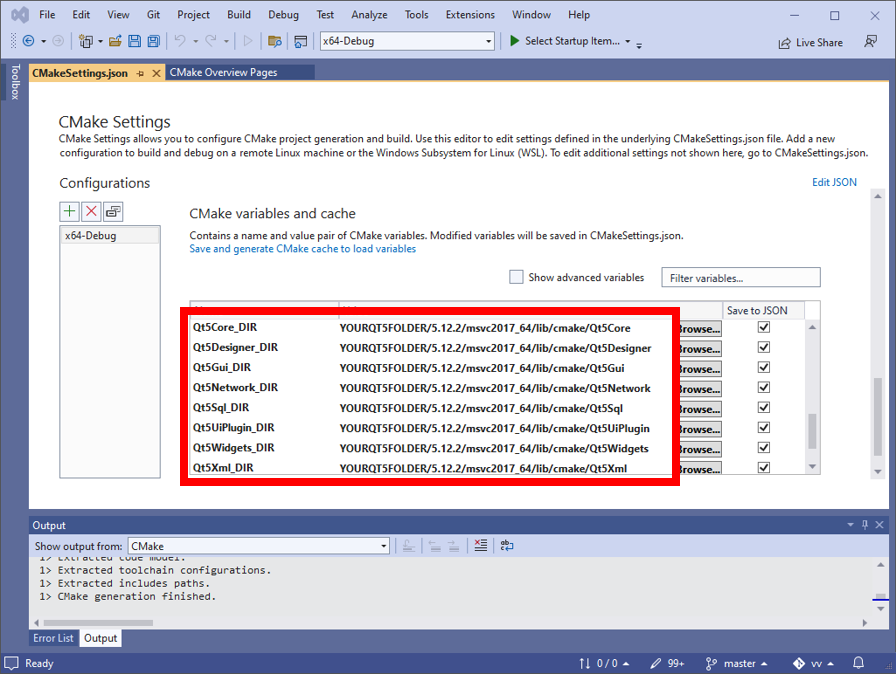
Wait again the “Cmake generation finished” signal and then in “CMake Variables and cache”:
- Checked “Show advanced variables”
- Make sure “Qt5***_DIR” option is correct.
The good folder is "YOURQT5FOLDER/5.12.2/msvc2017_64/lib/cmake/Qt5***" (see the image below).
If you have made a change:
- Save the CMakeSettings.json file (“File” > “Save CMakeSettings.json” or Ctrl + S)
- The option is checked and not in bold
- Make sure “ITK_DIR” option is correct. By default for a Debug Mode compilation, the good folder is “YOURITKFOLDER/out/install/x64-Debug/lib/cmake/ITK-4.13”.
If you have made a change:
- Save the CMakeSettings.json file (“File” > “Save CMakeSettings.json” or Ctrl + S)
- The option is checked and not in bold
- Make sure “VTK_DIR” option is correct. By default for a Debug Mode compilation, the good folder is “YOURVTKFOLDER/out/install/x64-Debug/lib/cmake/vtk-8.2”.
If you have made a change:
- Save the CMakeSettings.json file (“File” > “Save CMakeSettings.json” or Ctrl + S)
- The option is checked and not in bold
- Checked “CLITK_BUILD_REGISTRATION”, this option is now checked and in blod.
- Save the CMakeSettings.json file (File > Save CMakeSettings.json or Ctrl + S)
- The option is checked and not in bold
- Checked “CLITK_BUILD_SEGMENTATION”, this option is now checked and in blod
- Save the CMakeSettings.json file (File > Save CMakeSettings.json or Ctrl + S)
- The option is checked and not in bold
- Checked “CLITK_BUILD_TOOLS”, this option is now checked and in blod
- Save the CMakeSettings.json file (File > Save CMakeSettings.json or Ctrl + S)
- The option is checked and not in bold
- Checked “CLITK_EXPERIMENTAL”, this option is now checked and in blod
- Save the CMakeSettings.json file (File > Save CMakeSettings.json or Ctrl + S)
- The option is checked and not in bold
CAUTION: At this step, make sure that all changes have been applied correctly.
- To compile,
- Click on “Build” > “Build All” in the menu bar
- Click on “Build” > “Install CLITK” in the menu bar CLITK is now install in “YOURCLITKFOLDER/vv-master/out/install/x64-Debug/bin” for users or “YOURCLITKFOLDER/vv/out/install/x64-Debug/bin” for contributors by default (you can change this folder with the option “CMAKE_INSTALL_PREFIX”)
- PATH environment variable update
For Windows 10 system:
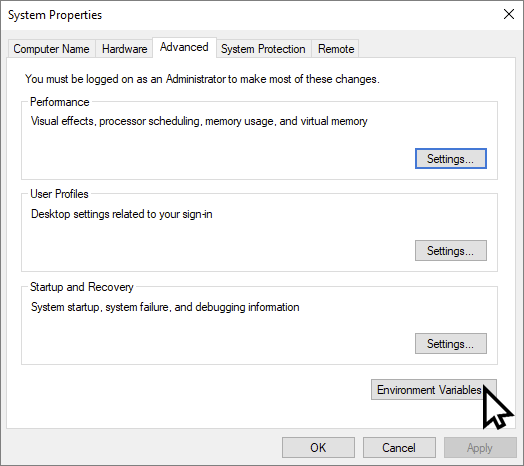
Press “Start” button > enter “Edit the system environment variables” (you must be Administrator to do that)
Click on “Environment variables” button
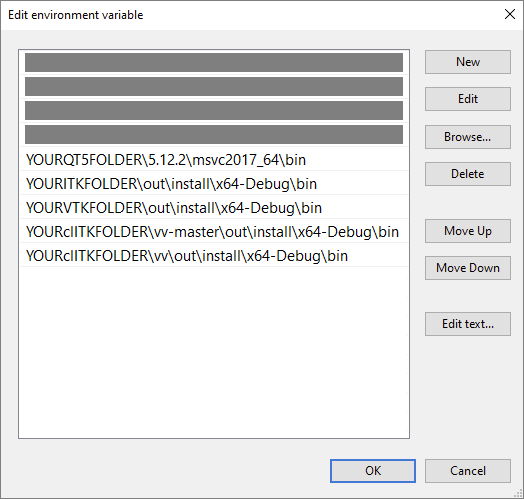
In “System variables” square, double click on “Path” to edit the PATH environment variable.

- Click on “New” button and add "YOURQT5FOLDER\5.12.2\msvc2017_64\bin"
- Click on “New” button and add "YOURITKFOLDER\out\install\x64-Debug\bin"
- Click on “New” button and add "YOURVTKFOLDER\out\install\x64-Debug\bin"
- For users, click on “New” button and add
"YOURCLITKFOLDER\vv-master\out\install\x64-Debug\bin"
For contributors, click on “New” button and add
"YOURCLITKFOLDER\vv\out\install\x64-Debug\bin"
Now, you can use all tools in "YOURCLITKFOLDER\vv-master\out\install\x64-Debug\bin" for users or "YOURCLITKFOLDER\vv\out\install\x64-Debug\bin" for contributors.
Work in progress...
Work in progress...