Repository navigation
User Guide
This guide covers PaddleDoc from an everyday user's perspective: turning documents into markdown, working with the jobs list, importing Confluence pages, using the Mail API, comparing vision-language models, and pushing results to OpenWebUI.
For administrator-only topics (Users, Teams, SSO providers, VL model connections, Paddle service settings), see the brief note at the end of this page — those screens are admin-managed and outside the scope of this guide.
Open PaddleDoc in your browser and sign in with your username (or email) and password. If your organization has configured single sign-on, you'll see one or more "or continue with" buttons below the password form — click your provider to sign in through it instead.
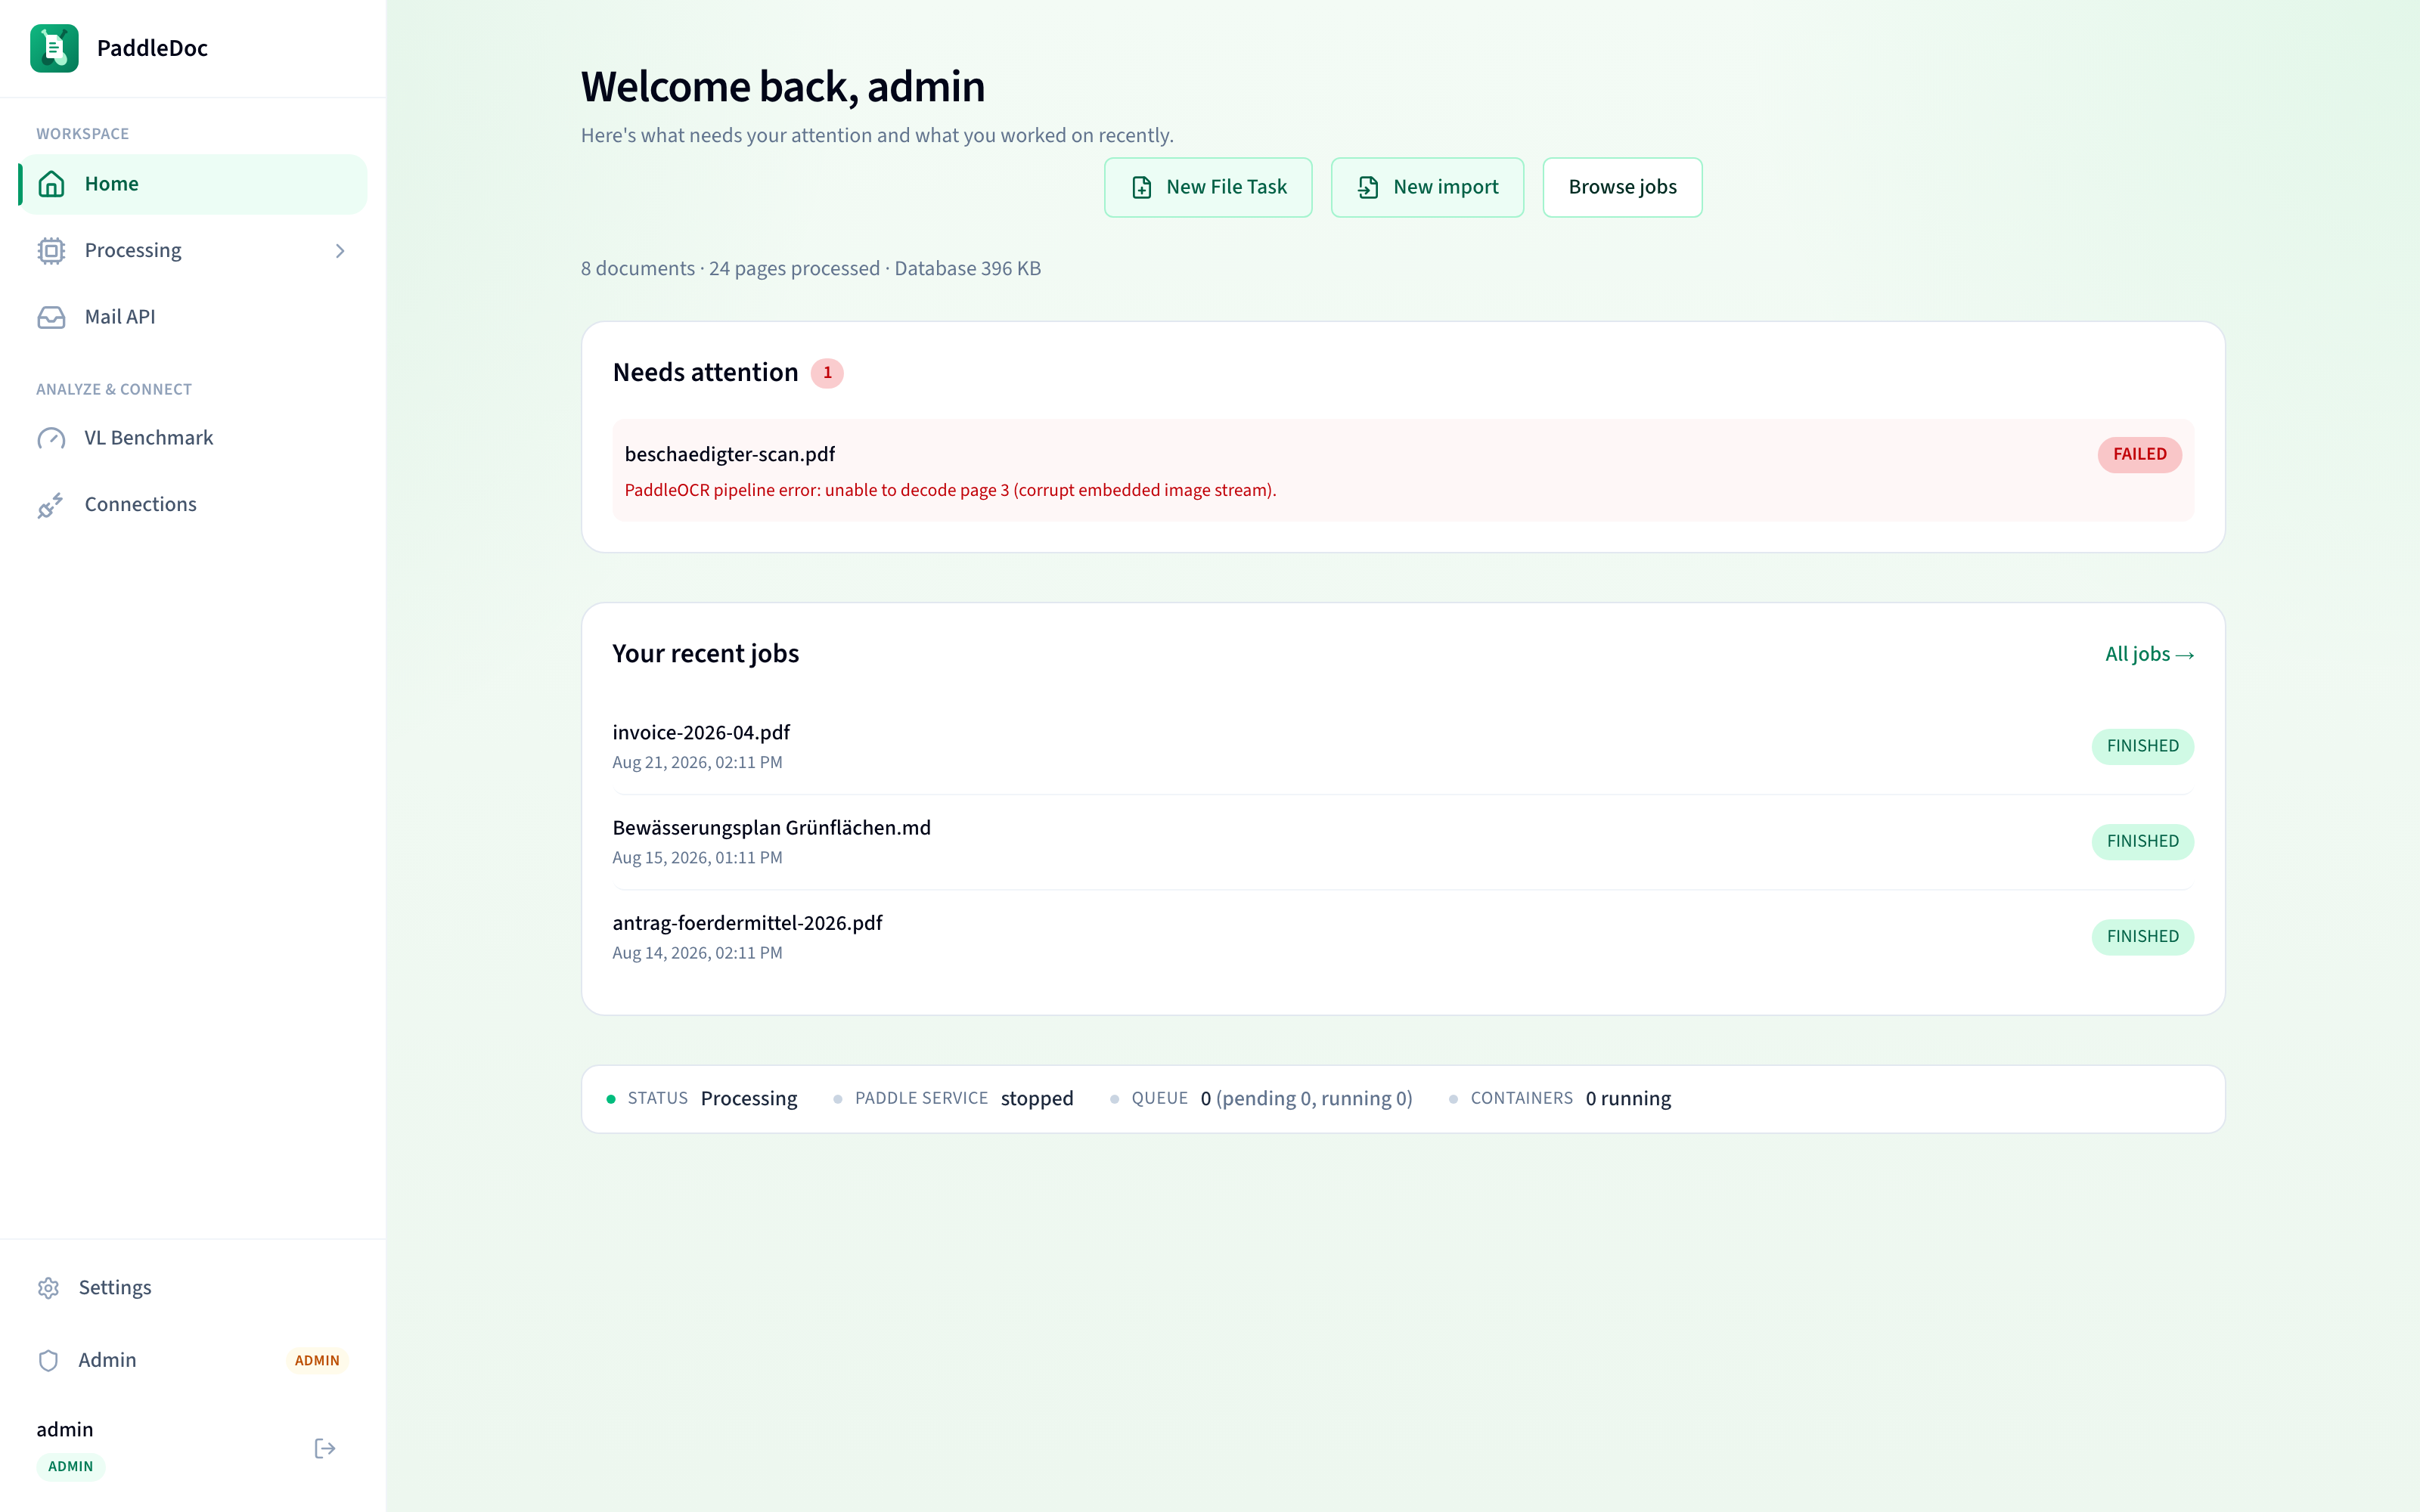
After signing in, Home shows you:
- New File Task and New import — the two quick-start buttons for starting work.
- Needs attention — your own failed jobs first, then anyone else's, so problems don't get lost.
- Your recent jobs — the last five jobs you started, newest first, with a link to browse all jobs.
- A status bar at the bottom showing whether the Paddle OCR service is reachable, how many jobs are queued/running, and how many worker containers are active. Expand Details for container and worker-node information.
The left sidebar groups the app into two sections:
- Workspace — Home, Processing (File Task, Jobs, Imports), and Mail API.
- Analyze & connect — VL Benchmark and Connections.
Your account menu at the bottom links to Settings and, if you're an administrator, Admin.
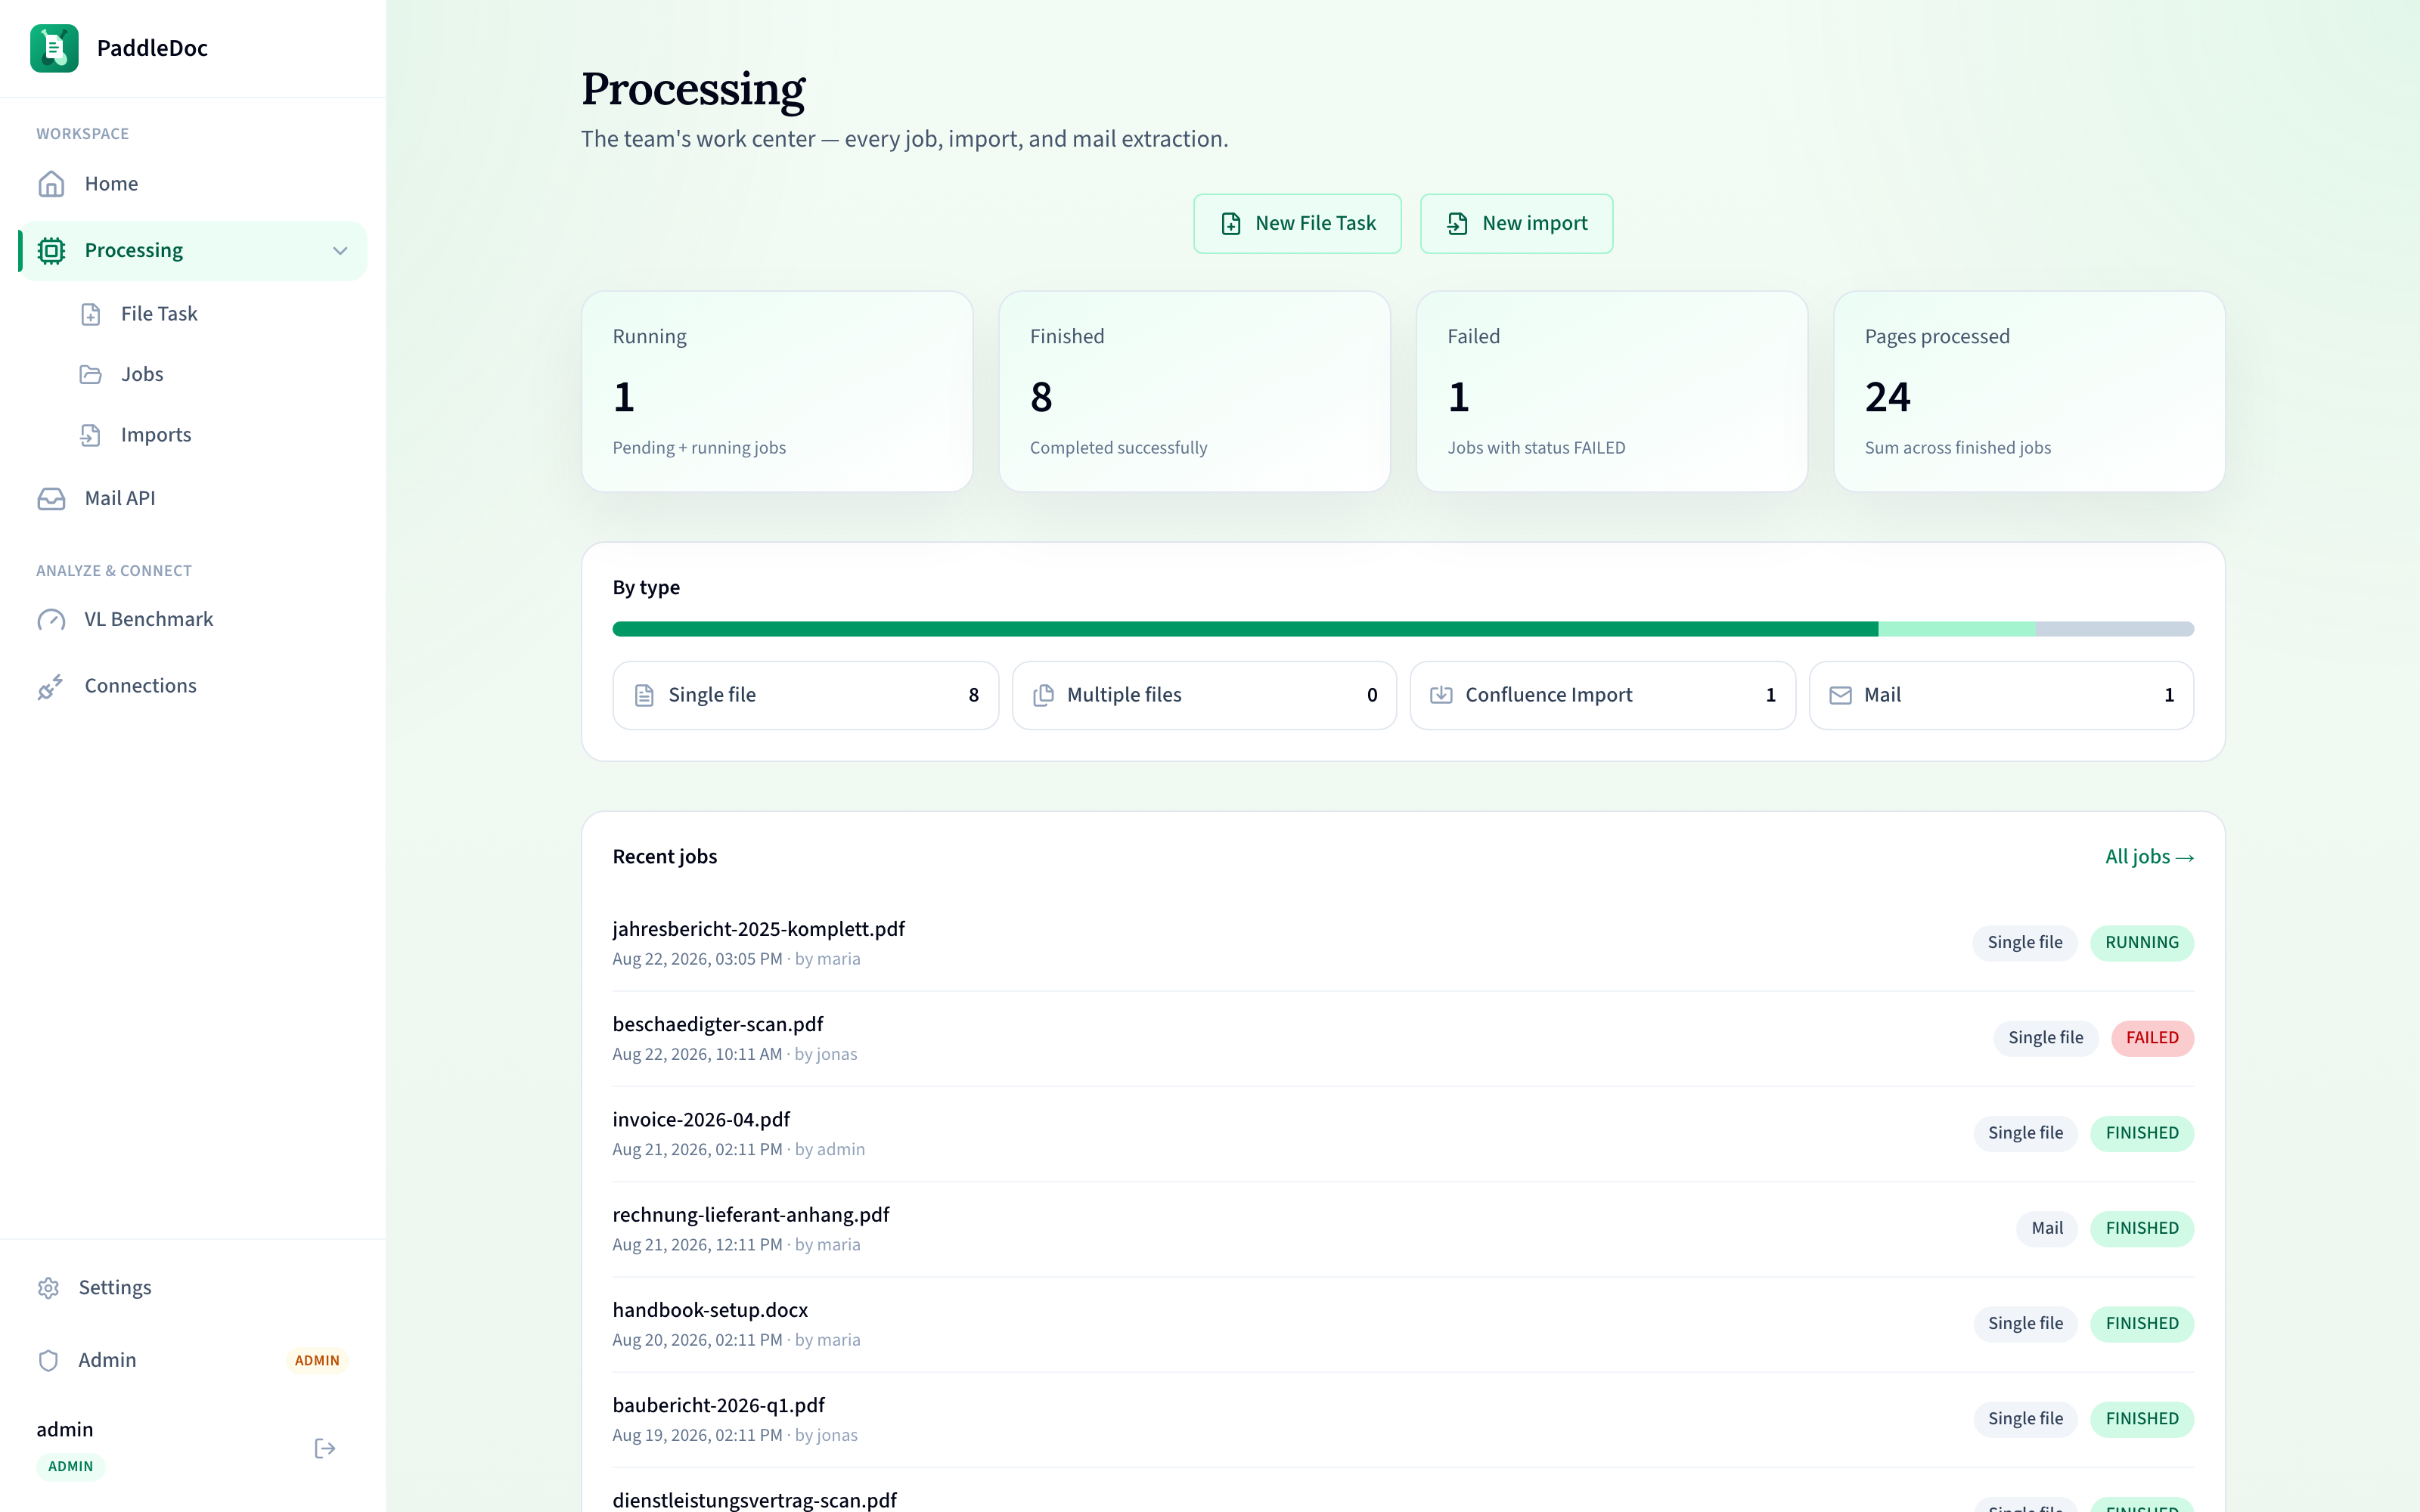
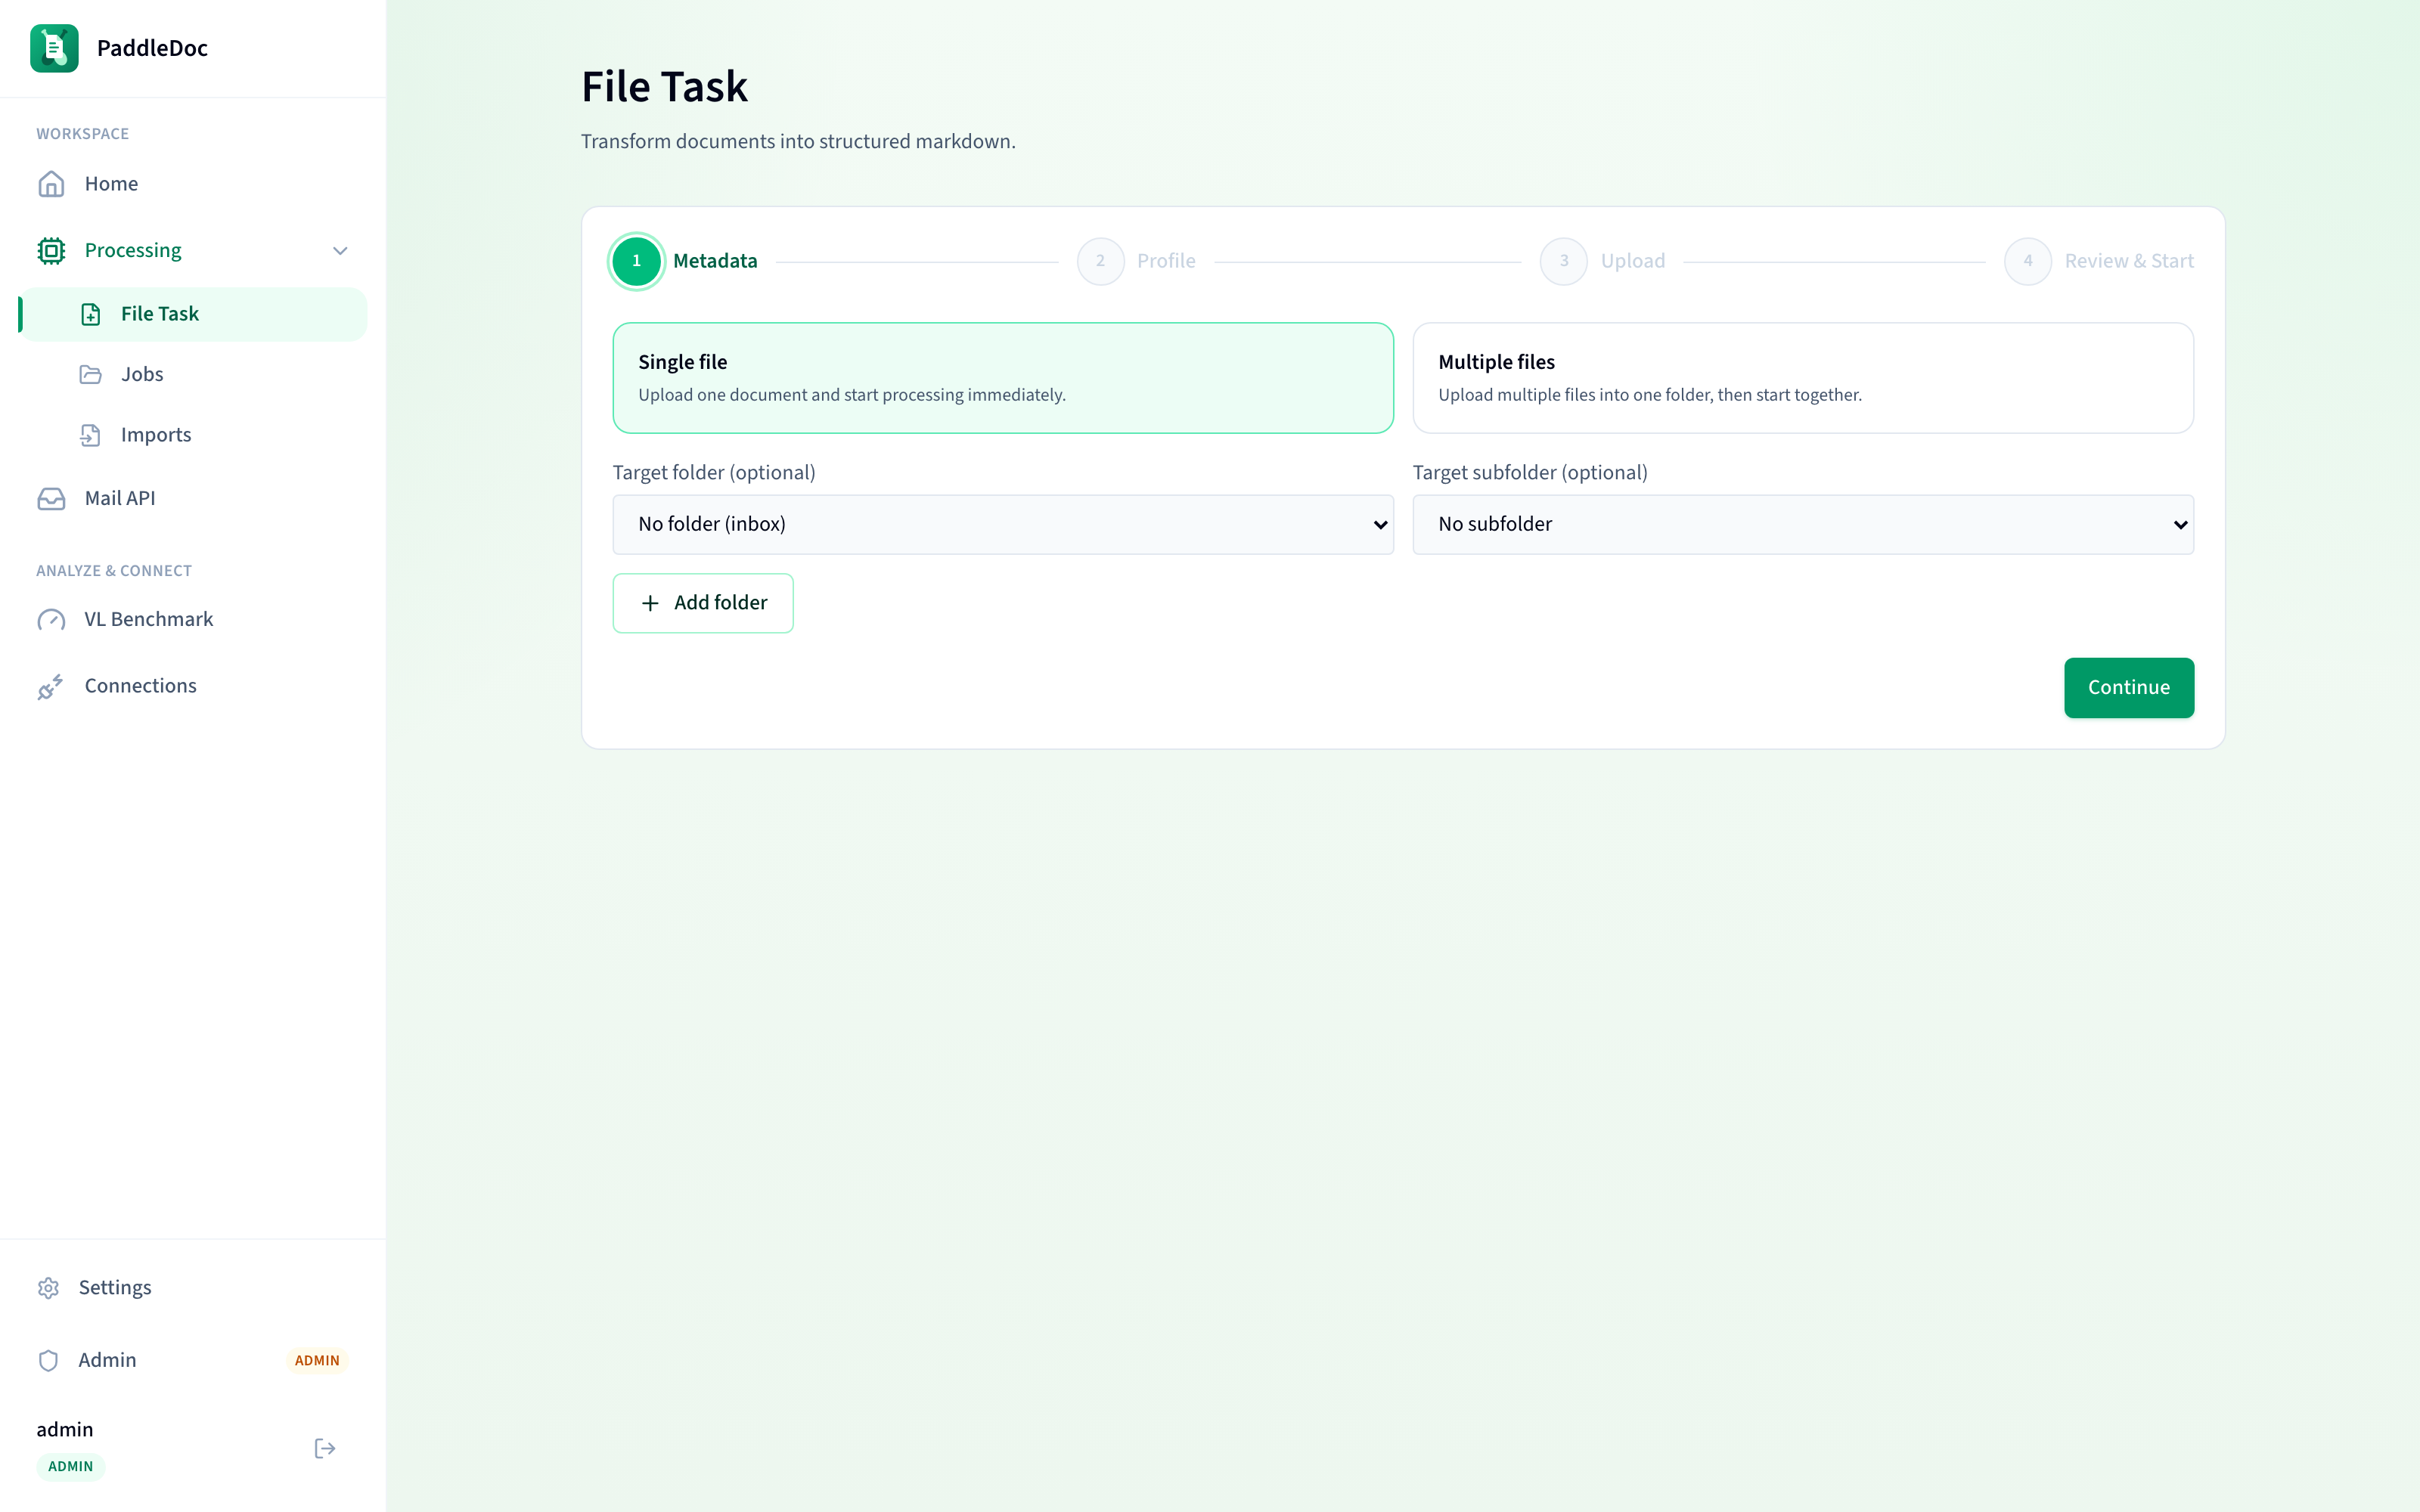
Go to Processing > File Task (or click New File Task from Home). The File Task wizard has four steps:
- Metadata — Choose Single file or Multiple files, optionally pick a target folder/subfolder (or create a new one), and for multiple files, an optional department label.
- Profile — Pick the OCR or vision-language profile that will process your document(s). See Choosing a profile below.
- Upload — Select or drag-and-drop the file(s).
- Review & Start — Confirm your choices and start processing.
You can jump back to any step you've already completed by clicking its circle in the step indicator; a step you haven't reached yet stays disabled until its prerequisite is satisfied.
Single file mode accepts: PDF, DOCX, PPTX, XLSX, XLS, PNG, JPG, JPEG, EML — up to 100 MB.
Multiple files mode accepts the same file types (no displayed size cap in the UI, but very large files are still subject to backend limits). Each file uploads individually into the shared collection folder; duplicate uploads (identical content to an existing document version) are skipped with a notice rather than creating a new job.
In Multiple files mode, drag files onto the upload area (or click Select files) as many times as you need — each drop/selection uploads immediately into the collection. The step shows a running list of uploaded filenames. Once you have at least one file uploaded, continue to Review & Start, where Start Collection Processing kicks off a job for every file in the collection using the profile you picked in step 2.
The Profile step lists every profile your deployment offers, each with a short description. In the Jobs list and job detail page, the profile actually used is shown as a compact chip:
| Chip | Profile | Description |
|---|---|---|
ocr6t |
ppocrv6_tiny | PP-OCRv6 tiny detection + recognition |
ocr6t+v3 |
ppocrv6_tiny_structurev3 | PP-StructureV3 + PP-OCRv6 tiny det + rec |
ocr6s |
ppocrv6_small | PP-OCRv6 small detection + recognition |
ocr6s+v3 |
ppocrv6_small_structurev3 | PP-StructureV3 + PP-OCRv6 small det + rec |
ocr6m |
ppocrv6_medium | PP-OCRv6 medium detection + recognition |
ocr6m+v3 |
ppocrv6_medium_structurev3 | PP-StructureV3 + PP-OCRv6 medium det + rec |
vl9b |
paddlevl_1_6_0_9b | PaddleOCR-VL 1.6 (0.9B) |
oai |
openai_vision | OpenAI-compatible Vision API |
A job run against a vision-language connection (rather than a static PaddleOCR profile) shows a vl:<name> chip instead, e.g. vl:GPT-4o. On the job detail page this appears as "VL: <name>" — the display name of the VL connection the job used, not a static profile. If the connection's name isn't available, you'll see the raw connection id instead.
"+v3" profiles run PP-StructureV3 layout analysis in addition to OCR, which produces better-structured markdown for complex documents (tables, multi-column layouts) at the cost of more processing time.
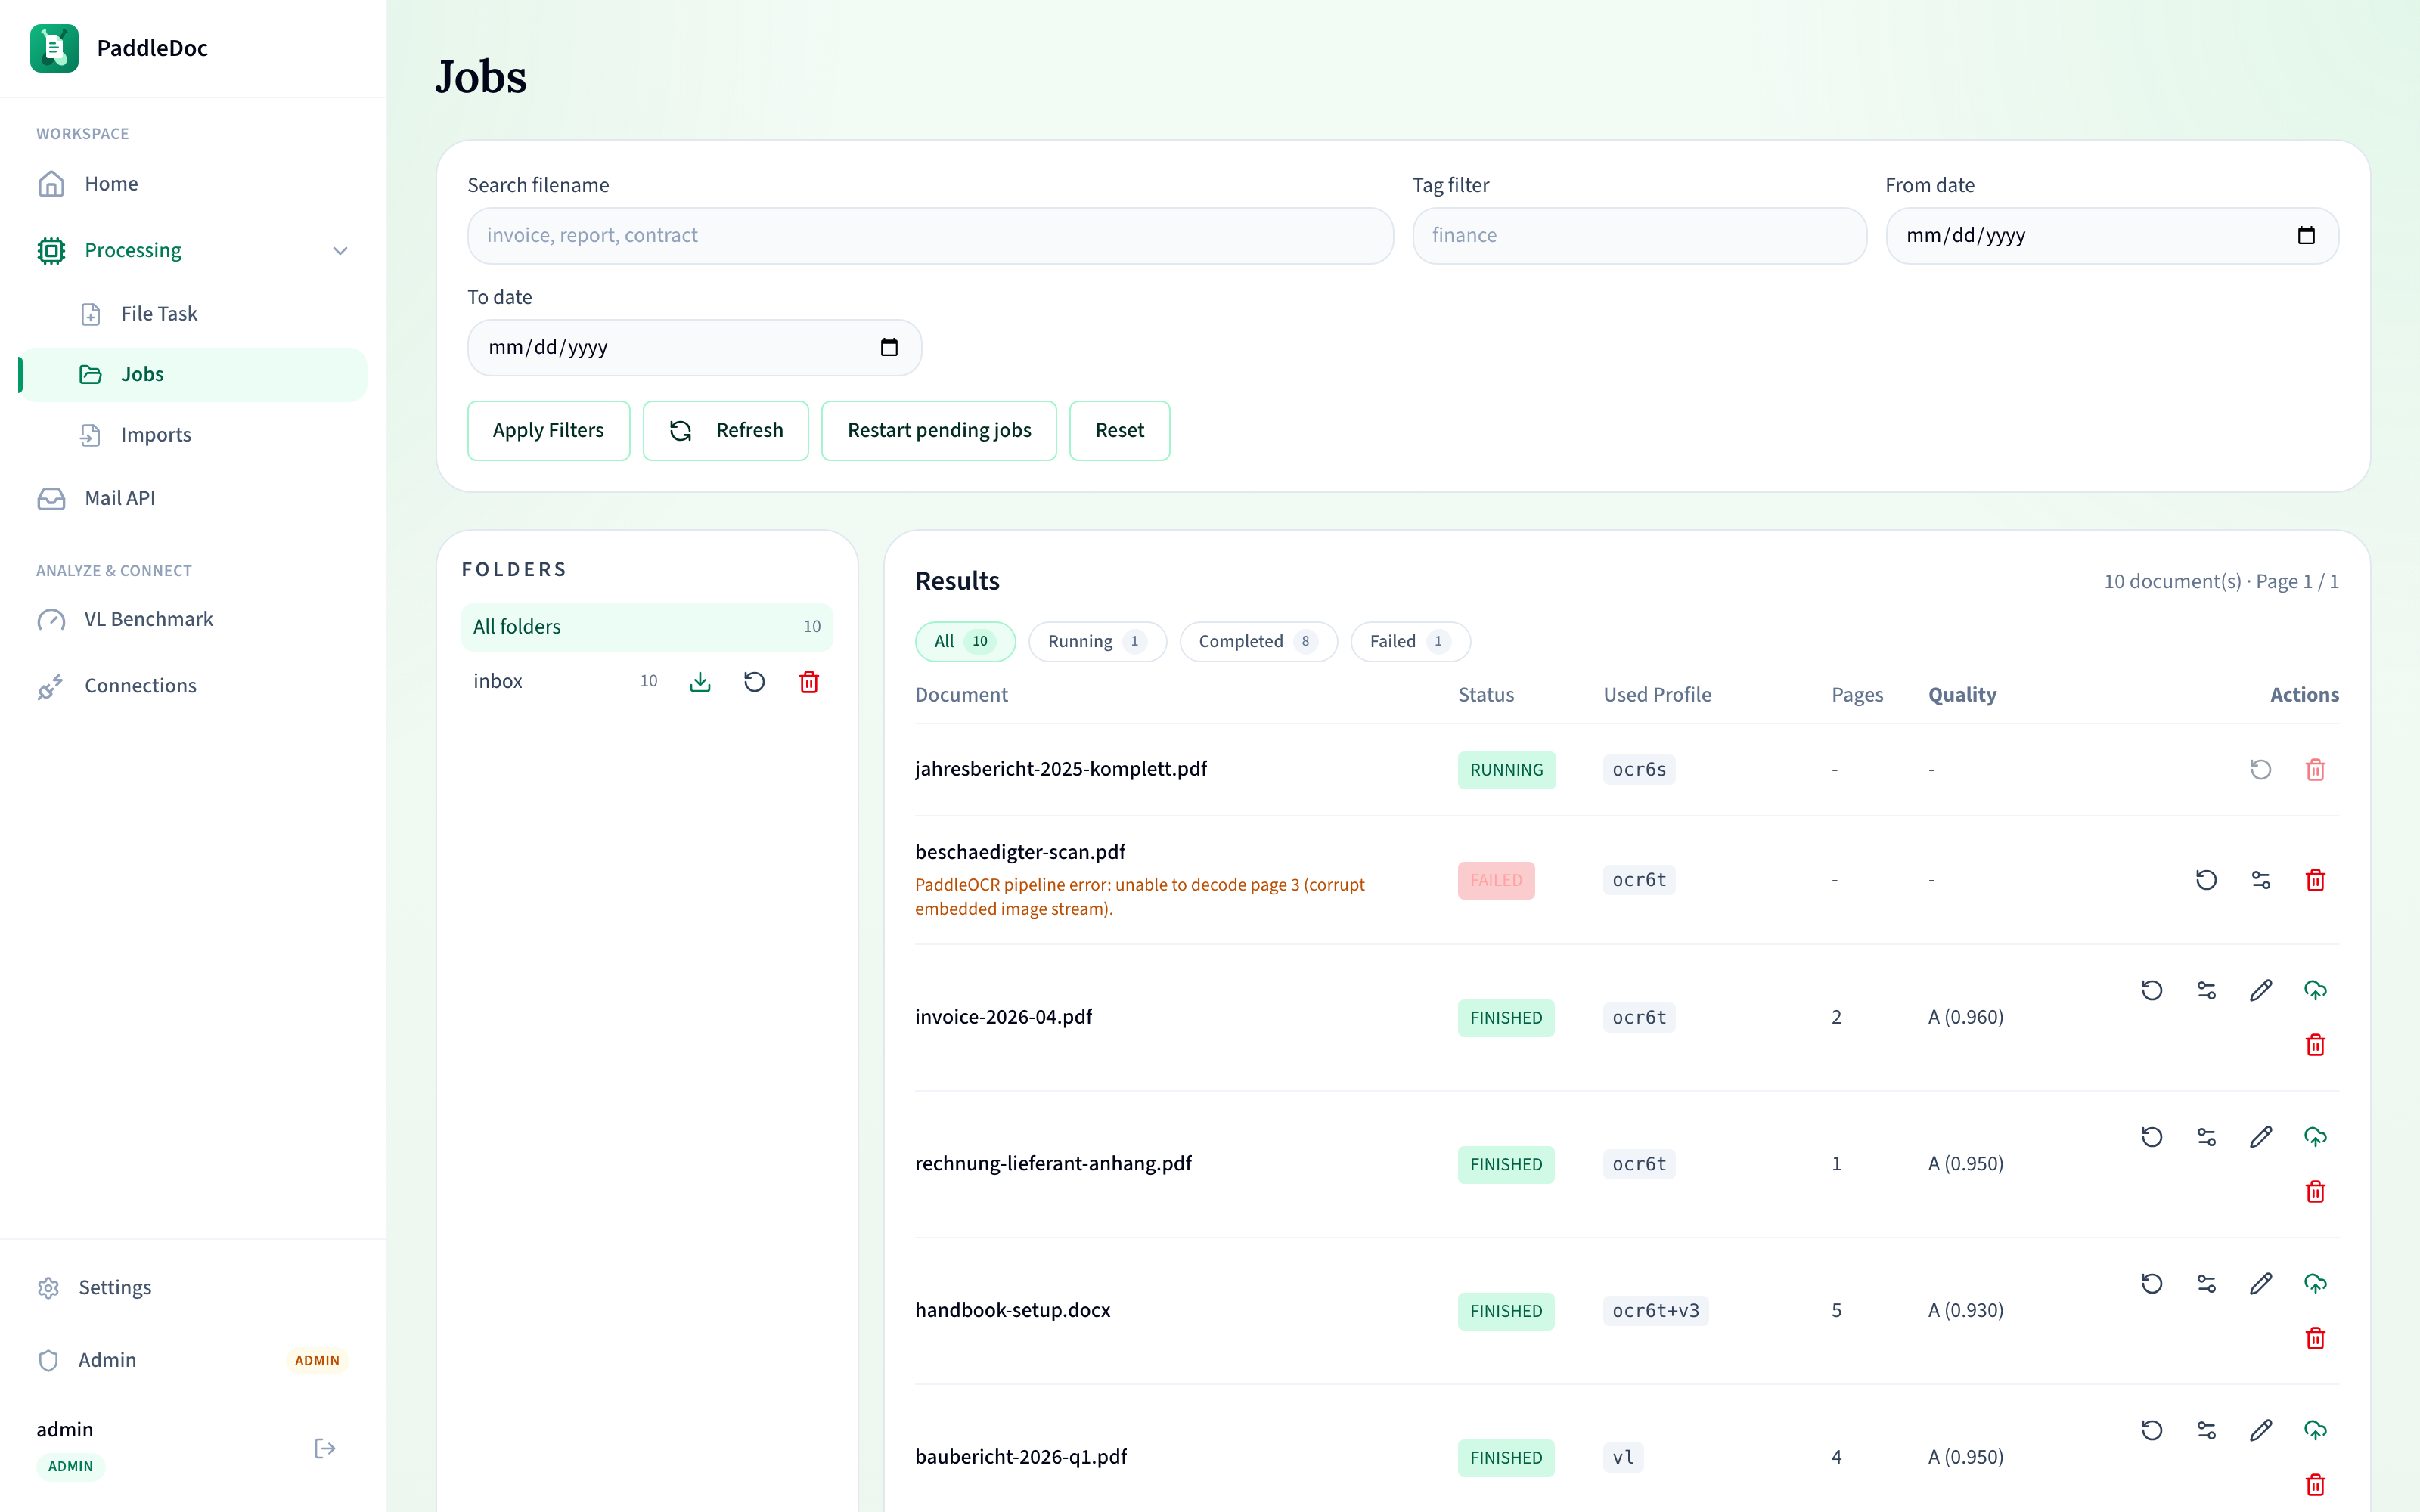
Go to Processing > Jobs to browse everything that's been processed (or is still processing).
- Search filename and Tag filter search the server-side; From date / To date narrow by creation date.
- Status chips (All / Running / Completed / Failed) filter the currently loaded list client-side, with live counts.
- The Folders sidebar lists every folder/subfolder in use, with a document count for each; click one to scope the table to that folder (and its subfolders).
- A
?type=deep link (e.g. from the Processing overview's "By type" chart) preselects Single file, Multiple files, Confluence Import, or Mail — shown as a dismissible chip above the table. - Click a column header (Document, Status, Used Profile, Pages) to sort; click again to reverse direction.
Each finished or failed job can show one or more of these icon actions on the right of its row:
| Icon | Action | What it does |
|---|---|---|
| ↓ (trending down) | Retry with lower profile | Only shown on a failed job when a lower-quality fallback profile is available. Re-queues the job with a cheaper/faster profile automatically chosen for you. |
| ↻ (Restart) | Restart | Re-queues the job with its original settings. Not available for Confluence-import page jobs (restarting those would discard the converted markdown). |
| ⚙ (Re-run with profile) | Re-run with profile… | Opens a dialog to pick a different profile and re-queue the job with it. Available on finished or failed jobs. |
| ✎ (Edit) | Edit markdown | Opens the job detail page directly in edit mode. Available on finished jobs. |
| ☁↑ (Push) | Push to OpenWebUI | Opens the OpenWebUI push dialog for this job. Available on finished jobs. |
| 🗑 (Delete) | Delete | Removes the job. Only shown where deletion is allowed for that view; password-protected jobs prompt for the password first. |
Folder-level actions (in the Folders sidebar) mirror some of these: download all markdown in a folder as a zip, restart every job in a folder, or delete a folder and its jobs.

Open any finished job to see its detail page: filename, status, profile used, page/block counts, and a Markdown Preview with Preview and Edit tabs.
- Click Edit markdown (or the pencil icon in the jobs list) to edit the markdown directly, including its YAML frontmatter. Saving creates a new version and returns you to preview mode with a "Saved as version N" confirmation.
- If a document has been re-uploaded or re-processed more than once, a Versions table appears showing every version's status, content hash, creation time, and uploader, with links between them. The current job's own row is not a link.
- Download Markdown and Download JSON buttons let you export the result directly.
Some jobs are protected with a document password (set at upload time via the backend/API). Opening such a job, saving an edit, or deleting it prompts you for the password. An incorrect password shows an error and lets you retry; if your session has actually expired instead, you're redirected to sign in again rather than shown a password prompt that could never succeed.
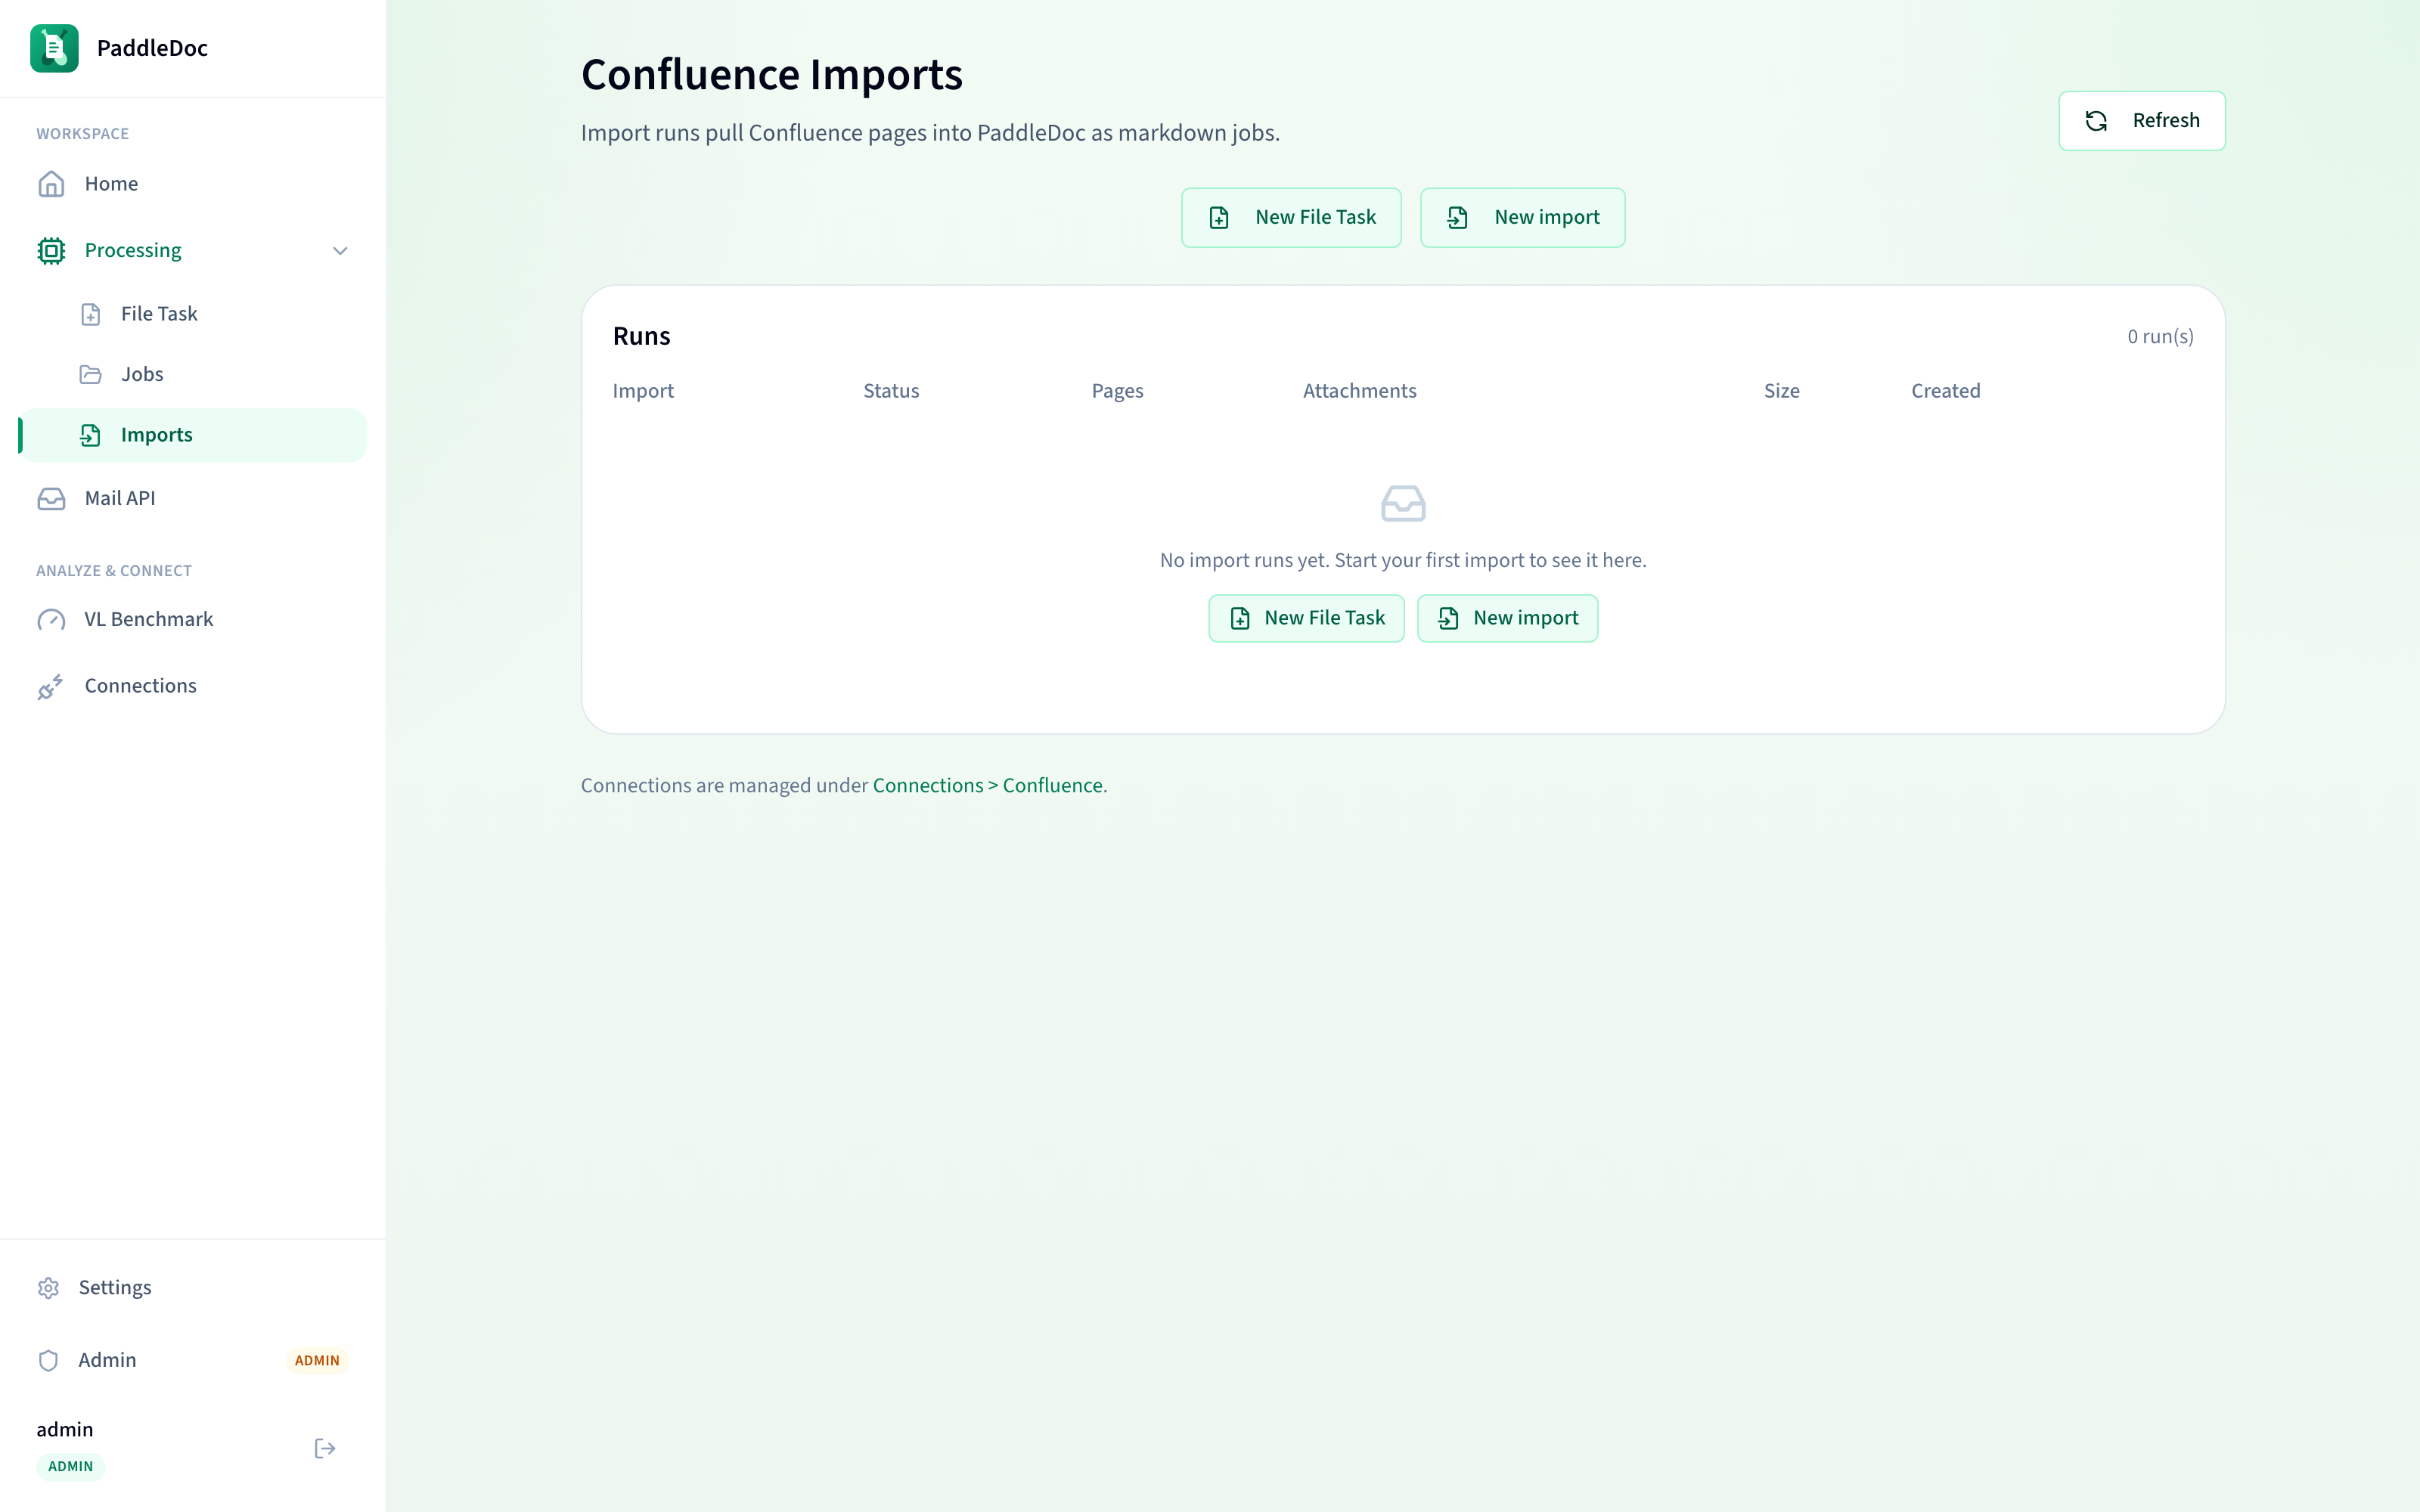
Confluence import pulls pages from a Confluence space or page tree into PaddleDoc as markdown jobs — one job per page, with attachments optionally OCR'd as their own jobs.

Go to Connections > Confluence and click Add connection. You'll need:
- A name and the Confluence base URL.
- An authentication method: Confluence Cloud (Atlassian account email + API token) or Server / Data Center (personal access token).
Tokens are stored encrypted and are write-only — they're never shown again after creation. Click Test to verify the connection before using it; a connection must pass a successful test before it can start an import.
You can also toggle Auto-refresh per connection with an interval (e.g. every 15 minutes/hour/day) so its most recent import run re-imports automatically to pick up Confluence changes. The connection card shows the last refresh time and any refresh error.
Go to Processing > Imports and click New import (or New import from Home/Processing). The wizard has three steps:
- Connection — Pick an existing tested connection, or create and test a new one.
- Scope — Choose Whole space (by space key or space URL) or Page tree (a single page and its children, by page URL or id). Pasting a full Confluence URL works; the server extracts the key or id for you.
-
Options + start:
- Max pages / Max depth — client-side hints; the server clamps to its own configured limits (defaults: 200 pages, depth 10; 0 depth imports only the root page).
- Include attachments and images — pulls attachments along with page content.
- OCR supported attachments (PDF, Office, images) as separate jobs — when enabled (and attachments are included), each eligible attachment becomes its own OCR job using the profile you select here.
- Use hierarchy as tags — adds each page's Confluence breadcrumb (space, then parent pages) to that page's job tags, so you can filter the jobs list by section afterward.
- Target folder/subfolder (default:
imports/<space or page name>), comma-separated tags, and an optional notification email.
Click Start import to launch the run and land on its progress page, which polls automatically every 2.5 seconds while the run is active: pages discovered/imported, failed pages, attachments saved, stored bytes, and the page currently being processed. You can Cancel a running import (pages already imported are kept) or, once finished, jump to View in Jobs filtered to the import's folder.
From the Imports list or a finished/failed run's detail page, click Edit & run again (the rotate icon). This opens the New Import wizard prefilled with that run's connection, scope, and all its options — adjust anything and start a fresh run without retyping everything. If the original connection no longer exists, you'll see a notice and can pick a different one.
When Use hierarchy as tags was enabled for an import, each resulting job's tags include the page's Confluence breadcrumb — the space name followed by each ancestor page title, in order from top to bottom. This lets you search or filter the Jobs list by any level of the original Confluence hierarchy (e.g. tag "Engineering" surfaces every page imported from that space, regardless of how deep it was nested).
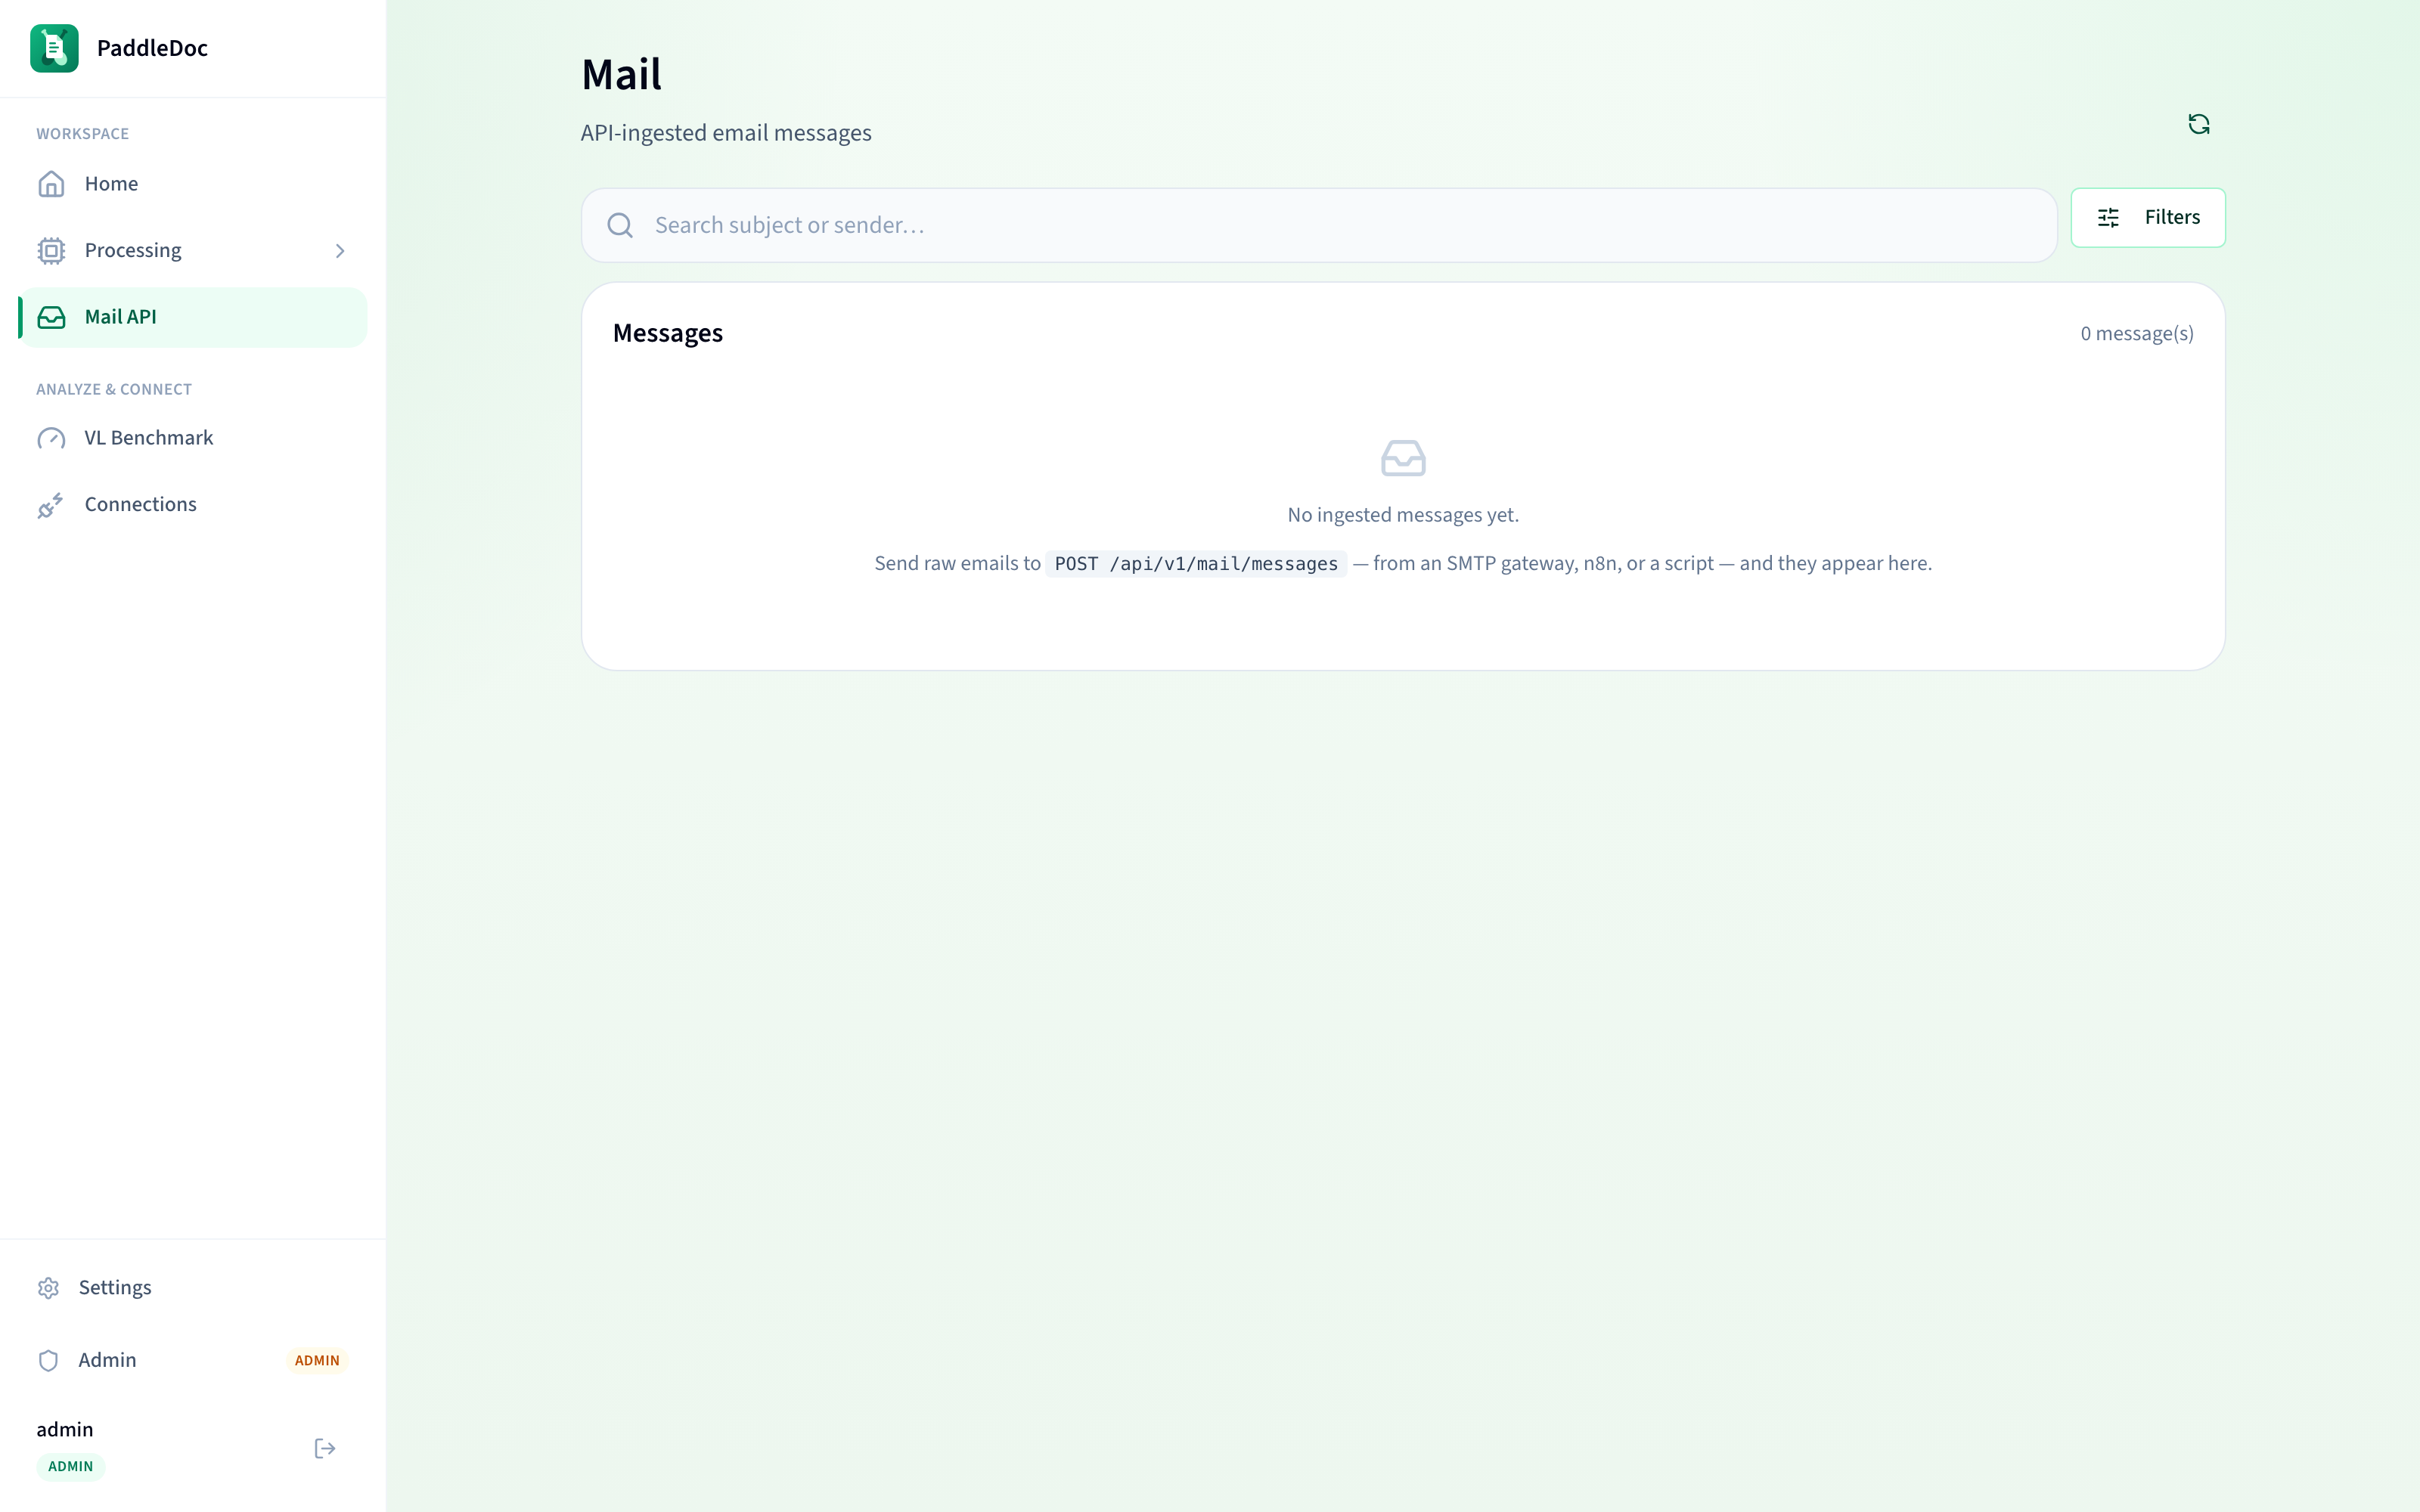
The Mail API lets an external system (an SMTP gateway, an automation tool like n8n, or a script) deliver an email directly into PaddleDoc for automatic markdown conversion of its attachments — no mailbox polling required.
Send a POST request to /api/v1/mail/messages with either the raw email as the body (Content-Type: message/rfc822, the primary contract) or as multipart/form-data with a single file field (convenient for curl -F or n8n's form mode):
curl -X POST "https://your-paddledoc-instance/api/v1/mail/messages" \
  -H "Authorization: Bearer <your-api-token>" \
  -H "Content-Type: message/rfc822" \
  --data-binary @message.eml
Optional query parameters (or form fields, in multipart mode): profile_id (OCR profile for attachment jobs), folder / subfolder (storage path, default mail), tags (comma-separated), and source (origin label, default api).
Identical messages (by content hash) are deduplicated automatically — resending the same email is safe and simply returns the existing message.
Go to Mail in the sidebar to browse ingested messages: sender, subject, a summary of parts, timestamp, and an aggregate status chip. Open a message to see its details and the jobs created from its attachments; those jobs also appear in the regular Jobs list, tagged with a small "from mail" badge that links back to the source message.
VL Benchmark runs one document through several vision-language models (or a static OCR profile as a baseline) side by side, so you can compare markdown quality and speed before committing to one.
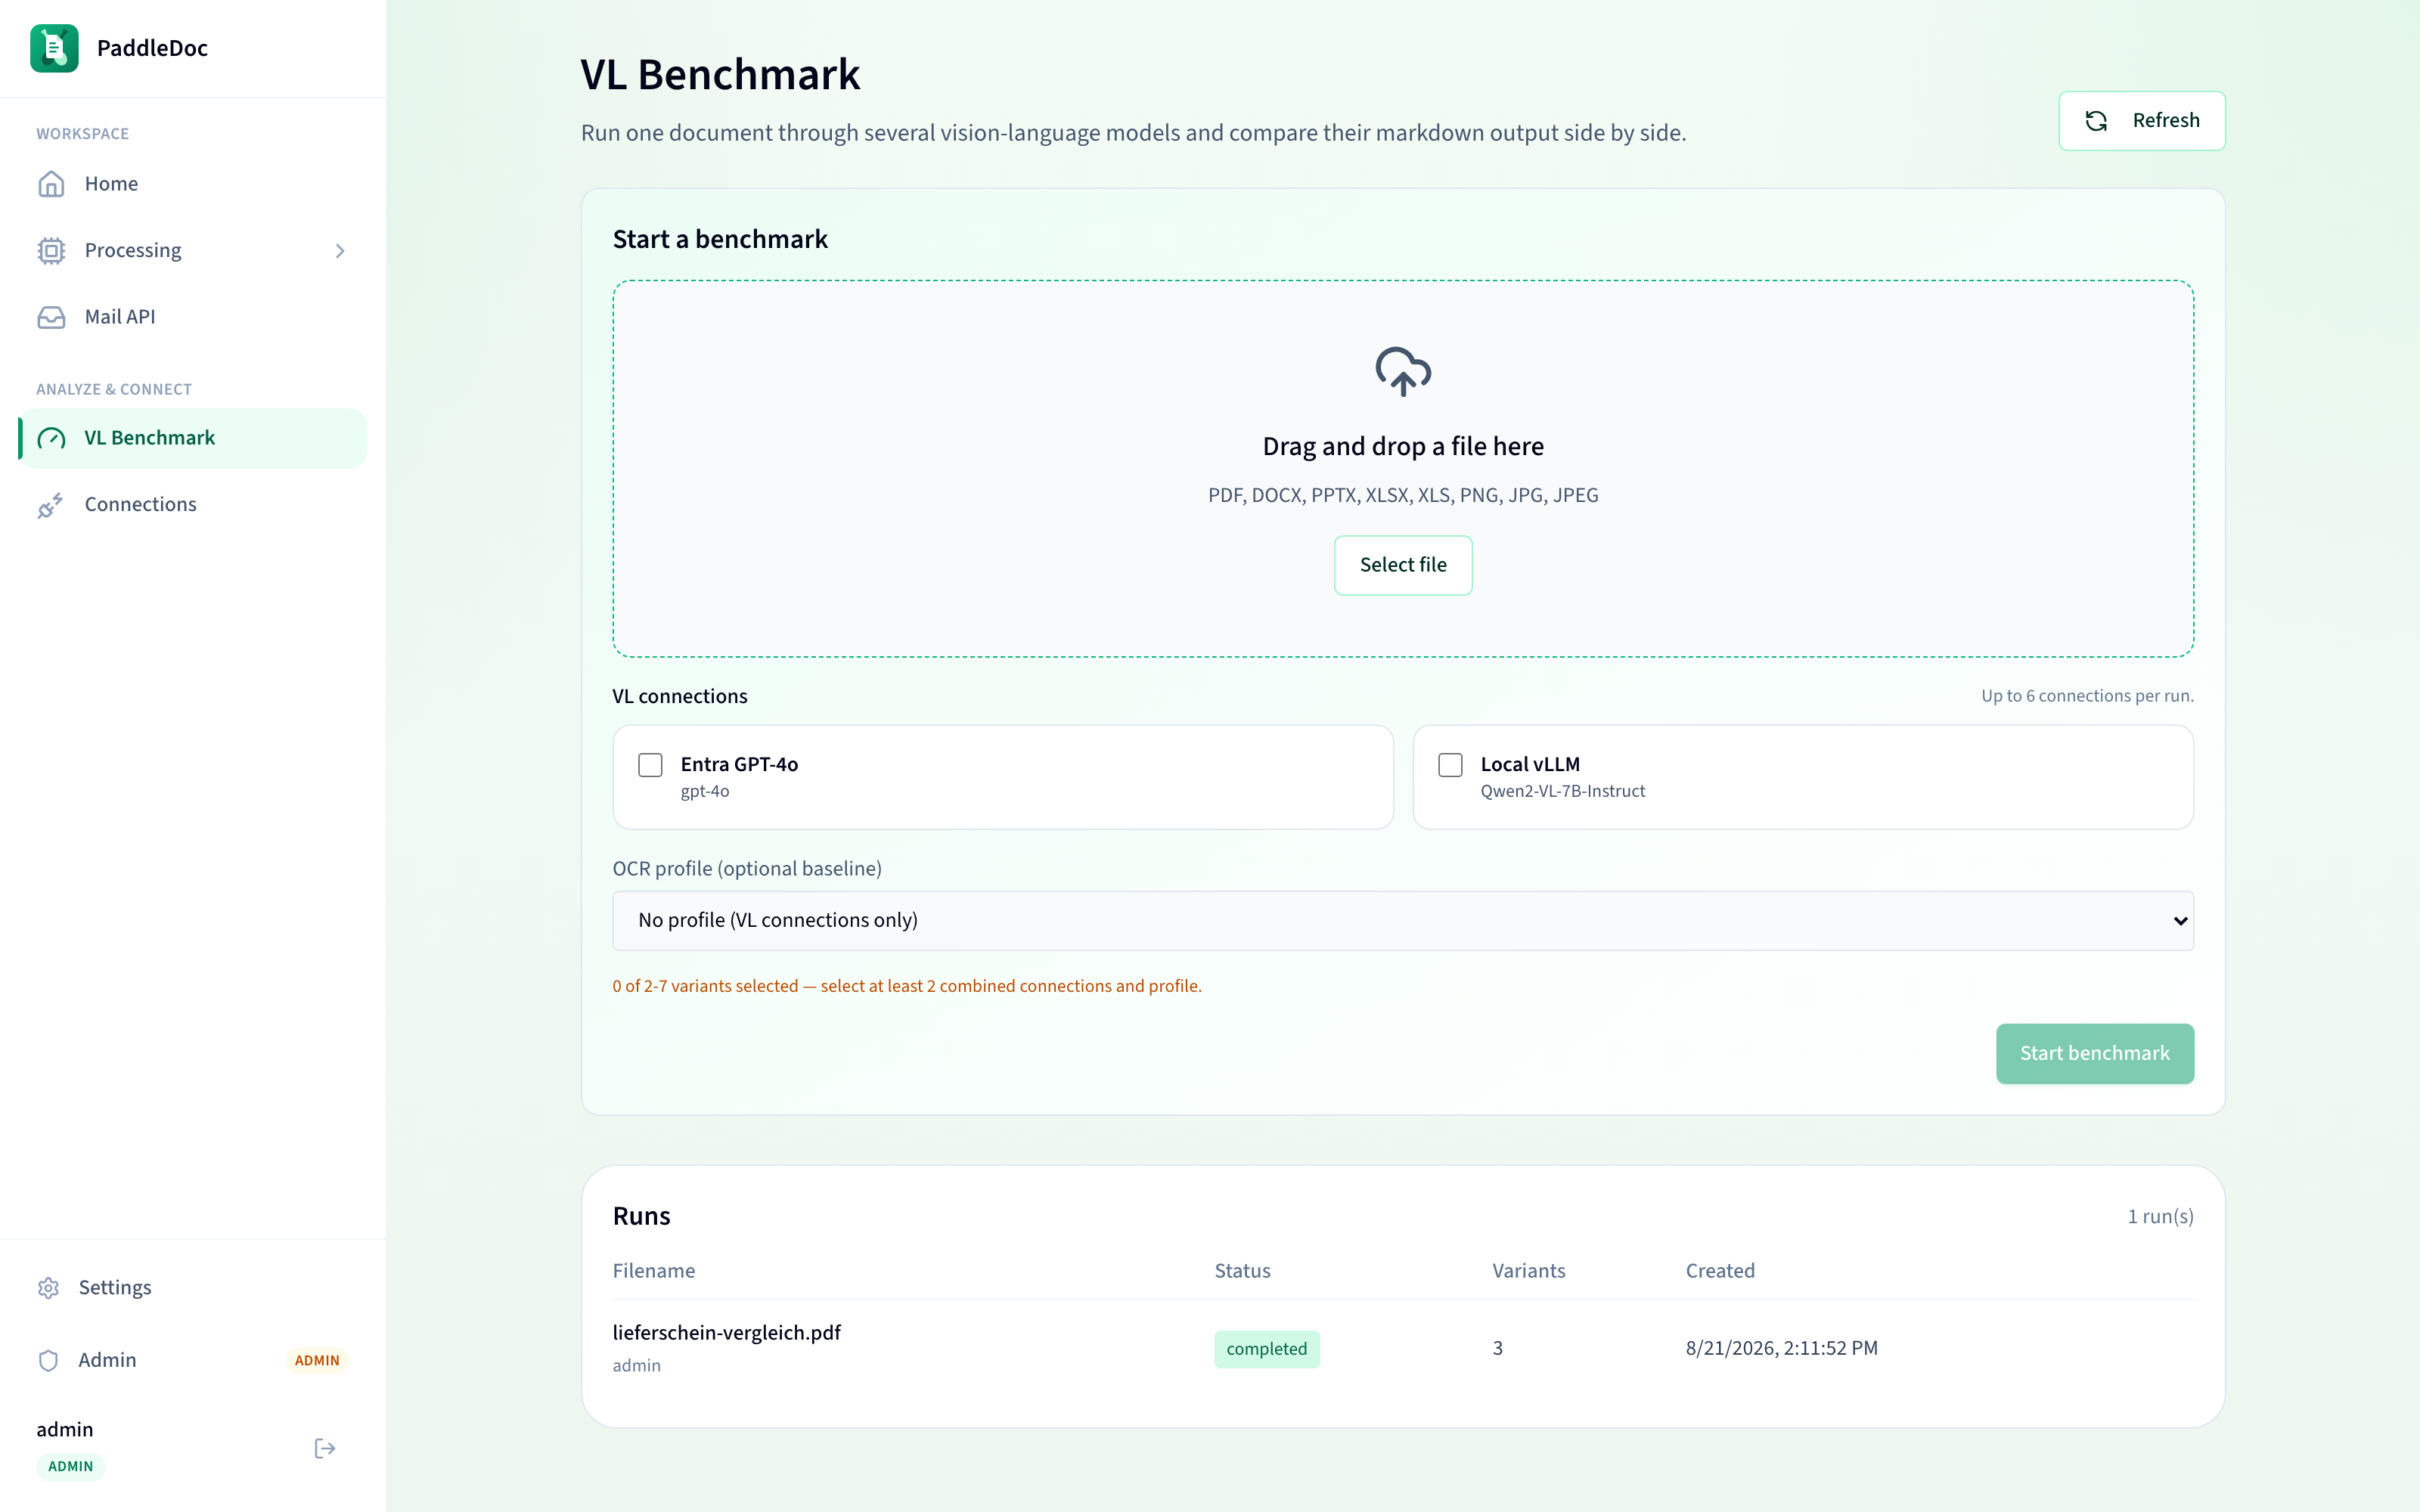
Go to VL Benchmark, drag or select a file (PDF, DOCX, PPTX, XLSX, XLS, PNG, JPG, JPEG), then choose:
- Up to 6 VL connections to include (checkboxes; each shows the connection's model name).
- Optionally, one OCR profile as a non-VL baseline variant.
You need 2 to 7 combined variants selected in total. Click Start benchmark to upload and begin; you're taken to the run's report page.
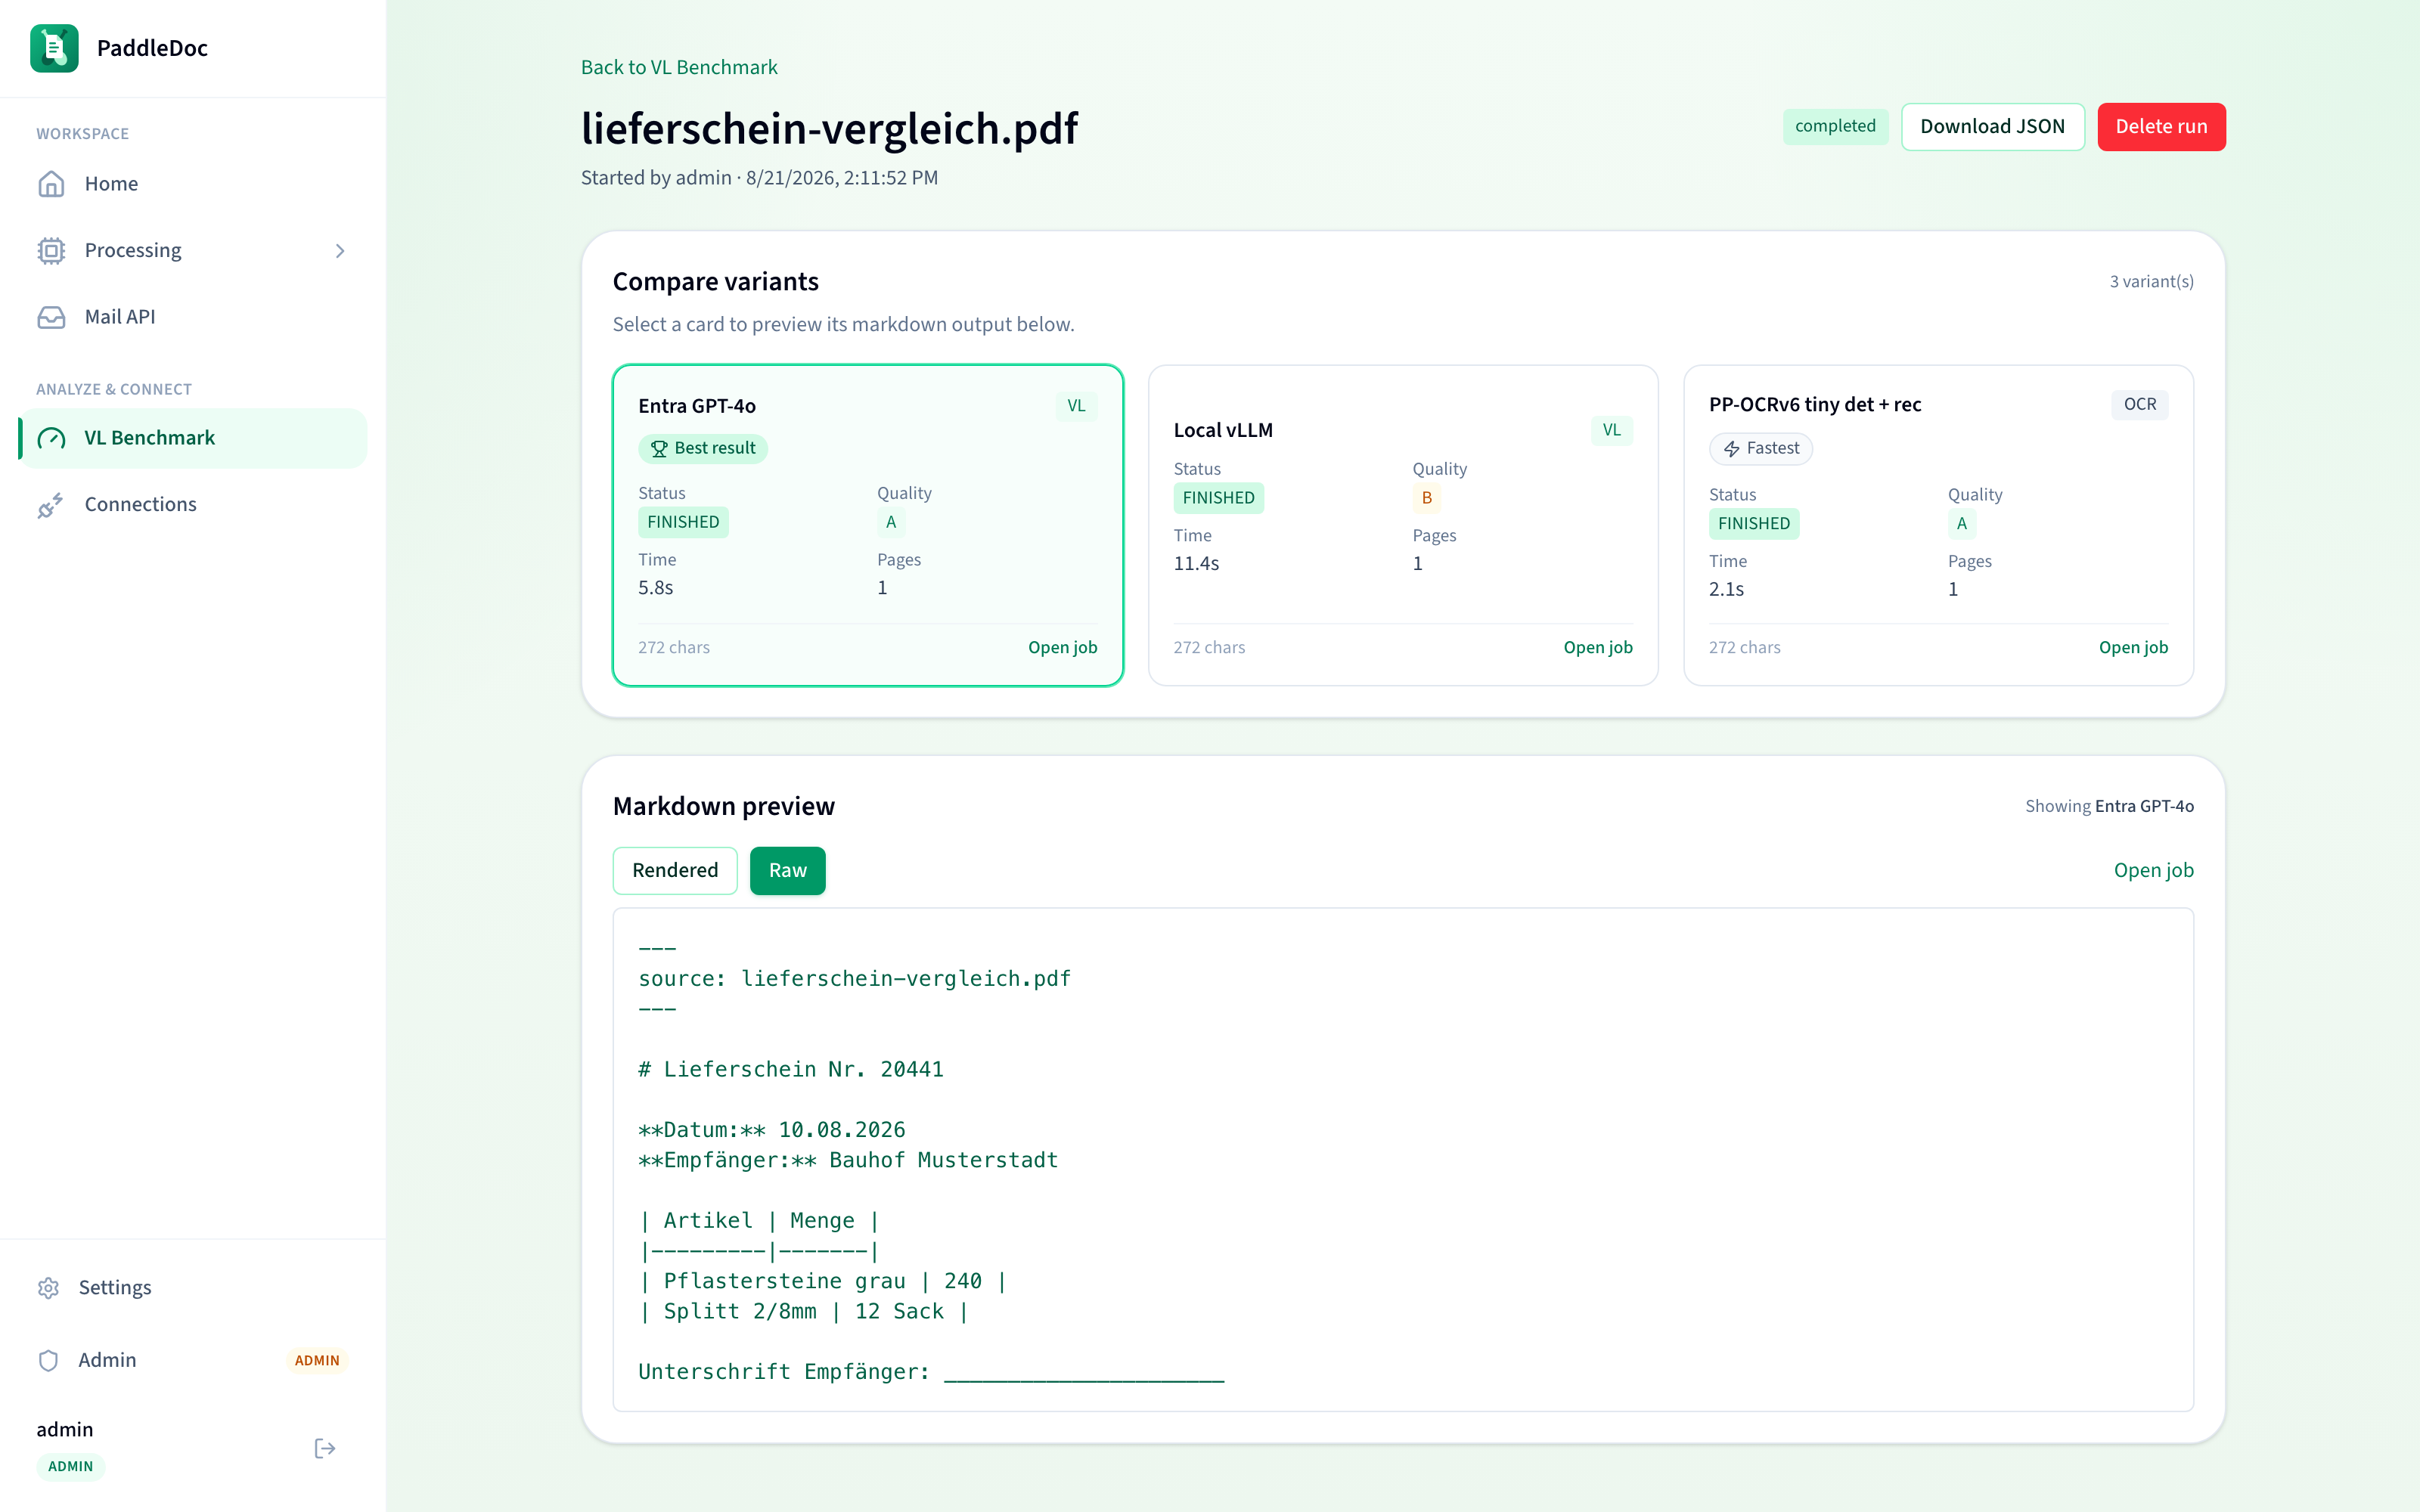
The report page polls automatically until every variant reaches a terminal status. Each variant is shown as a card with its status, quality grade, and processing time; two badges highlight standout results:
- Best result (trophy icon) — the variant with the highest quality grade.
- Fastest (lightning icon) — the variant with the shortest processing time.
Click any card to preview its markdown output below (Rendered or Raw view). Once all variants are done, a Download JSON button exports the full report.
Finished jobs can be pushed into an OpenWebUI knowledge collection so their markdown becomes searchable/retrievable there.
Go to Connections > OpenWebUI and add a connection (name + API key). Stored API keys are write-only and never displayed again.
From the Jobs list, click the Push to OpenWebUI (cloud-upload) icon on a finished job's row — or open the job and click Push to OpenWebUI on its detail page. In the dialog:
- Pick a Connection.
- Pick a Knowledge collection (loaded live from that OpenWebUI instance).
- Click Push.
The dialog then polls the push status until it reaches a terminal state (succeeded/failed), so you can watch it complete without leaving the dialog.
The job detail page shows your Last OpenWebUI push status, including which knowledge collection and connection it went to. If you edit and save the job's markdown after that push, a "Content changed since last push" notice appears — this means what's stored in OpenWebUI is now out of date with the job's current markdown, and you should push again to sync it.
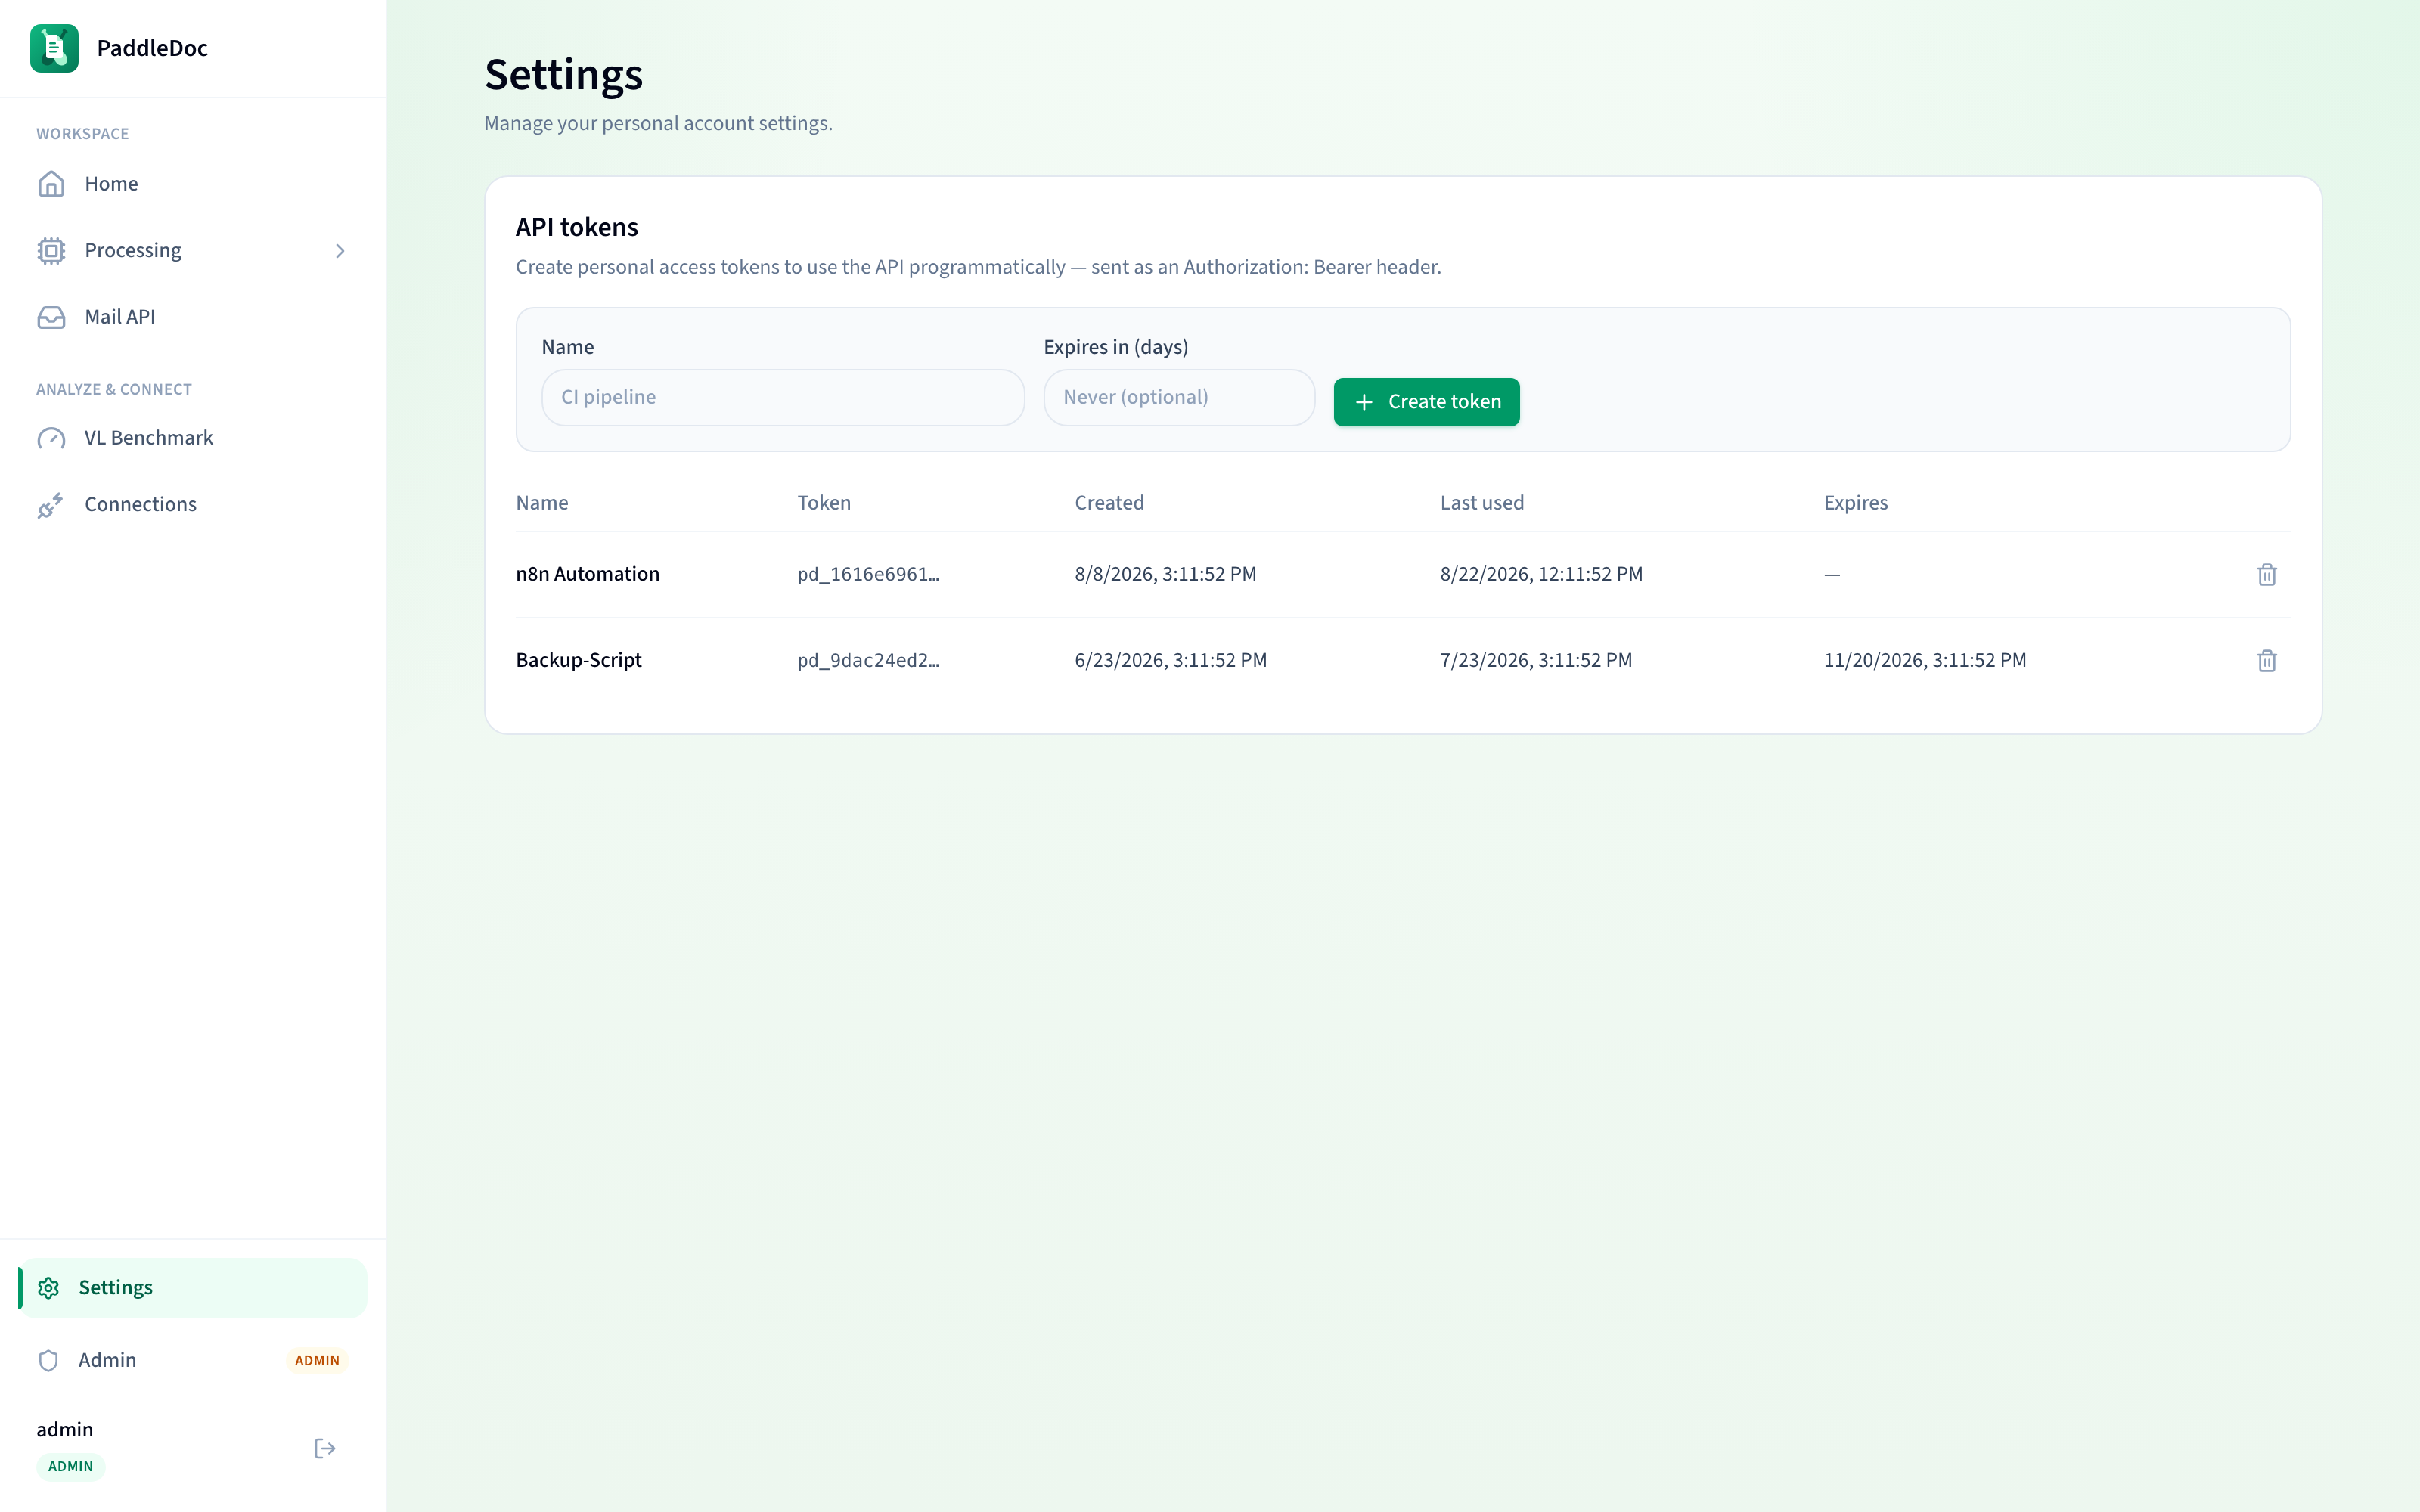
Go to Settings to manage your personal API tokens — used to call the PaddleDoc API programmatically (for example, from the Mail API or your own scripts).
- Enter a name for the token (and optionally an expiry in days — leave blank for no expiry).
- Click Create token. The full token value is shown once — copy it immediately, since it can't be retrieved again afterward (only its prefix is shown in the table from then on).
- Use it as a Bearer token:
Authorization: Bearer <your-token>.
Existing tokens can be revoked at any time from the table; a revoked token stops working immediately for any integration still using it.
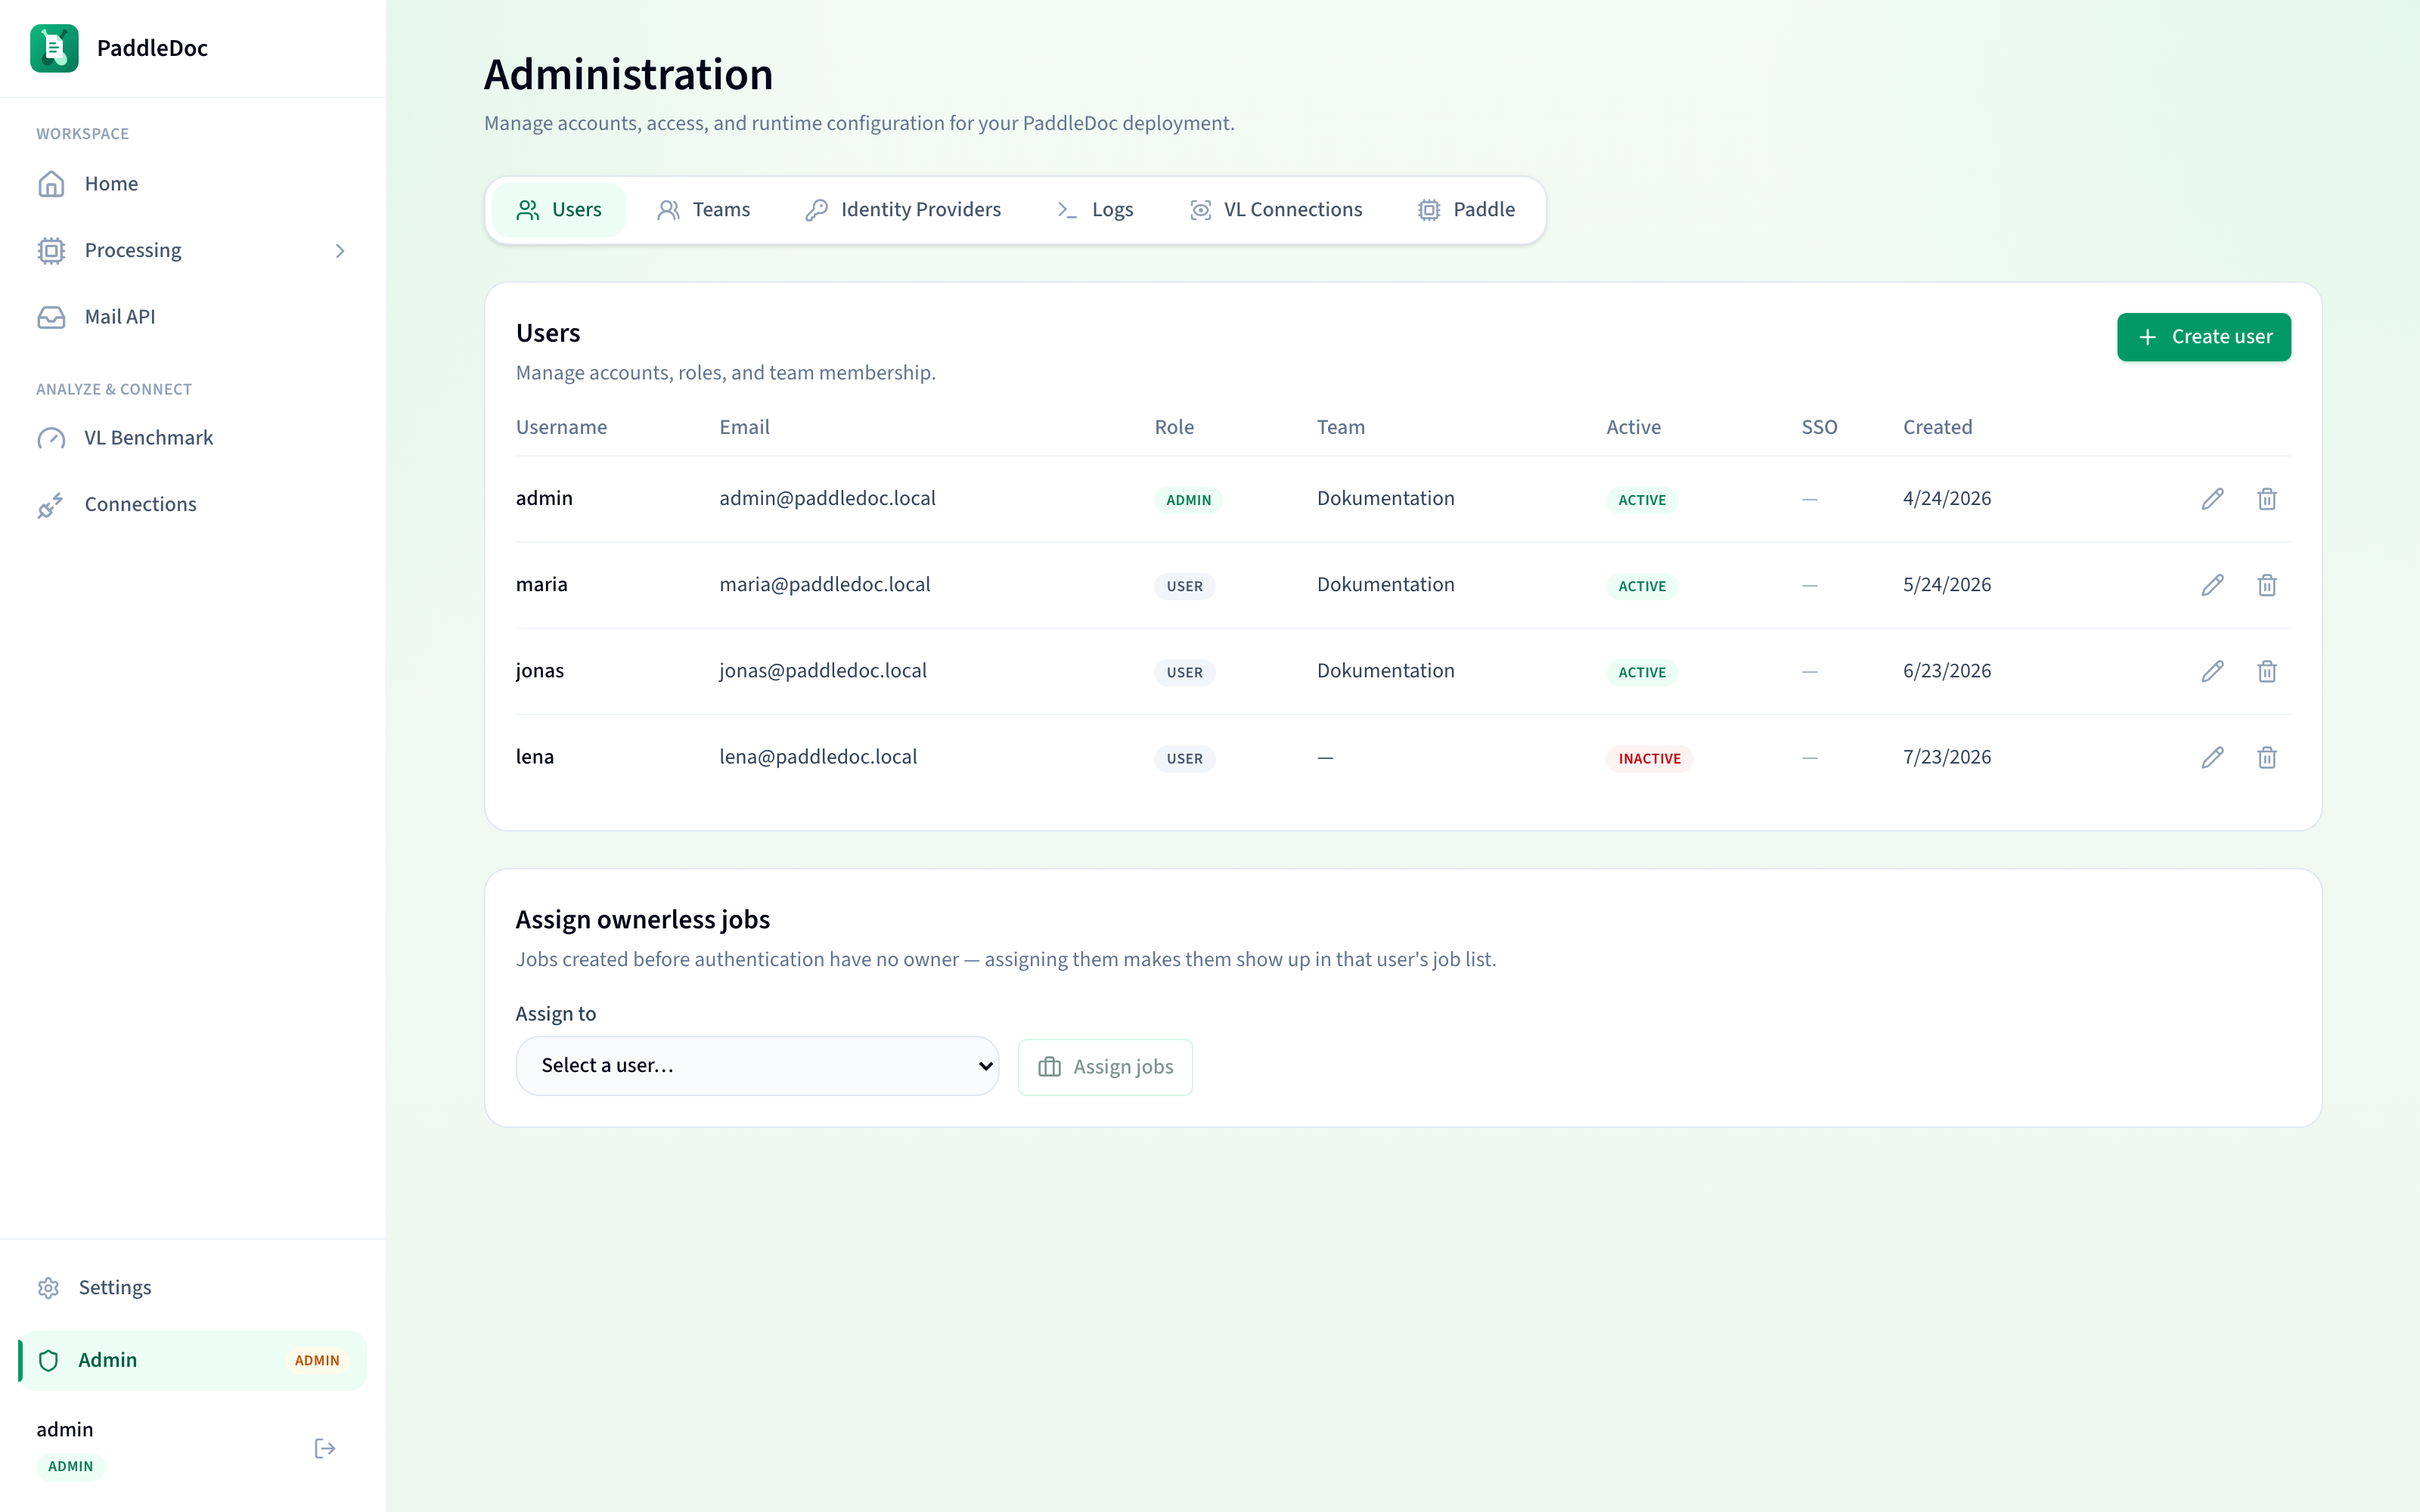
If your account has the administrator role, an Admin entry appears in the sidebar with a separate area for managing Users, Teams, SSO providers, VL model connections, and Paddle service settings. Those screens are covered elsewhere for administrators — this guide intentionally stays focused on day-to-day document processing.