Repository navigation
First Steps
You see the Rigol logo from the stock loader, then the OOS start-up screen with a checklist, then the scope. Each failed step is named on the screen. The version and the build stand at the bottom of the start-up screen. A start takes about 8 seconds.
The IP address comes from DHCP and is shown at the top right. Without DHCP the scope takes a link-local address, 169.254.x.y, as computers do (from 0.1.9; before, 192.168.177.64/24): a computer connected straight to the scope reaches it without any set-up.
OOS starts in one-shot mode: the next power-on starts the stock system. When OOS works for you, set System > Boot mode to Persist. Switch the scope off at the mains and wait 30 seconds between two starts of OOS.
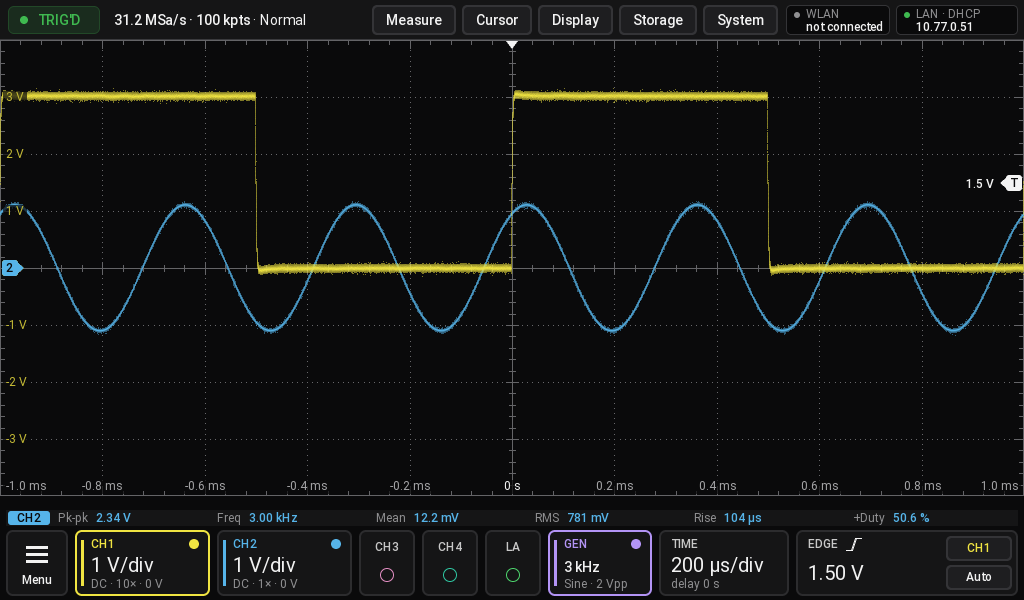
- Top bar: run state, sample rate and memory depth, the menus, network and USB.
- Plot: the waveforms. Drag offset, delay and trigger level, pinch to zoom. The button with four corners at its top right gives the plot the whole screen (below).
- Strip: the measurements.
- Cards: Menu, channels, logic analyser, generator, time base and trigger. Tap a card for its settings.
Front-panel keys and knobs work as labelled. The Menu button reaches every function. From 0.1.9 a channel key held for more than half a second, or a finger held on a channel's card, switches that channel between AC and DC coupling; channel keys act when they are let go.
Tap the sample rate at the top for Acquire. The rate itself follows the time base and the memory depth: slower time base or less memory, lower rate. The top rate is 1.25 GSa/s with one channel, 625 MSa/s with two, 312.5 MSa/s with three or four.
The Auto key sets up the channels that are on: levels, time base and trigger, and it sets the memory depth back to Auto. It searches at full bandwidth and then gives each channel its own bandwidth back. With no signal it restores your set-up.
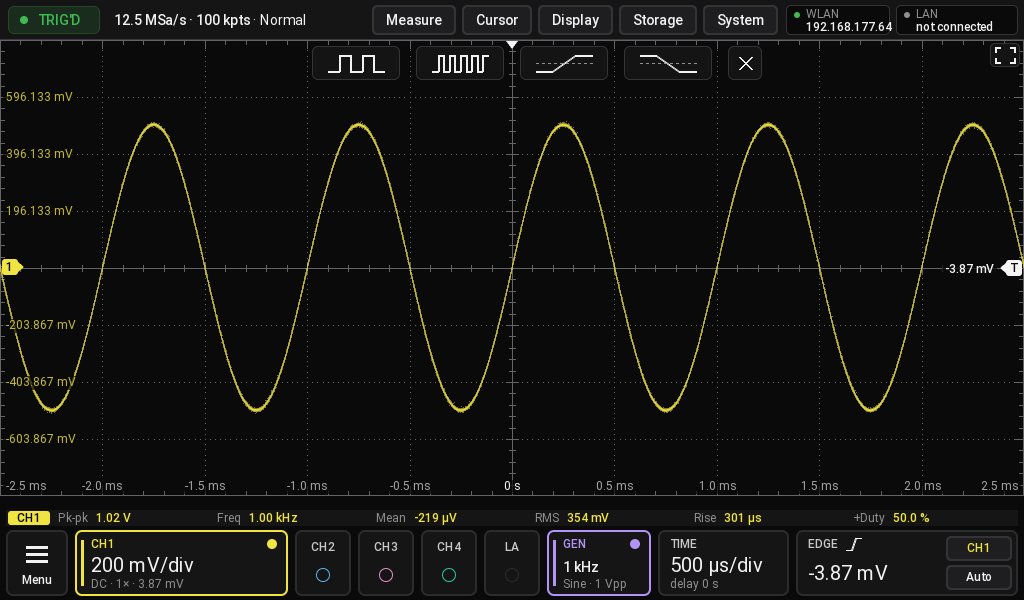
After Auto a bar at the top of the plot offers four views of the trigger channel:
| Button | View |
|---|---|
| a few pulses | about three periods |
| many pulses | about ten periods |
| rising ramp | the rising edge across about two divisions, trigger on the rising edge |
| falling ramp | the falling edge, trigger on the falling edge |
The x or a tap anywhere else closes the bar; otherwise it goes after 30 seconds.
Display > Windows splits the plot:
| Layout | Windows |
|---|---|
| One | the whole plot |
| Side by side | two, left and right |
| Stacked | two, one above the other |
| Four | two by two |
On the same page each channel, each math channel that is on and the logic analyser get a window. A new layout spreads the channels that are on, one per window, and you can move them afterwards. All windows share the time base. Each window has its own channel markers, volt labels and time axis. A drag in a window moves a channel of that window. The logic analyser lanes stand at the bottom of their window; with no channel in that window they fill it. Zoom, XY and the analysers use one window. The layout is saved with the setup.
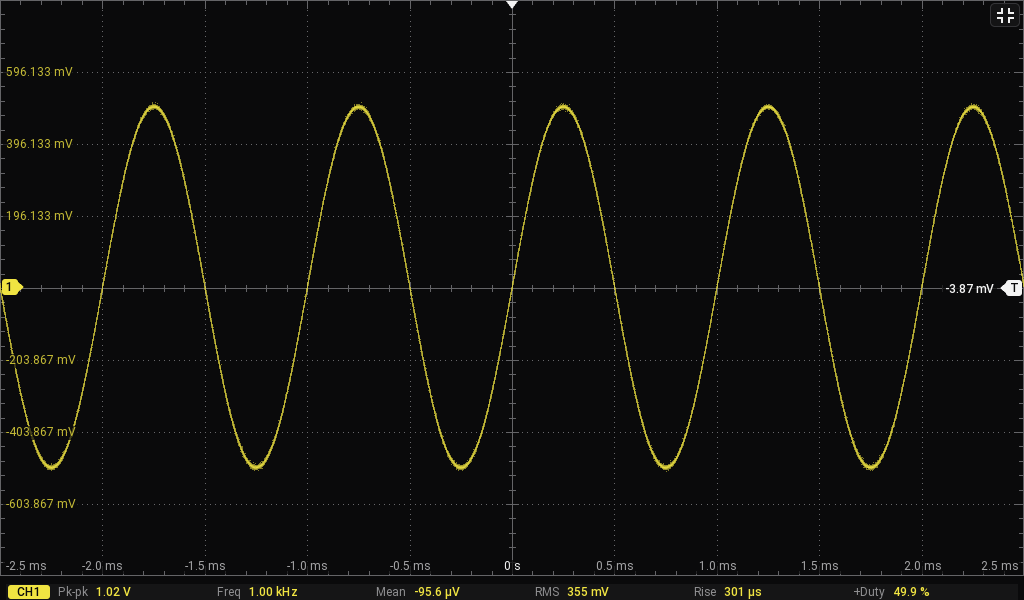
Full screen: the button with four corners at the top right of the plot hides the top bar and the cards. The same button, now with the corners pointing inwards, brings them back. Also on Display > Windows > Full screen. While the touch lock is on there is no full screen, because the Menu button is the way out of the lock.
From 0.1.12. Instead of one screen with everything on it, Display > Views (2, 3 or 4) gives screens to switch between. Each view keeps what is shown and where: the windows, the second pane, the measurements and their bar, DVM and counter, the cursors, the zoom, the histogram, the analyser page, XY and full screen. The channels, the time base, the trigger and the acquisition are the same in all of them. What you change while a view is shown stays with it; a view not used yet starts with the plot alone.
To switch: the numbers left of the top bar's buttons, a swipe from the left or right edge of the plot inwards (a vertical drag there still moves a channel or the trigger level), the Quick key set to Next view (System > Quick key), or SCPI :DISPlay:VIEW <n>. The views are saved with a setup.
A channel's bandwidth is Auto unless you choose another: the limit follows the sample rate, as on the stock system, so a slow time base shows less noise. With Full, a signal well above that limit keeps its size, but the noise of a slow signal can be larger than the trigger's hysteresis, and the hardware then triggers on the other edge too. The screen still shows the edge you set. Trigger > Noise reject widens the hysteresis from 0.3 to 0.7 divisions.
Trigger > Coupling (edge trigger, from 0.1.11): DC, AC, LF reject or HF reject, a filter in the trigger path only; the trace is not filtered. With AC and LF reject the DC is taken out, so a level of 0 V is the zero crossing of the signal whatever its offset. LF reject also weakens slow signals (a 10 kHz sine is already small), HF reject keeps the DC and suppresses fast signals (1 MHz no longer triggers). SCPI: :TRIGger:COUPling DC|AC|LFR|HFR.
From 0.1.6. Display > Text size: Normal, Large or Larger. Large and Larger make the text of the bars, cards, measurement rows, menus and dialogs 2 or 4 pixels bigger; the plot gets a little shorter. Kept across restarts.
- Display > Backlight (from 0.1.9): the panel's brightness, 10 to 100 %, in steps that look even.
- System > Graphics (from 0.1.7; under Display until 0.1.11): GPU (the default) or CPU. With GPU the scope's graphics chip draws the picture, which takes about half the load off the processor; from 0.1.8 on the chip is switched on. Where it does not start, the CPU draws. From 0.1.12 the GPU keeps 30 frames a second with a monitor in every HDMI mode (0.1.11: down to 16 to 25 with four channels).
- Display > HDMI (from 0.1.7): Mirror, Waveform, or Layout, which lays the whole screen out again at the monitor's size.
Names of channels and references, math formulas and WLAN passwords are typed on the on-screen keyboard. The arrows either side of Space move the insertion point one character, and a tap into the entry puts it where you tap. Typing and Delete work at the insertion point, so a wrong character in a long password is fixed without typing the rest again. Show / Hide shows the password.
Setups stay on the scope. Screenshots and CSV files go to a USB stick in the front port, into the folder OOS.
From 0.1.6. The scope has no clock battery and starts in 2013. System > Date and time:
-
Time from NTP (off by default; then OOS sends nothing to the outside): the clock from an NTP server, a few seconds after a network link comes up and then every hour. NTP server = DHCP (from 0.1.12, the default) takes the server your DHCP lease names (option 42), else
pool.ntp.org; the state line says which one was asked. Or pick a server, or type one with Other. -
Time zone: common zones with their daylight saving time, or any POSIX
TZstring. - Set the clock: date and time by hand, for a scope without a network.
Once the clock is set, new files are named by date and time (shot-20261111-143005.png) instead of a number.
System > Self-cal. Warm the scope up for 30 minutes and disconnect all inputs. It takes about 5 minutes per channel and pass, with 4 passes. The factory files are never changed.