This is the summary for my 20 minute talk at the Texas Linux Fest 2015.
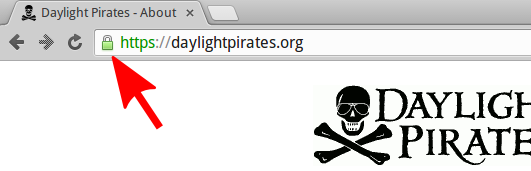
The little lock at the top of your website.
private_key.pem- This is your private key. Don't share it with anyone!certificate_signing_request.csr- This is what you give to the certificate authority (it's signed by your private key).signed_certificate.pem- This is what the certificate authority gives back to you.intermediate.pem- This is the certificate authority's intermediate certificate that signed your certificate.root.pem- This is the certificate authority's root certificate that is included in browsers and signed the intermediate certificate.
NOTE: This guide assumes your webserver is running nginx on Ubuntu 14.04. Adjust commands as needed for your environment.
Create a private key for your website (you can do this on your local system or on your webserver).
openssl genrsa 4096 > private_key.pemCreate a certificate signing request (CSR) for your domain.
openssl req -new -sha256 -key private_key.pem -subj "/CN=txlfhttps.com" > certificate_signing_request.csrGet the certificate signing request signed by a certifiate authority.
Free:
- https://www.startssl.com/ (pay to revoke)
- https://www.letsencrypt.org/ (coming Q4 2015)
Cheap:
You'll end up with a signed certificate signed_certificate.pem.
Download any intermediate and root certificates.
#if you used StartSSL (free)
wget https://www.startssl.com/certs/class1/sha2/pem/sub.class1.server.sha2.ca.pem -O intermediate.pem

#if you used PositiveSSL from Namecheap ($9)
wget https://support.comodo.com/index.php?/Knowledgebase/Article/GetAttachment/979/1056458 -O intermediate.pemCreate the packaged certificate files (they are just combinations of the certs).
# chained certificates
cat signed_certificate.crt intermediate.crt > chained.pem

# dhparam file (NOTE: this sometimes takes over an hour)
openssl dhparam -out dhparam.pem 4096Copy the key and certificates to your server.
scp private_key.pem root@txlfhttps.com:/etc/nginx/private_key.pem
scp chained.pem root@txlfhttps.com:/etc/nginx/chained.pem
scp dhparam.pem root@txlfhttps.com:/etc/nginx/dhparam.pemUpdate your webserver configuration to use https.
From:
server {
  listen 80;
  server_name txlfhttps.com;

  # my awesome site
  location / {
    proxy_pass https://txlfhttps.github.io/;
  }
}
To:
server {
  listen 80;
  server_name txlfhttps.com;

  return 301 https://txlfhttps.com$request_uri;
}

server {
  listen 443;
  server_name txlfhttps.com;

  ssl on;
  ssl_certificate chained.pem;
  ssl_certificate_key private_key.pem;
  ssl_session_timeout 1d;
  ssl_protocols TLSv1 TLSv1.1 TLSv1.2;
  ssl_ciphers ECDHE-RSA-AES256-GCM-SHA384:ECDHE-RSA-AES128-GCM-SHA256:DHE-RSA-AES256-GCM-SHA384:ECDHE-RSA-AES256-SHA384:ECDHE-RSA-AES128-SHA256:ECDHE-RSA-AES256-SHA:ECDHE-RSA-AES128-SHA:DHE-RSA-AES256-SHA:DHE-RSA-AES128-SHA;
  ssl_dhparam dhparam.pem;
  ssl_session_cache shared:SSL:50m;
  ssl_prefer_server_ciphers on;
  ssl_stapling on;
  ssl_stapling_verify on;
  resolver 8.8.4.4 8.8.8.8;

  # my awesome site
  location / {
    proxy_pass https://txlfhttps.github.io/;
  }
}
Restart your webserver!
sudo service nginx restart