
REST Client allows you to send HTTP request and view the response in Acode Editor directly. It eliminates the need for a separate tool to test REST APIs and makes API testing convenient and efficient.
This project is a port of the excellent VSCode REST Client by Huachao Mao, adapted for the Acode Editor ecosystem. Original core logic and parsing concepts belong to the original author.
- Send HTTP request in editor and view response in a editor tab with syntax highlight
- Send cURL command in editor and copy HTTP request as
cURL command - Compose MULTIPLE requests in a single file (separated by
###delimiter) - View image response directly in editor
- Environments and custom/system variables support
- Use variables in any place of request(URL, Headers, Body)
- Interactively assign prompt custom variables per request
HTTPlanguage support.httpand.restfile extensions support- Syntax highlight (Request and Response)
- Comments (line starts with
#or//) support - Support
jsonandxmlbody indentation, comment shortcut and auto closing brackets - CodeLens support to add an actionable link to send request
In editor, type an HTTP request as simple as below:
https://example.com/comments/1Or, you can follow the standard RFC 2616 that including request method, headers, and body.
POST https://example.com/comments HTTP/1.1
content-type: application/json

{
    "name": "sample",
    "time": "Wed, 21 Oct 2015 18:27:50 GMT"
}
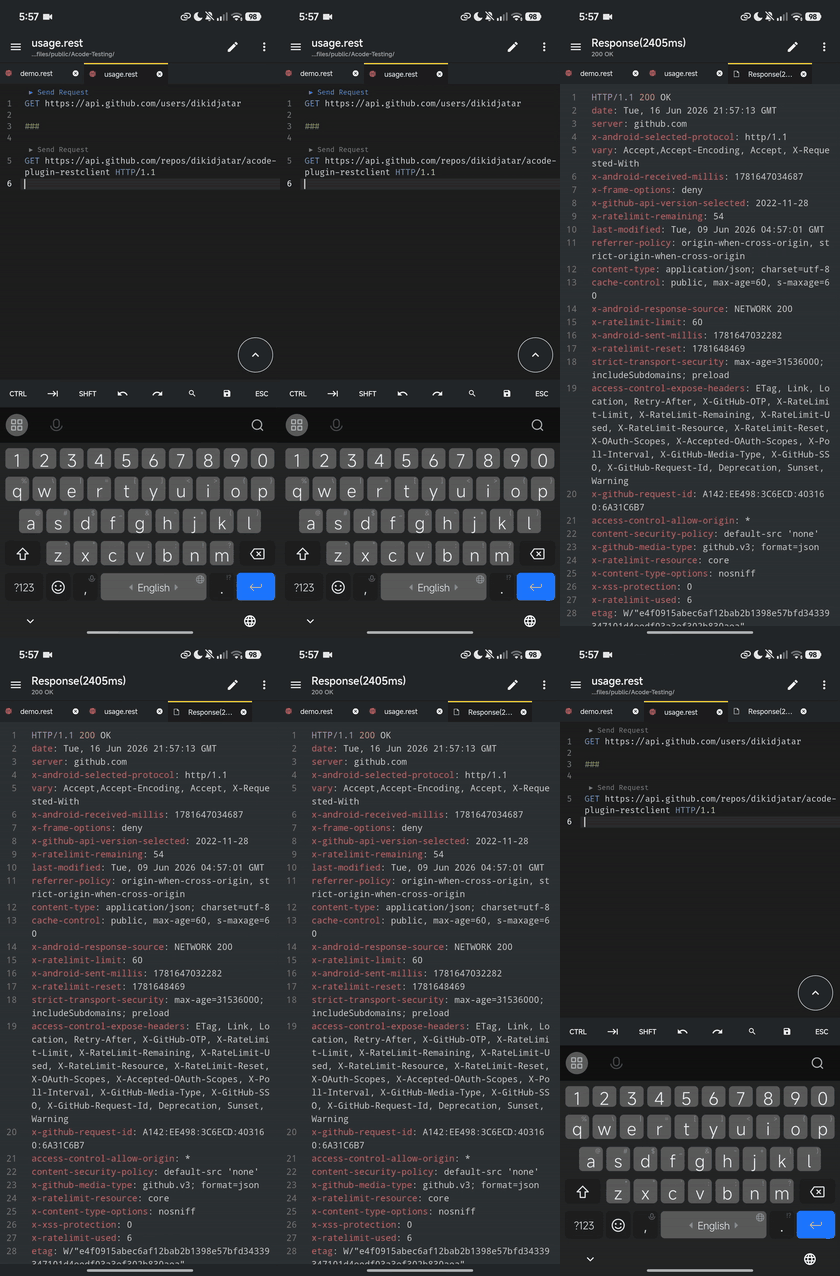
To send a prepared request, you have several options. The easiest way is to click the Send Request link above the request. This link will appear automatically if the file's language mode is set to HTTP.
The response will be previewed in a separate editor tab inside Acode Editor. If you prefer to use the full power of searching, selecting, or manipulating in Acode Editor, you can preview the response in an untitled document by setting REST Client: previewResponseInUntitledDocument to true.
If you need to store multiple requests in the same file and execute them at your convenience, REST Client Plugin has got you covered. By using the three or more consecutive # symbol as a delimiter, you can create a separation between the requests that the plugin can recognize. Once you have done this, simply place your cursor between the delimiters of the desired request, issue it as usual, and the plugin will send it out without any hassle.
GET https://example.com/comments/1 HTTP/1.1

###

GET https://example.com/topics/1 HTTP/1.1

###

POST https://example.com/comments HTTP/1.1
content-type: application/json

{
    "name": "sample",
    "time": "Wed, 21 Oct 2015 18:27:50 GMT"
}
REST Client plugin also provides the flexibility that you can send the request with your selected text in editor.
The first non-empty line of the selection (or document if nothing is selected) is the Request Line. Below are some examples of Request Line:
GET https://example.com/comments/1 HTTP/1.1GET https://example.com/comments/1https://example.com/comments/1If request method is omitted, request will be treated as GET, so above requests are the same after parsing.
You can always write query strings in the request line, like:
GET https://example.com/comments?page=2&pageSize=10Sometimes there may be several query parameters in a single request, putting all the query parameters in Request Line is difficult to read and modify. So we allow you to spread query parameters into multiple lines(one line one query parameter), we will parse the lines in immediately after the Request Line which starts with ? and &, like
GET https://example.com/comments
    ?page=2
&pageSize=10Once you've written your Request line, the lines that immediately follow until the first empty line will be parsed as Request Headers. These headers should follow the standard field-name: field-value format, with each line representing a single header. By default if you don't explicitly specify a User-Agent header, REST Client Plugin will automatically add one with the value acode-restclient. However, if you want to change the default value, you can do so in the REST Client: defaultHeaders setting.
Below are examples of Request Headers:
User-Agent: rest-client
Accept-Language: en-GB,en-US;q=0.8,en;q=0.6,zh-CN;q=0.4
Content-Type: application/jsonIf you want to provide a request body, simply add a blank line following the request headers, as demonstrated in the POST example in the usage section. Anything written after the blank line will be treated as Request Body content. Here are some examples:
POST https://example.com/comments HTTP/1.1
Content-Type: application/xml
Authorization: token xxx

<request>
    <name>sample</name>
    <time>Wed, 21 Oct 2015 18:27:50 GMT</time>
</request>
When content type of request body is application/x-www-form-urlencoded, you may even divide the request body into multiple lines. And each key and value pair should occupy a single line which starts with &:
POST https://api.example.com/login HTTP/1.1
Content-Type: application/x-www-form-urlencoded

name=foo
&password=bar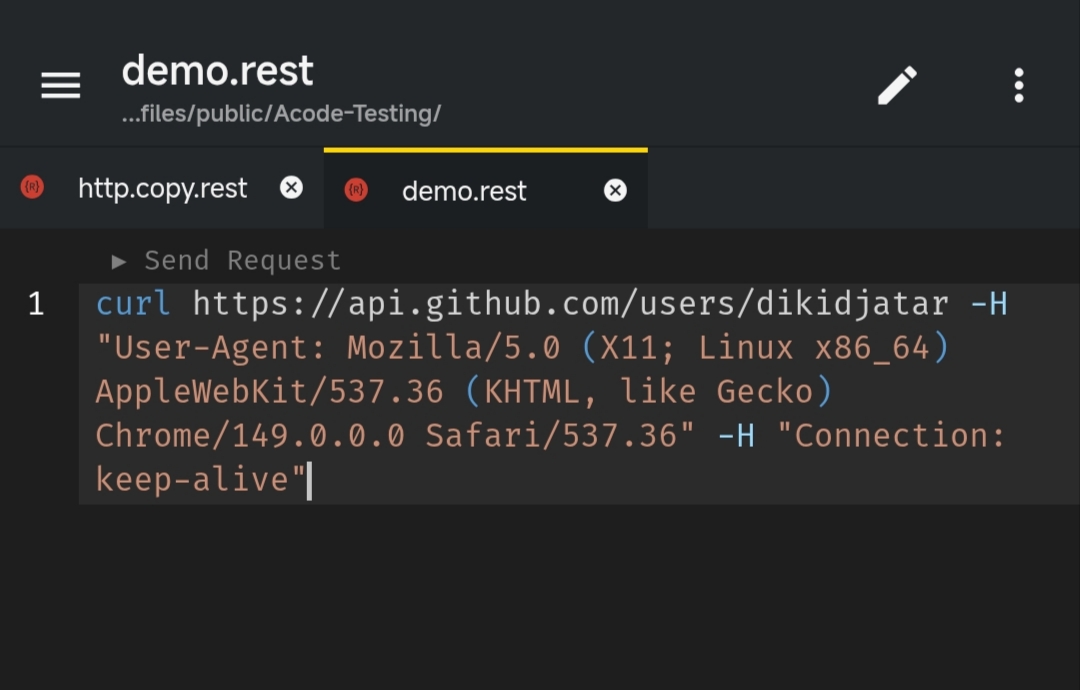 We add the capability to directly run curl request in REST Client plugin. The issuing request command is the same as raw HTTP one. REST Client will automatically parse the request with specified parser.
REST Client doesn't fully support all the options of cURL, since underneath we use request library to send request which doesn't accept all the cURL options. Supported options are listed below:
- -X, --request
- -L, --location, --url
- -H, --header(no @ support)
- -I, --head
- -b, --cookie(no cookie jar file support)
- -u, --user(Basic auth support only)
- -d, --data, --data-ascii,--data-binary, --data-raw
Add language support for HTTP request, with features like syntax highlight, auto completion, code lens and comment support, when writing HTTP request in Acode. By default, the language association will be automatically activated in two cases:
- File with extension
.httpor.rest - First line of file follows standard request line in RFC 2616, with
Method SP Request-URI SP HTTP-Versionformat
We support two types of variables, one is Custom Variables which is defined by user into File Variables, Prompt Variables, and Request Variables
The reference syntax of system and custom variables types has a subtle difference, for the former the syntax is {{CustomVariableName}}, without preceding $ before variable name. The definition syntax and location for different types of custom variables are different. Notice that when the same name used for custom variables, request variables takes higher resolving precedence over file variables, file variables takes higher precedence over environment variables.
Custom variables can cover different user scenarios with the benefit of environment variables, file variables, and request variables. Environment variables are mainly used for storing values that may vary in different environments. File variables are mainly used for representing values that are constant throughout the http file. Request variables are used for the chaining requests scenarios which means a request needs to reference some part(header or body) of another request/response in the same http file, imagine we need to retrieve the auth token dynamically from the login response, request variable fits the case well. Both file and request variables are defined in the http file and only have File Scope.
For file variables, the definition follows syntax @variableName = variableValue which occupies a complete line. And variable name MUST NOT contain any spaces. As for variable value, it can consist of any characters, even whitespaces are allowed for them (leading and trailing whitespaces will be trimmed). If you want to preserve some special characters like line break, you can use the backslash \ to escape, like \n. File variable value can even contain references to all of other kinds of variables. For instance, you can create a file variable with value of other request variables like @token = {{loginAPI.response.body.token}}. When referencing a file variable, you can use the percent % to percent-encode the value.
@hostname = api.example.com
@port = 8080
@host = {{hostname}}:{{port}}
@contentType = application/json
@createdAt = {{$datetime iso8601}}
@modifiedBy = {{$processEnv USERNAME}}

###

@name = Strunk & White

GET https://{{host}}/authors/{{%name}} HTTP/1.1

###

PATCH https://{{host}}/authors/{{%name}} HTTP/1.1
Content-Type: {{contentType}}

{
    "content": "foo bar",
    "created_at": "{{createdAt}}",
    "modified_by": "{{modifiedBy}}"
}
With prompt variables, user can input the variables to be used when sending a request. This gives a flexibility to change most dynamic variables without having to change the http file. User can specify more than one prompt variables. The definition syntax of prompt variables is like a single-line comment by adding the syntax before the desired request url with the following syntax // @prompt {var1} or # @prompt {var1}. A variable description is also assignable using // @prompt {var1} {description} or # @prompt {var1} {description} which will prompt an input popup with a desired description message.
The reference syntax is the same as others, follows {{var}}. The prompt variable will override any preceding assigned variable and will never be stored to be used in other requests.
@hostname = api.example.com
@port = 8080
@host = {{hostname}}:{{port}}
@contentType = application/json

###
# @prompt username
# @prompt refCode Your reference code display on webpage
# @prompt otp Your one-time password in your mailbox
POST https://{{host}}/verify-otp/{{refCode}} HTTP/1.1
Content-Type: {{contentType}}

{
    "username": "{{username}}",
    "otp": "{{otp}}"
}
Request variables are similar to file variables in some aspects like scope and definition location. However, they have some obvious differences. The definition syntax of request variables is just like a single-line comment, and follows // @name requestName or # @name requestName just before the desired request url. You can think of request variable as attaching a name metadata to the underlying request, and this kind of requests can be called with Named Request, while normal requests can be called with Anonymous Request. Other requests can use requestName as an identifier to reference the expected part of the named request or its latest response. Notice that if you want to refer the response of a named request, you need to manually trigger the named request to retrieve its response first, otherwise the plain text of variable reference like {{requestName.response.body.$.id}} will be sent instead.
The reference syntax of a request variable is a bit more complex than other kinds of custom variables. The request variable reference syntax follows {{requestName.(response|request).(body|headers).(*|JSONPath|XPath|Header Name)}}. You have two reference part choices of the response or request: body and headers. For body part, you can use * to reference the full response body, and for JSON and XML responses, you can use JSONPath and XPath to extract specific property or attribute. For example, if a JSON response returns body {"id": "mock"}, you can set the JSONPath part to $.id to reference the id. For headers part, you can specify the header name to extract the header value. Additionally, the header name is case-insensitive.
If the JSONPath or XPath of body, or Header Name of headers can't be resolved, the plain text of variable reference will be sent instead. And in this case, diagnostic information will be displayed to help you to inspect this. And you can also hover over the request variables to view the actual resolved value.
Below is a sample of request variable definitions and references in an http file.
@baseUrl = https://example.com/api

# @name login
POST {{baseUrl}}/api/login HTTP/1.1
Content-Type: application/x-www-form-urlencoded

name=foo&password=bar

###

@authToken = {{login.response.headers.X-AuthToken}}

# @name createComment
POST {{baseUrl}}/comments HTTP/1.1
Authorization: {{authToken}}
Content-Type: application/json

{
    "content": "fake content"
}

###

@commentId = {{createComment.response.body.$.id}}

# @name getCreatedComment
GET {{baseUrl}}/comments/{{commentId}} HTTP/1.1
Authorization: {{authToken}}

###

# @name getReplies
GET {{baseUrl}}/comments/{{commentId}}/replies HTTP/1.1
Accept: application/xml

###

# @name getFirstReply
GET {{baseUrl}}/comments/{{commentId}}/replies/{{getReplies.response.body.//reply[1]/@id}}
followredirect: Follow HTTP 3xx responses as redirects. (Default is true)defaultHeaders: If particular headers are omitted in request header, these will be added as headers for each request. (Default is{ "User-Agent": "acode-restclient", "Accept-Encoding": "gzip" })timeouSeconds: Timeout in seconds. 0 for infinity. (Default is 0)requestNameAsResponseTabTitle: Show request name as the response tab title. Only valid when using html view, if no request name is specified defaults to "Response". (Default is false)
REST Client plugin also supports request-level settings for each independent request. The syntax is similar with the request name definition, # @settingName [settingValue], a required setting name as well as the optional setting value. Available settings are listed as following:
| Name | Syntax | Description |
|---|---|---|
| note | # @note |
Use for request confirmation, especially for critical request |
| no-redirect | # @no-redirect |
Don't follow the 3XX response as redirects |
This project is a port of the excellent VSCode REST Client by Huachao Mao, adapted for the Acode Editor ecosystem. Original core logic and parsing concepts belong to the original author.
All the amazing contributors❤️
Please provide feedback through the GitHub Issue system, or fork the repository and submit PR.