Local storage
-
Install DBeaver -> https://dbeaver.io/download/ or PgAdmin -> https://www.pgadmin.org/download/
-
Create your practise database. https://www.postgresqltutorial.com/postgresql-create-database/
-
After building your database and filling the fields, it's time to do a backup.
-
In DBeaver, you can right click the database > tools > backup as seen here and click on backup. You can save the dump in whichever local directory you want.
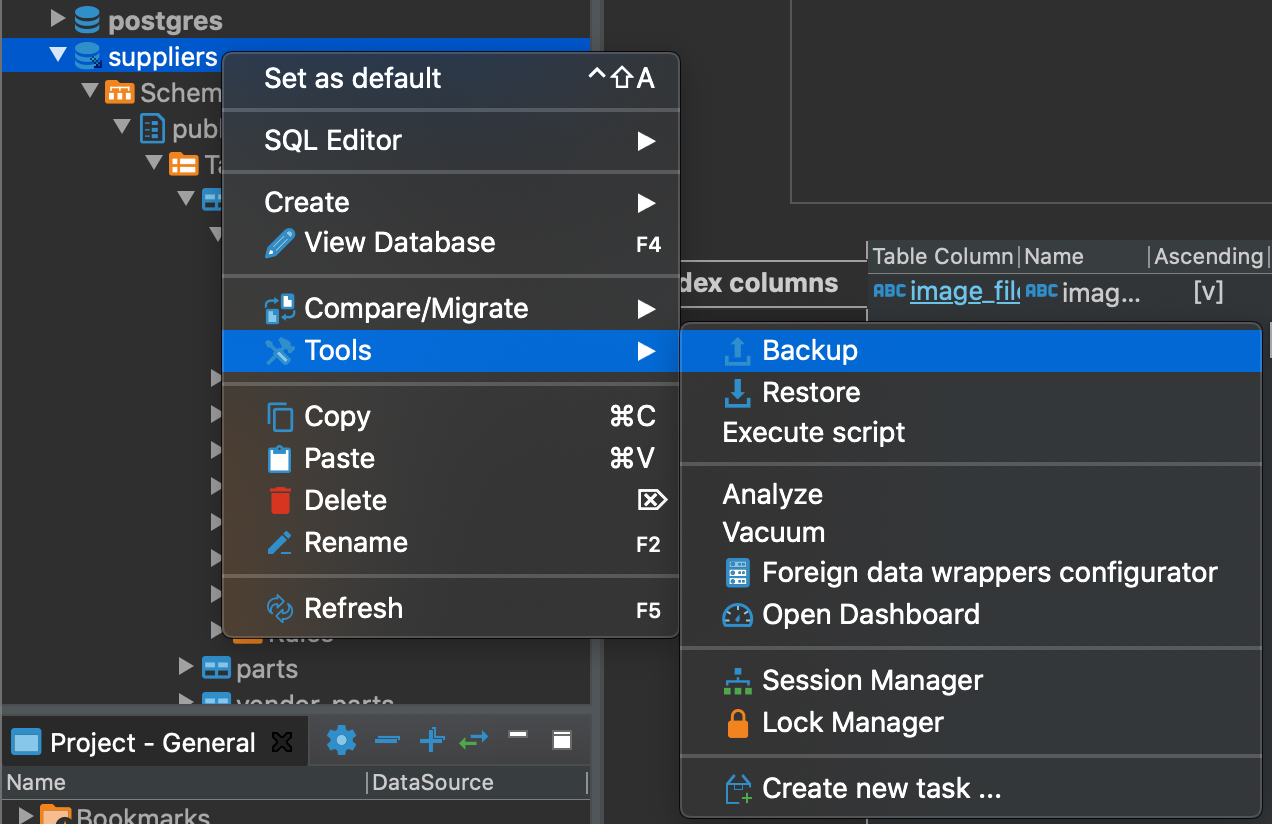
To backup,
psql -U username -d dbname < filename
Storage in EC2
-
In DBeaver, you can right click the database > tools > backup as seen here and click on backup. You can save the dump in whichever local directory you want.
-
To push the dump from your local computer into your S3, you will first need to install AWS CLI in your computer. -> https://github.com/aws/aws-cli/tree/v2
-
Configure your aws cli with the command
aws configure. Type in your access key, secret key and the default region name. To test if your aws is working, type in the following commandaws s3 ls. You should see the list of your buckets. Once it's working, push your dump from your local directory into the s3 with the following commandaws s3 cp /path/to/dump s3://bucket-you-want-to-store. Eg aws s3 cp /Users/test/dump-suppliers-1234567 s3://Testbucket -
Configure your ec2. Select whichever instance you want, and under 'configure security group', input the following.
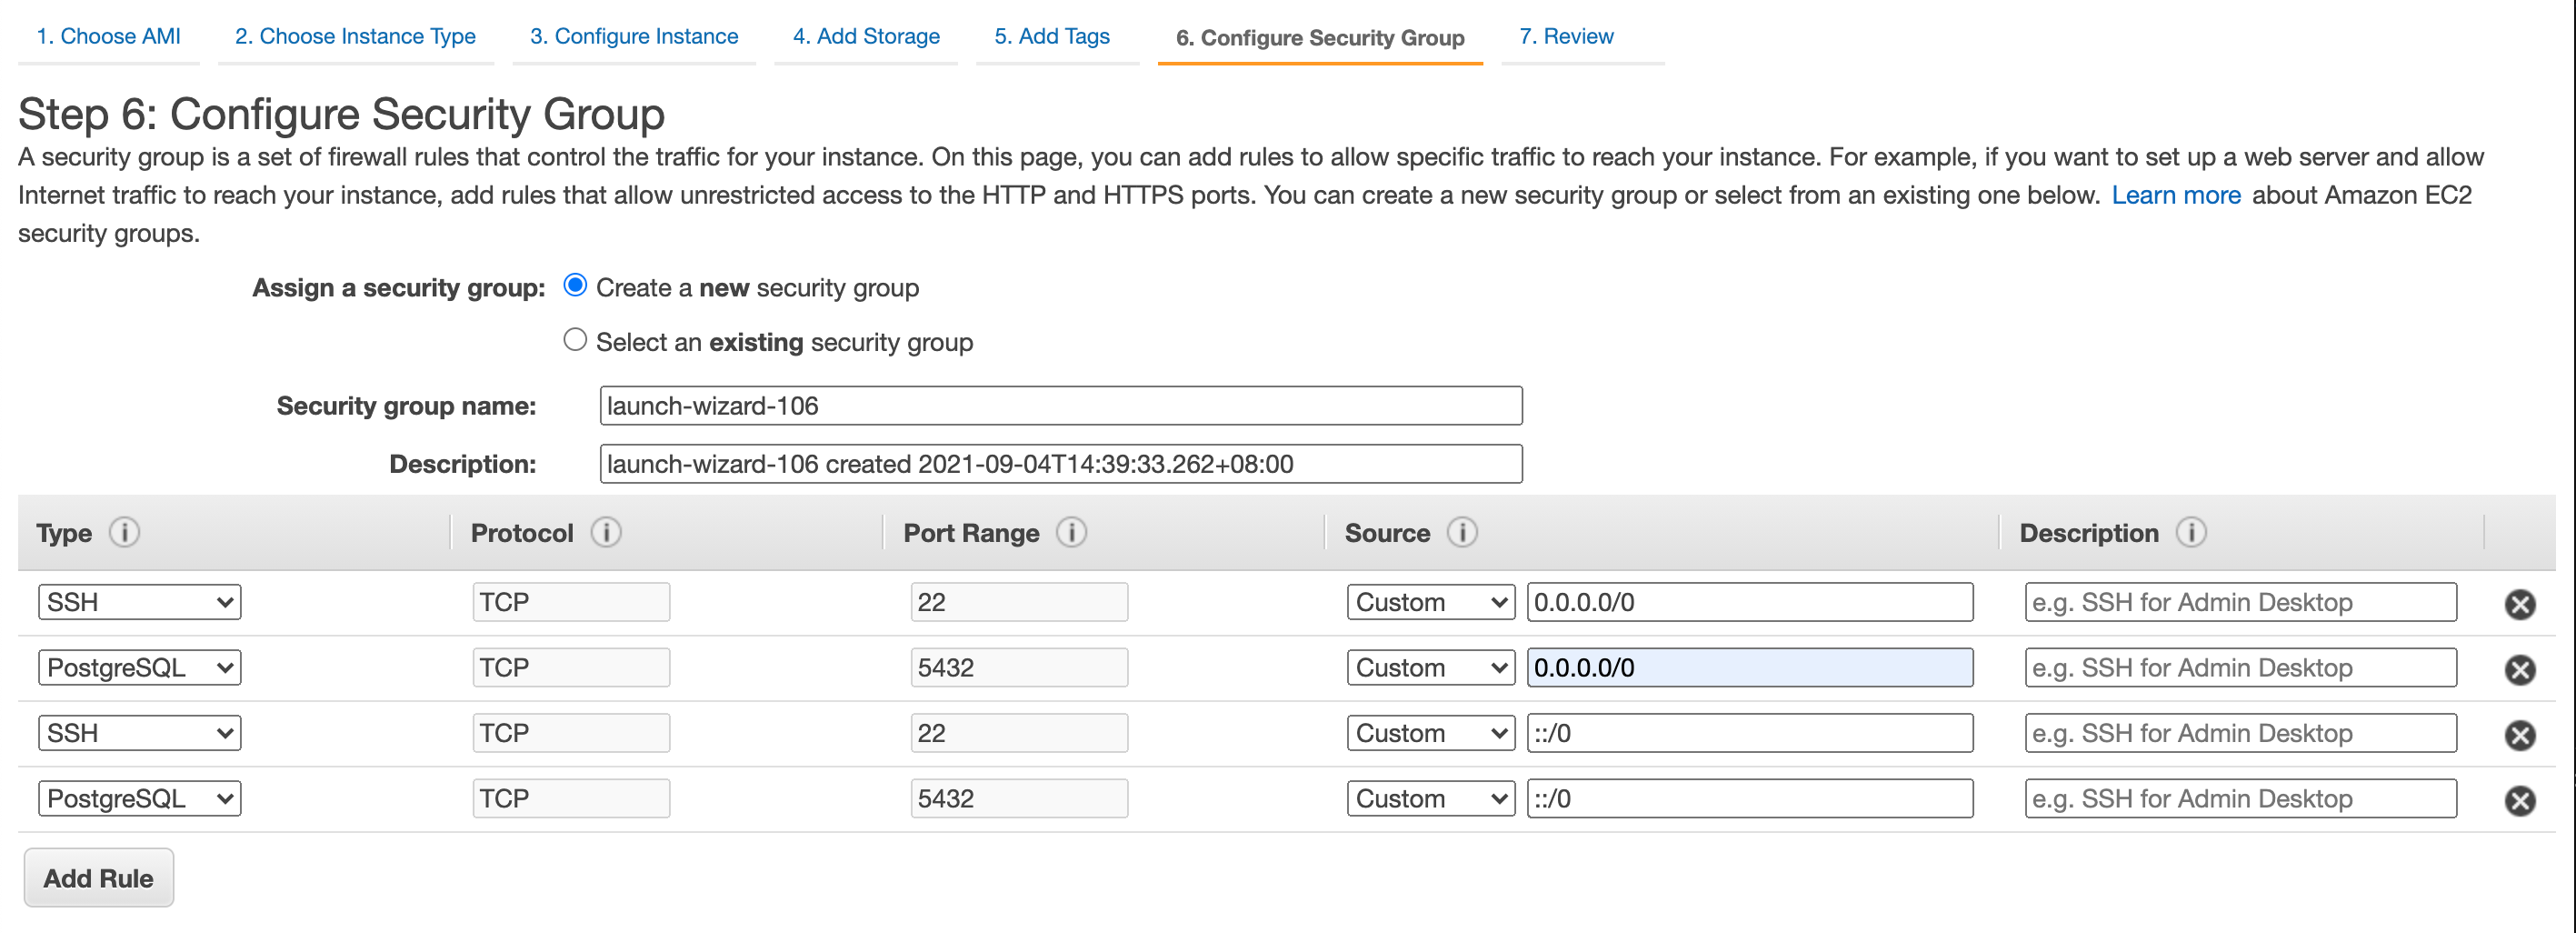
- SSH into your instance and install AWS CLI, Postgresql. You have to install AWS CLI again because your new instance does not have it. To install, use the following command
sudo apt-get updateandsudo apt install awscli. To install Postgresql,sudo apt-get install postgresql postgresql-contrib. Again, configure your AWS CLI with the commandaws configure. Key in your access key again, secret key as well as your default region name. - Now you'll want to copy your dump from the s3 into the instance.
aws s3 cp s3://location-of-dump-in-s3/dump dumpEg,aws s3 cp s3://Testbucket/dump-suppliers-1234567 dump-suppliers-1234567. This will copy the dump into whichever directory you're at in the instance. To check if it's there, just typels. - Now create the db in postgresql,
sudo -u postgres createdb suppliers. This will be the place where you will restore the dump. Go into the db withsudo -u postgres psql. You can\lto list the databases. You should see suppliers database inside. To quit postgresql, type\qto quit. To connect with the db,\c database-you-want-to-connect. Eg,\c suppliers. You should see the followingYou are now connected to database "suppliers" as user "postgres". - Check the list of roles with
du. You should see postgres under role name. However, you will want ubuntu in the role name too because that is the username of your instance (ubuntu@ip-xxx-xx-x-xx). If you tried to restore your dump without giving excess to the username ubuntu, you will get an errorpg_restore: error: connection to database "suppliers" failed: FATAL: role "ubuntu" does not exist - To create the role, quit the database with
q. Create your username withsudo -u postgres createuser ubuntu. Alternatively, you can enter postgres withsudo -u postgres psql,CREATE ROLE username superuser;andALTER ROLE username WITH LOGIN; - Restore your database with
pg_restore -d database-name dump-nameEg.pg_restore -d suppliers dump-suppliers-1234567 - When the restoring has completed, log in to postgres again with
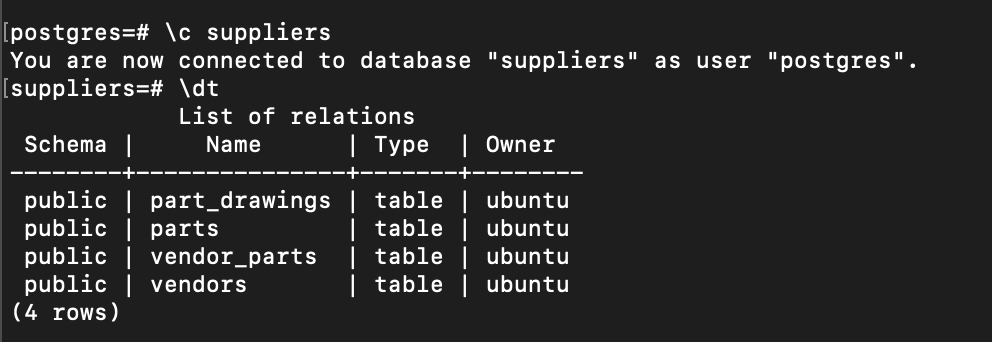
sudo -u postgres psql. Connect to the database suppliers with\c suppliers. To check the tables,\dt. Viola! your restoration is complete. To double check, you can do a simple countSELECT COUNT(*) FROM table-in-databaseEg,SELECT COUNT(*) FROM part_drawingsand match it with your original database.
Automating the backup with Cron Credits to https://mattsegal.dev/postgres-backup-automate.html
- Create a shell script with your DB credentials such as DB host, DB port, DB name, DB username and DB pw
export PG_DB_HOST=localhost
export PG_DB_PORT=5432
export PG_DB_NAME=suppliers
export PG_DB_USER=abc
export PG_DB_PW=<put in your own pw>
- Write your backup into file and push it into S3 with the following:
TIME=$(date "+%s")
BACKUP_FILE="postgres_${PG_DB_NAME}_${TIME}.pgdump"
pg_dump --format=custom > $BACKUP_FILE
echo "Backup completed

S3_BUCKET=s3://ai-model-database-backup/postgresql
S3_TARGET=$S3_BUCKET/$BACKUP_FILE
echo "Copying $BACKUP_FILE to $S3_TARGET"
aws s3 cp $BACKUP_FILE $S3_TARGET

echo "Backup completed for $PG_DB_NAME"
- Next, create a cron job in the terminal with the following,
crontab -e. Inside cron, you'll want to specify the frequency of your backups, the path to your script as well as a log for easier debugging. The example below tells cron to run the job every minute. To do your own adjustments, you can use https://crontab.guru/#_*_
*    *    *   *   *    command_to_executed/Path to the files/
|    |    |   |   |
|    |    |   |   +----- day of week (0 - 6) (Sunday=0)
|    |    |   +------- month (1 - 12)
|    |    +--------- day of month (1 - 31)
|    +----------- hour (0 - 23)
+------------- min (0 - 59)
An example will be as follows:
#tell cron to run the backup every minute. Also include a backup.log to debug in the following path ```~/```
* * * * * ~/s3backup.sh >> ~/backup.log 2>&1
Once you have finished updating, use the following command to save and exit :wq
To check your cron, use the following command crontab -l
Keep an eye out for the limited default PATH when running cron.