JavaGuide2
Here we will start to write the model for our blog engine.
The model layer has a central position in a play application (and in fact in all well designed applications). It is the
demain-specific representation of the information on which the application operates. As we want to create a task
management system, the model layer will contain classes like User, Project and Task.
Because most model objects need to survive between application restarts, we have to save them in a persistent datastore. A common choice is to use a relational database. But because Java is an object oriented language, we will use an Object Relational Mapper to help reduce the impedance mismatch.
Though Play does come with support for relational databases out of the box, there is nothing stopping you from using Play framework with a NoSQL database, in fact, this is a very common way to implement models in Play framework. However we will use a relational database for this tutorial.
Ebean is a Java ORM library that aims to implement a very simple interface to mapping Java objects to the database. It uses JPA annotations for mapping classes to tables, but if you have had experience with JPA before, Ebean differs in that it is sessionless. This can greatly simplify the way you interact with the database, removing many of the surprises of things being done at odd times, such as session flushing, and errors with regards to stale or detached objects, that can occur when using JPA.
We will start to code ZenTasks by creating the User class. Create a new file called app/models/User.java, and
declare a first implementation of the User class:
package models;

import javax.persistence.*;
import play.db.ebean.*;
import com.avaje.ebean.*;

@Entity
public class User extends Model {

    @Id
    public String email;
    public String name;
    public String password;

    public User(String email, String name, String password) {
      this.email = email;
      this.name = name;
      this.password = password;
    }

    public static Finder<String,User> find = new Finder<String,User>(
        String.class, User.class
    );
}
The @Entity annotation marks this class as a managed Ebean entity, and the Model superclass automatically provides a
set of useful JPA helpers that we will discover later. All fields of this class will be automatically persisted to the
database.
It's not required that your model objects extend the
play.db.ebean.Modelclass. You can use plain Ebean as well. But extending this class is a good choice in most cases as it will make a lot of the Ebean stuff easier.
If you have used JPA before, you know that every JPA entity must provide an @Id property. In this case, we are
choosing email to be the id field.
The find field will be used to programatically make queries, which we will see later.
Now if you're a Java developer with any experience at all, warning sirens are probably clanging like mad at the sight of a public variable. In Java (as in other object-oriented languages), best practice says to make all fields private and provide accessors and mutators. This is to promote encapsulation, a concept critical to object oriented design. In fact, play takes care of that for you and automatically generates getters and setters while preserving encapsulation; we will see how it works later in this tutorial.
You can now refresh the application homepage. This time you should see something different:
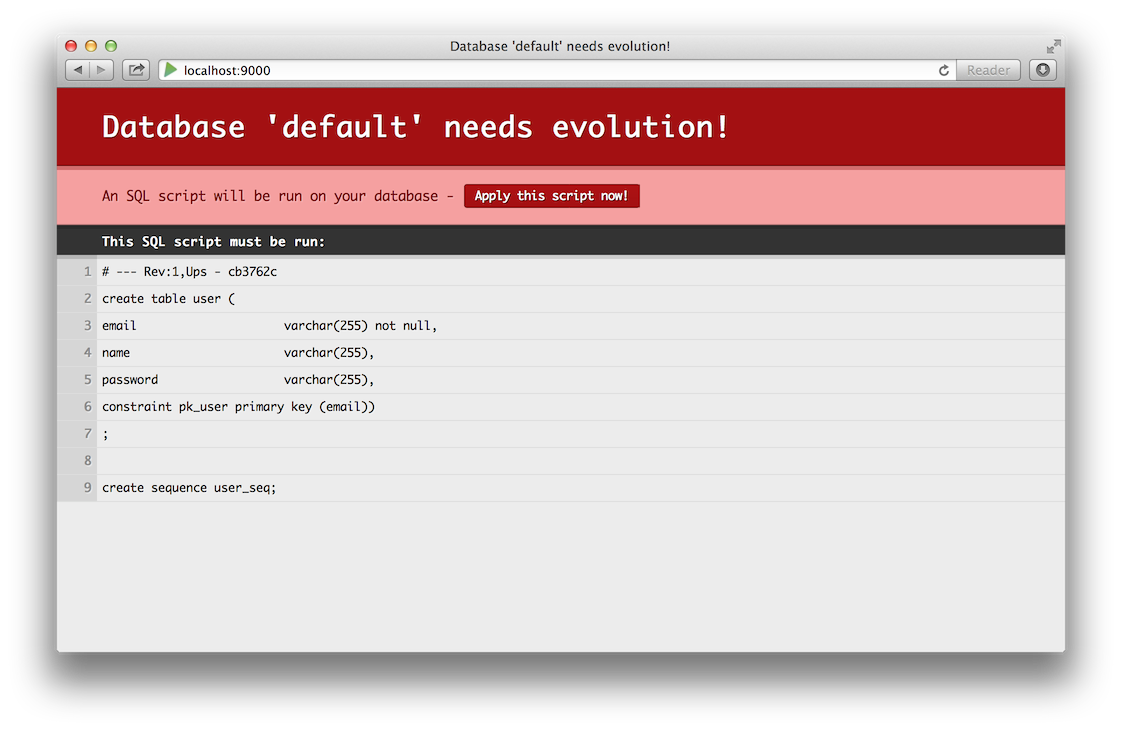
Play has automatically detected that you've added a new model, and has generated a new evolution for it. An evolution is an SQL script that migrates the database schema from one state to the next in your application. In our case, our database state is empty, and Play has generated scripts that create the tables. For now during the early stages of development, we will let Play to continue to generate these scripts for us. Later on in the project lifecycle, you will switch to writing them yourself. Each time you see this message, you can safe click the apply button.
If you don't want to have to worry about applying evolutions each time you restart play, you can disable this prompting by adding the argument
-DapplyEvolutions.default=truewhen you run theplaycommand.
A good way to test the newly created User class is to write a JUnit test case. It will allow you to incrementally
complete the application model and ensure that all is fine.
Create a new file called test/model/UserTest. We will start off by setting up the application, with an in memory
database, ready to write and run our tests:
import models.*;
import org.junit.*;
import static org.junit.Assert.*;
import play.test.WithApplication;
import static play.test.Helpers.*;

public class UserTest extends WithApplication {
    @Before
    public void setUp() {
        start(fakeApplication(inMemoryDatabase()));
    }
}
We have extended the WithApplication class. This is optional, it provides the start() method that allows us to
easily start a fake application, and it automatically cleans it up after each test has run. You could manage these
yourself, but we are going to let Play manage it for us.
Now we will write our first test, which is just going to check that we can insert a row, and retrieve it again:
    @Test
    public void createAndRetrieveUser() {
        new User("bob@gmail.com", "Bob", "secret").save();
        User bob = User.find.where().eq("email", "bob@gmail.com").findUnique();
        assertNotNull(bob);
        assertEquals("Bob", bob.name);
    }
You can see that we have programatically created a query using the User.find finder, to find a unqiue instance where
email is equal to Bob's email address.
To run this test case, make sure that you have stopped the running application by pressing Ctrl+D in the play console,
and then run test. The test should pass.
Although we could use the find object from anywhere in our code to create queries for users, it's not good practice to
spread that code all through our application. One such query that we need is a query that will authenticate users. In
User.java, add the authenticate() method:
    public static User authenticate(String email, String password) {
        return find.where().eq("email", email)
            .eq("password", password).findUnique();
    }
And now the test case:
    @Test
    public void tryAuthenticate() {
        new User("bob@gmail.com", "Bob", "secret").save();

        assertNotNull(User.authenticate("bob@gmail.com", "secret"));
        assertNull(User.authenticate("bob@gmail.com", "badpassword"));
        assertNull(User.authenticate("tom@gmail.com", "secret"));
    }
Each time you make a modification you can run all the tests from the play test runner to make sure you didn't break anything.
The above authentication code stores the password in cleartext. This is considered very bad practice, you should hash the password before storing it, and then hash it before running the query, but that is beyond the scope of this tutorial.