JavaGuide4
We can now display a dashboard, but before we can go on to allow users to create, work on and assign tasks, we need a way for users to identify themselves.
To start off, let's implement a screen that allows a user to login. Create a new route in conf/routes for the login
screen:
GET /login controllers.Application.login()
And now add the login action to app/controllers/Application.java:
public static Result login() {
    return ok(
        login.render()
    );
}
In our action we have referred to a new login template, let's write a skeleton for that template now, in
app/views/login.scala.html:
<html>
    <head>
        <title>Zentasks</title>
        <link rel="shortcut icon" type="image/png" href="@routes.Assets.at("images/favicon.png")">
        <link rel="stylesheet" type="text/css" media="screen" href="@routes.Assets.at("stylesheets/login.css")">
    </head>
    <body>
        <header>
            <a href="@routes.Application.index" id="logo"><span>Zen</span>tasks</a>
        </header>

    </body>
</html>
Now visit <http://localhost:9000/login> in your browser to check that our route is working. Apart from the title, the
page should be blank.
Our login page needs to contain a form, which will of course, hold an email address (username) and password.
Play provides a forms API for handling the rendering, decoding and validation of forms. Let's start off by implementing
our form as a Java object. Open the app/controllers/Application.java class, and declare a static inner class called Login at the end of it:
public static class Login {

    public String email;
    public String password;

}
Now we need to pass this form into our template, to render. Modify the login method in
app/controllers/Application.java to pass this form to the template:
    public static Result login() {
        return ok(
            login.render(form(Login.class))
        );
    }
And now declare the form as a parameter for the login template to accept, in app/views/login.scala.html:
@(form: Form[Application.Login]

<html>
...
Now we need to render our form. Add the form to the login template:
@helper.form(routes.Application.authenticate) {
   <h1>Sign in</h1>

   <p>
       <input type="email" name="email" placeholder="Email" value="@form("email").value">
   </p>
   <p>
       <input type="password" name="password" placeholder="Password">
   </p>
   <p>
       <button type="submit">Login</button>
   </p>
}
The important thing to notice here is the @helper.form call. We have passed to it a route,
routes.Application.authenticate. This tells Play where this form should be submitted to. Notice that there are no
hard coded URLs here? This means we can change our URL structure without silently breaking our application.
Play actually offers a much richer set of form tags, but they are overkill for our login form. We will look at those later in the tutorial.
Of course, the authenticate route hasn't been implemented yet, so let's implement it now. First of all, add the route
to conf/routes:
POST /login controllers.Application.authenticate()
Now implement the method in app/controllers/Application.java:
public static Result authenticate() {
    Form<Login> loginForm = form(Login.class).bindFromRequest();
    return ok();
}
Make sure you add an import statement for
play.data.*toApplication.java
Currently, our authenticate action is doing nothing but reading our form. The next thing we want to do is validate
the form, and there is only one thing we are concerned with in the validation, is the username and password correct? To
implement this validation, we are going to write a validate method on the Login class in
app/controllers/Application.java.
public String validate() {
    if (User.authenticate(email, password) == null) {
      return "Invalid user or password";
    }
    return null;
}
As you can see, this method is able to do any arbitrary validation, in our case, using the User.authenticate method
that we've already implemented, and if validation fails, it returns a String with the error message, otherwise
null if validation passes.
We can now use this validation by using the hasErrors() method on our Form object in the authenticate action:
public static Result authenticate() {
    Form<Login> loginForm = form(Login.class).bindFromRequest();
    if (loginForm.hasErrors()) {
        return badRequest(login.render(loginForm));
    } else {
        session().clear();
        session("email", loginForm.get().email);
        return redirect(
            routes.Application.index()
        );
    }
}
This code introduces a number of new concepts. Firstly, if validation fails, we return a status of 400 Bad Request,
rendering the login page with our form that had the failed validation. By passing this form back, we can extract any
validation errors from the form, and the values the user entered, and render them back to the user.
If the validation was successful, then we put an attribute into the session. We call this attribute email, and it's
value is the email address of the user that just successfully logged in. We will use this session attribute later to
find out the currently logged in user.
After setting the user in the session, we issue an HTTP redirect to the dashboard. You can see that we've used the reverse router, in the same way that we include assets in templates, to refer to the dashboard action.
We are almost finished with validation. The one thing left to do is to display the error message when validation fails.
You saw before that we passed the invalid form back to the template, we will use this to get the error message. Place
the following code in app/views/login.scala.html, just below the Sign In heading:
@if(form.hasGlobalErrors) {
    <p class="error">
        @form.globalError.message
    </p>
}
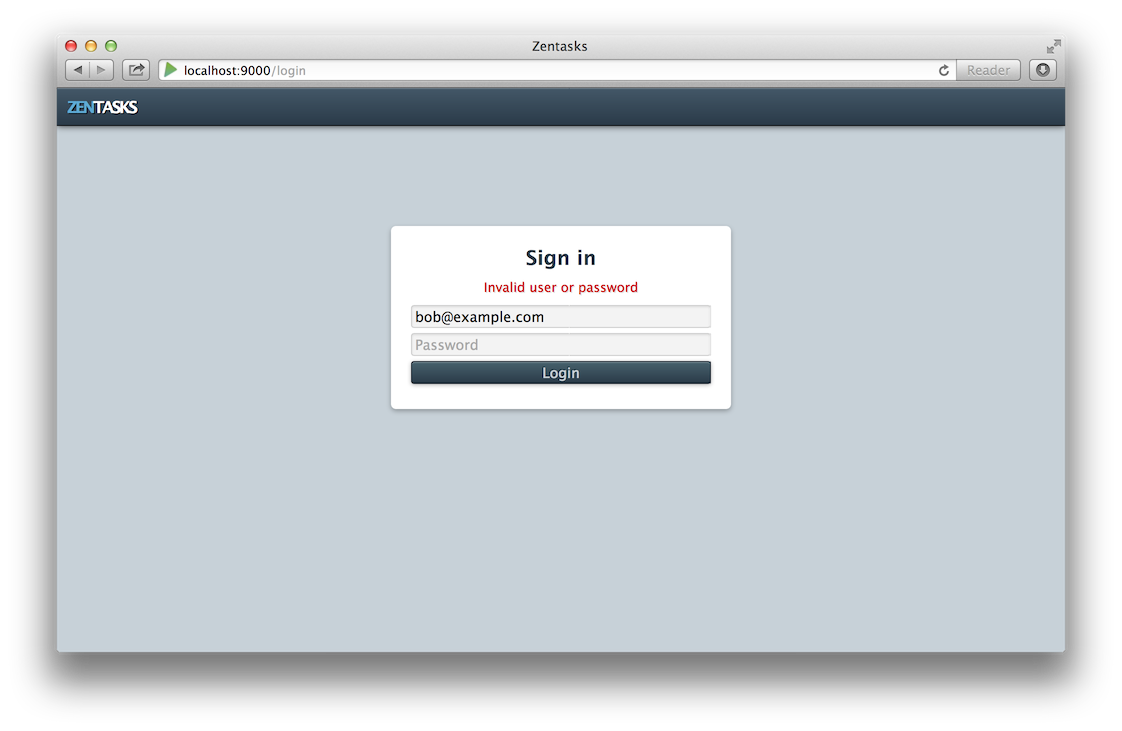
Now try and log in with an invalid password. You should see something like this:
Now reenter the valid password (secret), and login. You should be taken to the dashboard.
Now that we are able to login, we can start protecting actions with authentication. Play allows us to do this using action composition. Action composition is the ability to compose multiple actions together in a chain. Each action can do something to the request before delegating to the next action, and can also modify the result. An action can also decide not to pass the request onto the next action, and instead generate the result itself.
Play already comes with a built in authenticator action, which we will extend to add our logic. We will call this
authenticator Secured. Open app/controllers/Secured.java, and implement this class.
package controllers;

import play.*;
import play.mvc.*;
import play.mvc.Http.*;

import models.*;

public class Secured extends Security.Authenticator {

    @Override
    public String getUsername(Context ctx) {
        return ctx.session().get("email");
    }

    @Override
    public Result onUnauthorized(Context ctx) {
        return redirect(routes.Application.login());
    }
}
We have implemented two methods here. getUsername is used to get the username of the current logged in user. In our
case this is the email address, that we set in the email attribute in the session when the user logged in. If this
method returns a value, then the authenticator considers the user to be logged in, and lets the request proceed. If
however the method returns null, then the authenticator will block the request, and instead invoke onUnathorized,
which we have implemented to redirect to our login screen.
Now let's use this authenticator on the dashboard. In app/controllers/Application.java, add the
@Security.Authenticated annotation with our authenticator to the index method:
@Security.Authenticated(Secured.class)
public static Result index() {
    ...
Now try and visit the dashboard. If you logged in successfully before, you're probably now on the dashboard, the authenticator hasn't blocked you because you were already logged in. You could close your browser and reopen it to log out, but now is as good a time as any for us to implement a log out action. As always, start with the route:
GET /logout controllers.Application.logout()
And then implement the action in app/controllers/Application.java:
public static Result logout() {
    session().clear();
    flash("success", "You've been logged out");
    return redirect(
        routes.Application.login()
    );
}
There is one new concept here. After clearing the session, we added an attribute to the flash scope, a success message.
The flash scope is similar to the session, except that the flash scope lasts only until the next request comes in. This
will allow us to render the success message in the login template when the redirected request comes in. Let's add the
message to app/views/login.scala.html, just as we did for the error message:
@if(flash.contains("success")) {
    <p class="success">
        @flash.get("success")
    </p>
}
Finally lets add a logout link to the main template, app/views/main.scala.html, inside the header section:
<header>
    <a href="@routes.Application.index" id="logo"><span>Zen</span>tasks</a>
    <dl id="user">
        <dt>User</dt>
        <dd>
            <a href="@routes.Application.logout()">Logout</a>
        </dd>
    </dl>
</header>
Now go to the dashboard in your browser, try logging out, and then visiting the dashboard again. You should be unable to view the dashboard, it will redirect to the login screen. Login, and you should be able to see the dashboard again.
There is one last thing that we want to do. We can currently block access to an action based on whether we are logged
in, but how can we access the currently logged in user? The answer is through the request.username() method. This
will give us the email address of the current user.
Let's put the name of the user in the main template next to the logout link. To get the name, we'll actually have to load the whole user from the database. Let's also limit the projects to the one that the user is a member of, and the tasks to the ones that the user is assigned to, using the methods that we've already implemented on our models:
Start by loading the user in the index method in app/controllers/Application.java:
@Security.Authenticated(Secured.class)
public static Result index() {
    return ok(index.render(
        Project.findInvolving(request().usename()),
        Task.find.findTodoInvolving(request().username()),
        User.find.byId(request().username())
    ));
}
We've passed an additional parameter to the index template, so let's declare that parameter in app/views/index.scala.html, and pass it to the main template:
@(projects: List[Project], todoTasks: List[Task], user: User)

@main(projects, user) {
    ...
And of course, we'll have to add it to our app/views/main.scala.html parameter declaration:
@(projects: List[Project], user: User)(body: Html)Now we can use it in the header, add it before the logout link we just added:
<dl id="user">
    <dt>@user.name <span>(@user.email)</span></dt>
    <dd>
        <a href="@routes.Application.logout()">Logout</a>
    </dd>
</dl>
Now visit the dashboard again, ensuring you are logged in.
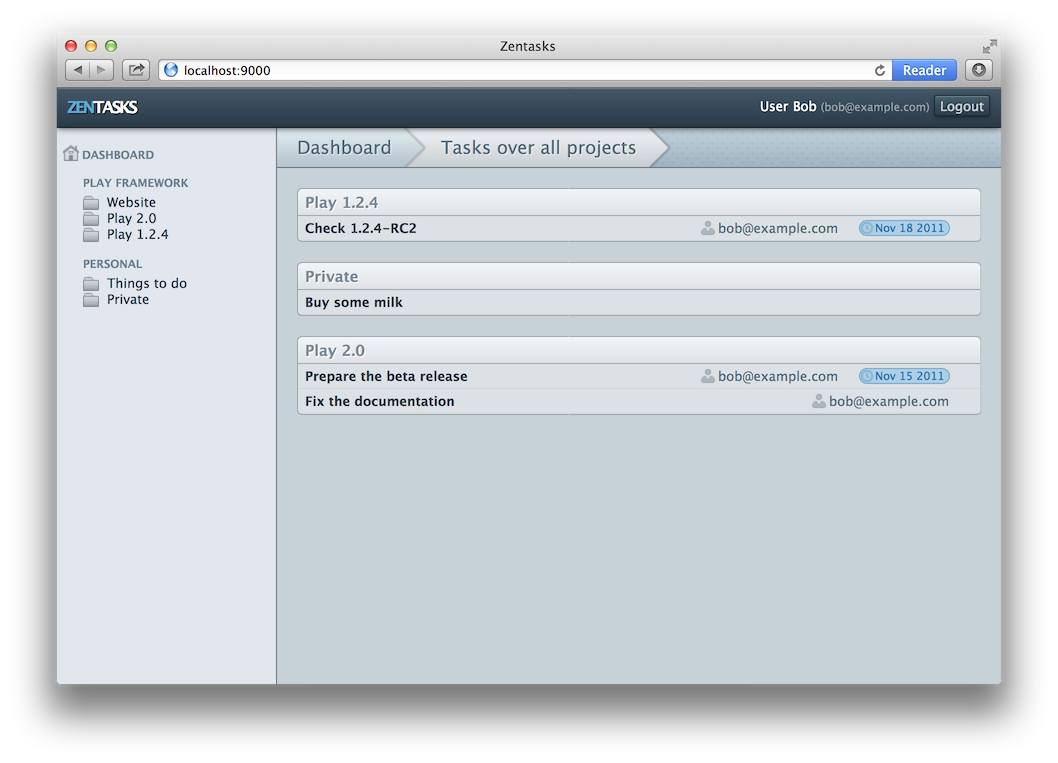
We can now see the currently logged in user, and only the projects that the user has access to and the tasks they have assigned to them.
As always, commit your work to git.
Go to the next part