The efficient, reliable, and developer-friendly way to use the Synthea API.
Actor page: apify.com/johnvc/Synthea-Medical-Record-Generator-API Input schema: apify.com/johnvc/Synthea-Medical-Record-Generator-API/input-schema
The Synthea API generates synthetic, FHIR-compliant patient health records on demand. Every patient, encounter, condition, medication, and observation is fabricated by Synthea, so the data is safe to use for testing, demos, machine-learning training, and FHIR pipeline development without touching any real protected health information (PHI). Configure population size, demographics, and location, and get back full FHIR bundles. Built for healthcare developers, data engineers, and AI agent workflows.

- Python 3.11 or higher
- An Apify account and API key (get a free key here)
-
Clone the repository
git clone https://github.com/johnisanerd/Apify-Synthea-API.git cd Apify-Synthea-API -
Install dependencies with UV
# Install UV if you do not have it:
curl -LsSf https://astral.sh/uv/install.sh | sh

# Install project dependencies:
uv sync
-
Configure your API key
cp .env.example .env
# Edit .env and add your Apify API key
# Get your free API key at: https://apify.com?fpr=9n7kx3
-
Run the example
uv run python synthea-api-example.py
export APIFY_API_TOKEN="your_api_key_here"
uv run python synthea-api-example.pySafe by design. Every record is synthetic. There is no real PHI, so you can share, commit, and train on the data freely.
FHIR-compliant. Output is standard FHIR bundles (optionally US Core R4), ready to load into a FHIR server, an ETL pipeline, or a test suite.
Reproducible. Provide a seed (and clinician_seed) to regenerate the exact same population every time.
Demographic control. Filter by gender, age range, US state, and city, and set a reference date for the generation.
Complete patient histories. Each patient bundle contains hundreds of linked resources: encounters, conditions, observations, procedures, medications, claims, and more.
Predictable, pay-per-use pricing. Billing is per patient generated, with a small per-run fee.
- Generate any number of synthetic patients per run
- Demographic filters: gender, age range, state, city
- Reproducible output via random seeds
- Optional US Core R4 Implementation Guide profiles
- Full FHIR bundles plus run metadata
- Standard FHIR R4 resources with internal references intact
- Hundreds of linked resources per patient (encounters, conditions, observations, and more)
- Generation parameters echoed in
execution_metadata - Large bundles delivered via the run's key-value store
{
  "population_size": 1,
  "seed": 1
}{
"population_size": 10,
"gender": "F",
"age_range": "30-40",
"state": "Massachusetts",
"exporter_fhir_use_us_core_ig": true
}| Parameter | Type | Required | Default | Description |
|---|---|---|---|---|
population_size |
int |
Yes | 1 |
Number of synthetic patients to generate. Each is billed. |
seed |
int |
No | - | Random seed for reproducible patients. |
reference_date |
str |
No | (today) | Reference date in YYYYMMDD format. |
clinician_seed |
int |
No | - | Seed for consistent clinician assignment. |
gender |
str |
No | - | M or F to generate only that gender. |
age_range |
str |
No | - | Age range as minAge-maxAge, e.g. 30-40. |
state |
str |
No | - | US state name for patient location, e.g. Massachusetts. |
city |
str |
No | - | City name (requires state). |
exporter_fhir_use_us_core_ig |
bool |
No | false |
Use US Core R4 Implementation Guide profiles. |
Each run returns one dataset item summarizing the generation and listing the output files. The full FHIR bundles are stored in the run's key-value store and referenced by key_value_store_key (see the example for how to fetch one).
{
  "generation_timestamp": "2026-05-30T13:21:30",
  "patient_count": 1,
  "execution_metadata": { "population_size": 1, "seed": 1, "age_range": "30-40", "state": "Massachusetts" },
  "summary": { "total_fhir_files": 3, "total_csv_files": 0, "total_metadata_files": 1, "patient_count": 1 },
  "data": {
    "fhir_bundles": [
      {
        "file": "Juliette736_Merideth332_Lynch190_bb1ad573-....json",
        "format": "fhir",
        "size_mb": 1,
        "key_value_store_key": "fhir-bundle-Juliette736_Merideth332_Lynch190_bb1ad573",
        "stored_in_kv_store": true
      }
    ]
  }
}
Fetching that bundle from the key-value store yields a standard FHIR Bundle. For one patient it held about 386 resources, including Patient, Encounter, Condition, Observation, Procedure, DiagnosticReport, and Claim. The synthetic patient was female, born 1993-07-25, in Marshfield Hills, MA. Alongside the patient file, each run also writes hospitalInformation and practitionerInformation bundles.
You can load the Synthea API as an MCP tool so assistants call it for you. The MCP server URL preloads just this one Actor:
https://mcp.apify.com/?tools=actors,docs,johnvc/Synthea-Medical-Record-Generator-API
Authenticate with OAuth in the browser when offered, or with your Apify API token (the same APIFY_API_TOKEN used by the Python example). Get a token at https://console.apify.com/settings/integrations and a free Apify account at https://apify.com?fpr=9n7kx3 .
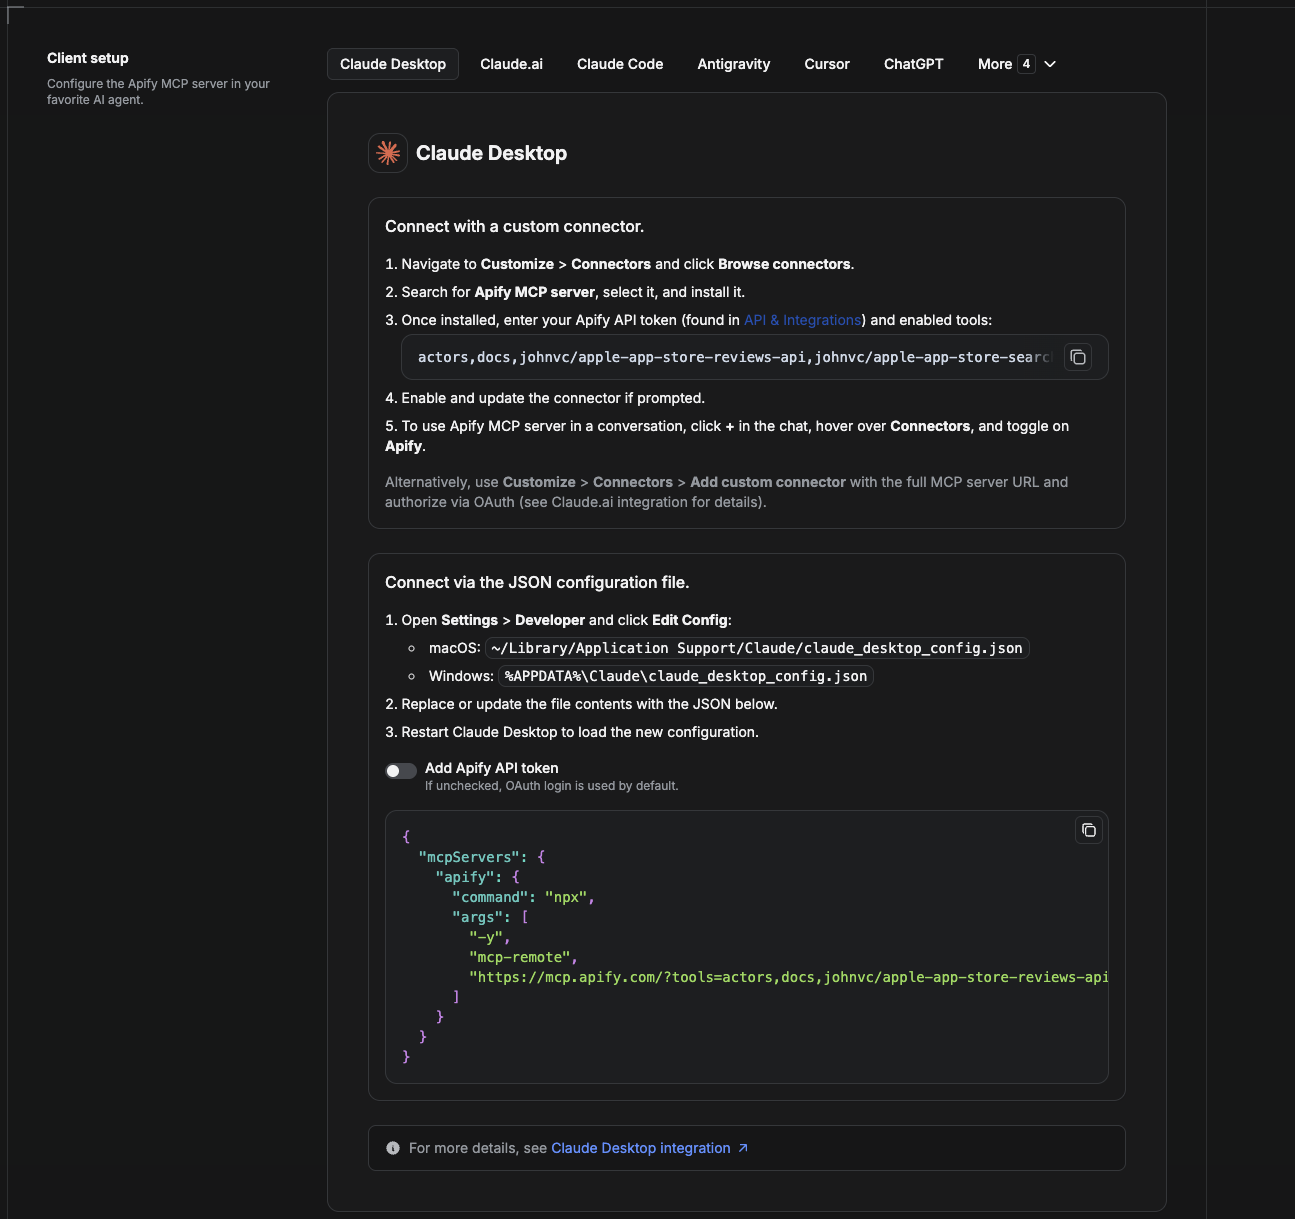
Cowork is the desktop app's automation mode. To give it the Synthea API as a tool, add the Apify MCP server as a connector.
- Open the Claude desktop app and go to Settings → Connectors (or Settings → Developer → Edit Config to edit
claude_desktop_config.jsondirectly).- macOS:
~/Library/Application Support/Claude/claude_desktop_config.json - Windows:
%APPDATA%\Claude\claude_desktop_config.json
- macOS:
- Add the Apify MCP server, preloaded with only this Actor:
{
  "mcpServers": {
    "apify": {
      "command": "npx",
      "args": [
        "-y",
        "mcp-remote",
        "https://mcp.apify.com/?tools=actors,docs,johnvc/Synthea-Medical-Record-Generator-API"
      ]
    }
  }
}- Restart the app. When Cowork first calls the tool, complete the OAuth prompt in your browser, or add your Apify API token in the connector settings to skip OAuth.
- In a Cowork chat, confirm the tool is available and ask it to run the Synthea API.
Download the desktop app and start a free trial: https://claude.ai/referral/uIlpa7nPLg More help: https://docs.apify.com/platform/integrations/claude-desktop
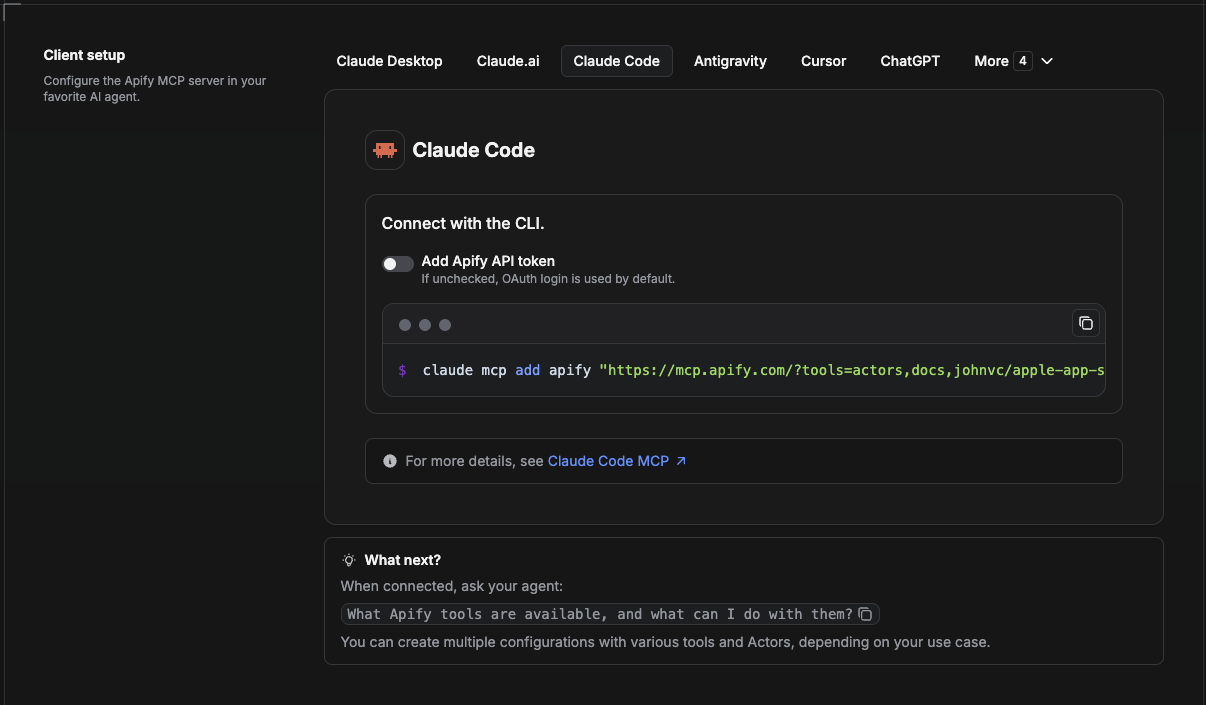
Claude Code is the command-line tool. Add the Actor's MCP server with one command:
claude mcp add --transport http apify \
  "https://mcp.apify.com/?tools=actors,docs,johnvc/Synthea-Medical-Record-Generator-API"
To use a token instead of browser OAuth:
claude mcp add --transport http apify \
  "https://mcp.apify.com/?tools=actors,docs,johnvc/Synthea-Medical-Record-Generator-API" \
  --header "Authorization: Bearer YOUR_APIFY_TOKEN"
Then verify with claude mcp list, or run /mcp inside a session. Ask Claude Code to call the Synthea API.
Try Claude Code free: https://claude.ai/referral/uIlpa7nPLg Claude Code MCP docs: https://code.claude.com/docs/en/mcp
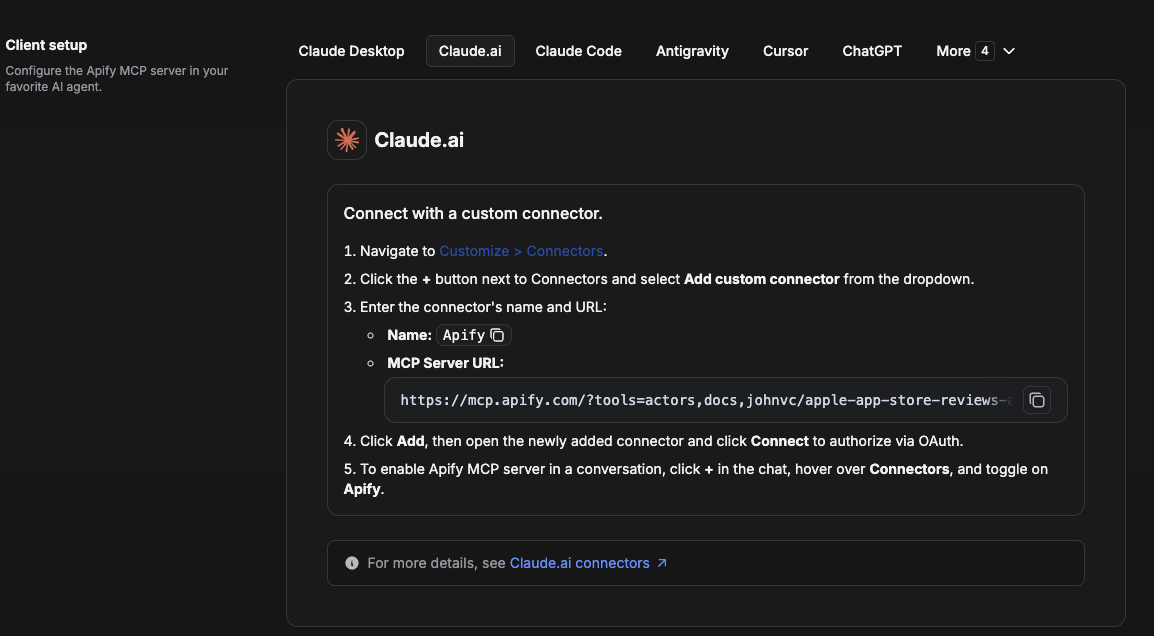
On claude.ai you add Apify as a connector, then enable just this Actor's tool.
- Go to Settings → Connectors → Browse connectors and search for Apify MCP server. Install it (enable or update if prompted).
- When connecting, authenticate with your Apify API token, and enable the tool
johnvc/Synthea-Medical-Record-Generator-API. - In any chat, open + → Connectors and turn on Apify.
- Alternatively, choose Add custom connector and paste the full MCP URL
https://mcp.apify.com/?tools=actors,docs,johnvc/Synthea-Medical-Record-Generator-API, using OAuth when prompted. - Ask Claude to run the Synthea API.
Open Claude on the web: https://claude.ai
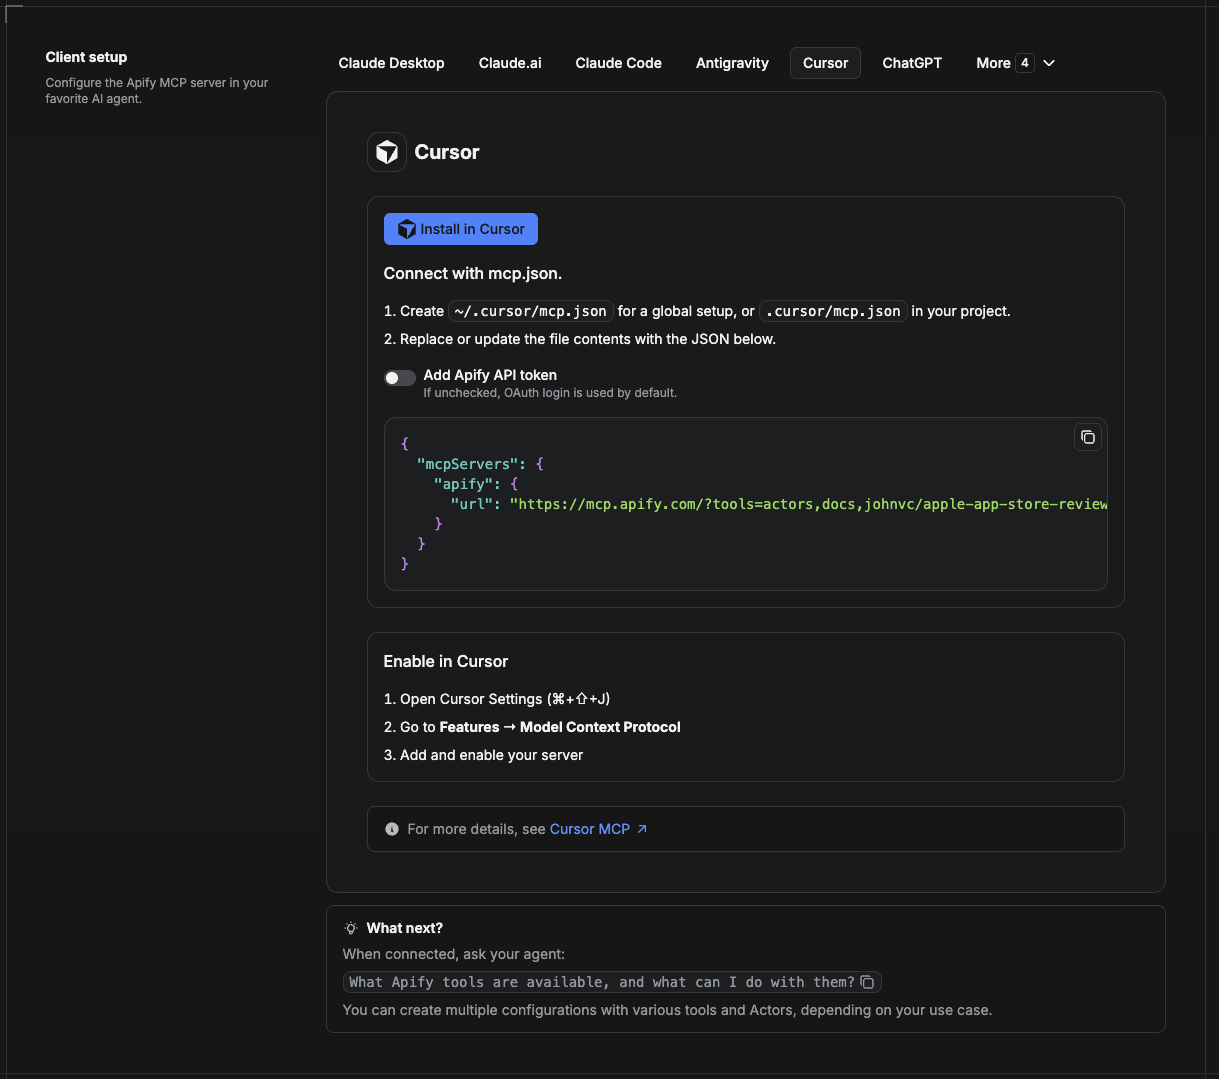
Cursor reads MCP servers from a project file at .cursor/mcp.json.
- In your project, create
.cursor/mcp.json:
{
  "mcpServers": {
    "apify": {
      "url": "https://mcp.apify.com/?tools=actors,docs,johnvc/Synthea-Medical-Record-Generator-API"
    }
  }
}- If you prefer token auth over browser OAuth, add a header:
{
  "mcpServers": {
    "apify": {
      "url": "https://mcp.apify.com/?tools=actors,docs,johnvc/Synthea-Medical-Record-Generator-API",
      "headers": { "Authorization": "Bearer YOUR_APIFY_TOKEN" }
    }
  }
}- Open Cursor → Settings → MCP and confirm the apify server is connected (green dot).
- In Composer or Chat, ask Cursor to call the Synthea API.
New to Cursor? Get it here: https://cursor.com/referral?code=XQP4VBLI3NNX
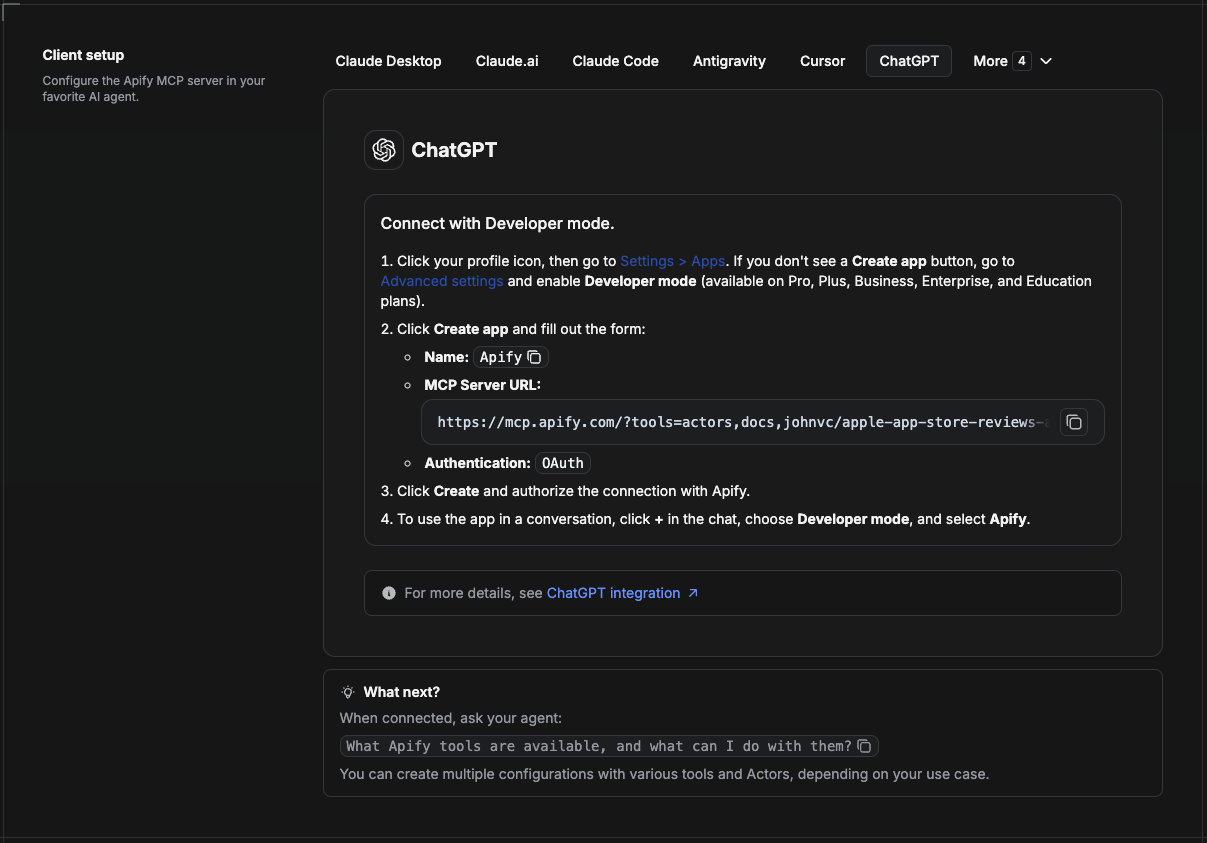
ChatGPT connects to the Apify MCP server through Developer mode (available on ChatGPT Pro, Plus, Business, Enterprise, and Education plans).
- Click your profile icon, then go to Settings > Apps. If you do not see a Create app button, open Advanced settings and enable Developer mode.
- Click Create app and fill out the form:
- Name: Apify
- MCP Server URL:
https://mcp.apify.com/?tools=actors,docs,johnvc/Synthea-Medical-Record-Generator-API - Authentication: OAuth
- Click Create and authorize the connection with Apify.
- To use the app in a conversation, click + in the chat, choose Developer mode, and select Apify.
More help: https://docs.apify.com/platform/integrations/mcp
Use the Synthea API to power healthcare app testing, FHIR pipelines, and ML datasets with safe, synthetic, standards-compliant data.
Last Updated: 2026.05.30