Easily convert terminal output into SVG images. truecolor, animation, cropping and many appearance options are supported.

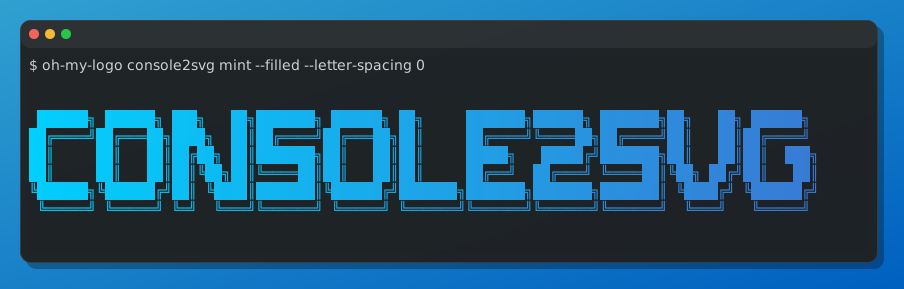
Of course, this hero image is generated using console2svg itself.
Console screenshots in raster formats (PNG, etc.) often make text look blurry. console2svg converts console output into vector SVG images so you can save your terminal as a crisp, scalable image.
For example, let's open this image in your browser and zoom in — the text remains sharp at any scale 👀
There are similar tools, but console2svg stands out for:
- No dependencies: no additional software or libraries required. available as npm, dotnet tool and static binary.
- Video mode: save command execution animations as SVG. great for documentation and blog posts.
- Crop: trim specific parts of the output. Crop based on text patterns is also supported, making it easy to trim specific lines or sections.
- Background and window: add background and window frames to produce presentation-ready SVGs for documentation, blogs, social media, etc.
- CI friendly: with features like replay and timeout, it can generate both static and animated SVGs in CI environments, minimizing discrepancies between code and images.
- Windows support: works on Windows, macOS and Linux.
The simplest way to use it is to just put the command you want to run after console2svg. For example, the following command converts the description text of console2svg into SVG (oh, how meta).
console2svg console2svg
You can also generate SVG with a window frame. and some options to customize the appearance.
For example, -w specifies the width, -c is an option to display the command at the beginning of the output, and -d is an option to specify the style of the window frame, where we specify a macOS-like frame. If the command is long, you can also write it together after --.
console2svg -w 120 -c -d macos-pc -- console2svg
In video mode(-v), you can capture the animation of the command execution and save it as an SVG.
By using the replay feature, you can save the command execution record and later regenerate the SVG based on that record.
console2svg -v -c -d macos -- copilot --banner



You can install it as a global tool using the dotnet or npm package manager.
# dotnet global tool
dotnet tool install -g ConsoleToSvg
# npm global package
npm install -g console2svg
It is also available as a standalone binary that you can download from the releases page and add to your PATH.
# linux
curl -sSL https://github.com/arika0093/console2svg/releases/latest/download/console2svg-linux-x64 -o console2svg
mv -f console2svg /usr/local/bin/
chmod +x /usr/local/bin/console2svg

# windows (cmd)
curl -sSL https://github.com/arika0093/console2svg/releases/latest/download/console2svg-win-x64.exe -o console2svg.exeA convenient GitHub Action is also available for use in CI. To use the latest version of console2svg, simply add the following step to your workflow:
- uses: arika0093/console2svg@mainExample usage in GitHub Actions
Full workflow example that generates an SVG and commits it back:
jobs:
  gen:
    runs-on: ubuntu-latest
    permissions:
      contents: write
    steps:
      - name: Checkout
        uses: actions/checkout@v4

      - name: Setup console2svg
        uses: arika0093/console2svg@main

      - name: Generate SVG
        run: console2svg -w 120 -c -d macos-pc -o output.svg -- dotnet --version

      - name: Commit Changes
        uses: stefanzweifel/git-auto-commit-action@v7
        with:
          commit_message: "[skip-ci] chore: regenerate SVG"
CI environment variables override
Some libraries (for example chalk) detect CI environments and automatically disable color output. However, when generating SVGs you always want color enabled. Therefore, console2svg automatically sets and removes the following environment variables by default:
TERM=xterm-256color: set to enable color support.COLORTERM=truecolor: enable TrueColor output.FORCE_COLOR=3: same;3indicates TrueColor.CI(deleted): removed because some libraries disable color when they detect a CI environment.TF_BUILD(deleted): removed for the same reason (used by Azure Pipelines).
To disable this behavior, use the --no-colorenv and --no-delete-envs options.
Tip
This repository uses this action itself to automatically regenerate all the SVG images in the assets/ directory whenever a new release is published.
Width and height default to the current terminal dimensions.
my-command | console2svgWidth is 100 characters by default, and height is automatically adjusted to fit the content.
console2svg "git log --oneline"
# or
console2svg -- git log --oneline
If you want to set a fixed width and height, you can use the -w and -h options.
console2svg -w 120 -h 20 -- git log --onelineYou can crop the output by specifying the number of pixels or characters to crop from each side.
# ch: character width, px: pixel
console2svg --crop-top 1ch --crop-left 5px --crop-right 30px -- your-command
You can also crop at the position where a specific character appears.
When specifying a character, you can specify it like :(number), which crops at a relative position from the detected line.
For example, the following example crops from the line where the character Host is located to 2 lines above the line where the character .NET runtimes installed: is located.
console2svg --crop-top "Host" --crop-bottom ".NET runtimes installed:-2" -- dotnet --infoThe result will look like this.

use -m video or -v to capture the animation of the command execution and save it as an SVG.
# apt install sl
console2svg -c -d -v -- sl
You can specify the --timeout option to output SVG after a certain time has elapsed.
This is useful for converting commands that do not terminate, such as nyancat, into SVG.
There is also a --sleep option to specify the stop time after playback. This allows you to display the last frame for a specified time after the command execution is finished.
# apt install nyancat
console2svg -w 160 -h 32 -c -d -v --timeout 5 --sleep 0.5 -- nyancat -d 10
You can also save the command execution record and later regenerate the SVG based on that record.
To save the record, use the --replay-save option to save the command execution.
console2svg --replay-save ./replay.json -- bash
# save key inputs to replay.json
Then, generate the SVG based on the saved key input. By using this feature, you can generate an SVG that records terminal operations as shown below.
console2svg -w 80 -h 20 -v -c -d macos --replay ./replay.json -- bash
The replay file is in a simple JSON format. If you make a mistake in the input, you can directly edit this file (or of course, you can ask AI to fix it for you).
Replay file format
// replay.json
{
  "version": "1",
  "appVersion": "0.4.0.2+17cc95284e",
  "createdAt": "2026-03-01T06:52:43.3615812+00:00",
  // If more than 1 second has passed from the total time,
  // it will exit with an error as a timeout.
  "totalDuration": 10.9530099,
  "replay": [
    {
      // first event: absolute time from recording start (seconds)
      "time": 1.5,
      "key": "e",
      "modifiers": [],
      "type": "keydown"
    },
    {
      // subsequent events: delta from the previous event (seconds)
      "tick": 0.08,
      "key": "c",
      "modifiers": ["shift"],
      "type": "keydown"
    },
    // and so on...
  ]
}You can set the background color or image of the output SVG, and adjust the opacity of the background fill.
console2svg -h 10 -c -d macos-pc --background "#003060" --opacity 0.85 -- dotnet --version
You can also set a gradient background.
console2svg -h 10 -c -d macos-pc --background "#004060" "#0080c0" --opacity 0.85 -- dotnet --version
Image background is also supported.
console2svg -h 10 -c -d macos-pc --background image.png --opacity 0.85 -- dotnet --version
You can customize the appearance with various options.
For example, in the following example, the prompt (the string displayed at the beginning) is changed to [HELLO!] $,
the command header is changed to my-custom-header, and the text color is changed to #00f040.
console2svg -h 4 --prompt "[HELLO!] $" --header "my-custom-header" --forecolor "#00f040" --backcolor "#042515" -- echo "hi"![console2svg -h 4 --prompt "[HELLO!] $" --header "my-custom-header" --forecolor "#00f040" --backcolor "#042515" -- echo "hi"](/jongalloway/console2svg/blob/main/assets/cmd-term-custom.svg)
-d option allows you to specify the style of the window frame.
| Image | Style(-d) |
Description |
|---|---|---|
 |
none |
no window frame |
 |
transparent |
transparent background (text-only output) |
 |
macos |
macOS style window frame |
 |
windows |
Windows Terminal style window frame |
*-pc styles are designed for use with a background, and include padding and shadows to create a "window" effect. You can also customize the padding with the --pc-padding option.
| Image | Style(-d) |
|---|---|
 |
macos-pc |
 |
windows-pc |
By combining with tmux, you can save the step-by-step execution process of commands as SVG images.
First, open tmux. If it's not installed, install it using apt install tmux or brew install tmux, etc.
tmuxExecute commands in the default window (:0).
$ echo "say hello"
$ echo "say goodbye"
After completing the command execution you want to record, open a new window with ctrl+b c. Then, run tmux capture-pane | console2svg to save the content of the original window as SVG.
# tmux options:
#   -p: print the captured content to stdout
#   -e: include escape sequences (for colors, etc.)
#   -t :0: target the first pane (you can specify other panes as needed)
# console2svg options:
#   -h 12: set the height of the output SVG to 12 lines (adjust as needed)
tmux capture-pane -pe -t :0 | console2svg -h 12 -o capture-$(date +%s).svg
Recording and replaying tmux usage
With the power of console2svg, you can even record and explain how to use console2svg itself :)

tmux capture-pane result example

Then repeat the workflow: press ctrl+b p to return to the original window, work on your commands, press ctrl+b n to switch to the SVG capture pane, and run the console2svg command. This allows you to progressively save the command execution process as SVG images.
Of course, you can also save all lines (useful for evidence). In that case, specify the -S - option on the tmux side to capture the entire screen.
tmux capture-pane -pe -S - -t :0 | console2svg -o full-capture-$(date +%s).svgBy combining with various commands, you can also convert to PNG or other formats. One of the easy-to-use tools is rsvg-convert. It only converts to PNG format, but it's easy to use.
apt install librsvg2-bin

# use --stdout to write SVG to stdout, then pipe to rsvg-convert to convert to PNG
console2svg --stdout -- your-command | rsvg-convert -o output.png

# Pipe mode also works
your-command | console2svg --stdout | rsvg-convert -o output.png
ImageMagick can also be used. It supports formats other than PNG, but it may take a little effort to install.
# apt version may be outdated, so it's better to install from the official site
# install v7 or later (v6 may have issues with SVG conversion)
sudo curl -sSL https://imagemagick.org/archive/binaries/magick -o /usr/local/bin/magick
sudo chmod +x /usr/local/bin/magick

# check version
magick -version

# convert SVG to PNG
console2svg --stdout -- your-command | magick - output.png- Windows 10 and later (required
ConPTY) - Linux (tested on Ubuntu 24.04, but should work on other distributions as well)
- macOS (ver 0.6.2 and later support macOS(arm64) natively)
-o: Output SVG file path (default:output.svg)-c: Prepend the command line to the output as if typed in a terminal.-w: width of the output SVG (default: terminal width[pipe], 100ch[pty])-h: height of the output SVG (default: terminal height[pipe], auto[pty])-v: output to video mode SVG (animated, looped by default)-d: window chrome style (none, macos, windows, macos-pc, windows-pc, transparent, ...)--background: background color or image for the output SVG--forecolor: override default console foreground color--header: override command header text (shown even without-c)--prompt: override prompt prefix for-c(default:$or#when root)--verbose: enable verbose logging--crop-*: crop the output by specified pixels, characters, or text patterns