





Production-ready project generator for AI/LLM applications with 20+ enterprise integrations.
Built with FastAPI, Next.js 15, PydanticAI/LangChain, and everything you need for professional business applications.
Why This Template • Features • Demo • Quick Start • Architecture • AI Agent • Logfire • Documentation
Building advanced AI agents? Check out pydantic-deep - a deep agent framework built on pydantic-ai with planning, filesystem, and subagent capabilities.
Building AI/LLM applications requires more than just an API wrapper. You need:
- Type-safe AI agents with tool/function calling
- Real-time streaming responses via WebSocket
- Conversation persistence and history management
- Production infrastructure - auth, rate limiting, observability
- Enterprise integrations - background tasks, webhooks, admin panels
This template gives you all of that out of the box, with 20+ configurable integrations so you can focus on building your AI product, not boilerplate.
- 🤖 AI Chatbots & Assistants - PydanticAI or LangChain agents with streaming responses
- 📊 ML Applications - Background task processing with Celery/Taskiq
- 🏢 Enterprise SaaS - Full auth, admin panel, webhooks, and more
- 🚀 Startups - Ship fast with production-ready infrastructure
- PydanticAI or LangChain - Choose your preferred AI framework
- WebSocket Streaming - Real-time responses with full event access
- Conversation Persistence - Save chat history to database
- Custom Tools - Easily extend agent capabilities
- Multi-model Support - OpenAI, Anthropic, and more
- Observability - Logfire for PydanticAI, LangSmith for LangChain
- FastAPI + Pydantic v2 - High-performance async API
- Multiple Databases - PostgreSQL (async), MongoDB (async), SQLite
- Authentication - JWT + Refresh tokens, API Keys, OAuth2 (Google)
- Background Tasks - Celery, Taskiq, or ARQ
- Django-style CLI - Custom management commands with auto-discovery
- React 19 + TypeScript + Tailwind CSS v4
- AI Chat Interface - WebSocket streaming, tool call visualization
- Authentication - HTTP-only cookies, auto-refresh
- Dark Mode + i18n (optional)
| Category | Integrations |
|---|---|
| AI Frameworks | PydanticAI, LangChain |
| Caching & State | Redis, fastapi-cache2 |
| Security | Rate limiting, CORS, CSRF protection |
| Observability | Logfire, LangSmith, Sentry, Prometheus |
| Admin | SQLAdmin panel with auth |
| Events | Webhooks, WebSockets |
| DevOps | Docker, GitHub Actions, GitLab CI, Kubernetes |
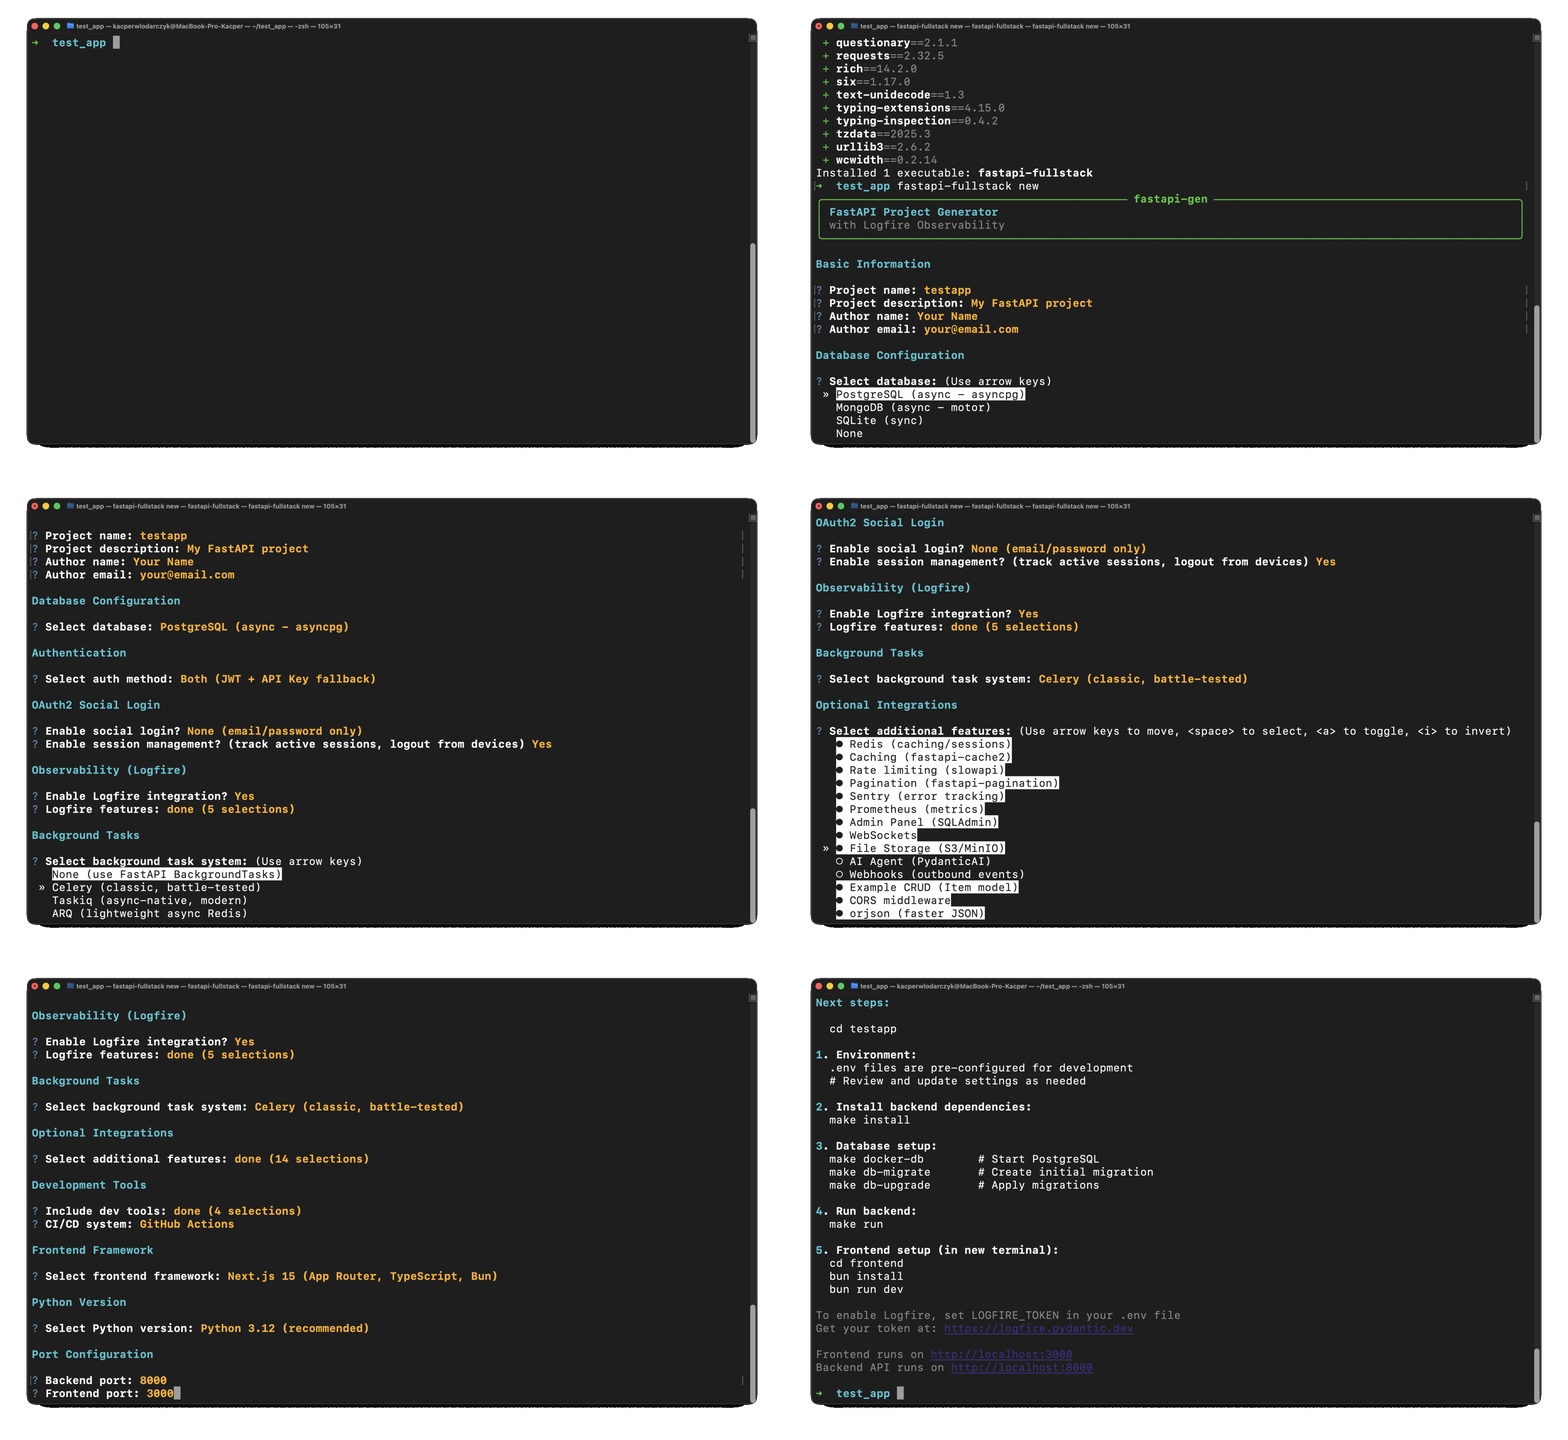
# pip
pip install fastapi-fullstack

# uv (recommended)
uv tool install fastapi-fullstack

# pipx
pipx install fastapi-fullstack# Interactive wizard (recommended)
fastapi-fullstack new
# Quick mode with options
fastapi-fullstack create my_ai_app \
--database postgresql \
--auth jwt \
--frontend nextjs
# Use presets for common setups
fastapi-fullstack create my_ai_app --preset production # Full production setup
fastapi-fullstack create my_ai_app --preset ai-agent # AI agent with streaming
# Minimal project (no extras)
fastapi-fullstack create my_ai_app --minimalcd my_ai_app
make installWindows Users: The
makecommand requires GNU Make which is not available by default on Windows. You can either install Make via Chocolatey (choco install make), use WSL (Windows Subsystem for Linux), or use the raw commands from the Manual Commands Reference section below.
# Start PostgreSQL with Docker
make docker-db

# Wait a few seconds for the database to be readyThe project uses Alembic for database migrations. After generating a new project, you need to create the initial migration:
# Create the initial migration (generates migration file based on your models)
make db-migrate
# When prompted, enter a message like: "Initial migration"

# Apply the migration to create tables
make db-upgrade
Note: Run
make db-migratewhenever you modify database models to generate new migrations.
# Create an admin user (required for SQLAdmin panel access)
make create-admin
# Enter email and password when promptedmake runThe API will be available at:
- API: http://localhost:8005
- Docs: http://localhost:8005/docs
- Admin Panel: http://localhost:8005/admin
cd frontend
bun install
bun dev
Frontend: http://localhost:3000
Alternatively, run everything with Docker:
# Start all backend services (API, database, Redis, etc.)
make docker-up
# Start frontend (separate command)
make docker-frontendEach generated project includes a CLI tool named flowfi. Run commands from the backend/ directory:
cd backend

# Server commands
uv run flowfi server run --reload     # Start dev server
uv run flowfi server routes           # Show all routes
# Database commands
uv run flowfi db migrate -m "message" # Create migration
uv run flowfi db upgrade              # Apply migrations
uv run flowfi db downgrade            # Rollback migration
# User commands
uv run flowfi user create-admin       # Create admin user
uv run flowfi user create             # Create regular user
uv run flowfi user list               # List all users
Or use Makefile shortcuts from the project root:
make help          # Show all available commands
make run           # Start dev server
make db-migrate    # Create new migration
make db-upgrade    # Apply migrations
make create-admin  # Create admin user
Access:
- API: http://localhost:8000
- Docs: http://localhost:8000/docs
- Admin Panel: http://localhost:8000/admin
- Frontend: http://localhost:3000
| Light Mode | Dark Mode |
|---|---|
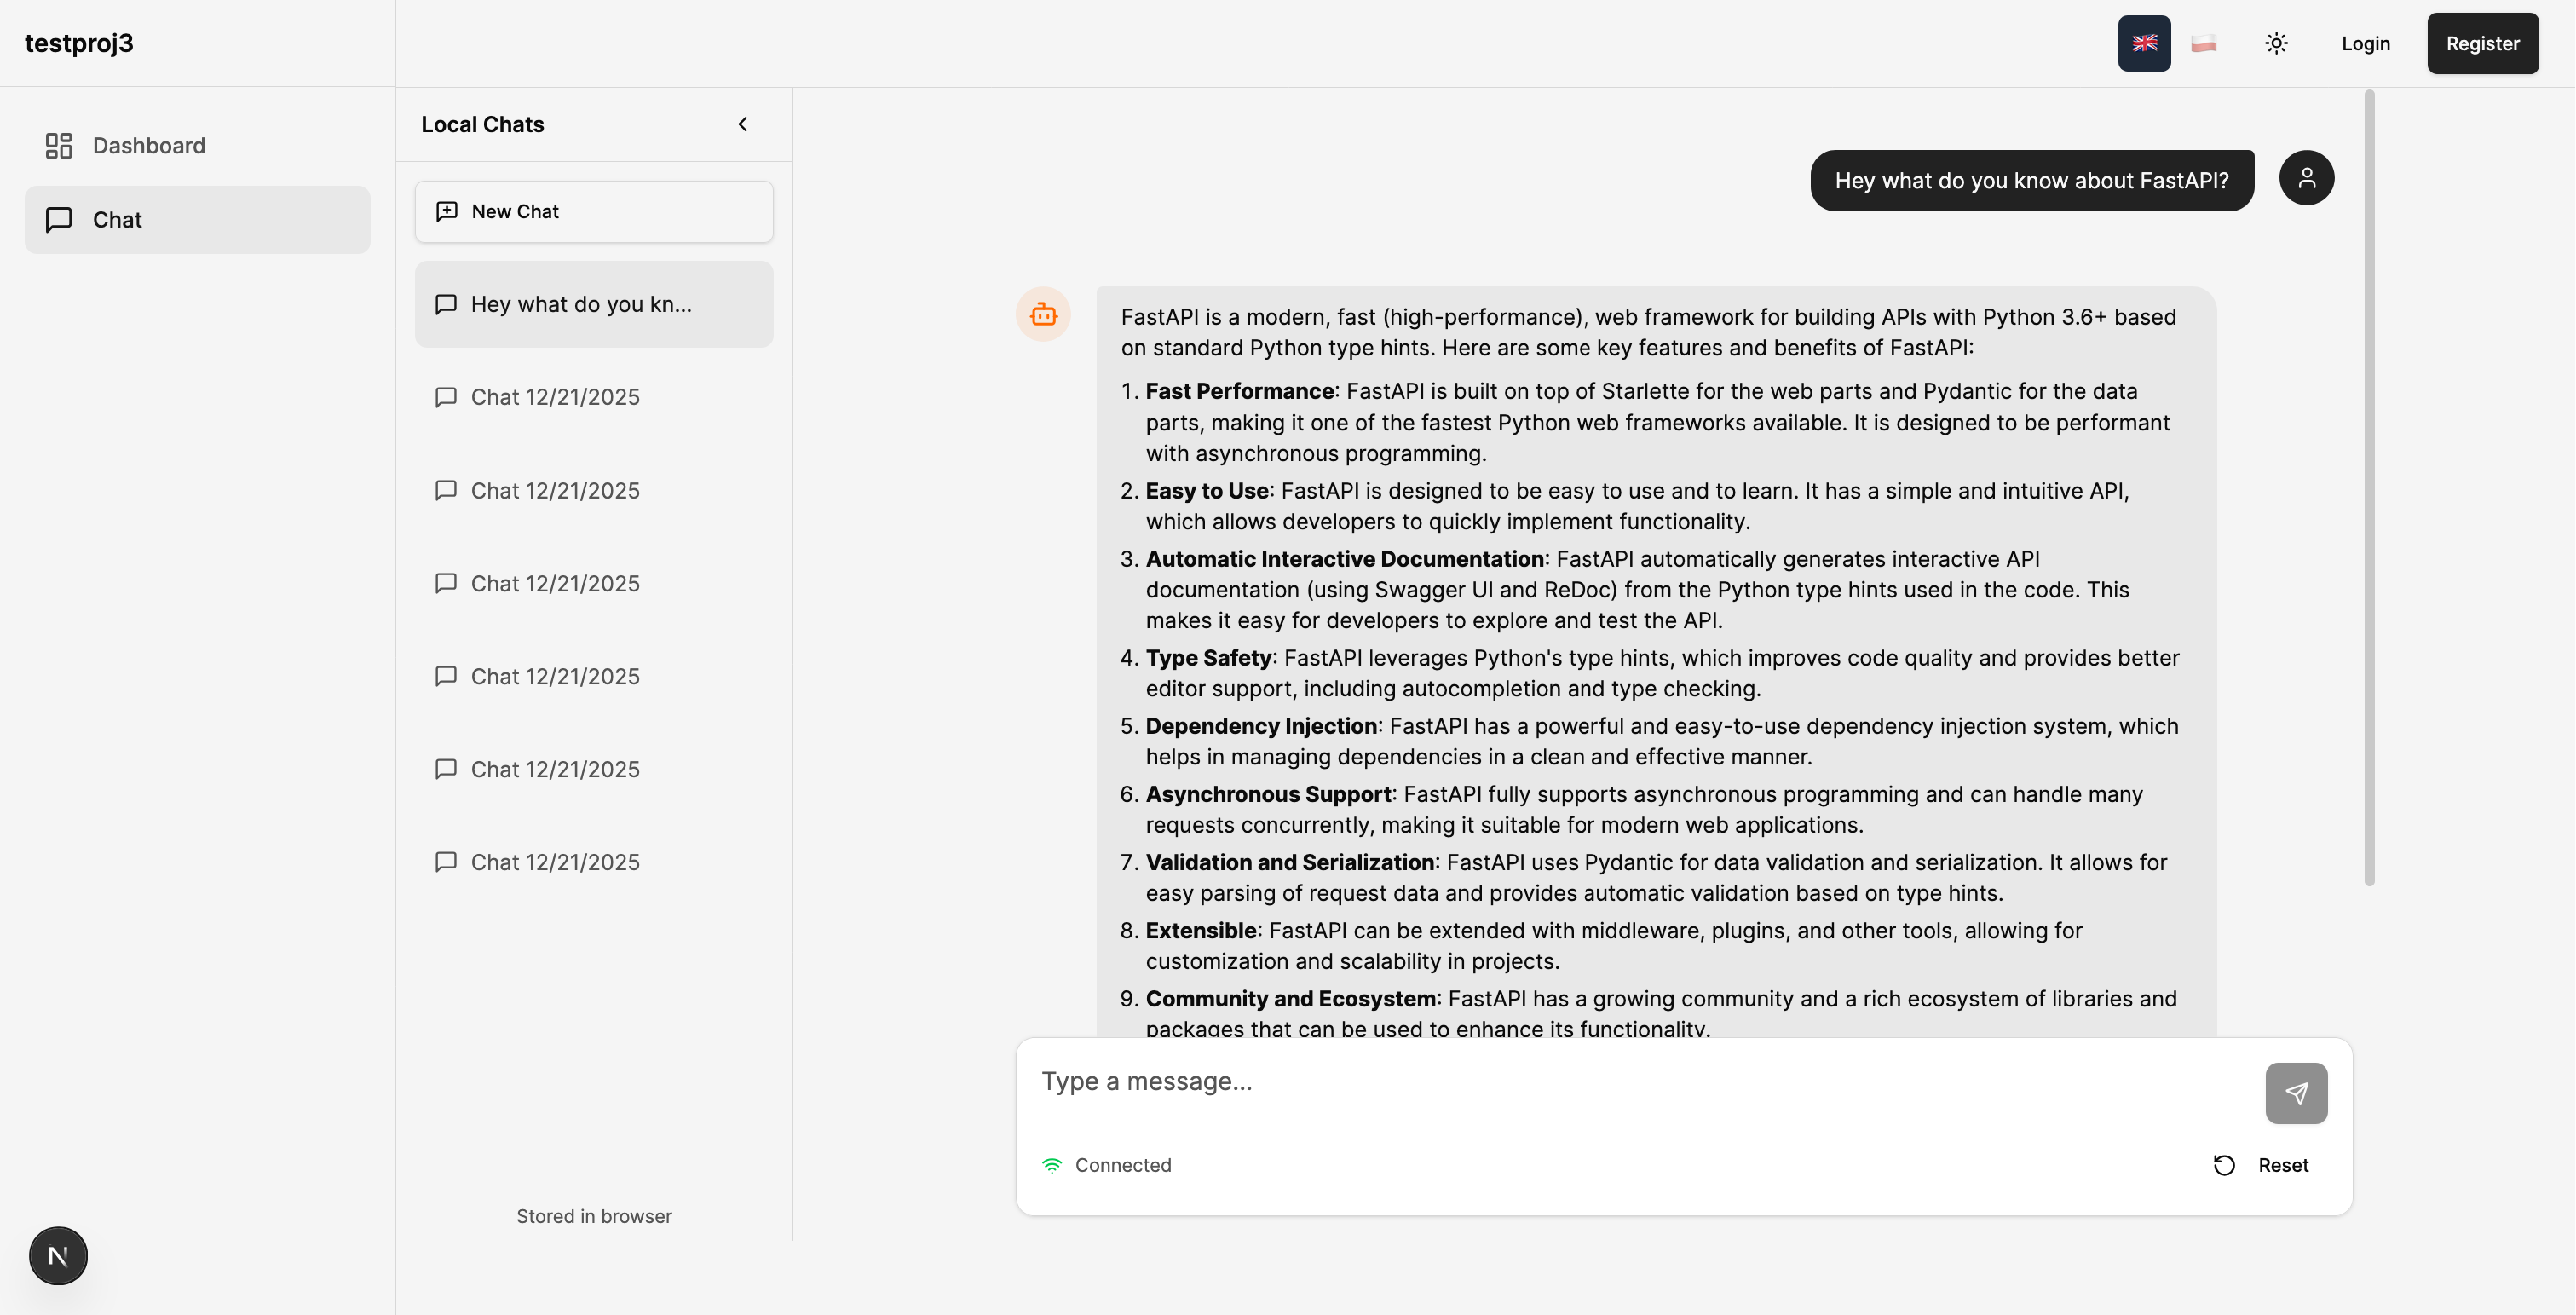 |
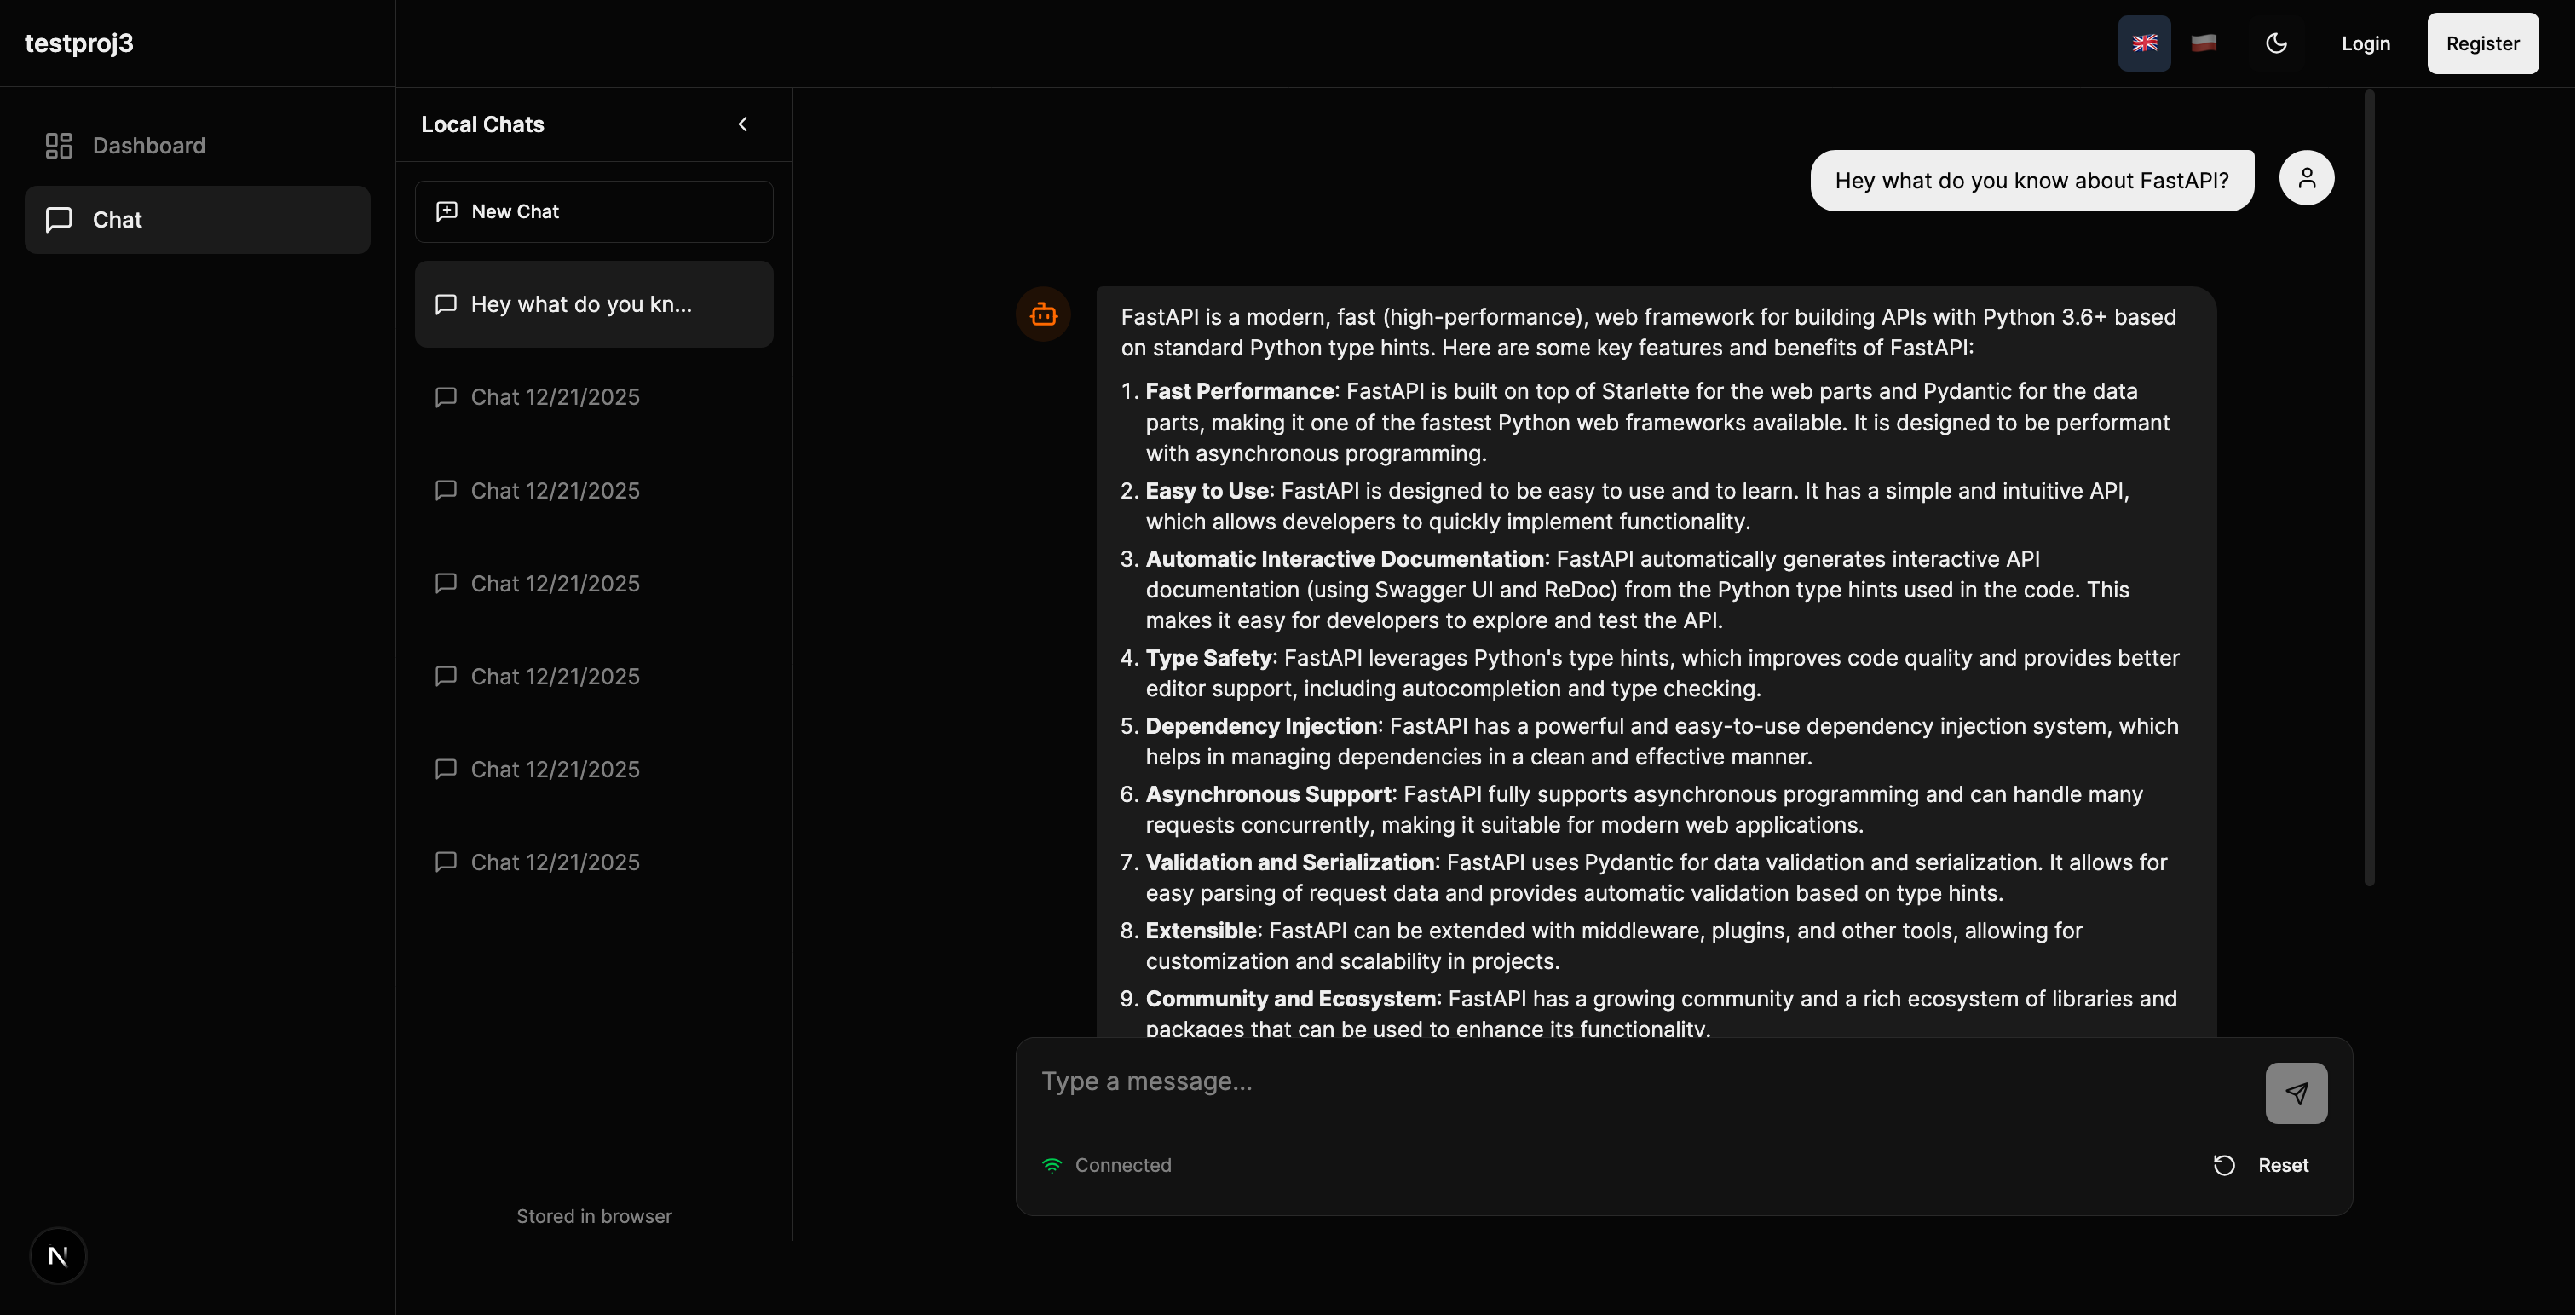 |
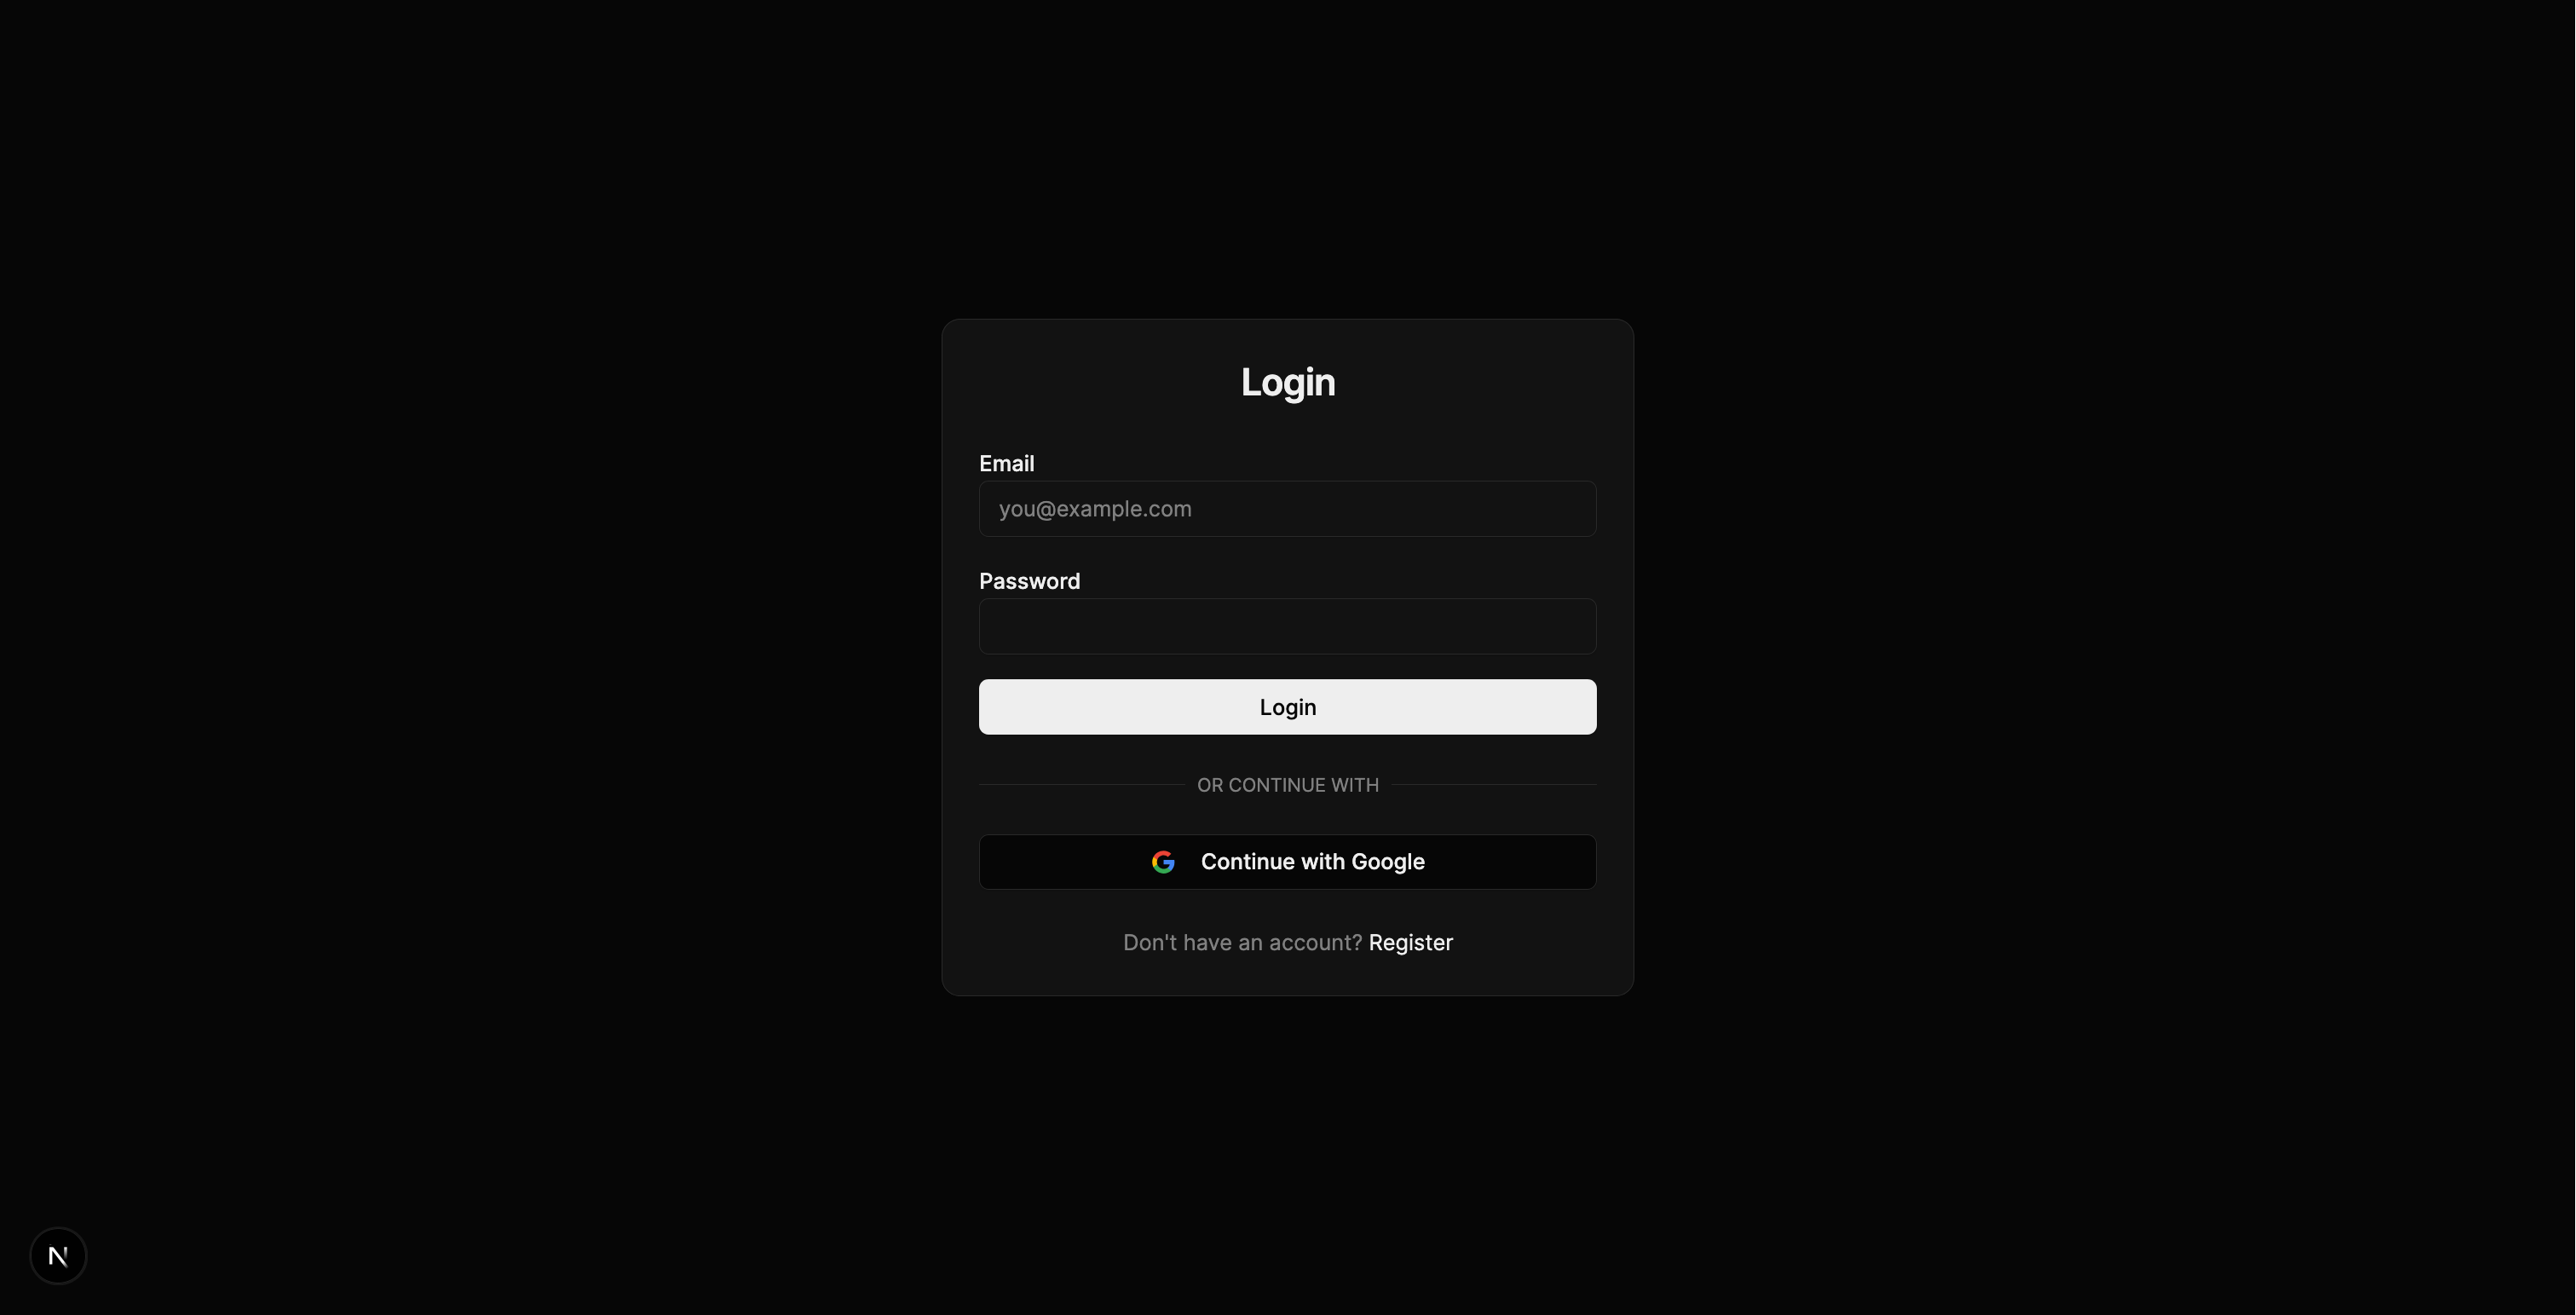
| Register | Login |
|---|---|
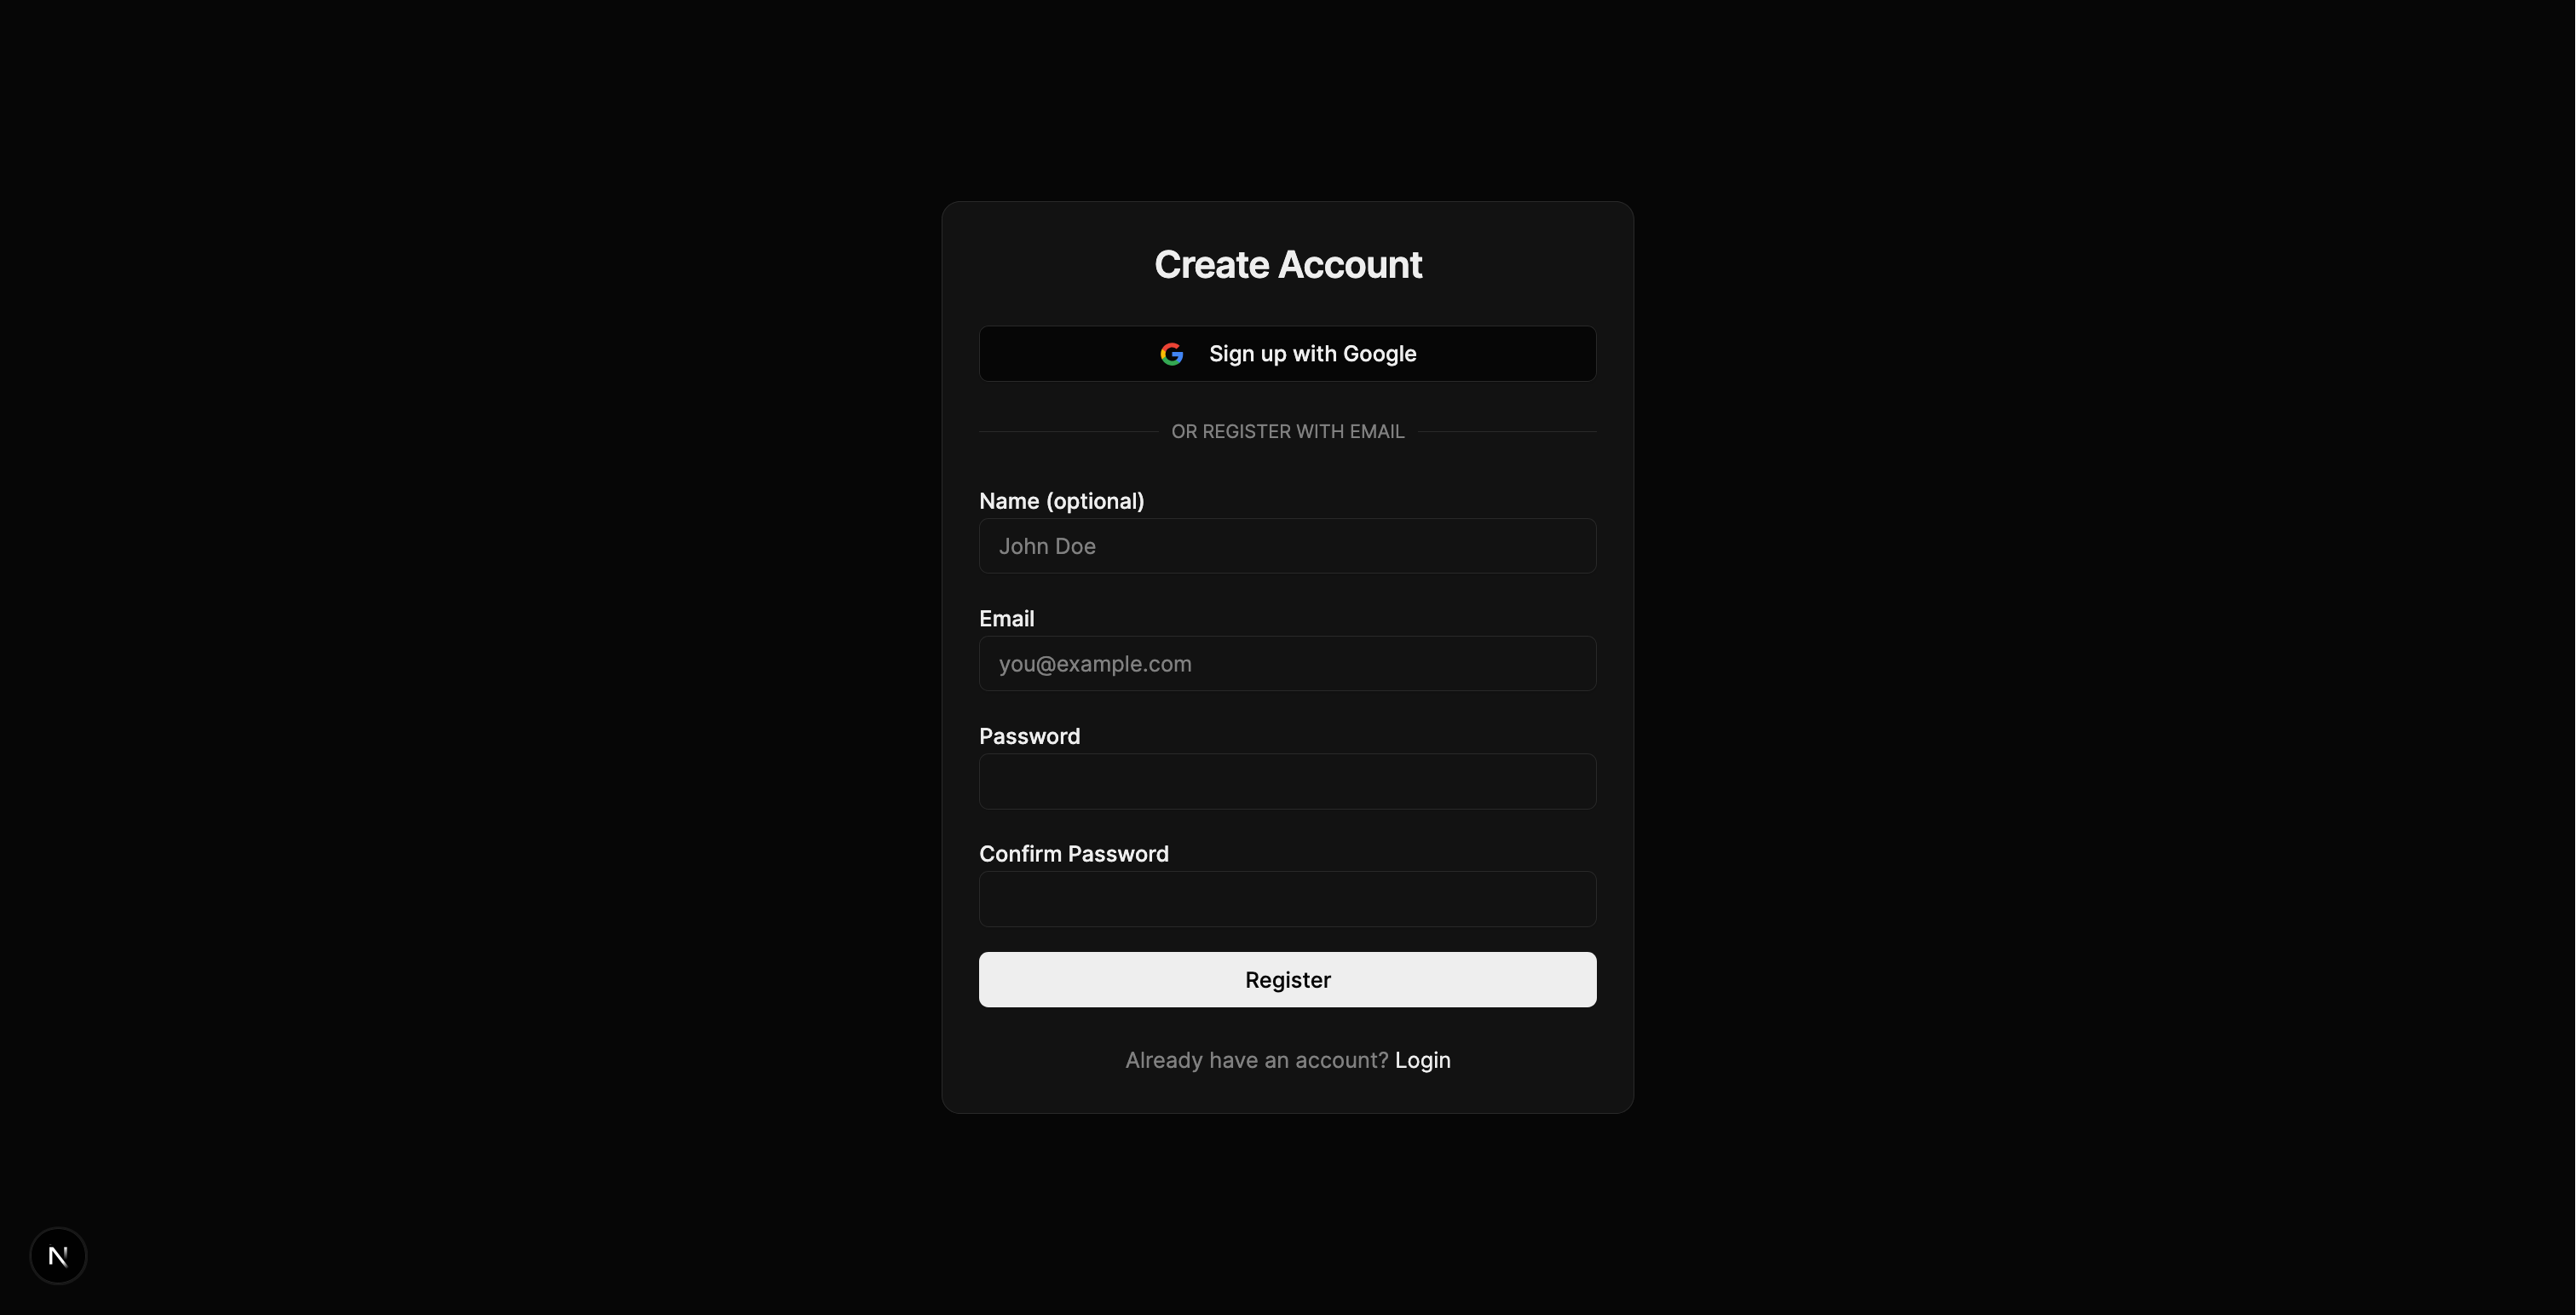 |
 |
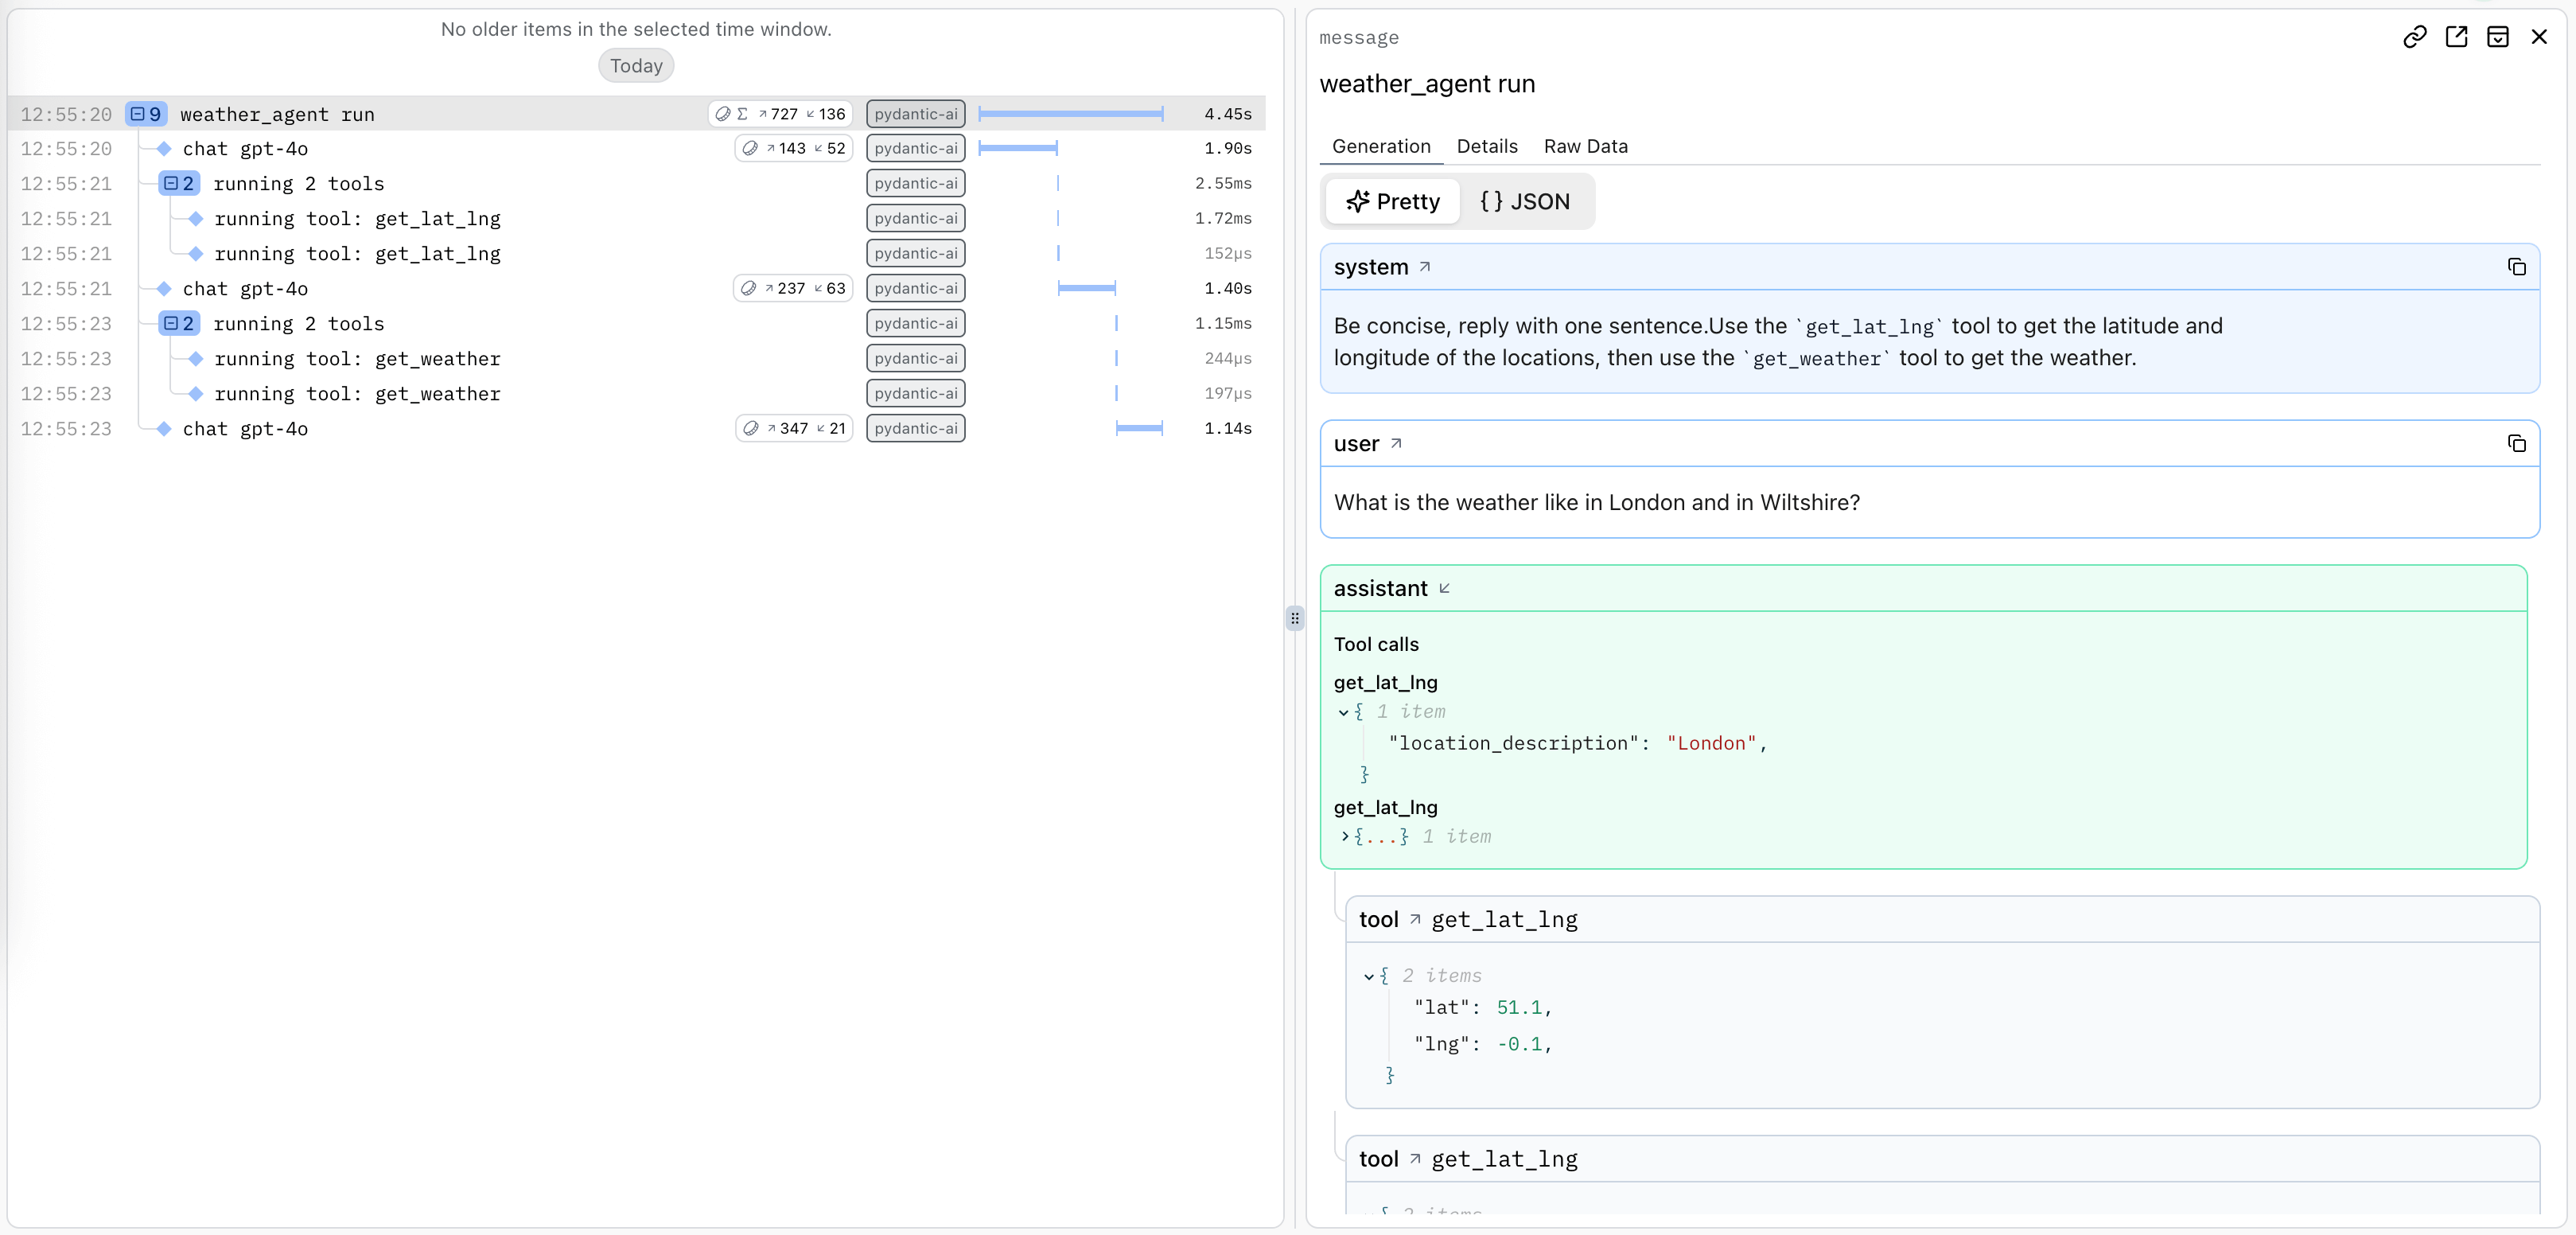
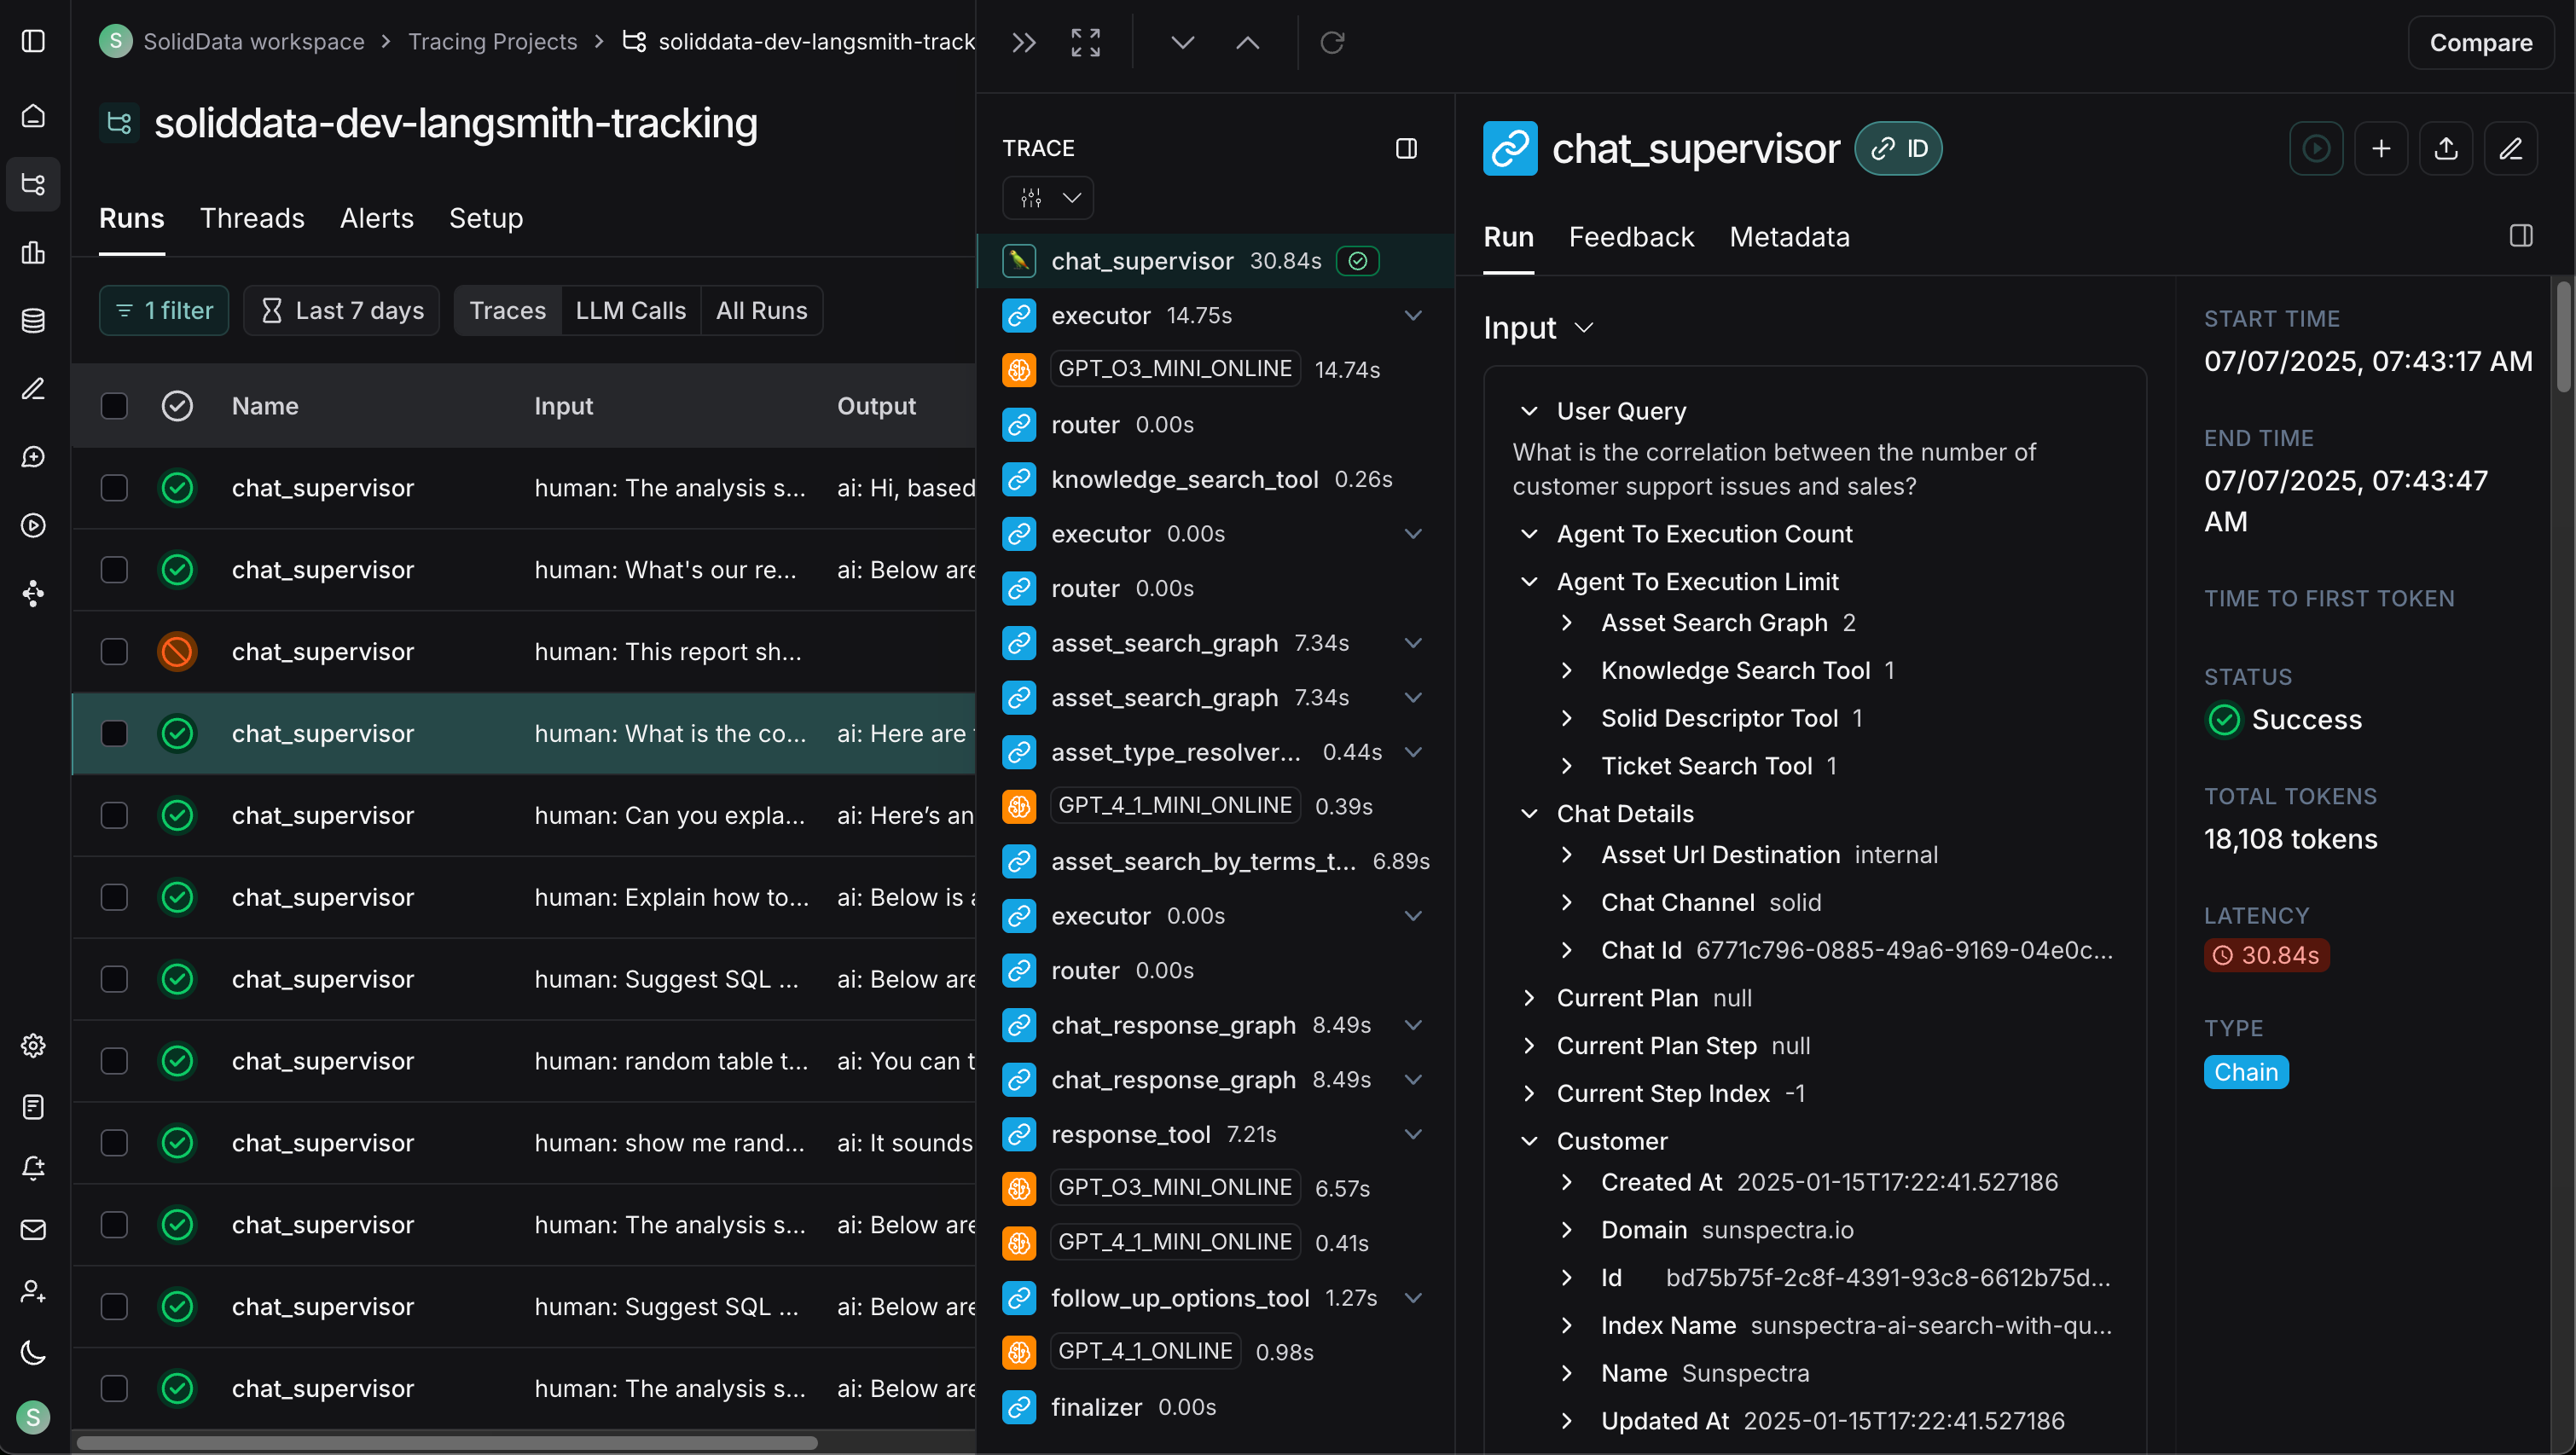
| Logfire (PydanticAI) | LangSmith (LangChain) |
|---|---|
 |
 |
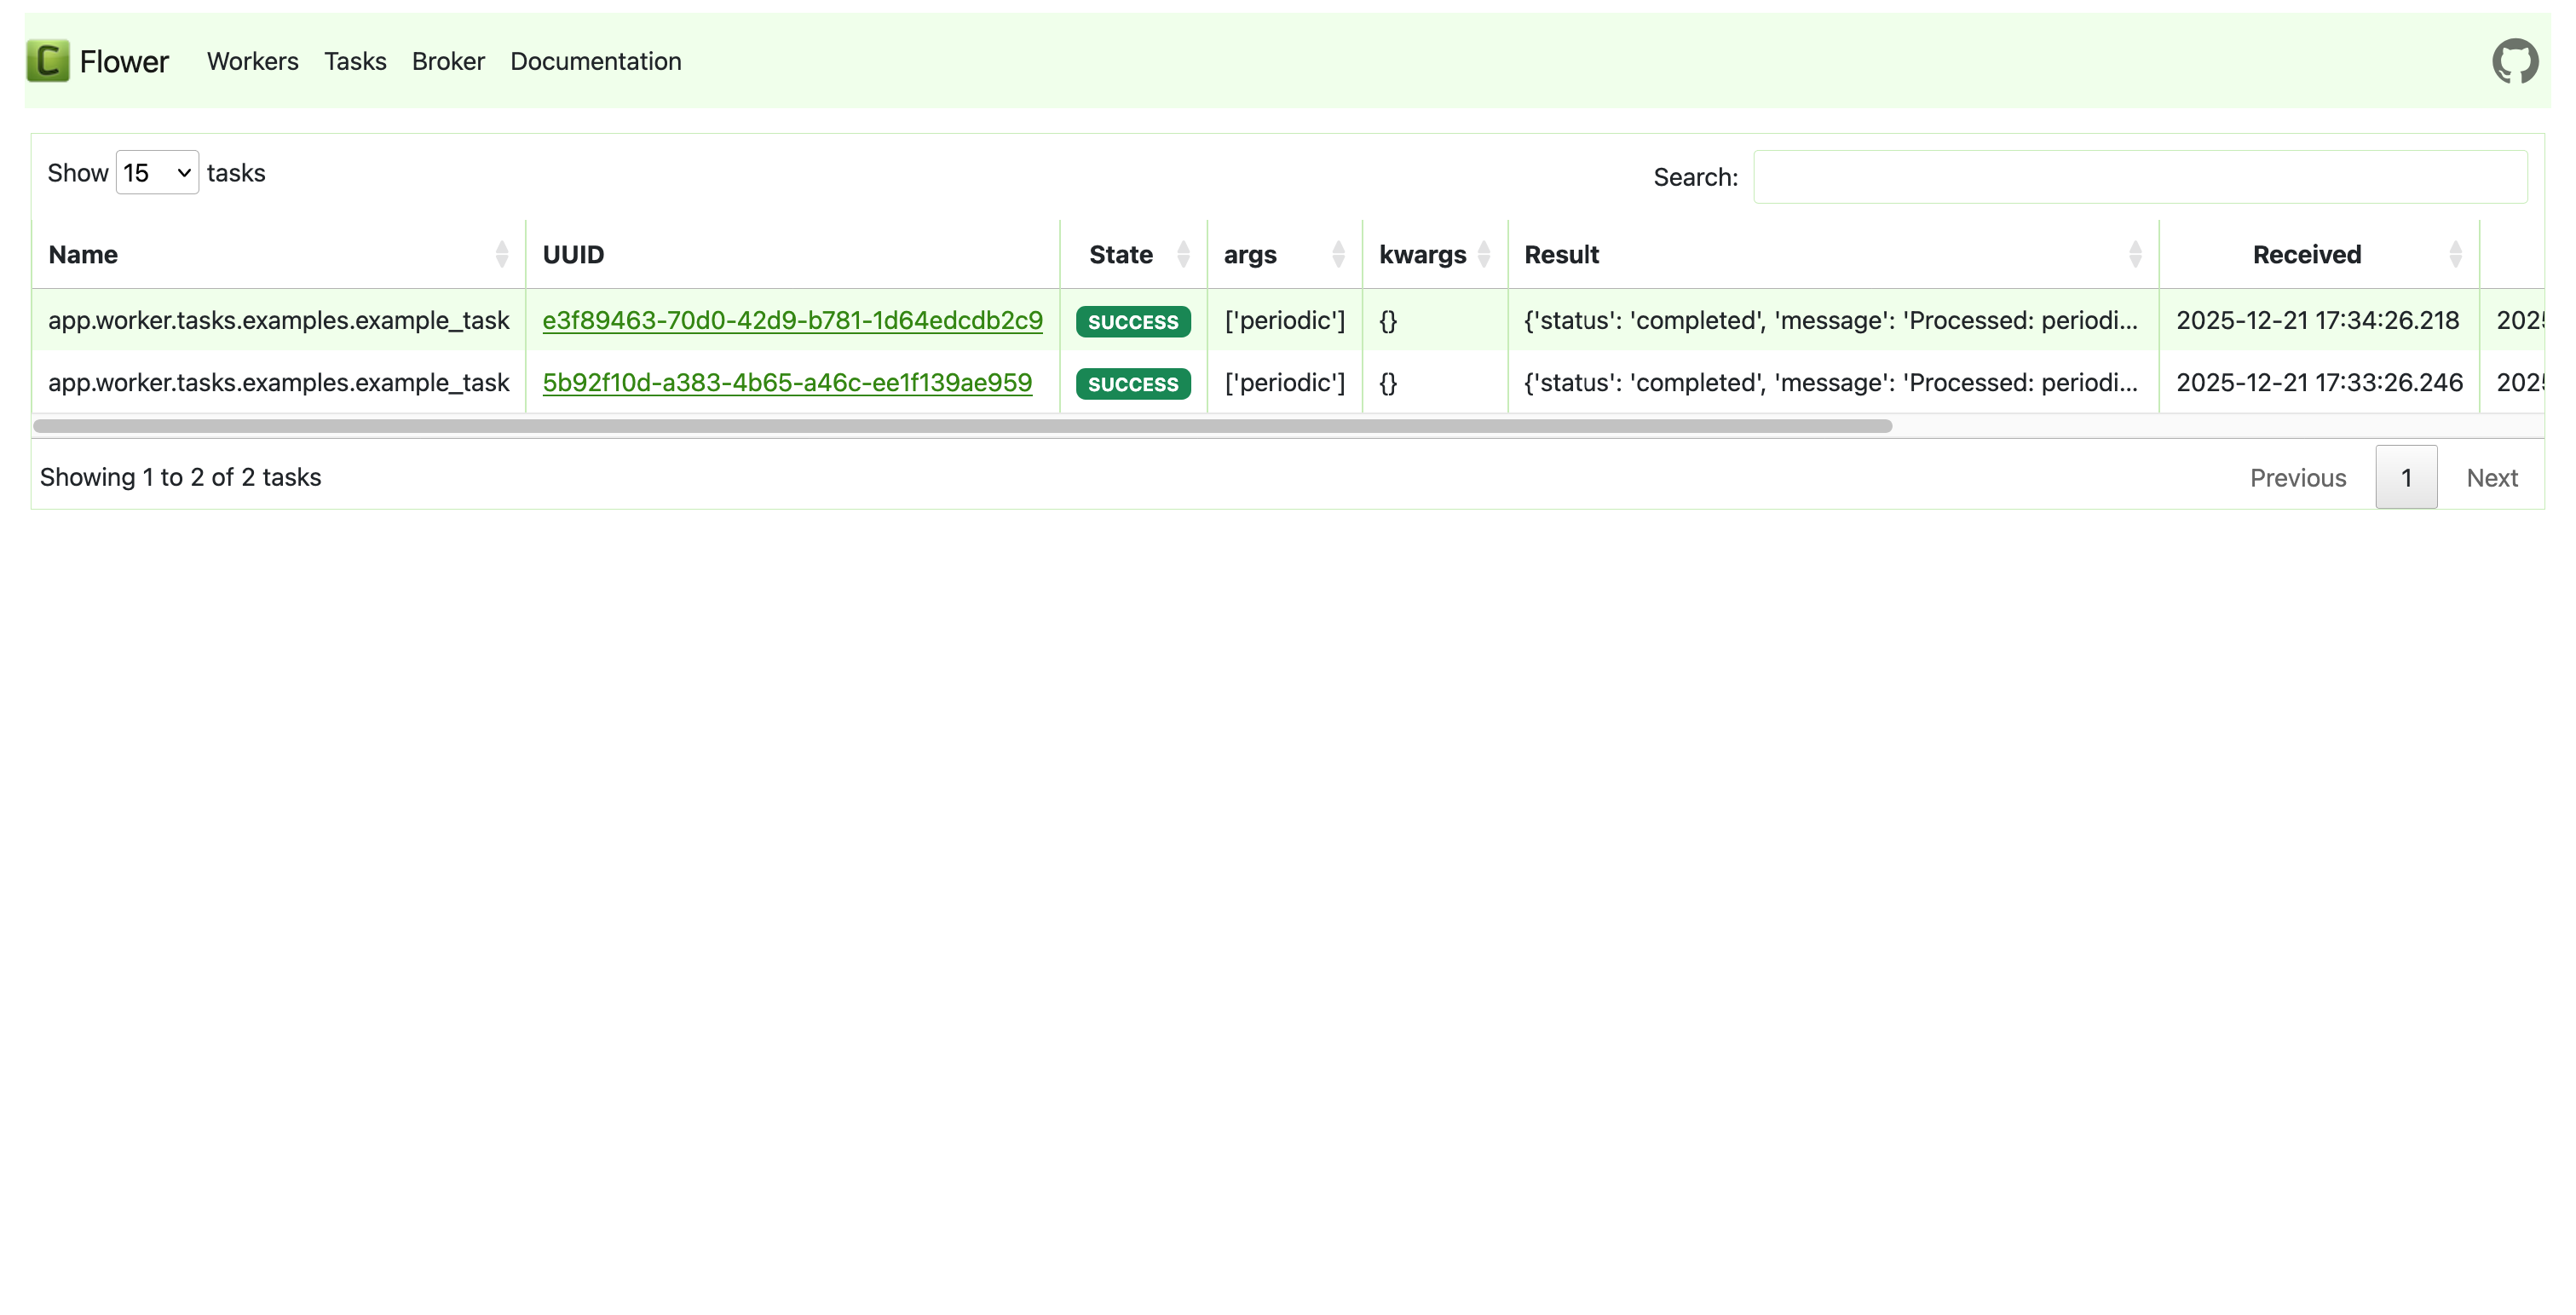
| Celery Flower | SQLAdmin Panel |
|---|---|
 |
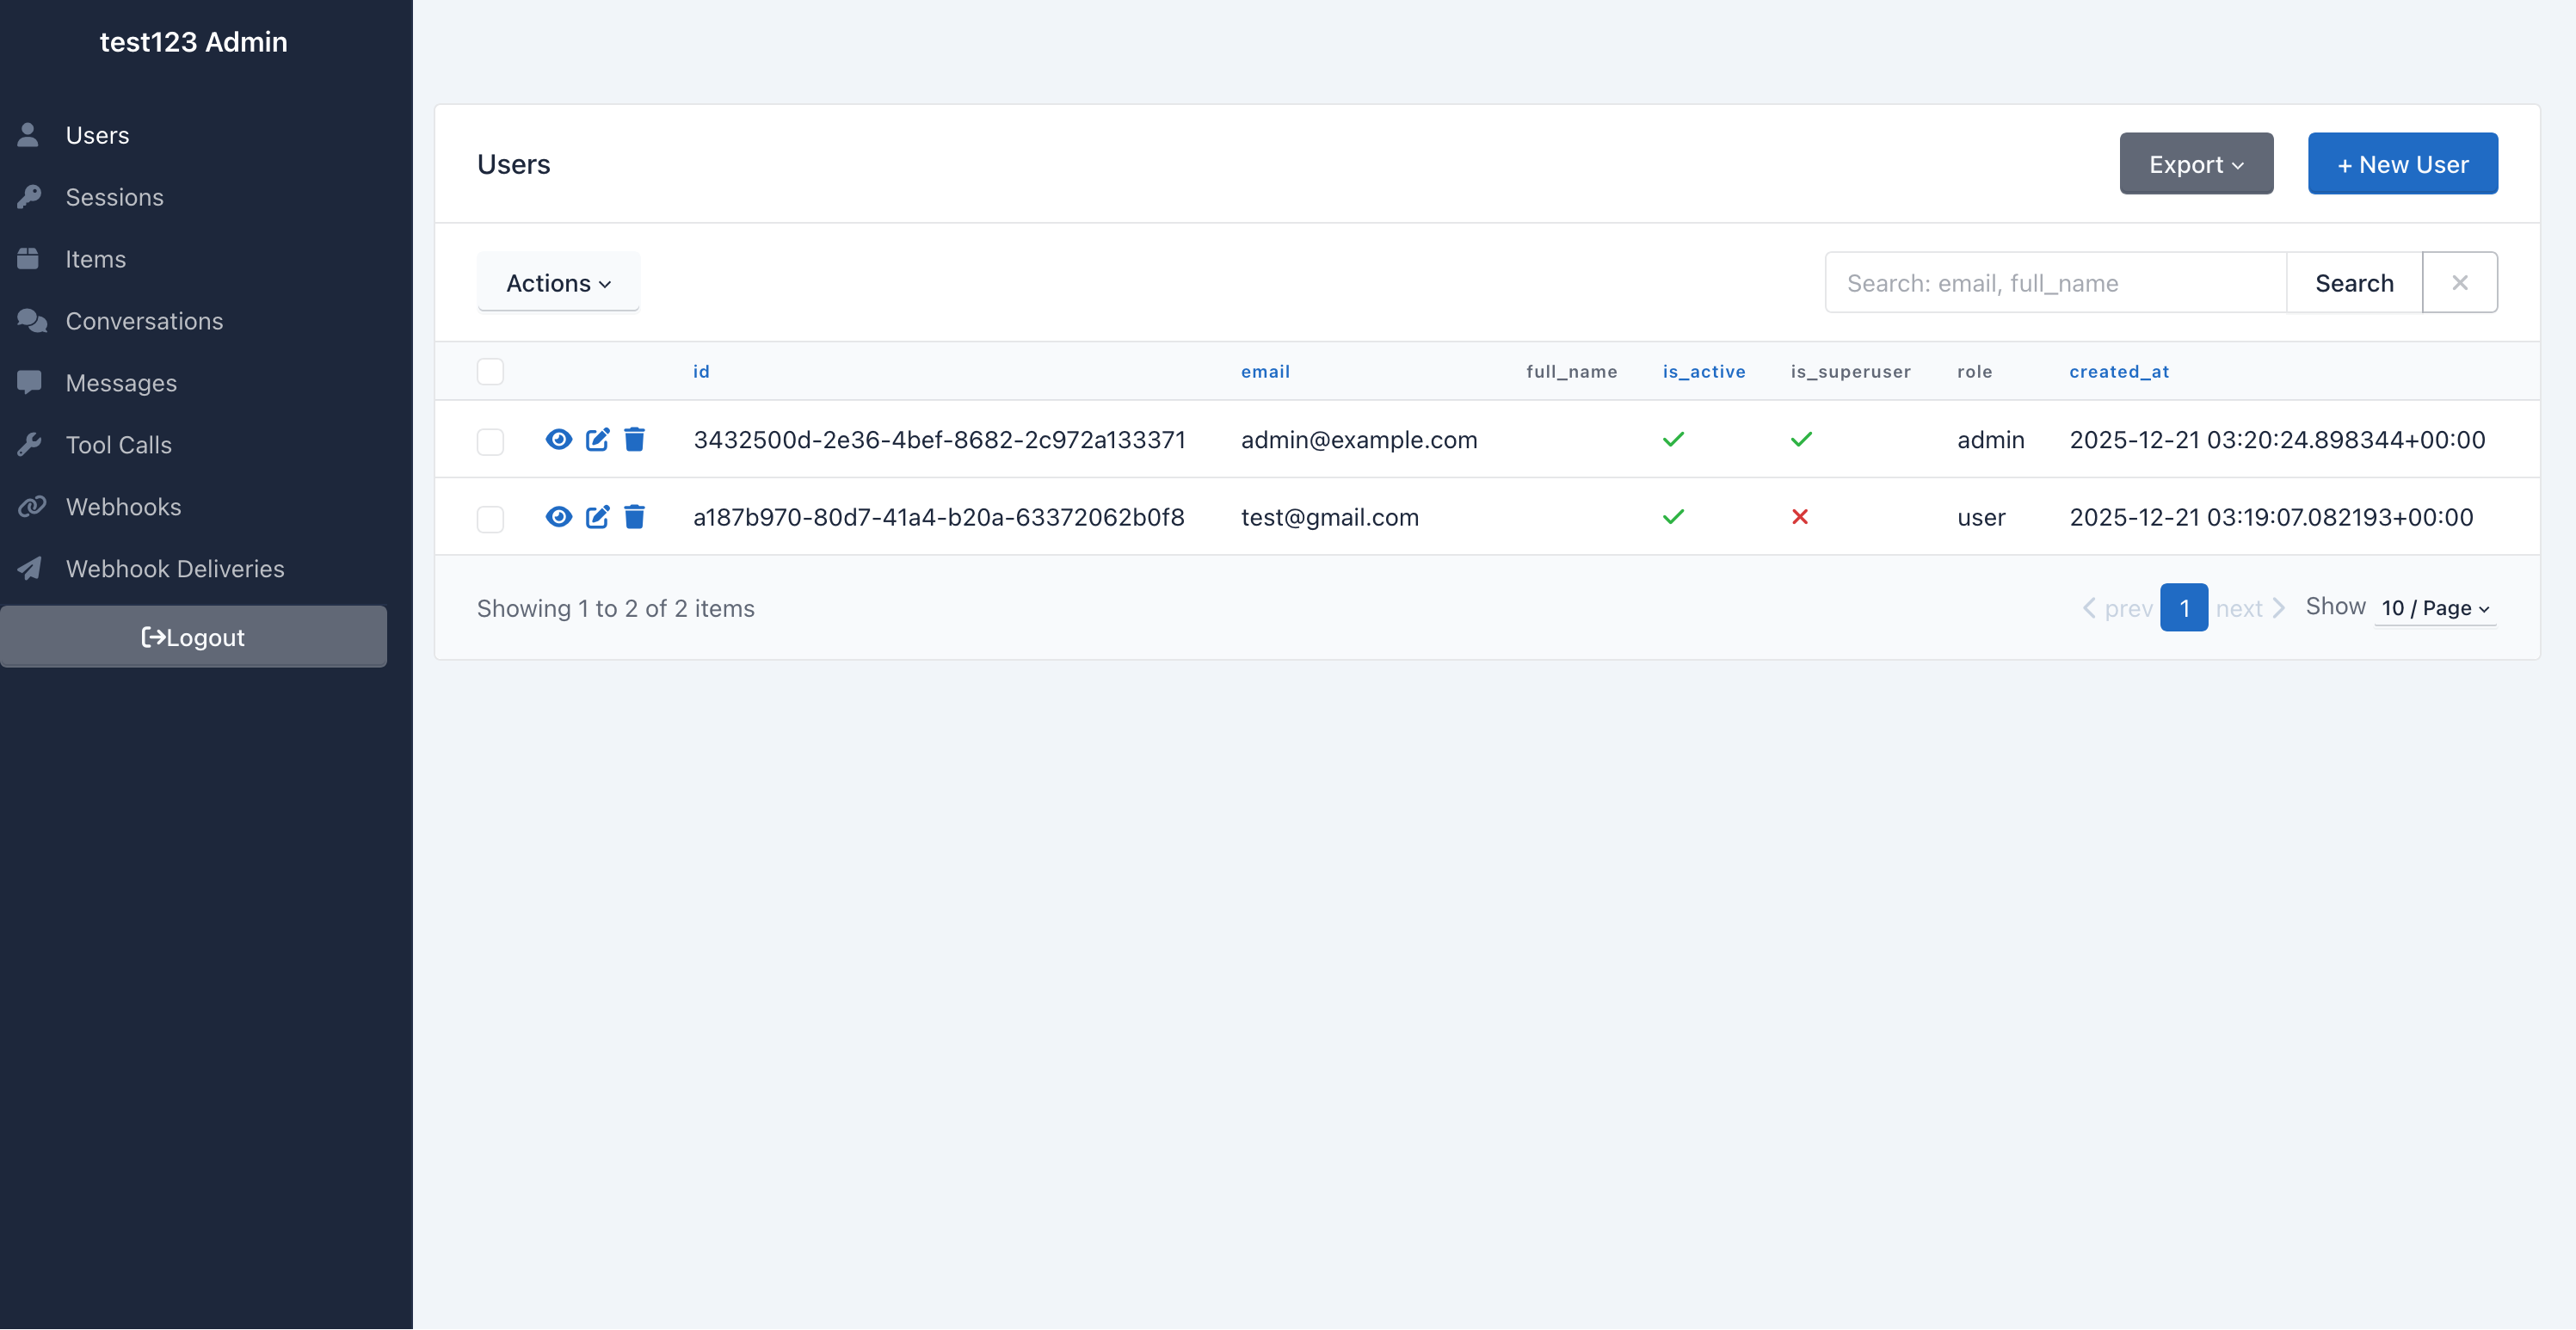 |
| API Documentation |
|---|
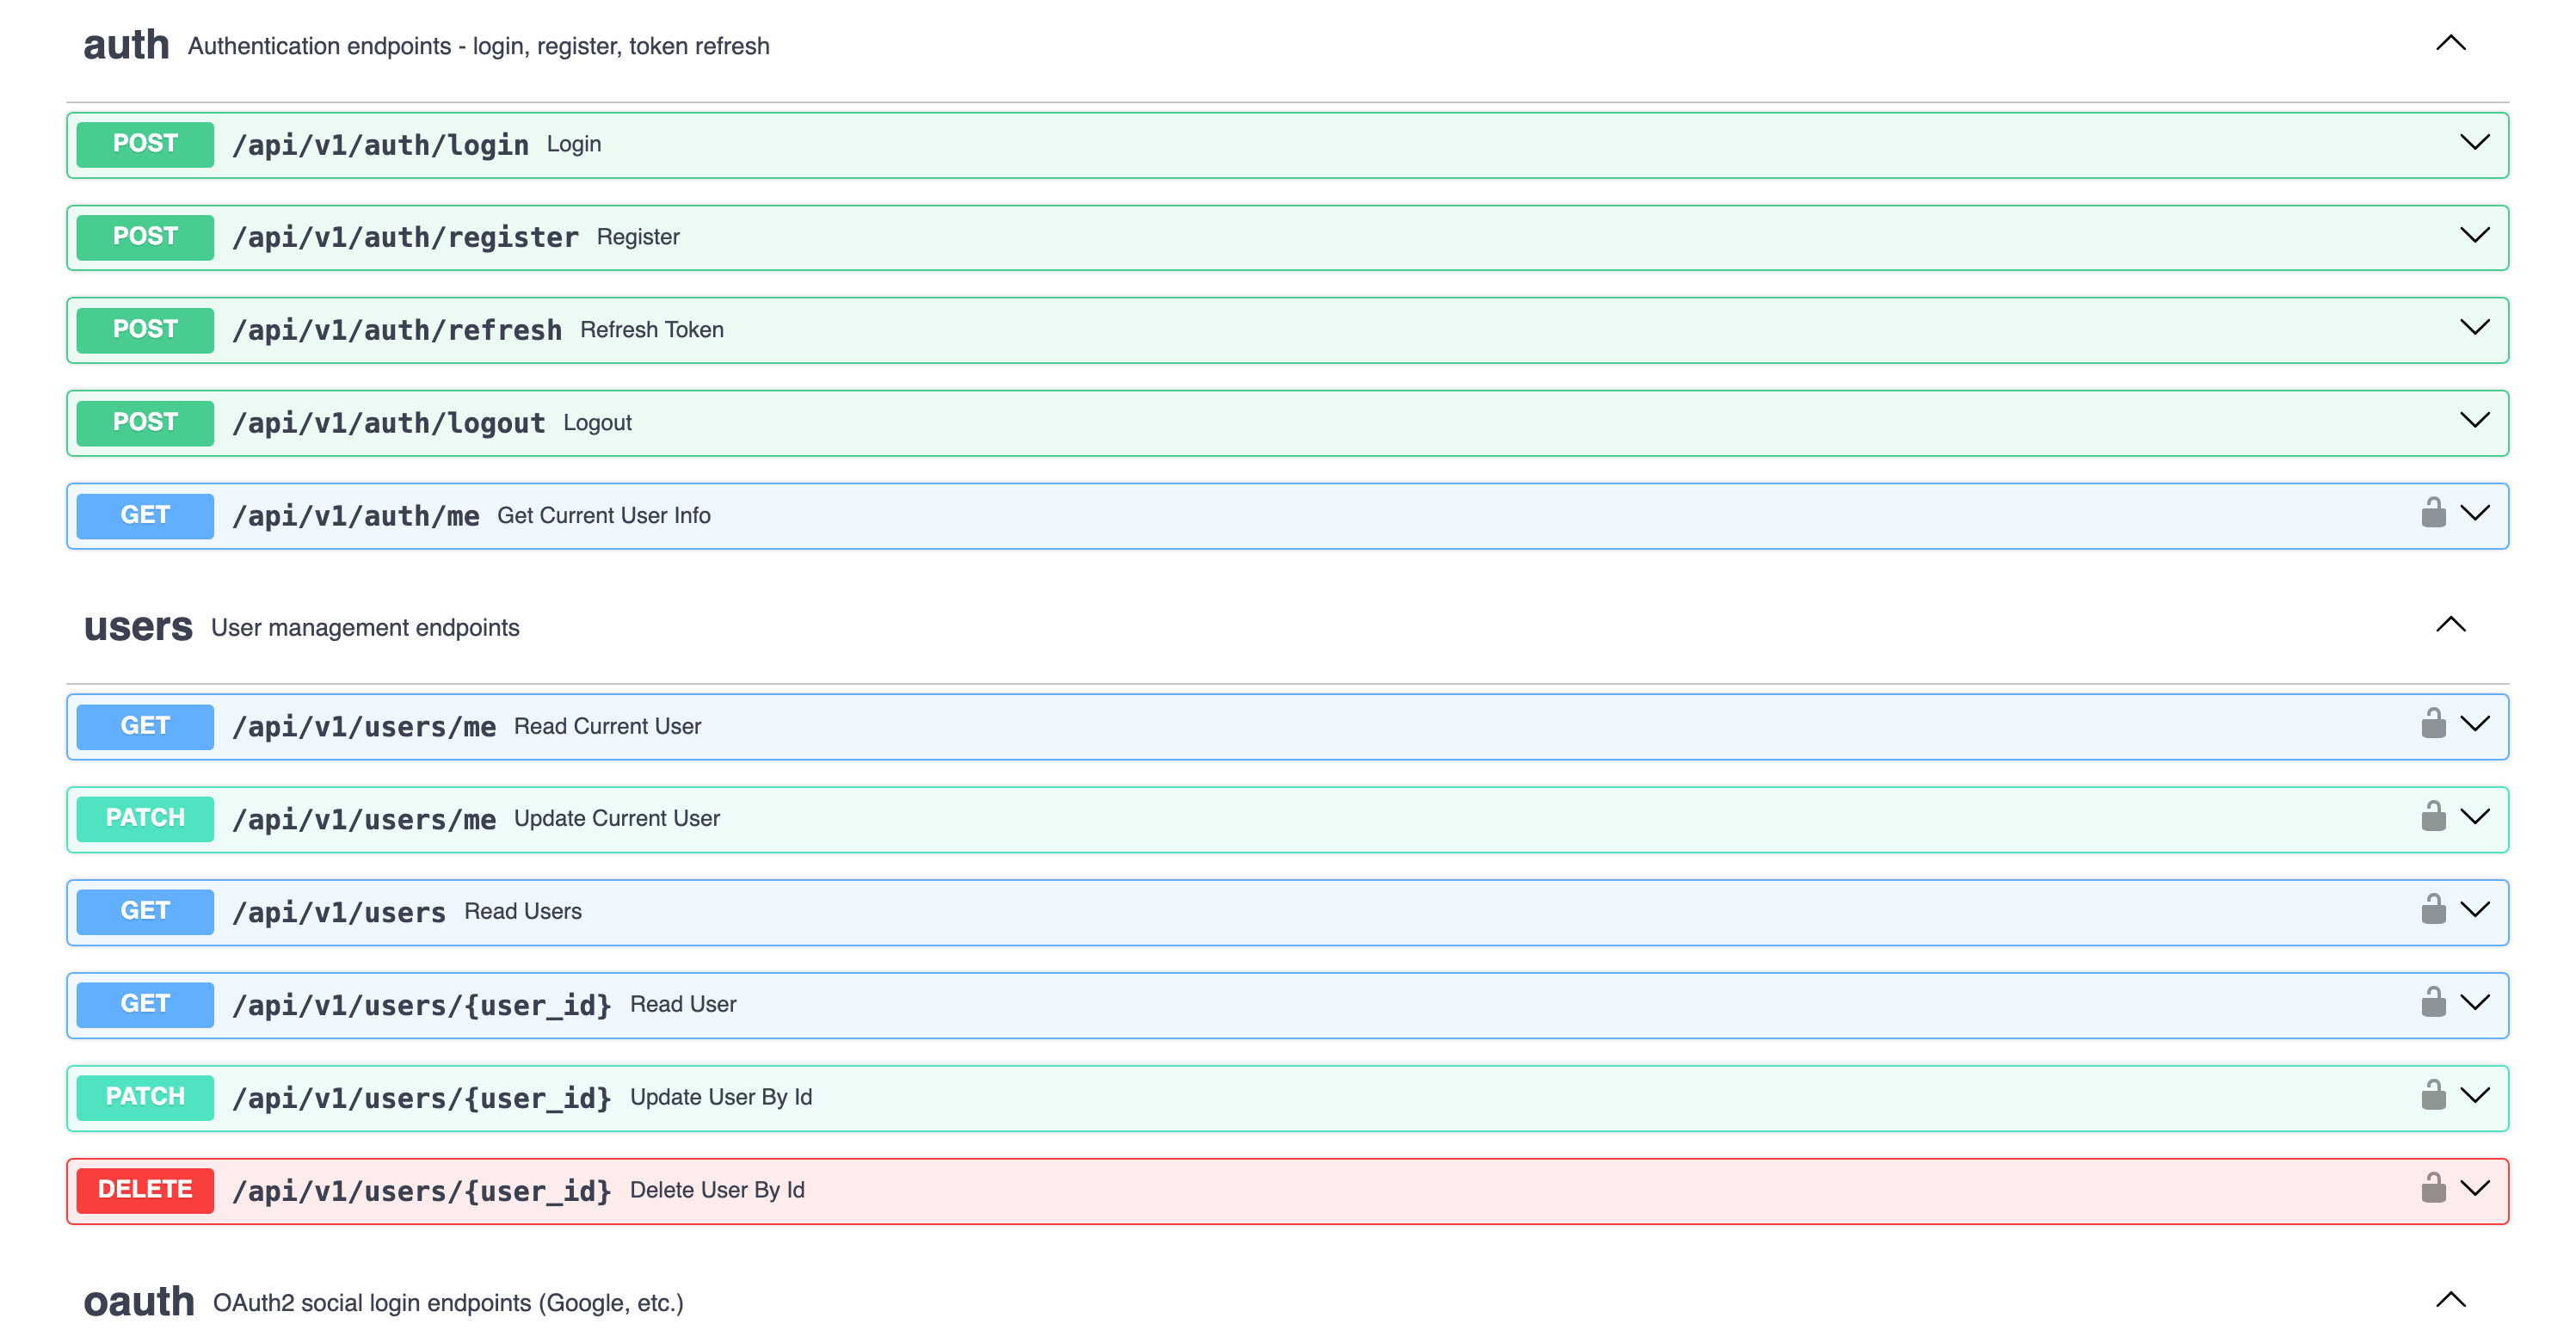 |
graph TB
    subgraph Frontend["Frontend (Next.js 15)"]
        UI[React Components]
        WS[WebSocket Client]
        Store[Zustand Stores]
    end

    subgraph Backend["Backend (FastAPI)"]
        API[API Routes]
        Services[Services Layer]
        Repos[Repositories]
        Agent[AI Agent]
    end

    subgraph Infrastructure
        DB[(PostgreSQL/MongoDB)]
        Redis[(Redis)]
        Queue[Celery/Taskiq]
    end

    subgraph External
        LLM[OpenAI/Anthropic]
        Webhook[Webhook Endpoints]
    end

    UI --> API
    WS <--> Agent
    API --> Services
    Services --> Repos
    Services --> Agent
    Repos --> DB
    Agent --> LLM
    Services --> Redis
    Services --> Queue
    Services --> Webhook
The backend follows a clean Repository + Service pattern:
graph LR
    A[API Routes] --> B[Services]
    B --> C[Repositories]
    C --> D[(Database)]

    B --> E[External APIs]
    B --> F[AI Agents]
| Layer | Responsibility |
|---|---|
| Routes | HTTP handling, validation, auth |
| Services | Business logic, orchestration |
| Repositories | Data access, queries |
See Architecture Documentation for details.
Choose between PydanticAI or LangChain when generating your project, with support for multiple LLM providers:
# PydanticAI with OpenAI (default)
fastapi-fullstack create my_app --ai-agent --ai-framework pydantic_ai

# PydanticAI with Anthropic
fastapi-fullstack create my_app --ai-agent --ai-framework pydantic_ai --llm-provider anthropic

# PydanticAI with OpenRouter
fastapi-fullstack create my_app --ai-agent --ai-framework pydantic_ai --llm-provider openrouter

# LangChain with OpenAI
fastapi-fullstack create my_app --ai-agent --ai-framework langchain

# LangChain with Anthropic
fastapi-fullstack create my_app --ai-agent --ai-framework langchain --llm-provider anthropic| Framework | OpenAI | Anthropic | OpenRouter |
|---|---|---|---|
| PydanticAI | ✓ | ✓ | ✓ |
| LangChain | ✓ | ✓ | - |
Type-safe agents with full dependency injection:
# app/agents/assistant.py
from pydantic_ai import Agent, RunContext

@dataclass
class Deps:
    user_id: str | None = None
    db: AsyncSession | None = None

agent = Agent[Deps, str](
    model="openai:gpt-4o-mini",
    system_prompt="You are a helpful assistant.",
)

@agent.tool
async def search_database(ctx: RunContext[Deps], query: str) -> list[dict]:
    """Search the database for relevant information."""
    # Access user context and database via ctx.deps
...Flexible agents with LangGraph:
# app/agents/langchain_assistant.py
from langchain.tools import tool
from langgraph.prebuilt import create_react_agent

@tool
def search_database(query: str) -> list[dict]:
    """Search the database for relevant information."""
    ...

agent = create_react_agent(
    model=ChatOpenAI(model="gpt-4o-mini"),
    tools=[search_database],
    prompt="You are a helpful assistant.",
)Both frameworks use the same WebSocket endpoint with real-time streaming:
@router.websocket("/ws")
async def agent_ws(websocket: WebSocket):
    await websocket.accept()

    # Works with both PydanticAI and LangChain
    async for event in agent.stream(user_input):
        await websocket.send_json({
            "type": "text_delta",
            "content": event.content
})Each framework has its own observability solution:
| Framework | Observability | Dashboard |
|---|---|---|
| PydanticAI | Logfire | Agent runs, tool calls, token usage |
| LangChain | LangSmith | Traces, feedback, datasets |
See AI Agent Documentation for more.
Logfire provides complete observability for your application - from AI agents to database queries. Built by the Pydantic team, it offers first-class support for the entire Python ecosystem.
graph LR
    subgraph Your App
        API[FastAPI]
        Agent[PydanticAI]
        DB[(Database)]
        Cache[(Redis)]
        Queue[Celery/Taskiq]
        HTTP[HTTPX]
    end

    subgraph Logfire
        Traces[Traces]
        Metrics[Metrics]
        Logs[Logs]
    end

    API --> Traces
    Agent --> Traces
    DB --> Traces
    Cache --> Traces
    Queue --> Traces
    HTTP --> Traces
| Component | What You See |
|---|---|
| PydanticAI | Agent runs, tool calls, LLM requests, token usage, streaming events |
| FastAPI | Request/response traces, latency, status codes, route performance |
| PostgreSQL/MongoDB | Query execution time, slow queries, connection pool stats |
| Redis | Cache hits/misses, command latency, key patterns |
| Celery/Taskiq | Task execution, queue depth, worker performance |
| HTTPX | External API calls, response times, error rates |
LangSmith provides observability specifically designed for LangChain applications:
| Feature | Description |
|---|---|
| Traces | Full execution traces for agent runs and chains |
| Feedback | Collect user feedback on agent responses |
| Datasets | Build evaluation datasets from production data |
| Monitoring | Track latency, errors, and token usage |
LangSmith is automatically configured when you choose LangChain:
# .env
LANGCHAIN_TRACING_V2=true
LANGCHAIN_API_KEY=your-api-key
LANGCHAIN_PROJECT=my_projectEnable Logfire and select which components to instrument:
fastapi-fullstack new
# ✓ Enable Logfire observability
#   ✓ Instrument FastAPI
#   ✓ Instrument Database
#   ✓ Instrument Redis
#   ✓ Instrument Celery
# ✓ Instrument HTTPX# Automatic instrumentation in app/main.py
import logfire
logfire.configure()
logfire.instrument_fastapi(app)
logfire.instrument_asyncpg()
logfire.instrument_redis()
logfire.instrument_httpx()# Manual spans for custom logic
with logfire.span("process_order", order_id=order.id):
await validate_order(order)
await charge_payment(order)
await send_confirmation(order)For more details, see Logfire Documentation.
Each generated project includes a powerful CLI inspired by Django's management commands. The CLI name matches your project slug (e.g., if your project is my_app, the CLI command is uv run my_app).
# Run commands from the backend directory:
cd backend

# Server
uv run flowfi server run --reload
uv run flowfi server routes

# Database (Alembic wrapper)
uv run flowfi db init
uv run flowfi db migrate -m "Add users"
uv run flowfi db upgrade

# Users
uv run flowfi user create-admin       # Create admin (interactive)
uv run flowfi user create             # Create user (interactive)
uv run flowfi user list               # List all users
Tip: Use
makecommands as shortcuts - they handle theuv runprefix and directory automatically. Runmake helpto see all available commands.
Create your own commands with auto-discovery:
# app/commands/seed.py
from app.commands import command, success, error
import click

@command("seed", help="Seed database with test data")
@click.option("--count", "-c", default=10, type=int)
@click.option("--dry-run", is_flag=True)
def seed_database(count: int, dry_run: bool):
    """Seed the database with sample data."""
    if dry_run:
        info(f"[DRY RUN] Would create {count} records")
        return

    # Your logic here
    success(f"Created {count} records!")
Commands are automatically discovered from app/commands/ - just create a file and use the @command decorator.
uv run flowfi cmd seed --count 100
uv run flowfi cmd seed --dry-runIf you don't have make installed (common on Windows), use these commands directly.
All commands should be run from the project root directory.
| Task | Command |
|---|---|
| Install dependencies | uv sync --directory backend --dev |
| Start dev server | uv run --directory backend flowfi server run --reload |
| Start prod server | uv run --directory backend flowfi server run --host 0.0.0.0 --port 8005 |
| Show routes | uv run --directory backend flowfi server routes |
| Task | Command |
|---|---|
| Format code | uv run --directory backend ruff format app tests cli |
| Fix lint issues | uv run --directory backend ruff check app tests cli --fix |
| Check linting | uv run --directory backend ruff check app tests cli |
| Type check | uv run --directory backend mypy app |
| Task | Command |
|---|---|
| Run tests | uv run --directory backend pytest tests/ -v |
| Run with coverage | uv run --directory backend pytest tests/ -v --cov=app --cov-report=term-missing |
| Task | Command |
|---|---|
| Create migration | uv run --directory backend flowfi db migrate -m "message" |
| Apply migrations | uv run --directory backend flowfi db upgrade |
| Rollback migration | uv run --directory backend flowfi db downgrade |
| Show current | uv run --directory backend flowfi db current |
| Show history | uv run --directory backend flowfi db history |
| Task | Command |
|---|---|
| Create admin | uv run --directory backend flowfi user create-admin |
| Create user | uv run --directory backend flowfi user create |
| List users | uv run --directory backend flowfi user list |
| Task | Command |
|---|---|
| Start worker | uv run --directory backend flowfi taskiq worker |
| Start scheduler | uv run --directory backend flowfi taskiq scheduler |
| Task | Command |
|---|---|
| Start all services | docker-compose up -d |
| Stop all services | docker-compose down |
| View logs | docker-compose logs -f |
| Build images | docker-compose build |
| Start PostgreSQL only | docker-compose up -d db |
| Start Redis only | docker-compose up -d redis |
| Start production | docker-compose -f docker-compose.prod.yml up -d |
| Task | Command (Unix) | Command (Windows PowerShell) |
|---|---|---|
| Clean cache | find . -type d -name __pycache__ -exec rm -rf {} + |
Get-ChildItem -Recurse -Directory -Filter __pycache__ | Remove-Item -Recurse -Force |
my_project/
├── backend/
│   ├── app/
│   │   ├── main.py              # FastAPI app with lifespan
│   │   ├── api/
│   │   │   ├── routes/v1/       # Versioned API endpoints
│   │   │   ├── deps.py          # Dependency injection
│   │   │   └── router.py        # Route aggregation
│   │   ├── core/                # Config, security, middleware
│   │   ├── db/models/           # SQLAlchemy/MongoDB models
│   │   ├── schemas/             # Pydantic schemas
│   │   ├── repositories/        # Data access layer
│   │   ├── services/            # Business logic
│   │   ├── agents/              # AI agents with centralized prompts
│   │   ├── commands/            # Django-style CLI commands
│   │   └── worker/              # Background tasks
│   ├── cli/                     # Project CLI
│   ├── tests/                   # pytest test suite
│   └── alembic/                 # Database migrations
├── frontend/
│   ├── src/
│   │   ├── app/                 # Next.js App Router
│   │   ├── components/          # React components
│   │   ├── hooks/               # useChat, useWebSocket, etc.
│   │   └── stores/              # Zustand state management
│   └── e2e/                     # Playwright tests
├── docker-compose.yml
├── Makefile
└── README.md
Generated projects include version metadata in pyproject.toml for tracking:
[tool.fastapi-fullstack]
generator_version = "0.1.5"
generated_at = "2024-12-21T10:30:00+00:00"| Option | Values | Description |
|---|---|---|
| Database | postgresql, mongodb, sqlite, none |
Async by default |
| Auth | jwt, api_key, both, none |
JWT includes user management |
| OAuth | none, google |
Social login |
| AI Framework | pydantic_ai, langchain |
Choose your AI agent framework |
| LLM Provider | openai, anthropic, openrouter |
OpenRouter only with PydanticAI |
| Background Tasks | none, celery, taskiq, arq |
Distributed queues |
| Frontend | none, nextjs |
Next.js 15 + React 19 |
| Preset | Description |
|---|---|
--preset production |
Full production setup with Redis, Sentry, Kubernetes, Prometheus |
--preset ai-agent |
AI agent with WebSocket streaming and conversation persistence |
--minimal |
Minimal project with no extras |
Select what you need:
fastapi-fullstack new
# ✓ Redis (caching/sessions)
# ✓ Rate limiting (slowapi)
# ✓ Pagination (fastapi-pagination)
# ✓ Admin Panel (SQLAdmin)
# ✓ AI Agent (PydanticAI or LangChain)
# ✓ Webhooks
# ✓ Sentry
# ✓ Logfire / LangSmith
# ✓ Prometheus
# ... and more| Document | Description |
|---|---|
| Architecture | Repository + Service pattern, layered design |
| Frontend | Next.js setup, auth, state management |
| AI Agent | PydanticAI, tools, WebSocket streaming |
| Observability | Logfire integration, tracing, metrics |
| Deployment | Docker, Kubernetes, production setup |
| Development | Local setup, testing, debugging |
This project is inspired by:
- full-stack-fastapi-template by @tiangolo
- fastapi-template by @s3rius
- FastAPI Best Practices by @zhanymkanov
- Django's management commands system
Contributions are welcome! Please read our Contributing Guide for details.
MIT License - see LICENSE for details.
Made with ❤️ by VStorm