Full Guide to use a Rift CV1 as FBT trackers
This guide will focus on how to use your Rift CV1 Touch controllers as FBT trackers. It will explain every part of it from acquiring the devices to a fully operational setup with automations.
You can follow this guide if you just want to use them as controllers in SteamVR, just don't do anything related to using them as trackers (it will be mentioned).
What you need :
-
An Oculus Rift CV1 headset.
- It has to work enough to be detected by Meta Horizon Link and be able to be tracked by the sensors (otherwise you can't do the sensor setup and/or you may have tracking issues).
-
At least 2 Touch Controllers, one left and one right.
- A third one is recommended to have a full 3 points full body tracking, and it can be either a left or right controller.
- If you don't want to get a third one, you can use the headset as a tracker (not really recommended, it's bulky and tethered) or use other solutions.
- A third one is recommended to have a full 3 points full body tracking, and it can be either a left or right controller.
-
2-4 Oculus Rift Sensors
- 3 is recommended for 360° tracking.
- USB extensions may be required depending on where you place them. I recommend getting 3 meters long USB 3.0 extensions (Amazon Basics ones are great), anything longer may require an active USB extension.
-
Something to attach the controllers to your feet and waist.
- See below for some examples.
-
A VR-capable PC with :
-
One free HDMI port on the dedicated GPU.
- This is necessary for the headset to work.
- DP to HDMI adapters work.
- Note for laptop users: if your laptop has an NVIDIA GPU, open NVIDIA Control Panel → anything related to "PhysiX" and make sure the HDMI port is wired to the NVIDIA GPU, otherwise it won't work.
-
3-5 free USB ports depending on the number of sensors.
- USB 2.0 or USB 3.0 for the headset, it works regardless.
- USB 3.0 recommended for at least 2 sensors, the rest should be in USB 2.0.
- USB hubs can work but aren't really recommended for the sensors, getting a USB PCIe card would be better.
- Note: you WILL have issues if your motherboard has a bad USB controller (i.e. A520 chipset). Getting a USB PCIe card can help but won't fix everything.
-
One free HDMI port on the dedicated GPU.
-
Another VR headset compatible with SteamVR and not using Meta Horizon Link (i.e. another Oculus Rift, Oculus Rift S)
- If you're using a Meta Quest, use something else than Horizon Link, like Steam Link or Virtual Desktop.
- Plug the headset cable on your PC, with the HDMI cable on your dedicated GPU.
- Plug your sensors on USB ports.
- As said previously, 2 sensors should be on USB 3.0 ports and the rest on USB 2.0 ports.
- If you have any USB issues, try different combinations to see what works the best for you.
- As said previously, 2 sensors should be on USB 3.0 ports and the rest on USB 2.0 ports.
Now that part entirely depends on your room's layout, how many sensors you have, your furniture and your play space.
What you want to do is to maximize coverage by spacing the sensors as much as possible and want to point the sensors down so they see the floor.
I personally have quite a small room and don't have as much flexibility as I wanted, but this is what my setup looks like :
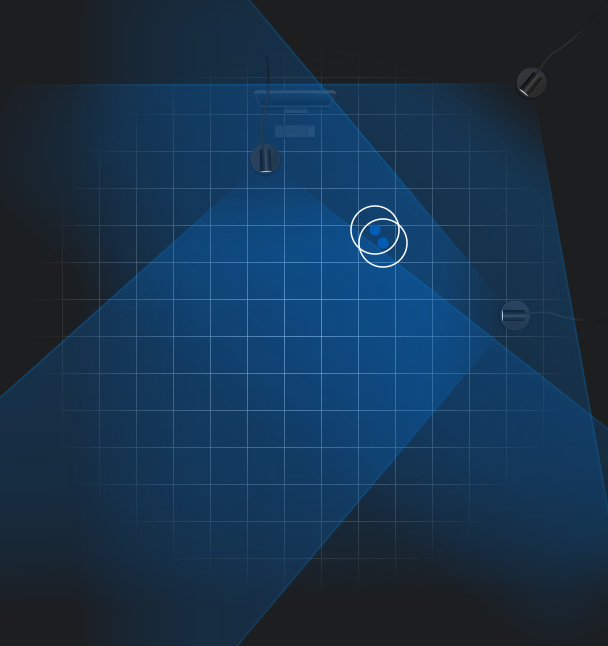
By the way, please do not listen to the software's placement recommendation as they aren't adapted to what we want to do.
Take your time and adjust everything to have the best setup possible.
Meta has made a detailed blog that can help you place them.
Pro tip: you can unscrew the sensor from its feet to have a much smaller footprint and attach it to something else (I personally used double-sided tape).
One step to keep the headset awake is to tape the proximity sensor, so the headset thinks you're wearing it.
I personally taped a piece of paper on the headset to make sure it properly detects something.
This step alone won't be enough to keep the headset awake as it will be stationary, but ODTKRA is here for that.
Skip this if you don't want to use them as FBT trackers
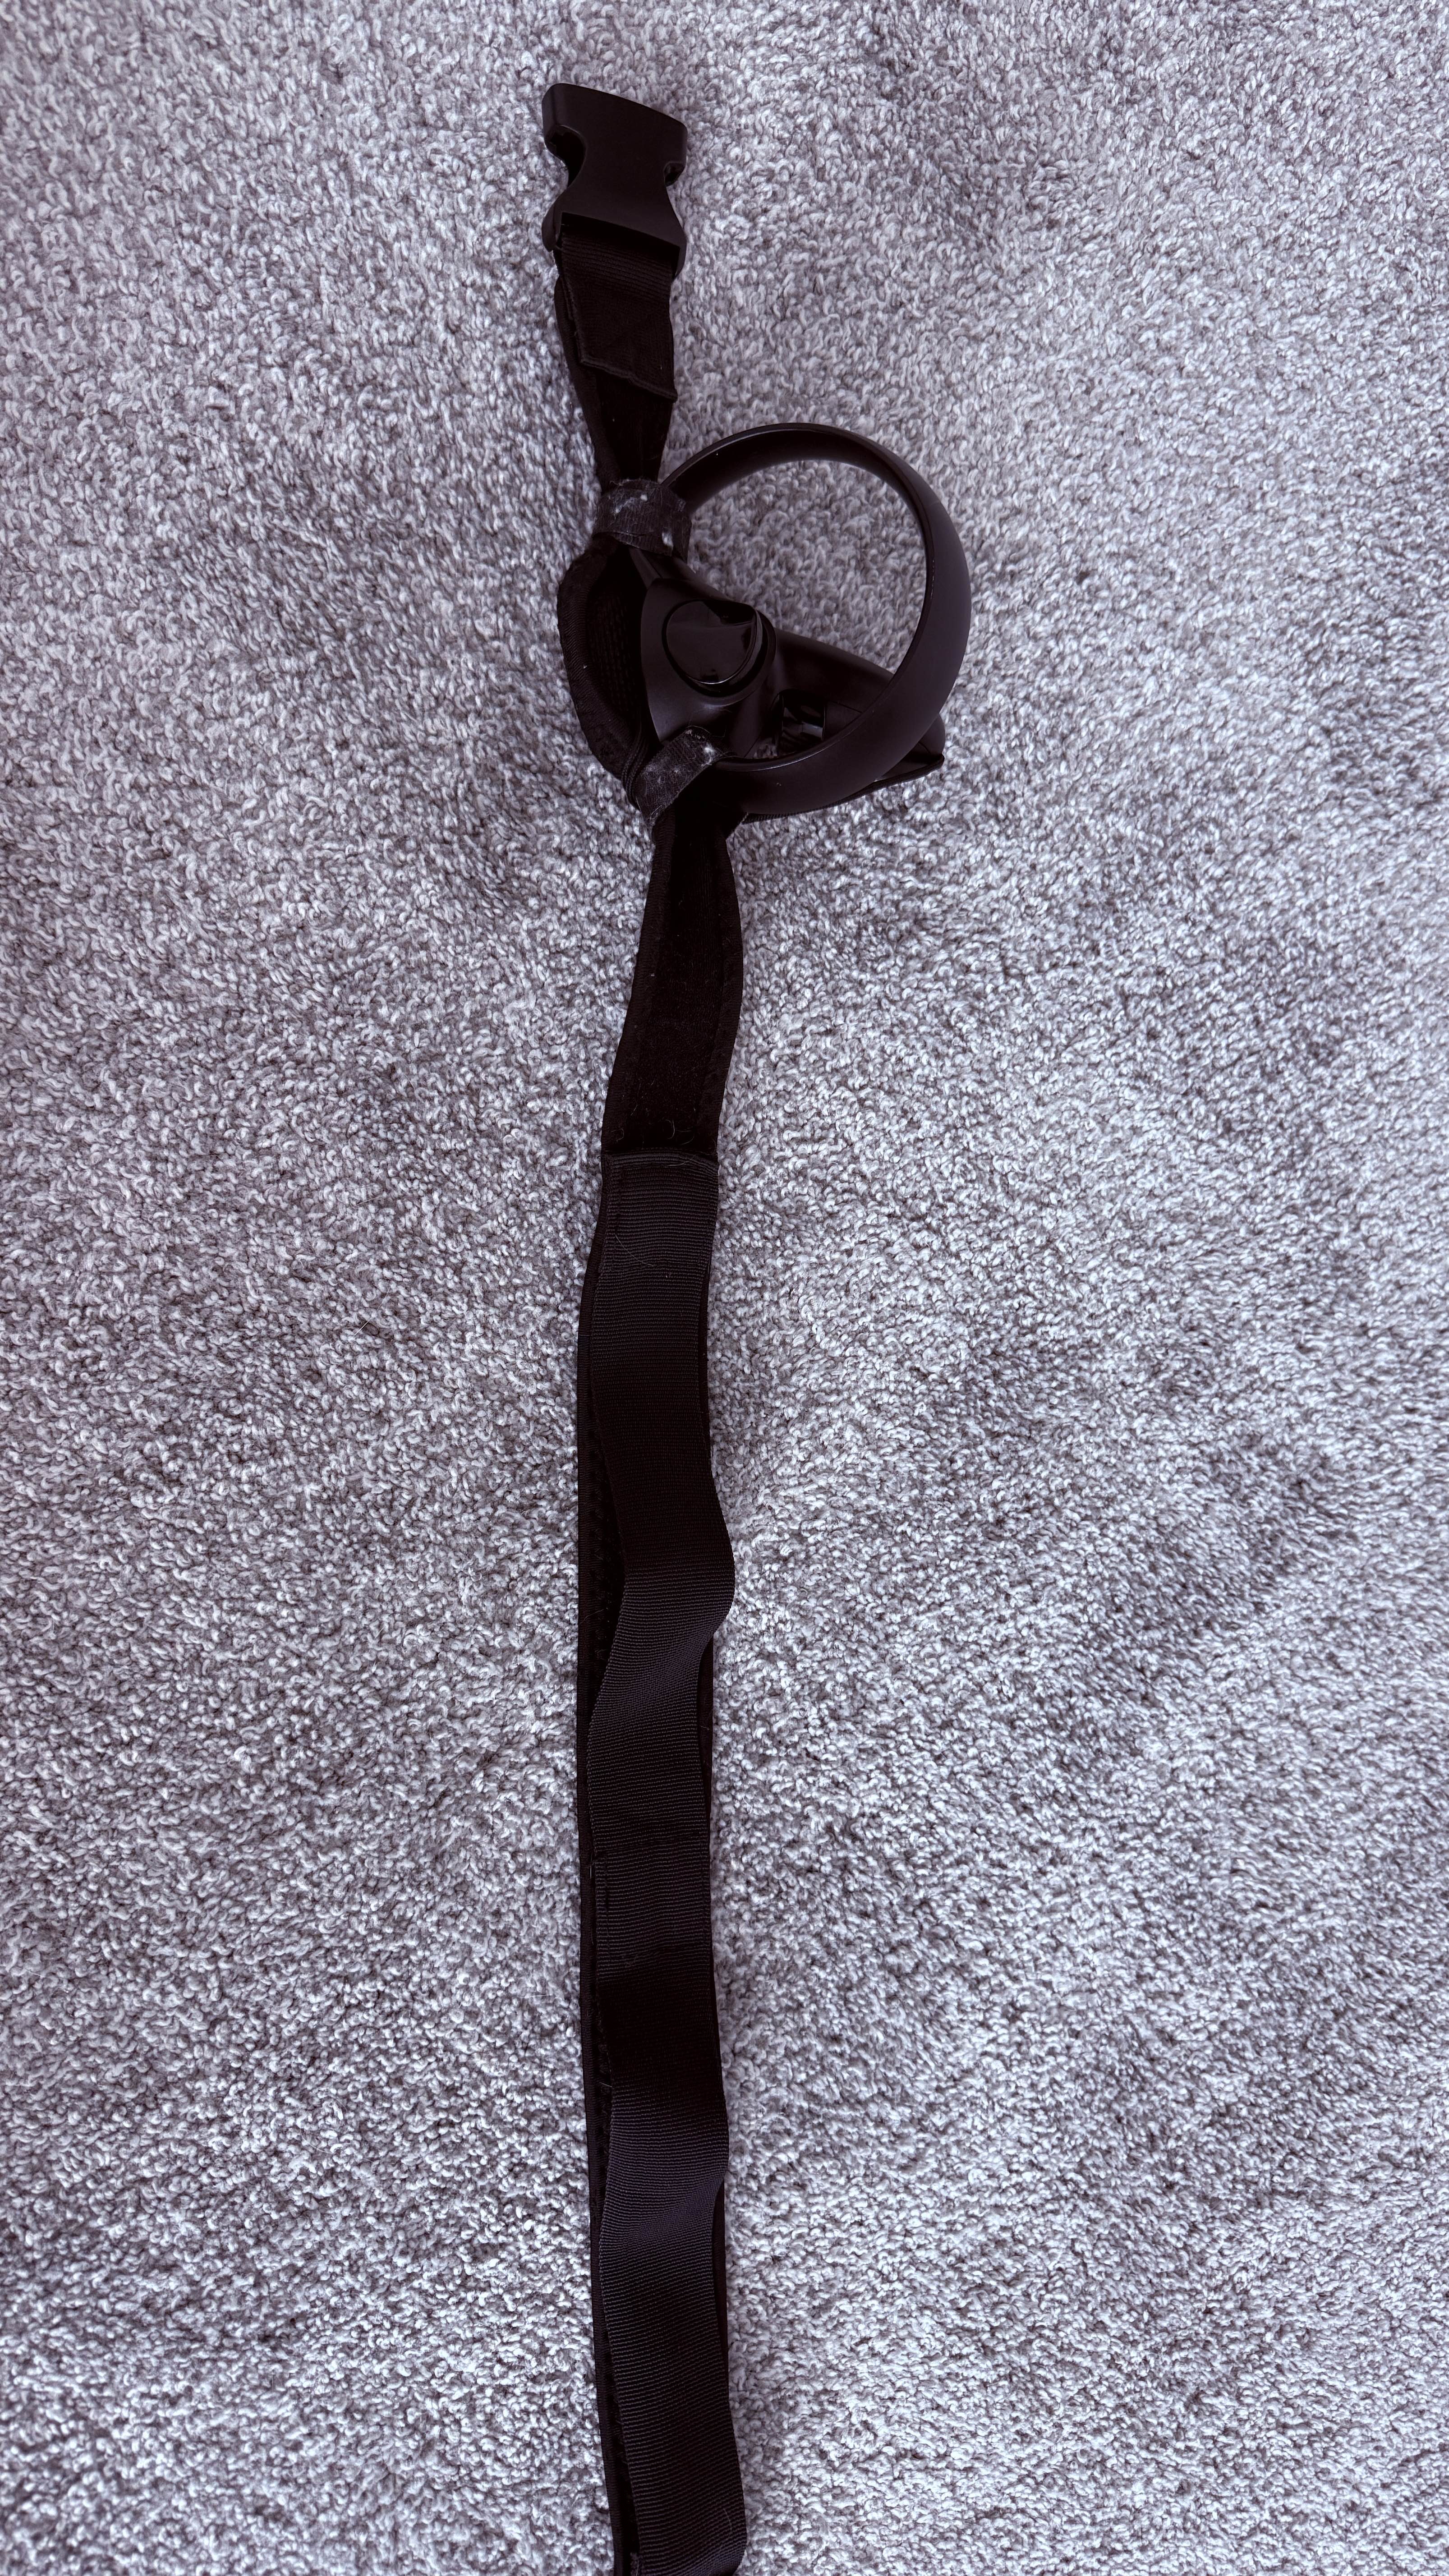
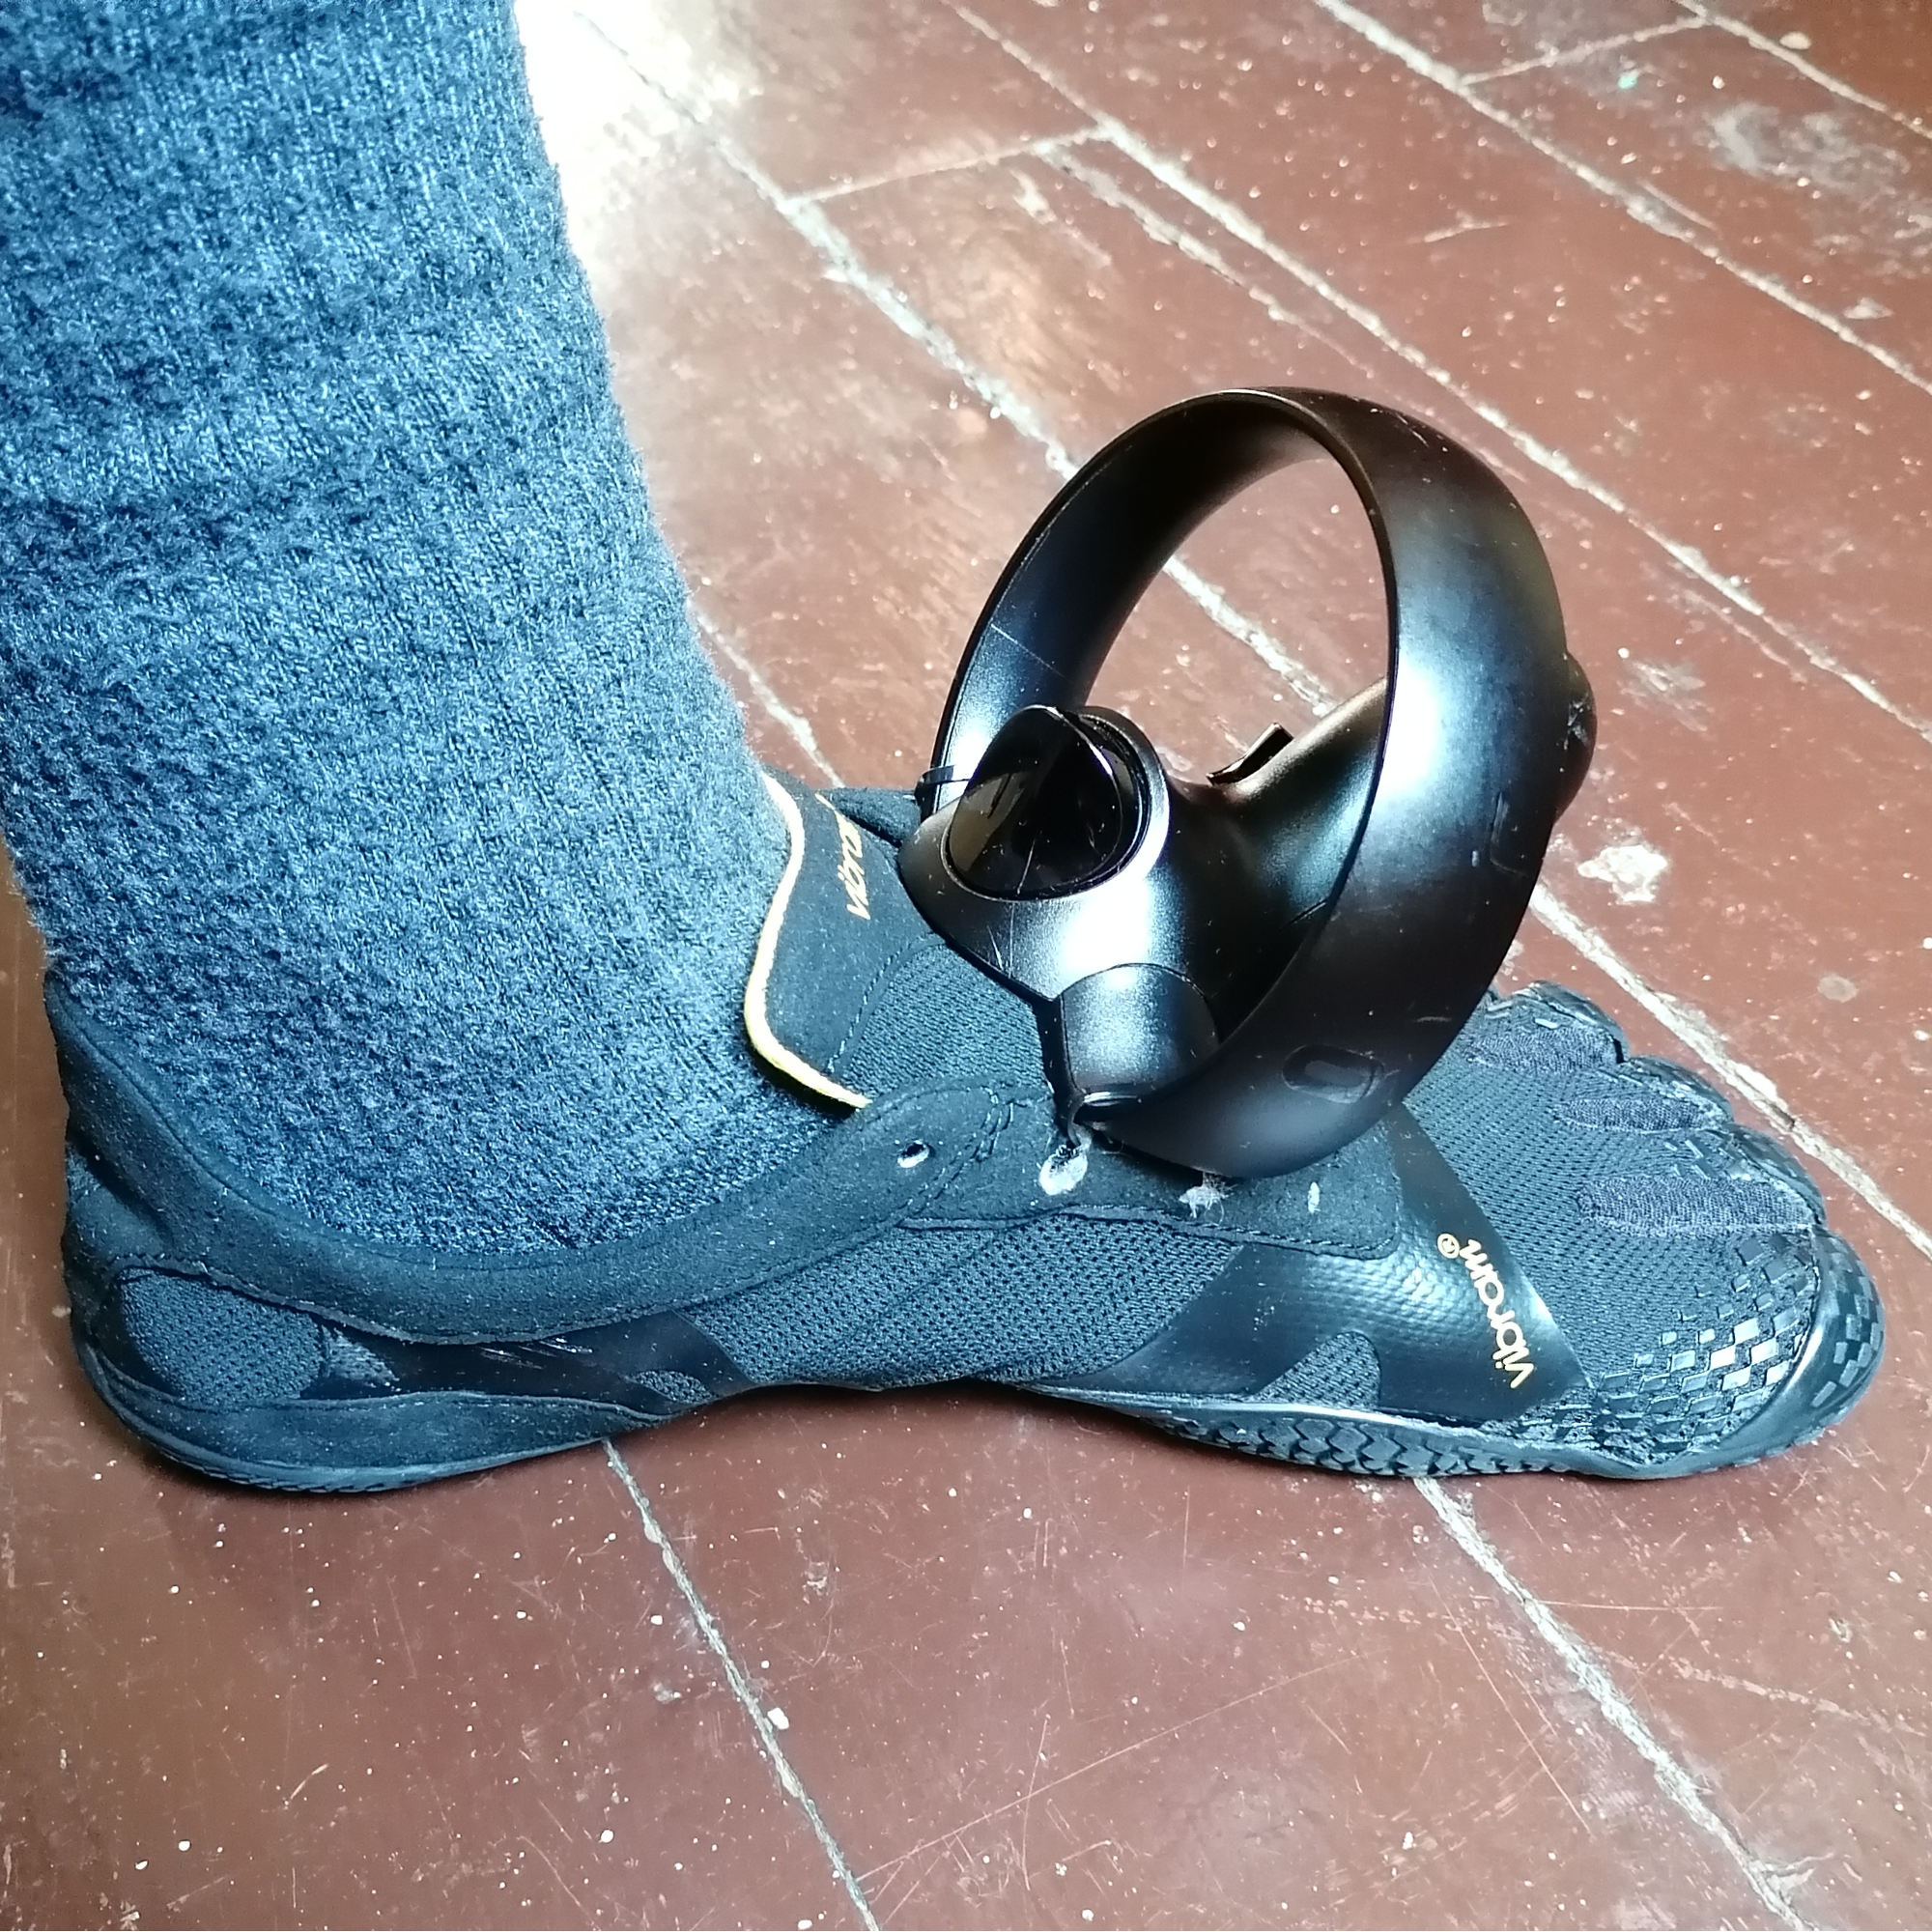
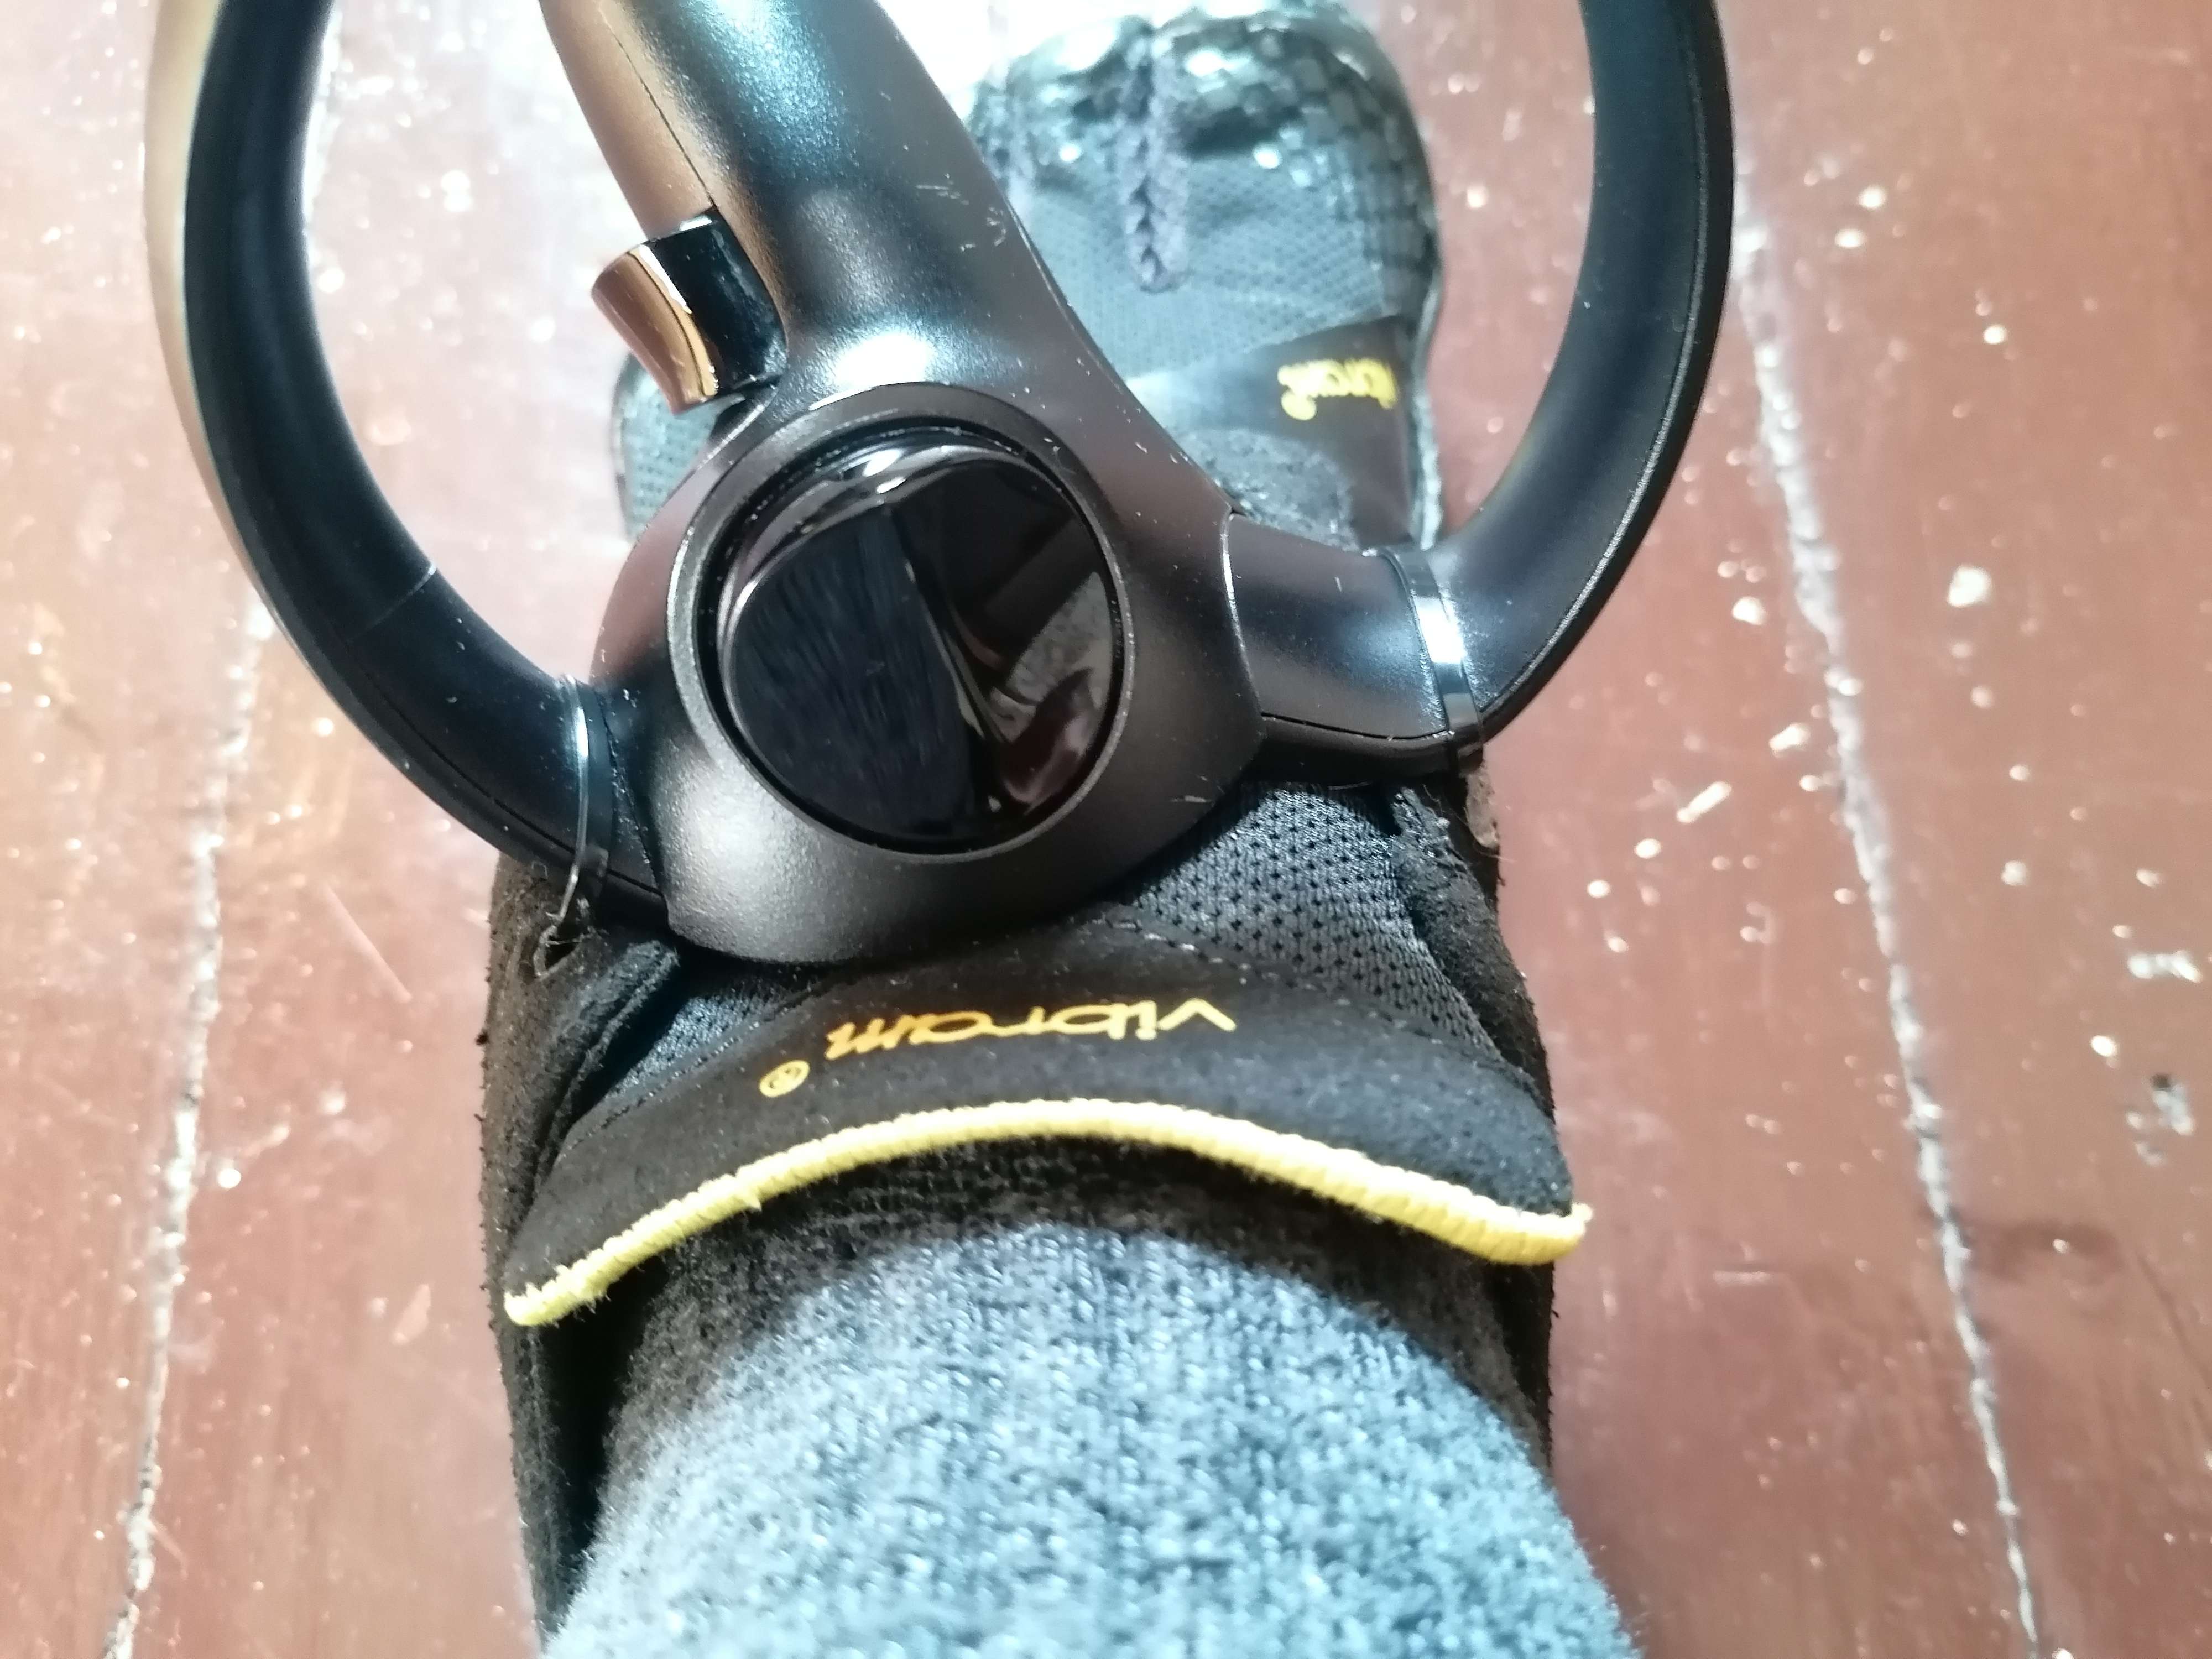
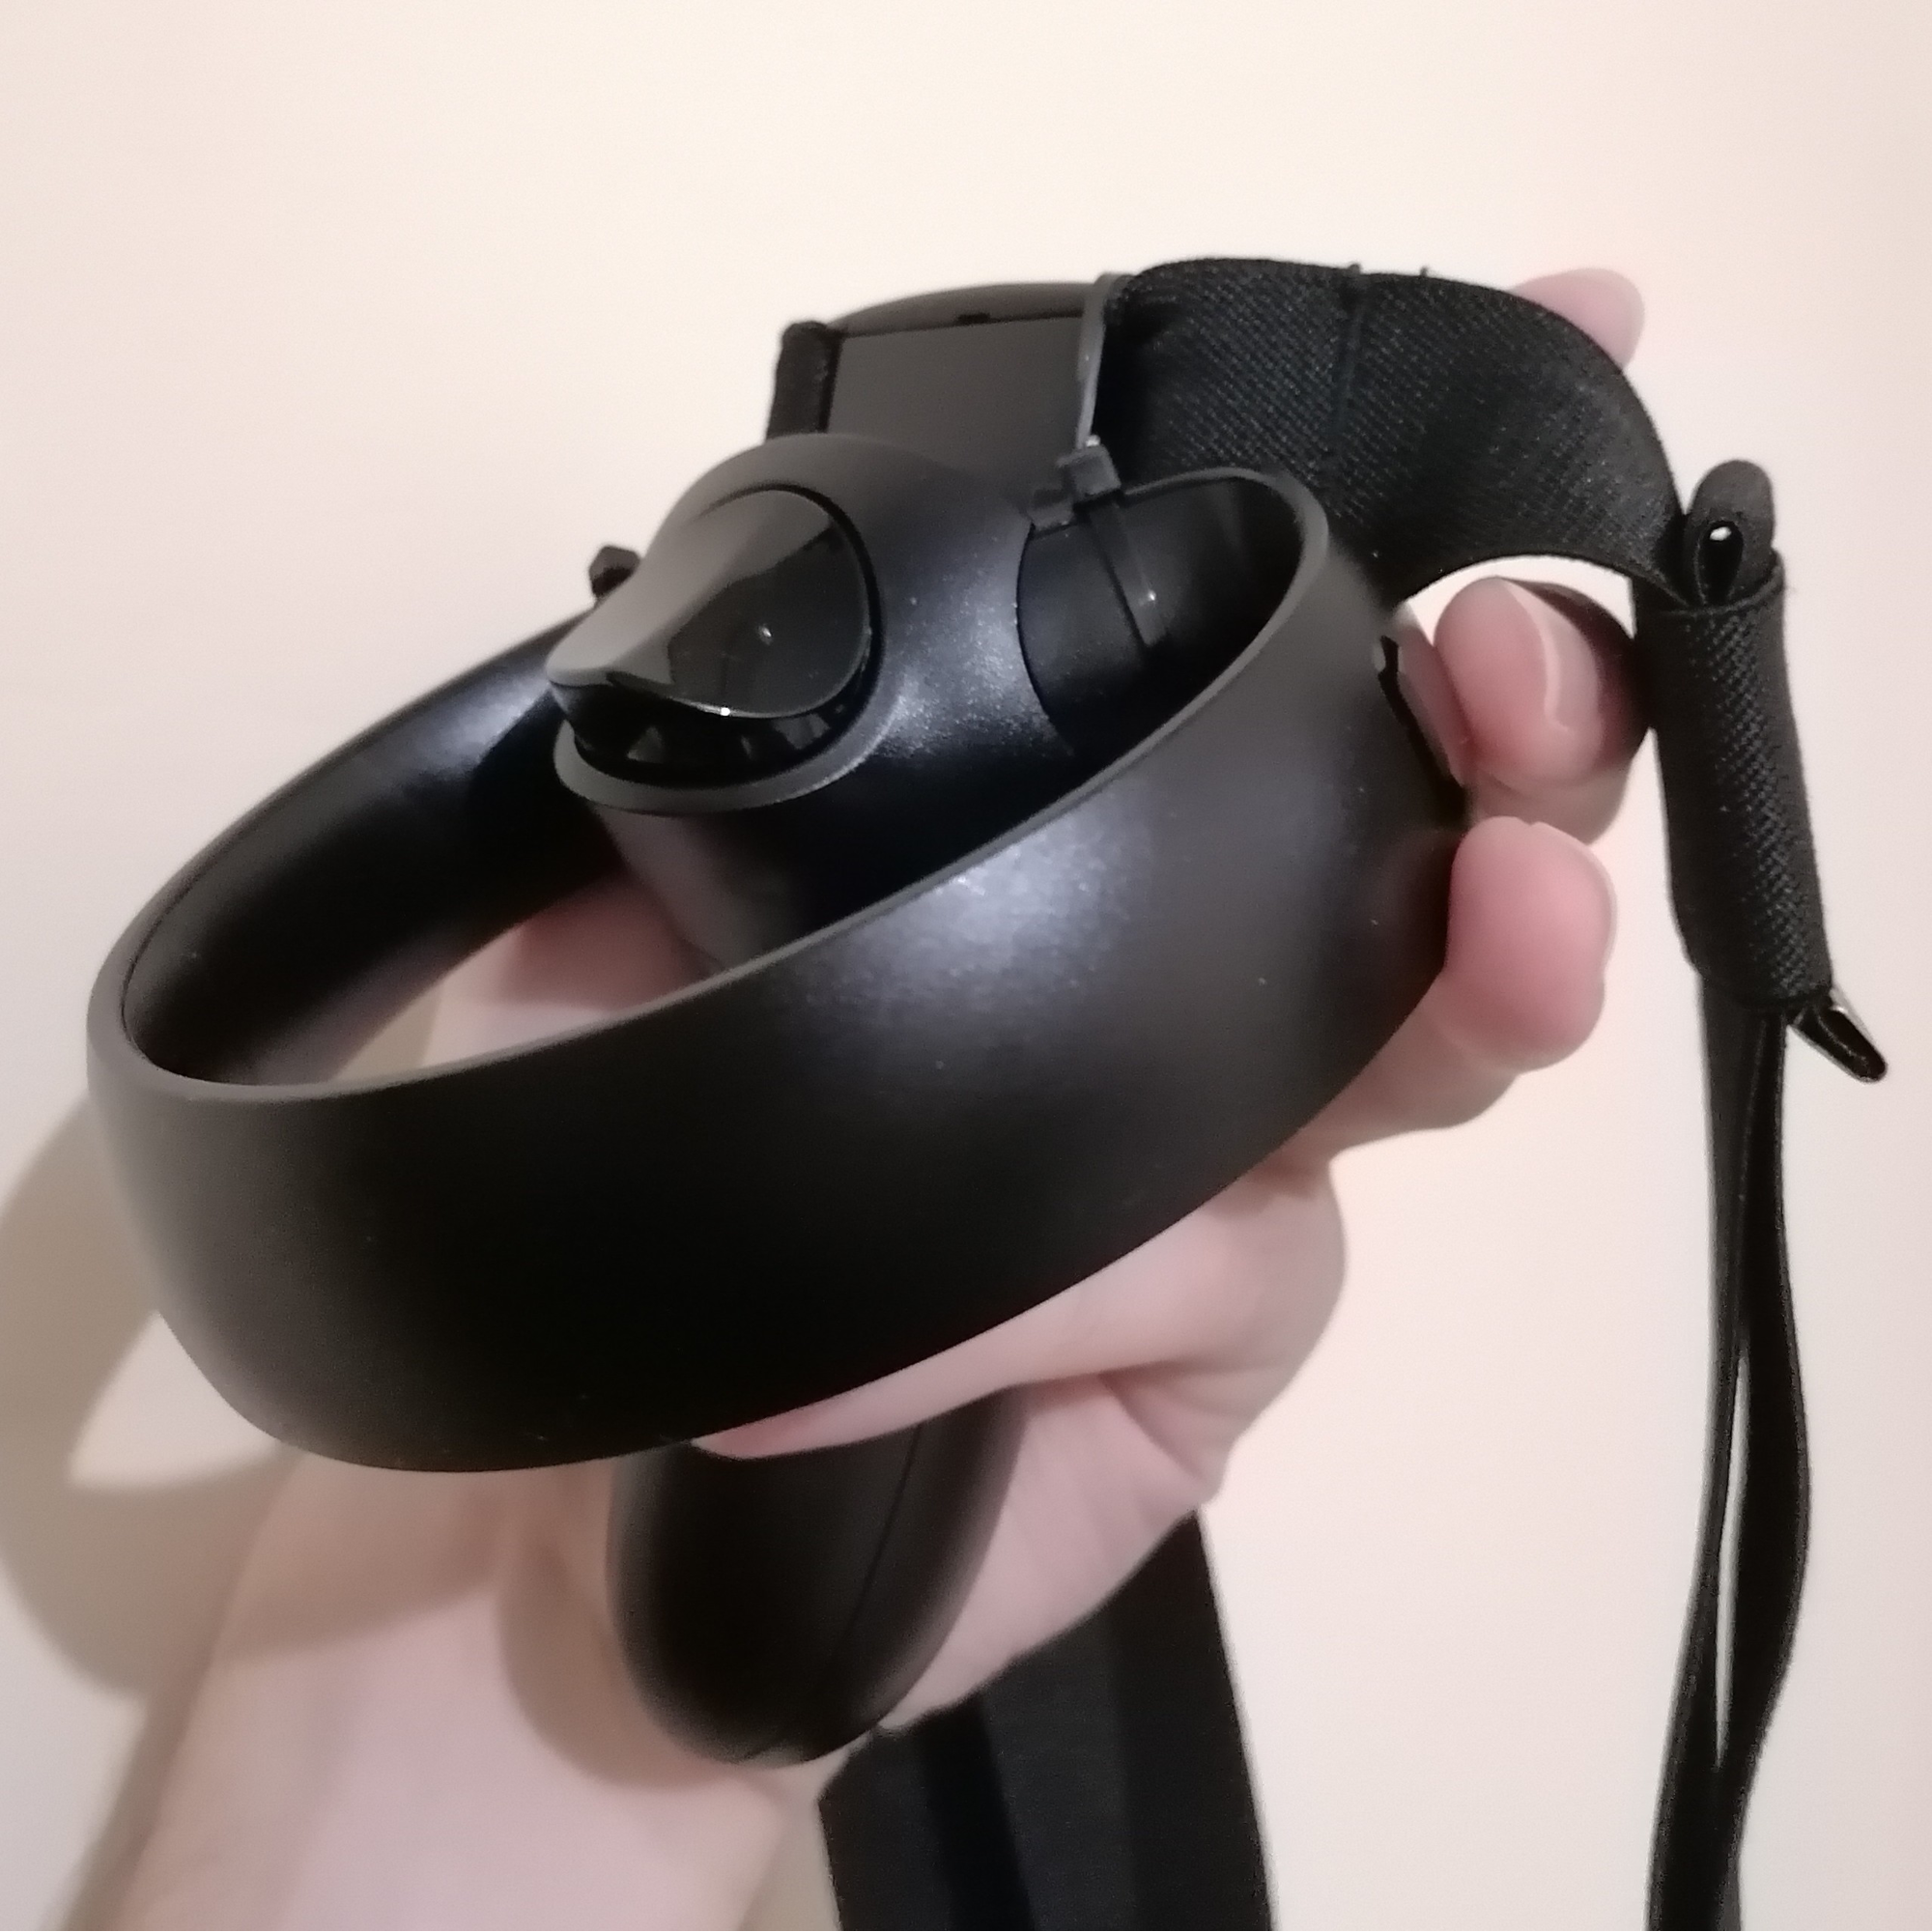
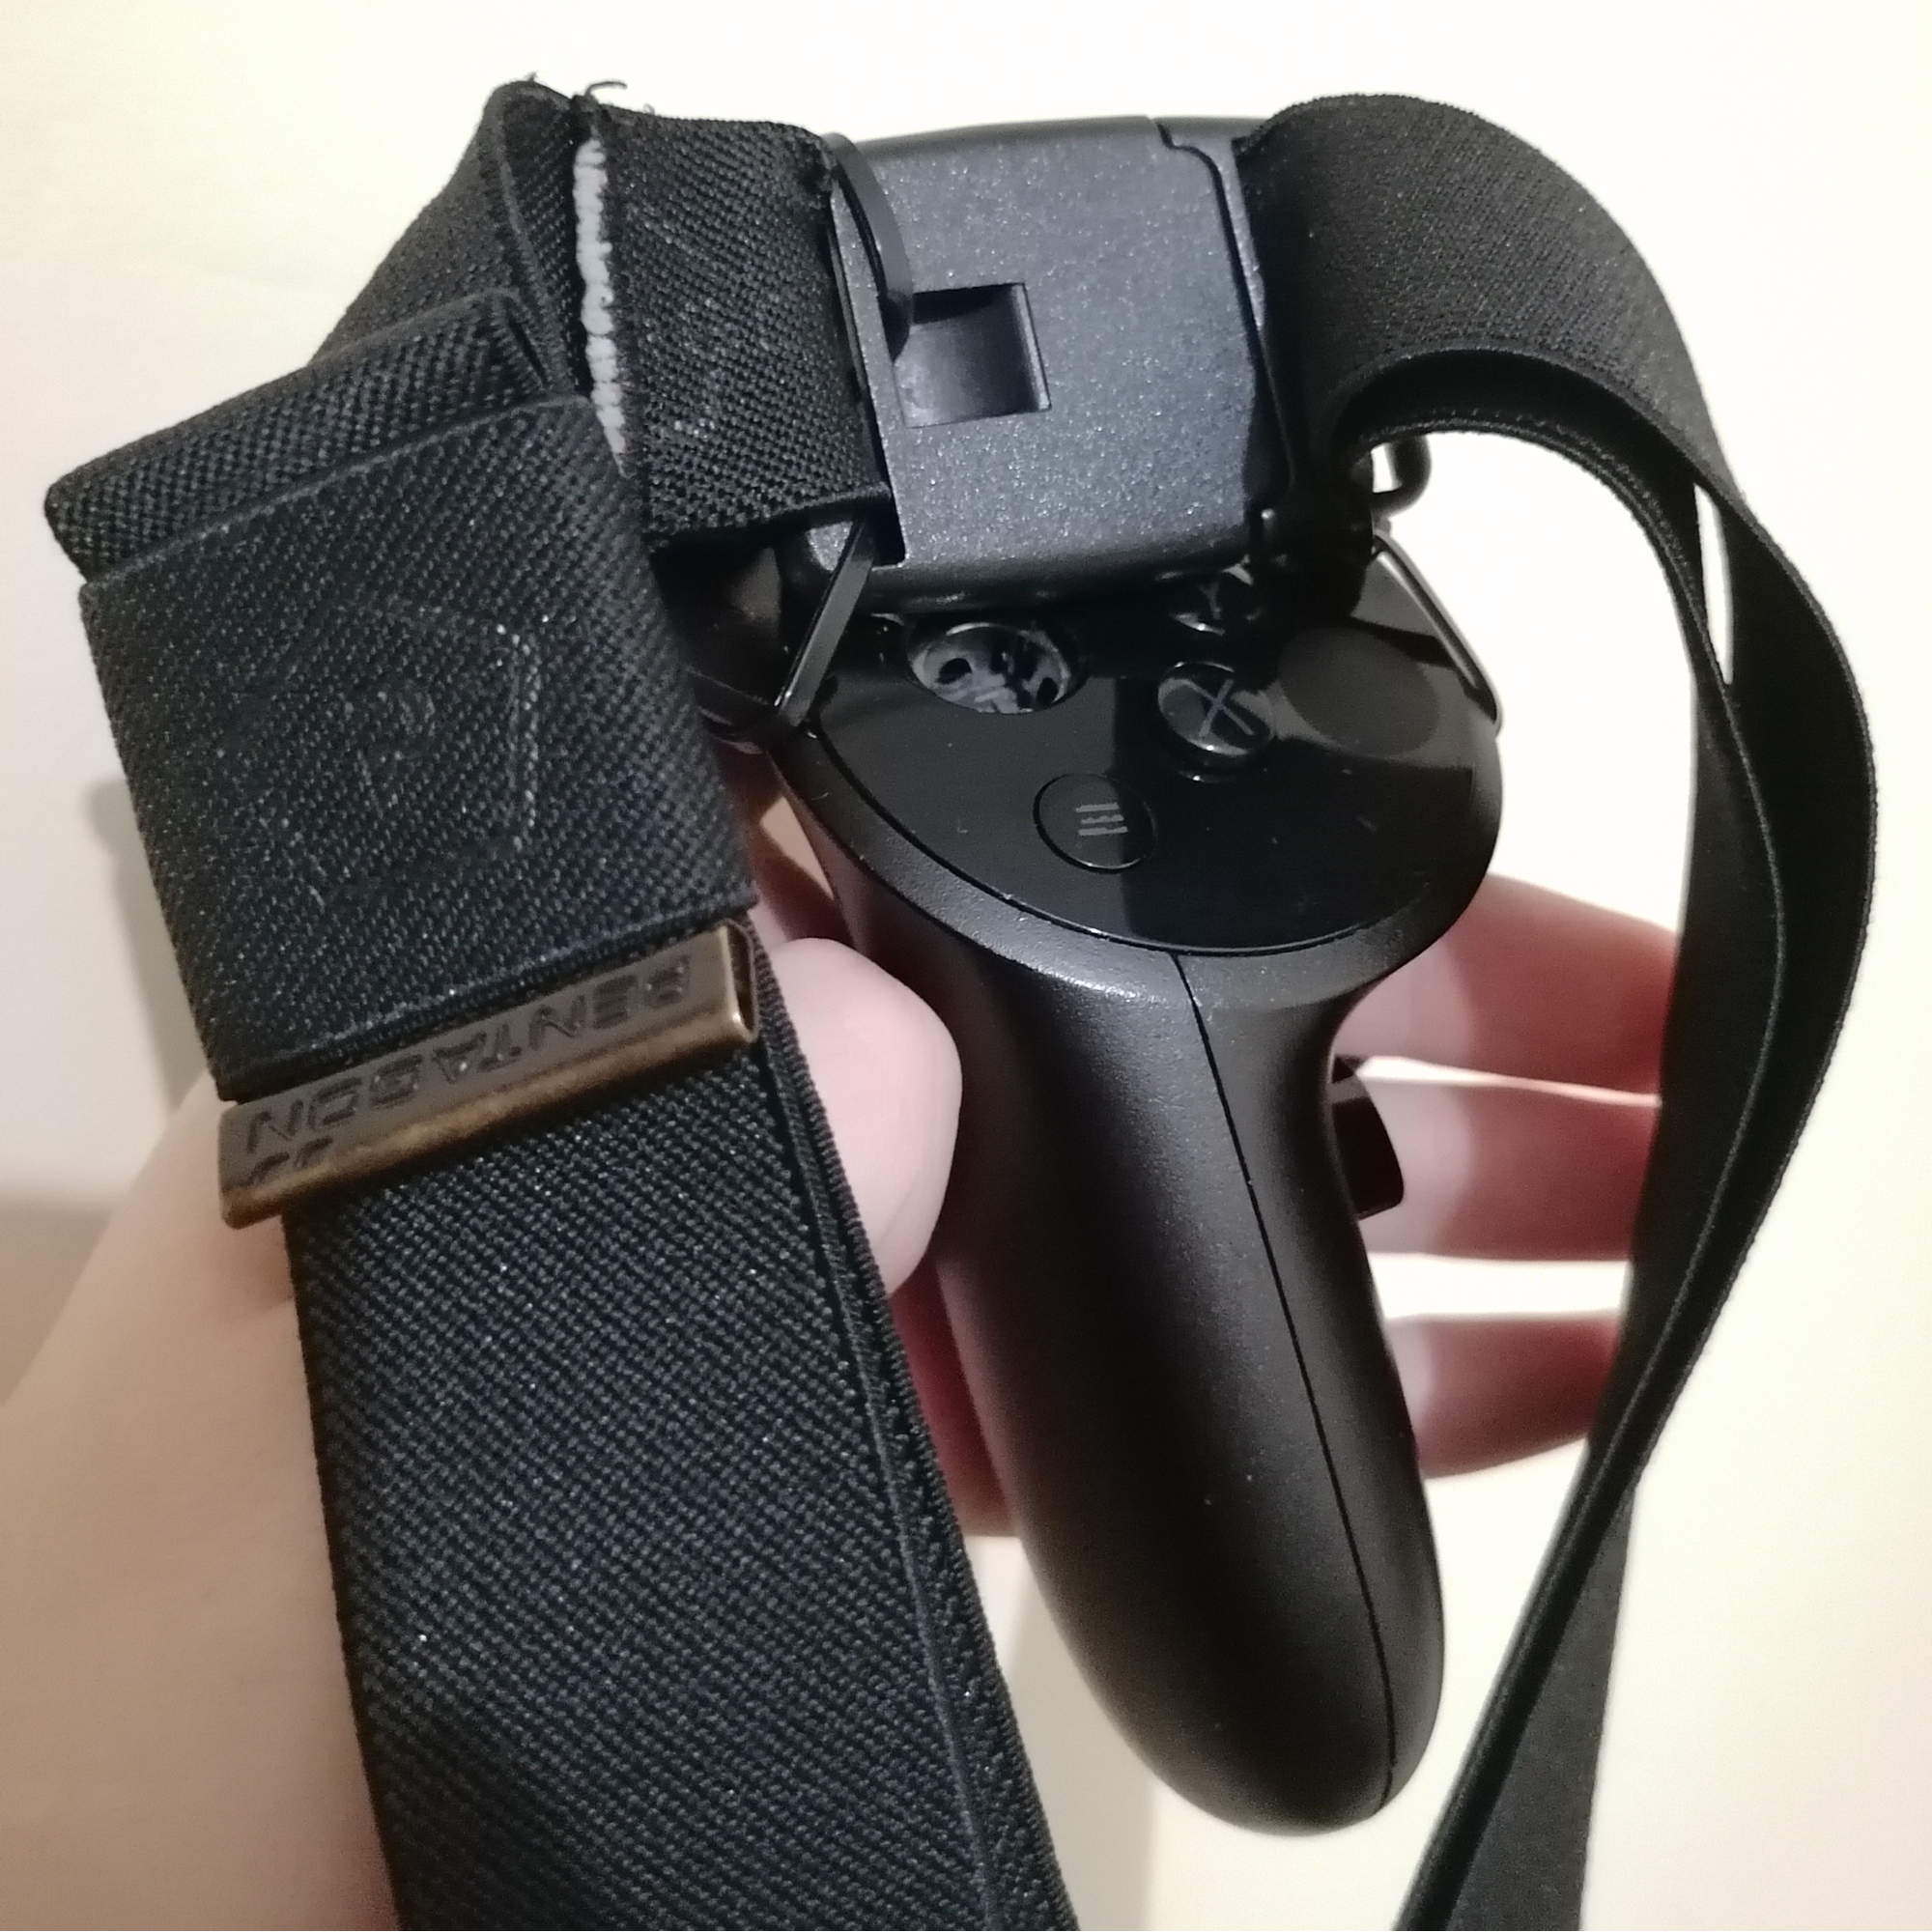
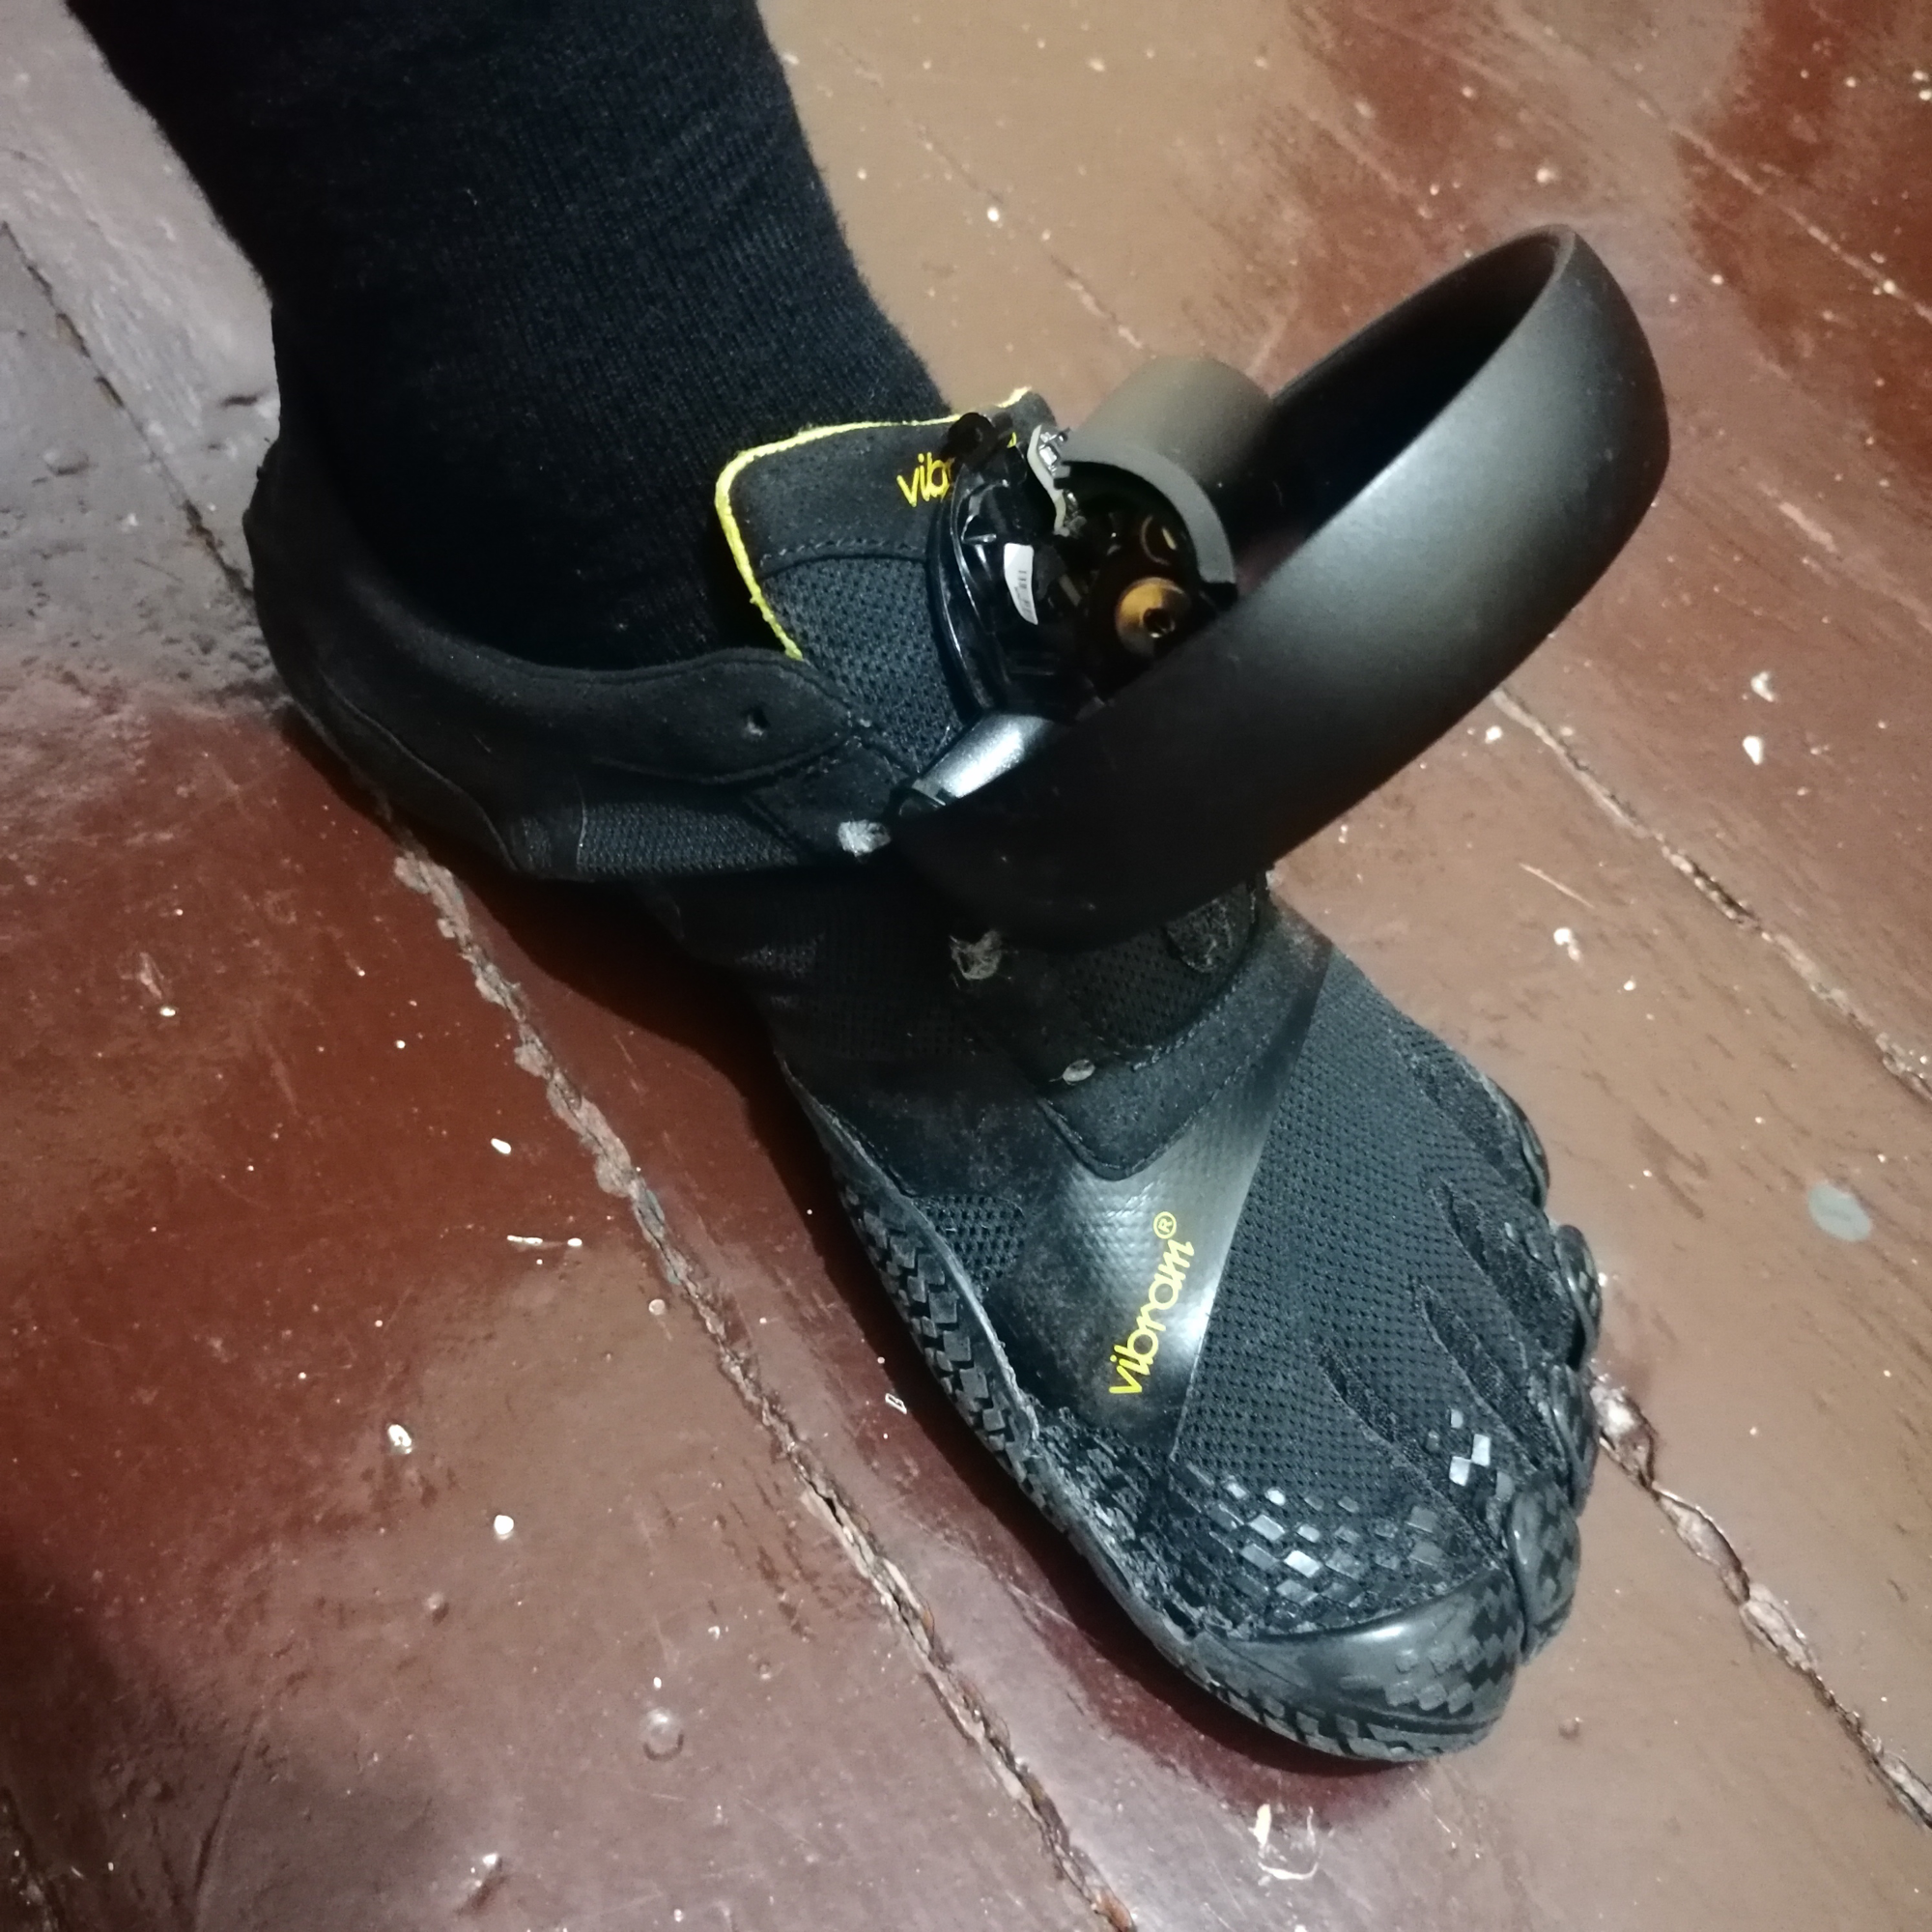
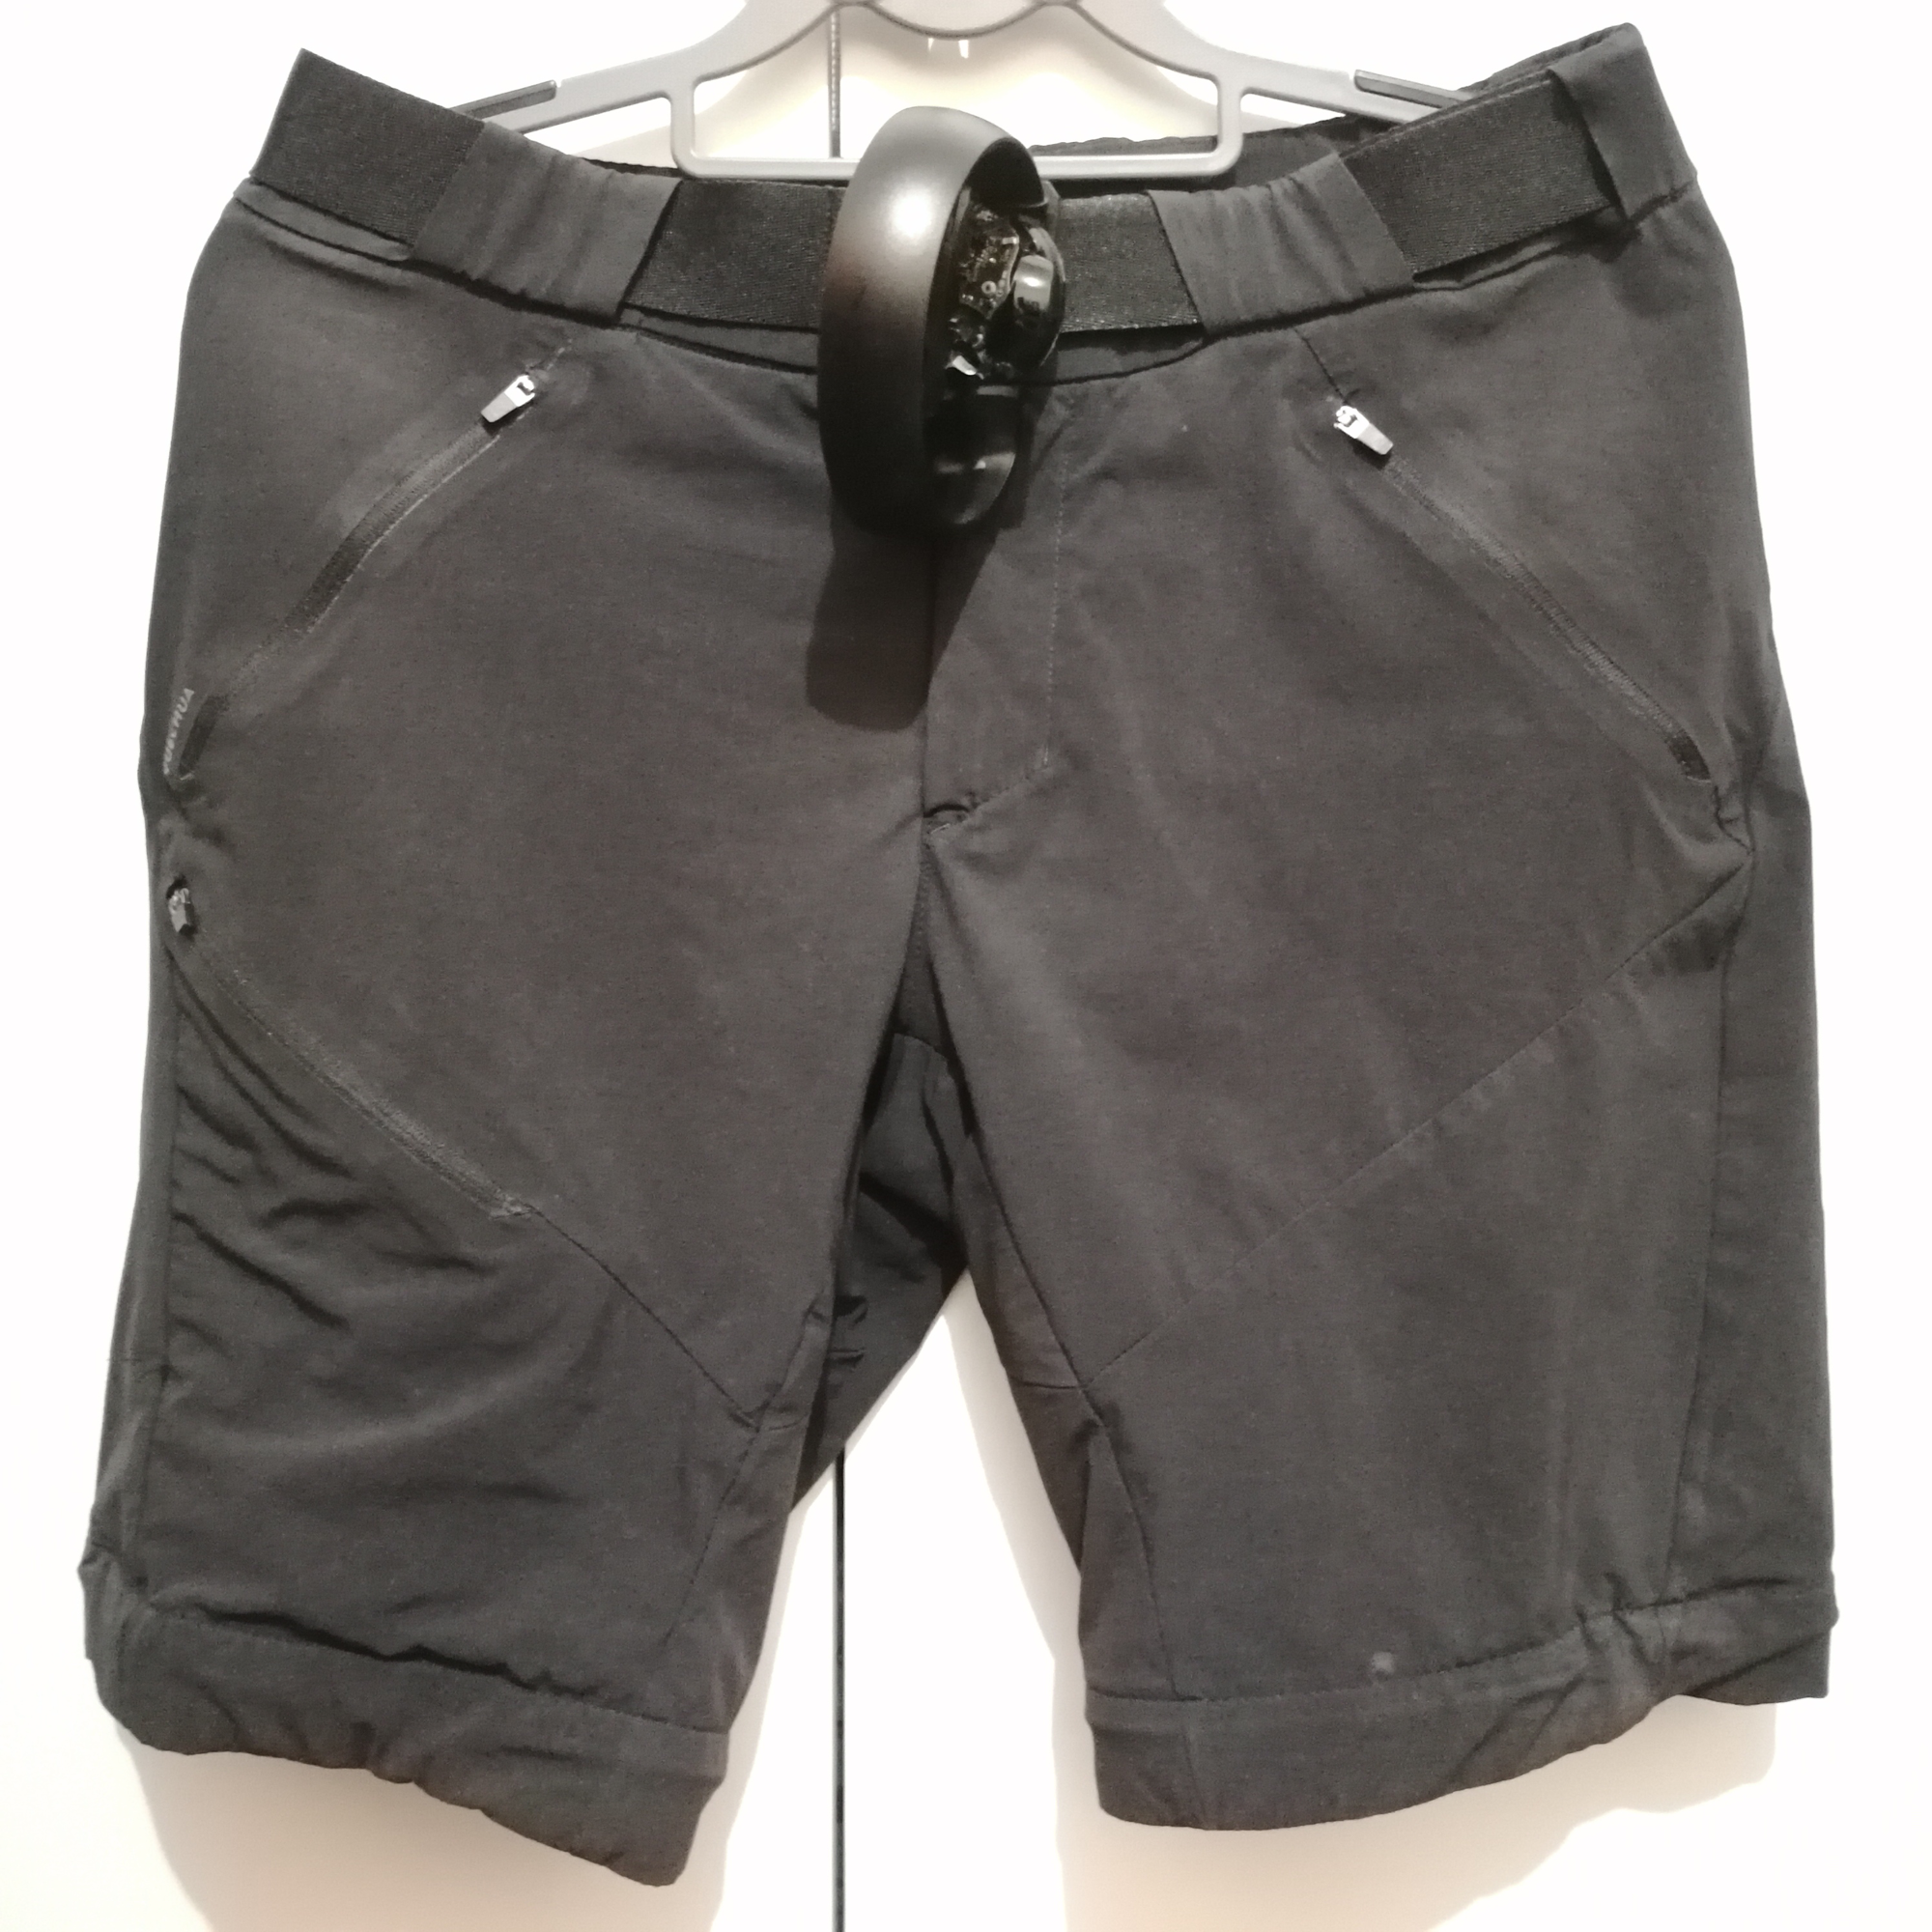
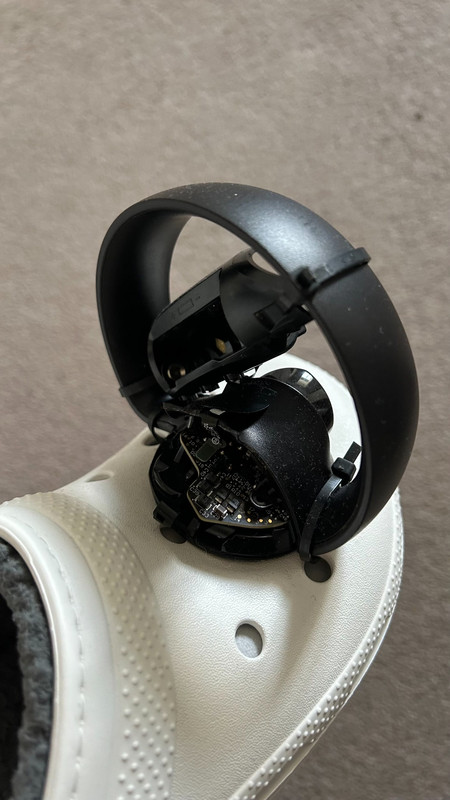
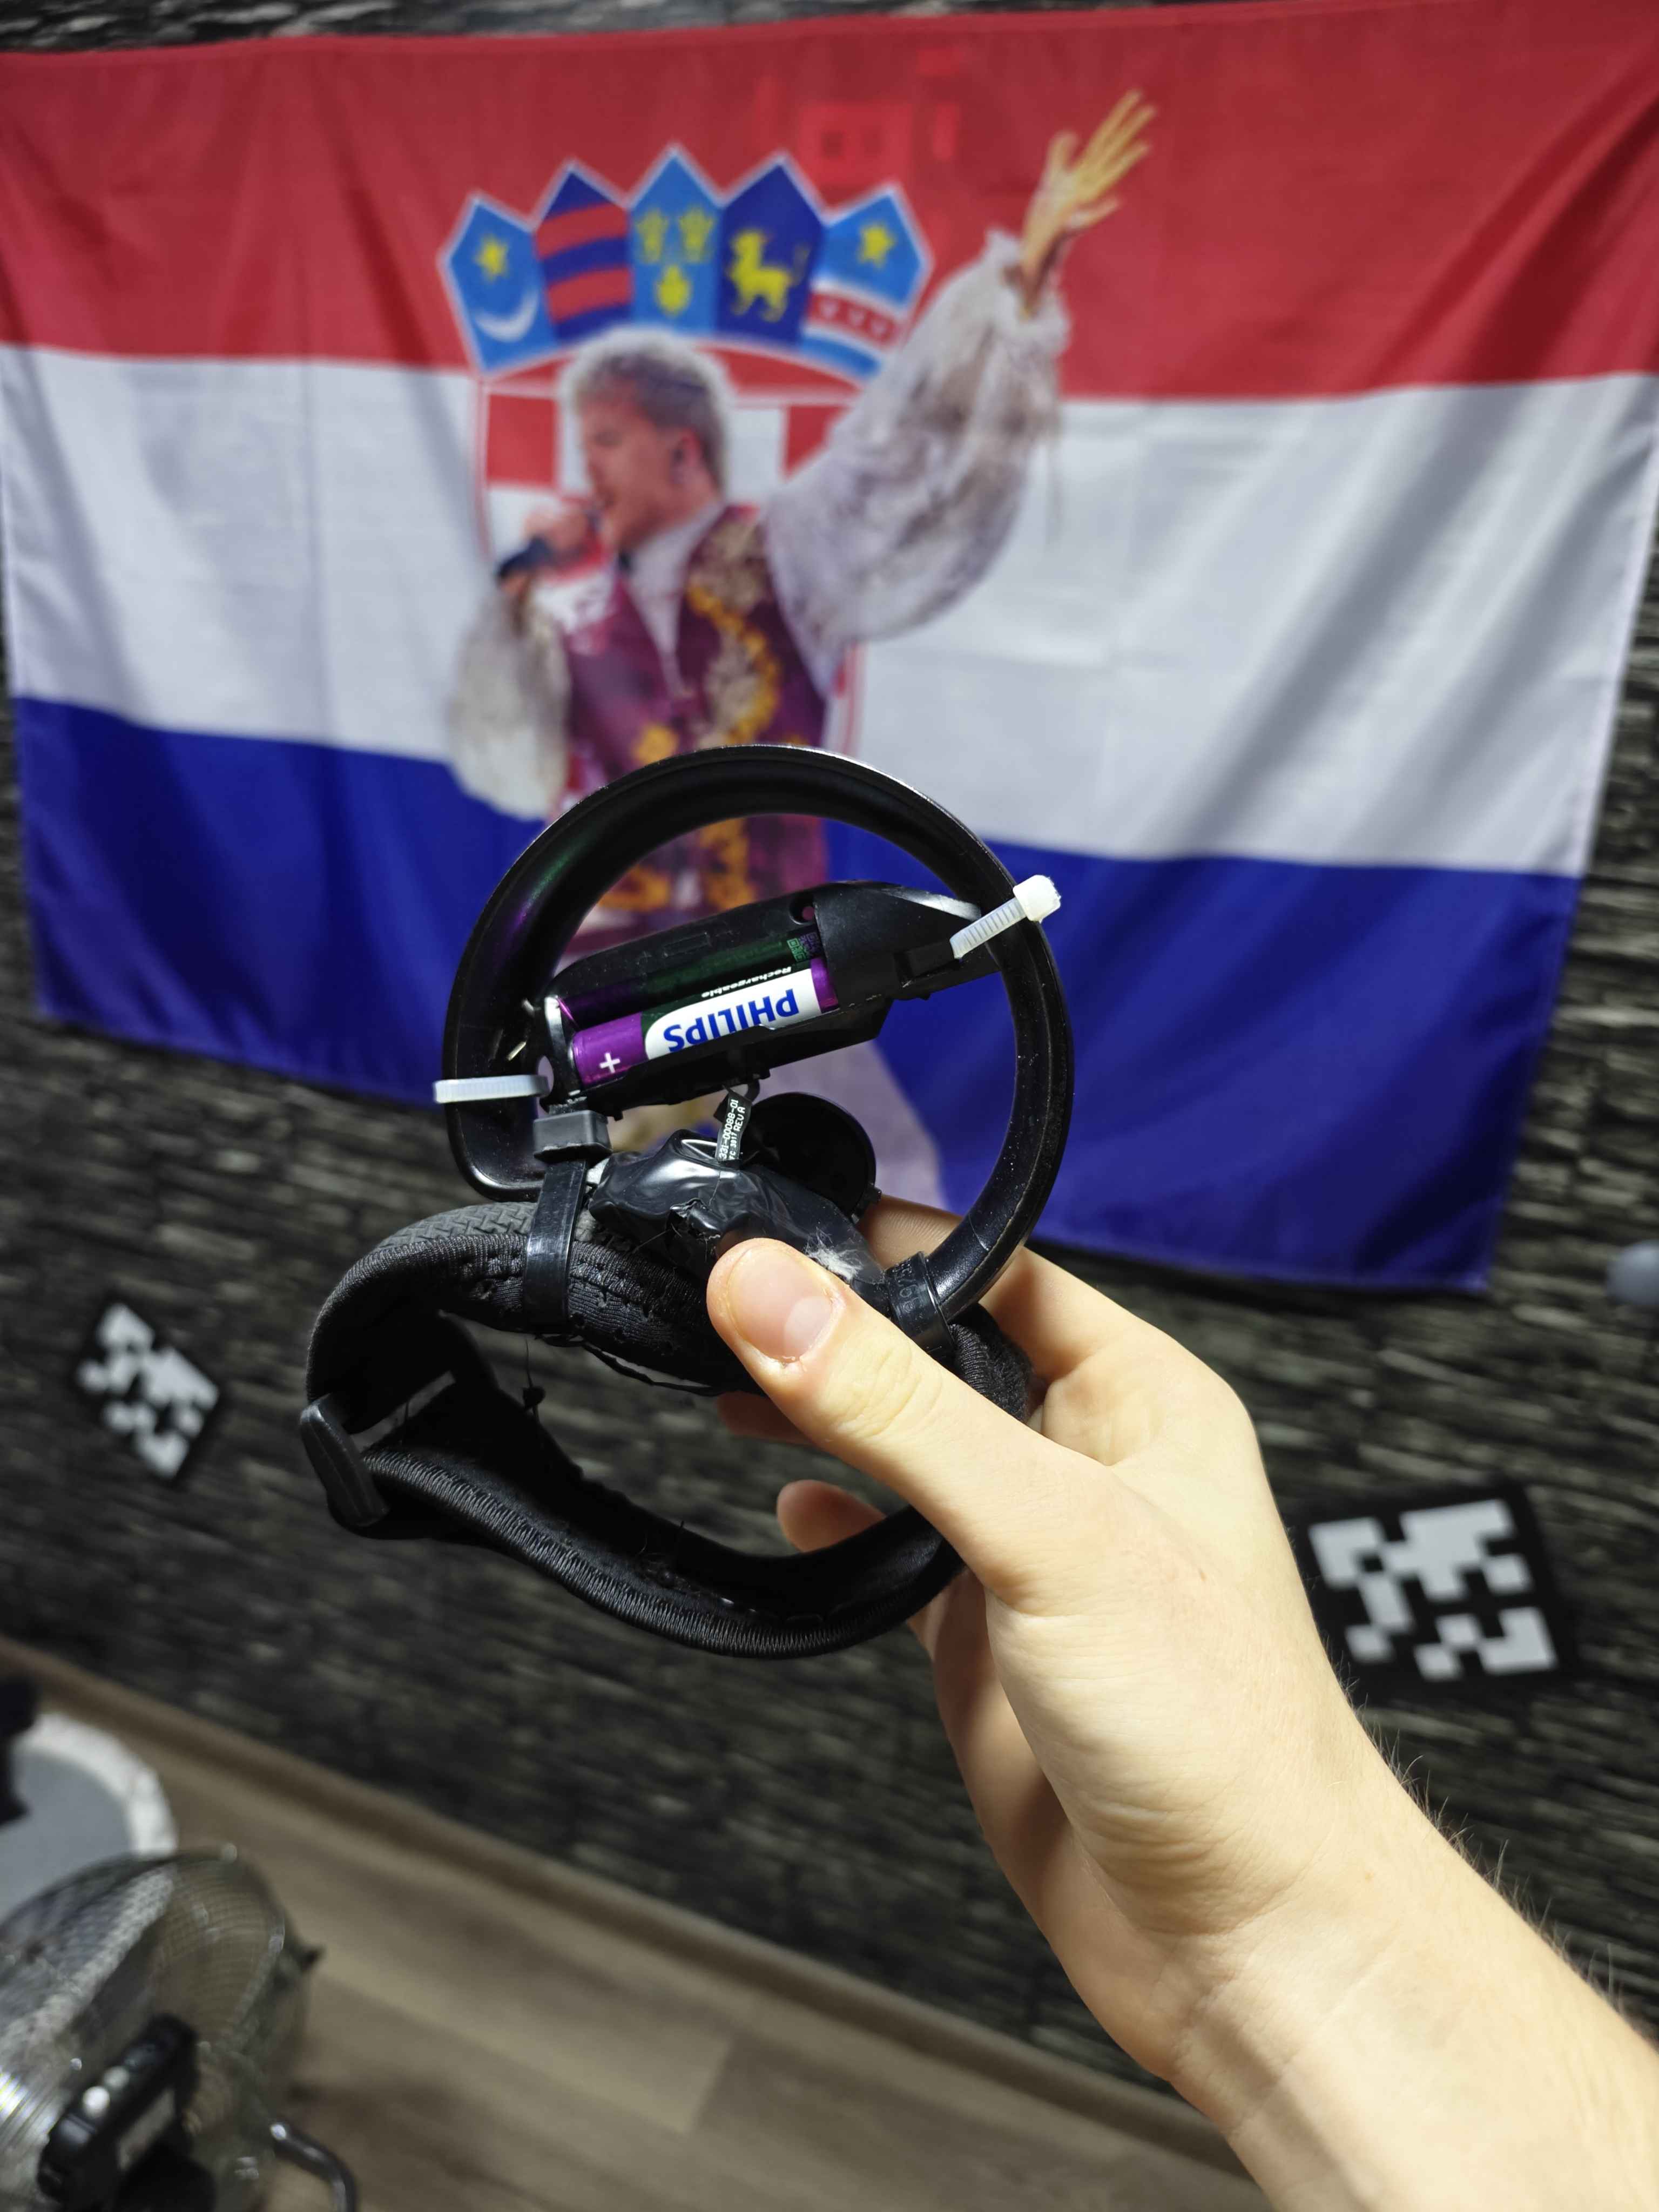
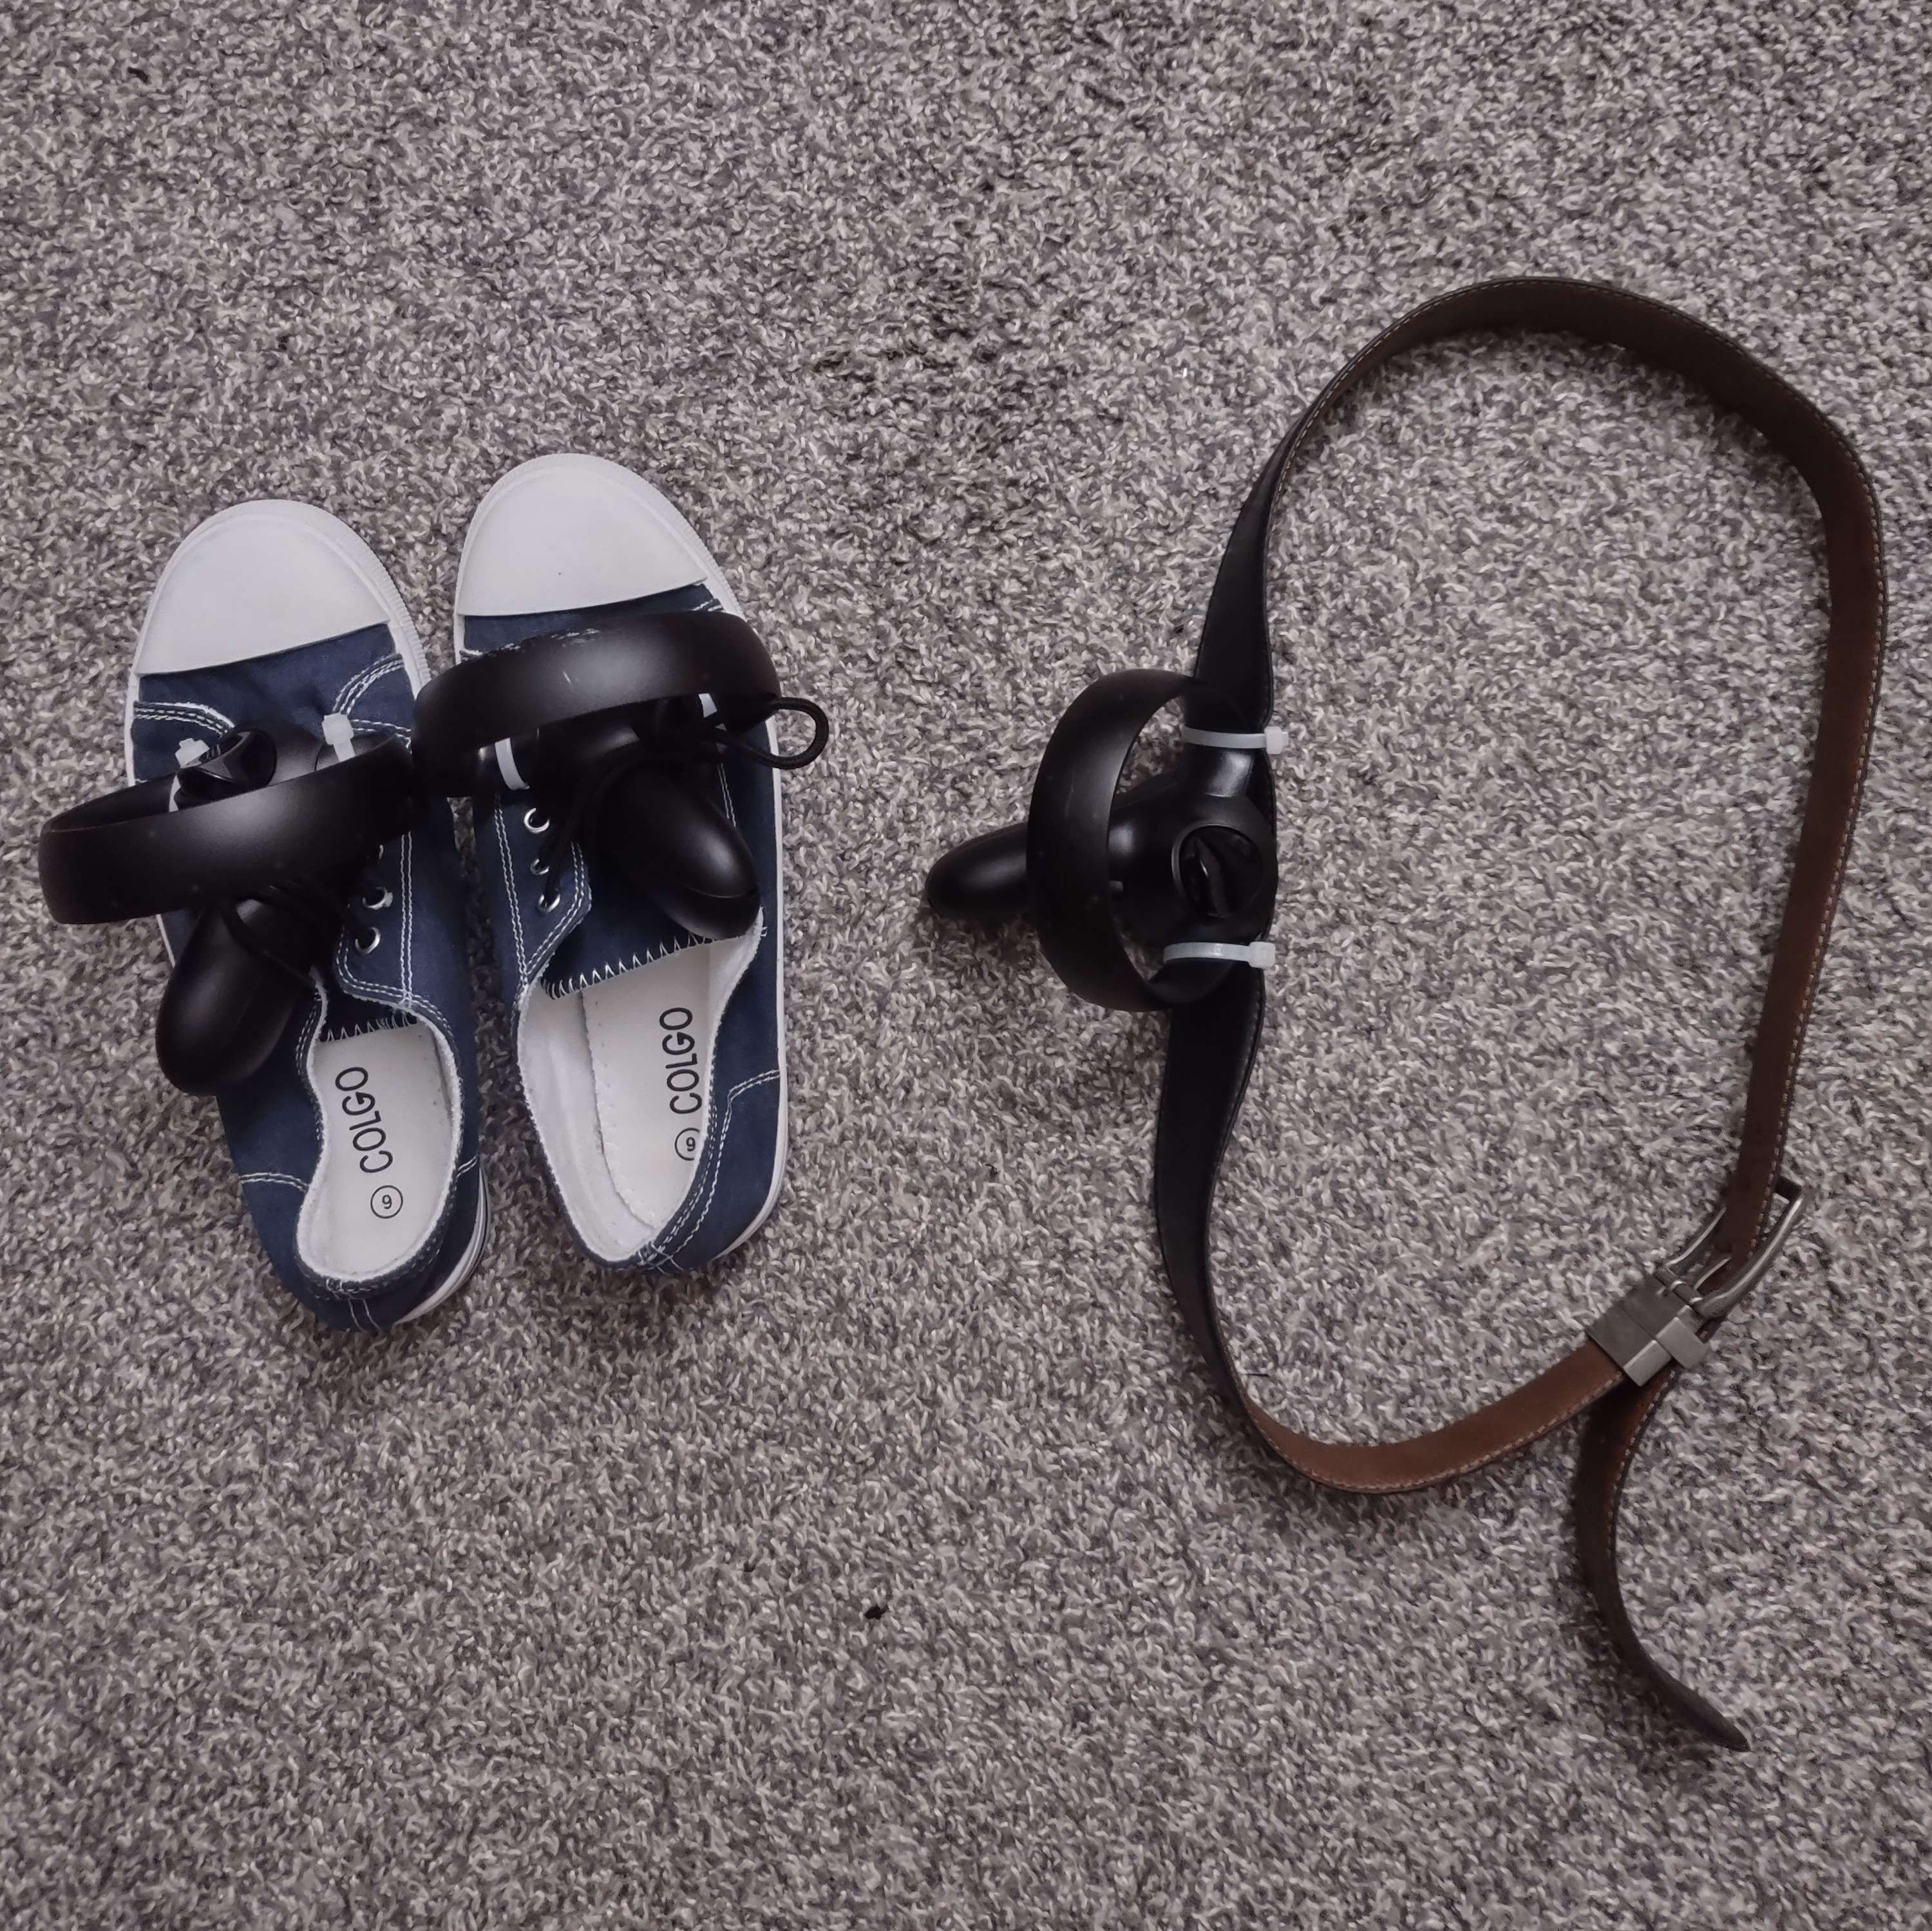
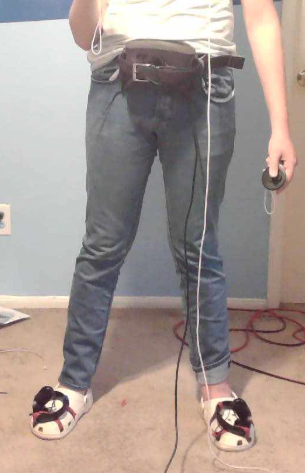
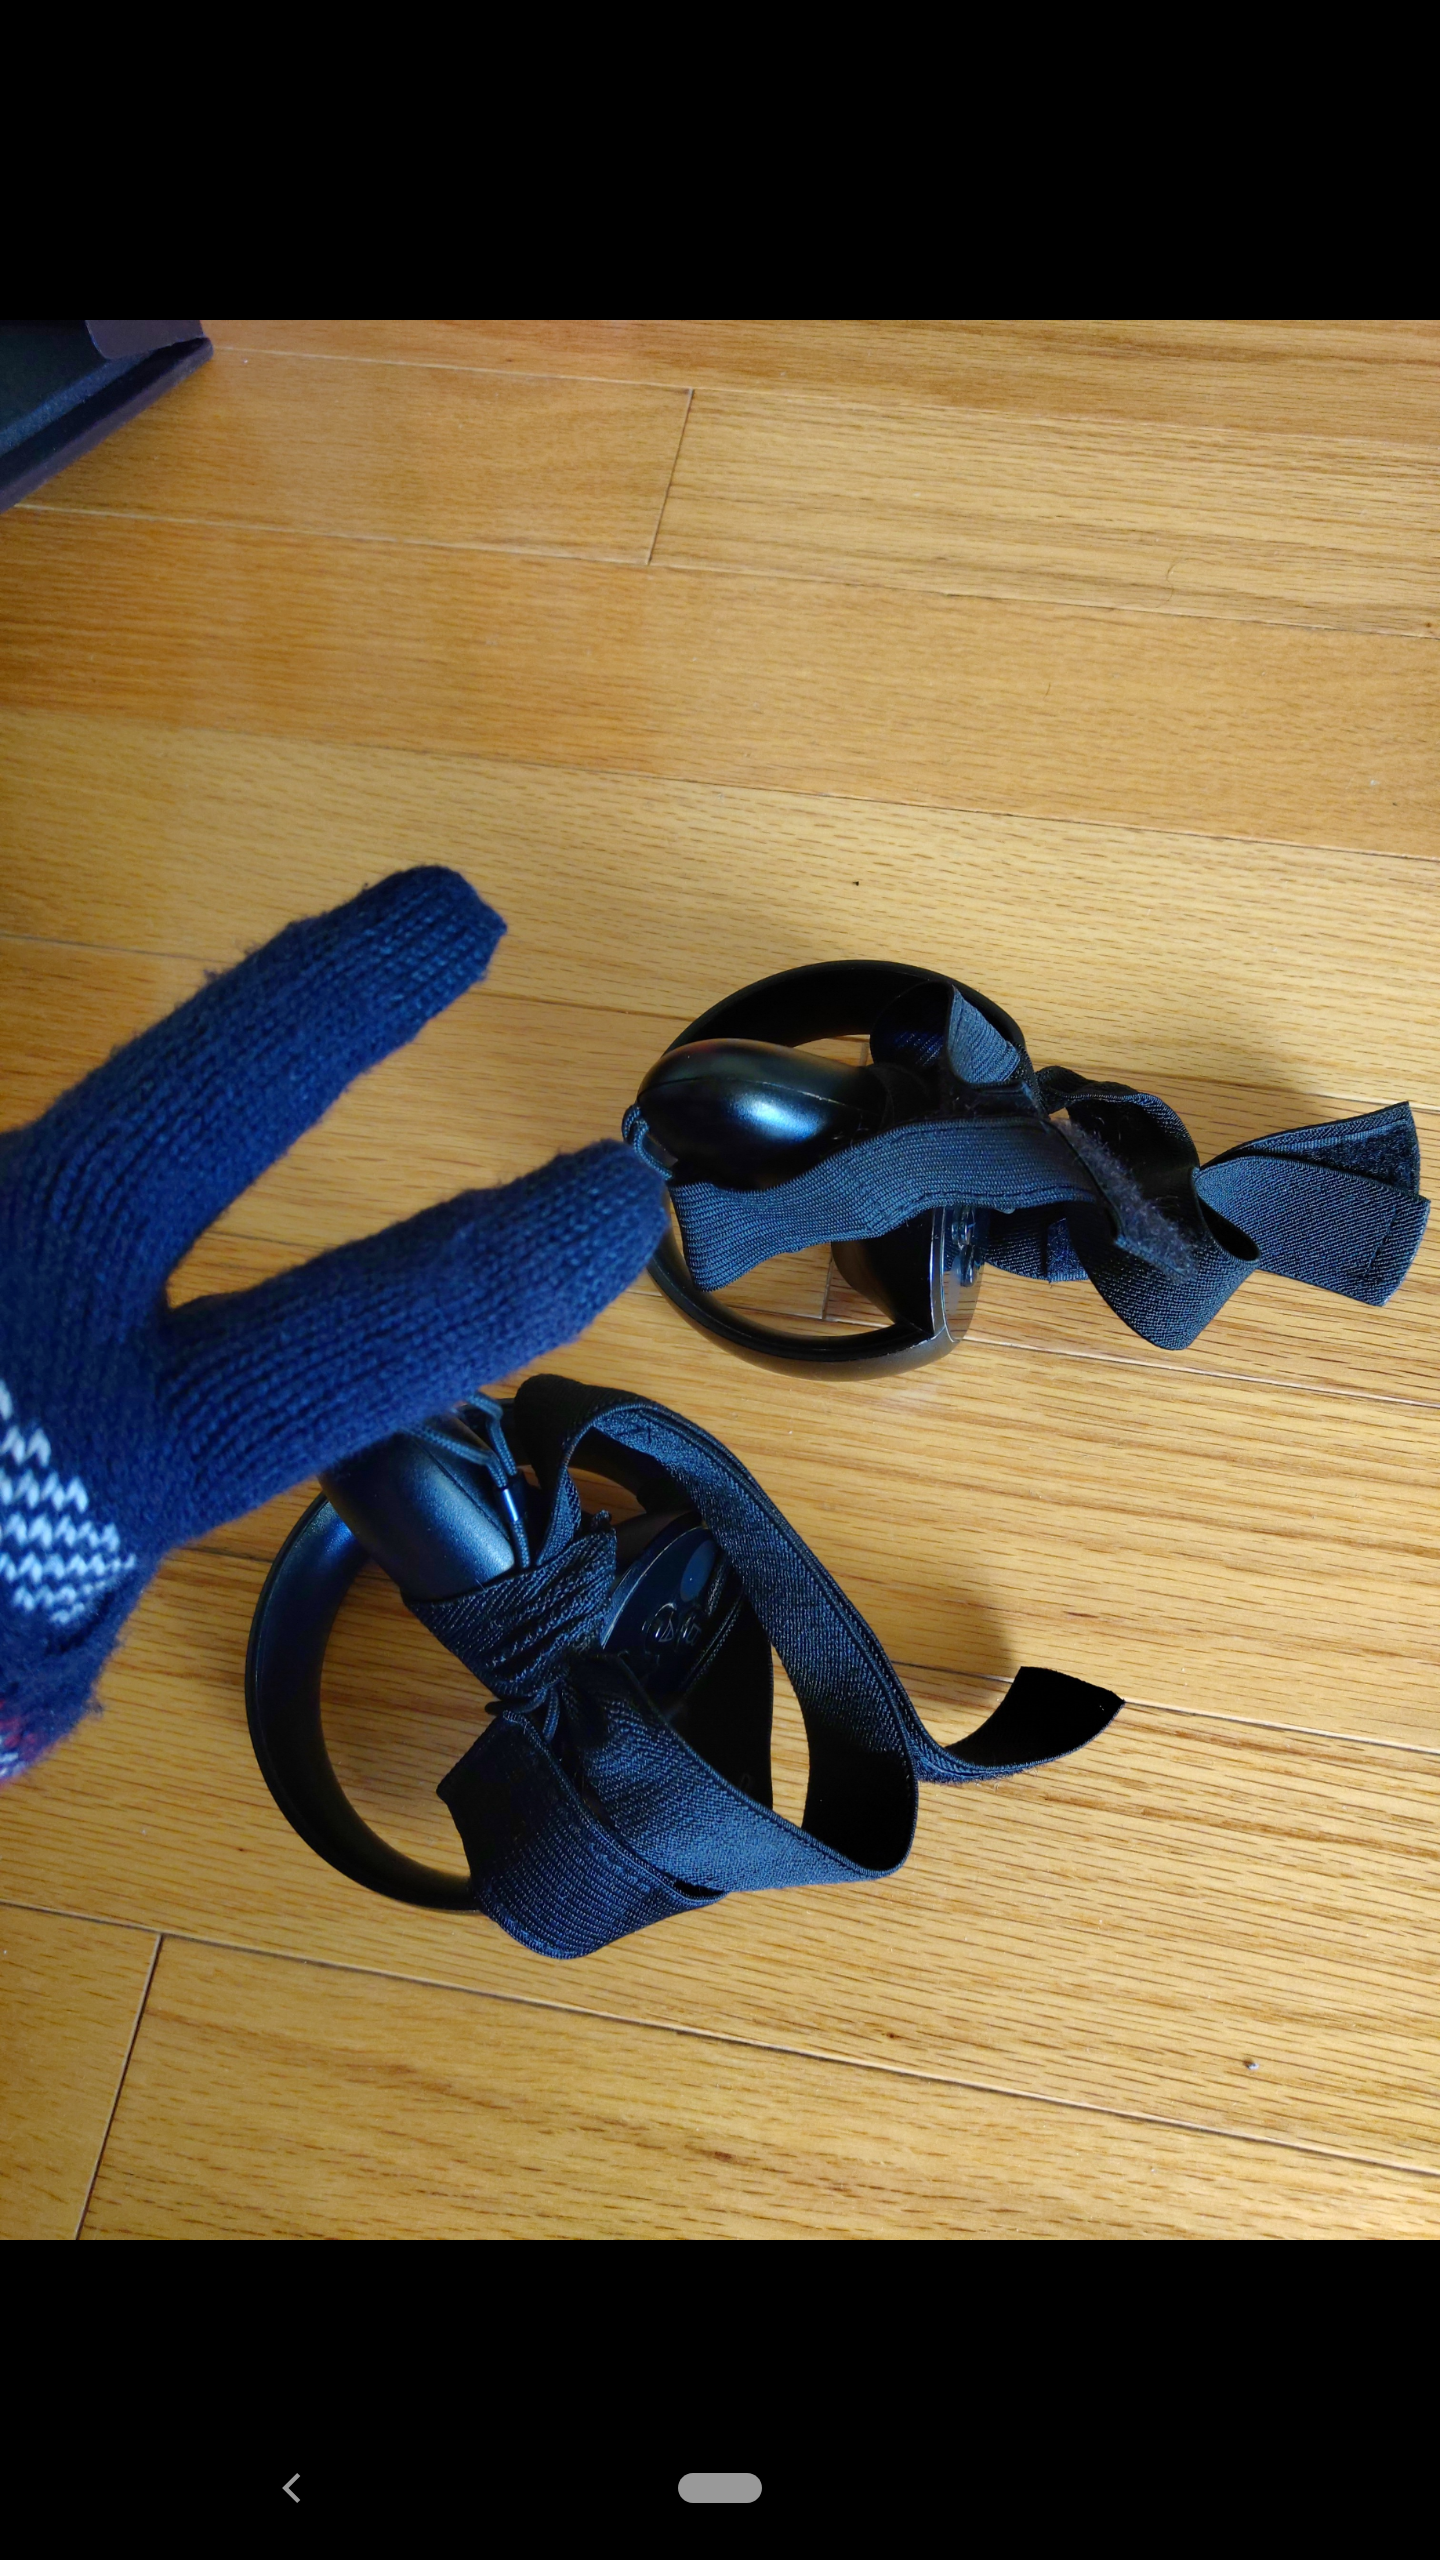
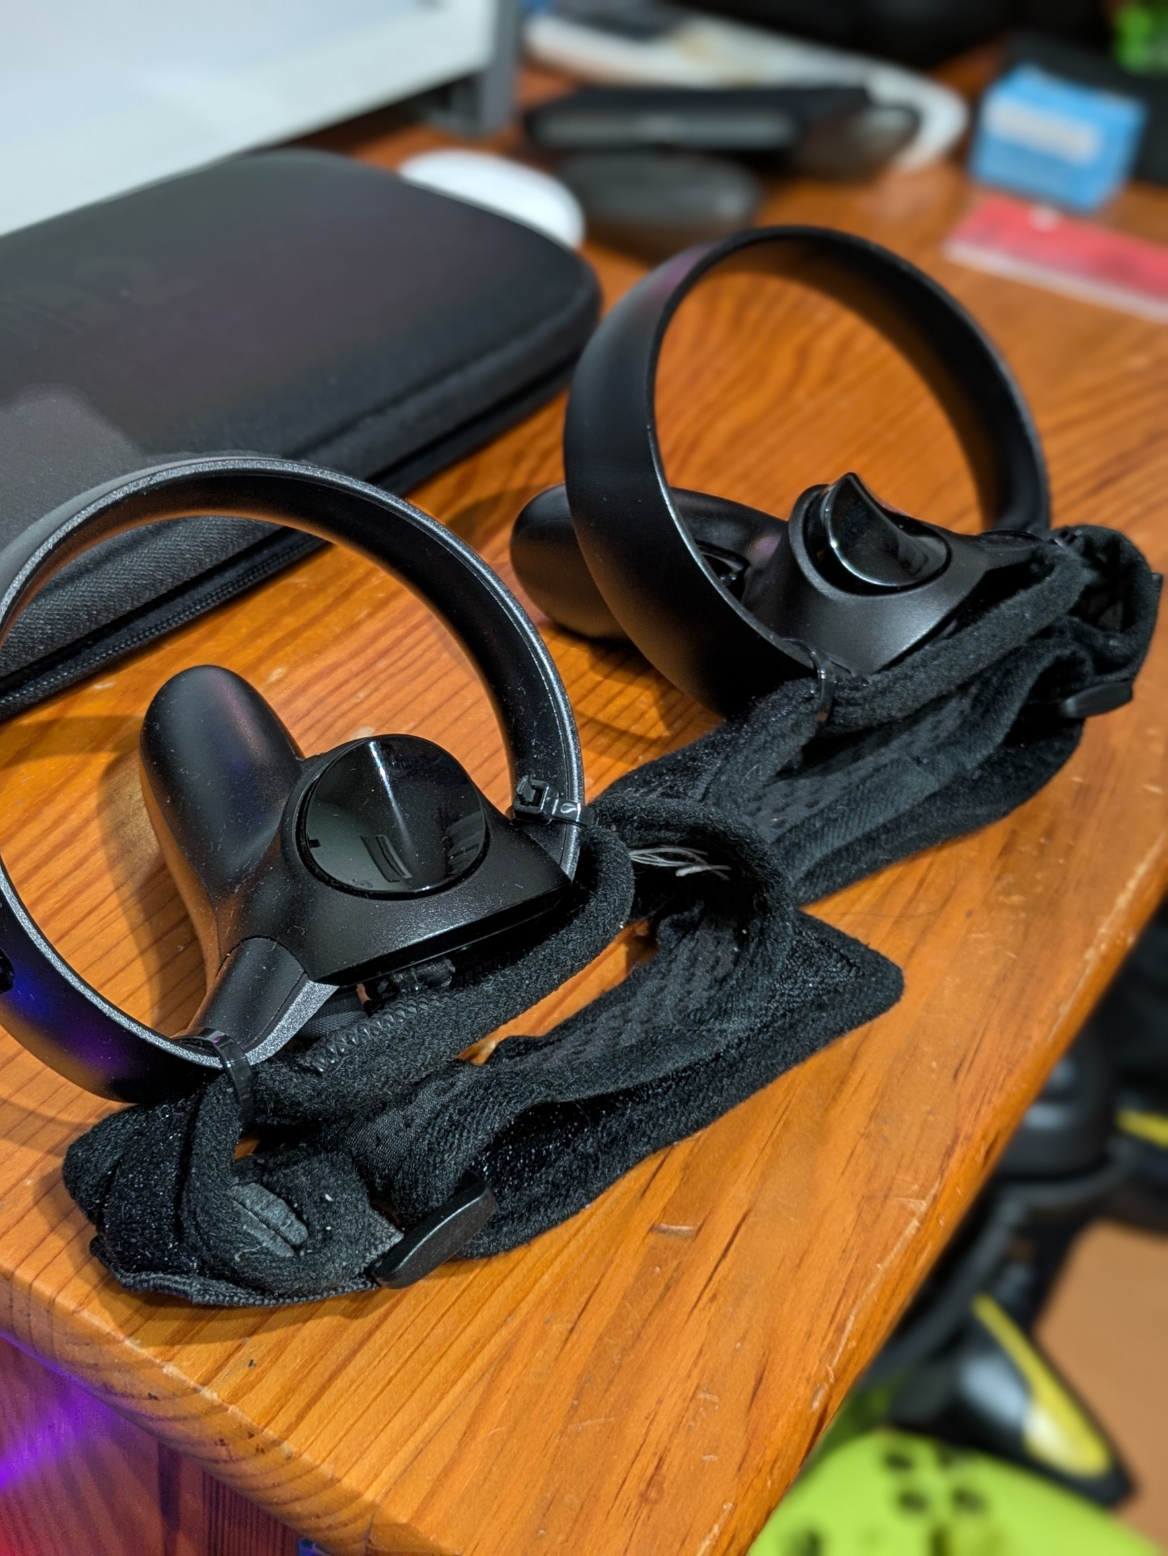
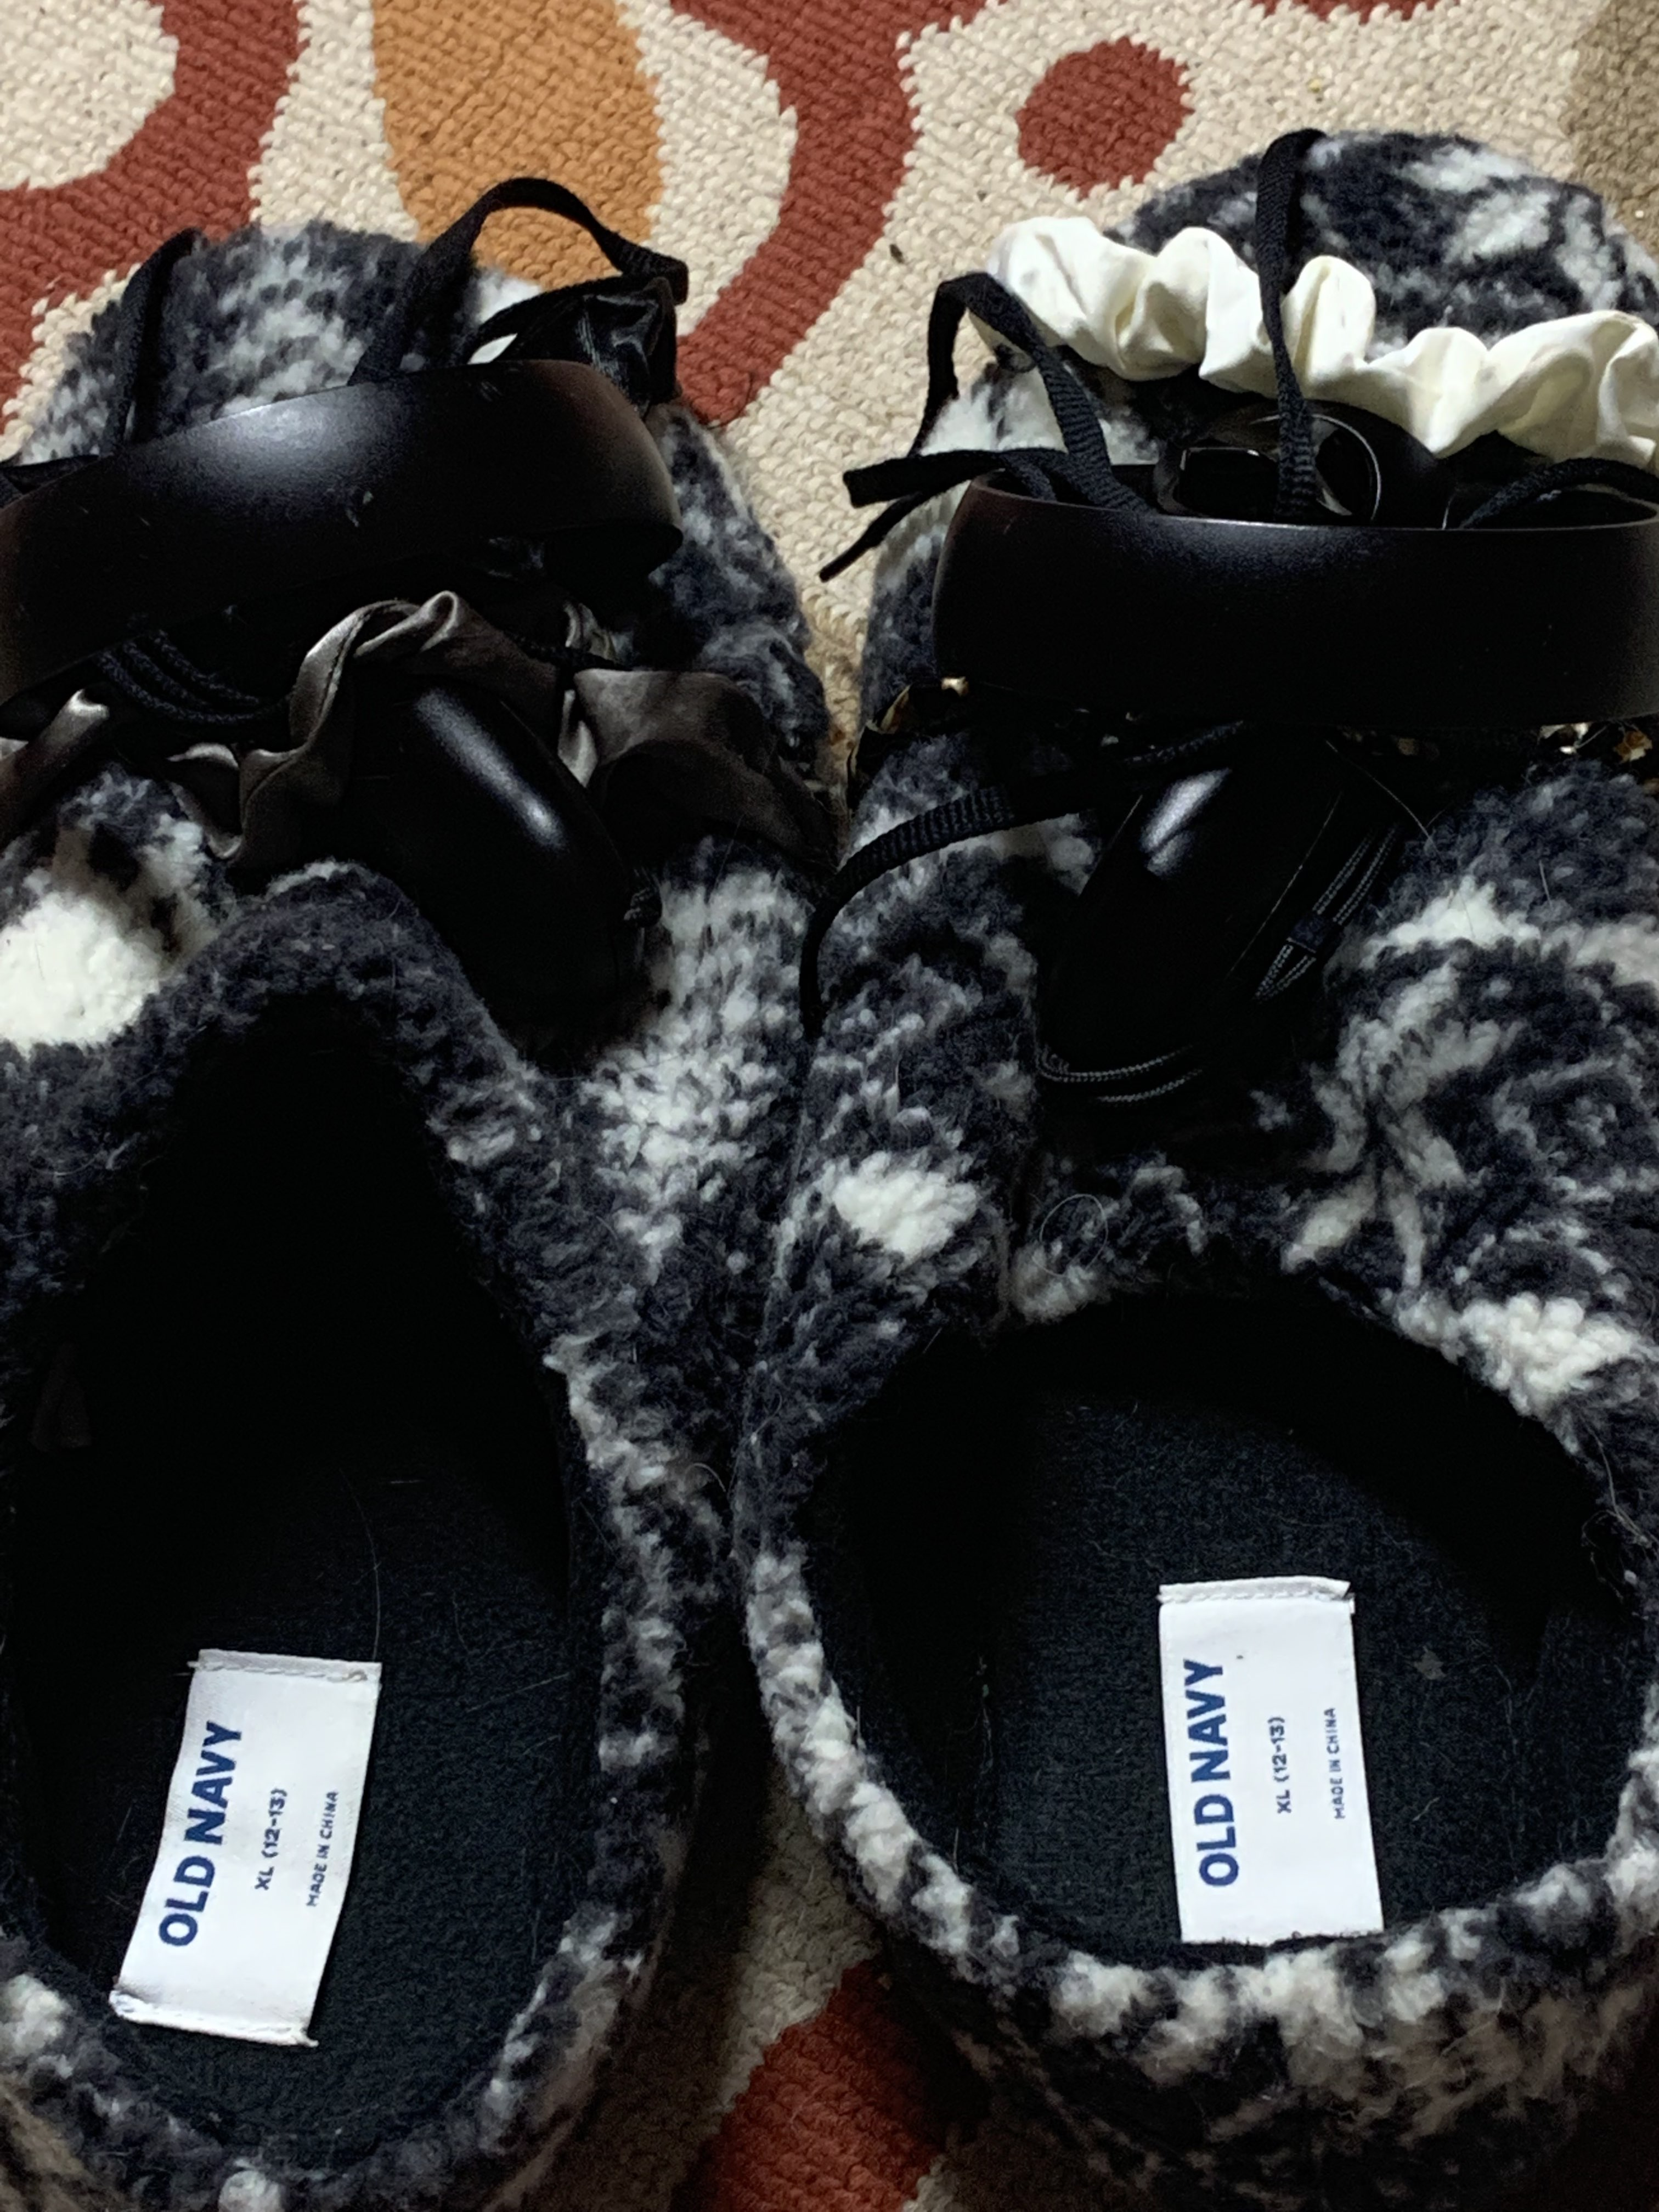
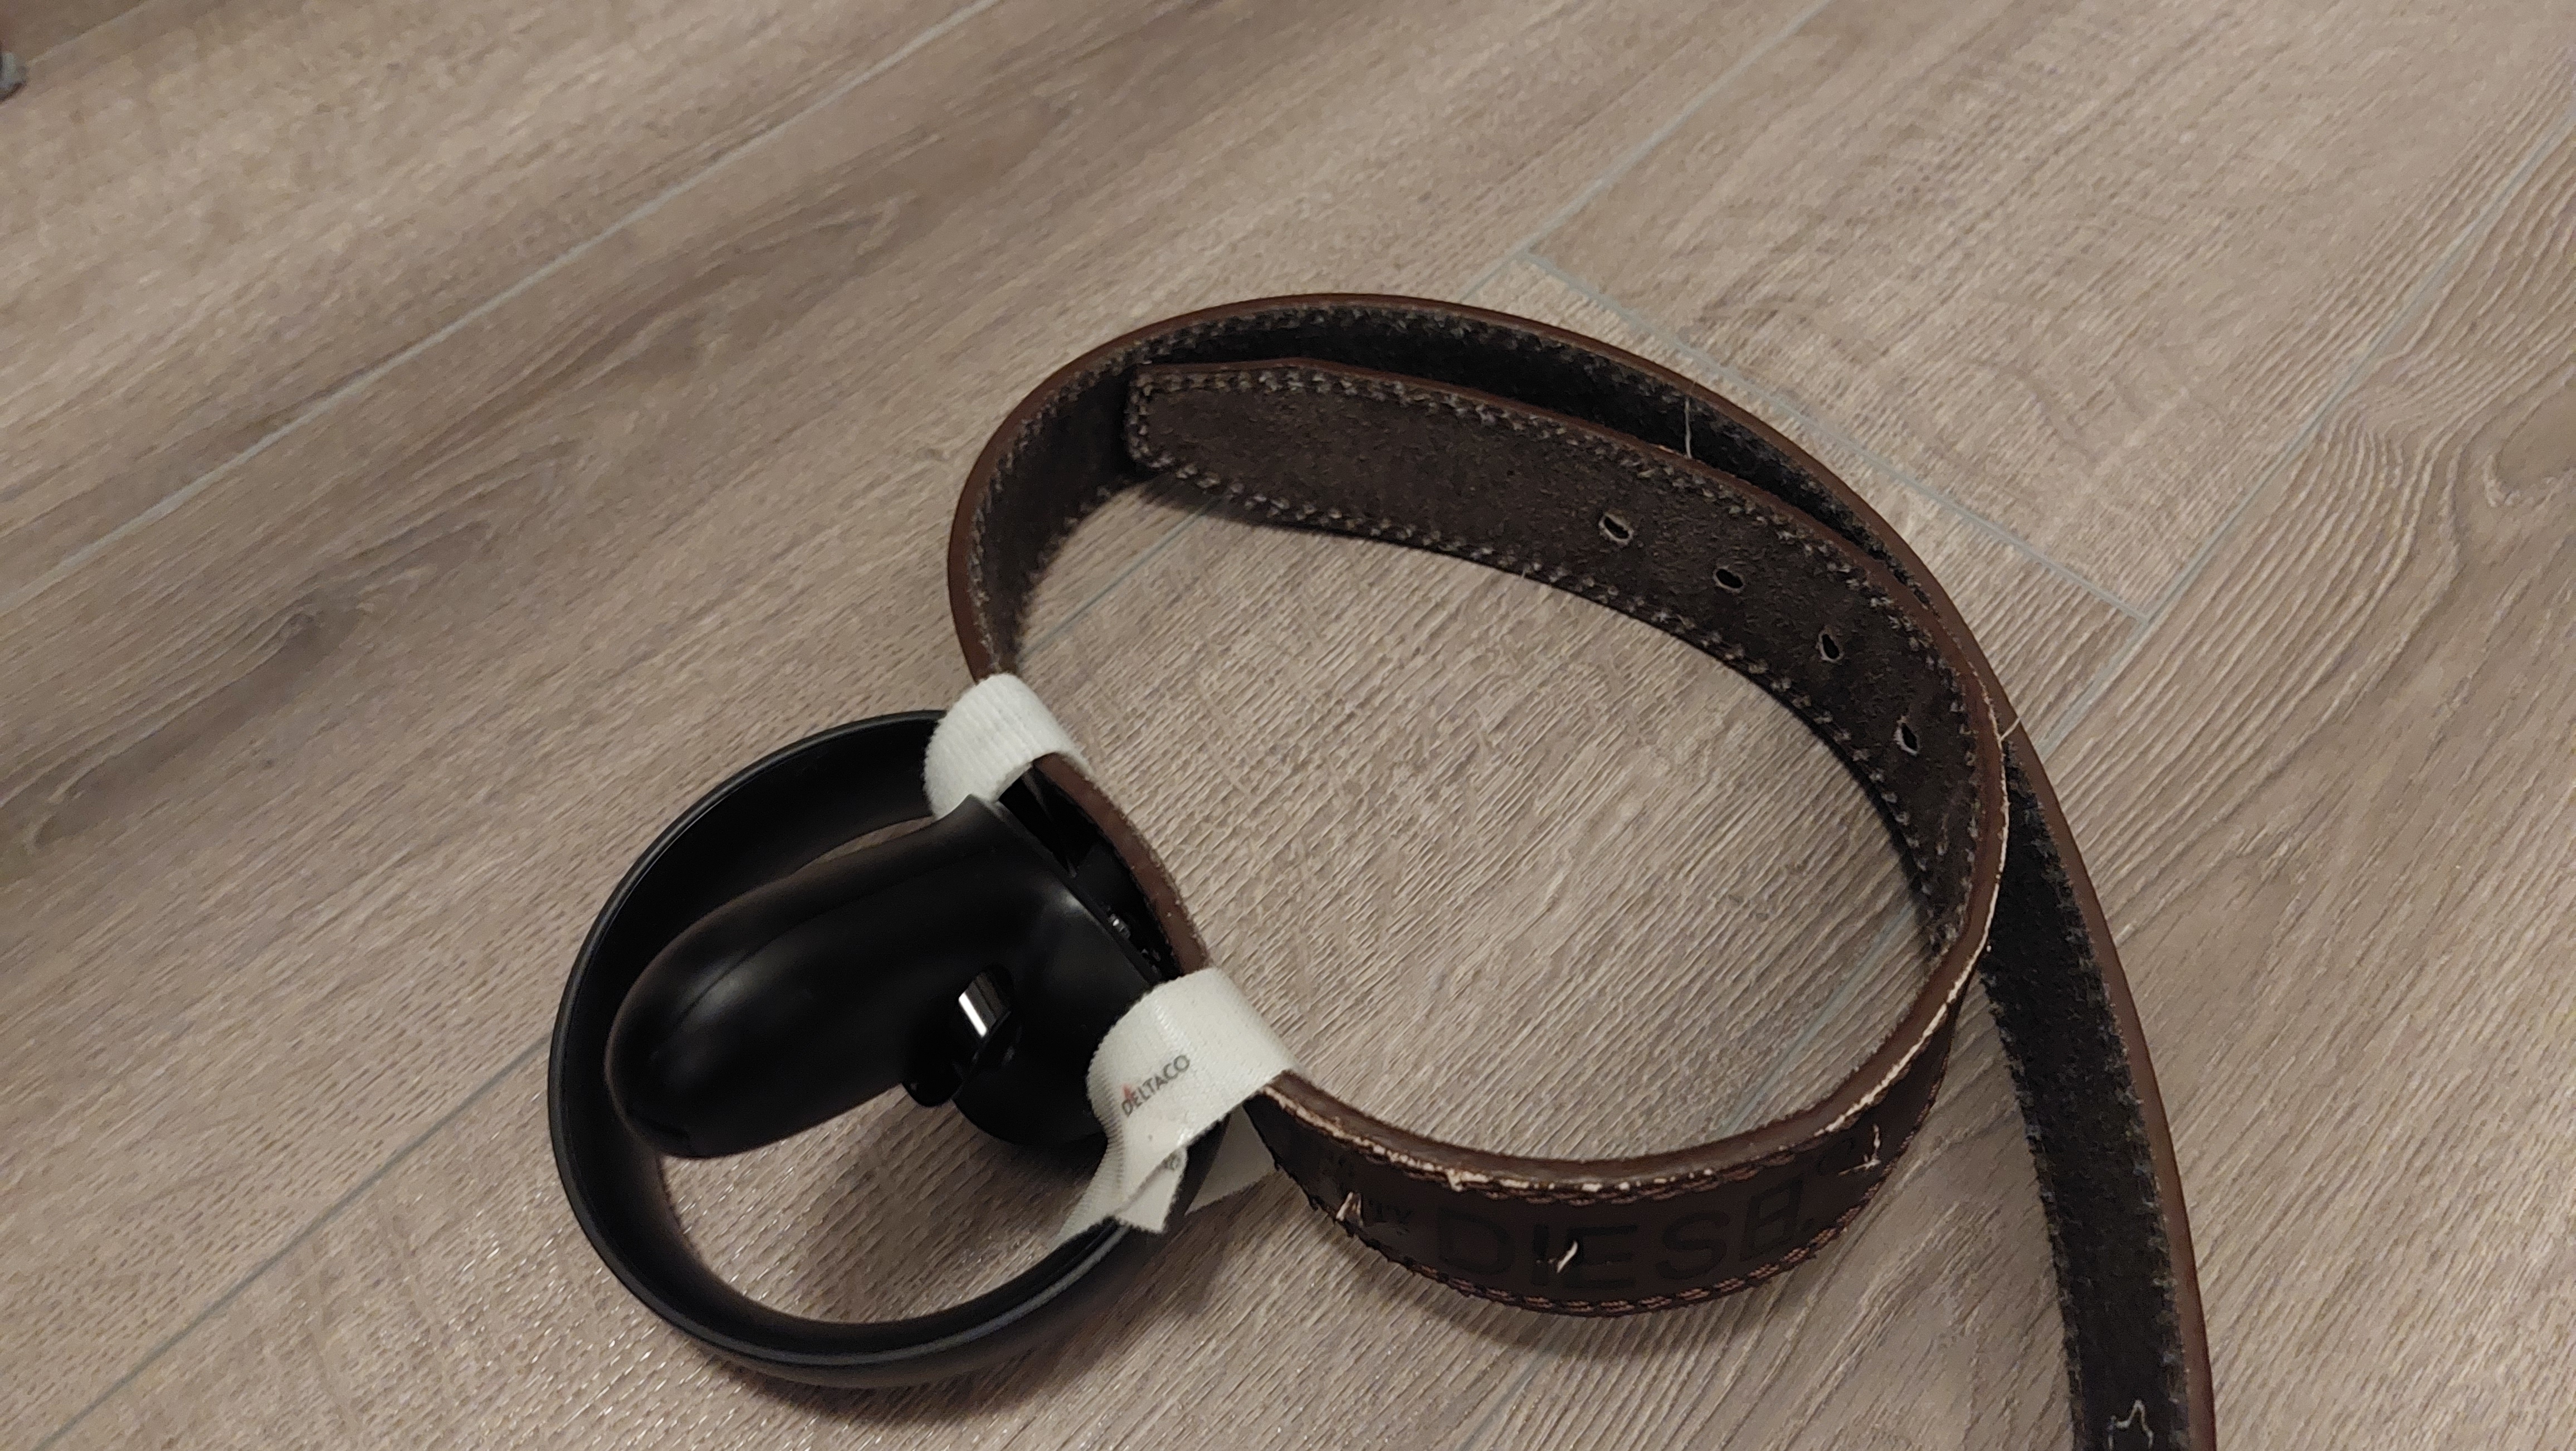
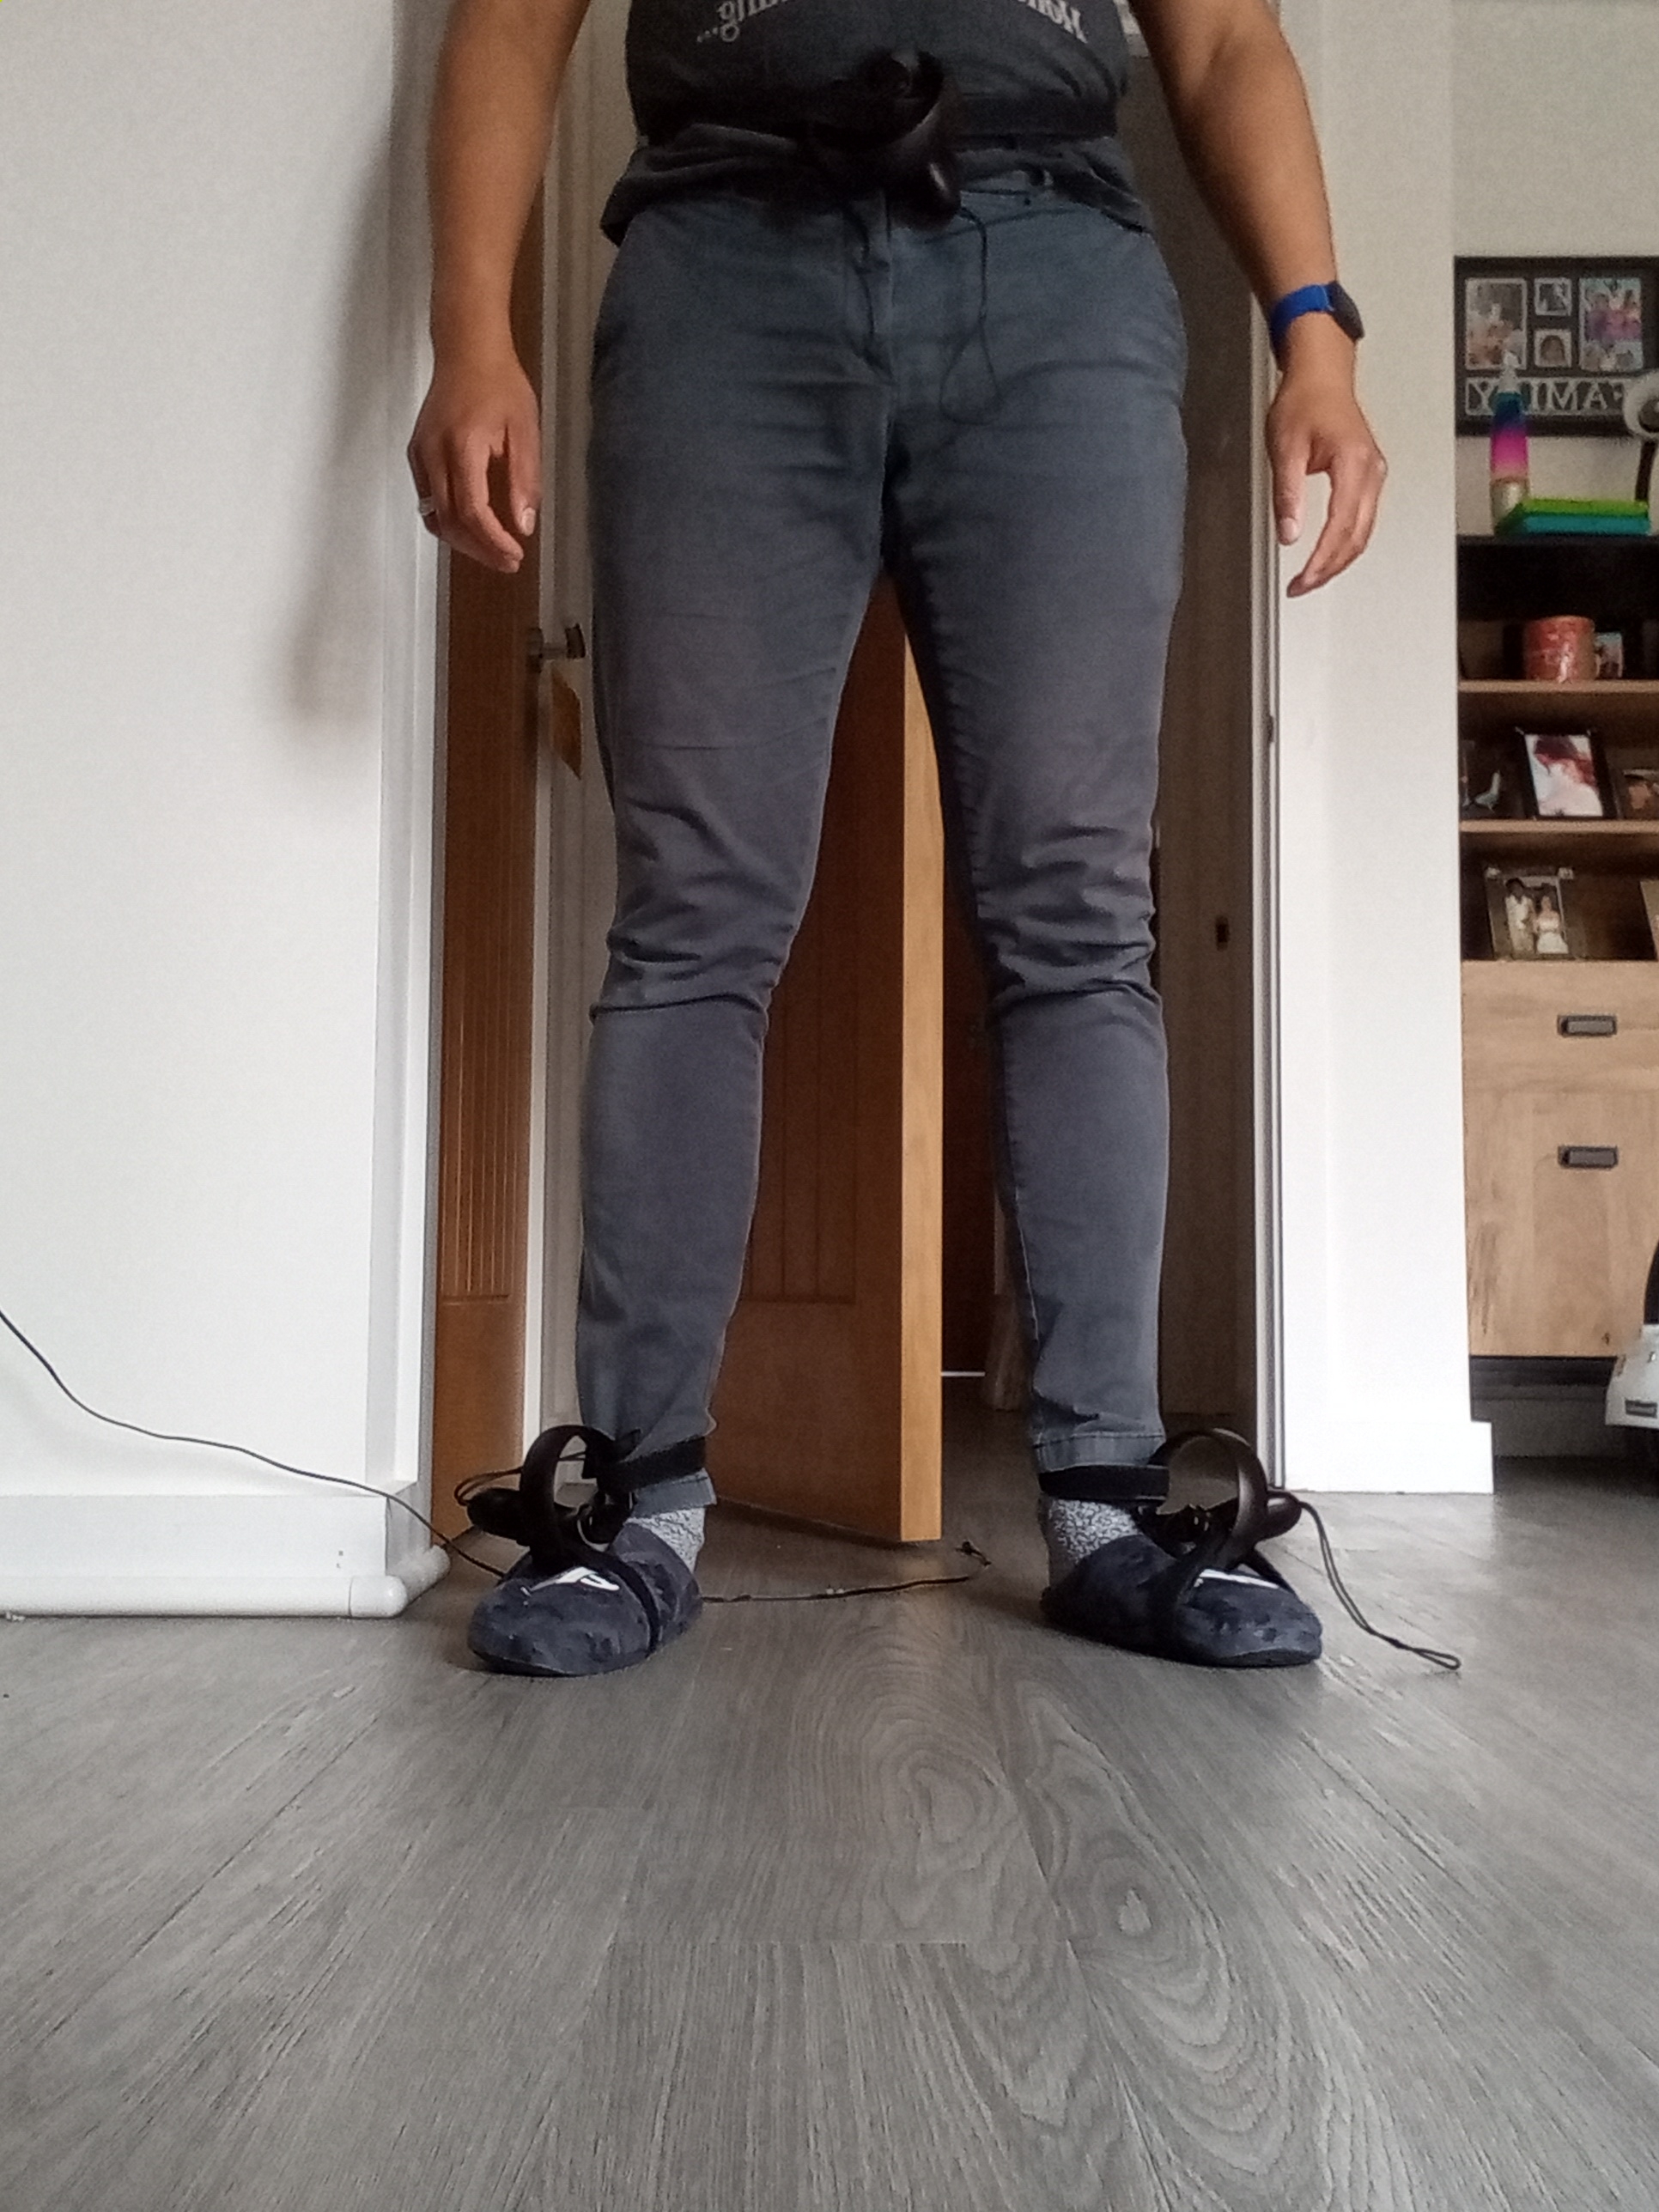
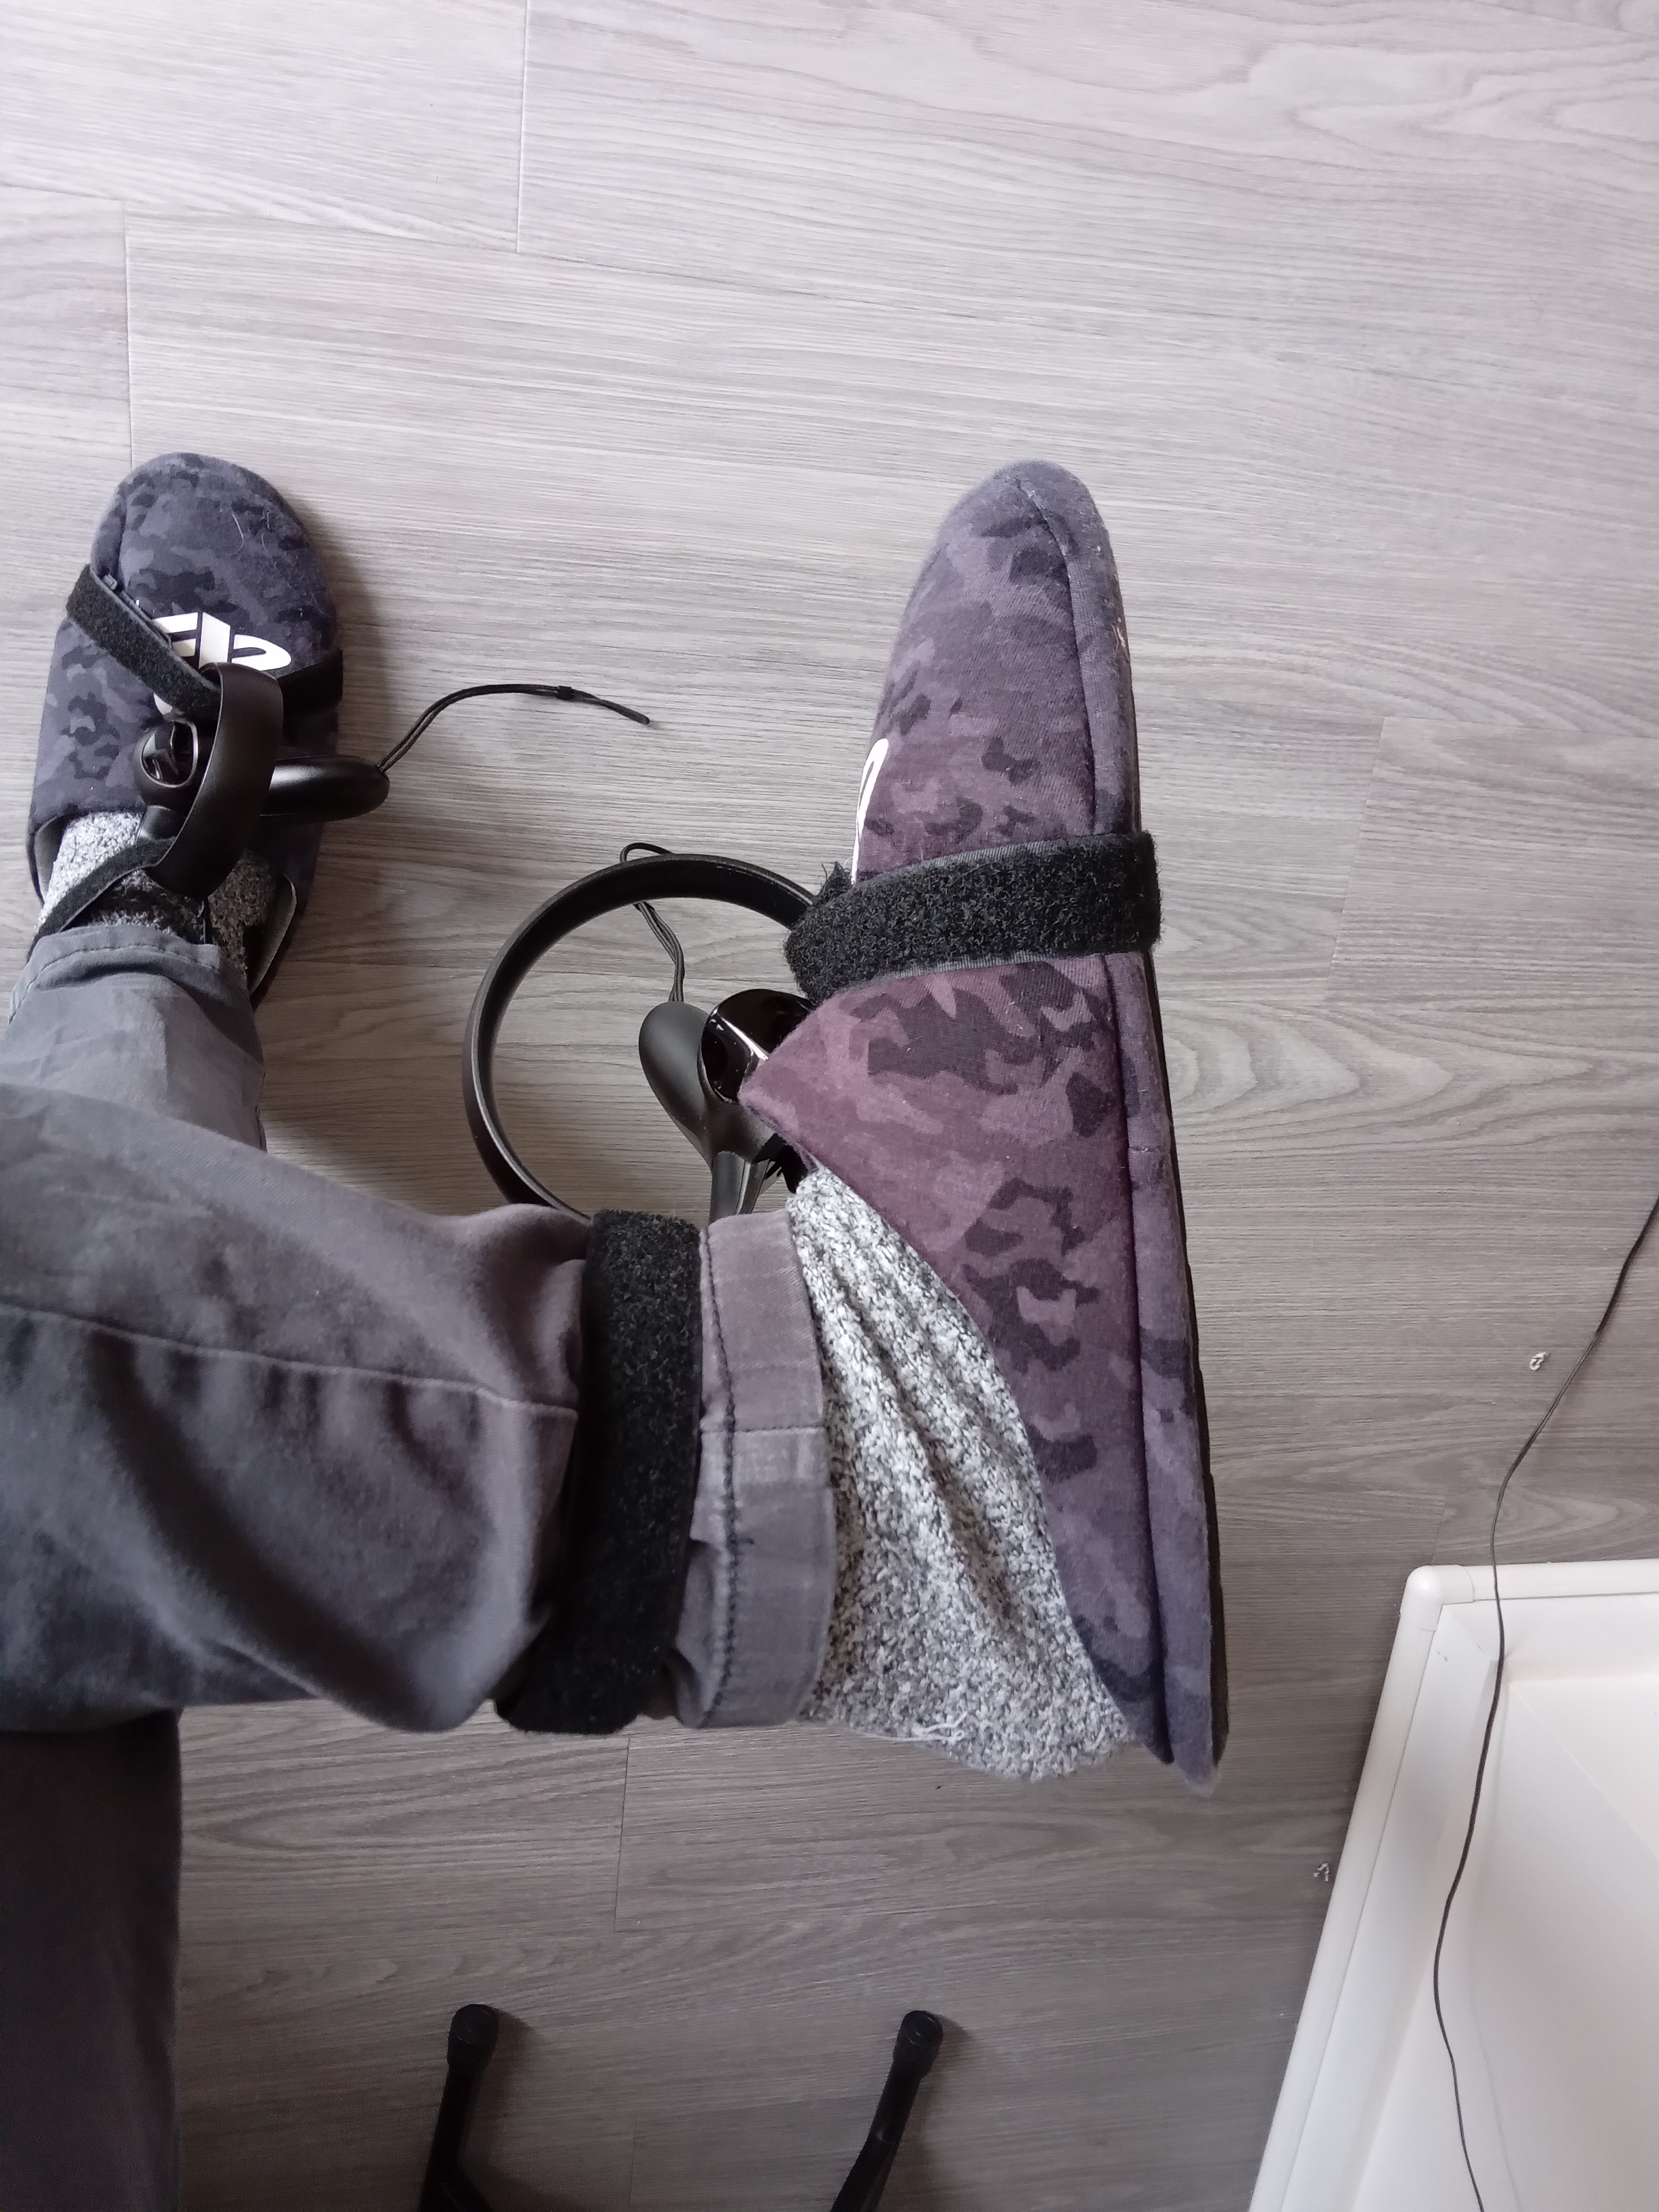
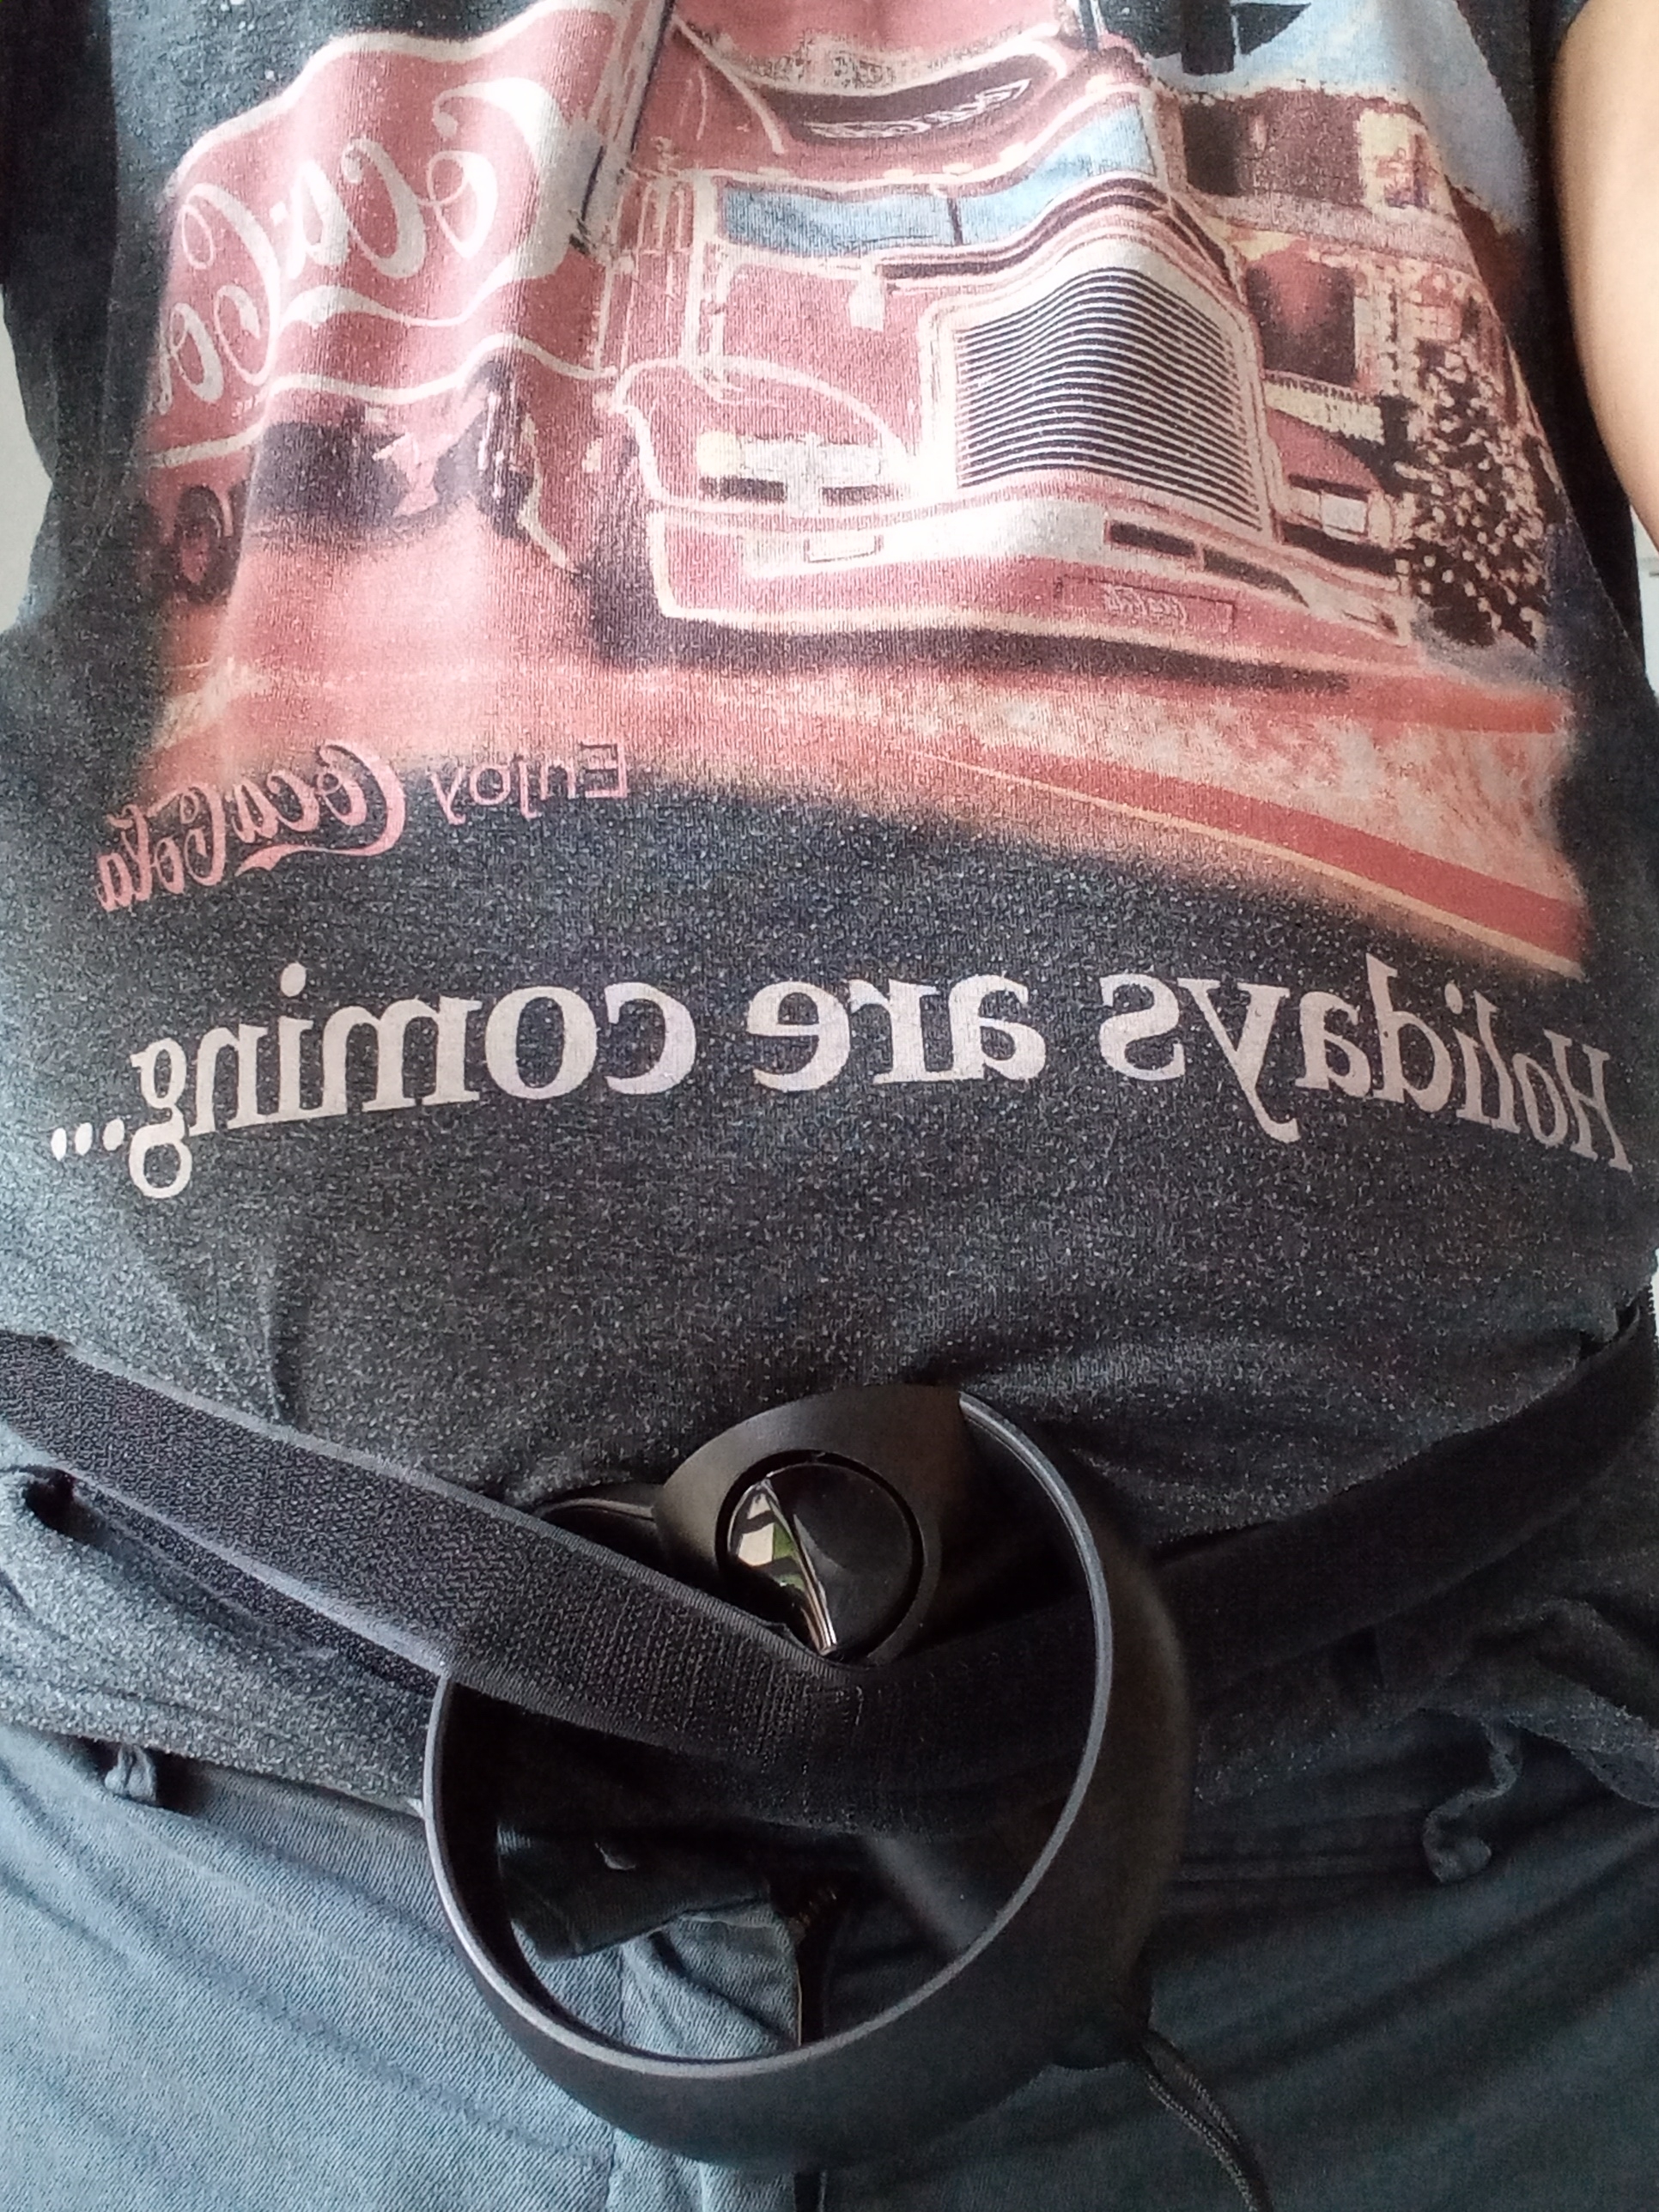
There are different ways to attach the controllers on yourself. You can use shoes, belts or even Vive tracker straps.
I will include a few examples here, mostly taken from Driver4VR's discord :
| Image | Source |
|---|---|
 |
.casserole |
|
litesubspace |
|
omyf |
 |
fiddlestyx. |
 |
milkgalaxy |
 |
ruevr. |
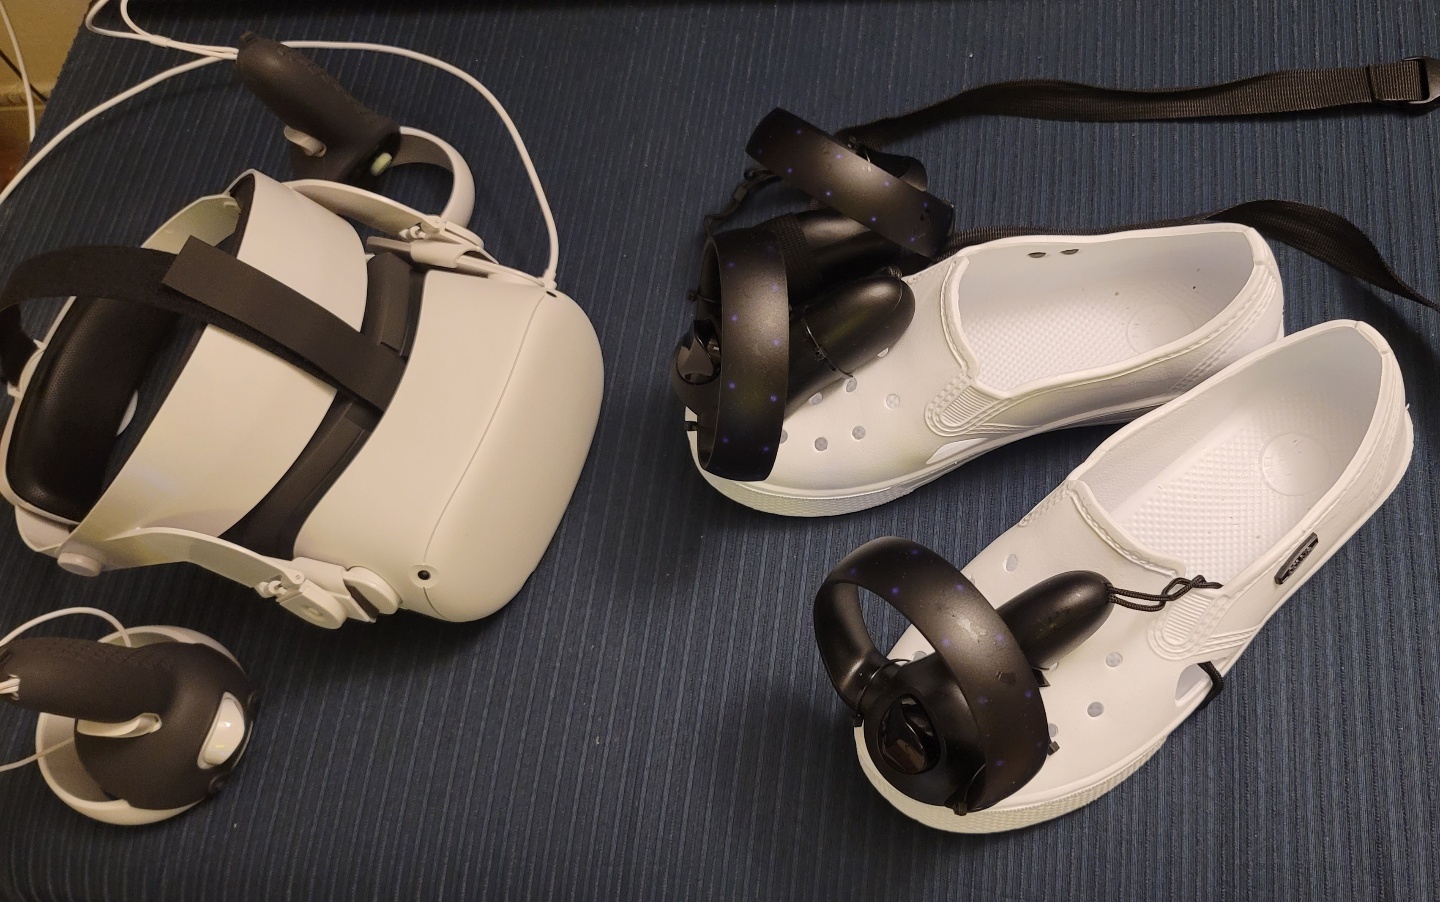 |
vickers |
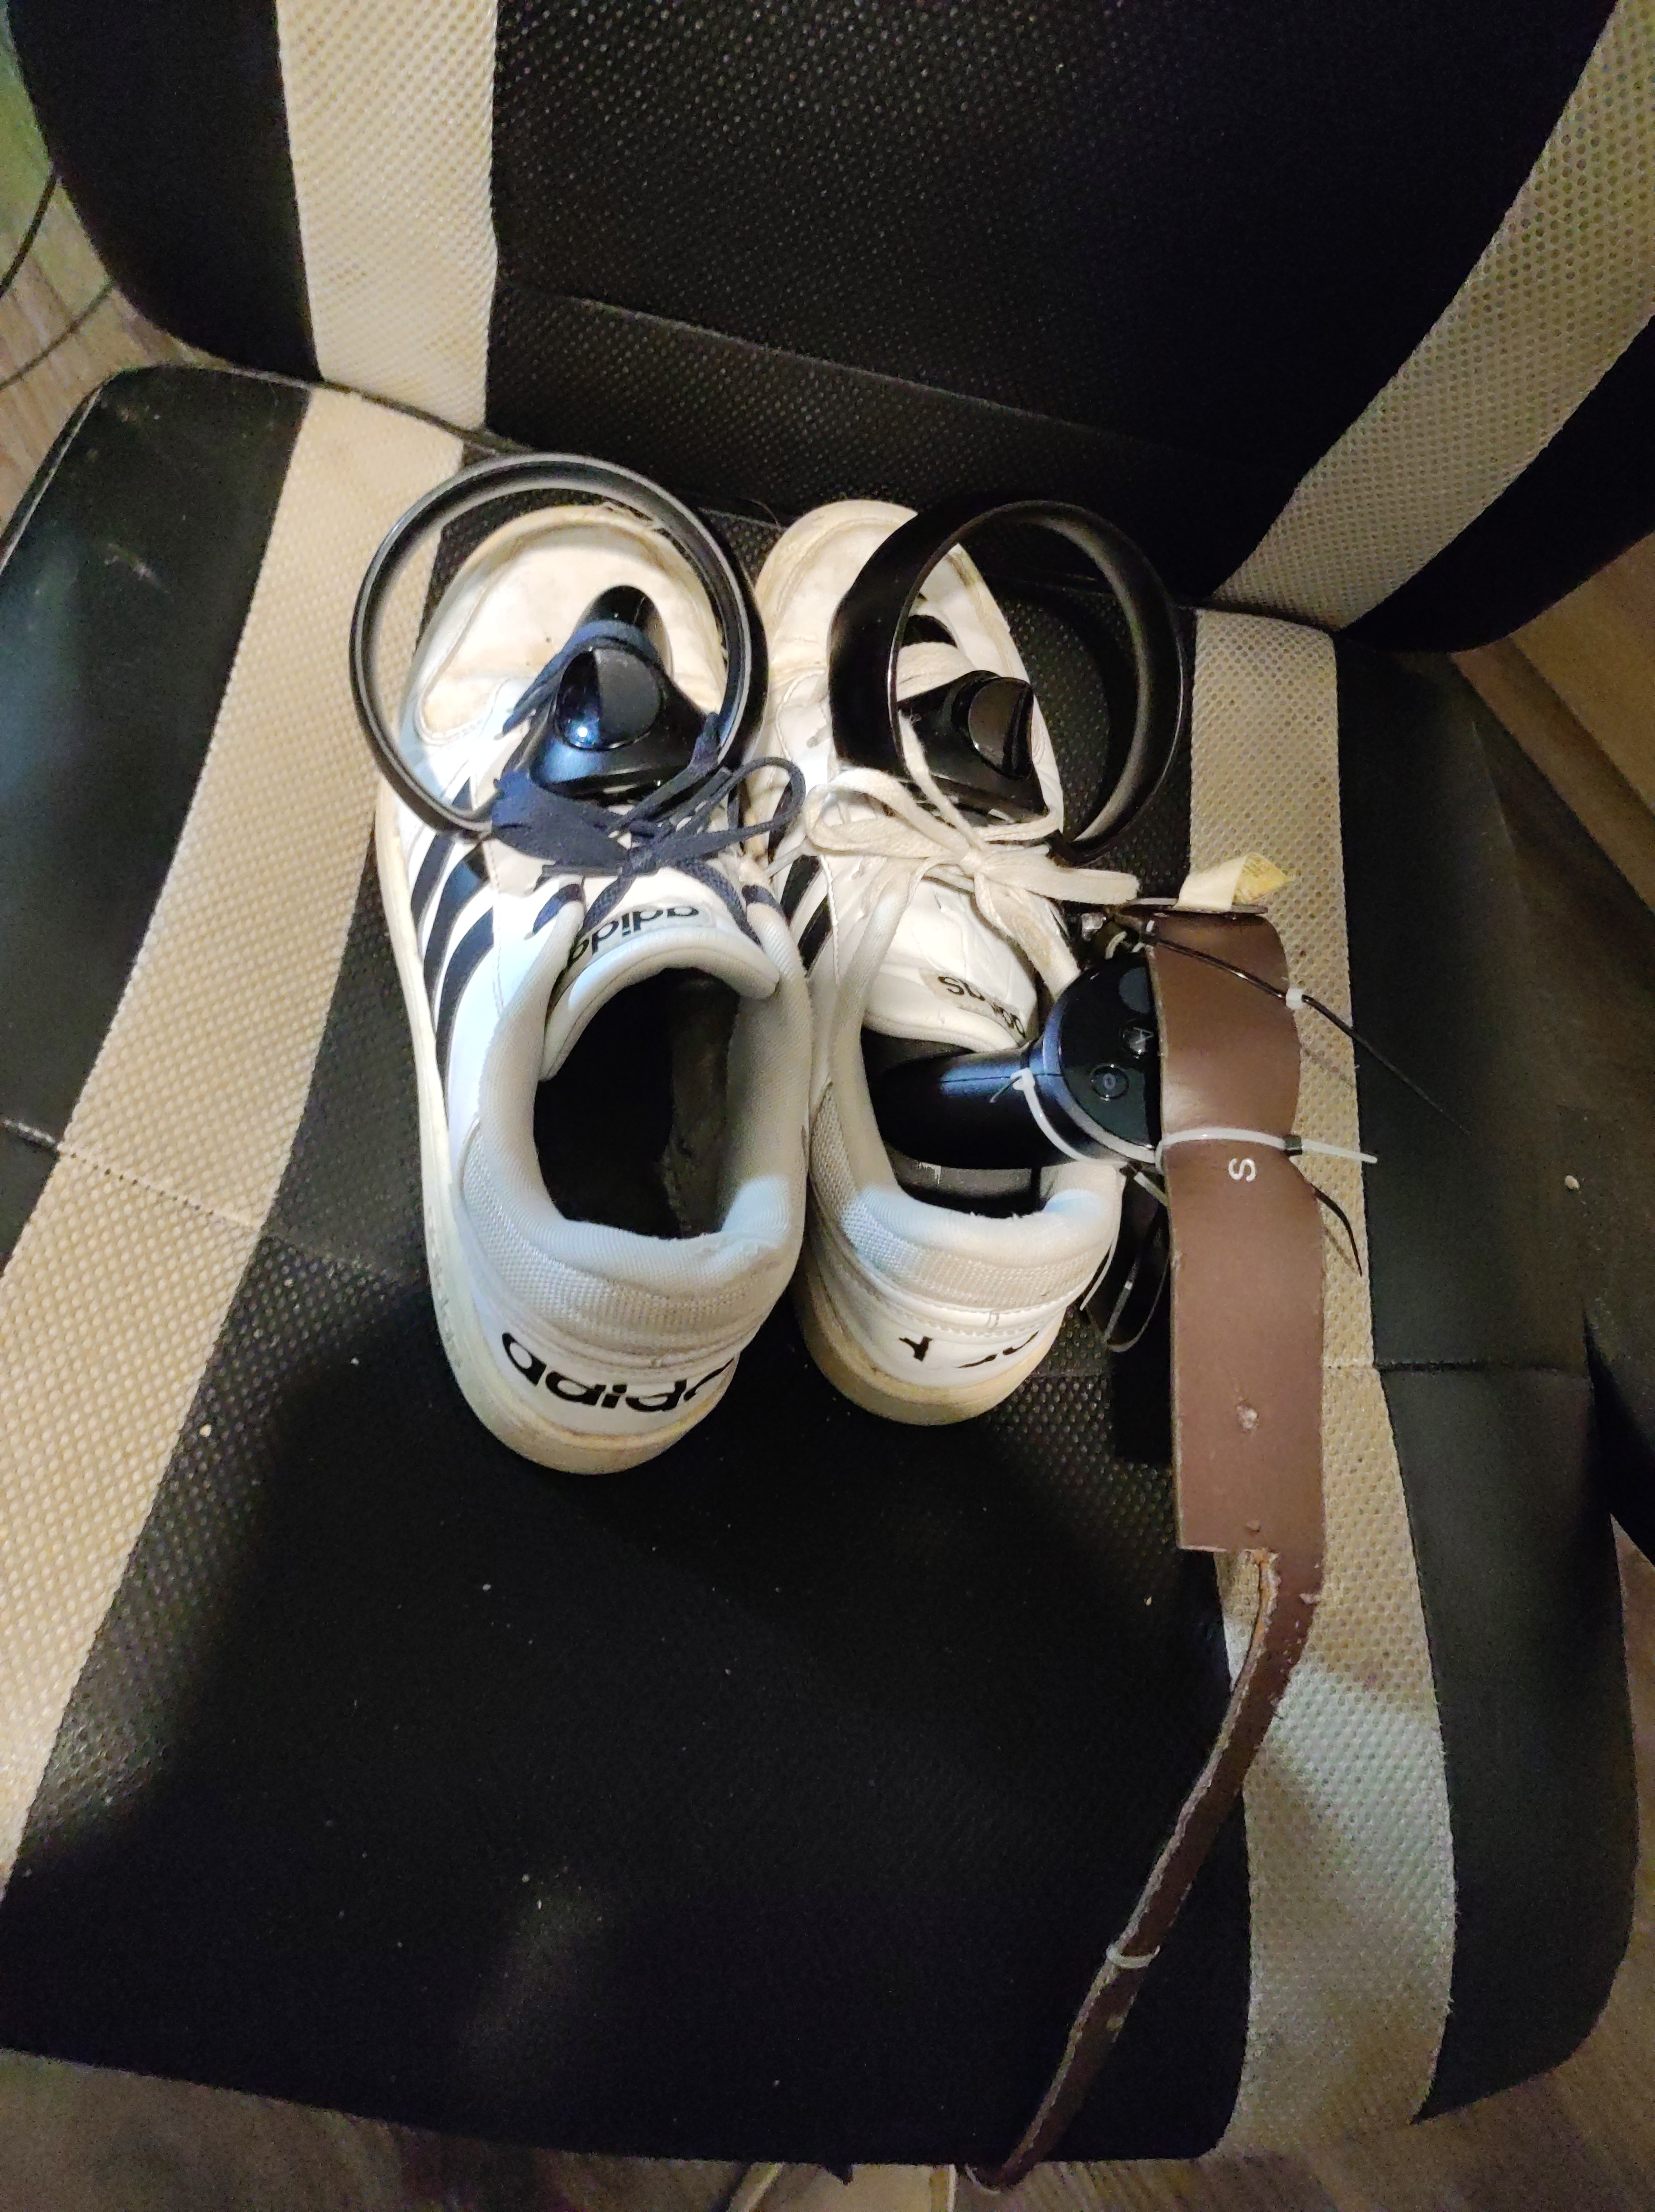 |
pixel4441 |
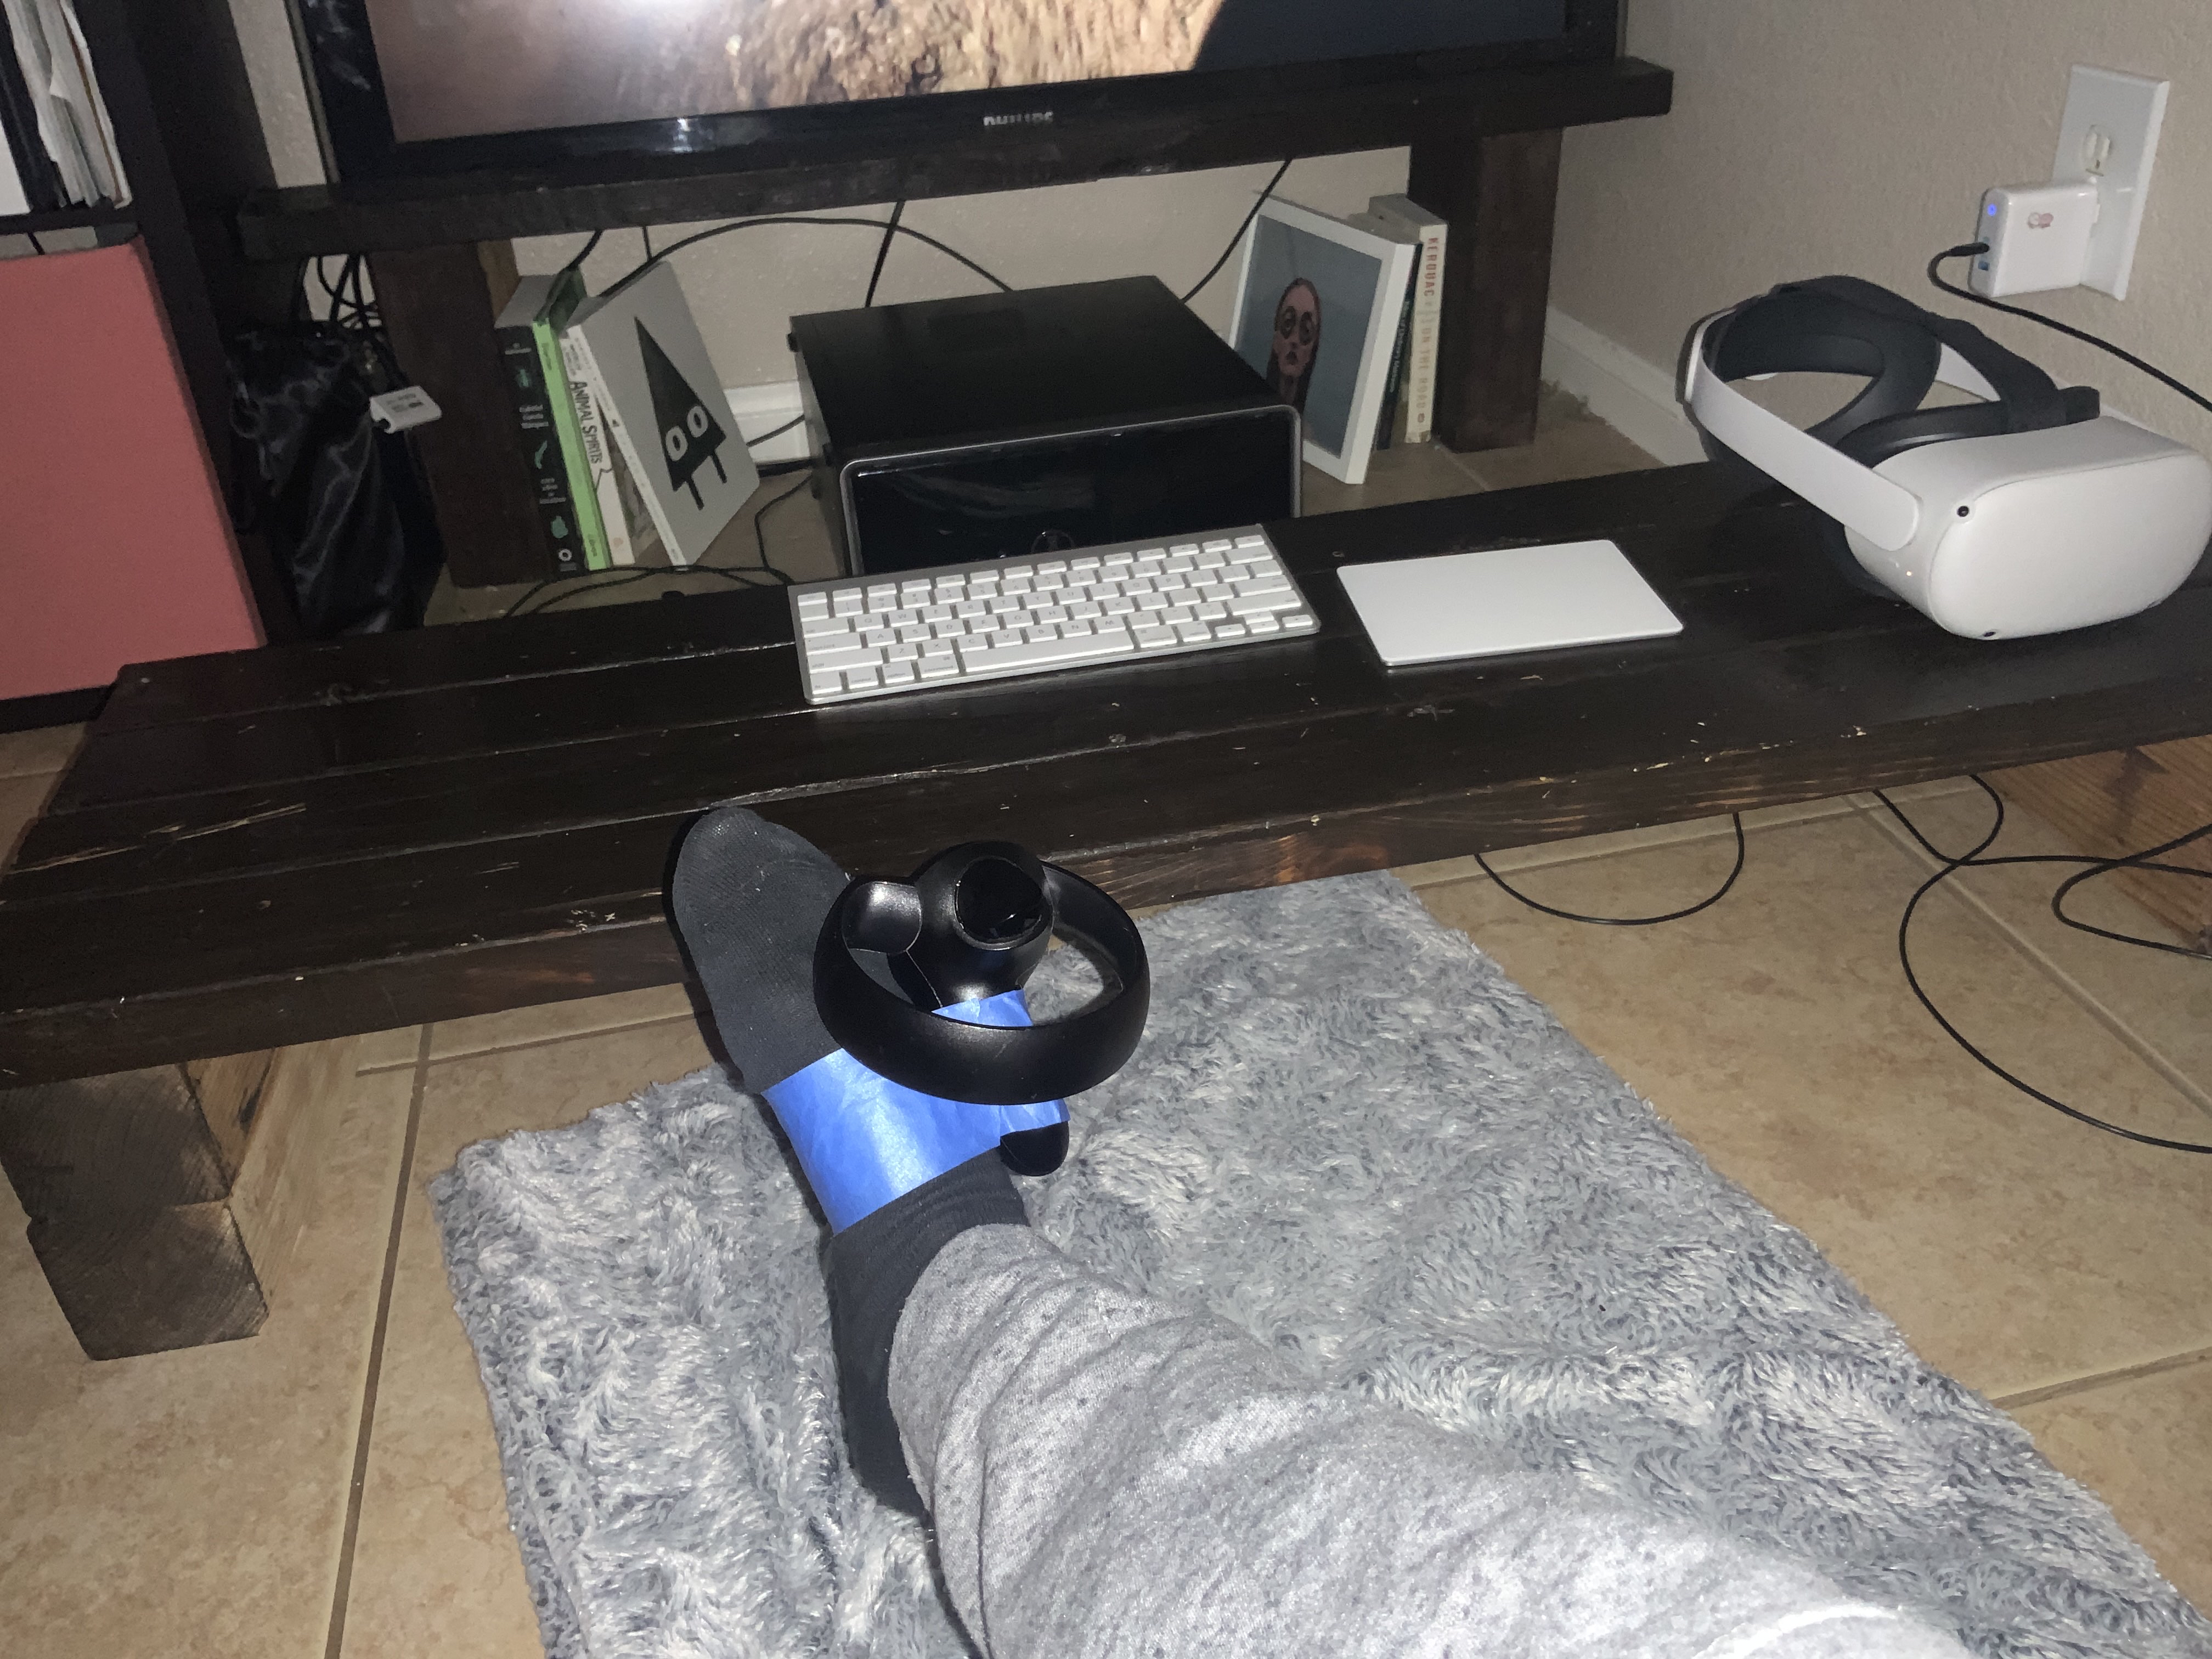 |
lillilkg |
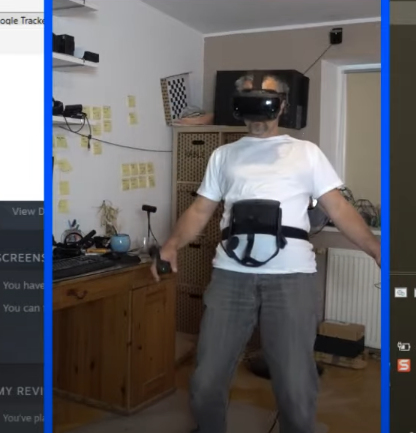 |
gregdriver |
 |
hexarose |
 |
Myself, nicolas-riera |
 |
m1st1e |
 |
mackandelius |
|
jpwinks |
Tip from litesubspace : "Zipties are the way to go if you don't have/don't want to use laces, [it] took just 2 zipties per foot (and they can still slip on/off), hip is 3 and you can loosen/tighten the belt as you see fit." "Having the belt on a proper pair of pants/shorts keeps the rotation even more locked in."
Be careful if you plan to do any hardware modification to the controllers.
- SteamVR (obviously).
-
Meta Horizon Link.
- IMPORTANT : Meta Horizon Link has to be installed in the default path (
C:\Program Files\Meta Horizon) for this guide to work.
- IMPORTANT : Meta Horizon Link has to be installed in the default path (
-
OculusDash-ODTKRA Switcher.
- The switcher will come in handy, as you need OculusDash to do the sensor setup and having ODTKRA as OculusDash will make it start automatically and prevent the headset from rendering anything.
- Oculus Touch Steam Link.
- Space Calibrator (download the Steam version).
Make sure SteamVR and Space Calibrator are both working with your main headset before continuing.
If it does, you can close them and continue the guide.
- Install Meta Horizon Link (highly recommended installing it in the default path).
- Log in to your Meta Account.
- At the top, there should be a blue banner asking you to set up your Rift, click on it.
- Follow with the setup, as usual (controller pairing, sensor setup, guardian boundary...). You are done with the setup when you reach the dashboard.
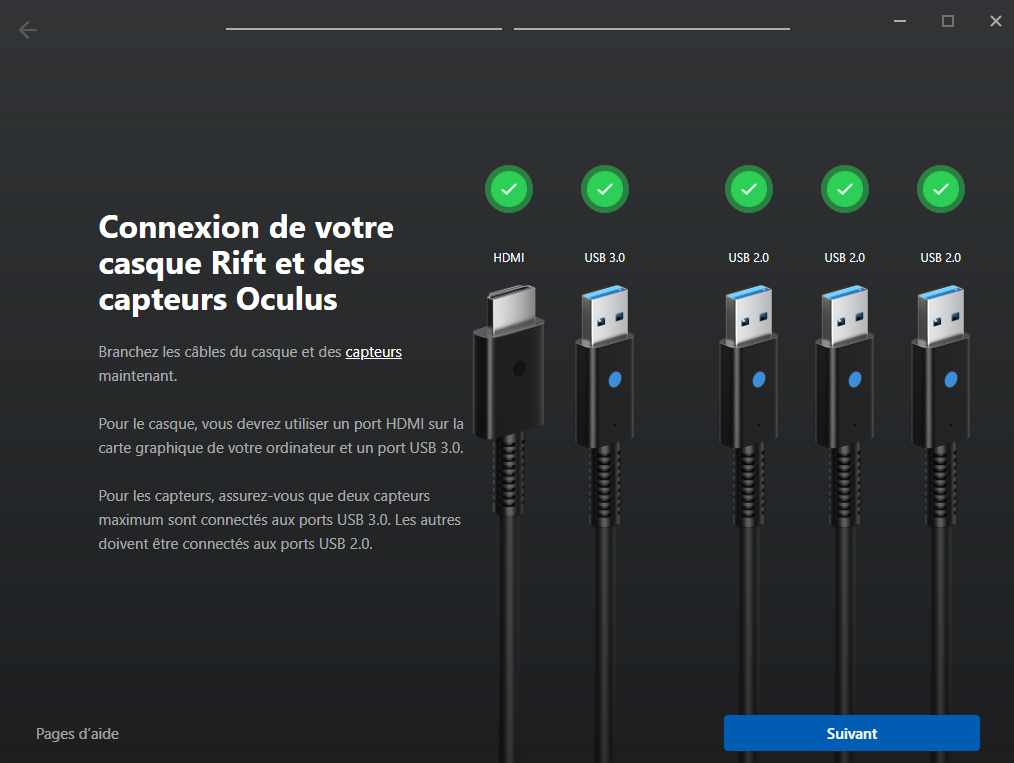
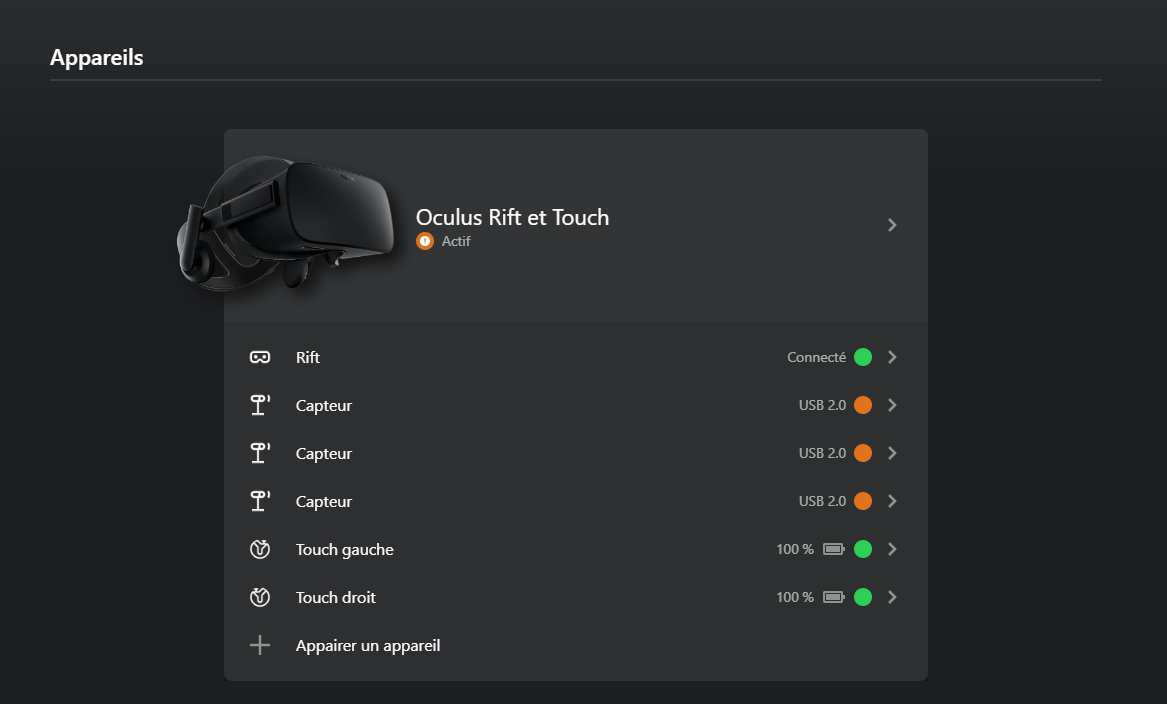
All of my sensors are in USB 2.0 as otherwise I have USB issues due to my garbage A520 motherboard chipset.
*Pro tip : if your headset is like mine and has broken screens, go in C:\Program Files\Meta Horizon\Support\oculus-diagnostics and open OculusMirror.exe.
If you have a third Touch controller, don't forget to pair a new device → VR Object.
Notes about the third controller :
-
Sleep is disabled when a Touch controller is connected as a VR Object, even after closing everything and turning off your PC. This will cause an INSANE amount of battery drain when the controller is unused as the controller basically fully stays on.
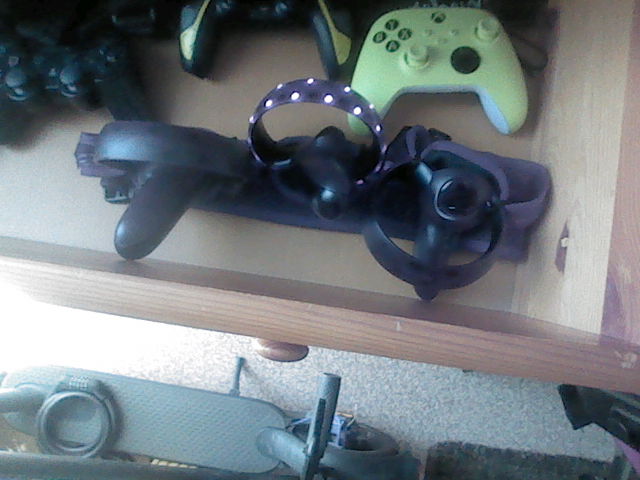
- You can either remove the battery, or do the following to bring back sleep :
- Put the controller into pairing mode by holding Y + Menu / B + Oculus.
- While the while led is bliking, remove the battery.
- Put back the battery back into the controller.
- When the controller connects to the software again, sleep will be disabled again, and you will have to do those steps each time.
- You can either remove the battery, or do the following to bring back sleep :
-
Sometimes, it may not show up in SteamVR after launching everything.
- This seems to be an issue with OculusTouchSteamLink, the only workaround I found is to restart SteamVR.
- A few things have to be changed in Meta Horizon Link Settings:
- In General, enable Unknown Sources.
- In Developer, disable automatic updates.
- Updates do not bring any useful improvements to the Rift CV1 and can break a few things here.
You have 2 ways to use ODTKRA :
- Use the switcher (recommended, and required for the automation scripts, which this guide will focus on).
- Download the .exe manually from this repository and run it while Meta Horizon Link is running.
- Download OculusDash-ODTKRA Switcher and save it somewhere useful
- You will need to set OculusDash back if you happen to need to do a sensor setup
- Run it once
- It will automatically set ODTKRA as OculusDash so it starts automatically
- Note: running it again will set OculusDash back
- Download Oculus Touch Steam Link, zip or 7z doesn't really matter.
- Extract the archive
- Go in your SteamVR local files (from Steam, or default path is
C:\Program Files (x86)\Steam\steamapps\common\SteamVR) →driversand move theOculusTouchLinkfolder in it.- It should look like this :
└── SteamVR/
    └── drivers/
        └── OculusTouchLink/
            ├── bin/
            ├── resources/
            ├── config.dat
            ├── driver.vrdrivermanifest
            ├── ovr_dummy.exe
            └── ovr_test.exe
- It should look like this :
(skip these steps if you don't want to use your Touch controllers as FBT trackers)
-
Start
ovr_test.exe- You should be greeted by this :
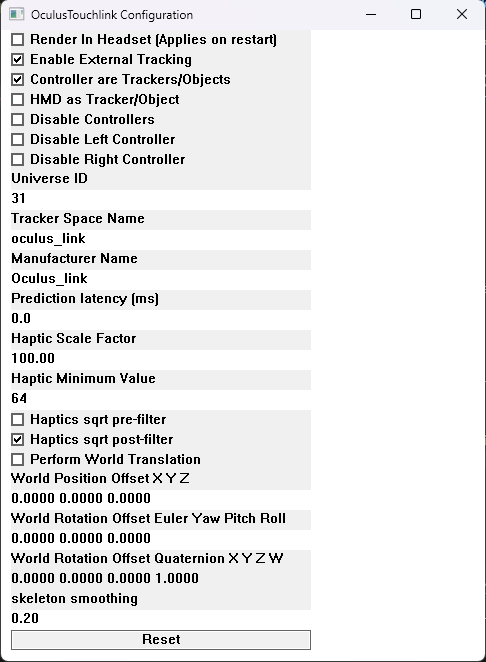
- You should be greeted by this :
-
Enable
Controller are Trackers/Objects, and if you want to use the headset as a tracker, enableHMD as Trackers/Object. -
Set
Prediction latency (ms)to0.0.- You can adjust this value as you may want, but I find
0.0to be good.
- You can adjust this value as you may want, but I find
-
Close the window when done.
-
Open a command prompt
-
Type the following command :
"C:\Program Files (x86)\Steam\steamapps\common\SteamVR\bin\win64\vrpathreg adddriver C:\'Program Files (x86)'\Steam\steamapps\common\SteamVR\drivers\OculusTouchLink"(adapt the SteamVR path if needed).
If nothing happens after pressing on Enter, that's normal.
Now you can launch everything in the following order, and you will see Vive trackers floating in space :
SteamVR (with your main headset) -> Space Calibrator -> Meta Horizon Link (this should launch ODTKRA, otherwise launch it manually) -> ovr_test.exe
- Go in Space Calibrator, either in the SteamVR dashboard or on your desktop.
- At the top left, select one of your two controllers of your main headset (or the headset itself).
- At the top right, select one of your Rift CV1 touch controllers (first one is the left one, second one is the right one).
- Select
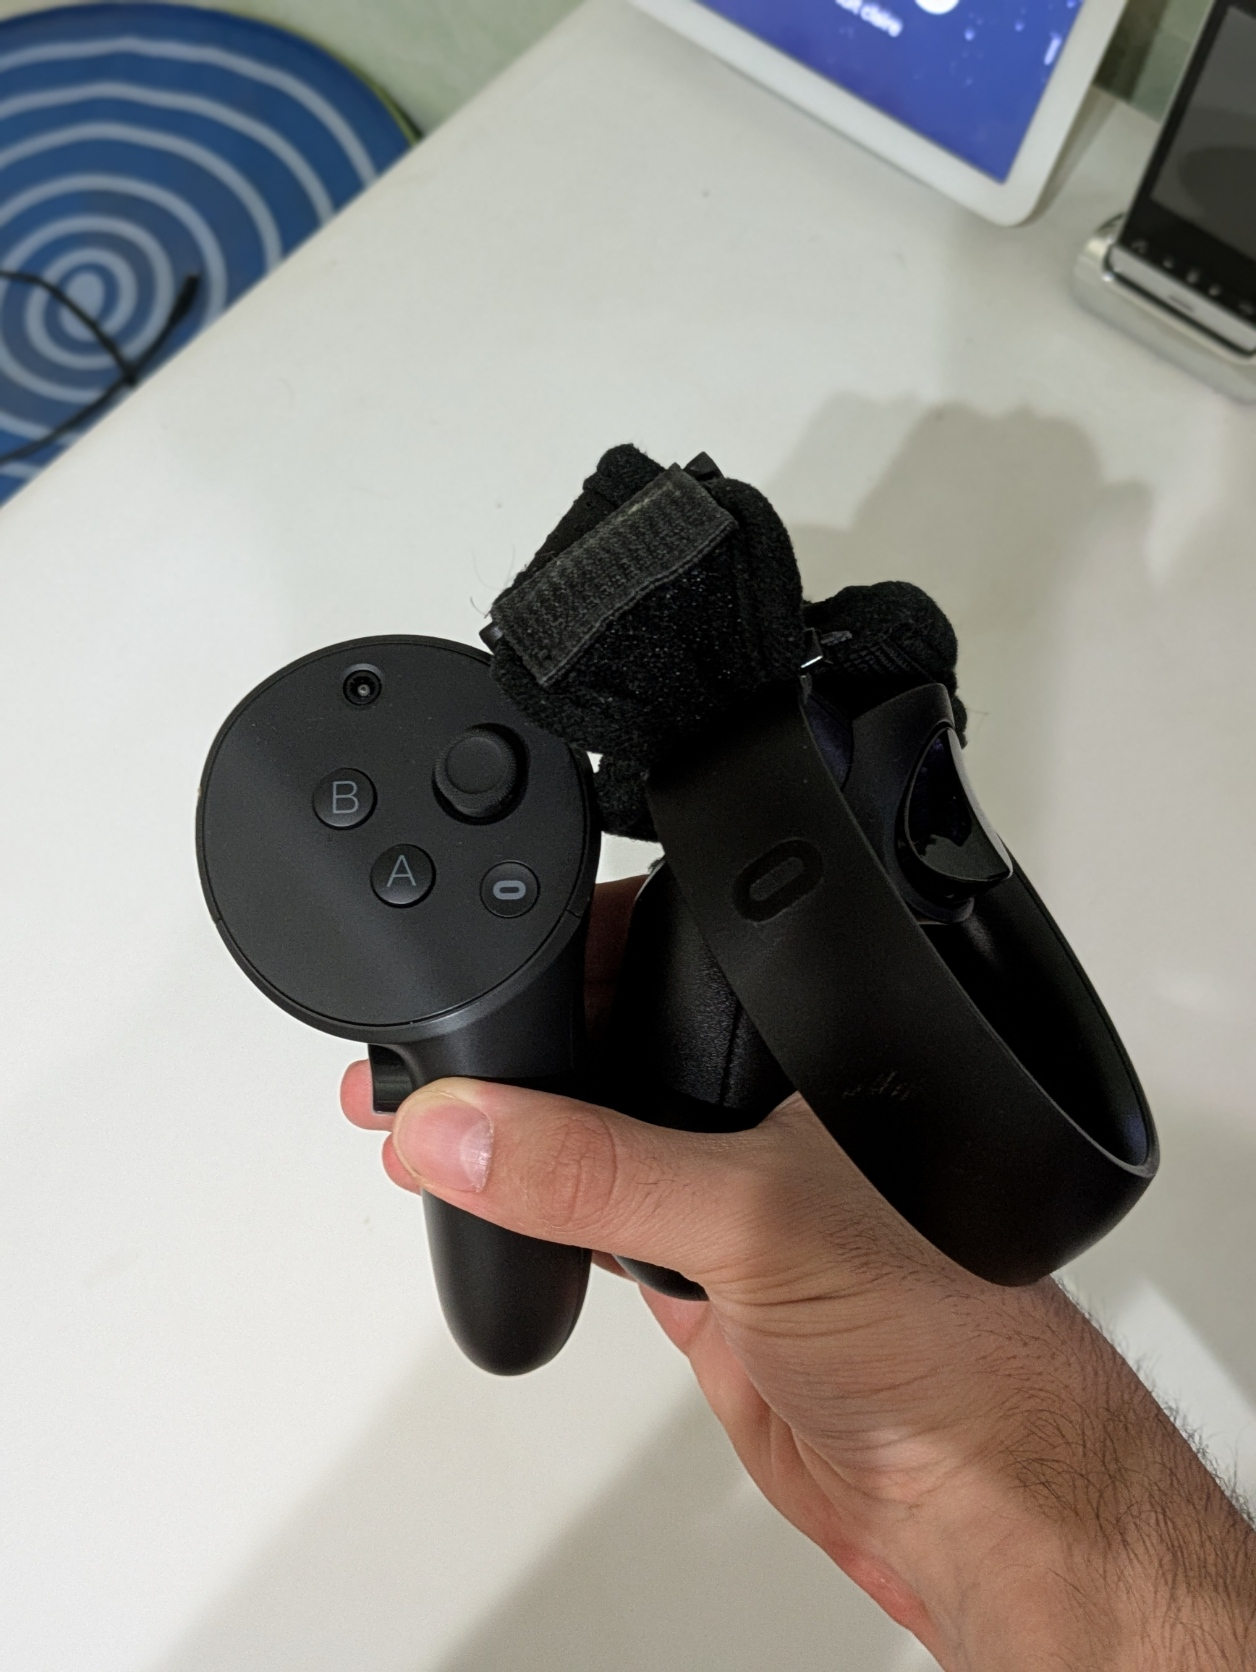
SloworVery Slowspeed. - Grab both of them in one hand :
- Click on
Start Calibration. - Now slowly do 8-pattern (or ∞-pattern) figures in the air during the calibration ends.
- Those figures should be big, and you should move around a bit in your room while doing it.
- Use both your wrist and your arm.
- Make sure that neither your main headset's controller nor the CV1 Touch lose tracking while doing the calibration.
When the calibration ends, voilà!, your Rift CV1 controllers should show up in the correct place, and you're ready to enjoy then in compatible games!
Ok, that's cool, but it's really annoying to launch and close everything manually EVERY time... or it is only me.... anyway, I made automated scripts so you can launch and close everything with one if not zero click.
The setup is a bit annoying, but when it is set up, it's very painless to start and stop everything.
To properly and fully start and stop Meta Horizon Link, we have to start and stop its service so it doesn't run in the background, which can cause issues.
The first thing to do is to disable the automatic start of the service.
Note: this is reset when you update and/or reinstall Meta Horizon Link.
- Open Services.
- Find
Oculus VR Runtime Service. - Double-click on it.
- On
Startup type, set it to `Manual. - Click on
OK.
- Download
allow OVRService manipulation.ps1 - Open it with something like notepad.
- On line 7 (
$userName), replaceYOUR_USERNAME_HERE!!!!!!!!!!!!!!!!!with... your username- If you don't know what it is, go in
C:\Usersand look at your user's folder name.
- If you don't know what it is, go in
- Save and exit.
- Open a PowerShell window with administrator rights
- Go in the folder where the .ps1 file is located :
cd C:\Users\YOUR_USERNAME_HERE\Downloads
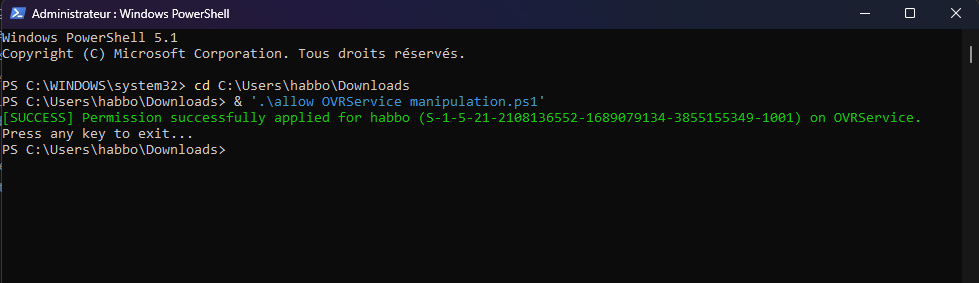
- Execute the script :
& '.\allow OVRService manipulation.ps1'
- Download the StartCV1FBT.ps1 and StopCV1FBT.ps1 scripts.
- You can also download RestartCV1FBT.ps1 to quickly restart everything during a session if you have USB issues like me.
- Put those files in
\SteamVR\drivers\OculusTouchLink.- It should look like this now :
    └── SteamVR/
        └── drivers/
            └── OculusTouchLink/
                ├── bin/
                ├── resources/
                ├── config.dat
                ├── driver.vrdrivermanifest
                ├── ovr_dummy.exe
                ├── ovr_test.exe
                ├── RestartCV1FBT.ps1 (optional)
                ├── StartCV1FBT.ps1
                └── StopCV1FBT.ps1
- It should look like this now :
In whatever most convenient folder you want (Desktop, Start Menu...), do this for each .ps1 file :
Right-click → New → Shortcut
| Name | Location |
|---|---|
| StartCV1FBT | C:\Windows\System32\WindowsPowerShell\v1.0\powershell.exe -WindowStyle Hidden -ExecutionPolicy Bypass -File "C:\Program Files (x86)\Steam\steamapps\common\SteamVR\drivers\OculusTouchLink\StartCV1FBT.ps1" |
| StopCV1FBT | C:\Windows\System32\WindowsPowerShell\v1.0\powershell.exe -WindowStyle Hidden -ExecutionPolicy Bypass -File "C:\Program Files (x86)\Steam\steamapps\common\SteamVR\drivers\OculusTouchLink\StopCV1FBT.ps1" |
| RestartCV1FBT | C:\Windows\System32\WindowsPowerShell\v1.0\powershell.exe -WindowStyle Hidden -ExecutionPolicy Bypass -File "C:\Program Files (x86)\Steam\steamapps\common\SteamVR\drivers\OculusTouchLink\RestartCV1FBT.ps1" |
You can, optionally, use the following icons I made for the shortcuts. Save them and apply them on the shortcuts.
| Script | Icon |
|---|---|
| StartCV1FBT | |
| StopCV1FBT | |
| RestartCV1FBT |
At this point, running the shortcuts should automatically start everything minimized, stop everything and restart properly everything.
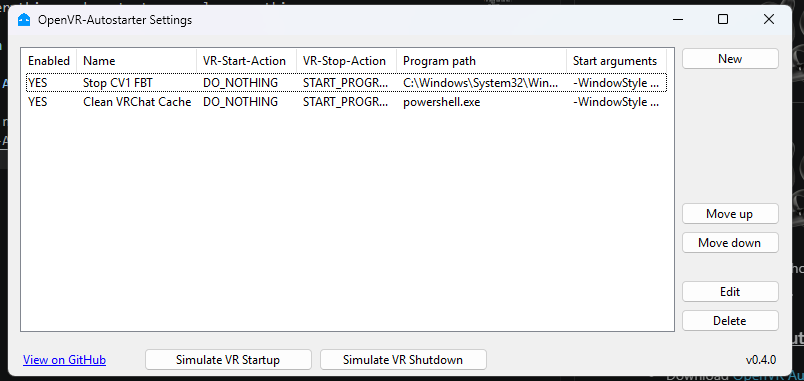
- Download OpenVR Autostarter.
- Install it.
- Note: it may not install properly, see this comment.
- When opening it, you are greeted by this :
Start automatically when SteamVR starts :
- Click on New.
- Give it a name (i.e. Start CV1 FBT).
- Set
when VR runtime startstostart program. - Set
when VR runtime stopstodo nothing. - Set
Program Path / URLtoC:\Windows\System32\WindowsPowerShell\v1.0\powershell.exe. - Set
(optional) start program with argumentsto-WindowStyle Hidden -ExecutionPolicy Bypass -File "C:\Program Files (x86)\Steam\steamapps\common\SteamVR\drivers\OculusTouchLink\StartCV1FBT.ps1". - Enable
start program minimized. - Save.
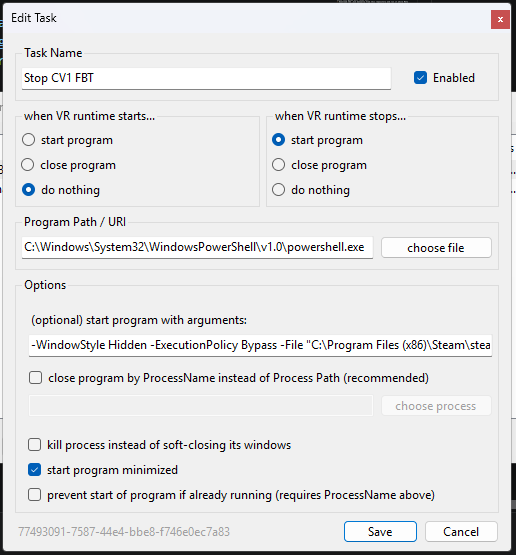
Stop automatically when SteamVR stops :
- Click on New.
- Give it a name (i.e. Stop CV1 FBT).
- Set
when VR runtime startstodo nothing. - Set
when VR runtime stopstostart program. - Set
Program Path / URLtoC:\Windows\System32\WindowsPowerShell\v1.0\powershell.exe. - Set
(optional) start program with argumentsto-WindowStyle Hidden -ExecutionPolicy Bypass -File "C:\Program Files (x86)\Steam\steamapps\common\SteamVR\drivers\OculusTouchLink\StopCV1FBT.ps1". - Enable
start program minimized. - Save.
- Close Autostarter.
Congratulations, you are fully good to go!!!!
At this point, you just need to start SteamVR and things will just start without any input from yourself (or with one click if you chose so). Same if you decide to stop SteamVR.
Thanks for reading my guide and have fun in VR!