<<<<<<< HEAD
Course repo for the mvc course.
Course is available at:
GitHub Pages for this repo are published at:
Clone the course repo (this repo).
dbwebb clone mvc
=======
<!--
---
author: mos
revision:
"2023-03-28": "(B, mos) Work through and very updated."
"2022-03-27": "(A, mos) First release."
---
-->

Get going with Symfony
====================
This exercise will help you create a web application/service using a Symfony installation.
You will add a controller that serves responses as web pages using the template engine Twig. You will also create a controller that provides a REST API with JSON responses.
* [Documentation](#documentation)
* [Video](#video)
* [Prerequisites](#prerequisites)
* [Prepare](#prepare)
* [Install the project skeleton](#install-the-project-skeleton)
* [Run your app](#run-your-app)
* [Publish the app to the student server](#publish-the-app-to-the-student-server)
* [Create a home page using a controller](#create-a-home-page-using-a-controller)
* [Add a controller and a route](#add-a-controller-and-a-route)
* [The controller class](#the-controller-class)
* [Use bin/console debug:router](#use-binconsole-debugrouter)
* [Visit the route](#visit-the-route)
* [Add another route](#add-another-route)
* [Symfony bin/console](#symfony-binconsole)
* [The controller](#the-controller)
* [Add a JSON route](#add-a-JSON-route)
* [Use a JsonResponse](#use-a-JsonResponse)
* [JSON pretty print](#json-pretty-print)
* [Add a new controller](#add-a-new-controller)
* [Render a web page using a template](#render-a-web-page-using-a-template)
* [Install Twig package](#install-twig-package)
* [Create a controller using twig](#create-a-controller-using-twig)
* [Create a template file](#create-a-template-file)
* [Extend a base template](#extend-a-base-template)
* [Include CSS and JavaScript in the base template](#include-CSS-and-JavaScript-in-the-base-template)
* [Install Encore](#install-Encore)
* [Setup the project using Encore](#setup-the-project-using-Encore)
* [Add style](#add-style)
* [Add JavaScript](#add-JavaScript)
* [Navigate between pages](#navigate-between-pages)
* [Add routes to home, about](#add-routes-to-home,-about)
* [Add a navbar](#add-a-navbar)
* [Show images](#show-images)
* [Ordinary image as an asset](#ordinary-image-as-an-asset)
* [Add a favicon](#add-a-favicon)
* [Add a header image](#add-a-header-image)
* [Where to go from here?](#where-to-go-from-here?)
<!--
TODO
* How to send arguments to a route
* `/api/lucky/number/1/100`
* How to verify its type
* Session
* Render form using Symfony
* navbar responsive
-->
Documentation
----------------------------
The exercise is built on the [documentation of the Symfony project](https://symfony.com/doc/current). Use the documentation to learn more or as a reference if you get into trouble.
Video
----------------------------
There is a video where Mikael works through this exercise, step by step (in Swedish).
[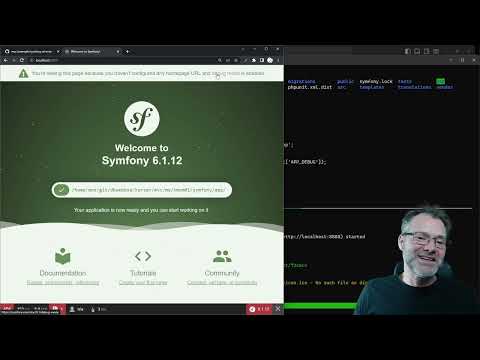](https://www.youtube.com/watch?v=1QVvLGNqTxw)
Prerequisites
----------------------------
You have installed PHP in the terminal.
You have installed Composer, the PHP package manager.
Prepare
----------------------------
It is assumed that you are working in the course repository.
Start by copying the code for this exercise to your directory.
rsync -av example/symfony me/kmom01 cd me/kmom01/symfony
5d7b974 (2.0.5 Layout overhaul)
<<<<<<< HEAD
. ..: Copyright (c) 2021 Mikael Roos et al, mos@dbwebb.se
=======
Install the project skeleton
----------------------------

We shall install and set up a skeleton for a Symfony web application using composer.

This part of the exercise comes from the article "[Installing & Setting up the Symfony Framework](https://symfony.com/doc/current/setup.html)".

Ok, let's start to install a project skeleton using `composer create-project` into the directory `app`.

This creates a traditional Symfony web application.
composer create-project symfony/website-skeleton app cd app
You can check what files are available in the app directory. You can see that there is merely only the file `composer.json`. You can open it to inspect it, it contains the details that will be installed to set up the Symfony application.

The directory `vendor/` is the place where all the downloaded files will be installed and the `composer.lock` contains the snapshot of all the installed packages and versions. You can inspect the content below the `vendor/` directory to see the structure of the installed packages.

You can now use composer to complete the installation of the web application.
composer require webapp
The process will start by checking that your system has all the necessary php extensions before installing.

If you get any questions during the installation procedure, just answer with the default reply by pressing enter.

You can check what packages are installed and what versions.
composer show
Before you proceed, check the content below `vendor/` again, it now contains a lot of directories with PHP packages.


Run your app
-----------------------

Let's start the application to verify that it works.

You can open the PHP built-in web server to verify the installation.
php -S localhost:8888 -t public
The public web files are all under the `public/` directory so that is the starting point.
You should now be able to open a web browser to `http://localhost:8888` and see the welcome page.

Publish the app to the student server
-----------------------
You can now try to run the application on the student server.
Start by copying the `.htaccess` file to the `public` directory.
cp ../.htaccess public
The file `.htaccess` will now be in the root of your public web directory and it will set up the paths so the application will work on the student server. This [file can be used to configure the Apache web server](https://httpd.apache.org/docs/2.4/howto/htaccess.html).

Edit the file `.htaccess` and change 'mosstud' to your acronym. Do also review that the path seems to be correct. Your images, stylesheets and the routing will not work if the acronym or path is incorrect.

Publish the application to the student server.
dbwebb publishpure me
Verify that you can see the welcome page correctly on the student server.

Create a home page using a controller
-----------------------
This shows how to create a home page in Symfony by using a controller. The information is based on the article [create your first page in Symfony](https://symfony.com/doc/current/page_creation.html).
### Add a controller and a route
Copy the controller file containing the code for the route `lucky/number`.
cp ../LuckyController.php src/Controller
This is the controller class that implements the controller action that is reachable through the route path (route) `lucky/number`.


### The controller class

The controller class looks like this. It is a PHP class using Symfony base classes.

Visit the class in `src/Controller/LuckyController.php` and review the code. Do you understand the structure and its parts?

```php
<?php

namespace App\Controller;

use Symfony\Component\HttpFoundation\Response;
use Symfony\Component\Routing\Annotation\Route;

class LuckyController
{
    #[Route('/lucky/number')]
    public function number(): Response
    {
        $number = random_int(0, 100);

        return new Response(
            '<html><body>Lucky number: '.$number.'</body></html>'
        );
    }
}
The controller action number() returns the complete html page as the response to the browser.
Now check that the route lucky/number is available and that Symfony recognizes it. Use the following command in the terminal when you are in the app/ directory.
You will see an entry like this, together with all other routes supported in the application.
 -------------------------- -------- -------- ------ ---------------
  Name                       Method   Scheme   Host   Path
 -------------------------- -------- -------- ------ ---------------
  app_lucky_number           ANY      ANY      ANY    /lucky/number
 -------------------------- -------- -------- ------ ---------------
The application detects the route path from the attribute (annotation) #[Route('/lucky/number')] in the comment over the method.
Open the route lucky/number in your browser to see that it works. It can look like this.

Inspect the code in the controller and make a few small changes to the web page so you get a feeling of "owning the code".
Now you can try to add another route, just to see that it works. Edit the controller class and add this method.
    #[Route("/lucky/hi")]
    public function hi(): Response
    {
        return new Response(
            '<html><body>Hi to you!</body></html>'
        );
    }
Verify that the route is available by checking bin/console debug:route and then open it through the browser.
It can look like this.

The tool bin/console is a utility that can help develop and troubleshoot your application.
Here are a few examples on how to use it.
# Show the routes
bin/console debug:router

# Match a specific route
bin/console router:match /lucky/number

# Clear the cache
bin/console cache:clear

# Show available commands
bin/console
Verify that you can match both routes using the command router:match.
lucky/numberlucky/hi
You can read about the structure of a controller in Symfony in the docs.
The controller is the C in the design pattern Model View Controller (MVC) and it is the entry point for the application.

The url has a rout path that is interpreted by the (Symfony) router and it leads to a controller action which has the responsibility to send a response back to the caller. It may take help of model classes and views when creating the response. In the example code above, the controller used no model classes and no views, it just returned the response directly as a web page.
When building a RESTFul API or a web service, the server usually provides a JSON response, instead of serving a web pages as the reponse.
Here follows a /api/lucky/number version providing the number in a JSON structure instead of a web page. Add the method to your controller.
    #[Route("/api/lucky/number")]
    public function jsonNumber(): Response
    {
        $number = random_int(0, 100);

        $data = [
            'lucky-number' => $number,
            'lucky-message' => 'Hi there!',
        ];

        $response = new Response();
        $response->setContent(json_encode($data));
        $response->headers->set('Content-Type', 'application/json');

        return $response;
    }
Verify that the route exists and can be used.
It can look something like this when displaying the results in a browser.

You can see that the HTTP response header is saying application/json indicating that it the response is a JSON response.
You can rewrite the above code and send a JsonResponse instead. That is a Symfony class specialized for JSON data and it slightly reduces your code.
    #[Route("/api/lucky/number")]
    public function jsonNumber(): Response
    {
        $number = random_int(0, 100);

        $data = [
            'lucky-number' => $number,
            'lucky-message' => 'Hi there!',
        ];

        return new JsonResponse($data);
    }
You also need to add the following on the top, to be able to use the class JsonResponse.
use Symfony\Component\HttpFoundation\JsonResponse;Add it alphabetically so it looks like this at the top of the controller class.
namespace App\Controller;

use Symfony\Component\HttpFoundation\Response;
use Symfony\Component\HttpFoundation\JsonResponse;
use Symfony\Component\Routing\Annotation\Route;

class LuckyController
Verify that the JSON response still works.
When you return a large JSON structure it might sometimes be easier to read if you return it in a formatted way, also known as "pretty print". To do that you can use the following code to format the response before sending it.
        // return new JsonResponse($data);

        $response = new JsonResponse($data);
        $response->setEncodingOptions(
            $response->getEncodingOptions() | JSON_PRETTY_PRINT
        );
        return $response;
A formatted pretty print show each property on its own row, so it will be easier to read it.
Update your method so it returns a pretty printed response and verify that it works.
It looks something like this.

Let's try to add a new controller and move the method we just created doing /api/lucky/number into its own src/Controller/LuckyControllerJson.php.
Ok? You should then do the following.
- Create a new controller file
src/Controller/LuckyControllerJson.php. - Add an empty Controller class to it.
- Move the method doing the
/api/lucky/numberinto the class. - Verify that it works.
Here is an empty class if you want to start with that.
<?php

namespace App\Controller;

use Symfony\Component\HttpFoundation\Response;
use Symfony\Component\HttpFoundation\JsonResponse;
use Symfony\Component\Routing\Annotation\Route;

class LuckyControllerJson
{

}
Always use the same capitalization on the file name and the class name.
The namespace App\Controller indicates that the filename should be saved in the directory src/Controller. It is a vital mapping that the PHP autoloader is using to find the source files.
Use the command bin/console to verify that the route only exists at one class and use your browser to verify that it works.
Now you know how to add new controller classes which is a vital part of structuring your code base.
Let's use a template engine to do the rendering of the $data using a template file to create the resulting web page. We are to use the Twig template engine to do this.
Quickly browse the documentation on the template engine Twig.
Start by installing the Twig package.
# You are in the app directory
composer require twig
Start by creating a new controller file src/Controller/LuckyControllerTwig.php and add the following empty class to it.
<?php

namespace App\Controller;

use Symfony\Bundle\FrameworkBundle\Controller\AbstractController;
use Symfony\Component\HttpFoundation\Response;
use Symfony\Component\Routing\Annotation\Route;

class LuckyControllerTwig extends AbstractController
{

}
This controller extends the base class AbstractController which provides access to helper methods to render the content onto twig templates.
Now add the following method the to LuckyControllerTwig class.
    #[Route("/lucky/number/twig", name: "lucky_number")]
    public function number(): Response
    {
        $number = random_int(0, 100);

        $data = [
            'number' => $number
        ];

        return $this->render('lucky_number.html.twig', $data);
    }
Use bin/console to verify that the route is detected by Symfony.
We still need to add the template file before we can use it.
Create the file templates/lucky_number.html.twig and add the following code to it.
{# templates/lucky_number.html.twig #}

<h1>Your lucky number is {{ number }}</h1>
You can now open the route in your browser and see that it works.
It can look like this.

Twig allows you to include other templates by including them, but a more advanced feature is the feature to extend a base template. Twig calls this feature "template inheritance".
There is a file templates/base.html.twig and if you inspect it you see an html template file defining blocks that can be overridden by a template extending the base template.
Now take your templates/lucky_number.html.twig` and rewrite it to look like this.
{% extends "base.html.twig" %}

{% block title %}Magic number{% endblock %}

{% block body %}
    <h1>Magic number</h1>
    <p>Welcome to my awesome magical homepage.</p>
    <p>This is the current magic number: {{ number }}</p>
{% endblock %}
It can look like this in the browser.

The base template templates/base.html.twig already contains blocks to set up CSS and JavaScript files.
These blocks use the Symfony tool Encore to manage static assets like stylesheets and JavaScripts.
Let's add a stylesheet and JavaScript using the Encore tool.
First, we need to install Encore. This is how to do it.
composer require symfony/webpack-encore-bundle
npm install
You now have the directory assets/ and the configuration file webpack.config.js. Review them both in your editor.
You can read in detail how to set up the project using Encore.
To ensure that the stylesheets and the JavaScript files are included, open up the configuration file webpack.config.js and edit this line.
.setPublicPath('/build')
Remove the first slash to make it work even when the site is published as a subdirectory on the web server.
.setPublicPath('build')
You can now build the assets like this.
npm run build
This will create a directory public/build where all your generated stylesheets and JavaScripts will go. The base template will then include them automatically.
Verify that it works by reloading your browser.
You can add your style to the file assets/styles/app.css. Try to add the following and then rebuild the assets.
body {
    margin: 0 auto;
    max-width: 400px;
}

h1 {
    border-bottom: 4px double #ccc;
}
Reload the page and it can now look like this.

You can add your own Javascript modules. Try creating a file assets/js/hello.js and add the following module code to it (you need to create the directory assets/js).
export default () => {
    return `Yo yo - welcome to Encore!`
}
Then include and use the code from the assets/app.js like this.
import hello from './js/hello';

console.log(hello())
Now you can rebuild and reload your browser to verify that it works.
It can look like this.

Let's add a navbar where we can navigate between the pages on the website.
Let's add two new routes in the class LuckyControllerTwig like this.
    #[Route("/home", name: "home")]
    public function home(): Response
    {
        return $this->render('home.html.twig');
    }

    #[Route("/about", name: "about")]
    public function about(): Response
    {
        return $this->render('about.html.twig');
    }
You can see that you also need to add the template files that are used. For the time being, just add them like this.
templates/home.html.twig
{% extends "base.html.twig" %}

{% block title %}Home{% endblock %}

{% block body %}
    <h1>Home</h1>
{% endblock %}
templates/about.html.twig
{% extends "base.html.twig" %}

{% block title %}About{% endblock %}

{% block body %}
    <h1>About</h1>
{% endblock %}We now want to add a navbar so we can navigate between the pages.
- Home ->
/home - About ->
/about - Lucky number ->
/lucky/number/twig
The place to put this is into the base template, first in the body section. We can add it as HTML like this.
<nav>
    <ul>
        <li><a href="{{ path('home') }}">Home</a></li>
        <li><a href="{{ path('about') }}">About</a></li>
        <li><a href="{{ path('lucky_number') }}">Lucky number</a></li>
    </ul>
</nav>
We are using the Twig extension path() defined by Symfony to create the url for the navbar.
Reload the page and verify that the navbar works. Perhaps you would like to add some style to the navbar?

Let's add a few images to the website to ensure that we can link to static assets like images.
We save the images in the directory public/img so let's create it.
mkdir public/img
We need to download a set of images. The following commands download two images.
curl -s https://upload.wikimedia.org/wikipedia/commons/4/45/Glider.svg > public/img/glider.svg
curl -s 'https://upload.wikimedia.org/wikipedia/commons/thumb/f/f1/Coastal_buildings_of_%C3%85rstein_by_Nordsiveien_road_in_Gratangen%2C_Troms_og_Finnmark%2C_Norway%2C_2022_June.jpg/1280px-Coastal_buildings_of_%C3%85rstein_by_Nordsiveien_road_in_Gratangen%2C_Troms_og_Finnmark%2C_Norway%2C_2022_June.jpg' > public/img/background.jpg
Check the content of the directory public/img and verify that there are two images there.
Now we will add those images to the webpage.
Add the image to the page /about through the template file templates/about.html.twig like an ordinary image. Do also add a link so if the user clicks on the image, then the image is displayed in the browser.
{% block body %}
    <h1>About</h1>
    <p>An image which can be clicked on.</p>
    <a href="{{ asset('img/glider.svg') }}">
        <img src="{{ asset('img/glider.svg') }}" alt="">
    </a>
{% endblock %}
Add a favicon, in the same manner, using asset(). This is done in the base template templates/base.html.twig.
<link rel="icon" href="{{ asset('img/glider.svg') }}">However, note that it already exists an entry for the favicon in the base template, so remove that before adding your entry.
We can add a header that has a background image. This is done using CSS and we need to refer to the background image using CSS.
First, we add the header section in the base template templates/base.html.twig.
<header class="site-header" style="background-image: url({{ asset('img/background.jpg') }})">
    <span class="site-title">My Symfony Site</span>
</header>
The background image is added through the style attribute. That is one of many different ways to do it to deal with referencing an image from a stylesheet construct.
Then add some extra styling through the `asset/css/app.css``.
Altogether it might look like this. Well, I did some updates to my base template file and the other template files to make the header span the whole width of the page, so my result might look a bit different from yours.

Feel free to update your templates to create the structure you want from the website.
You now know the following about Symfony apps.
- How to install it.
- How to run it.
- How to add a controller and render web pages through views (template files) to your Symfony app.
- How to add routes that produce JSON responses which is an embryo of a RESTful API web service.
You might want to learn more about controllers and routing. Start reading here.
You might also find it useful to read up a bit more on Twig.
5d7b974 (2.0.5 Layout overhaul)