


English · 日本語
A command-line tool and library for monitoring and controlling Bambu Lab 3D printers over the LAN — for a person at the terminal or an AI agent.
It's a clean-room implementation: built from the protocol documentation
(OpenBambuAPI) and direct observation of
real hardware, with no dependency on — or reference to — existing Bambu libraries
(the observed protocol facts are written up in docs/protocol.md).
Four mechanisms make it safe to automate: machine-readable JSON (--json), a semantic
exit-code scheme, --confirm/--dry-run gates on every physical action, and
verify-by-reread — success is confirmed by re-reading the printer's own report, not by
the command going through.
The bambu CLI is designed around an interface that's easy for an AI agent to drive.
⚠️ Only tested on my own A1 mini in LAN mode. Other models / firmware are unverified — treat them as best-effort. It talks to the printer directly, with no cloud in the path; controlling a print needs LAN-only + Developer Mode on the printer, though just reading state doesn't.
# prebuilt binary — dashboard included
cargo binstall bambu-rs

# build from crates.io
cargo install bambu-rs

# ...or with the dashboard (needs node + pnpm to build the web UI)
cargo install bambu-rs --features dashboard
Prebuilt binaries for Linux, macOS, and Windows are attached to every release.
# one-time: register a printer (the 8-digit LAN access code is on the printer's screen)
bambu config add --printer a1 --ip 192.0.2.50 --serial <SERIAL> \
  --access-code <CODE> --model a1mini
bambu config list                   # saved profiles
bambu config show                   # the active profile (access code redacted)

# read state — one-shot JSON, or --watch to follow the active print to completion
bambu status --json
bambu status --watch
bambu info                          # firmware + the resolved capabilities for this printer
bambu hms                           # decode any health/maintenance (HMS) alerts

# files on the printer (FTPS): ls / upload / download / rm
bambu file ls
bambu file upload model.gcode.3mf --dest /cache

# calibrate — with no routine flag it runs them all (bed level, vibration, motor noise)
bambu calibrate --confirm --watch

# start a print: preview the resolved plan, then run it with guards and watch it
bambu job start /cache/model.gcode.3mf --plate 1 --dry-run        # → md5 / plate / AMS map
bambu job start /cache/model.gcode.3mf --plate 1 --ams-map 0 \
  --expect-md5 <md5> --expect-plate 1 --confirm --watch

# or upload a local file and start it in one step
bambu job start ./model.gcode.3mf --upload --plate 1 --confirm --watch
Reading state takes no flags and no checks — just a connect and a snapshot. Physical actions
(job start/pause/resume/stop, temp, light, gcode, ams, calibrate), by contrast,
require --confirm and check the printer's own state first (idle, no errors, the expected
file/plate). The exit code distinguishes success / unverified / rejected / busy so scripts and agents
can branch on it, and --json makes the output machine-readable.
bambu-rs doesn't slice — it delegates to Bambu Studio / OrcaSlicer's CLI to
produce a sliced .gcode.3mf, then uploads and prints it:
# 1. Slice a model to .gcode.3mf (Bambu Studio / OrcaSlicer CLI)
bambu-studio --slice 1 \
  --load-settings "machine.json;process.json" \
  --load-filaments "filament.json" \
  --allow-newer-file \
  --export-3mf out.gcode.3mf  model.3mf

# 2. Upload, preview the plan, then print it (asserting it's exactly what you inspected)
bambu file upload out.gcode.3mf --dest /cache
bambu job start /cache/out.gcode.3mf --plate 1 --dry-run          # → inspection.gcode_md5
bambu job start /cache/out.gcode.3mf --plate 1 --ams-map 0 \
  --expect-md5 <that-md5> --expect-plate 1 --confirm --watch
Full details (flags, AMS mapping, external spool, --dry-run) in
docs/slicing.md.
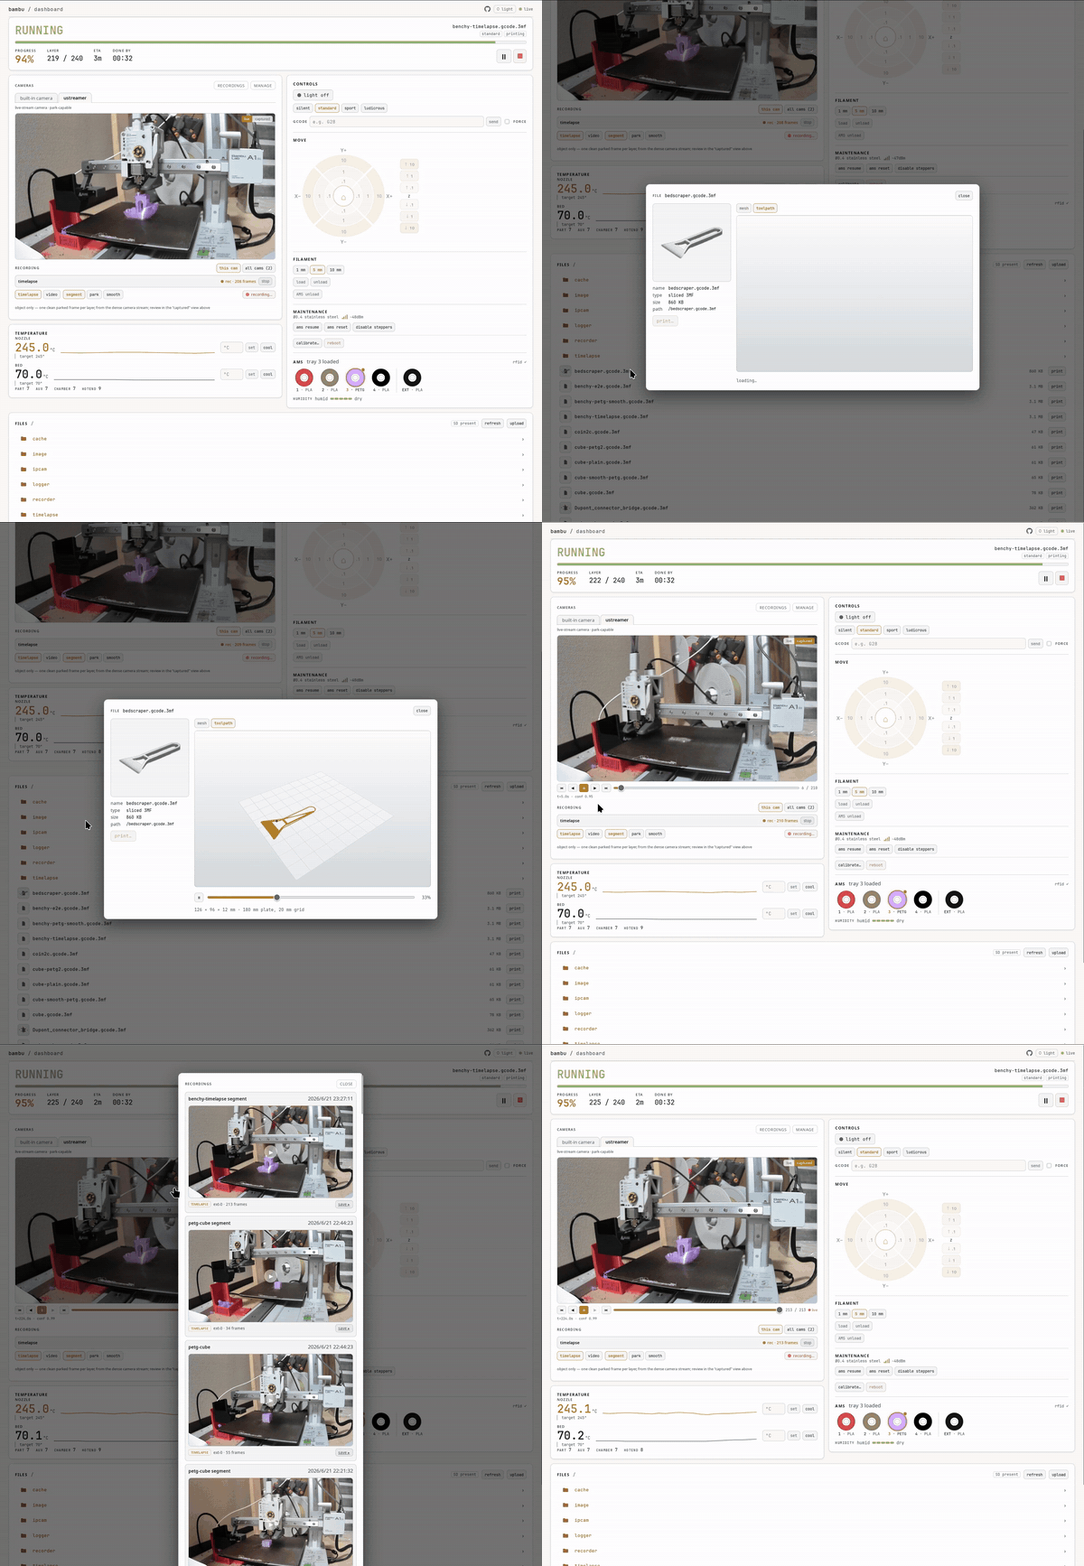
bambu serve runs a small local server. With the dashboard feature enabled, it serves the
web dashboard built into the CLI (without it, you still get the REST API). From a phone or
browser you get live printer status, temperatures, AMS, the live camera, one-click
clean-timelapse capture, and the usual controls — all over the same single LAN connection
(reads are open; control is gated behind an optional password).
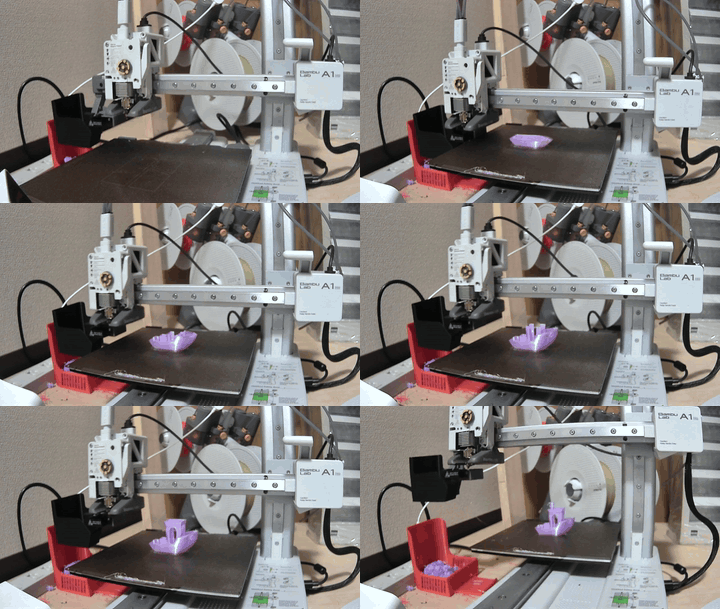
The printer's own built-in timelapse works as you'd expect: toggle recording with
bambu timelapse enable/disable, opt in per print with job start --timelapse, and fetch
the finished video with bambu timelapse get. Beyond that, bambu-rs can record your own
from an external camera, driven by the print's own layer events — one frame per layer. It
also covers printers whose built-in camera is missing or broken.
There are two ways to feed it. Point bambu timelapse capture at any tool to grab a frame
each layer (the command after -- runs as argv, never via a shell, with
{frame}/{layer}/{outdir} substituted in):
bambu timelapse capture --out-dir ./tl -- fswebcam -r 1280x720 {frame}

# a USB camera served over HTTP by µStreamer (its /snapshot endpoint):
bambu timelapse capture --out-dir ./tl -- \
  curl -s -m 15 -o {frame} "http://$USTREAMER_HOST/snapshot"

# an IP camera (e.g. an ATOM Cam running atomcam_tools) over plain HTTP:
bambu timelapse capture --out-dir ./tl -- \
  curl -s -m 15 -o {frame} "http://$ATOMCAM_HOST/cgi-bin/get_jpeg.cgi"
Or, for the smooth result above, bambu timelapse park reads a camera's MJPEG stream and
picks the parked frame for each layer on-device — the head clear of the object — so you
don't have to time the grab yourself. The bambu serve dashboard wraps the same into
one-click capture:
bambu timelapse park http://<host>/stream --config tuning.json --out ./tl --assemble out.mp4Either way, a failed grab is skipped and a suggested ffmpeg line is printed to stitch the
frames.
bambu speed standard                 # silent | standard | sport | ludicrous
bambu light on --node chamber        # on | off  ·  --node chamber | work
bambu gcode "G28"                    # over-limit temps / cold extrusion refused unless --force
bambu ams resume                     # resume | reset | pause | change | set-filament | settings
Physical actions take --confirm; ams change/set-filament also support --dry-run.
Deeper slicer integration comes later.
The protocol and safety logic live in a reusable Rust crate — the bambu CLI and the
bambu serve dashboard are both just consumers of it.
[dependencies]
bambu-rs = { version = "0.1", default-features = false }   # library only — no CLI/server deps
use bambu_rs::client::LanMqttClient;
use bambu_rs::config::ResolvedTarget;
use bambu_rs::core::command::{Command, ProjectFile};
use bambu_rs::core::model::Model;
use bambu_rs::core::session::CommandOutcome;
let client = LanMqttClient::new(ResolvedTarget {
ip: "192.0.2.50".into(),
serial: "<SERIAL>".into(),
access_code: "<CODE>".into(),
model: Model::A1Mini,
});
// Full calibration. `send_and_verify` confirms the routine actually started by
// re-reading the printer's own report — not just that the publish succeeded.
let outcome = client.send_and_verify(&Command::Calibration {
bed_level: true,
vibration: true,
motor_noise: true,
})?;
assert_eq!(outcome, CommandOutcome::Verified);
// Print a sliced 3MF already uploaded to the printer (plate 1).
let job = ProjectFile::new("ftp:///cache/model.gcode.3mf", 1, "my-print");
client.send_and_verify(&Command::ProjectFile(job))?;Per-firmware differences are captured as capabilities of a given (model, firmware): how
the camera streams (the A1 sends JPEG over a raw TCP socket; X-series printers use RTSP),
whether a temperature command is still honoured once a print is running (newer firmware
silently ignores it), whether state arrives as one full snapshot or as deltas, even a field
name whose spelling changed between releases. The set is resolved once on connect, and
command-building, report parsing, and the safety checks all read from it instead of
scattering if firmware >= … branches through the code. bambu info prints it for the
connected printer:
$ bambu info
printer: a1 (a1mini)
firmware: 01.07.02.00
registry: supported
push:     delta_only
camera:   jpeg_tcp_6000
control:  requires_developer_mode — control needs LAN-only + Developer Mode enabled
modules:
  ota        hw OTA       sw 01.07.02.00  Bambu Lab A1 mini
  esp32      hw AP05      sw 01.16.39.58
  mc         hw MC02      sw 00.01.30.10
  th         hw TH03      sw 00.00.07.72
  ams_f1/0   hw AMS_F102  sw 00.00.08.15  AMS Lite