Your Own Mesh
This is the standard workflow for a normal skeletal mesh (anything that isn't a MetaHuman). It's two parts: assign a Deformer Graph so the mesh writes its stretch/squash vertex colors, then use those vertex colors in a material.
For MetaHumans, follow MetaHumans instead — they need a different deformer and a material-function swap.
The Deformer Graph is what measures stretch/squash and writes it into the mesh's vertex colors (Red = stretch, Green = squash).
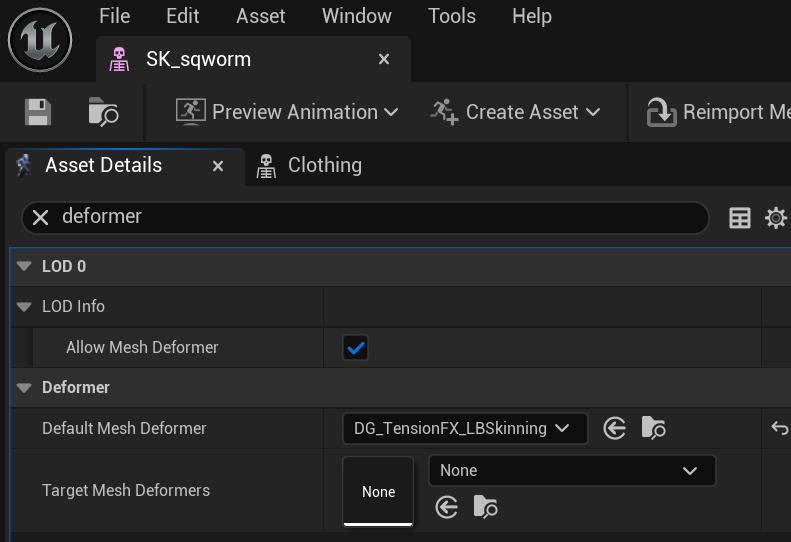
- Open your Skeletal Mesh asset.
- In the asset Details panel, find Default Mesh Deformer (type
deformin the details search box to jump to it). - Set it to the deformer that matches how your mesh moves:
-
DG_TensionFX_LBSkinning— for ordinary skinned meshes (most cases). -
DG_TensionFX_Morph_and_MLDeformers— if your mesh is driven by morph targets or an ML Deformer.
-
That's it for the data. With the deformer assigned, the mesh now writes live
stretch/squash into its vertex colors every frame. You can preview the raw vertex
colors by temporarily assigning a debug material (M_TensionDebug reads vertex
color straight to emissive).
The deformer also exposes power constants inside the graph itself, so you can bias stretch/squash strength at the deformer level (affecting every mesh that uses it) rather than per-material. See Material Controls & Tuning.
Now make a material that does something with the stretch/squash values.
The quickest path is to start from the provided example material so you can see the wiring, then adapt it:
- Open
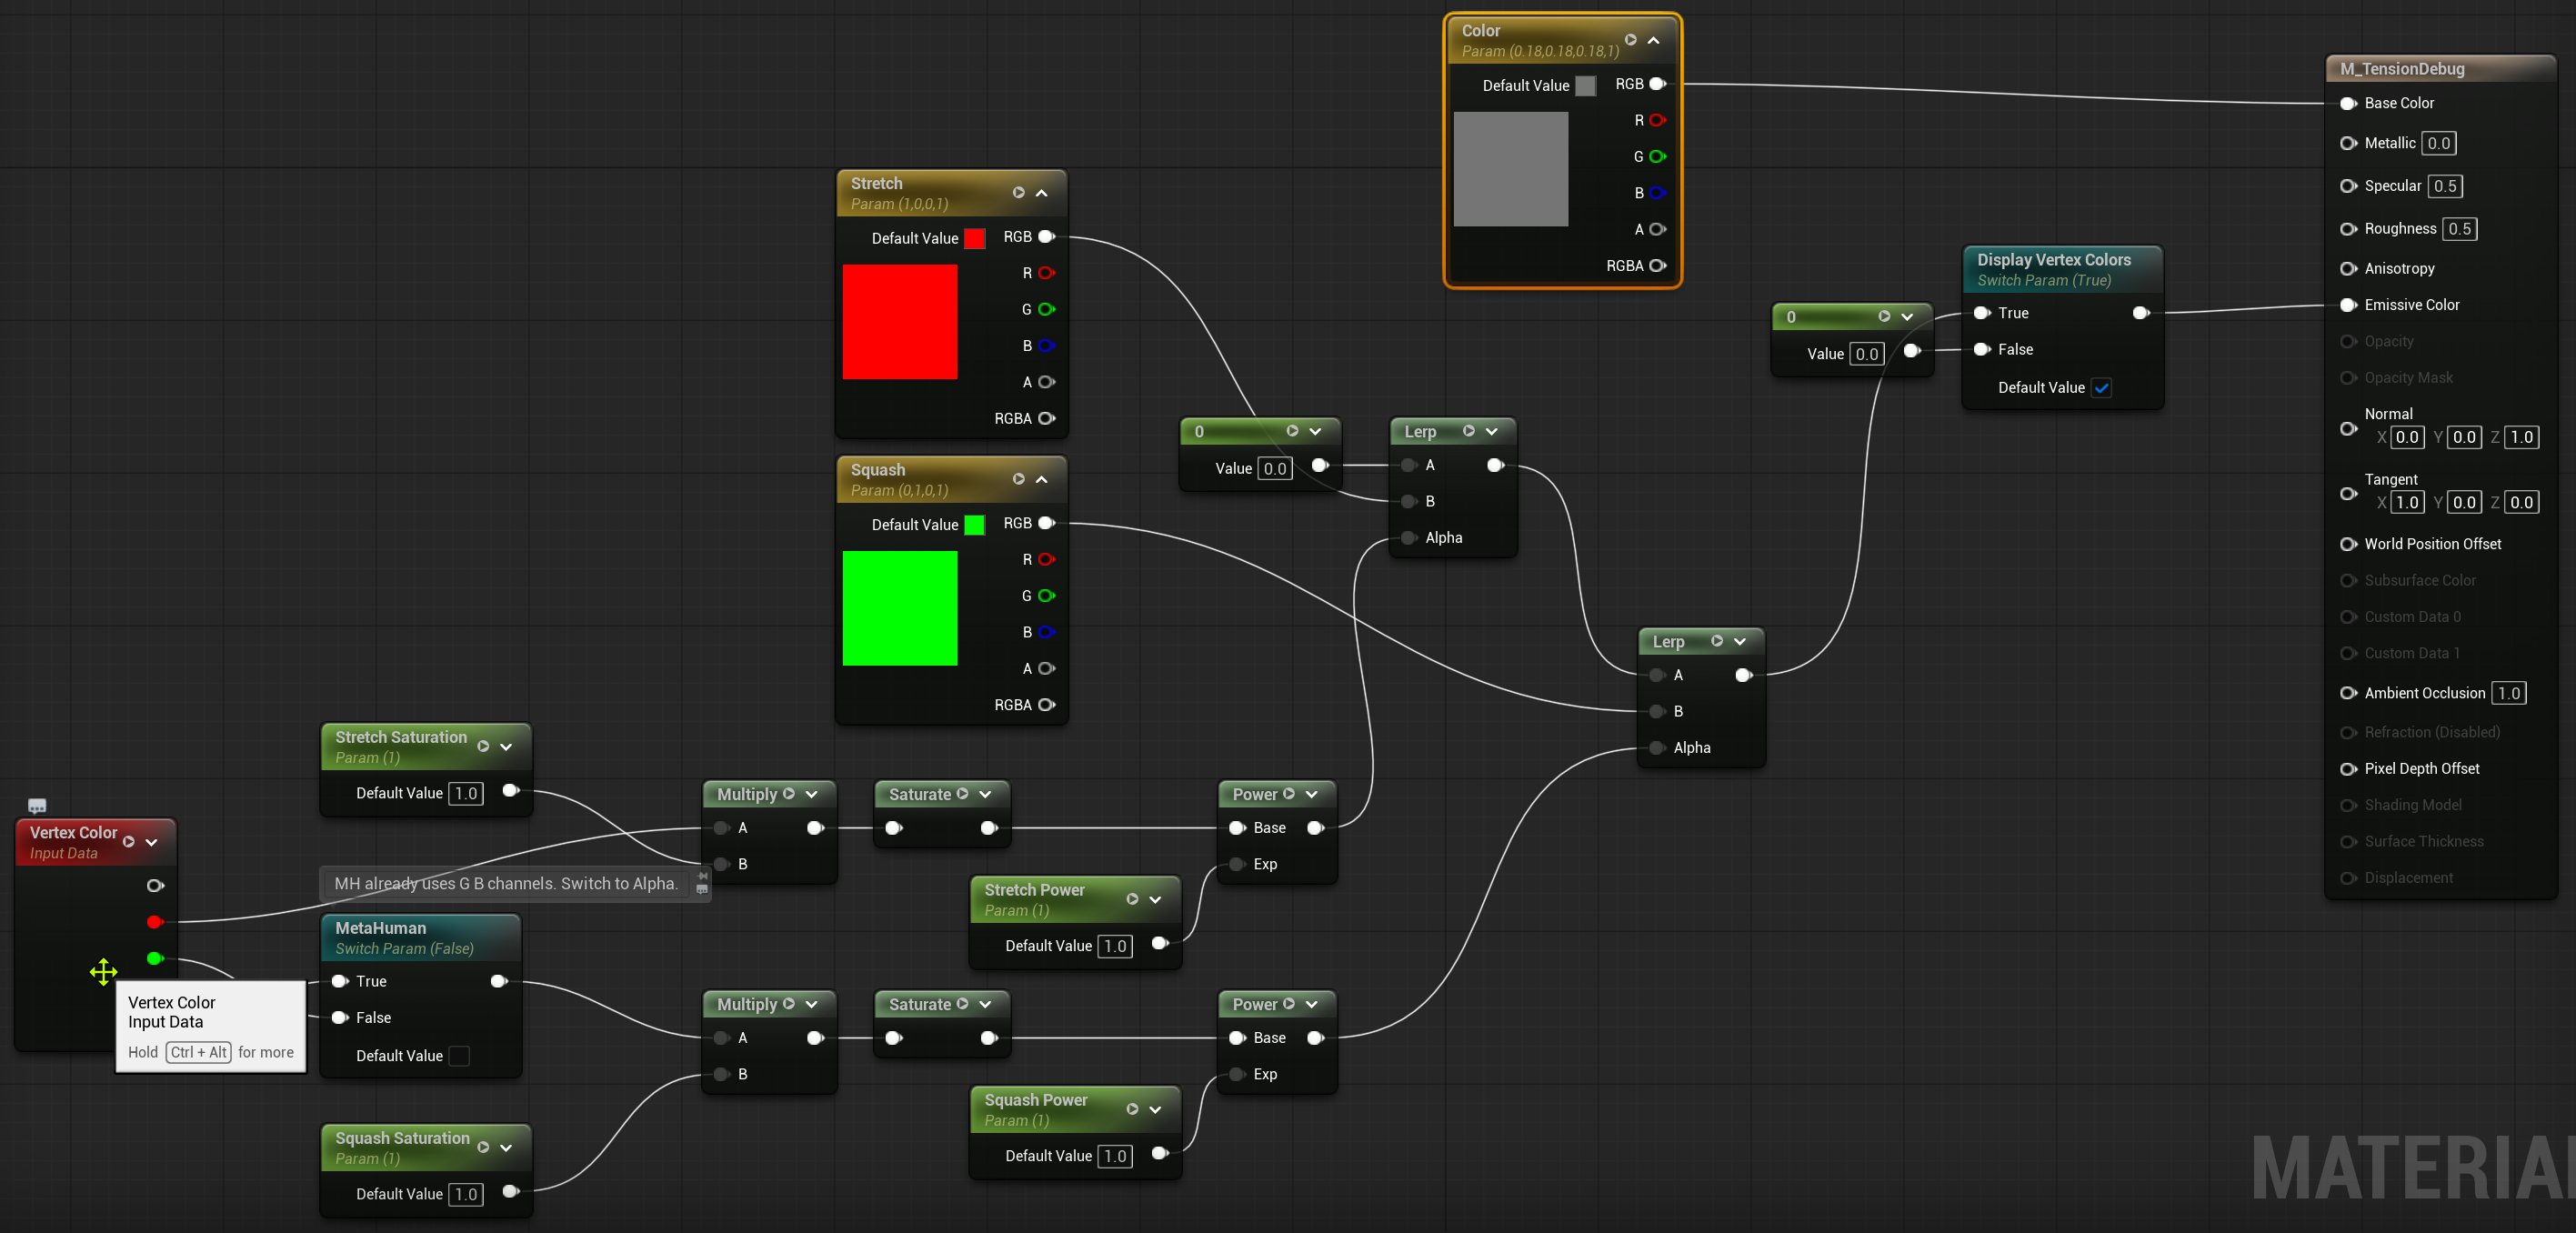
MI_SqworminContent/TensionFX/Examples/Sqworm/Materials/, or open its parent material to see the full graph. - The pattern is simple:
- A Vertex Color node brings in the values.
- Red channel = stretch amount, Green channel = squash amount.
- Those drive color, roughness, and (in the wrinkle example material) procedural wrinkles, each behind an on/off switch and a power/strength control.
To use it on your mesh, either assign that material (swapping the base textures for yours) or rebuild the same Vertex-Color→effect wiring in your own material.
Create a Material Instance of your material to tune it non-destructively. The example material exposes things like Stretch/Squash Power, roughness and saturation shifts, and the wrinkle controls — see Material Controls & Tuning for more. The display colors in the example are just for visualization — change them freely; they don't affect the math.
Next: Material Controls & Tuning → · or the MetaHuman workflow →