Bring TJBot to Life
Congratulations on assembling your TJBot hardware! 🦾🤖 The next step is to install and configure TJBot's software.
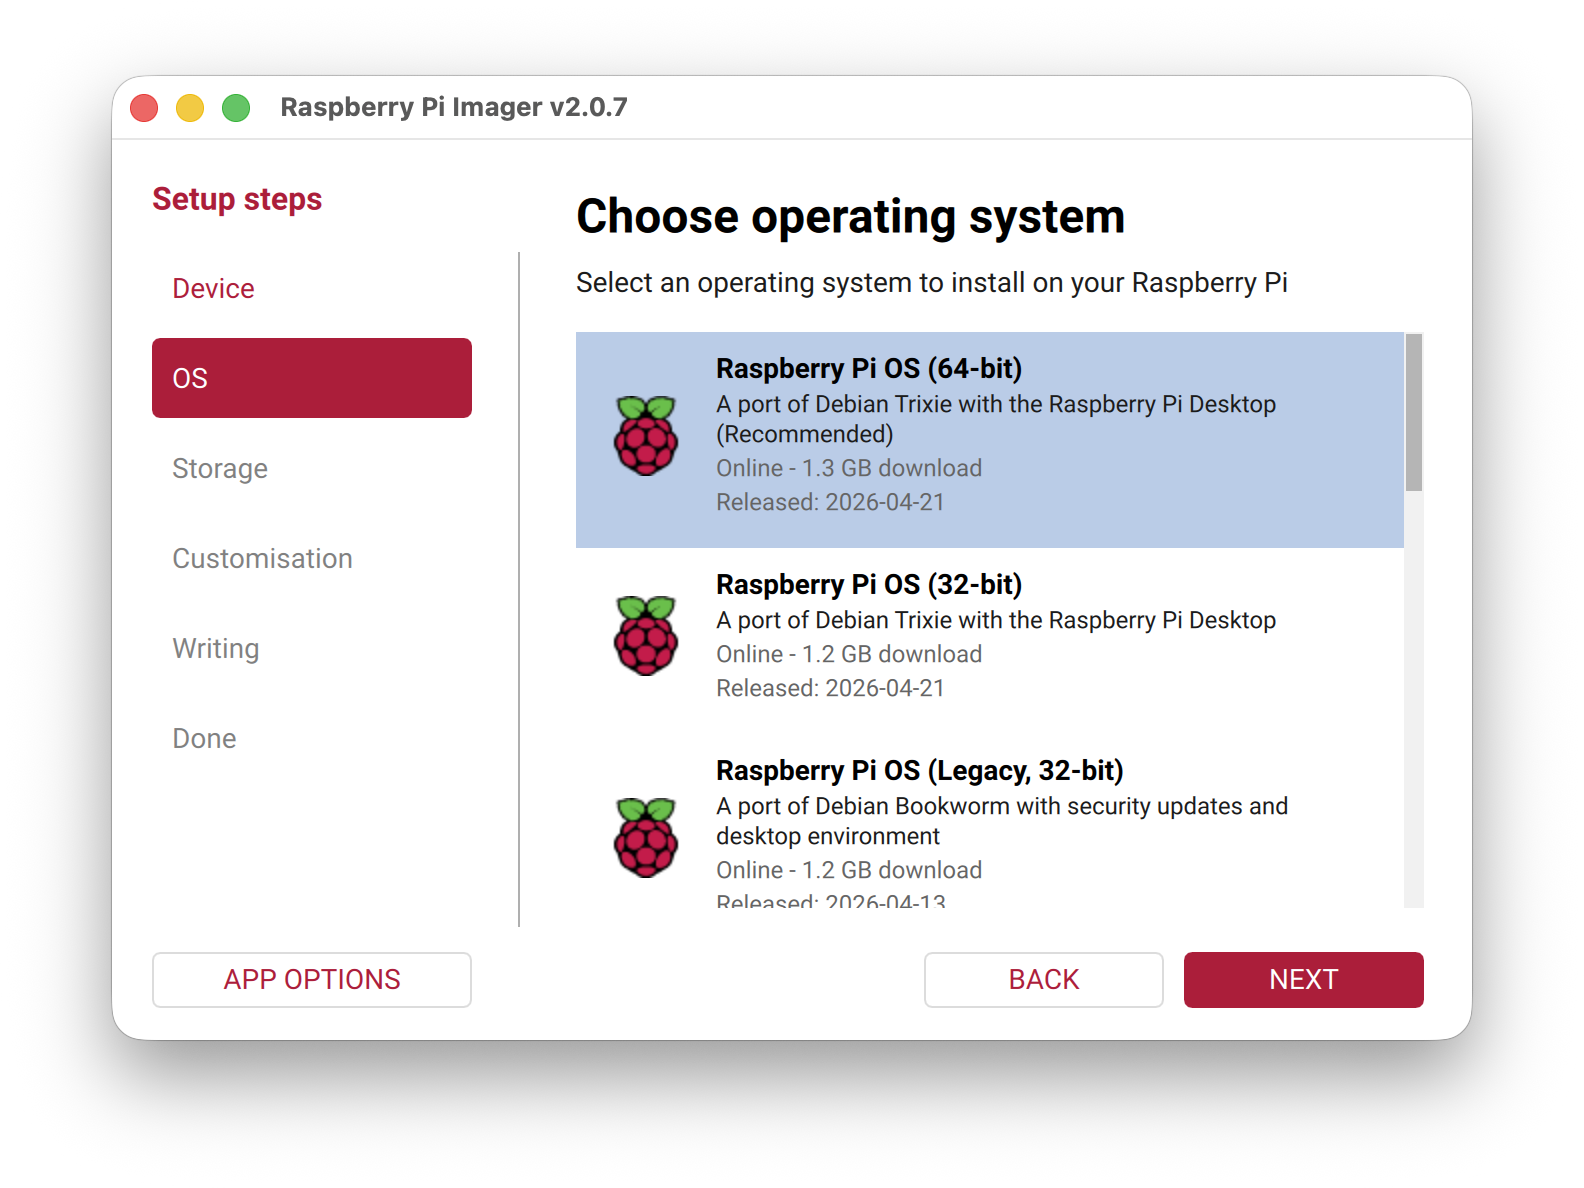
The first step is to install Raspberry Pi OS to your storage device (e.g. your SD card). Use the Raspberry Pi Imager to do this. As of this writing, the latest Raspberry Pi OS is named "Trixie," released on April 21, 2026.
Next, run the TJBot setup script to install TJBot's specific software requirements, including Node.js, uv, and mise.
Open a Terminal and run the following command:
curl -sL https://tjbot-ce.github.io/setup | sudo bashImportant
This script must be run as root because it makes system-level changes. It must also be run using the bash shell.
The setup script downloads the tjbot code repository to ~/.tjbot/tjbot, which contains a set of recipes that demonstrate its capabilities. The script adds TJBot's bin/ directory to your path, which contains a tjbot command that allows you to easily run TJBot recipes.
TJBot's configuration file is stored in ~/.tjbot/tjbot.toml. After setting up TJBot's software, edit your TJBot's configuration using the built-in configuration editor. Run the following command within your Terminal:
$ tjbot config


TJBot Configuration Editor
Schema loaded from /home/pi/.tjbot/tjbot/vendor/tjbot-config/tjbot-config.schema.yaml
Arrow keys to navigate · Enter to select · Ctrl-C to cancel

[?] Select section to configure:
 >   log      - Console logging configuration.
     hardware - Hardware physically attached to the Raspberry Pi.
     listen   - Settings for audio capture and speech recognition.
     see      - Settings for the camera and computer vision.
     shine    - Settings for LED hardware.
     speak    - Settings for audio playback and text-to-speech.
     wave     - Settings for servo hardware.
     💾 Save and exit 🟢
     ✖ Exit without saving
Within the configuration editor, you can change each of TJBot's settings. Begin by configuring your TJBot's hardware, then set up the rest of TJBot's capabilities: listen, see, shine, speak, and wave. When you have finished, select "💾 Save and exit" to save your configuration to ~/.tjbot/tjbot.toml.
Note
If you have an existing tjbot.toml file, it will be backed up first and given a name containing the current date and time. These files can safely be removed if you do not need them.
You can also directly edit the tjbot.toml file using your favorite text editor. Advanced users may wish to review this file as it contains a lot of documentation for each configuration option, including how to enable custom, on-device ML models for STT, TTS, and Vision.
If you would like to use cloud-based AI services, you will need to create those services and download the authentication credentials from your provider. We provide guides for how to set up services on these cloud platforms:
Once you have configured your TJBot, it's time to run some tests to make sure everything is working!
TJBot comes with tests for each of its major subsystems. These can be run using the tjbot command:
-
tjbot testlists all available tests -
tjbot test cameratests the camera hardware -
tjbot test ledtests the LED hardware -
tjbot test microphonetests the microphone hardware -
tjbot test servotests the servo hardware -
tjbot test stttests the Speech-to-Text services (local or cloud-based) -
tjbot test speakertests the speaker hardware -
tjbot test ttstests the Text-to-Speech services (local or cloud-based) -
tjbot test visiontests the Vision services (local or cloud-based)
We recommend running through all of the tests to ensure your hardware & software are working properly.
Tip
TJBot uses the ALSA audio system to record and play audio. In some cases, ALSA may not automatically know which device it should use and may throw an error or fail silently. In this case, you can use the microphone and speaker tests to determine the device names of those devices (e.g. plughw:0,0, plughw:1,0, etc.). Then, you can update your tjbot.toml file to explicitly specify those device names in listen.device and speak.device.
Now that your TJBot is set up, it's time to play!