Github Markdown Documentation
This Wiki page was last updated for v4.4.*
Note
Section 1 is created by me with some help from the internet. Rest of this Documentation is copied from various Resources, mostly the Github wiki.
Tip
Normally Github doesn't permit Text Color changes in README files. We use a workaround by using Inline Coding from
Warning
Viewing Color Text Codes in VSCode gives some formatting errors. View them in Github.
You can change Text Color in anywhere in your Markdown files. Even titles.
You can use either \textcolor, or \color codes to do the job. \textcolor only impacts the Text, while \color is applied to text, all math symbols, and equations.
- The correct Syntax is
{\color{color-name}<text or equation>}wrapped in$$ - Each
\color{color-name}should be under separate one open{and one closed}curly bracket. - While using multiple words etc, you need to use
\spacefunction to leave spaces between words. - To use Special Characters, you need to escape them via
\\. e.g.\\&>> & (Using only one\sometimes isn't enough.$$\textcolor{red}{WARNING:}$$ VS Code might give errors.) - To prevent the Text from appearing in Middle of Screen, you should use a
to leave a Space that$$\textcolor{gold}{LATEX}$$ can't ignore.
| Code | Result | |
|---|---|---|
| Single Word, Single Color, No Special Characters | $$\textcolor{aqua}{Example}$$ |
|
| Single Word, Single Color, Special Characters | $$\textcolor{aqua}{\\&}$$ |
|
| Single Word, Multi Color | $$\textcolor{aqua}{E}\textcolor{red}{X}\textcolor{yellow}{A}\textcolor{green}{M}\textcolor{white}{P}\textcolor{blue}{L}\textcolor{purple}{E}$$ |
|
| Multi Word | $$\textcolor{aqua}{Example \space With \space Space}$$ |
|
| Multi Word, Multi Color | $$\textcolor{aqua}{Example} \space \textcolor{red}{With} \space \textcolor{green}{Space}$$ |
| Color | Color Code |
|---|---|
| aqua | |
| black | |
| blue | |
| brown | |
| cyan | |
| darkgray | |
| gold | |
| gray | |
| green | |
| lightblue | |
| lightgray | |
| lightgreen | |
| magenta | |
| orange | |
| pink | |
| purple | |
| red | |
| violet | |
| white | |
| yellow |
You can add a README file to your repository to tell other people why your project is useful, what they can do with your project, and how they can use it.
You can add a README file to a repository to communicate important information about your project. A README, along with a repository license, citation file, contribution guidelines, and a code of conduct, communicates expectations for your project and helps you manage contributions.
For more information about providing guidelines for your project, see Adding a code of conduct to your project and Setting up your project for healthy contributions.
A README is often the first item a visitor will see when visiting your repository. README files typically include information on:
- What the project does
- Why the project is useful
- How users can get started with the project
- Where users can get help with your project
- Who maintains and contributes to the project
If you put your README file in your repository's hidden .github, root, or docs directory, GitHub will recognize and automatically surface your README to repository visitors.
If a repository contains more than one README file, then the file shown is chosen from locations in the following order: the .github directory, then the repository's root directory, and finally the docs directory.
When your README is viewed on GitHub, any content beyond 500 KiB will be truncated.
If you add a README file to the root of a public repository with the same name as your username, that README will automatically appear on your profile page. You can edit your profile README with GitHub Flavored Markdown to create a personalized section on your profile. For more information, see Managing your profile README.
For the rendered view of any Markdown file in a repository, including README files, GitHub will automatically generate a table of contents based on section headings. You can view the table of contents for a README file by clicking the "Outline" menu icon in the top corner of the rendered page.
You can link directly to any section that has a heading. To view the automatically generated anchor in a rendered file, hover over the section heading to expose the icon and click the icon to display the anchor in your browser.

For more detailed information about section links, see Section links.
You can define relative links and image paths in your rendered files to help readers navigate to other files in your repository.
A relative link is a link that is relative to the current file. For example, if you have a README file in root of your repository, and you have another file in docs/CONTRIBUTING.md, the relative link to CONTRIBUTING.md in your README might look like this:
[Contribution
guidelines for this project](docs/CONTRIBUTING.md)
GitHub will automatically transform your relative link or image path based on whatever branch you're currently on, so that the link or path always works. The path of the link will be relative to the current file. Links starting with / will be relative to the repository root. You can use all relative link operands, such as ./ and ../.
Your link text should be on a single line. The example below will not work.
[Contribution
guidelines for this project](docs/CONTRIBUTING.md)Relative links are easier for users who clone your repository. Absolute links may not work in clones of your repository - we recommend using relative links to refer to other files within your repository.
A README should only contain information necessary for developers to get started using and contributing to your project. Longer documentation is best suited for wikis. For more information, see About wikis.
- Adding a file to a repository
- 5 tips for making your GitHub profile page accessible in the GitHub blog
- Facilitating quick creation and resumption of codespaces
Tip
This is imported from https://docs.github.com/en/get-started/writing-on-github/getting-started-with-writing-and-formatting-on-github/basic-writing-and-formatting-syntax
Create sophisticated formatting for your prose and code on GitHub with simple syntax.
To create a heading, add one to six # symbols before your heading text. The number of # you use will determine the hierarchy level and typeface size of the heading.
# 4. A first-level heading
## 4.1. A second-level heading
### 4.1.1. A third-level heading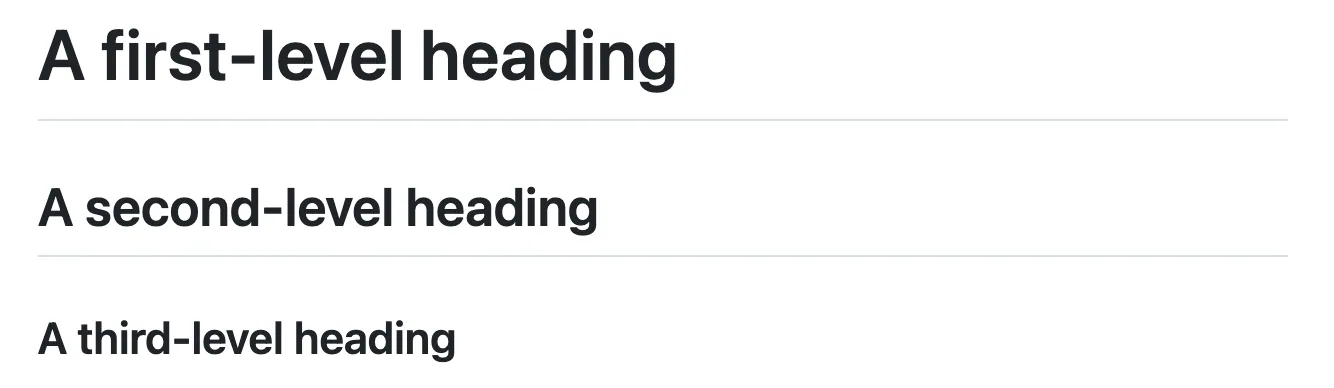
When you use two or more headings, GitHub automatically generates a table of contents that you can access by clicking the "Outline" menu icon within the file header. Each heading title is listed in the table of contents and you can click a title to navigate to the selected section.

You can indicate emphasis with bold, italic, strikethrough, subscript, or superscript text in comment fields and .md files.
| Style | Syntax | Keyboard shortcut | Example | Output | |
|---|---|---|---|---|---|
| Bold |
** ** or __ __
|
Command+B (Mac) or Ctrl+B (Windows/Linux) | **This is bold text** |
This is bold text | |
| Italic |
* * or _ _ |
Command+I (Mac) or Ctrl+I (Windows/Linux) | _This text is italicized_ |
This text is italicized | |
| Strikethrough |
~~ ~~ or ~ ~
|
None | ~~This was mistaken text~~ |
||
| Bold and nested italic |
** ** and _ _
|
None | **This text is _extremely_ important** |
This text is extremely important | |
| All bold and italic | *** *** |
None | ***All this text is important*** |
All this text is important | |
| Subscript | <sub> </sub> |
None | This is a <sub>subscript</sub> text |
This is a subscript text | |
| Superscript | <sup> </sup> |
None | This is a <sup>superscript</sup> text |
This is a superscript text | |
| Underline | <ins> </ins> |
None | This is an <ins>underlined</ins> text |
This is an underlined text |
You can quote text with a >.
Text that is not a quote

> Text that is a quote
Quoted text is indented with a vertical line on the left and displayed using gray type.

Note
When viewing a conversation, you can automatically quote text in a comment by highlighting the text, then typing R. You can quote an entire comment by clicking , then Quote reply. For more information about keyboard shortcuts, see Keyboard shortcuts.
You can call out code or a command within a sentence with single backticks. The text within the backticks will not be formatted. You can also press the Command+E (Mac) or Ctrl+E (Windows/Linux) keyboard shortcut to insert the backticks for a code block within a line of Markdown.
Use `git status` to list all new or modified files that haven't yet been committed.
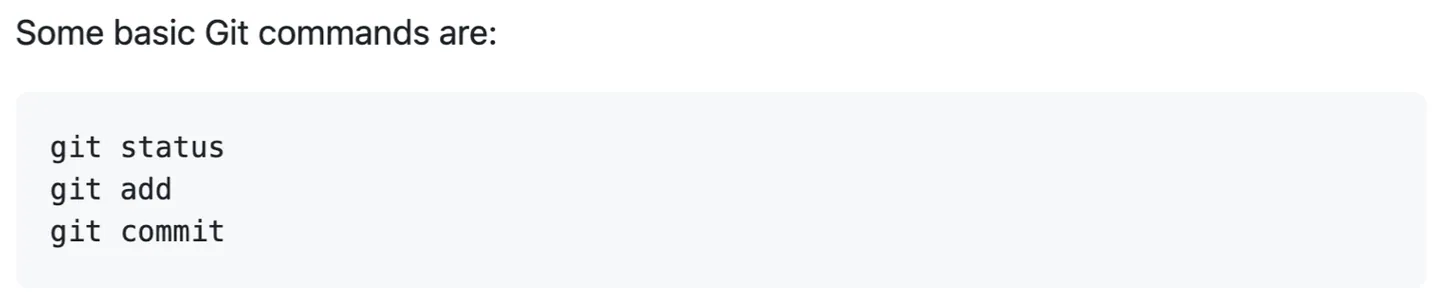
To format code or text into its own distinct block, use triple backticks.
Some basic Git commands are:
```
git status
git add
git commit
```
For more information, see Creating and highlighting code blocks.
If you are frequently editing code snippets and tables, you may benefit from enabling a fixed-width font in all comment fields on GitHub. For more information, see About writing and formatting on GitHub.
In issues, pull requests, and discussions, you can call out colors within a sentence by using backticks. A supported color model within backticks will display a visualization of the color.
The background color is `#ffffff` for light mode and `#000000` for dark mode.
Here are the currently supported color models.
| Color | Syntax | Example | Output |
|---|---|---|---|
| HEX | `#RRGGBB` |
`#0969DA` |
 |
| RGB | `rgb(R,G,B)` |
`rgb(9, 105, 218)` |
 |
| HSL | `hsl(H,S,L)` |
`hsl(212, 92%, 45%)` |
 |
Note
- A supported color model cannot have any leading or trailing spaces within the backticks.
- The visualization of the color is only supported in issues, pull requests, and discussions.
You can create an inline link by wrapping link text in brackets [ ], and then wrapping the URL in parentheses ( ). You can also use the keyboard shortcut Command+K to create a link. When you have text selected, you can paste a URL from your clipboard to automatically create a link from the selection.
You can also create a Markdown hyperlink by highlighting the text and using the keyboard shortcut Command+V. If you'd like to replace the text with the link, use the keyboard shortcut Command+Shift+V.
This site was built using [GitHub Pages](https://pages.github.com/).

Note
GitHub automatically creates links when valid URLs are written in a comment. For more information, see Autolinked references and URLs.
You can link directly to any section that has a heading. To view the automatically generated anchor in a rendered file, hover over the section heading to expose the icon and click the icon to display the anchor in your browser.
If you need to determine the anchor for a heading in a file you are editing, you can use the following basic rules:
- Letters are converted to lower-case.
- Spaces are replaced by hyphens (
-). Any other whitespace or punctuation characters are removed. - Leading and trailing whitespace are removed.
- Markup formatting is removed, leaving only the contents (for example,
_italics_becomesitalics). - If the automatically generated anchor for a heading is identical to an earlier anchor in the same document, a unique identifier is generated by appending a hyphen and an auto-incrementing integer.
For more detailed information on the requirements of URI fragments, see RFC 3986: Uniform Resource Identifier (URI): Generic Syntax, Section 3.5.
The code block below demonstrates the basic rules used to generate anchors from headings in rendered content.
# 5. Example headings

## 5.1. Sample Section

## 5.2. This'll be a _Helpful_ Section About the Greek Letter Θ!
A heading containing characters not allowed in fragments, UTF-8 characters, two consecutive spaces between the first and second words, and formatting.

## 5.3. This heading is not unique in the file

TEXT 1

## 5.4. This heading is not unique in the file

TEXT 2

# 6. Links to the example headings above

Link to the sample section: [Link Text](#51-sample-section).

Link to the helpful section: [Link Text](#thisll-be-a-helpful-section-about-the-greek-letter-Θ).

Link to the first non-unique section: [Link Text](#54-this-heading-is-not-unique-in-the-file).

Link to the second non-unique section: [Link Text](#this-heading-is-not-unique-in-the-file-1).
Note
If you edit a heading, or if you change the order of headings with "identical" anchors, you will also need to update any links to those headings as the anchors will change.
You can define relative links and image paths in your rendered files to help readers navigate to other files in your repository.
A relative link is a link that is relative to the current file. For example, if you have a README file in root of your repository, and you have another file in docs/CONTRIBUTING.md, the relative link to CONTRIBUTING.md in your README might look like this:
[Contribution
guidelines for this project](docs/CONTRIBUTING.md)
GitHub will automatically transform your relative link or image path based on whatever branch you're currently on, so that the link or path always works. The path of the link will be relative to the current file. Links starting with / will be relative to the repository root. You can use all relative link operands, such as ./ and ../.
Your link text should be on a single line. The example below will not work.
[Contribution
guidelines for this project](docs/CONTRIBUTING.md)Relative links are easier for users who clone your repository. Absolute links may not work in clones of your repository - we recommend using relative links to refer to other files within your repository.
You can use standard HTML anchor tags (<a name="unique-anchor-name"></a>) to create navigation anchor points for any location in the document. To avoid ambiguous references, use a unique naming scheme for anchor tags, such as adding a prefix to the name attribute value.
Note
Custom anchors will not be included in the document outline/Table of Contents.
You can link to a custom anchor using the value of the name attribute you gave the anchor. The syntax is exactly the same as when you link to an anchor that is automatically generated for a heading.
For example:
# 7. Section Heading

Some body text of this section.

<a name="my-custom-anchor-point"></a>
Some text I want to provide a direct link to, but which doesn't have its own heading.

(… more content…)

[A link to that custom anchor](#my-custom-anchor-point)
Tip
Custom anchors are not considered by the automatic naming and numbering behavior of automatic heading links.
If you're writing in issues, pull requests, or discussions in a repository, GitHub will render a line break automatically:
This example
Will span two lines
However, if you are writing in an .md file, the example above would render on one line without a line break. To create a line break in an .md file, you will need to include one of the following:
-
Include two spaces at the end of the first line.
This example
Will span two lines
-
Include a backslash at the end of the first line.
This example\ Will span two lines -
Include an HTML single line break tag at the end of the first line.
This example<br/>
Will span two lines
If you leave a blank line between two lines, both .md files and Markdown in issues, pull requests, and discussions will render the two lines separated by the blank line:
This example

Will have a blank line separating both linesYou can display an image by adding ! and wrapping the alt text in [ ]. Alt text is a short text equivalent of the information in the image. Then, wrap the link for the image in parentheses ().

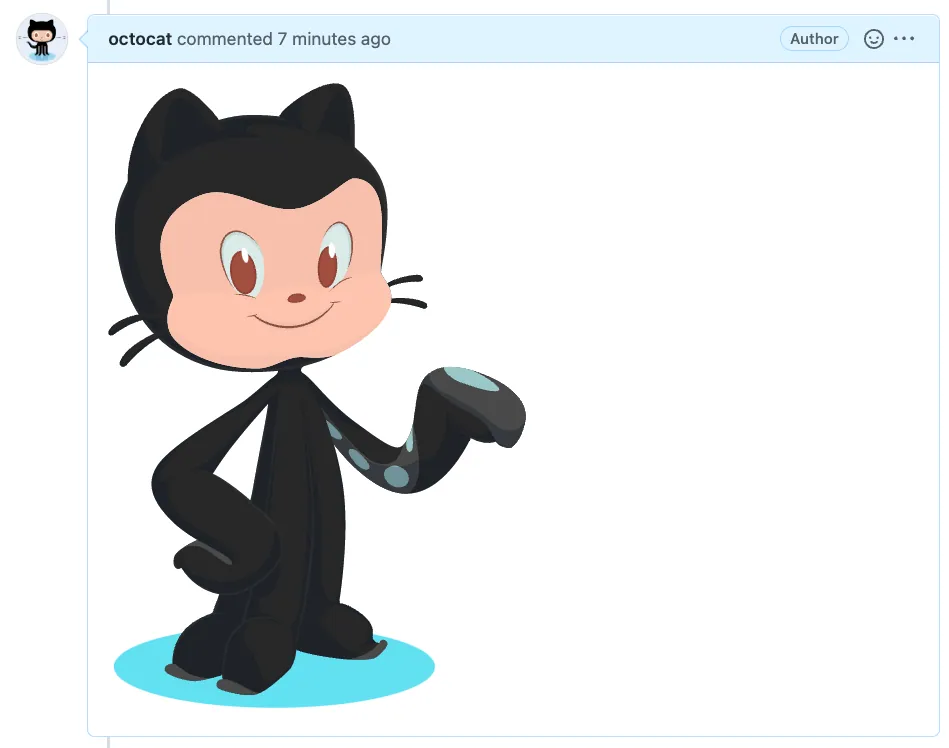
GitHub supports embedding images into your issues, pull requests, discussions, comments and .md files. You can display an image from your repository, add a link to an online image, or upload an image. For more information, see Uploading assets.
Note
When you want to display an image that is in your repository, use relative links instead of absolute links.
Here are some examples for using relative links to display an image.
| Context | Relative Link |
|---|---|
In a .md file on the same branch |
/assets/images/electrocat.png |
In a .md file on another branch |
/../main/assets/images/electrocat.png |
| In issues, pull requests and comments of the repository | ../blob/main/assets/images/electrocat.png?raw=true |
In a .md file in another repository |
/../../../../github/docs/blob/main/assets/images/electrocat.png |
| In issues, pull requests and comments of another repository | ../../../github/docs/blob/main/assets/images/electrocat.png?raw=true |
Note
The last two relative links in the table above will work for images in a private repository only if the viewer has at least read access to the private repository that contains these images.
For more information, see Relative Links.
The <picture> HTML element is supported.
You can make an unordered list by preceding one or more lines of text with -, *, or +.
- George Washington
* John Adams
+ Thomas Jefferson
To order your list, precede each line with a number.
1. James Madison
2. James Monroe
3. John Quincy Adams
You can create a nested list by indenting one or more list items below another item.
To create a nested list using the web editor on GitHub or a text editor that uses a monospaced font, like Visual Studio Code, you can align your list visually. Type space characters in front of your nested list item until the list marker character (- or *) lies directly below the first character of the text in the item above it.
1. First list item
   - First nested list item
     - Second nested list item
Note
In the web-based editor, you can indent or dedent one or more lines of text by first highlighting the desired lines and then using Tab or Shift+Tab respectively.


To create a nested list in the comment editor on GitHub, which doesn't use a monospaced font, you can look at the list item immediately above the nested list and count the number of characters that appear before the content of the item. Then type that number of space characters in front of the nested list item.
In this example, you could add a nested list item under the list item 100. First list item by indenting the nested list item a minimum of five spaces, since there are five characters (100. ) before First list item.
100. First list item
     - First nested list item
You can create multiple levels of nested lists using the same method. For example, because the first nested list item has seven characters (␣␣␣␣␣-␣) before the nested list content First nested list item, you would need to indent the second nested list item by at least two more characters (nine spaces minimum).
100. First list item
     - First nested list item
       - Second nested list item
For more examples, see the GitHub Flavored Markdown Spec.
To create a task list, preface list items with a hyphen and space followed by [ ]. To mark a task as complete, use [x].
- [x] #739
- [ ] https://github.com/octo-org/octo-repo/issues/740
- [ ] Add delight to the experience when all tasks are complete :tada:
If a task list item description begins with a parenthesis, you'll need to escape it with \:
- [ ] \(Optional) Open a followup issue
For more information, see About tasklists.
You can mention a person or team on GitHub by typing @ plus their username or team name. This will trigger a notification and bring their attention to the conversation. People will also receive a notification if you edit a comment to mention their username or team name. For more information about notifications, see About notifications.
Note
A person will only be notified about a mention if the person has read access to the repository and, if the repository is owned by an organization, the person is a member of the organization.
@github/support What do you think about these updates?

When you mention a parent team, members of its child teams also receive notifications, simplifying communication with multiple groups of people. For more information, see About organization teams.
Typing an @ symbol will bring up a list of people or teams on a project. The list filters as you type, so once you find the name of the person or team you are looking for, you can use the arrow keys to select it and press either tab or enter to complete the name. For teams, enter the @organization/team-name and all members of that team will get subscribed to the conversation.
The autocomplete results are restricted to repository collaborators and any other participants on the thread.
You can bring up a list of suggested issues and pull requests within the repository by typing #. Type the issue or pull request number or title to filter the list, and then press either tab or enter to complete the highlighted result.
For more information, see Autolinked references and URLs.
If custom autolink references are configured for a repository, then references to external resources, like a JIRA issue or Zendesk ticket, convert into shortened links. To know which autolinks are available in your repository, contact someone with admin permissions to the repository. For more information, see Configuring autolinks to reference external resources.
You can upload assets like images by dragging and dropping, selecting from a file browser, or pasting. You can upload assets to issues, pull requests, comments, and .md files in your repository.
You can add emoji to your writing by typing :EMOJICODE:, a colon followed by the name of the emoji.
@octocat :+1: This PR looks great - it's ready to merge! :shipit:

Typing : will bring up a list of suggested emoji. The list will filter as you type, so once you find the emoji you're looking for, press Tab or Enter to complete the highlighted result.
For a full list of available emoji and codes, see the Emoji-Cheat-Sheet.
You can create a new paragraph by leaving a blank line between lines of text.
You can add footnotes to your content by using this bracket syntax:
Here is a simple footnote[^1].

A footnote can also have multiple lines[^2].

[^1]: My reference.
[^2]: To add line breaks within a footnote, add 2 spaces to the end of a line.
This is a second line.
The footnote will render like this:

Note
The position of a footnote in your Markdown does not influence where the footnote will be rendered. You can write a footnote right after your reference to the footnote, and the footnote will still render at the bottom of the Markdown. Footnotes are not supported in wikis.
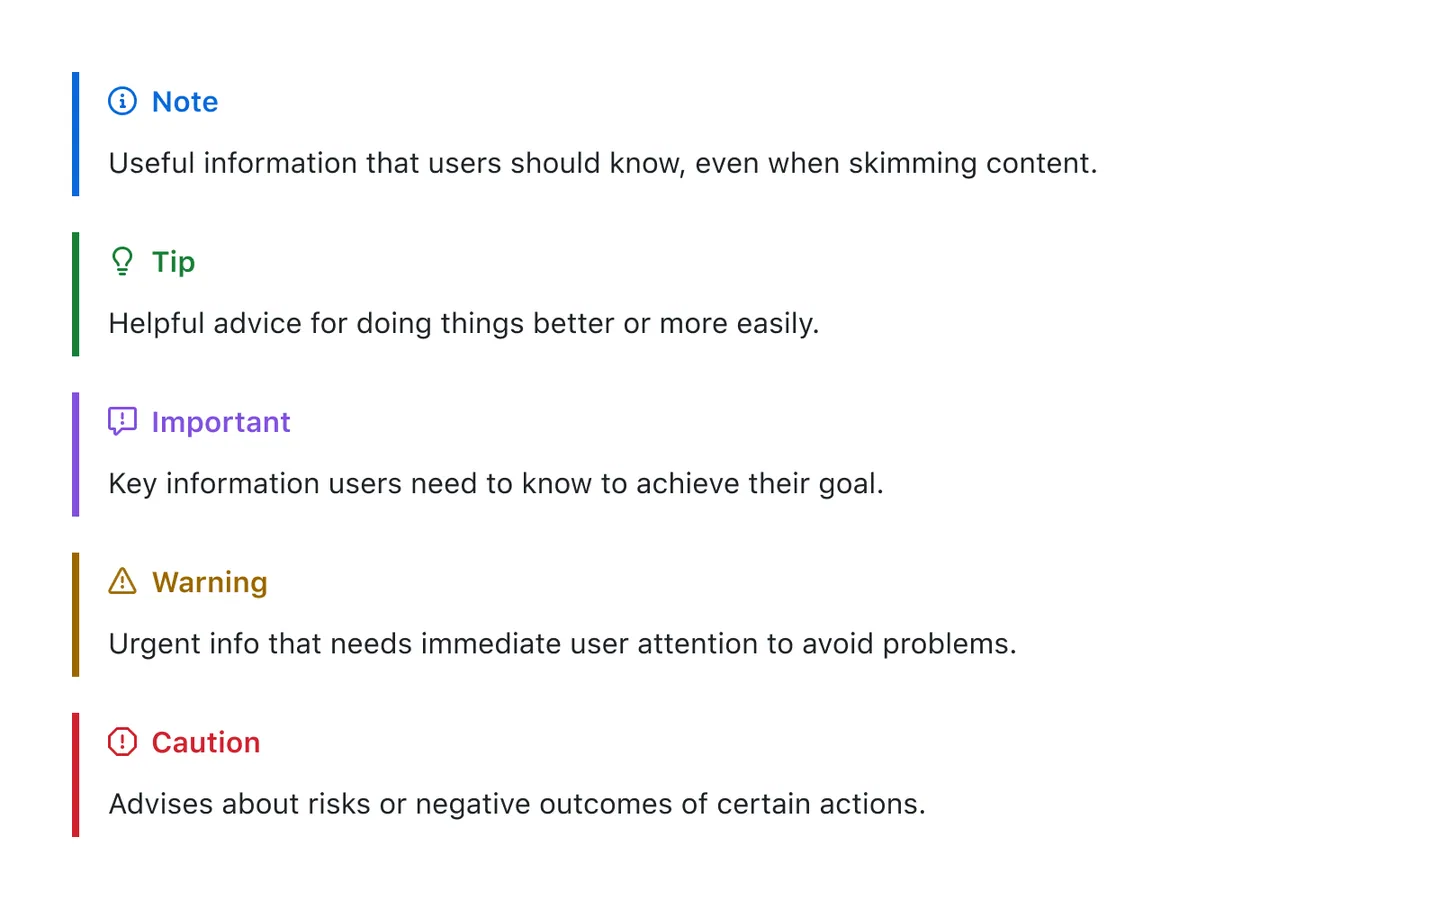
Alerts, also sometimes known as callouts or admonitions, are a Markdown extension based on the blockquote syntax that you can use to emphasize critical information. On GitHub, they are displayed with distinctive colors and icons to indicate the significance of the content.
Use alerts only when they are crucial for user success and limit them to one or two per article to prevent overloading the reader. Additionally, you should avoid placing alerts consecutively. Alerts cannot be nested within other elements.
To add an alert, use a special blockquote line specifying the alert type, followed by the alert information in a standard blockquote. Five types of alerts are available:
> [!NOTE]
> Useful information that users should know, even when skimming content.

> [!TIP]
> Helpful advice for doing things better or more easily.

> [!IMPORTANT]
> Key information users need to know to achieve their goal.

> [!WARNING]
> Urgent info that needs immediate user attention to avoid problems.

> [!CAUTION]
> Advises about risks or negative outcomes of certain actions.
Here are the rendered alerts:
You can tell GitHub to hide content from the rendered Markdown by placing the content in an HTML comment.
<!-- This content will not appear in the rendered Markdown -->
You can tell GitHub to ignore (or escape) Markdown formatting by using \ before the Markdown character.
Let's rename \*our-new-project\* to \*our-old-project\*.

For more information on backslashes, see Daring Fireball's Markdown Syntax.
Note
The Markdown formatting will not be ignored in the title of an issue or a pull request.
When viewing a Markdown file, you can click Code at the top of the file to disable Markdown rendering and view the file's source instead.

Disabling Markdown rendering enables you to use source view features, such as line linking, which is not possible when viewing rendered Markdown files.
- GitHub Flavored Markdown Spec
- About writing and formatting on GitHub
- Working with advanced formatting
- Quickstart for writing on GitHub
Tip
This is imported from https://docs.github.com/en/get-started/writing-on-github/working-with-advanced-formatting
Formatting like tables, syntax highlighting, and automatic linking allows you to arrange complex information clearly in your pull requests, issues, and comments.
You can build tables to organize information in comments, issues, pull requests, and wikis.
You can create tables with pipes | and hyphens -. Hyphens are used to create each column's header, while pipes separate each column. You must include a blank line before your table in order for it to correctly render.
| First Header  | Second Header |
| ------------- | ------------- |
| Content Cell  | Content Cell  |
| Content Cell  | Content Cell  |
The pipes on either end of the table are optional.
Cells can vary in width and do not need to be perfectly aligned within columns. There must be at least three hyphens in each column of the header row.
| Command | Description |
| --- | --- |
| git status | List all new or modified files |
| git diff | Show file differences that haven't been staged |
If you are frequently editing code snippets and tables, you may benefit from enabling a fixed-width font in all comment fields on GitHub. For more information, see About writing and formatting on GitHub.
You can use formatting such as links, inline code blocks, and text styling within your table:
| Command | Description |
| --- | --- |
| `git status` | List all *new or modified* files |
| `git diff` | Show file differences that **haven't been** staged |
You can align text to the left, right, or center of a column by including colons : to the left, right, or on both sides of the hyphens within the header row.
| Left-aligned | Center-aligned | Right-aligned |
| :---         |     :---:      |          ---: |
| git status   | git status     | git status    |
| git diff     | git diff       | git diff      |
To include a pipe | as content within your cell, use a \ before the pipe:
| Name     | Character |
| ---      | ---       |
| Backtick | `         |
| Pipe     | \|        |
You can streamline your Markdown by creating a collapsed section with the <details> tag.
You can temporarily obscure sections of your Markdown by creating a collapsed section that the reader can choose to expand. For example, when you want to include technical details in an issue comment that may not be relevant or interesting to every reader, you can put those details in a collapsed section.
Any Markdown within the <details> block will be collapsed until the reader clicks to expand the details.
Within the <details> block, use the <summary> tag to let readers know what is inside. The label appears to the right of .
<details>

<summary>Tips for collapsed sections</summary>

## 8.3. You can add a header

You can add text within a collapsed section.

You can add an image or a code block, too.

```ruby
   puts "Hello World"
```

</details>
The Markdown inside the <summary> label will be collapsed by default:

After a reader clicks , the details are expanded:

Optionally, to make the section display as open by default, add the open attribute to the <details> tag:
<details open>Share samples of code with fenced code blocks and enabling syntax highlighting.
You can create fenced code blocks by placing triple backticks ``` before and after the code block. We recommend placing a blank line before and after code blocks to make the raw formatting easier to read.
```
function test() {
  console.log("notice the blank line before this function?");
}
```

Tip
To preserve your formatting within a list, make sure to indent non-fenced code blocks by eight spaces.
To display triple backticks in a fenced code block, wrap them inside quadruple backticks.
````
```
Look! You can see my backticks.
```
````

If you are frequently editing code snippets and tables, you may benefit from enabling a fixed-width font in all comment fields on GitHub. For more information, see About writing and formatting on GitHub.
You can add an optional language identifier to enable syntax highlighting in your fenced code block.
Syntax highlighting changes the color and style of source code to make it easier to read.
For example, to syntax highlight Ruby code:
```ruby
require 'redcarpet'
markdown = Redcarpet.new("Hello World!")
puts markdown.to_html
```
This will display the code block with syntax highlighting:

Tip
When you create a fenced code block that you also want to have syntax highlighting on a GitHub Pages site, use lower-case language identifiers. For more information, see About GitHub Pages and Jekyll.
We use Linguist to perform language detection and to select third-party grammars for syntax highlighting. You can find out which keywords are valid in the languages YAML file.
You can also use code blocks to create diagrams in Markdown. GitHub supports Mermaid, GeoJSON, TopoJSON, and ASCII STL syntax. For more information, see Creating diagrams.
Create diagrams to convey information through charts and graphs
You can create diagrams in Markdown using four different syntaxes: mermaid, geoJSON, topoJSON, and ASCII STL. Diagram rendering is available in GitHub Issues, GitHub Discussions, pull requests, wikis, and Markdown files.
Mermaid is a Markdown-inspired tool that renders text into diagrams. For example, Mermaid can render flow charts, sequence diagrams, pie charts and more. For more information, see the Mermaid documentation.
To create a Mermaid diagram, add Mermaid syntax inside a fenced code block with the mermaid language identifier. For more information about creating code blocks, see Creating and highlighting code blocks.
For example, you can create a flow chart by specifying values and arrows.
Here is a simple flow chart:

```mermaid
graph TD;
    A-->B;
    A-->C;
    B-->D;
    C-->D;
```

Note
You may observe errors if you run a third-party Mermaid plugin when using Mermaid syntax on GitHub.
To ensure GitHub supports your Mermaid syntax, check the Mermaid version currently in use.
```mermaid
  info
```
You can use GeoJSON or TopoJSON syntax to create interactive maps. To create a map, add GeoJSON or TopoJSON inside a fenced code block with the geojson or topojson syntax identifier. For more information, see Creating and highlighting code blocks.
For example, you can create a map by specifying coordinates.
```geojson
{
  "type": "FeatureCollection",
  "features": [
    {
      "type": "Feature",
      "id": 1,
      "properties": {
        "ID": 0
      },
      "geometry": {
        "type": "Polygon",
        "coordinates": [
          [
              [-90,35],
              [-90,30],
              [-85,30],
              [-85,35],
              [-90,35]
          ]
        ]
      }
    }
  ]
}
```

For example, you can create a TopoJSON map by specifying coordinates and shapes.
```topojson
{
  "type": "Topology",
  "transform": {
    "scale": [0.0005000500050005, 0.00010001000100010001],
    "translate": [100, 0]
  },
  "objects": {
    "example": {
      "type": "GeometryCollection",
      "geometries": [
        {
          "type": "Point",
          "properties": {"prop0": "value0"},
          "coordinates": [4000, 5000]
        },
        {
          "type": "LineString",
          "properties": {"prop0": "value0", "prop1": 0},
          "arcs": [0]
        },
        {
          "type": "Polygon",
          "properties": {"prop0": "value0",
            "prop1": {"this": "that"}
          },
          "arcs": [[1]]
        }
      ]
    }
  },
  "arcs": [[[4000, 0], [1999, 9999], [2000, -9999], [2000, 9999]],[[0, 0], [0, 9999], [2000, 0], [0, -9999], [-2000, 0]]]
}
```

For more information on working with .geojson and .topojson files, see Working with non-code files.
You can use ASCII STL syntax directly in markdown to create interactive 3D models. To display a model, add ASCII STL syntax inside a fenced code block with the stl syntax identifier. For more information, see Creating and highlighting code blocks.
For example, you can create a simple 3D model:
```stl
solid cube_corner
  facet normal 0.0 -1.0 0.0
    outer loop
      vertex 0.0 0.0 0.0
      vertex 1.0 0.0 0.0
      vertex 0.0 0.0 1.0
    endloop
  endfacet
  facet normal 0.0 0.0 -1.0
    outer loop
      vertex 0.0 0.0 0.0
      vertex 0.0 1.0 0.0
      vertex 1.0 0.0 0.0
    endloop
  endfacet
  facet normal -1.0 0.0 0.0
    outer loop
      vertex 0.0 0.0 0.0
      vertex 0.0 0.0 1.0
      vertex 0.0 1.0 0.0
    endloop
  endfacet
  facet normal 0.577 0.577 0.577
    outer loop
      vertex 1.0 0.0 0.0
      vertex 0.0 1.0 0.0
      vertex 0.0 0.0 1.0
    endloop
  endfacet
endsolid
```

For more information on working with .stl files, see Working with non-code files.
Use Markdown to display mathematical expressions on GitHub.
To enable clear communication of mathematical expressions, GitHub supports LaTeX formatted math within Markdown. For more information, see LaTeX/Mathematics in Wikibooks.
GitHub's math rendering capability uses MathJax; an open source, JavaScript-based display engine. MathJax supports a wide range of LaTeX macros, and several useful accessibility extensions. For more information, see the MathJax documentation and the MathJax Accessibility Extensions Documentation.
Mathematical expressions rendering is available in GitHub Issues, GitHub Discussions, pull requests, wikis, and Markdown files.
There are two options for delimiting a math expression inline with your text. You can either surround the expression with dollar symbols ($), or start the expression with $` and end it with `$. The latter syntax is useful when the expression you are writing contains characters that overlap with markdown syntax. For more information, see Basic writing and formatting syntax.
This sentence uses `$` delimiters to show math inline: $\sqrt{3x-1}+(1+x)^2$

This sentence uses $\` and \`$ delimiters to show math inline: $`\sqrt{3x-1}+(1+x)^2`$

To add a math expression as a block, start a new line and delimit the expression with two dollar symbols $$.
[!TIP] If you're writing in an .md file, you will need to use specific formatting to create a line break, such as ending the line with a backslash as shown in the example below. For more information on line breaks in Markdown, see Basic writing and formatting syntax.
**The Cauchy-Schwarz Inequality**\
$$\left( \sum_{k=1}^n a_k b_k \right)^2 \leq \left( \sum_{k=1}^n a_k^2 \right) \left( \sum_{k=1}^n b_k^2 \right)$$

Alternatively, you can use the ```math code block syntax to display a math expression as a block. With this syntax, you don't need to use $$ delimiters. The following will render the same as above:
**The Cauchy-Schwarz Inequality**

```math
\left( \sum_{k=1}^n a_k b_k \right)^2 \leq \left( \sum_{k=1}^n a_k^2 \right) \left( \sum_{k=1}^n b_k^2 \right)
```
To display a dollar sign as a character in the same line as a mathematical expression, you need to escape the non-delimiter $ to ensure the line renders correctly.
-
Within a math expression, add a
\symbol before the explicit$.This expression uses `\$` to display a dollar sign: $`\sqrt{\$4}`$ -
Outside a math expression, but on the same line, use span tags around the explicit
$.To split <span>$</span>100 in half, we calculate $100/2$


- The MathJax website
- Getting started with writing and formatting on GitHub
- GitHub Flavored Markdown Spec
References to URLs, issues, pull requests, and commits are automatically shortened and converted into links.
GitHub automatically creates links from standard URLs.
Visit https://github.com

For more information on creating links, see Basic writing and formatting syntax.
Within conversations on GitHub, references to issues and pull requests are automatically converted to shortened links.
Note
Autolinked references are not created in wikis or files in a repository.
| Reference type | Raw reference | Short link |
|---|---|---|
| Issue or pull request URL | https://github.com/jlord/sheetsee.js/issues/26 | #26 |
# and issue or pull request number |
#26 | #26 |
GH- and issue or pull request number |
GH-26 | GH-26 |
Username/Repository# and issue or pull request number |
jlord/sheetsee.js#26 | jlord/sheetsee.js#26 |
Organization_name/Repository# and issue or pull request number |
github-linguist/linguist#4039 | github-linguist/linguist#4039 |
If you reference an issue, pull request, or discussion in a list, the reference will unfurl to show the title and state instead. For more information about task lists, see About tasklists.
When referencing the URL of a label in Markdown, the label is automatically rendered. Only labels of the same repository are rendered, URLs pointing to a label from a different repository are rendered as any URL.
The URL of a label can be found by navigating to the labels page and clicking on a label. For example, the URL of the label "enhancement" in our public docs repository is
https://github.com/github/docs/labels/enhancementNote
If the label name contains a period (.), the label will not automatically render from the label URL.
References to a commit's SHA hash are automatically converted into shortened links to the commit on GitHub.
| Reference type | Raw reference | Short link |
|---|---|---|
| Commit URL | https://github.com/jlord/sheetsee.js/commit/a5c3785ed8d6a35868bc169f07e40e889087fd2e |
a5c3785 |
| SHA | a5c3785ed8d6a35868bc169f07e40e889087fd2e | a5c3785 |
| User@SHA | jlord@a5c3785ed8d6a35868bc169f07e40e889087fd2e | jlord@a5c3785 |
Username/Repository@SHA |
jlord/sheetsee.js@a5c3785ed8d6a35868bc169f07e40e889087fd2e |
jlord/sheetsee.js@a5c3785 |
When referencing a commit from a private repository inside of a commit message, the commit SHA will only be shortlinked if at least one of the authors or committers of the commit have at least read access to the referenced commit.
If custom autolink references are configured for a repository, then references to external resources, like a JIRA issue or Zendesk ticket, convert into shortened links. To know which autolinks are available in your repository, contact someone with admin permissions to the repository. For more information, see Configuring autolinks to reference external resources.
By default, references generate a backlink. For example, manually linking to an issue in a pull request will automatically generate another link from the issue back to the pull request.
To avoid this behavior, you can use redirect.github.com instead of github.com when constructing the URL in your reference. If you do use a redirect.github.com URL in your reference link, no pop-up window will appear when hovering over it.
Note
This method is not supported in GitHub Enterprise Cloud with Data Residency (ghe.com).
You can convey information by attaching a variety of file types to your issues and pull requests.
Note
For public repositories, uploaded files can be accessed without authentication. In the case of private and internal repositories, only people with access to the repository can view the uploaded files.
To attach a file to an issue or pull request conversation, drag and drop it into the comment box. Alternatively, you can click below the issue comment box to browse, select, and add a file from your computer.

For a pull request, you can also click in the formatting bar above the pull request comment box.

When you attach a file, it is uploaded immediately to GitHub and the text field is updated to show the anonymized URL for the file. For more information on anonymized URLs see About anonymized URLs.
Note
In many browsers, you can copy-and-paste images directly into the box.
The maximum file size is:
- 10MB for images and gifs
- 10MB for videos uploaded to a repository owned by a user or organization on a free GitHub plan
- 100MB for videos uploaded to a repository owned by a user or organization on a paid GitHub plan
- 25MB for all other files
Note
To upload videos greater than 10MB to a repository owned by a user or organization on a paid GitHub plan, you must either be an organization member or outside collaborator, or be on a paid plan.
The following image and media file types are supported in all contexts.
-
PNG (
.png) -
GIF (
.gif) -
JPEG (
.jpg,.jpeg) -
SVG (
.svg) -
Video (
.mp4,.mov,.webm)[!NOTE] Video codec compatibility is browser specific, and it's possible that a video you upload to one browser is not viewable on another browser. At the moment we recommend using H.264 for greatest compatibility.
The following file types are supported for uploads in issue comments, pull request comments, and discussion comments within repositories. This list of file types is also supported in organization discussions.
- PDFs (
.pdf) - Microsoft Office documents (
.docx,.pptx,.xlsx,.xls`` ,.xlsm) - OpenDocument formats (
.odt,.fodt,.ods,.fods,.odp,.fodp,.odg,.fodg,.odf) - Rich text and word processing files (
.rtf,.doc)
- Plain text and markup (
.txt,.md,.copilotmd) - Data and tabular files (
.csv,.tsv,.log,.json,.jsonc)
- C files (
.c) - C# files (
.cs) - C++ files (
.cpp) - CSS files (
.css) - Diagrams (
.drawio) - Dump files (
.dmp) - HTML files (
.html,.htm) - Java files (
.java) - JavaScript files (
.js) - Jupyter notebooks (
.ipynb) - Patch files (
.patch) - PHP files (
.php) - Profiling files (
.cpuprofile) - Program database files (
.pdb) - Python files (
.py) - Shell scripts (
.sh) - SQL files (
.sql) - TypeScript files (
.ts,.tsx) - XML files (
.xml) - YAML files (
.yaml,.yml)
Note
If you use Linux and try to upload a .patch file, you will receive an error message. This is a known issue.
- Archives and packages (
.zip,.gz,.tgz)
- Text and email files (
.debug,.msg,.eml)
- Bitmap and TIFF images (
.bmp,.tif,.tiff)
- Audio files (
.mp3,.wav)
You can use tasklists to break the work for an issue or pull request into smaller tasks, then track the full set of work to completion.
Important
Tasklist blocks are retired. You can read more about this on the GitHub Blog.
You can use sub-issues as the replacement for tasklist blocks. Sub-issues provide a dedicated section within each issue, making it easier to track related work without relying on Markdown. For more information about sub-issues, see Adding sub-issues.
A tasklist is a set of tasks that each render on a separate line with a clickable checkbox. You can select or deselect the checkboxes to mark the tasks as complete or incomplete.
You can use Markdown to create a tasklist in any comment on GitHub. If you reference an issue, pull request, or discussion in a tasklist, the reference will unfurl to show the title and state.
If you add a tasklist to the body of an issue, the list has added functionality.
- To help you track your team's work on an issue, the progress of an issue's tasklist appears in various places on GitHub, such as a repository's list of issues.
- If a task references another issue and someone closes that issue, the task's checkbox will automatically be marked as complete.
- If a task requires further tracking or discussion, you can convert the task to an issue by hovering over the task and clicking in the upper-right corner of the task. To add more details before creating the issue, you can use keyboard shortcuts to open the new issue form. For more information, see Keyboard shortcuts.
- Any issues referenced in the tasklist will specify that they are tracked in the referencing issue.

To create a task list, preface list items with a hyphen and space followed by [ ]. To mark a task as complete, use [x].
- [x] #739
- [ ] https://github.com/octo-org/octo-repo/issues/740
- [ ] Add delight to the experience when all tasks are complete :tada:
Note
You cannot create tasklist items within closed issues or issues with linked pull requests.
You can reorder the items in a tasklist. First, click or hover to the left of a task's checkbox until a grid of six dots appears. Then, drag and drop the grid to move the task to a new location.
You can reorder tasks across different lists in the same comment, but you cannot reorder tasks across different comments.

You can also convert tasks into issues. First, hover over one of the items in your tasklist and then click .

Any issues that are referenced in a tasklist specify that they are tracked by the issue that contains the tasklist. To navigate to the tracking issue from the tracked issue, click on the tracking issue number in the Tracked by section next to the issue status.
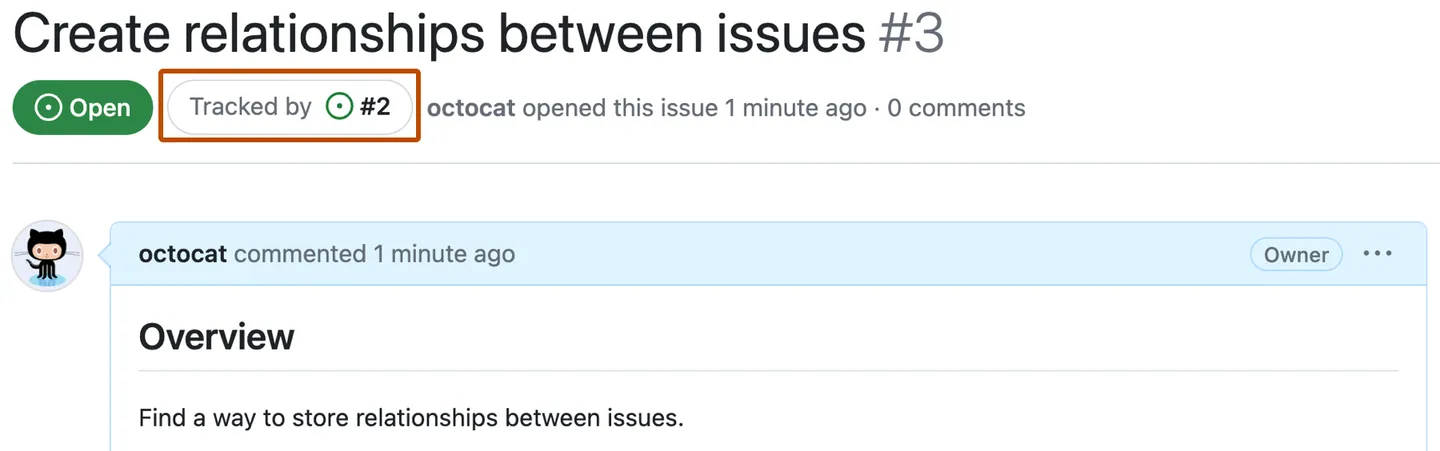
You can create a permanent link to a specific line or range of lines of code in a specific version of a file or pull request.
This type of permanent link will render as a code snippet only in the repository it originated in. In other repositories, the permalink code snippet will render as a URL. This does not work in Markdown files, only in comments.

Tip
To create a permalink for an entire file, see Getting permanent links to files.
-
On GitHub, navigate to the main page of the repository.
-
Locate the code you'd like to link to:
- To link to code from a file, navigate to the file.
- To link to code from a pull request, navigate to the pull request and click Files changed. Then, browse to the file that contains the code you want to include in your comment, and click View.
-
Choose whether to select a single line or a range.
- To select a single line of code, click the line number to highlight the line.
- To select a range of code, click the number of the first line in the range to highlight the line of code. Then, hover over the last line of the code range, press Shift, and click the line number to highlight the range.
-
To the left of the line or range of lines, click . In the drop-down menu, click Copy permalink.
-
Navigate to the conversation where you want to link to the code snippet.
-
Paste your permalink into a comment, and click Comment.

You can link to specific lines in Markdown files by loading the Markdown file without Markdown rendering. To load a Markdown file without rendering, you can use the ?plain=1 parameter at the end of the URL for the file. For example, github.com/<organization>/<repository>/blob/<commit_SHA>/README.md?plain=1.
You can link to a specific line in the Markdown file the same way you can in code. Append #L with the line number or numbers at the end of the URL. For example, github.com/<organization>/<repository>/blob/<commit_SHA>/README.md?plain=1#L14 will highlight line 14 in the plain README.md file.
Use keywords to link an issue and pull request or to mark an issue or pull request as a duplicate.
To link a pull request to an issue to show that a fix is in progress and to automatically close the issue when someone merges the pull request, type one of the following keywords followed by a reference to the issue. For example, Closes #10 or Fixes octo-org/octo-repo#100.
- close
- closes
- closed
- fix
- fixes
- fixed
- resolve
- resolves
- resolved
For more information, see [Linking a pull request to an issue](https://docs.github.com/en/issues/tracking-your-work-with-issues/linking-a-pull-request-to-an-issue.
To mark an issue or pull request as a duplicate, type "Duplicate of" followed by the issue or pull request number it duplicates in the body of a new comment. For more information, see Marking issues or pull requests as a duplicate.