Home
Welcome to the tutorial explaining how to create a new bot for Telegram. In this article you will find:
- Create a new bot
- Generate self-signed certificate (optionsl)
- Set up simple Reverse Proxy using Nginx
- Register webHook in Telegram
- Deploy your first bot and use it via messenger
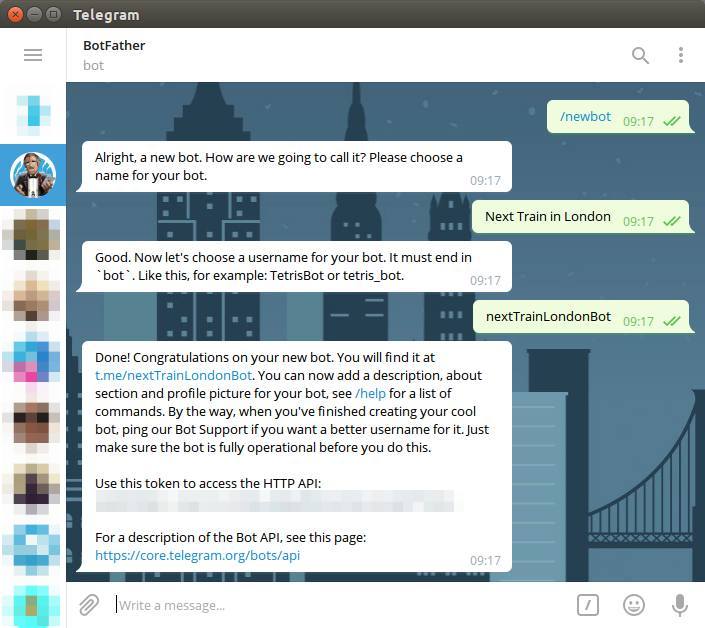
To create your bot you should ask @BotFather to do it. Simply send a personal message /newbot to him and follow the instructions.
If you have your domain with trusted certificates for it, please skip this chapter. If you wish to use LetsEncrypt, then you may take some ready solutions, like that image, but LetsEncrypt doesn't allow to generate certificates for bare IP address. That means if you have a domain for your service, go ahead and use LE. Otherwise, you have to generate self-signed certificate to set up a webhook to Telegram because this messenger requires mandatory https for the backend. Thus, performs the following actions:
Sometimes, the Alternative Names could prevent validating the domain, so, open the san.cnf file and provide valid IP addresses instead of "1.2.3.4". This will add valid SAN section to your certificate
Call this command
openssl req -newkey rsa:2048 -sha256 -nodes -keyout /path/to/nginx/key.pem -x509 -days 365 -outform pem -out /path/to/nginx/cert.pem -subj "/C=UK/ST=London/L=London/O=Daxi Digital/CN=1.2.3.4" -config /path/to/nginx/san.cnf
where:
-
-keyout /path/to/nginx/key.pemis the path where the private key will be saved -
-days 365the time for validity, one year in this example -
-outform pemwe expect PEM format for our certificate -
-subj "/C=UK/ST=London/L=London/O=Daxi Digital/CN=1.2.3.4"don't forget to provide valid IP address -
-config /path/to/nginx/san.cnfuse san.cnf file that we edited on the previous step
As result you will get two files: key.pem and cert.pem
run this command from the nginx directory:
openssl dhparam -out dhparam.pem 4096
this will take a while.
Ok, now you are ready to set up the Nginx as a reverse proxy. Before you begin, take a look at the default.conf file. It redirects all the traffic to the http://172.17.0.1:8444, which is the inner IP address of Docker Gatweay. If you run your bot without a container, then let this line without modification. If you want to run it with docker-compose, then change the IP address to proper host.
Then build the Docker with Nginx:
sudo docker build -t bot-nginx .
and start it:
sudo docker run -d --name bot-nginx -p 8443:8443 bot-nginx
Cool! Now you have a nice Reverse Proxy that redirects all the traffic to the localhost:8444 and manages certificates that you generated in step 2.
It's time to tell Telegram, that you have a ready backend for your bot. Simply call (don't forget to change IP address to yours and provide your bot API key):
curl -F "url=https://1.2.3.4:8443/<bot API Key>" -F "certificate=@/path/to/nginx/cert.pem" https://api.telegram.org/bot<bot API key>/setWebhook
if you want to debug the calls, you can use this call:
http https://api.telegram.org/bot<Bot Api Key>/getWebhookInfo
it will print to you the debug data about your webhook.
Generally, now you need simply to run your bot on the localhost. In my case I am using Go language, thus you need to compile it and then run. To compile, do:
go build
you will get demo-bot file. Copy this binary file to your server and on this server do:
./demo-bot
Have a fun!