Home
This wiki serves as the guide for using and configuring the Polaroid600 mod. The current version of the wiki was made for version 1.0.0+26.2 of the mod.
This section of the wiki is aimed at the players of the mod.
The mod features 5 different cameras (with 3 more planned in the future). These are based on real-life Polaroid cameras, and - based on the properties of their real-life counterparts - offer different features.
| Icon | Name | Focus | Flash | Double Exposure | Selfie Mirror | Film Format |
|---|---|---|---|---|---|---|
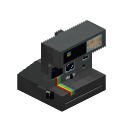 |
Polaroid 635 | Fixed-focus | Yes | No | No | 600 |
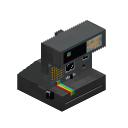 |
Polaroid 660 AF | Toggleable AF | Yes | No | No | 600 |
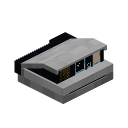 |
Polaroid Spectra | Toggleable AF | Yes | No | No | 1200 |
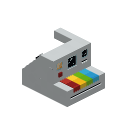 |
Polaroid Now | Toggleable AF | Yes | Yes | No | 600 |
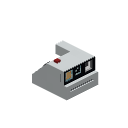 |
Polaroid Go | Fixed-focus | Yes | Yes | Yes | Go |
To take a photo, the camera must be filled with film. The way this works depends on the Film Mode configuration option, which is set to CARTRIDGE by default. To use a camera, you have to get at least one of the film items and "place it" on top of the Film Cartridge item in your inventory, just like you would with a Bundle in vanilla Minecraft. This places the cartridge with the film. A single cartridge can take 8 film items. No film mixing is allowed, so all of the film items must be the same type.
After that, you can, in similar fashion, place the cartridge on top of one of the camera items, which places the cartridge into the camera. The camera must be empty - i.e. can not contain any other cartridge. You can remove an empty cartridge from the camera by right-clicking with the camera on an empty slot in your inventory - again similar to how bundles work. If you insert a cartridge with 8 film items into a camera, you will also get a random Darkslide item. Once the camera is loaded, you can adjust the camera settings, as described in the sections below, or you can take a photo using the "Use Item/Interact" button - typically a right mouse button click.
In the case Film Mode is set to DIRECT, the cartridge step is skipped, and instead you put the film directly into the camera, again similar to how bundles work.
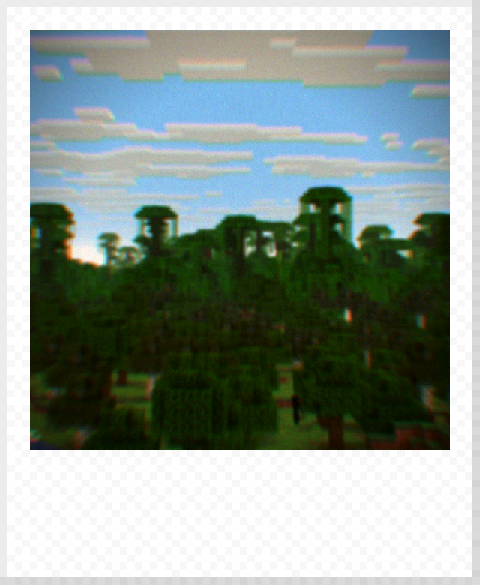
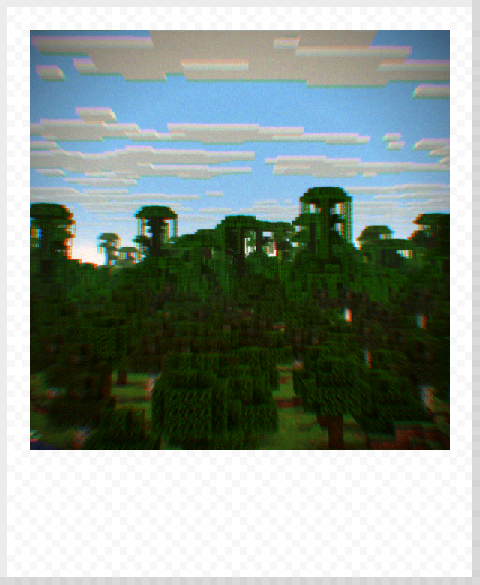
The mod applies a DOF shader to all taken photos, before sending them for further image processing. This DOF shader is vaguely based on real-life optics properties, and because of that, the distance of the focus point affects the look of the image. Fixed-point cameras, or cameras with turned-off autofocus, have their focus point about 0.66 blocks away - good enough to take a selfie or a portrait, not good for landscape photos. Autofocus makes the camera use the centre of the taken image as the focus point. Autofocus is controlled using the "Autofocus Toggle" keybind (by default '*').
 |
 |
|---|---|
| Without AF | With AF |
All currently added cameras have the ability to make a flash when taking a photo. This light is purely client-side, so similar to dynamic lights in other mods, it does not affect the world in any way, just the rendering. Flash is controlled using the "Flash Toggle" keybind (by default '9' on numeric keyboard).
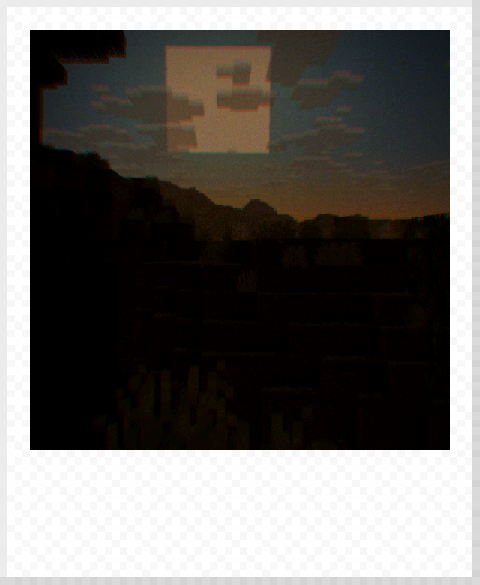
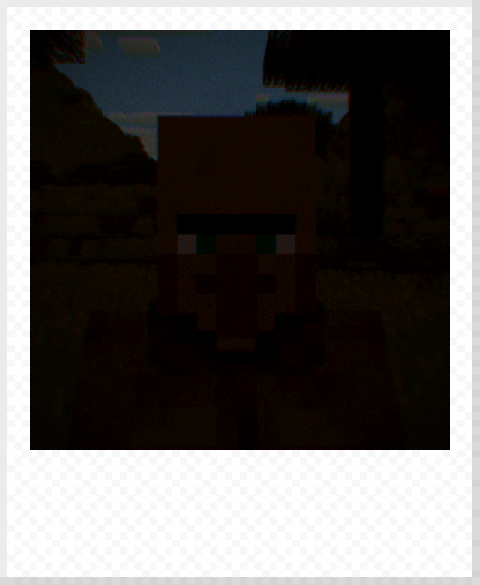
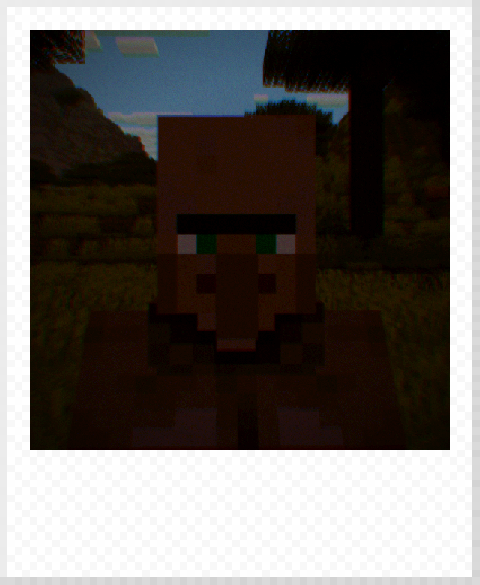
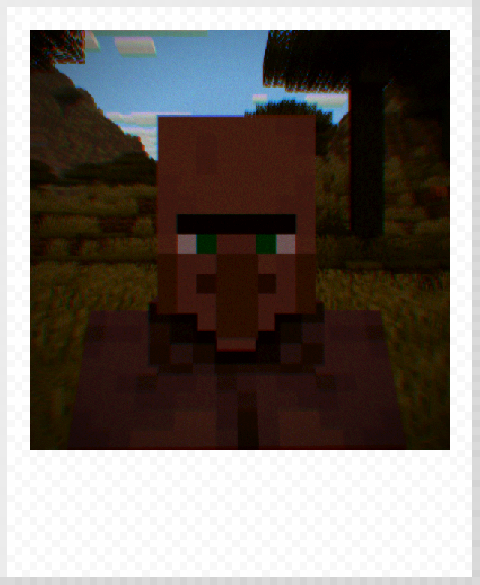
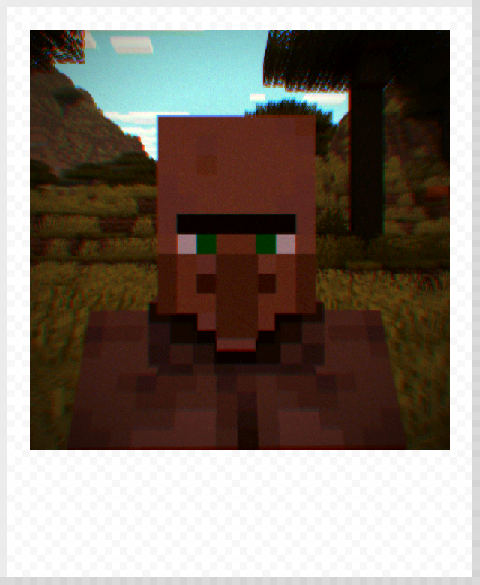
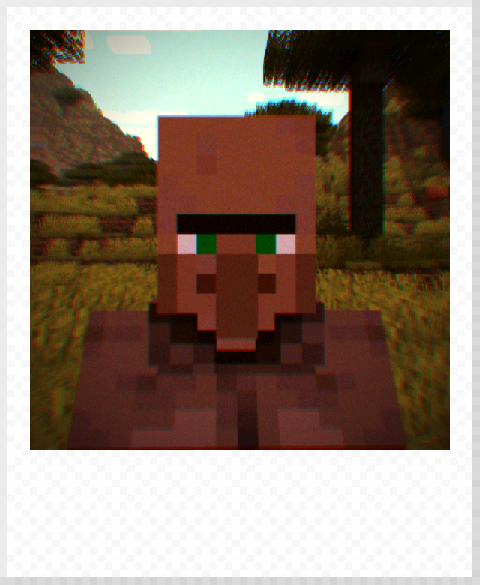
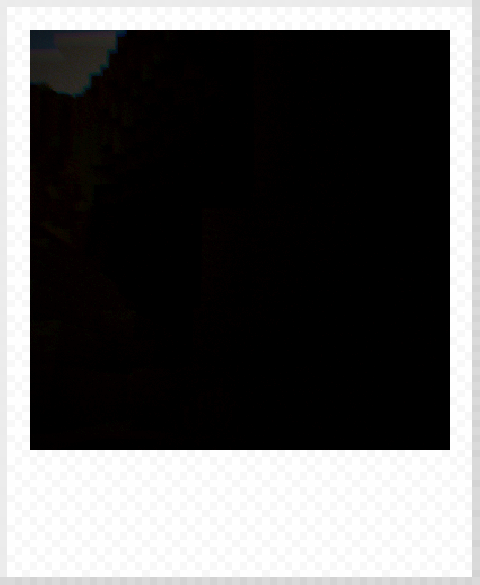
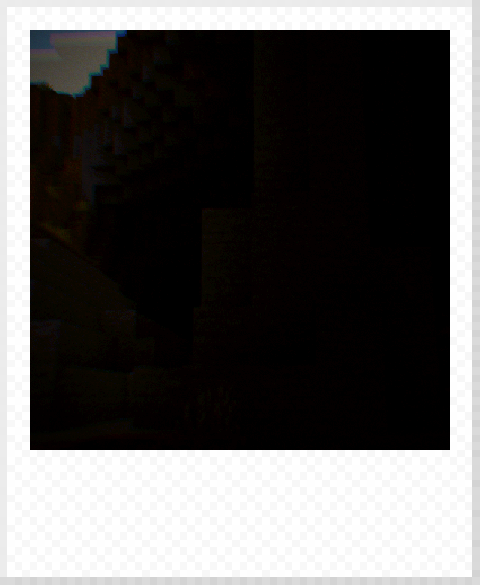
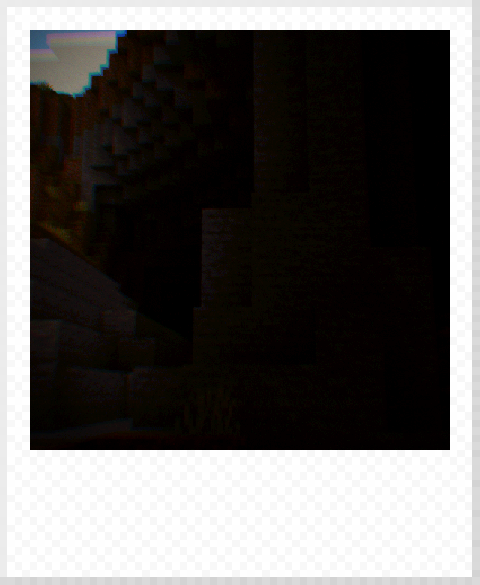
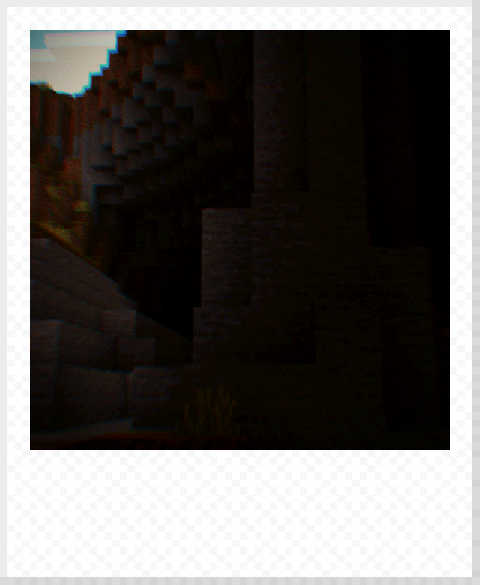
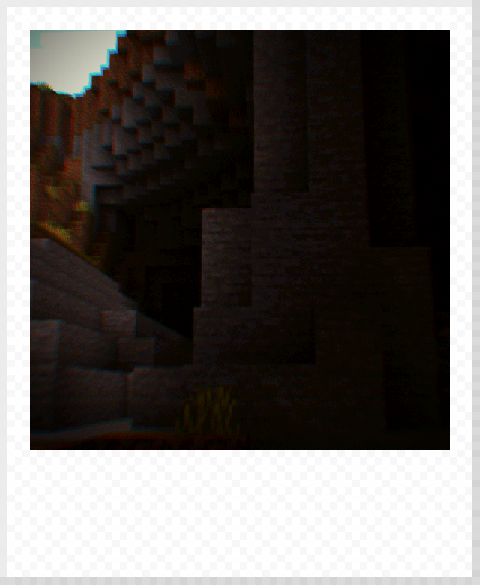
You can increase or decrease the brightness of the photos using the exposure adjustment keybinds (by default '+' and '-'). The exposure adjustment values range from -4 to 4.
| -4 | -2 | 0 | 2 | 4 |
|---|---|---|---|---|
 |
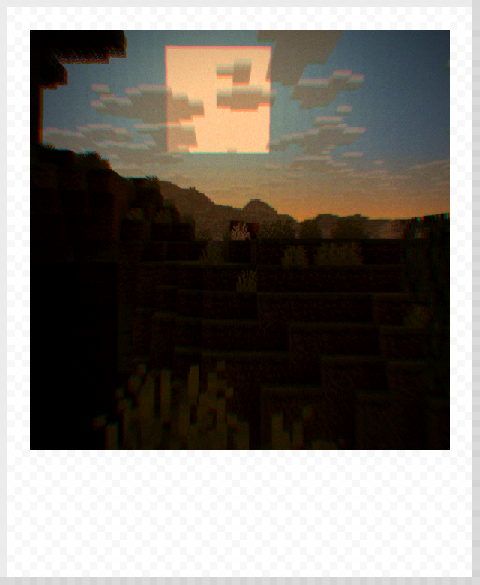 |
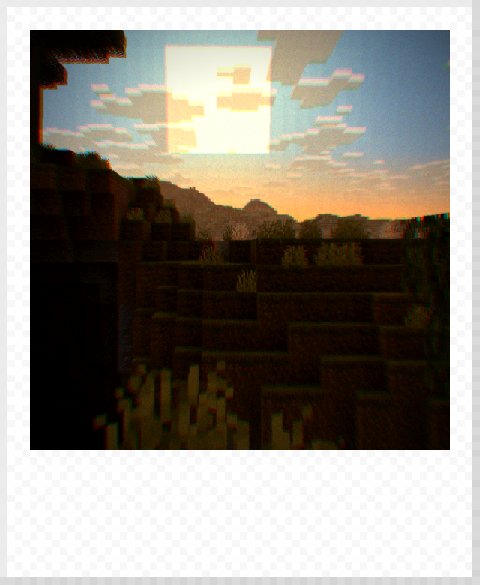 |
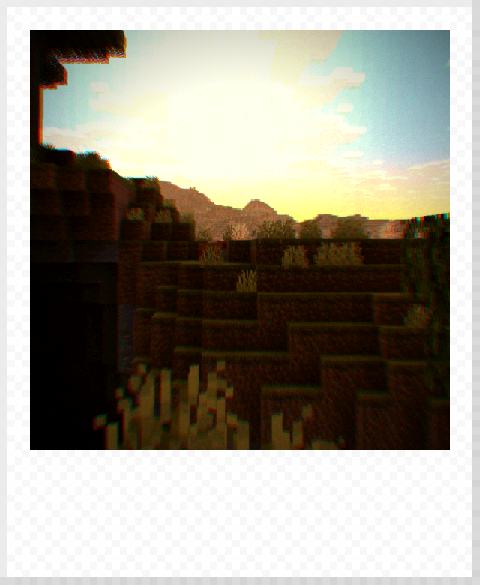 |
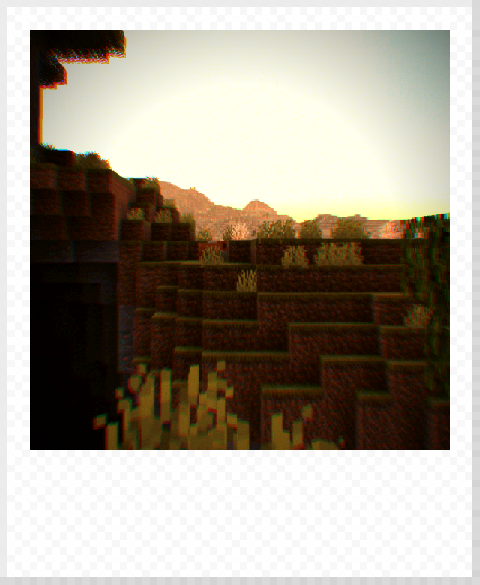 |
 |
 |
 |
 |
 |
 |
 |
 |
 |
 |
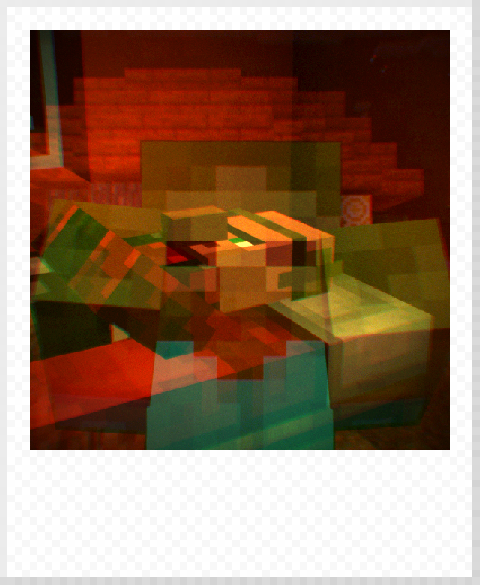
Double exposure allows you to blend two different images on one photo. This is done by enabling the double exposure mode on a compatible camera using the "Double Exposure Toggle" keybind (by default '/'). Since the first exposure is saved on the server side, different players can take each of the exposures. The double exposure mode automatically turns off after taking the second exposure.
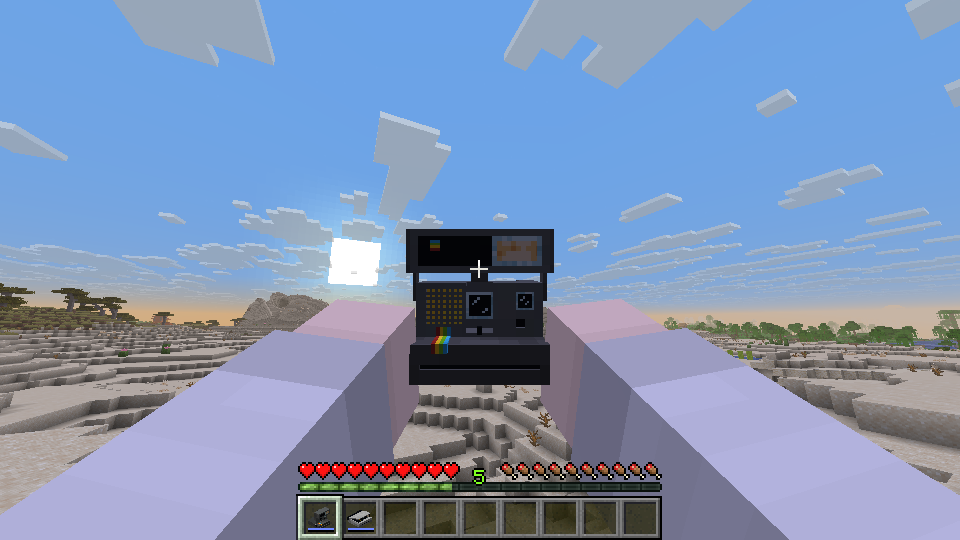
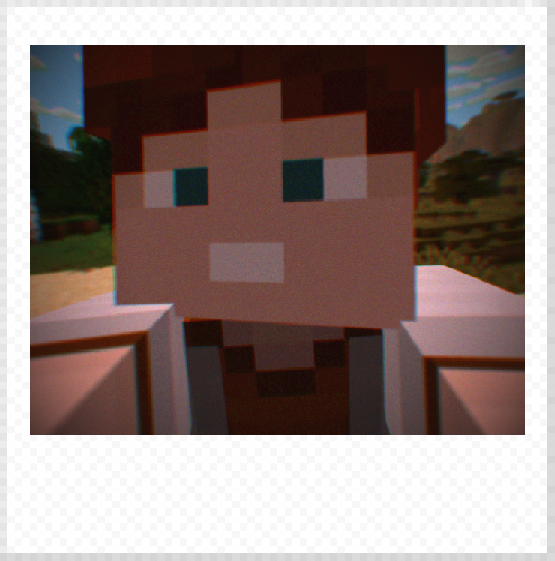
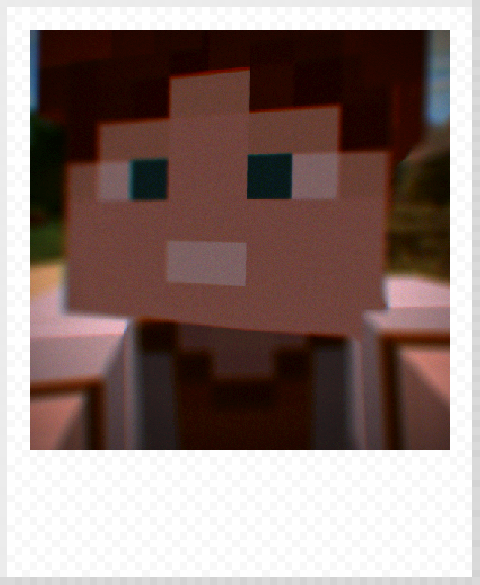
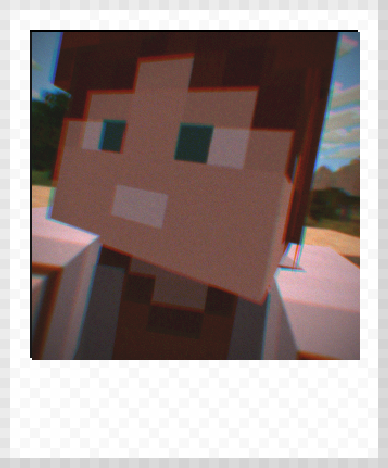
By pressing the selfie mode keybind (by default 'R'), you can enter selfie mode, which (naturally) means the player character points the camera at themselves at roughly an arm's length (0.625 blocks).
 |
 |
|---|
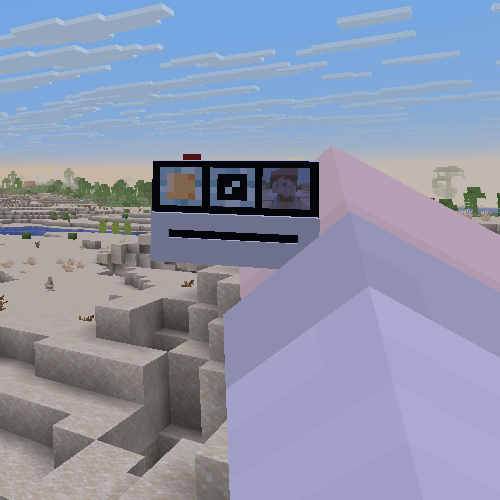
The selfie mirror that some cameras have gives a real-time preview of what the camera sees before you take a photo
 |
 |
|---|
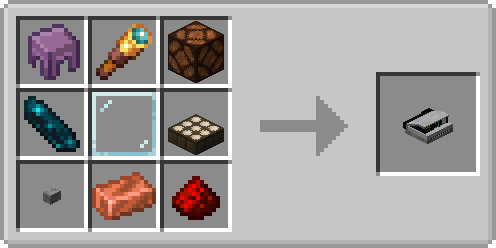
The crafting recipe complexity of the cameras generally rises with the functions they offer, with the simplest one being the Polaroid 635. However, the key materials pretty much all cameras use are Resin Bricks, Spyglass, Glass Pane, Copper Ingot, Redstone Lamp and Stone Button.
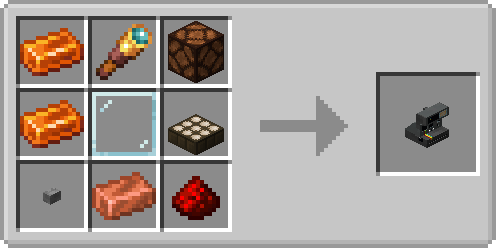 |
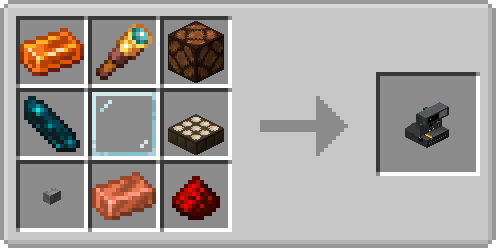 |
|---|---|
| Polaroid 635 | Polaroid 660 AF |
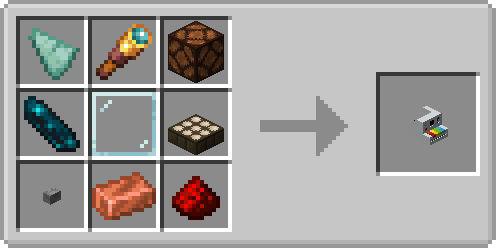 |
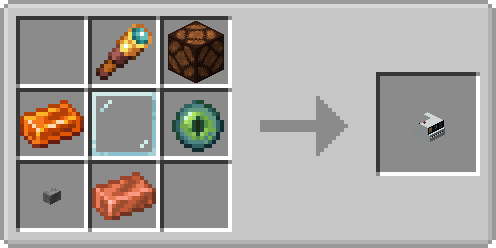 |
|---|---|
| Polaroid Now | Polaroid Go |
 |
|---|
| Polaroid Spectra |
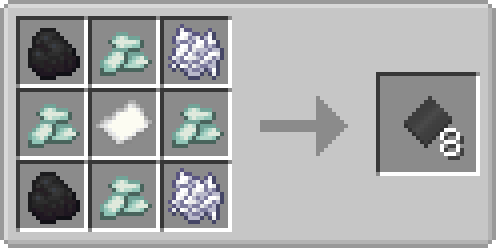
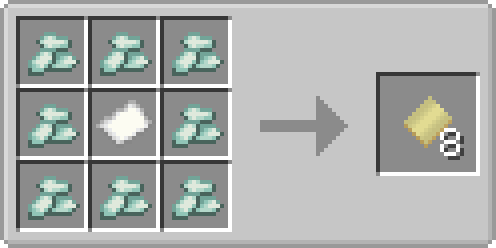
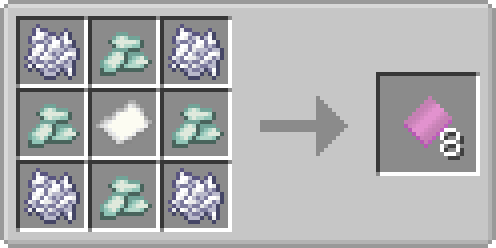
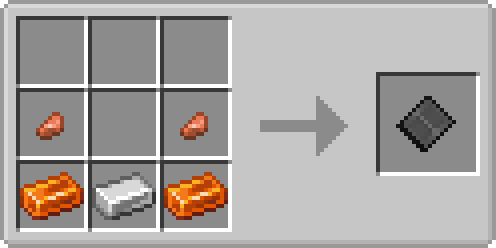
Prismarine crystals act as an analogue to silver halide crystals in real life, so they are an integral part of all film crafting recipes. The first required component is the light-sensitive layers. There are 4 types of light-sensitive layers: the red, green or blue light-sensitive layers, which are needed for colour film and the all-light-sensitive layer, which is required for monochromatic film, like black-and-white film.
 |
 |
|---|---|
| Light Senstive Layer | Blue Light Sensitive Layer |
 |
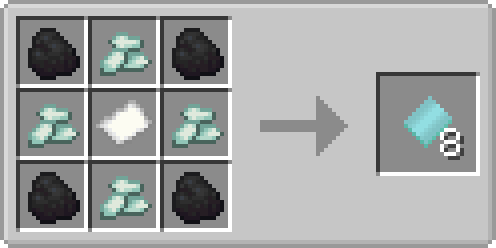 |
|---|---|
| Green Light Sensitive Layer | Red Light Sensitive Layer |
These are then used to craft either color or black-and-white negatives.
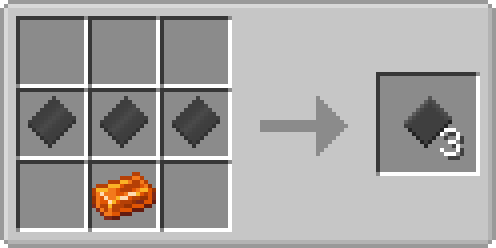 |
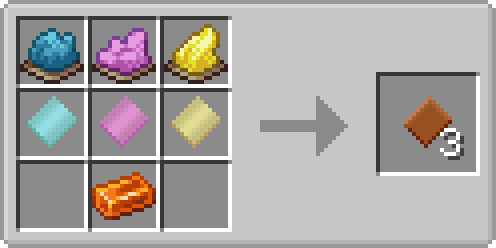 |
|---|---|
| B&W Negative | Color Negative |
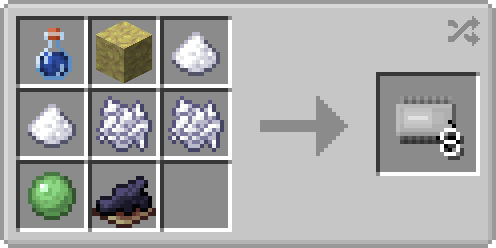
The other main film component is the reagent pod, which again comes in color and black-and-white variants.
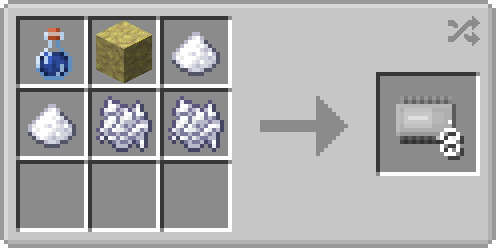 |
 |
|---|---|
| B&W Reagent | Color Reagent |
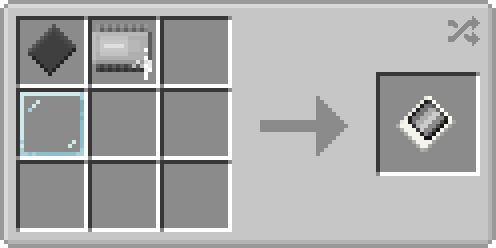
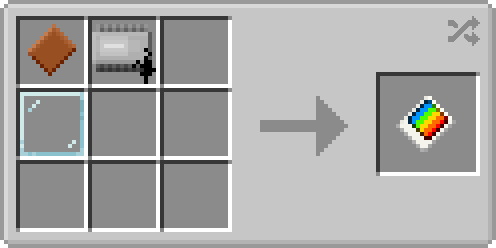
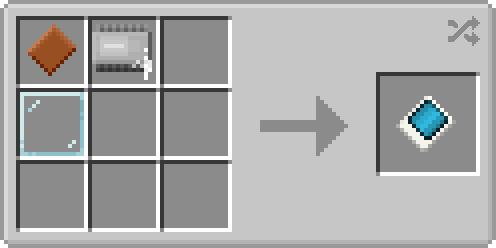
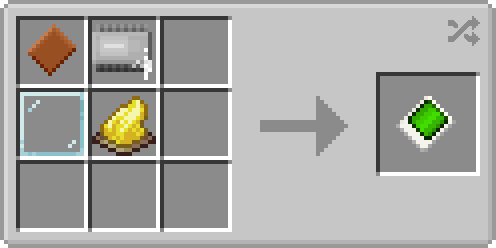
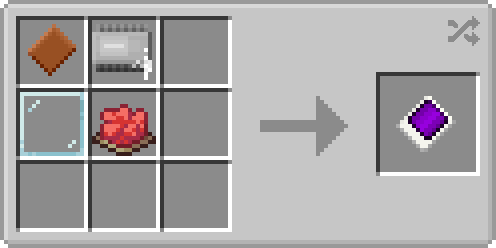
By combining them with a glass pane and potentially other items, you get different film types. Specifically, while the color negative and color reagent and B&W negative and B&W reagent pairs give the obvious color and B&W film, combining color negative with B&W reagent gives you blue film. By adding yellow or red dye into the recipe, you can get green and purple films. The film can then be inserted into a cartridge.
 |
 |
|---|---|
| B&W Film | Color Film |
 |
 |
|---|---|
| Blue Film | Green Film |
 |
 |
|---|---|
| Purple Film | Film Cartridge |
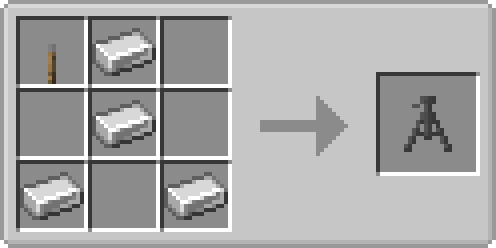
The final crafting recipe in the mod is the tripod.
 |
|---|
| Camera Tripod |
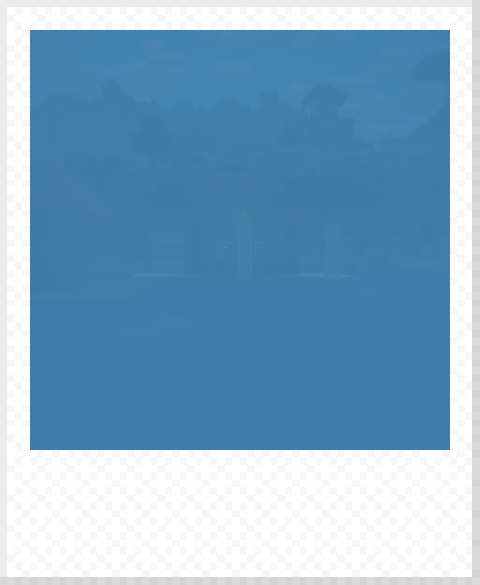
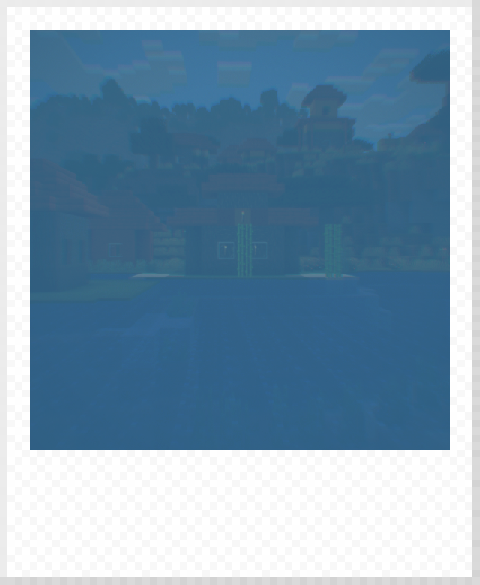
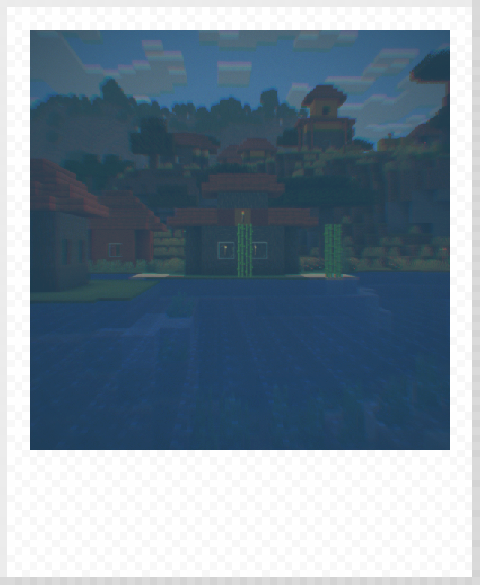
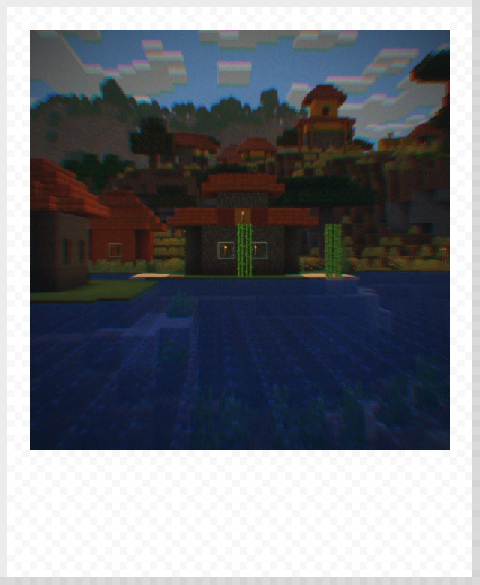
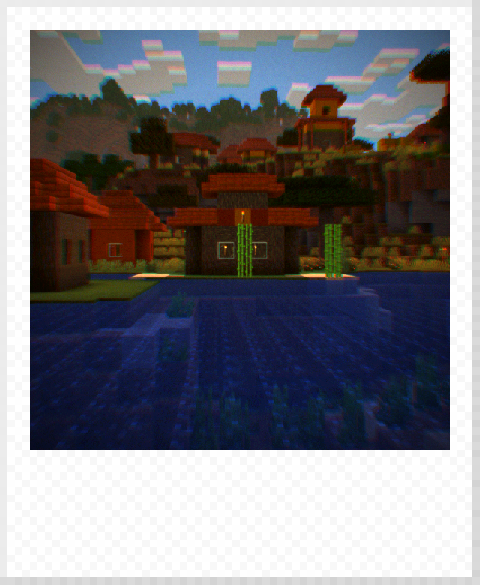
Upon ejection, photos take some time to fully develop. The photo will gradually shift from solid blue through darker blue with visible image outlines to a full clear image. This by default takes 1200 ticks (so a minute).
 |
 |
 |
 |
 |
 |
|---|---|---|---|---|---|
| +0s | +14s | +25s | +38s | +53s | +60s |
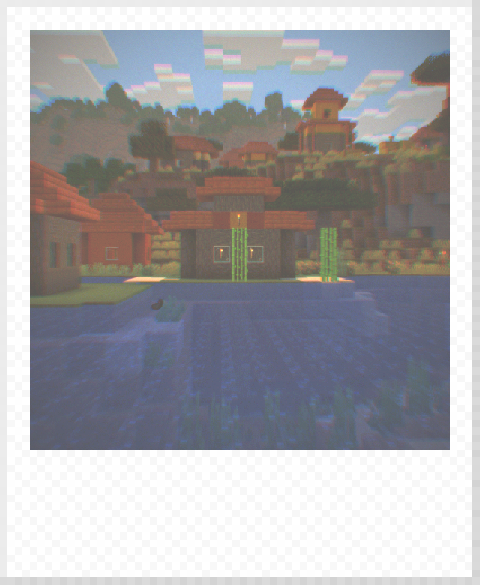
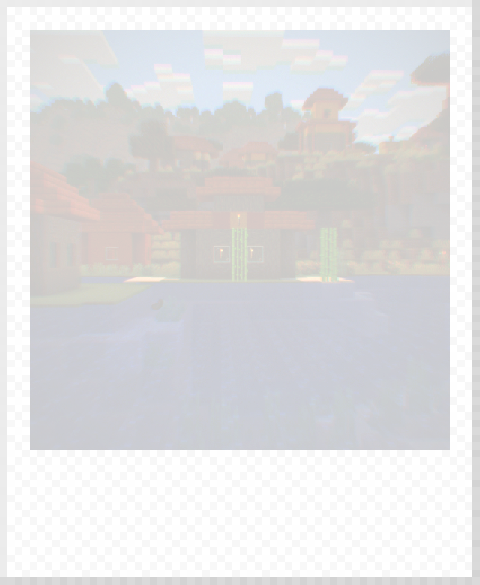
During the earliest moments (by default first 400 ticks), it is important to shield the developing photo from the sunlight, otherwise the image can get damaged - solarized, resulting in a bright white appearance. Solarization can happen when holding the developing photo in your hands, during the day and clear weather with no blocks above your head - basically, whenever Vanilla monsters can burn from the sunlight.
 |
 |
|---|---|
| Solarized Photo | More Solarized Photo |
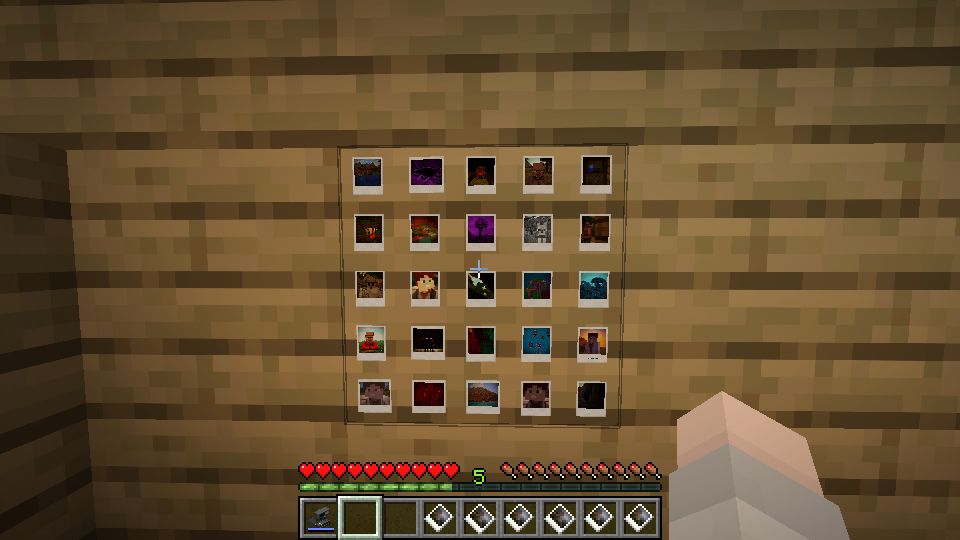
You can see your photo either directly in your hands or by using the item to open the UI screen to inspect it. Photos can also be placed on solid walls into a 5x5 grid.
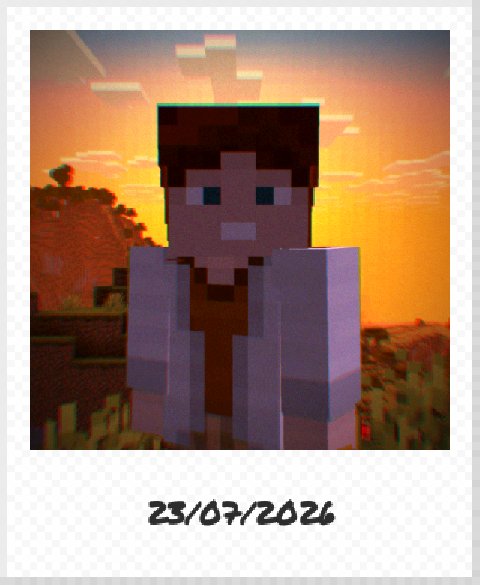
Renaming the photo item on an anvil makes the name of the item appear on the chin of the photo - similar to how people write on real Polaroid photos.
 |
|---|
| Photo with the name "23/07/2026" |
Since not everyone always has friends nearby to take a photo and not everyone likes classic selfies, there is also the camera tripod. Since it is an entity, by default it does not snap to the block grid of Minecraft, however, if you place it while crouching, it will snap to the grid similar to how armor stands do. And similar to armor stands, you can put cameras on them. Specifically, to put a camera on a tripod, hold the camera in your hand and right-click on the very top of the tripod. To take it down, right-click again, though this time, you have to click on the back of the camera, as clicking on the front of the camera has other functionality.
Specifically, right-clicking on the front part of the camera without crouching serves as an immediate trigger for the camera, basically the same thing as when you use the camera directly in your hands. Right-clicking while crouching starts the 10-second timer. The camera naturally shoots with the settings you set it to before shooting and acts the same way as when shooting normally - so keep in mind that double exposure does turn off after ejecting the photo. However, camera can take a photo only when there is no ejected photo. After taking a photo, the ejected photo appears in the ejection slot. You have to pick it up first by right-clicking on the camera, before you can take another photo.
To turn the tripod, click on the part of the tripod under the camera, basically the tripod head - the part with the lever - but not on the camera. This makes the camera look in the same direction (in terms of yaw) as you were during clicking.
Lastly, a camera on a tripod can be controlled using a redstone signal, specifically the rising edge of the signal.
This section of the wiki is aimed at the people who configure or troubleshoot the mod.
By default, the client config looks like this:
[general]
	[selfieMirror]
	#Whether the rendering of selfie mirrors should be allowed. Decreases performance a bit. Causes unexpected graphical issues with some rendering mods. If you use Sodium or shaders, you almost certainly want this to be FALSE!
	selfieMirrorAllowed = true
	#The resolution of the selfie mirror texture.
	# Default: 64
	# Range: 1 ~ 2048
	selfieMirrorResolution = 64
	#How many render ticks between selfie mirror updates.
	# Default: 20
	# Range: 1 ~ 20000
	selfieMirrorUpdatePeriod = 20

[photo]
	#Whether should use a non-vanilla marker font for the text on photos.
	customMarkerFont = true
	#Whether should the blue opacifier overlay be rendered. Some shaders have issues with it, so in such a case set to FALSE.
	opacifierOverlay = true
	#Whether should the white solarization overlay be rendered. Some shaders have issues with it, so in such a case set to FALSE.
	solarizationOverlay = true

[misc]
	#Whether should be darkslides available in the creative tab.
	darkslidesInCreativeTab = true
	#Whether cameras should eject darkslides when in creative mode.
	darkslidesInCreativeMode = true

[flash]
	#The range of a camera flash in blocks.
	# Default: 6.0
	# Range: 0.0 ~ 16.0
	flashRange = 6.0
	#The strength of a camera flash in blocks.
	# Default: 15.0
	# Range: 0.0 ~ 15.0
	flashStrength = 15.0
	#Whether camera flash should be used.
	flashEnabled = true
Most of these options are pretty self-explanatory, so this section just quickly goes through them.
Selfie mirrors, while useful, can be demanding on performance and are especially fragile when it comes to compatibility with mods like Sodium or Iris. Specifically, in the case of Sodium, they cause occasional level flickering and in the case of Iris outright break some shaders, especially those that rely on storing previous frames for effects like TAA. Hence, if you use any such mod, it is very recommended that you disable selfie mirrors using selfieMirrorAllowed. If you leave them on, you can customise their resolution and update rate using selfieMirrorResolution and selfieMirrorUpdatePeriod.
The mod makes use of the "Permanent Marker" font by Font Diner for the text on photo chins. However, you can turn this off by disabling customMarkerFont, making the game use the Vanilla Minecraft font instead.
Similar to the selfie mirrors, some shaders might have issues with the blue and white opacifier and solarization overlays, even though most shaders seem to work fine with them. For that reason, you can disable their rendering using opacifierOverlay and solarizationOverlay.
Darkslides might be somewhat annoying in the creative mod by cluttering the creative mode tab or your inventory, so for this reason you can disable them by darkslidesInCreativeTab and darkslidesInCreativeMode. The reason why darkslidesInCreativeMode is in the client config is the fact that Mojang considers creative mode to be a sort of more trusted level, so creative mode inventory changes are decided on the client side.
The camera flash is the one feature with an explicit patch for Sodium and Iris right in the mod. Still, some other mods could have an issue with it, so for that reason, you can disable the flash feature using flashEnabled. You can also customise the brightness of the flash at the position of the camera and the range it reaches using flashStrength and flashRange, though keep in mind that, unlike vanilla Minecraft lighting, the flash uses the inverse-square law.
By default, the server config looks like this:
[film]
	#The amount of time in ticks it takes for a photo to develop.
	# Default: 1200
	# Range: > 0
	developmentTime = 1200
	#The amount of time in ticks after ejection, during which the photo is susceptible to sun damage
	# Default: 400
	# Range: > 0
	solarizationTime = 400
	#Whether solarization should be enabled.
	solarizationEnabled = true
	#For how many ticks can the photo be under the sun, before solarization effects are visible. Should be less than Solarization Time
	# Default: 100
	# Range: > 0
	solarizationGraceAmount = 100

[camera]
	#Whether should cameras directly accept film like a bundle, or they should accept only cartridges filled with film
	#Allowed Values: DIRECT, CARTRIDGE
	filmMode = "CARTRIDGE"
	#Whether redstone interactions with a tripod should be enabled.
	redstone = true
	#How many ticks should a cooldown for a camera after taking a photo take.
	# Default: 60
	# Range: > 0
	cameraCooldown = 60
	#Whether darkslides should be ejected when filing camera with a full cartridge. Requires Camera Film Mode to be set to CARTRIDGE
darkslideEjection = trueThis section allows you to modify the duration of the development time (developmentTime) and the time during which the photo can be solarized (solarizationTime). Setting these to 0 disables development and solarization, though for disabling solarization it is preferable to use solarizationEnabled. You can also alter the amount of solarization that gets ignored using solarizationGraceAmount - if the photo has been solarized for at most solarizationGraceAmount number of ticks, the photo is not affected.
Most of these are useful mainly for multiplayer servers. You can disable darkslides for all players no matter their creative mod using the solarizationGraceAmount config option. You can disable redstone interactions with the tripod using redstone and the camera cooldown after taking a photo using cameraCooldown. The most interesting option is filmMode, which was explained in the Taking a Photo section.
The mod is technically data-driven, and you can use resource packs to alter the camera effects and data packs to alter the darkslides. This section serves as an example or quick showcase of how these work - it is not a full guide.
Film effects are described using .json files in resource packs, specifically in assets/polaroid600/film/. The json file names in this directory correspond to the identifiers of the film items - for example, film_600 for the color film. Here is what film_600.json looks like:
{
  "format" : "600",
  "transformations" : [
    {
      "type" : "polaroid600:grain",
      "strength" : 0.015625
    },
    {
      "type" : "polaroid600:aberration",
      "xScaleRed" : 8,
      "yScaleRed" : 8,
      "xScaleGreen" : 4,
      "yScaleGreen" : 4,
      "red" : 1,
      "green" : 0.5
    },
    {
      "type" : "polaroid600:linear_color",
      "red" : 1.05,
      "green" : 1.03,
      "blue" : 0.93
    },
    {
      "type" : "polaroid600:power_color",
      "red" : 1.625,
      "green" : 1.625,
      "blue" : 1.625
    },
    {
      "type" : "polaroid600:halation"
    },
    {
      "type" : "polaroid600:quantization",
      "red" : 48,
      "green" : 32,
      "blue" : 16
    },
    {
      "type" : "polaroid600:vignette",
      "strength" : 0.2
    }
  ]
}
The effects are described as a list/array of transformations applied to the image. The format field does not do anything right now, so you can keep it "600". The transformations correspond to the entries in ModFilmTransfomations.java and are applied in sequence. You should be able to add a new film type just by registering a new item and then creating a new json file, though that is more of mod creation than resource pack creation.
Darkslides are described using .json files in data packs, specifically in data/polaroid600/darkslides/. Each darkslide belongs to some darkslide series - like the "Creative Briefs" and "Instant Shooting Tips" series in real life. Each series corresponds to a json file in the directory. Here is an example of creative_briefs.json:
{
  "name" : "Creative Briefs",
  "darkslides" : [
    {
      "id" : "8_wishes",
      "text" : "Here are 8 wishes.\nUse them wisely."
    },
    {
      "id" : "keep_your_friends",
      "text" : "Keep your friends\nclose, and your\nPolaroid film\nin the fridge."
    },
    {
      "id" : "take_a_picture",
      "text" : "Take a picture.\nIt'll last longer."
    },
    {
      "id" : "force_to_be_reckoned",
      "text" : "A force to be\nreckoned with."
    },
    {
      "id" : "wish_you_were_here",
      "text" : "Wish you\nwere here."
    },
    {
      "id" : "off_the_path",
      "text" : "Off the\nbeaten path."
    },
    {
      "id" : "all_that_glitters",
      "text" : "All that\nglitters."
    },
    {
      "id" : "butter_to_my_jelly",
      "text" : "The peanut\nbutter to my jelly."
    },
    {
      "id" : "what_happens",
      "text" : "What happens\nin Vegas."
    },
    {
      "id" : "to_be_there",
      "text" : "You had\nto be there."
    },
    {
      "id" : "the_hunt",
      "text" : "The hunt\nfor Bigfoot."
    },
    {
      "id" : "when_life_gives_you",
      "text" : "When life gives\nyou lemons."
    },
    {
      "id" : "how_you_do_it",
      "text" : "It ain't what\nyou do, it's how\nyou do it."
    },
    {
      "id" : "love_me_tender",
      "text" : "Love me\ntender."
    },
    {
      "id" : "phasers_to_stun",
      "text" : "Set phasers\nto stun!"
    },
    {
      "id" : "what_i_want_to_be",
      "text" : "What I want to be\nwhen I grow up."
    },
    {
      "id" : "the_incredible_adventures",
      "text" : "The incredible\nadventures of..."
    },
    {
      "id" : "dream_on",
      "text" : "Dream on."
    },
    {
      "id" : "working_class",
      "text" : "Working class\nheroes."
    },
    {
      "id" : "welcome_to",
      "text" : "Welcome to\nparadise."
    }
  ]
}
Each series has a name and a list of darkslides. Each darkslide has an id and text or an image, depending on the optional type value. type can be either "with_image" or "text_only", with the latter being the default value. The name and text are not localized, so you have to write them as localized text in the language you want. Since all darkslides are just a single polaroid600:darkslide item with polaroid600:darkslide data component, adding a json file is enough for a darkslide series and entries to be recognised. They will be automatically randomly used during darkslide ejection and added into the creative mode tab, if the client did not disable that in their client config.
The mod is generally compatible with most mods, but as was written in previous questions, mods that alter rendering might cause issues. The most common such mods are Sodium and Iris.
The main source of incompatibility comes with the selfie mirror, which, presumably due to async culling or some other async feature, causes the world to randomly flicker. Hence, the simple solution is disabling the selfie mirror feature when using Sodium. The rest of the mod should work fine.
Since Iris requires Sodium, the selfie mirror issues also apply (though even to a larger degree as it comes with its own selfie mirror issues in the case of some shader packs). Iris, by using its own shader pipeline, also overrides my DOF effects, so no DOF effects are applied by the mod, only the other post-processing effects. Because of that, all cameras shoot the same when it comes to focus. Other restrictions depend on chosen shader packs. This table does not give any guarantees, but shows my results with testing some shader packs:
| Name | Working | Notes |
|---|---|---|
| BSL Shaders | Yes | |
| Bliss Shaders | Partially | The opacifier and solarization overlays are rendered as solid, so you can not see the photo until it is developed nor when it is solarized, slight flicker when taking a photo |
| Complementary Reimagined | Yes | |
| MakeUp - UltraFast | Almost Yes | Taking a photo slightly pollutes the previous frames buffer, causing a slight graphical glitch |
| Photon Shaders | Partially | The opacifier and solarization overlays are rendered as solid, so you can not see the photo until it is developed nor when it is solarized, slight flicker when taking a photo |
Currently planned features include:
- new cameras - namely the Polaroid I-2 (with manual aperture controls), the Polaroid SX-70 and the Polaroid 20x24.
- viewfinder mechanic
- better effects
- attempting to fix the shader issue with the overlays, as unlike the whole DOF issue that seems possible
- attempt to fix the DOF issue even though it seems less possible
- also fix the Go having AF