Release Testing Instructions WooCommerce 4.3
WooCommerce 4.3 includes:
- Updates to the Onboarding Checklist
- New WooCommerce Home section
- Updates to WooCommerce Product Blocks
- Notable Bug Fixes
WooCommerce Payments doesn't require an existing Jetpack connection anymore. It will now be recommended in the Payments section of the onboarding checklist if the site address is in US (or Puerto Rico). The UX for installing/activating WooCommerce Payments has been simplified.
- Start with a clean site, or just disconnect and deactivate Jetpack. Make sure WooCommerce Payments is not installed either.
- Go through the Setup Wizard. On the wizard, make sure that your store address is set to US (or Puerto Rico). Make sure you don't accept installing WooCommerce Services when prompted. Make sure you don't choose CBD as your current business type. Alternatively, if this is not a new site, you can go directly to
/wp-admin/admin.php?page=wc-adminto get to the setup checklist directly. - Once you're in the setup checklist, click "Set up payments". You should see WooCommerce Payments as the top card, and with a highlighted style.
- Click "Set up" on the WooCommerce Payments card. The WooCommerce Payments plugin should be installed and activated automatically, and you should be automatically redirected to
wordpress.com/jetpack/connect/authorize...to complete WooCommerce Payments setup. - There's no need to test it any further than that, since the rest of the connection and setup process is part of the WooCommerce Payments plugin and has been tested independently.
One of the main new features in WooCommerce 4.3 is the addition of a new Home Screen that is displayed when clicking on the primary WooCommerce menu item in wp-admin. Existing sites will still have the Analytics Dashboard shown when clicking on the WooCommerce menu item - so the same behavior that has existed in WooCommerce since 4.0. Existing sites will have to opt-in to the new Home Screen experience, and new sites will have it turned on be default.
To prepare for this test flow, please setup a new site with WooCommerce 4.3
- Install and activate WooCommerce 4.3, and proceed to the Onboarding Profile Wizard.
- Complete the onboarding wizard, feel free to choose any options as it doesn't impact the testing of the home screen.
- After you complete the onboarding wizard, you will be redirected to the new Home Screen
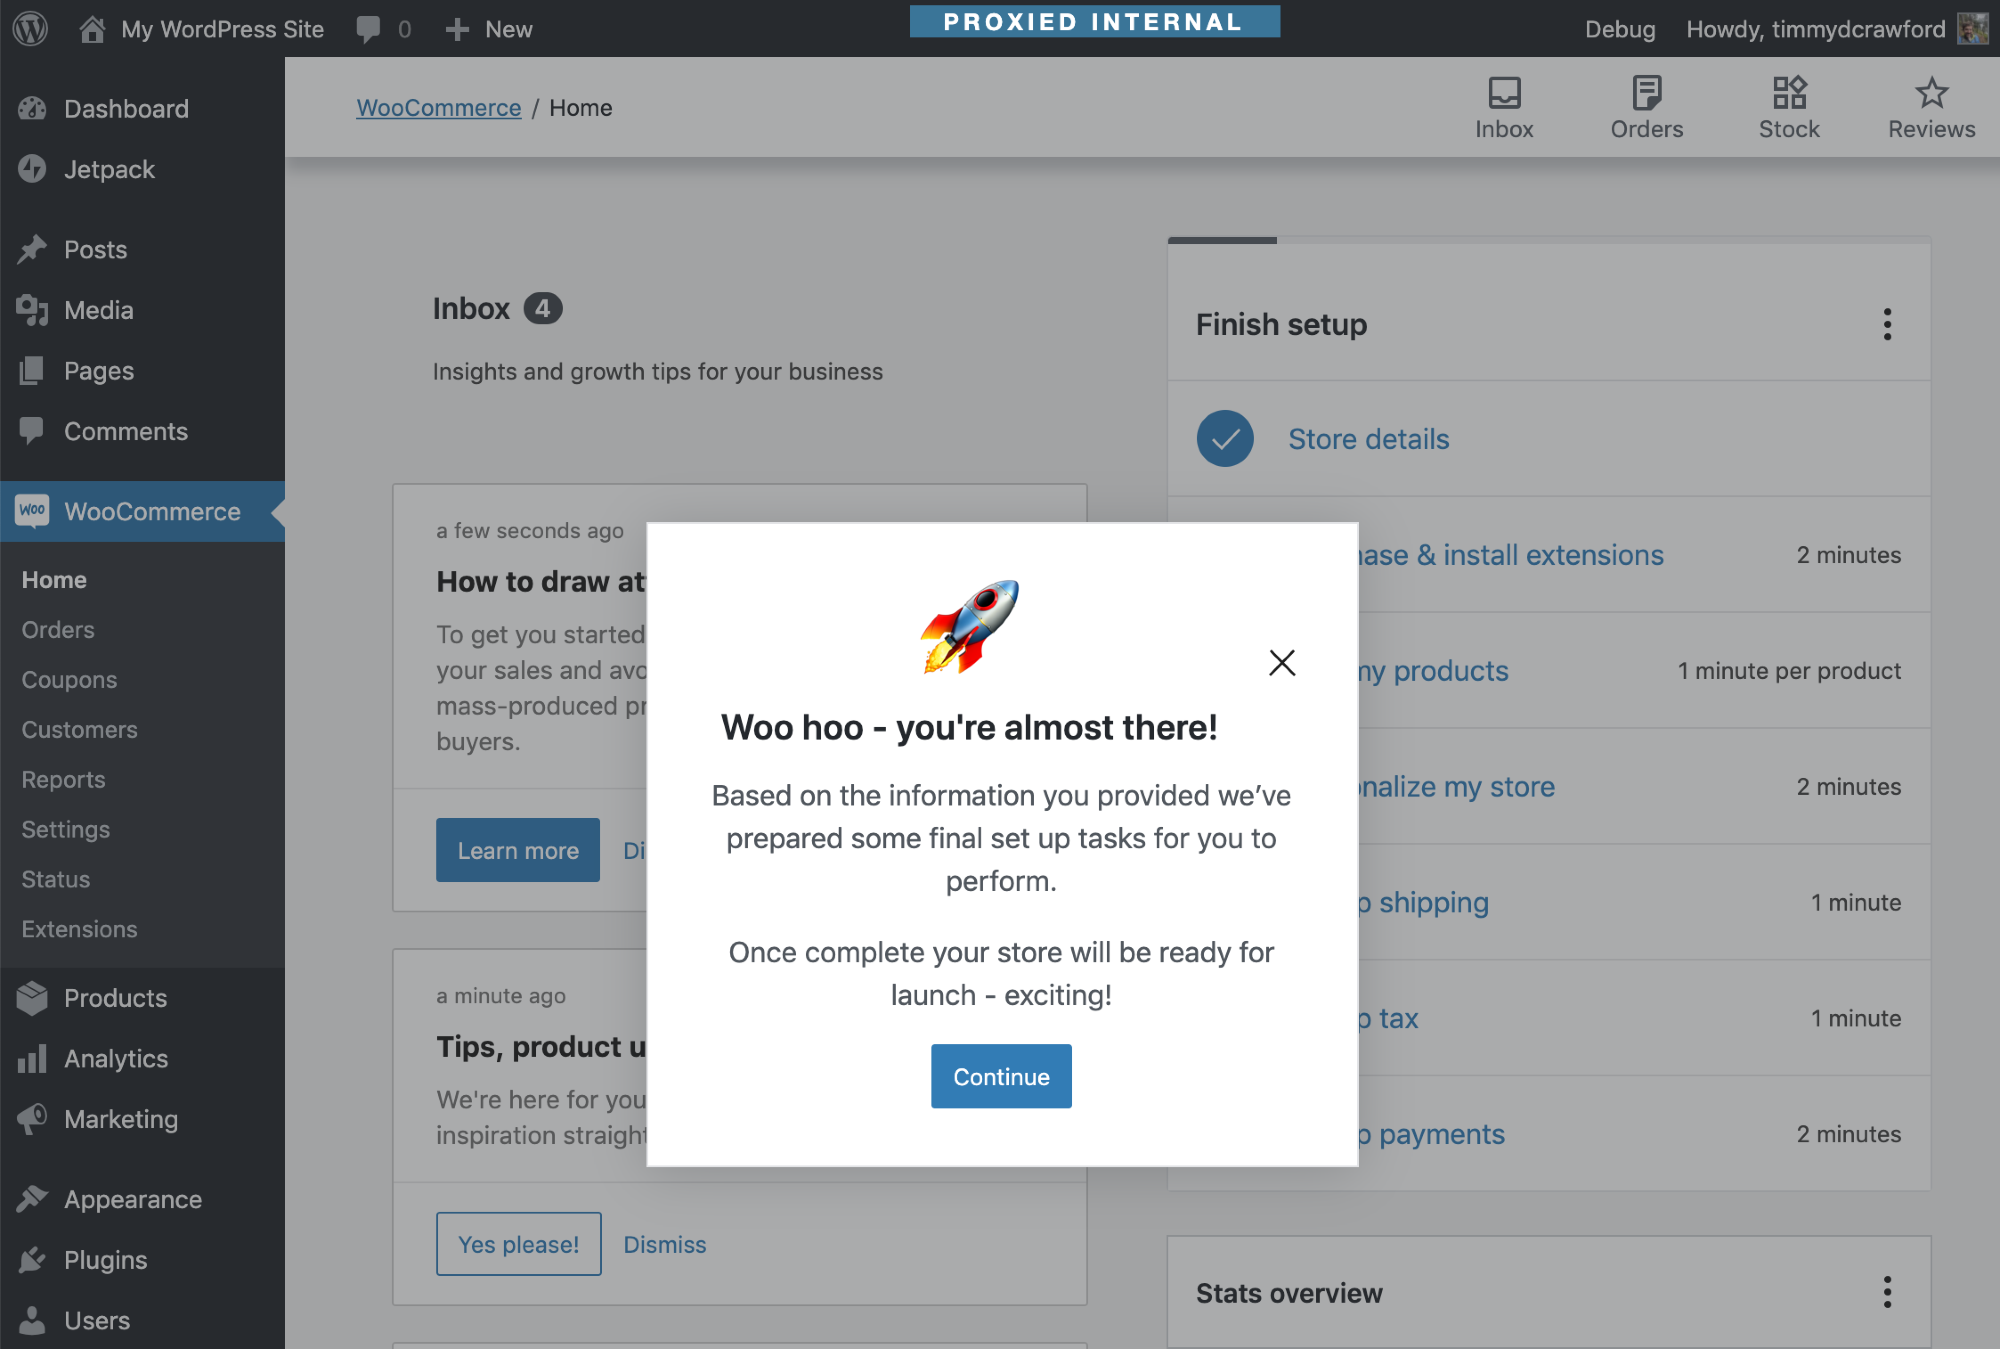
- Please note that the contents of the Inbox pictured above may vary depending on the options you selected during the onboarding wizard.
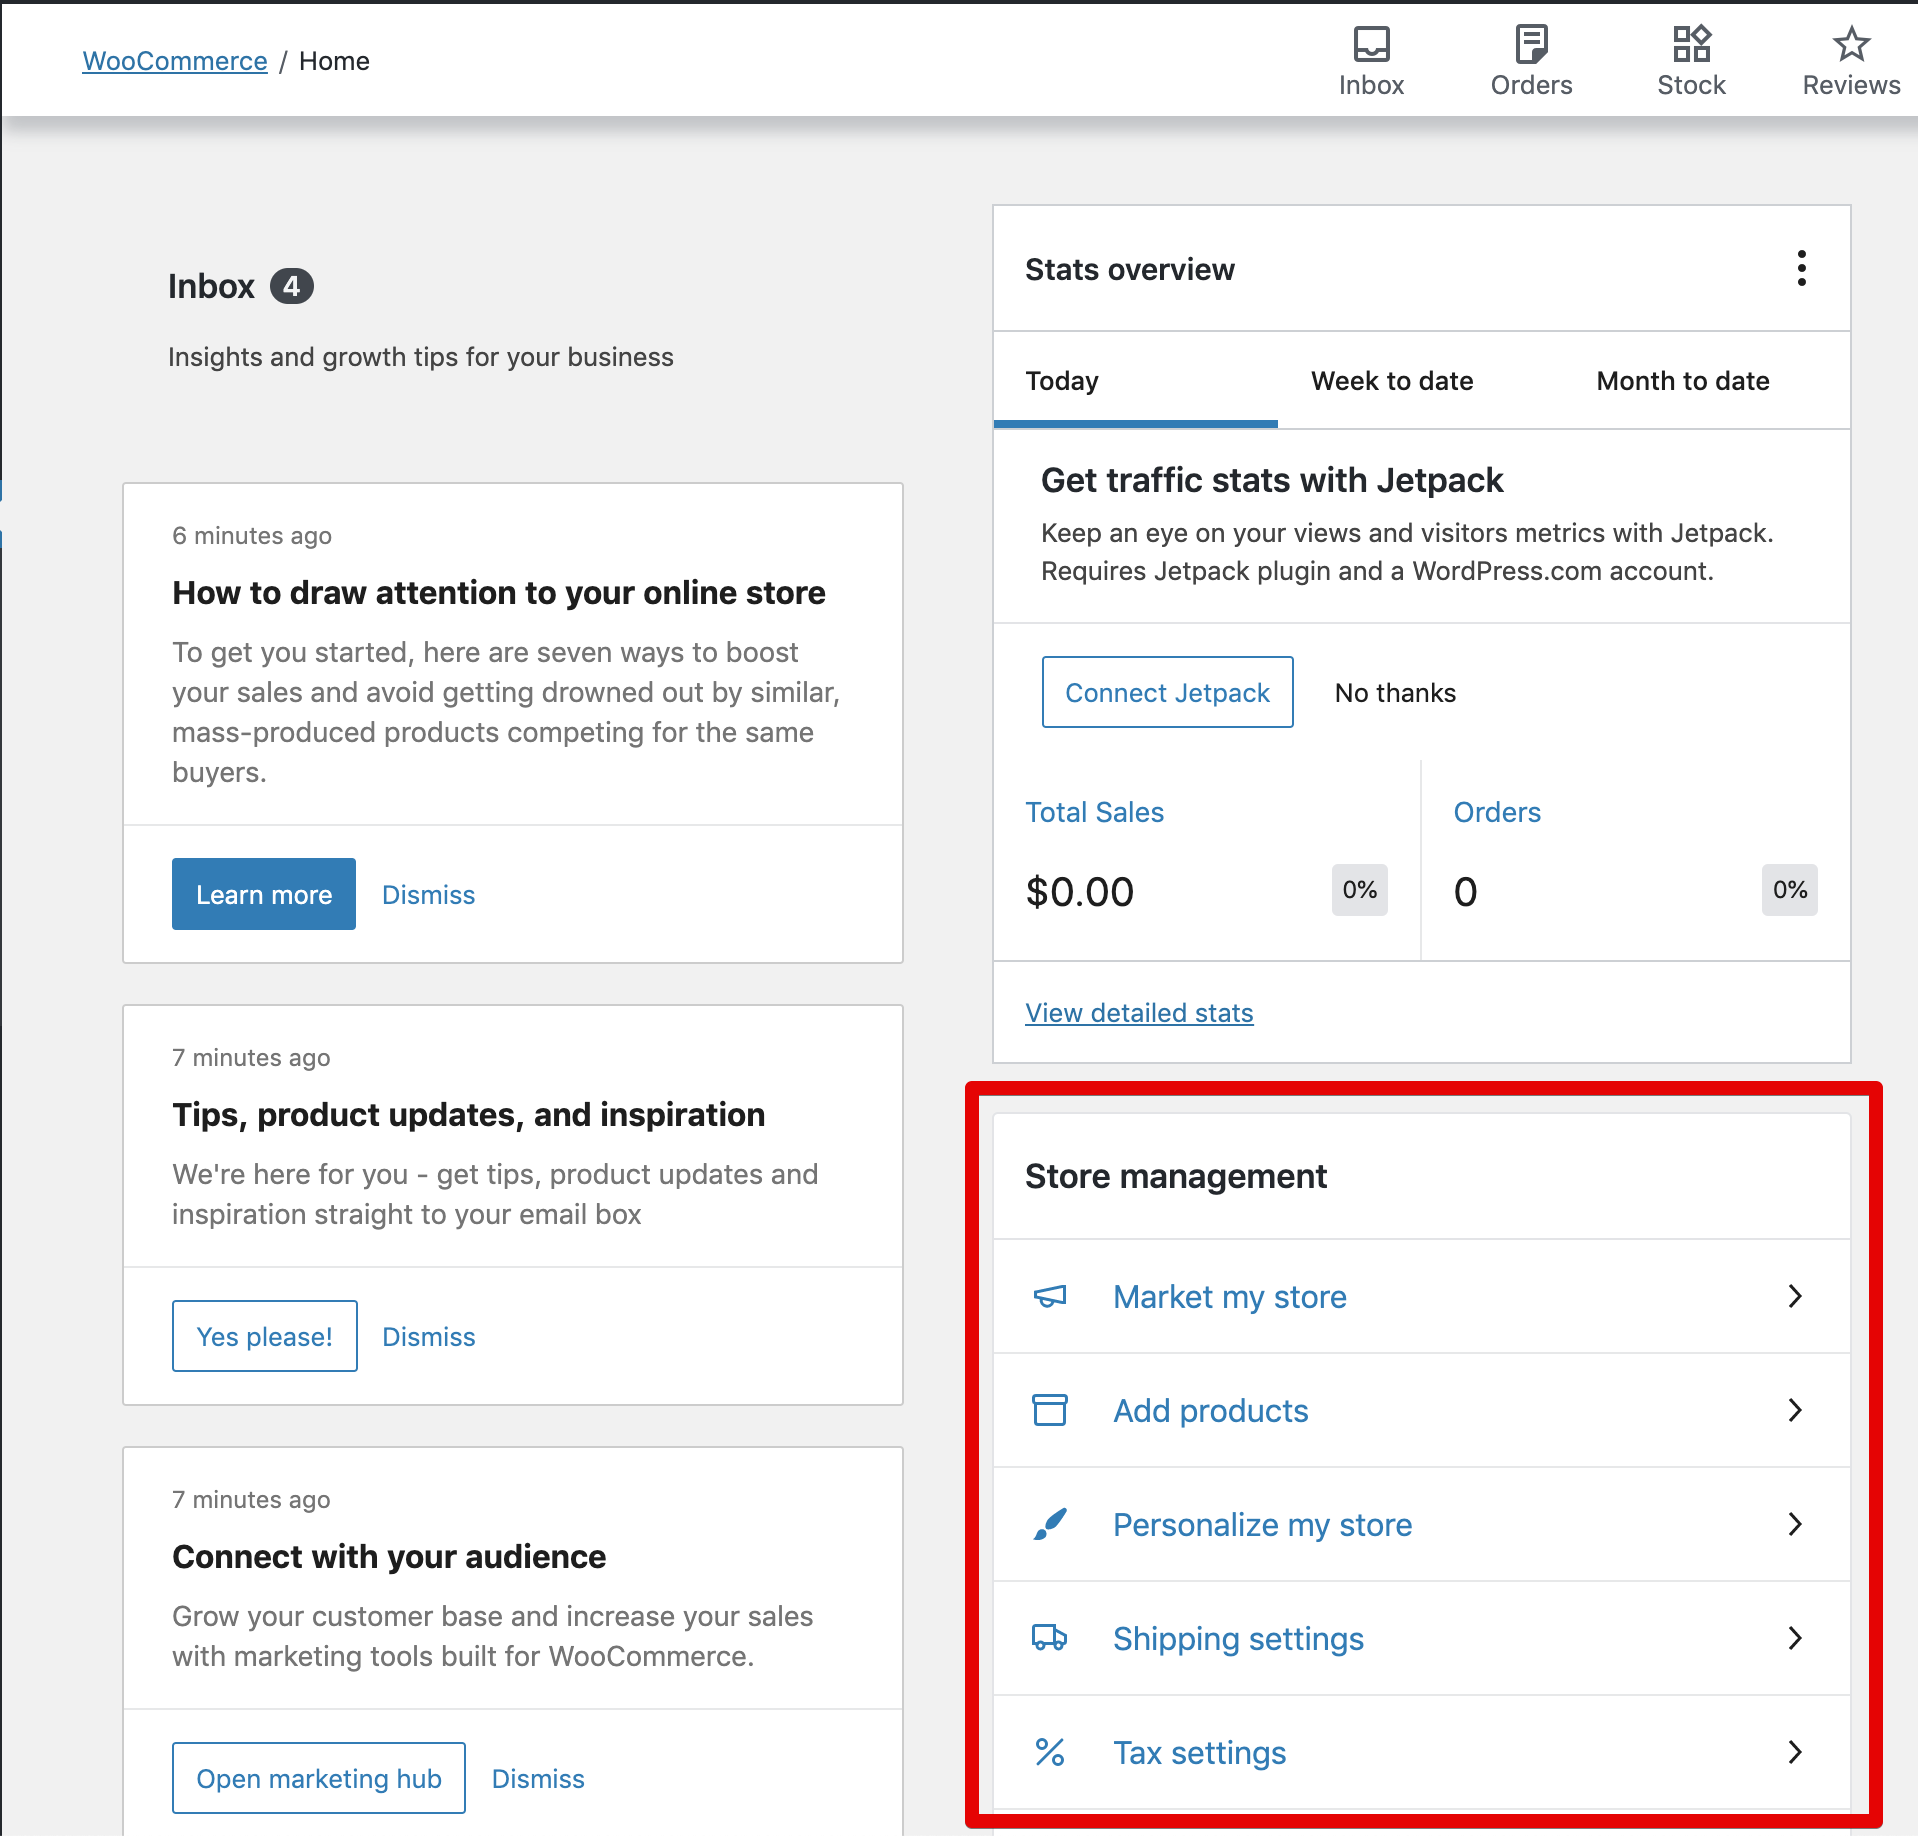
- Test Setup Checklist Dismiss: You can either complete all items in the setup checklist, or click the ellipsis menu and hide it:

- After dismissing or completing the setup checklist, verify that the "Store Management" quick links box is now displayed in the right column
For sites that are upgrading to 4.3 from a prior version of WooCommerce, the home screen is not enabled by default. This test flow will verify the opt-in to the new home screen functions as expected.
To complete this step, you will need to have a site that is already setup running WooCommerce 4.2, and you need to do the following items to "establish" the store as up and running:
- Install WooCommerce 4.2.
- Go through the onboarding wizard, and setup at least one product manually. These actions will install the Woo pages, and have at least one product setup which is what WooCommerce uses to determine if a store is new or not.
- On your WooCommerce 4.2 install, click on the WooCommerce menu item, note that it displays the Analytics Dashboard:
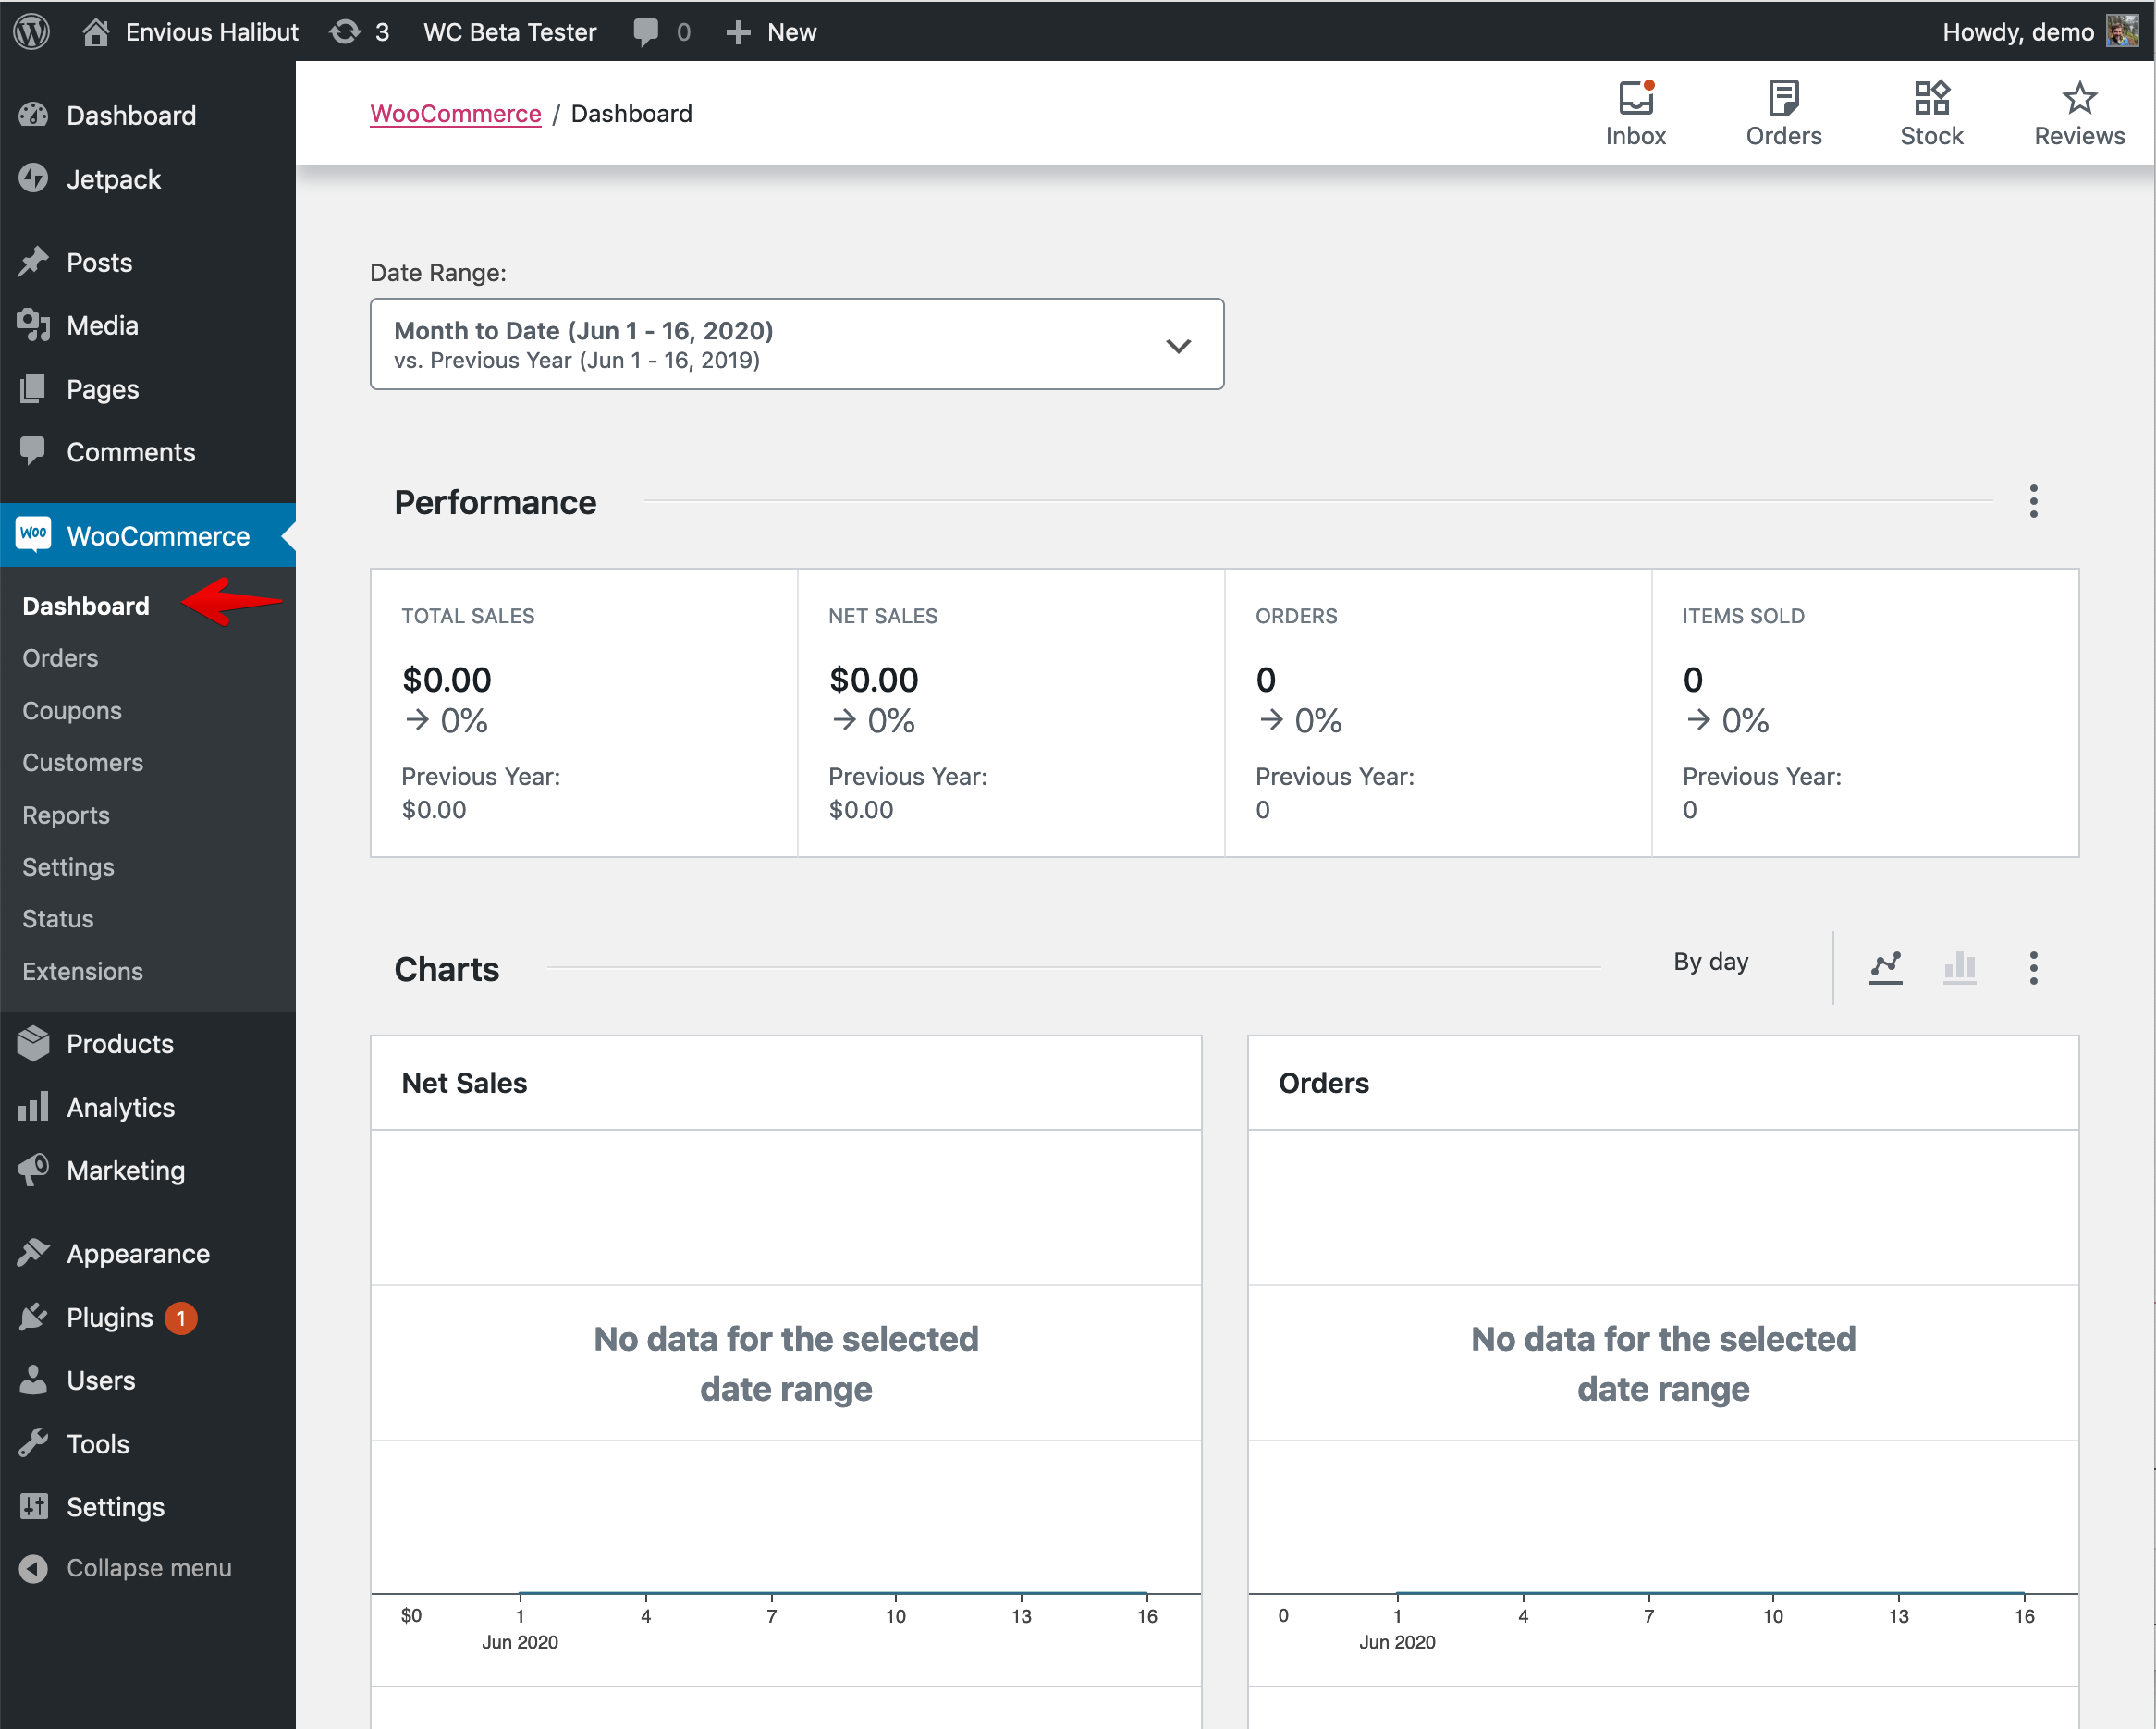
- Using the WooCommerce Beta Tester plugin, you can now easily update to the latest version of WooCommerce 4.3 ( beta or RC )
- After the update has applied, click on the WooCommerce link in the wp-admin sidebar. Verify that you are still shown the Analytics Dashboard ( see above ).
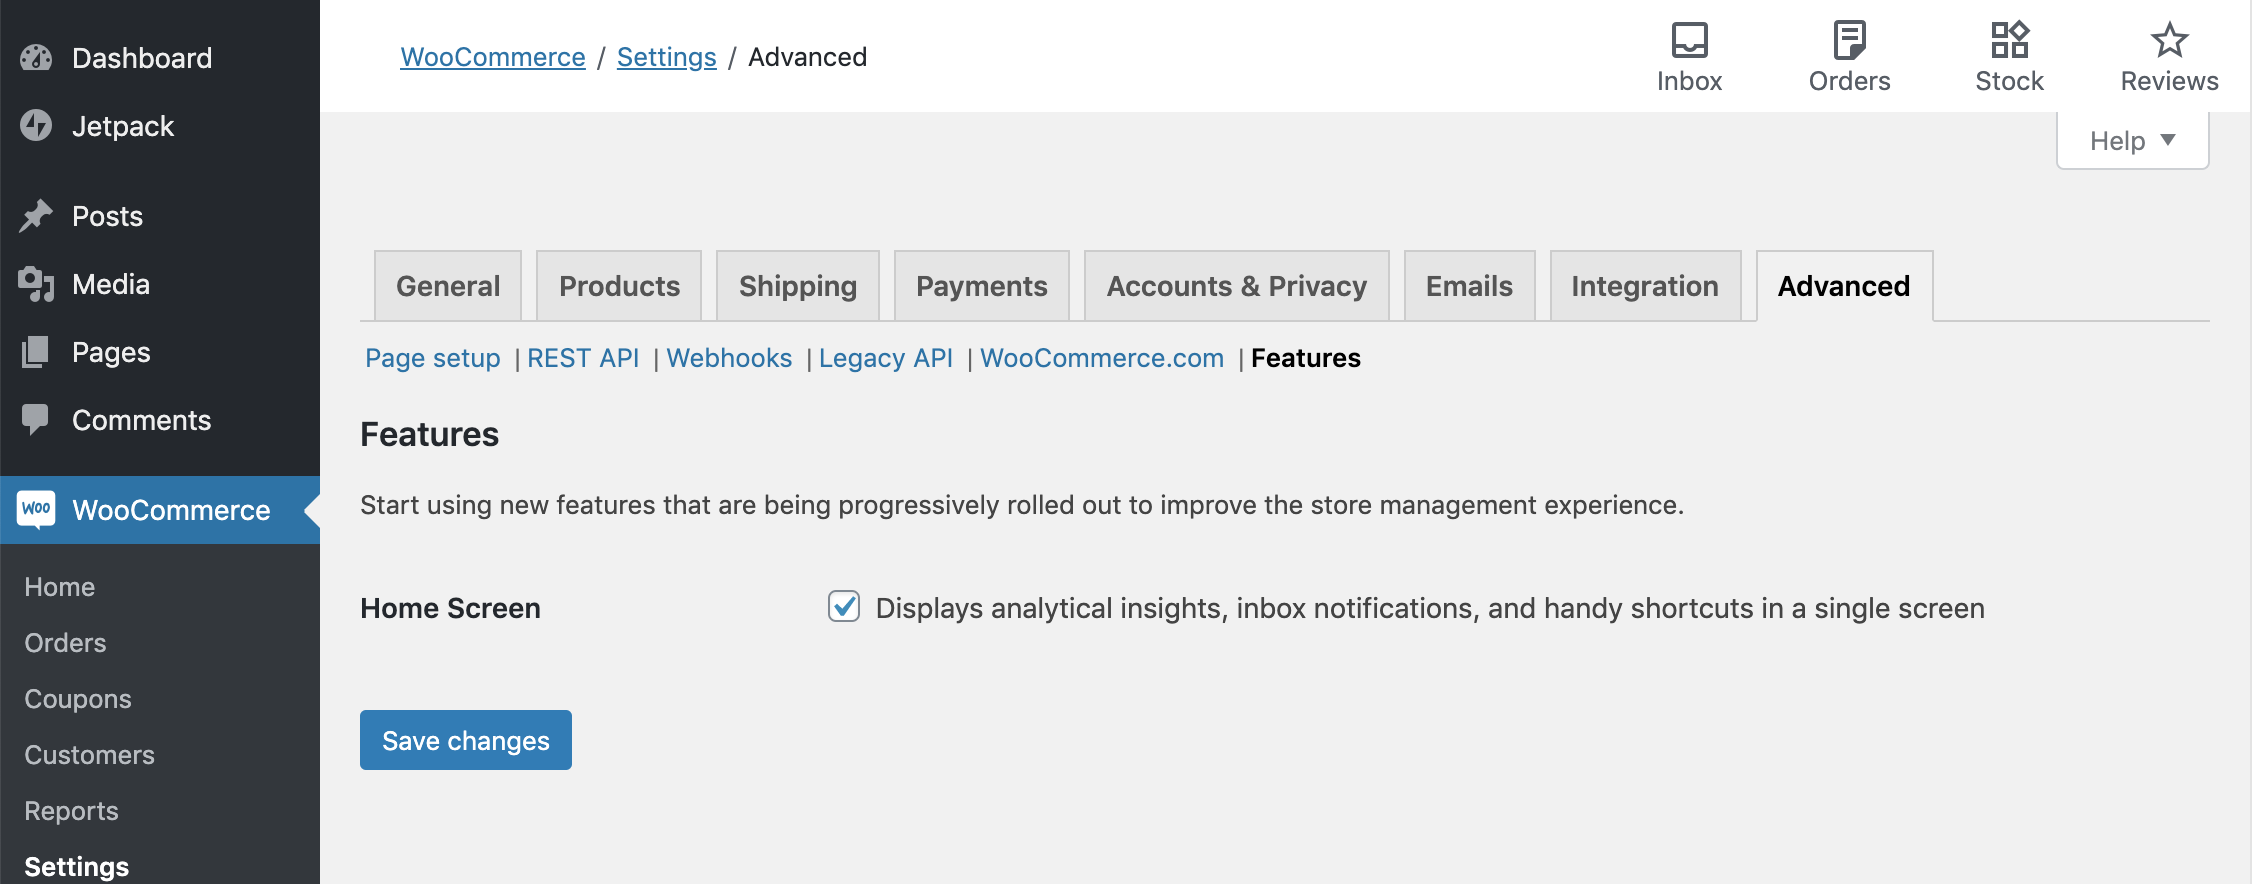
- Navigate to WooCommerce > Settings > Advanced > Features (
/wp-admin/admin.php?page=wc-settings&tab=advanced§ion=features) and enable/check the box for "Home Screen", and click "Save Changes":
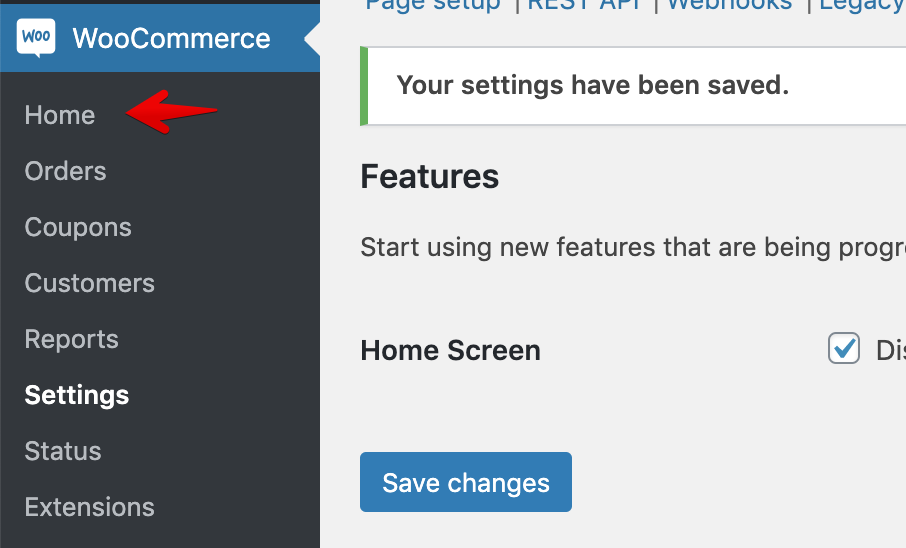
- Note after the page loads upon form submission, the first link under the WooCommerce menu should say "Home":
- Click on Home, and verify the new Home Screen is shown.
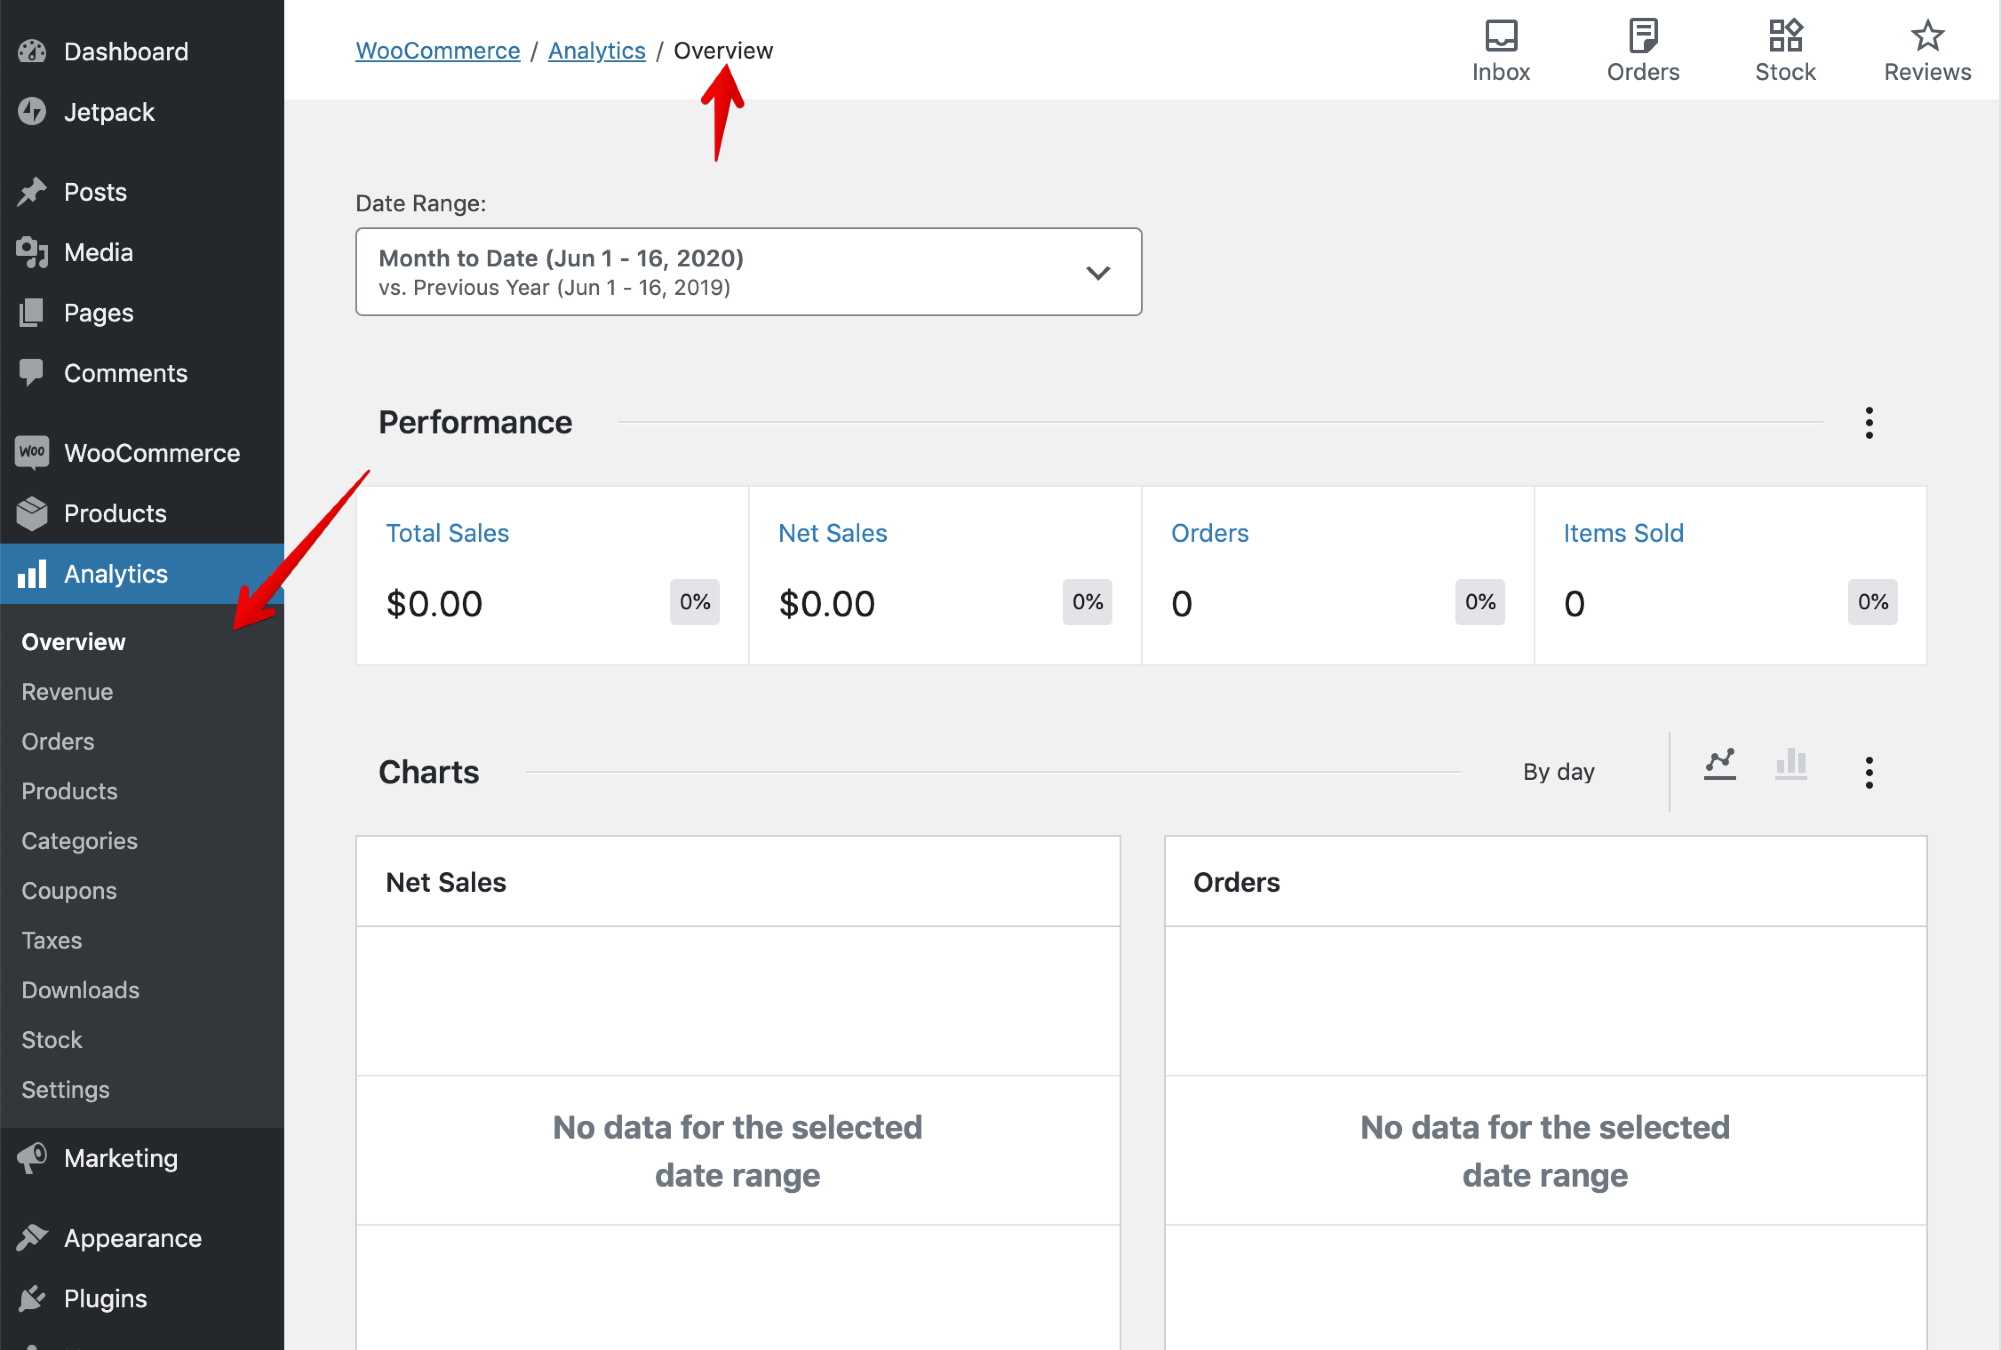
- Click on the Analytics menu item, and verify the Analytics Overview screen is shown.
Using either of the flows above, with the home screen active, you can also test the following items.
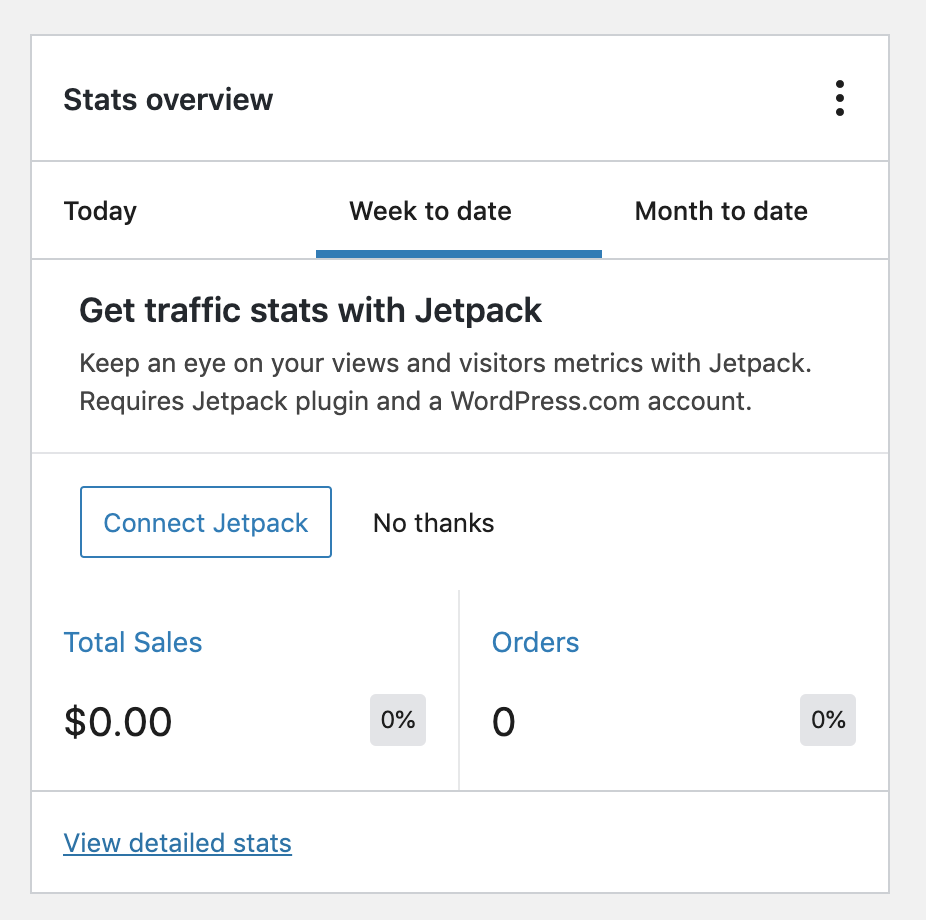
On the right side of the home screen you will see the new Stats Overview section.
- The first feature to test here is to click on the ellipsis menu in the header area, and toggle "Net Sales" to the on position:
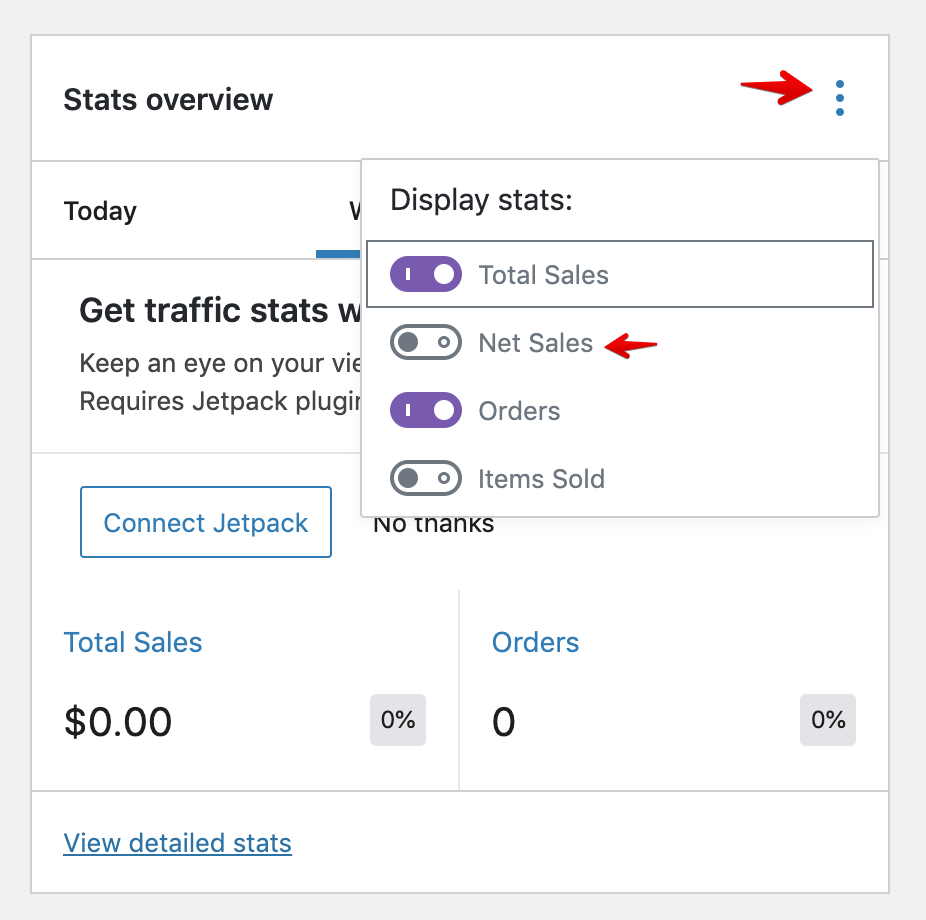
- After toggling "Net Sales", verify that it is shown along with "Total Sales" and "Orders" in the Stats Overview section now.
- Do a full browser refresh on this page.
- Verify your selection to display "Net Sales" has been persisted, and is still shown.
- Next interact with the date range tabs at the top of the section:
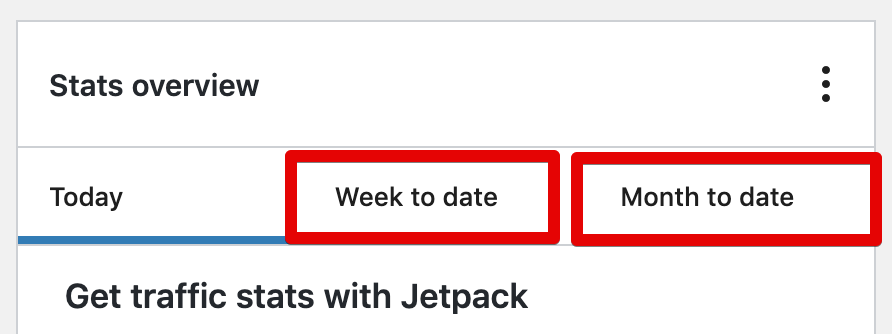
- If you have no sales data for these periods, it might be hard to notice the difference here, but note that the loading indicator happens as the time period is changed.
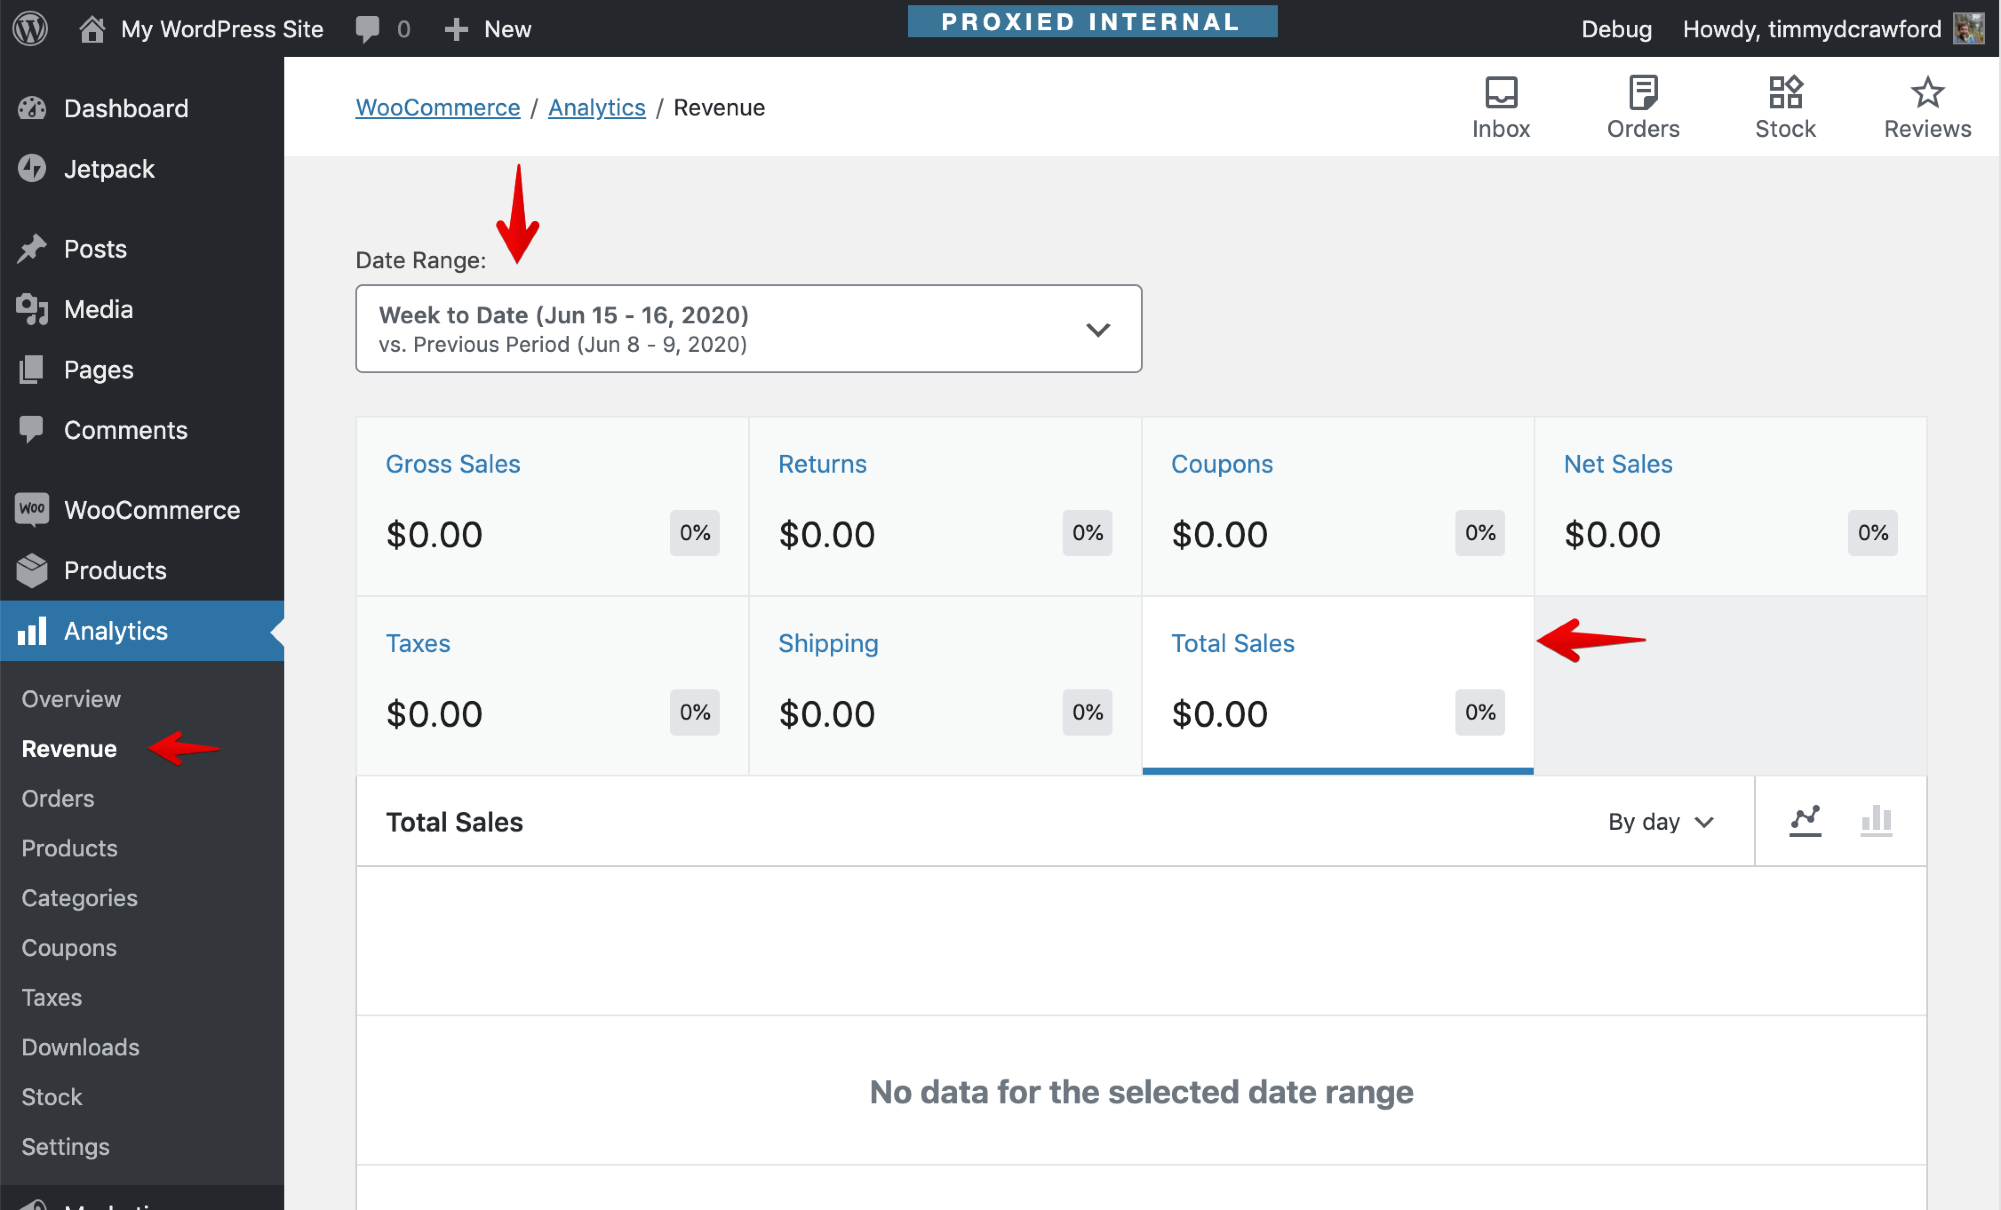
- Click on "Week to Date".
- Then click on "Total Sales". Note that this will open the Revenue Report, with the "Total Sales" chart selected, along with setting the date range to Week to Date:
- Return to the Home Screen by either hitting your back button, or clicking "WooCommerce" in the wp-admin navigation menu.
- Click the link at the bottom of the "Stats Overview" section, verify you are linked to the Analytics Overview page:
From the home screen, you can also test the new Store Management section:
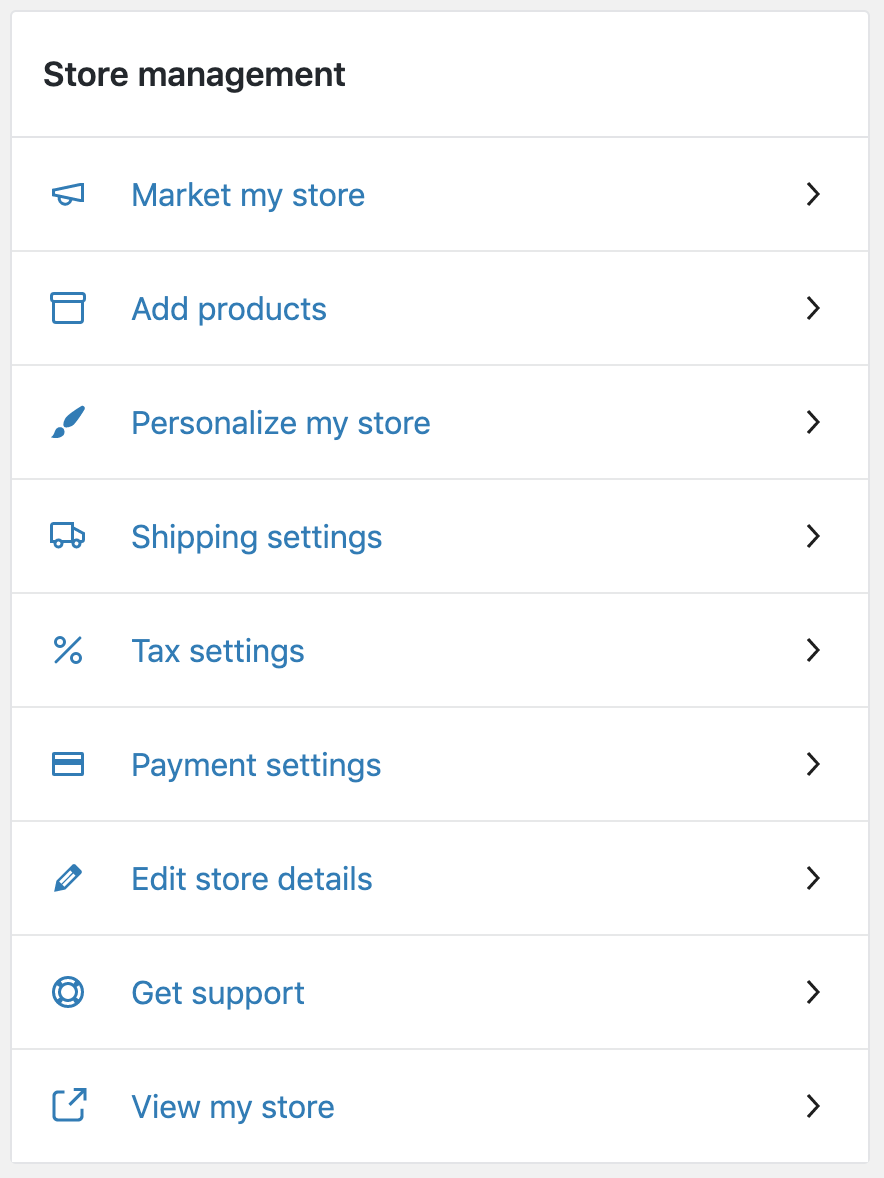
- Open the home screen.
- Hide the Setup Checklist if visible to expose the Store Management section.
- Interact with each link in the Store Management section.
- Verify the links send you to the correct location.
A refactor of the Inbox Notifications was made.
This refactor makes the following changes:
- Now there are 3 types of notifications.
- They are dismissable and undismissable.
- They appear also on the
Homepage.
The only way to see the Inbox Notifications was through the button Inbox in the navigation bar.
Now the Inbox Notifications are also on the Home page, so it will be necessary to test both scenarios.
There are 3 notification types: plain, thumbnail, and banner.
- The
plainnotification will look like this:

- The
thumbnailwill look like this:

- And the
bannerlike this:

By default the notifications are type plain.
You can use this plugin to:
- Add new notifications
- Undo notification deletion.
To use it you must:
- Install it like a normal plugin.
- Use the buttons
Add NotesandUndo Delete.

-
Add Noteswill add 3 notes (one of each type). -
Undo Deletewill undelete all the deleted notes.
-
As mentioned before, the Inbox Notifications are visible on the
Homepage and in the navigation bar, and it's necessary to test both. -
To be able to see the Inbox Notifications in the navigation bar, press the
Inboxbutton. -
The list of Inbox Notifications should be visible.
- Verify that the messages have the right style for
readandunreadmessages. To do this add a new message using the helper plugin mentioned above. - Verify that the number of
unreadnotes corresponds with the notes not yet read.

- Press the
Dismissbutton that appears at the bottom of the note. - Choose
Dismiss this message. - A confirmation modal will be visible. Press
Yes, I'm sure. - The message shouldn't be visible anymore.
- Do the same choosing the option
Dismiss all messages.

To undelete a notification you can press Undo in the Snackbar that appears after deleting or you can use the helper plugin.
- Press
Dismissin any message.
Flow A
- Choose
Dismiss this message. - A confirmation modal will be visible. Press
Yes, I'm sure. - A snackbar should be visible with the text:
Message dismissed.and with anUndobutton.

- Press
Undo. A placeholder will appear (while loading) in the place where the message will be shown after it has been undismissed.

- The message should be present in the list again.
Flow B
2. Choose Dismiss all messages.
- The behavior should be the same as choosing
Dismiss this messagebut will affect all the messages.

Also, a placeholder will appear instead of the messages while loading.
Home page
- Verify that the new design has been applied to the
Homepage when there are no messages to show.

Header
- Press the
Inboxbutton in the navbar to open the inbox notifications. - Delete all the inbox messages.
- Verify that the new design for the empty inbox message list in the inbox panel is visible.

These testing instructions are based on the testing instruction published specifically for WooCommerce Products Blocks 2.6.0 and 2.7.0.
- All of these tests should be done in Safari, Chrome, Firefox (latest version) and Internet Explorer 11.
- Also validate the behaviour of the block in mobile views vs desktop.
- Verify the block can be added to a new page.
- Verify only one instance of the block can be added to a page/post.
- Verify the various settings and configuration for the block in the editor works as expected for the given UI.
- Verify the block functions as expected for the given configuration on the frontend of the site.
- For an instance of this block setup on a post in an earlier release, verify that upgrading to this release doesn't break the block functionality in the frontend or in the editor.
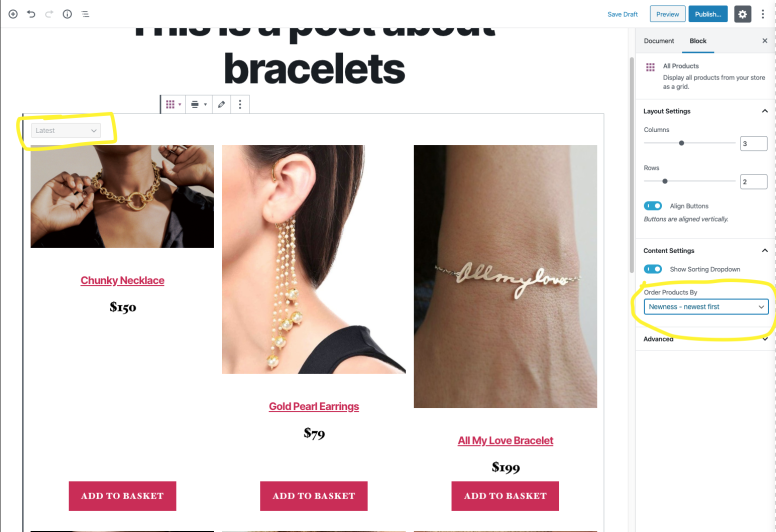
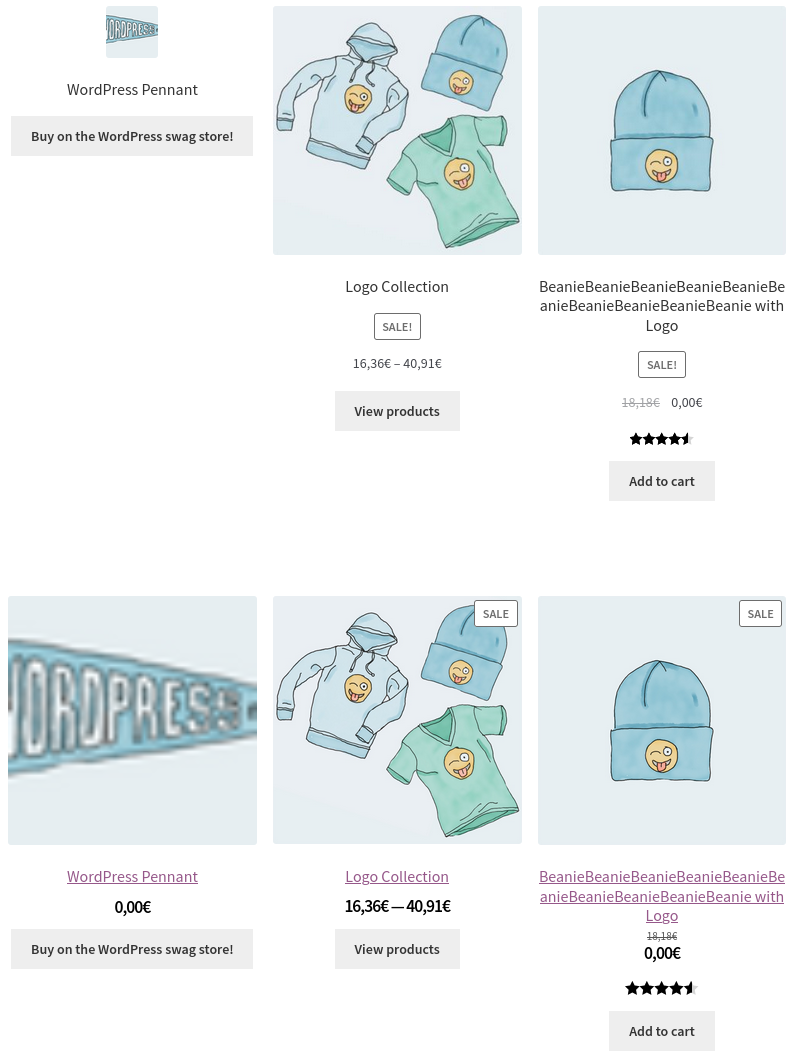
- When editing the All Products block, verify that when you change the default sorting options in the inspector controls for the block that the corresponding filter dropdown in the block preview updates as expected (see highlighted areas below):
- Verify that an error notice is shown in the All Products block if you try to add a product to the cart (using the Add to Cart button) if the product is out of stock or is sold individually and there is already an instance of that product in the cart.
These blocks are used in tandem with the All Products block to provide filtering options on the content rendered by the All Products block. They include:
- Filter Products By Attribute
- Filter Products By Price
- Active Product Filters
These blocks can be tested by adding them to the same page as the All Products block as the selected values in these blocks affects the products displayed by the All Products block.
- General testing involves setting up the filter blocks and verifying the the various configurations for the blocks work as expected in the editor (for settings) and the frontend (according to how the block was configured). Validate that when various filters are applied the expected results are shown in the All Products block.
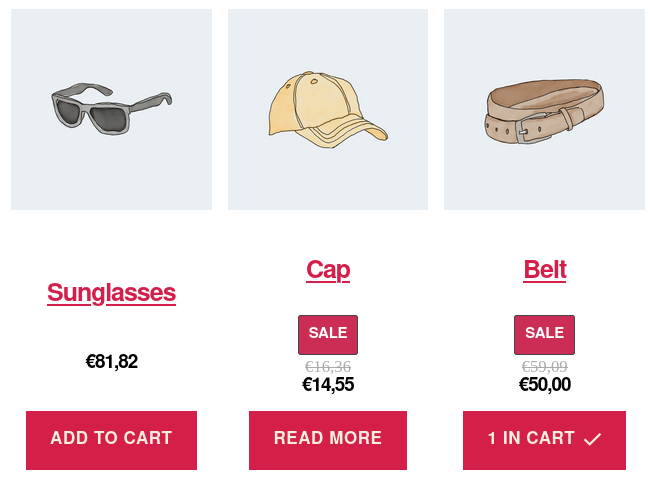
Testing the price filter block with various settings around taxes and prices
One fix in this release for this block is that when the price display setting (including or excluding tax) for WooCommerce differs from the price entered setting (prices input including or excluding tax), the displayed prices for filtered results from the entered Price Filter block might appear to be a mismatch (when it's querying based on the prices saved to the database). With this release, this is fixed so that no matter how WooCommerce is configured for displaying or saving prices respective to taxes, the displayed products will have prices matching the expected range set via the price filter block.
To test:
- In WooCommerce > Settings > Taxes, choose to enter prices inclusive of tax, but display prices excluding tax. Test that filters work as expected for the blocks.
- In WooCommerce > Settings > Taxes, choose to enter prices exclusive of tax, but display prices including tax. Test that filters work on products.
And/Or labelling in Active Filters block
- Setup various filter blocks so that some are set to
anytype filtering and others are set toalltype filtering. - Add the Active Filters block to the same post/page.
- Verify that when you apply filters on the frontend, the Active Filter block updates it's text to match the type of filtering being done.
Dropdown display style to Attribute Filter block
This release introduces a dropdown display style for the Filter Products by Attributes block (for both AND and OR type queries). Expected result:
To test:
- Create a post with a Filter Products by Attribute block and select the Dropdown option in Display style settings.
- Preview the post and interact with the filter (search terms, add them, remove them, repeat only using the keyboard, using a screen-reader etc).
- Verify everything works as expected for the ui/ux behaviour and for the returned results in the All Products block.
- This should work for either "and" or "or" filtering.
Add option to display an "apply filter button" for the Filter Products by Attribute block
- Create a post with an Filter Products by Attribute block and All products block
- For the Filter Products by Attribute block, enable the Filter Button option.
- Preview the post and verify selecting/unselecting options doesn't update the All Products block until you press the Go button.
All of these blocks share a common ancestor for the PHP side registration, so it's good to test them together. These blocks include:
- Top Rated Products
- Best Selling Products
- On Sale Products
- Products By Attribute
- Hand-Picked Products
- Products by Category
- Products by Tag
- Newest Products
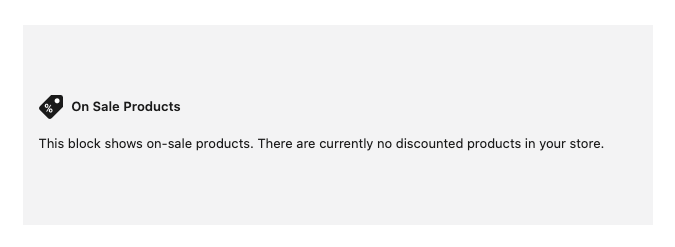
- Verify that if there are no products on sale, the On Sale Products block shows this placeholder in the editor:
- For any of the product grid blocks, verify that when a fresh instance of the block is added to the editor, it defaults to 3 rows and 3 columns for the grid.
- Verify that changing any of the values for the grid "sticks" and persists across saves. Also verify it shows as expected and configured on the frontend.
- For any of the product grid blocks, for an instance of the block setup on a post in an earlier release with no changes to it's settings, verify that upgrading to this release doesn't break the block functionality in the frontend or in the editor (However note that the grid will change from the default of 1 in the earlier release to 3 in the recent release automatically).
- Same test as above, except in the earlier release, change the grid to something other than 1 row and save. When upgrading to the new release the setting for the grid should have persisted with the block.
- Update a product so it has a very small image (100px or less).
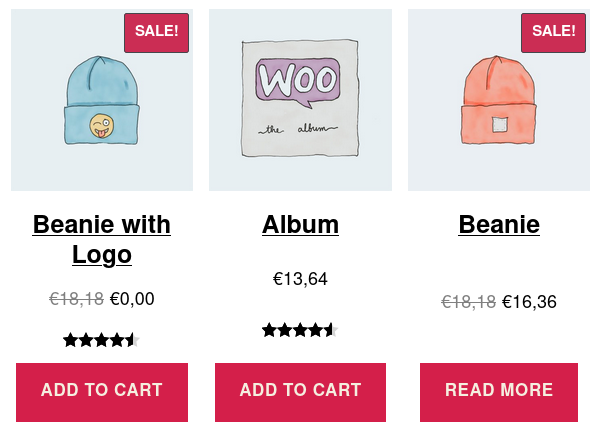
- Add the All Products block and a PHP-based product grids block (Hand-picked products, for example) and verify:
- Both of them have the same styles for prices.
- Both of them scale up the small image.
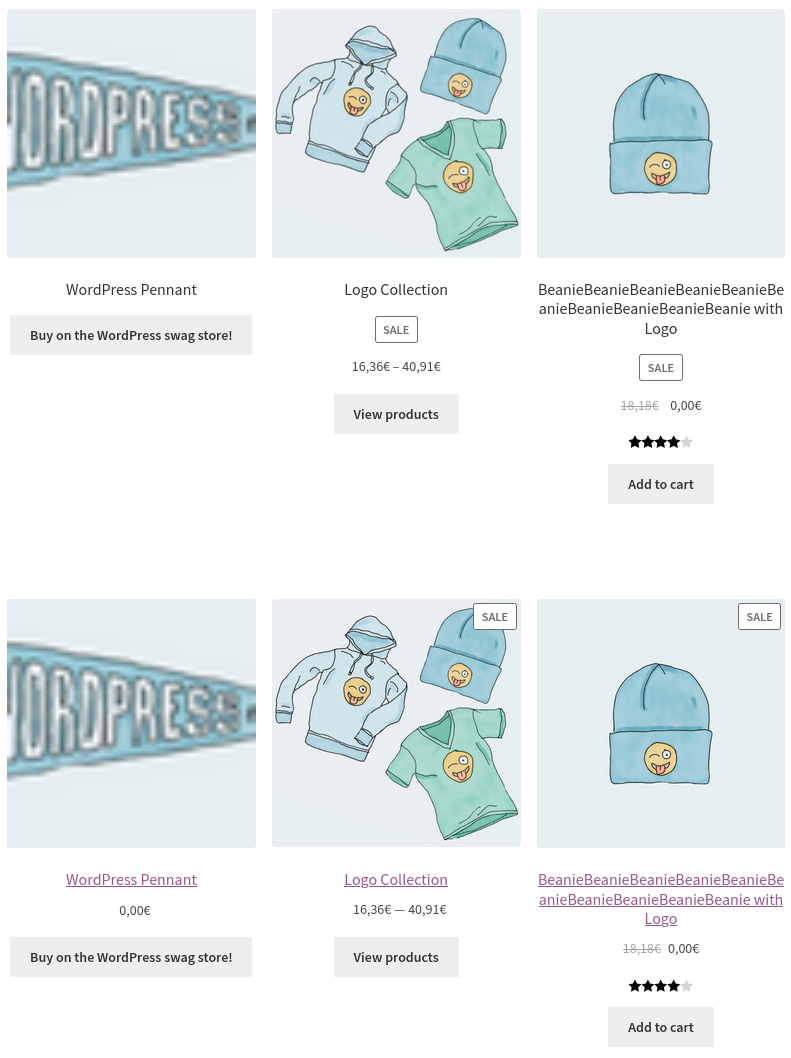
Handpicked products on top, All Products below:
- Add the CSS code snippets from the theming docs to undo the changes and verify:
- Note: you can add CSS code snippets going to Customize > Additional CSS, pasting the code and then pressing Publish.
- Hand-picked products block doesn't scale up the image anymore.
- All Products block shows discounted prices in two lines.
Handpicked products on top, All Products below:
- Enable the theme Twenty Twenty:
- Add the All Products block and the Hand-picked Products block in a page and verify:
- That with the All Products block you can add the On Sale badge and it's correctly aligned in the editor and the frontend (before, it was always shown on top of the image).
- The Hand-picked Products block discounted prices are not underlined.
- That with the All Products block you can add the On Sale badge and it's correctly aligned in the editor and the frontend (before, it was always shown on top of the image).
- Add the All Products block and the Hand-picked Products block in a page and verify:
There are a number of other specific focuses for testing for changes in this release for other blocks:
In this fix, when a product is changed for an existing featured product block, the link in the button updates to the page for the new product. Note, if there is a custom url applied when the product is changed, this will be replaced by the url to the product (that's expected).
To test:
- Verify any existing instance of this block in a previous release does not show any errors in the editor when updating to this release.
- Verify that if you edit the block and change the product it uses, the button url will update as well.
Support was added for showing category images in the Product Categories block. The following expectations:
- For the "List" display style the toggle option for showing category images is available (and is disabled by default).
- This option is not available for the "Dropdown" display style.
- When the option is toggled to "Show Category Image", images for categories are shown per category item in the list.
- Verify the new option works as expected according to the above both in the editor and in the frontend.
- Verify you can't add any of these blocks: Cart, Checkout and Single Product.
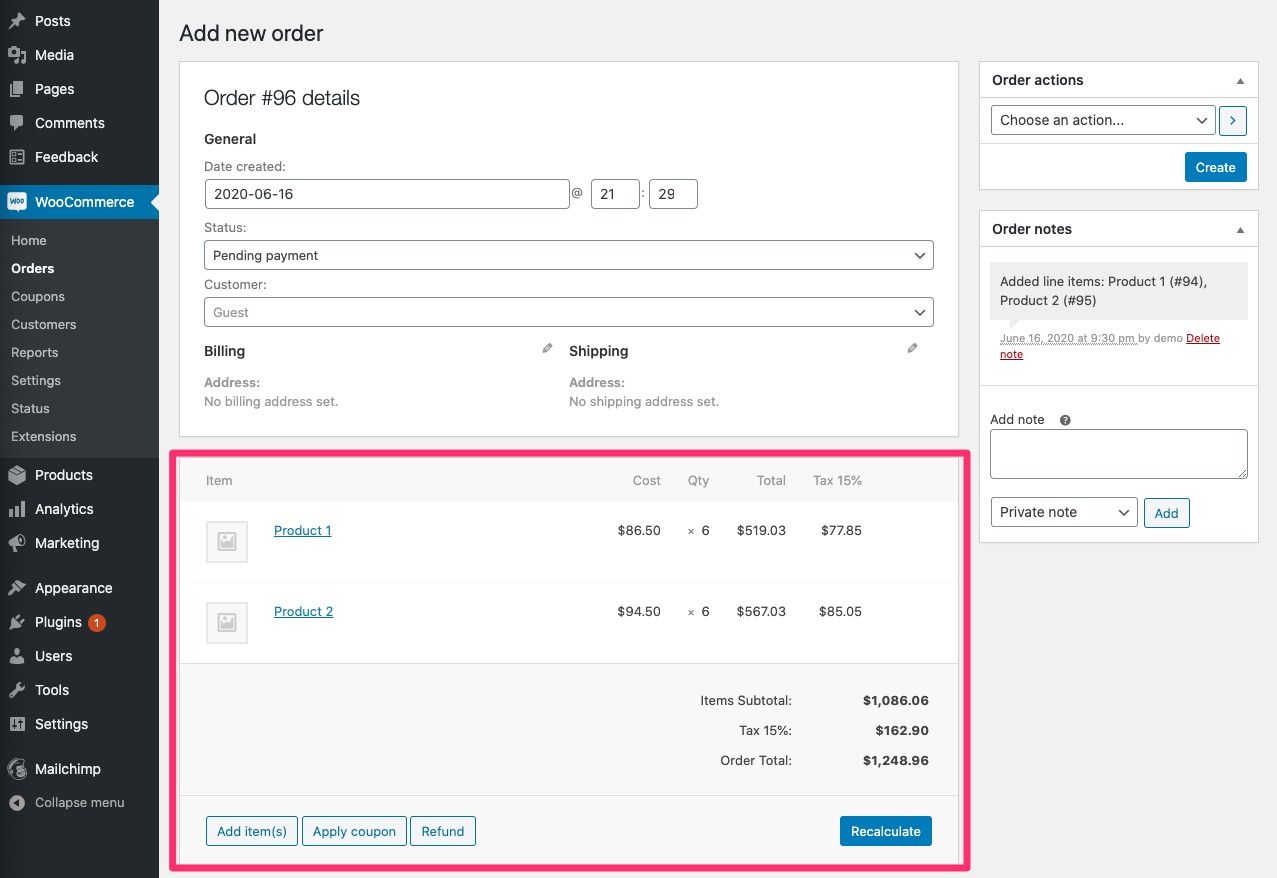
- Fix rounding issue (#26583)
To test:
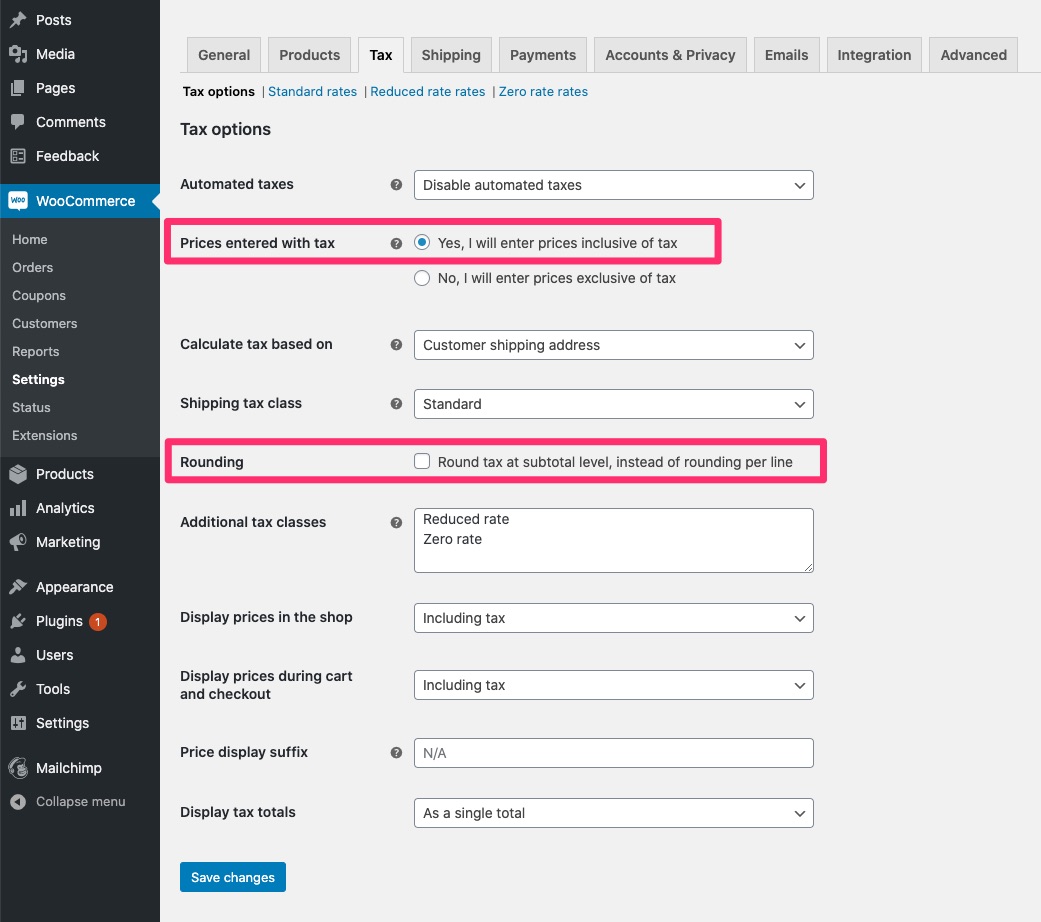
- Set prices to be inclusive of tax with
Yes, I will enter prices inclusive of tax - Uncheck the option
Round tax at subtotal level, instead of rounding per linein Tax settings:
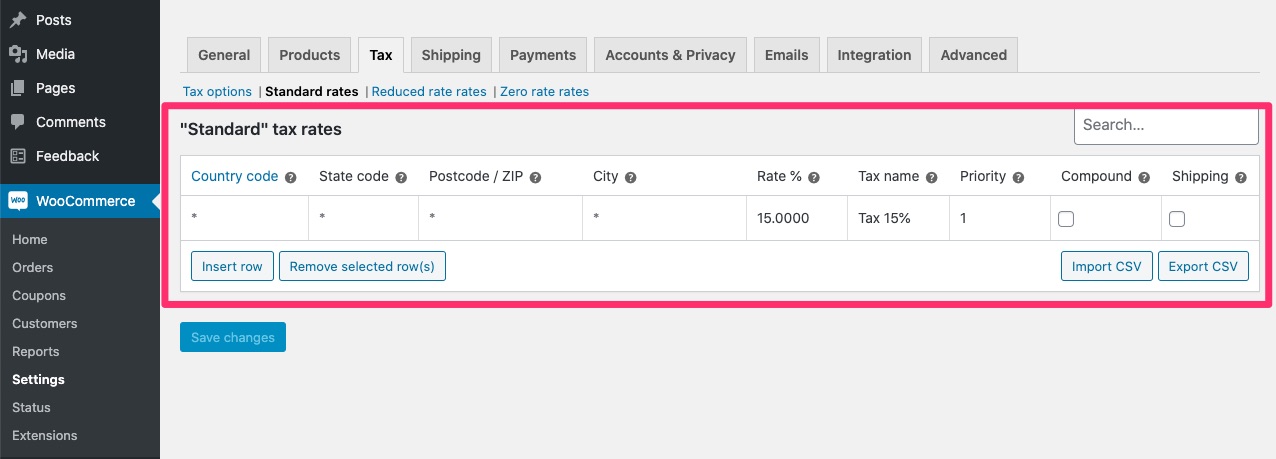
- Set tax rate to 15%:
- Create 2 products, one with a price of 99.48 and the next with the price of 108.68
- Create order in admin with 6 of each item
- Click on recalculate. You should see that the total will match the sum of item subtotal and taxes: