Release Testing Instructions WooCommerce 7.3
WooCommerce 7.3 includes:
Slack Workflow: WooCommerce Product Blocks
Blocks 9.1.0 Testing instructions
Blocks 9.1.1 Testing instructions
Blocks 9.1.2 Testing instructions
Blocks 9.1.3 Testing instructions
Blocks 9.1.4 Testing instructions
Blocks 9.1.5 Testing instructions
- Start OBW
- Type a country name and confirm it matches a country
- Type a state name and confirm it matches a state
With a new site,
-
Disable
Display suggestions within WooCommercein WooCommerce > Settings > Advanced > WooCommerce.com -
Go to WooCommerce > Home > Get more sales
-
Observe Pinterest plugin is only shown once

Without the fix, redundant Pinterest plugin will be shown in the marketing task:

- Set up woocommerce and enable tax settings in general woocommerce settings
- Go to tax settings tab
- If any of the 3 tax display settings (Prices entered with tax , Display prices in the shop, Display prices during cart and checkout) differ, there should be a warning banner.
- Clicking on "Use recommended settings" should change all the settings to be the same as the one set for "Prices entered with tax "

With a new site,
- Skip the Onboarding Wizard.
- Disable "Display suggestions within WooCommerce " in Settings > Advanced > WooCommerce.com.
- Navigate to the Free Features section in the Onboarding Wizard.
- See that Codisto is listed.
- Seet the word Codisto links to
https://woocommerce.com/pt-br/products/amazon-ebay-integration/?quid=c247a85321c9e93e7c3c6f1eb072e6e5in a new tab. - Select Codistro and complete the Onboarding Wizard.
- On the WordPress Plugins page, confirm that "Codisto Channel Cloud" plugin is installed.
- On the WordPress Plugins page, delete "Codisto Channel Cloud" plugin if it exists.
- On WooCommerce Home, click the Marketing Task (Get more sales).
- See that Codistro for WooCommerce is listed.
- Click "Get Started" button on Codistro for WooCommerce.
- Wait for Install.
- See that Codisto move to "Installed marketing extensions"
- Click "Manage" button.
- See that Codistro for WooCommerce manage page loads.


With a new site,
- Skip the Onboarding Wizard.
- Disable "Display suggestions within WooCommerce " in Settings > Advanced > WooCommerce.com.
- Navigate to the Free Features section in the Onboarding Wizard.
- See that Pinterest is listed.
- Select Pinterest and complete the Onboarding Wizard.
- On the WordPress Plugins page, confirm that Pinterest for WooCommerce plugin is installed.

- Go to
Products -> Add Newpage or use and existing variable product - Add as much attributes you can so you can generate more than 25 variations (This is the only way to see the pagination in action). Generate more than 25 variations of that product.
- Then copy the id of your product and then visit
/wp-admin/admin.php?page=wc-admin&path=/product/{product_id}. Replace the{product_id}string with your real id. - Under
Optionstab and in theVariationssection you should see the pagination component at the botton of the list if and only if the product has more than 25 variations and if the items per page is less than the total amount of variations.
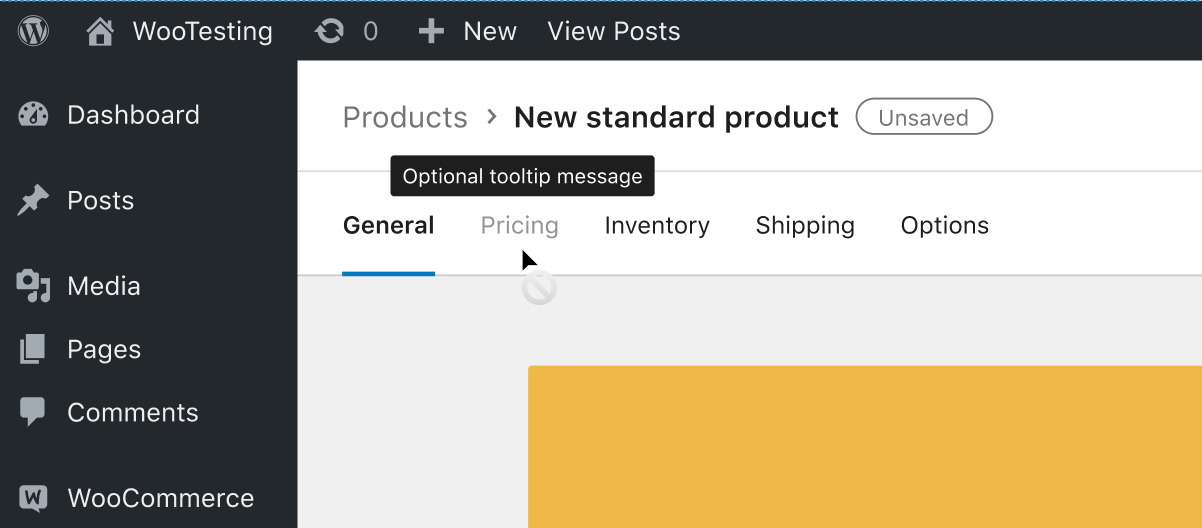
- Navigate to the new product management experience (Products -> Add new (MVP))
- Click the various tabs in the header to navigate between product sections (General/Pricing/etc)
- Make sure that all content is shown and works as expected
- Narrow your viewport to make sure that the header placement works with various screen sizes
- Scroll down inside a given tab and then click another tab to make sure you're scrolled back to the top
Tab content (only MVP scope)
- General
- Product details
- Images
- Attributes
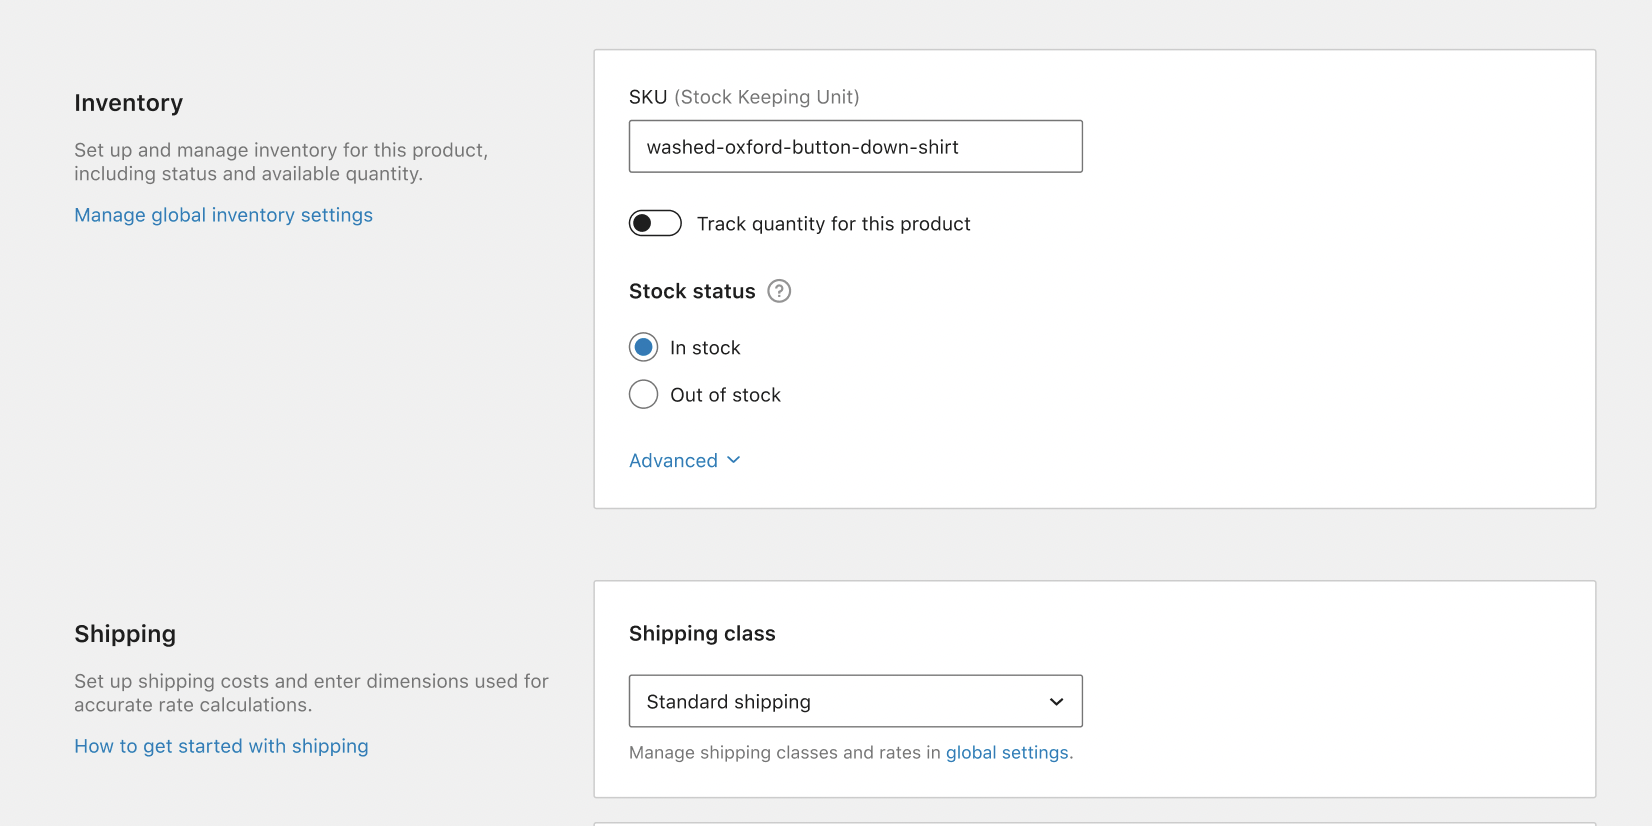
- Pricing
- Pricing
- Inventory
- Inventory
- Shipping
- Shipping
- Options
- Options
- Variations
Design
Acceptance criteria
- Users can see tabs at the top of the screen. They're part of the top navigation bar.
- The tabs are fixed at the top of the screen when users scroll up and down the page.
- On mobile, the tabs scroll horizontally. Design:
5sAIeTRd9Yp7nSCT33BAWz/%5BMaster%5D-fi-7342%3A344251&t=4r3ndH9ltPGnsjGr-4 - The page doesn't reload when users switch between tabs.
- We don't remember the scroll position when users switch between tabs. They always start at the top.
- Each tab has multiple states: resting (default), selected (with the
Gutenberg-Blueunderline), and disabled (Gutenberg-600,cursor: not-allowed;) - Each tab can have a suffix element, such as a badge or notification dot (not part of the MVP).
- Each tab is an identifiable element, and we can target it with the spotlight component.
- The tab bar can be expanded with custom tabs added by third-party plugins.
New Zealand
- Install WooCommerce 7.0.
- Create shipping locations (Settings - Shipping) for states in New Zealand.
- Set the store country/state (Settings - General) to a state of New Zealand.
- Add tax rates (WooCommerce - Settings - Tax - Standard, Reduced and Zero taxes) using states in New Zealand
- Create a few orders with shipping and billing addresses in New Zealand.
- Update WooCommerce to 7.3.
- Run the database update.
- If you have a big number of orders in the database you'll need to wait for multiple Action Scheduler runs (or force it manually).
- Verify that shipping locations, store address, tax rates, and orders are now correct (with the updated state names).
Ukraine Repeat steps above using Ukraine as the country and its states.
- Run the WooCommerce onboarding wizard.
- You can do this by installing and activating WooCommerce in a brand new site.
- Or, via the WooCommerce ▸ Settings screen, locate the Help pulldown and re-run the wizard that way:
- Within the first onboarding screen, select Croatia as the country/region (most of the other settings can be ignored/you can supply the bare minimum ... and, for expediency, I recommend against installing any extras or switching theme):

- Now navigate to WooCommerce ▸ Settings ▸ General:
- Country/state field should still be
Croatia. - The currency should be
Euro (€).
- Country/state field should still be

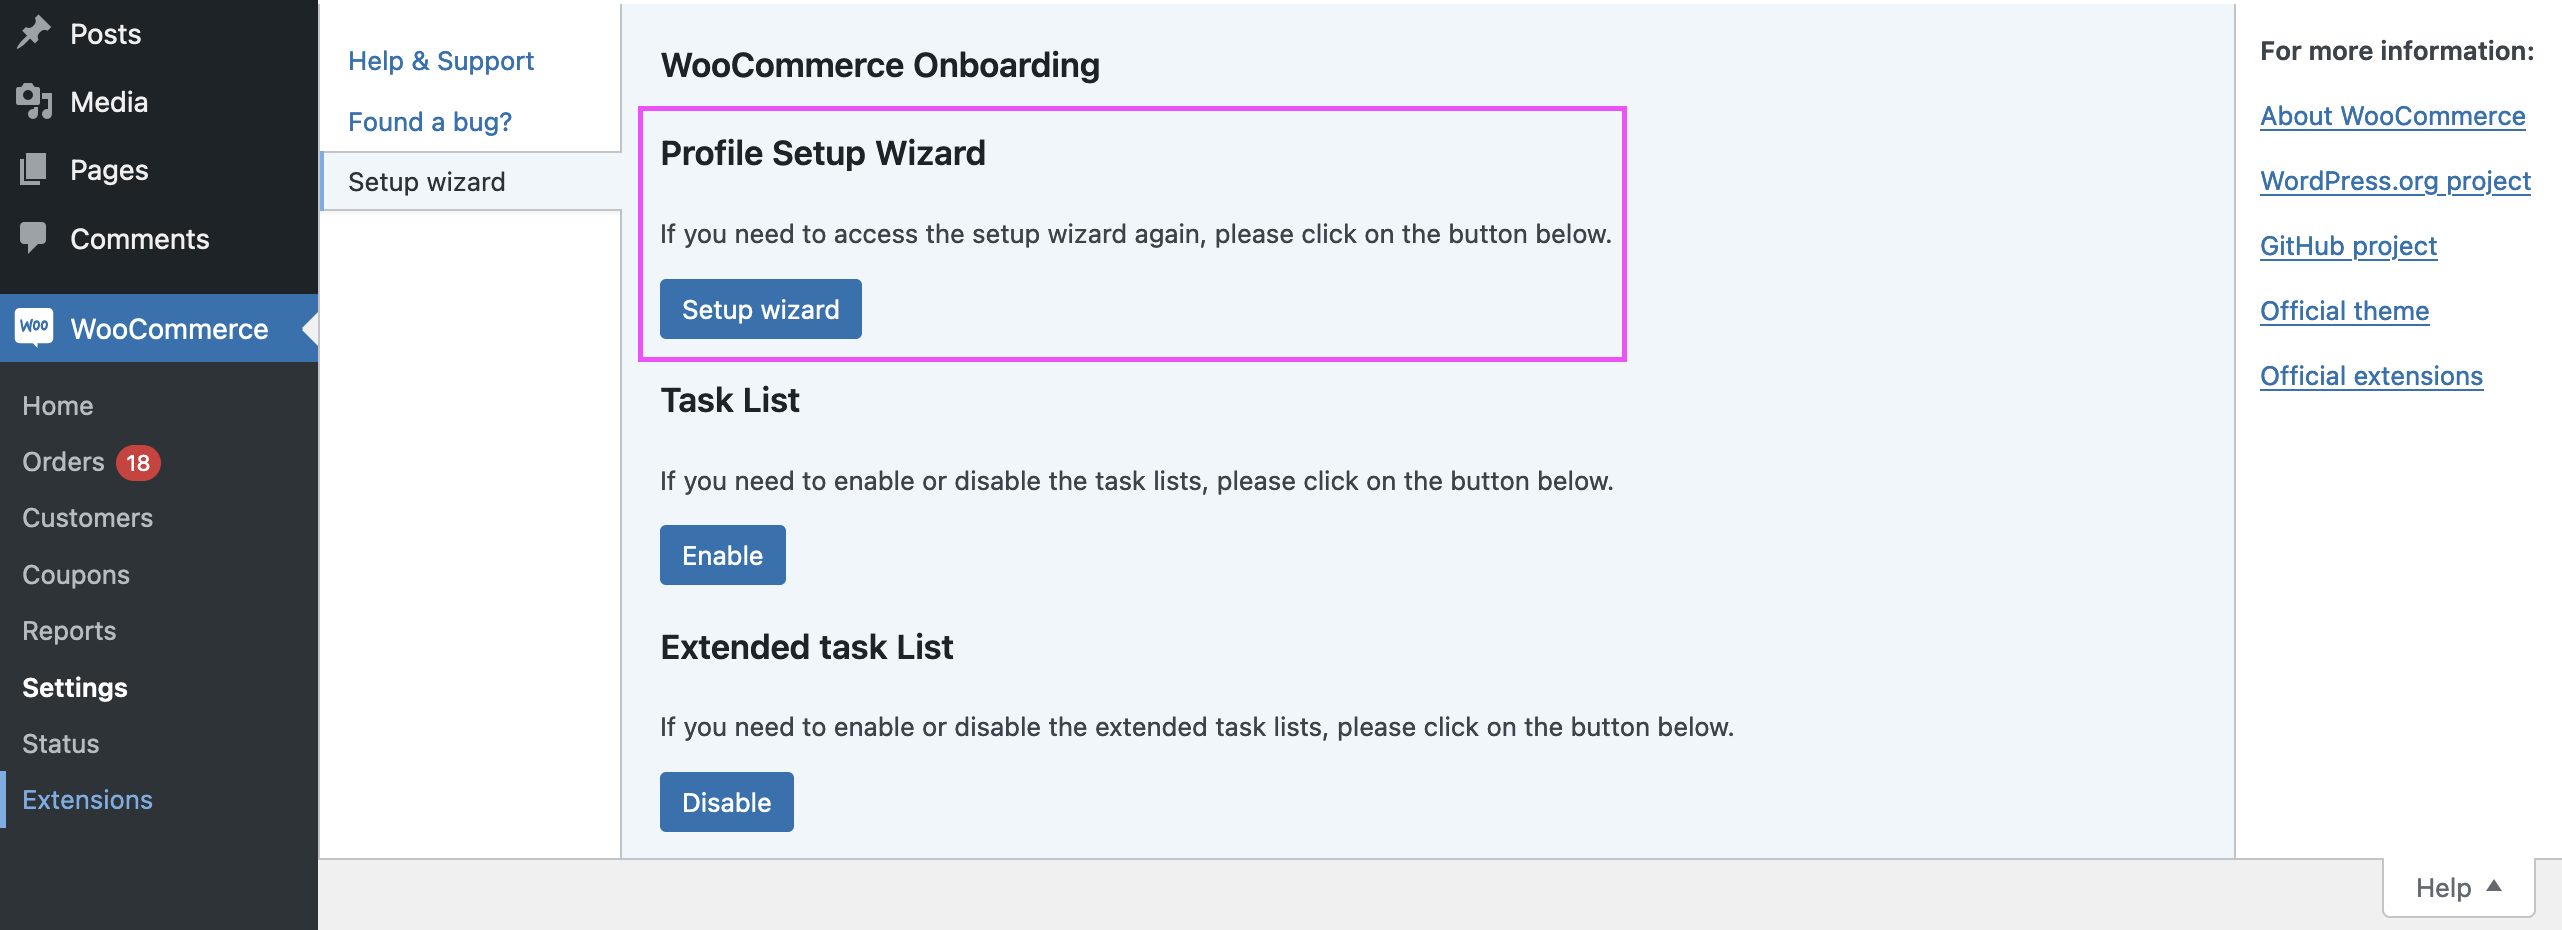
- Navigate to WooCommerce -> Settings -> Help, and press the Setup Wizard button.
- Complete the OBW till Themes tab.
- Select any Paid theme and complete the OBW.
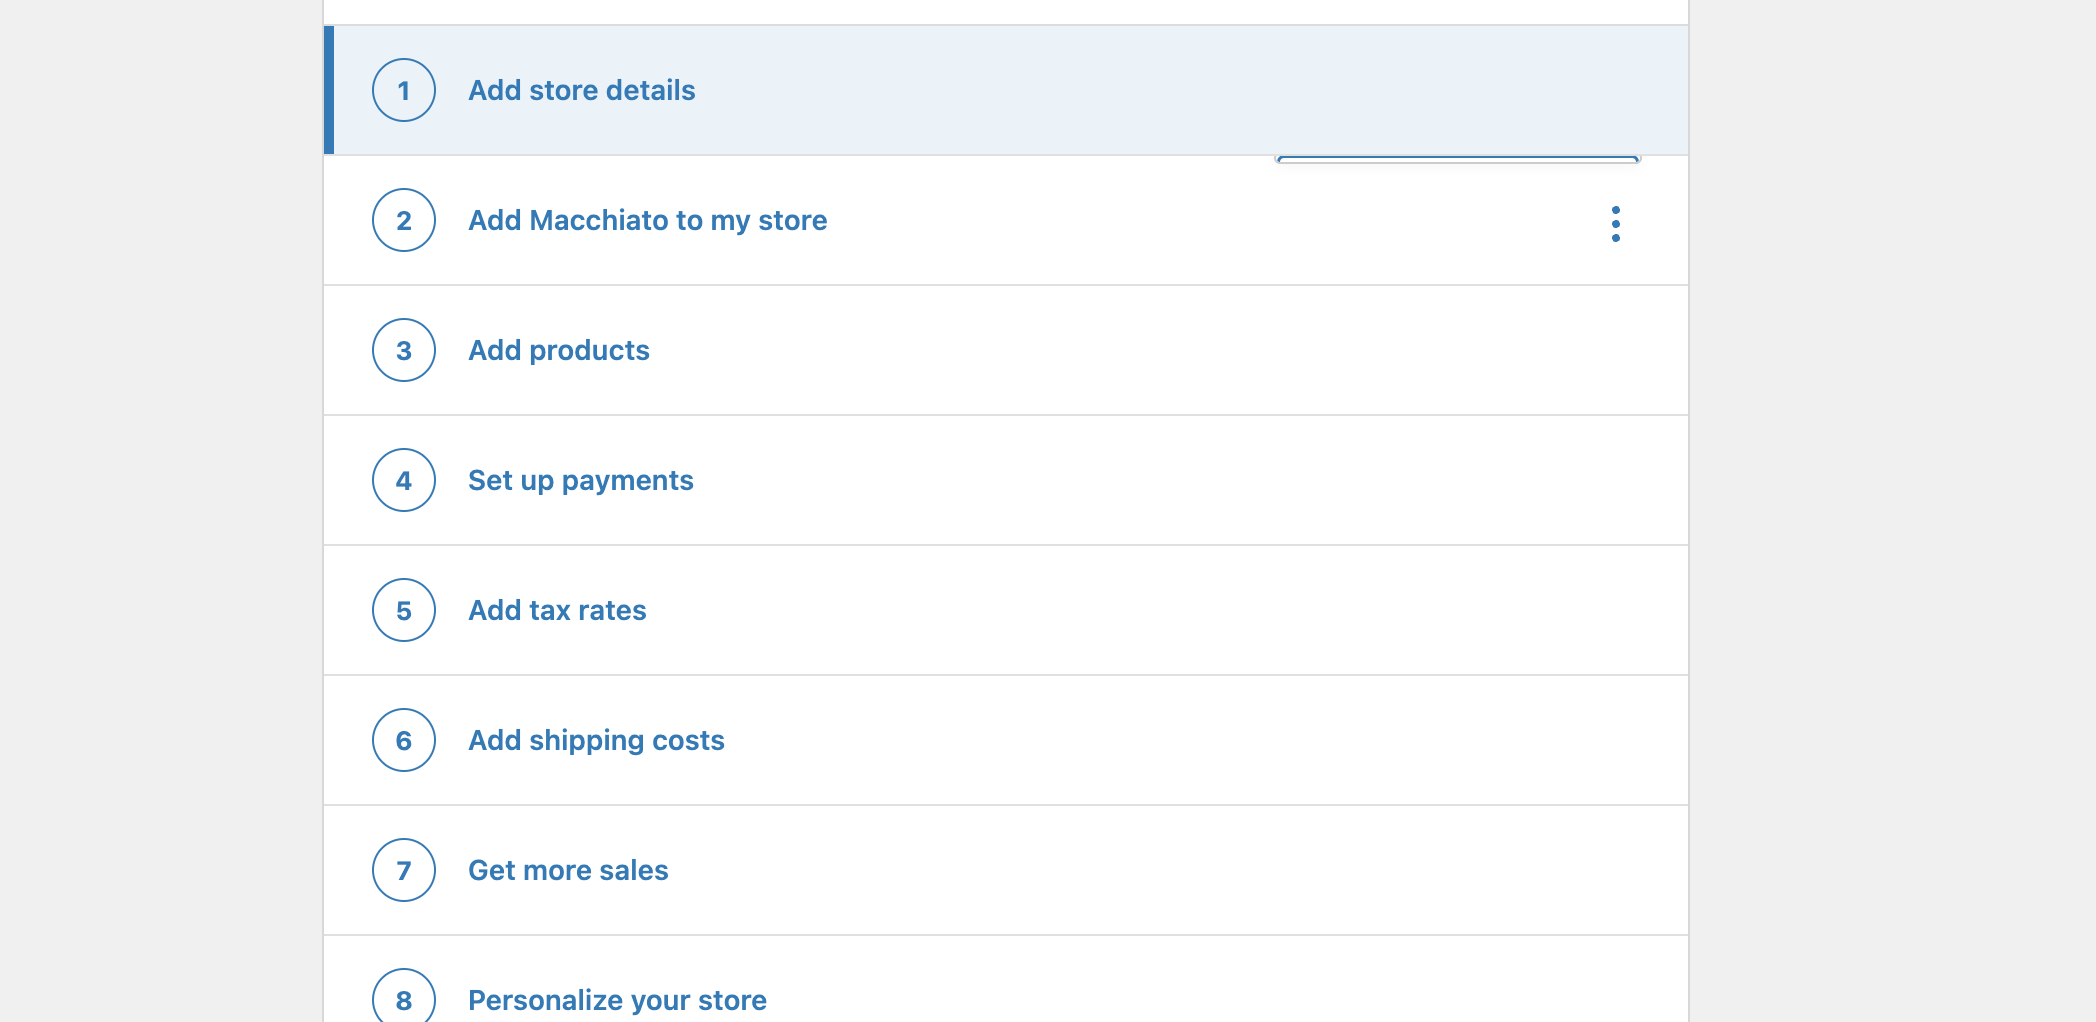
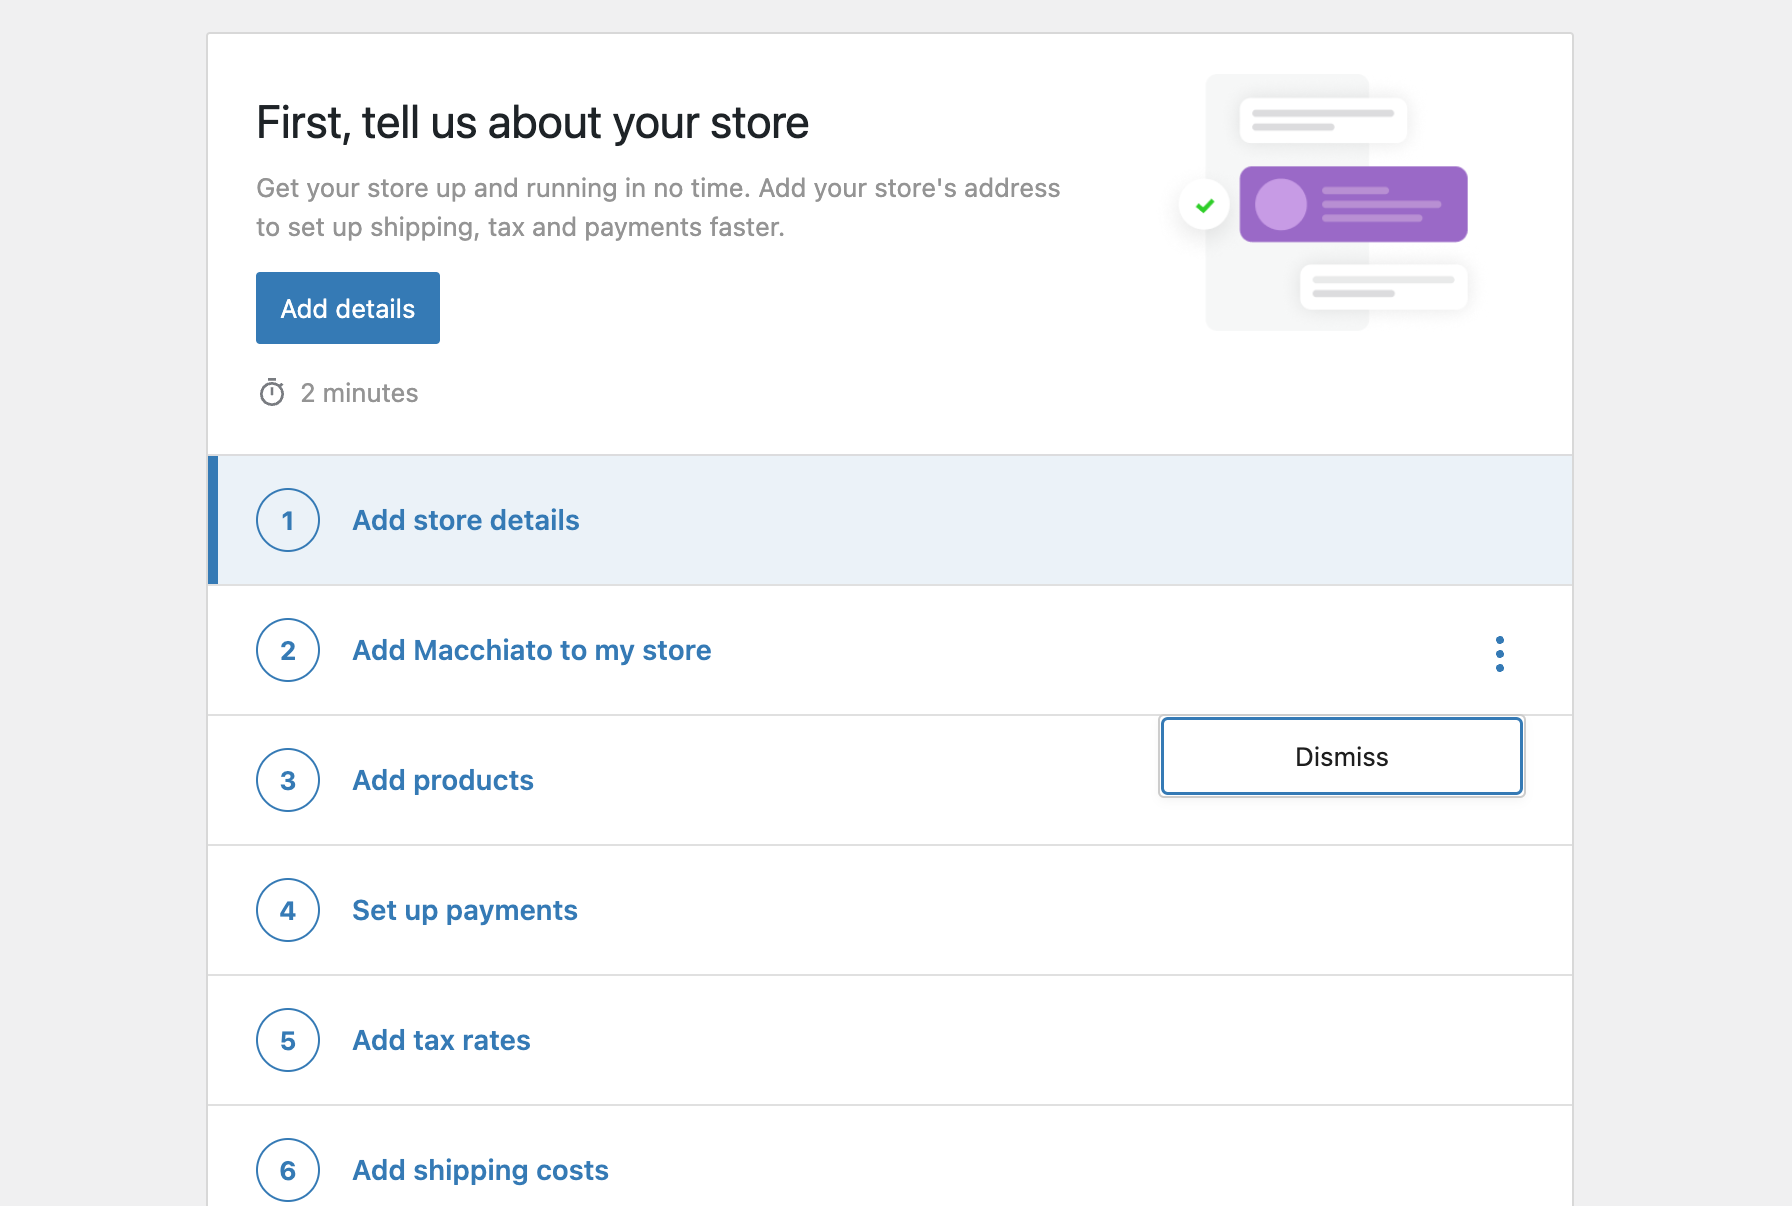
- Go to Woocommerce > Home.
- Select ellipsis menu of "Add (Paid Theme) to my store" task from Set up tasklist.
- Observe that, "Dismiss" button no longer overlaps with task list "Add (Paid Theme) to my store".
Before
After
- Go to OBW
- Continue with a WCPay eligible country such as US
- Uncheck WCPay in the business details step
- Complete OBW
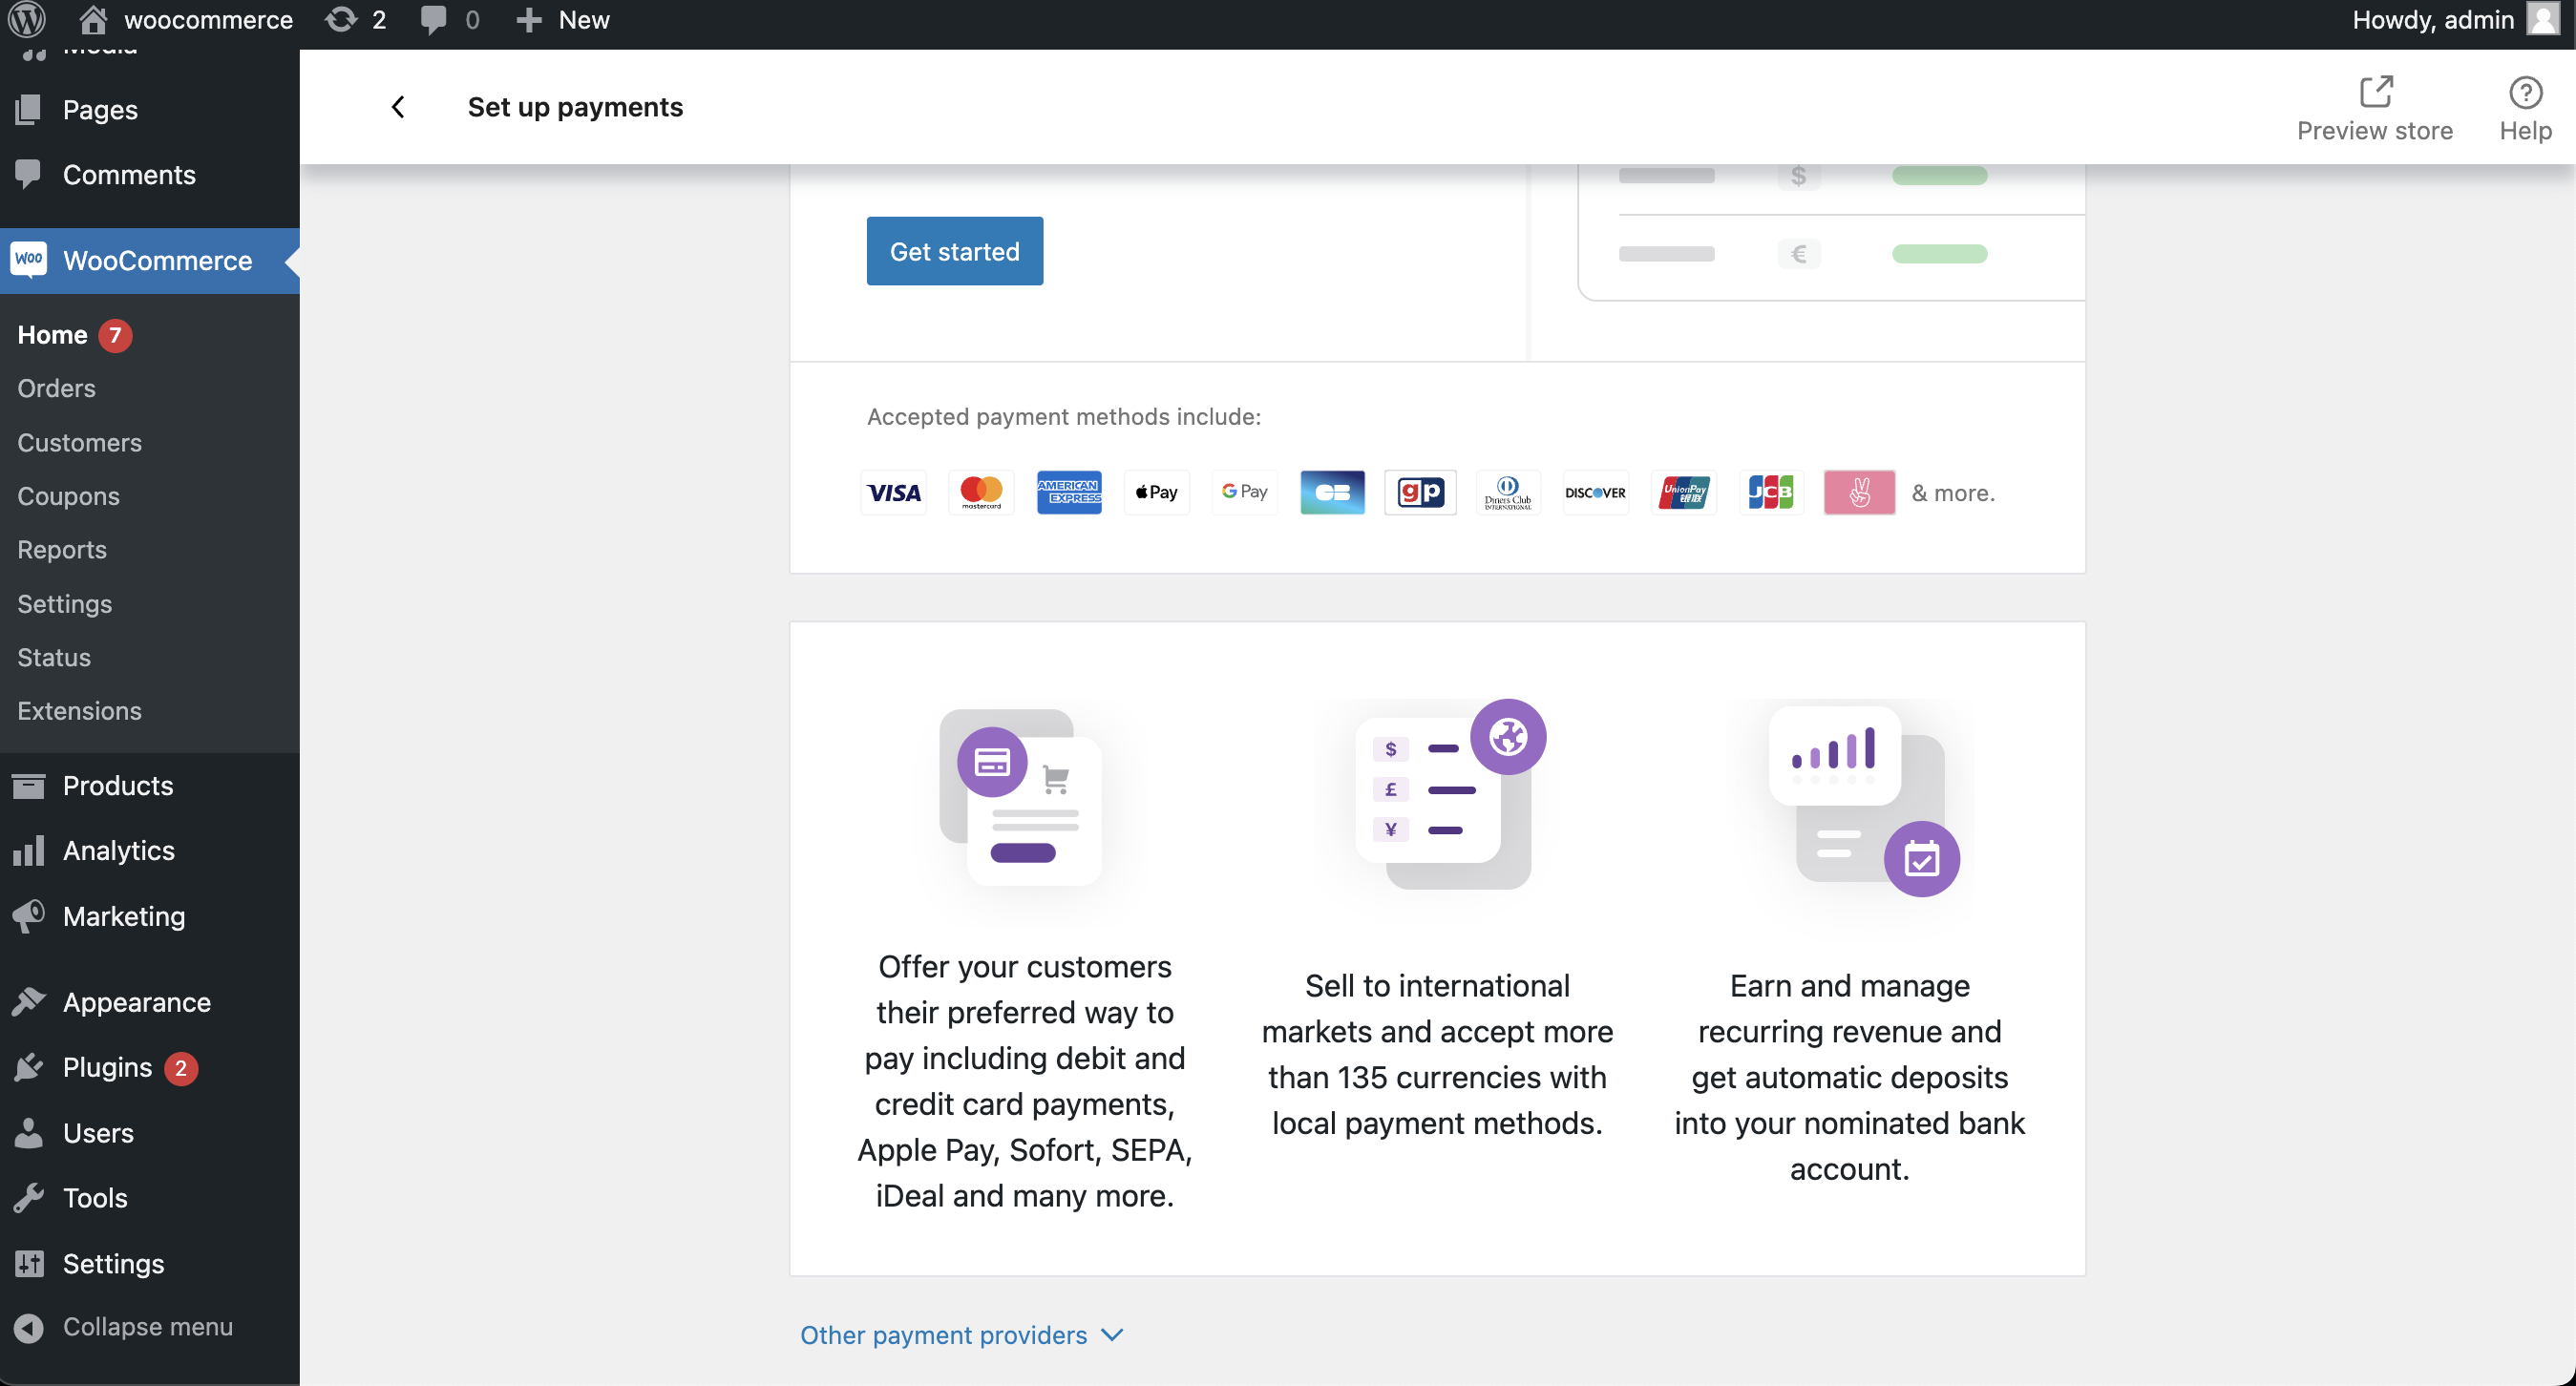
- Go to
WooCommerce > Home > Set up paymentstask - Observe that the benefit UI is displayed properly.
before:
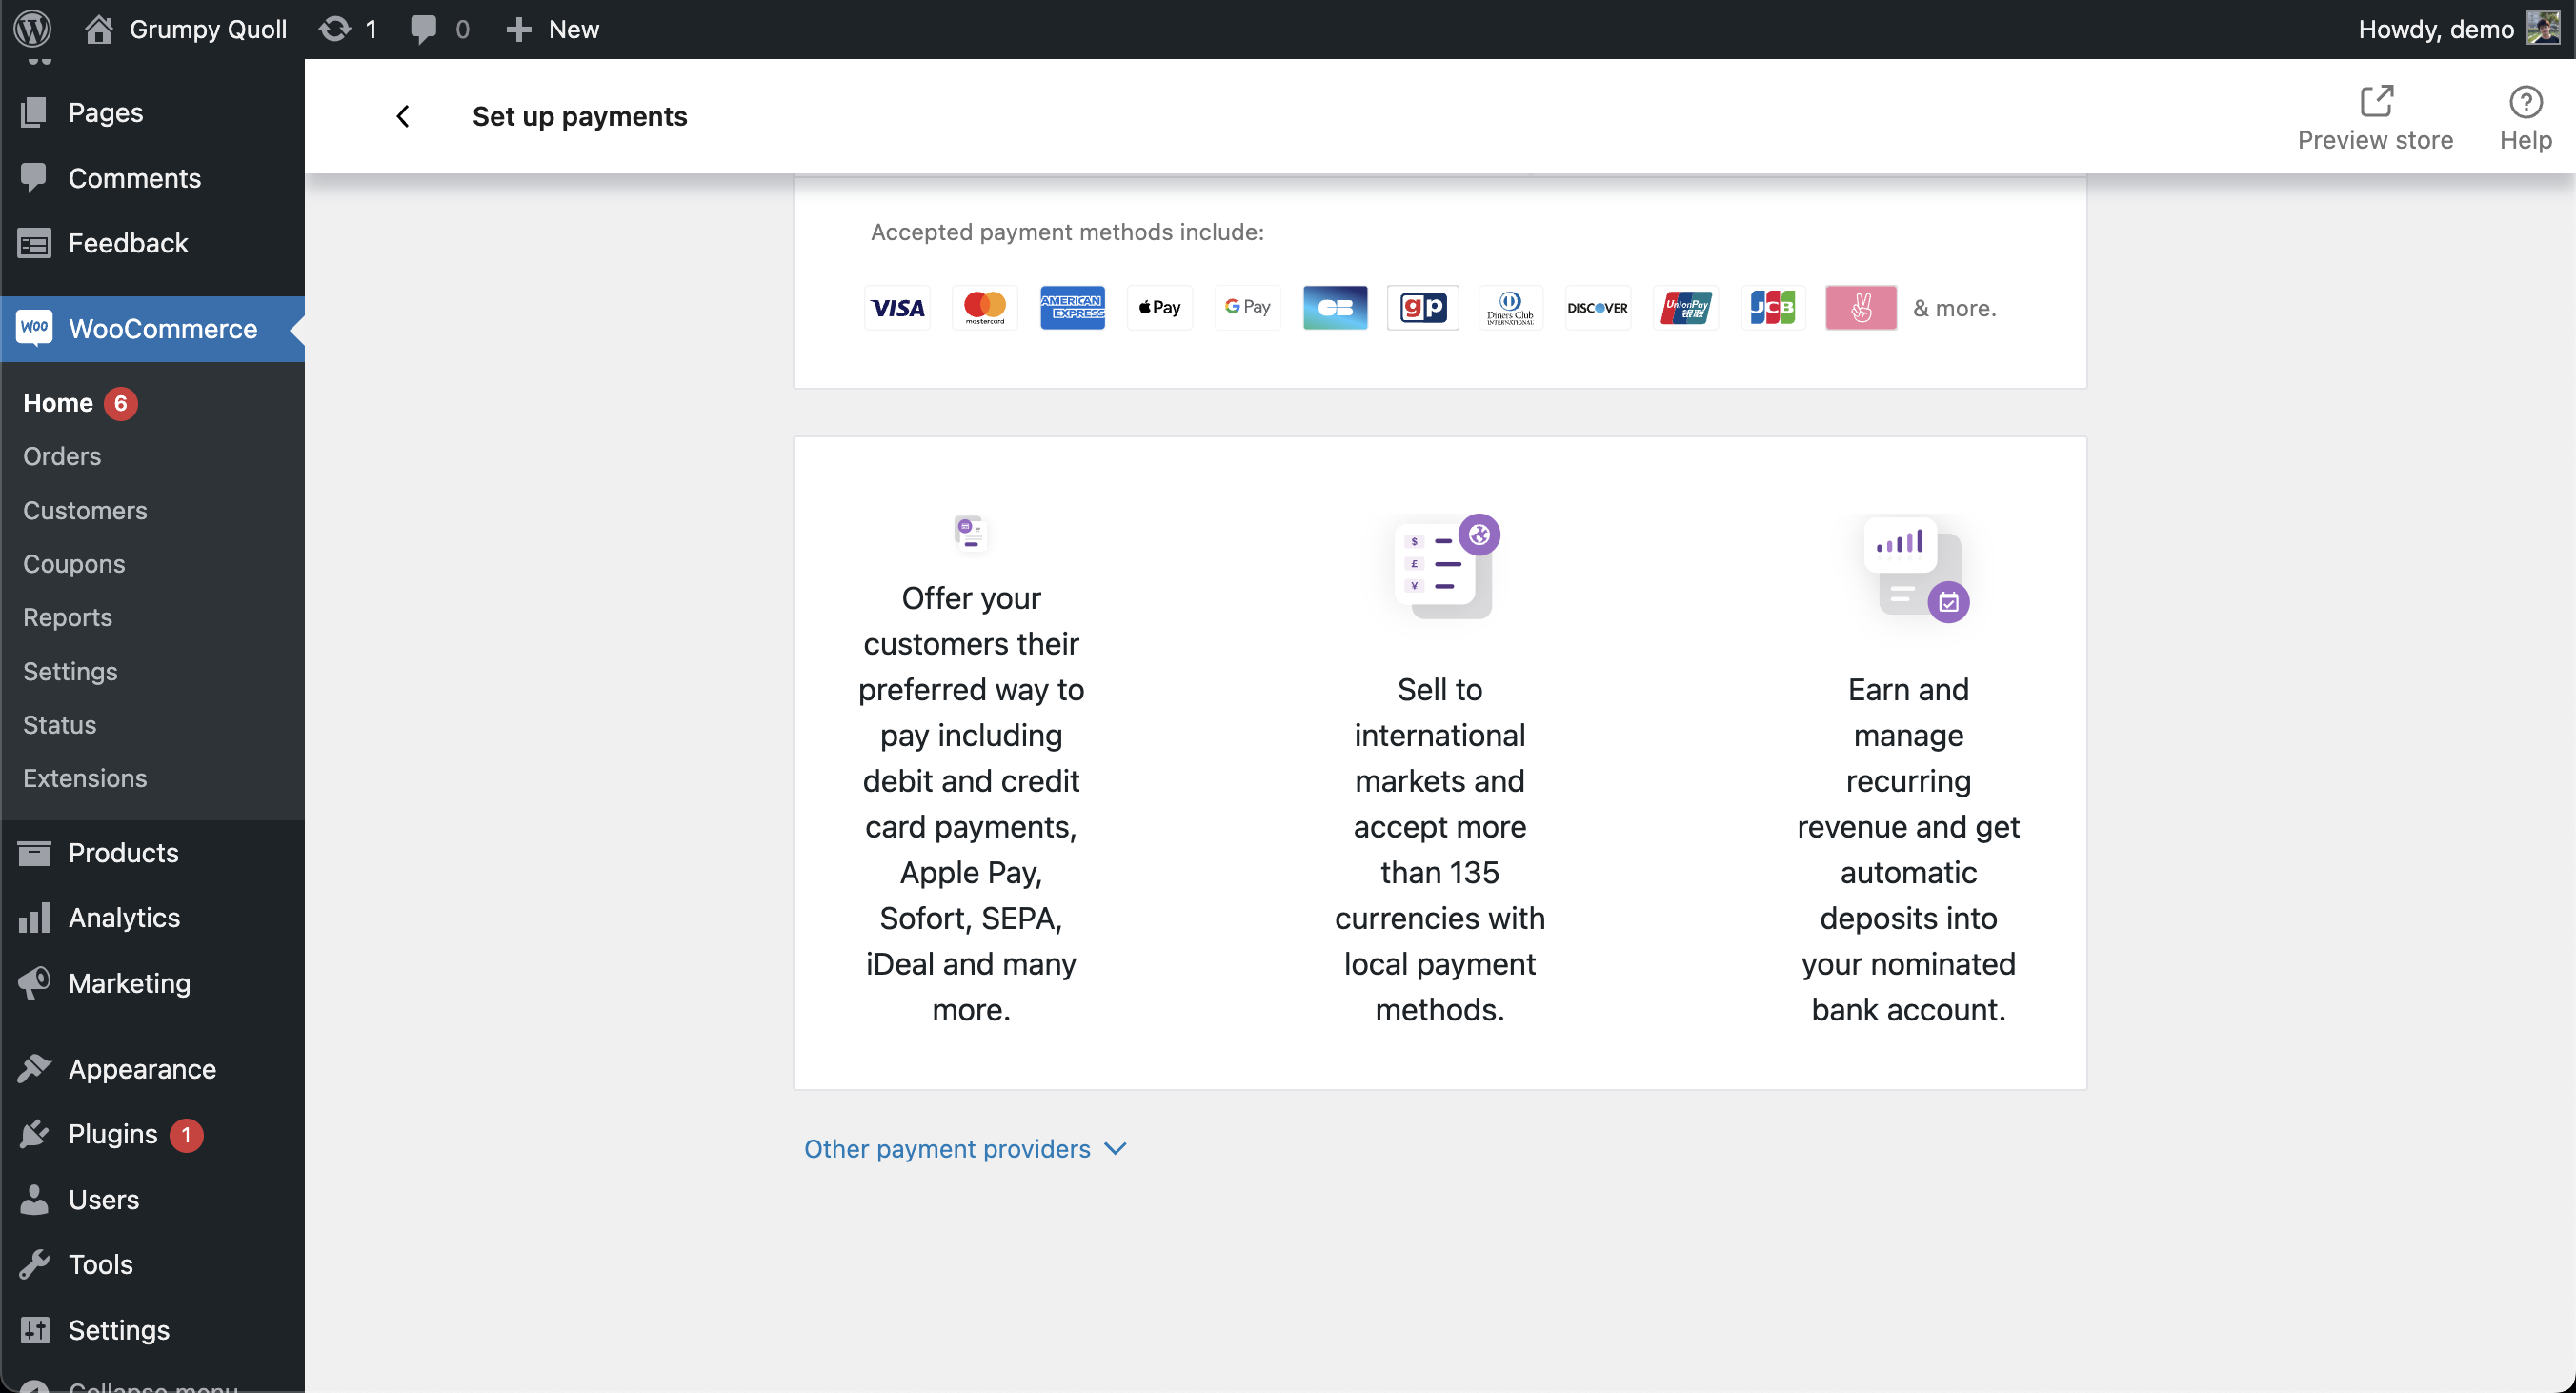
after:
- Start OBW
- On the store details step, enter "ita" as the search query.
- Confirm the filtered result shows only countries that start with "ita".
- Confirm that it should not show incorrect results as shown below:

- Test with other search keywords, and confirm that only relevant countries are being shown in the results.
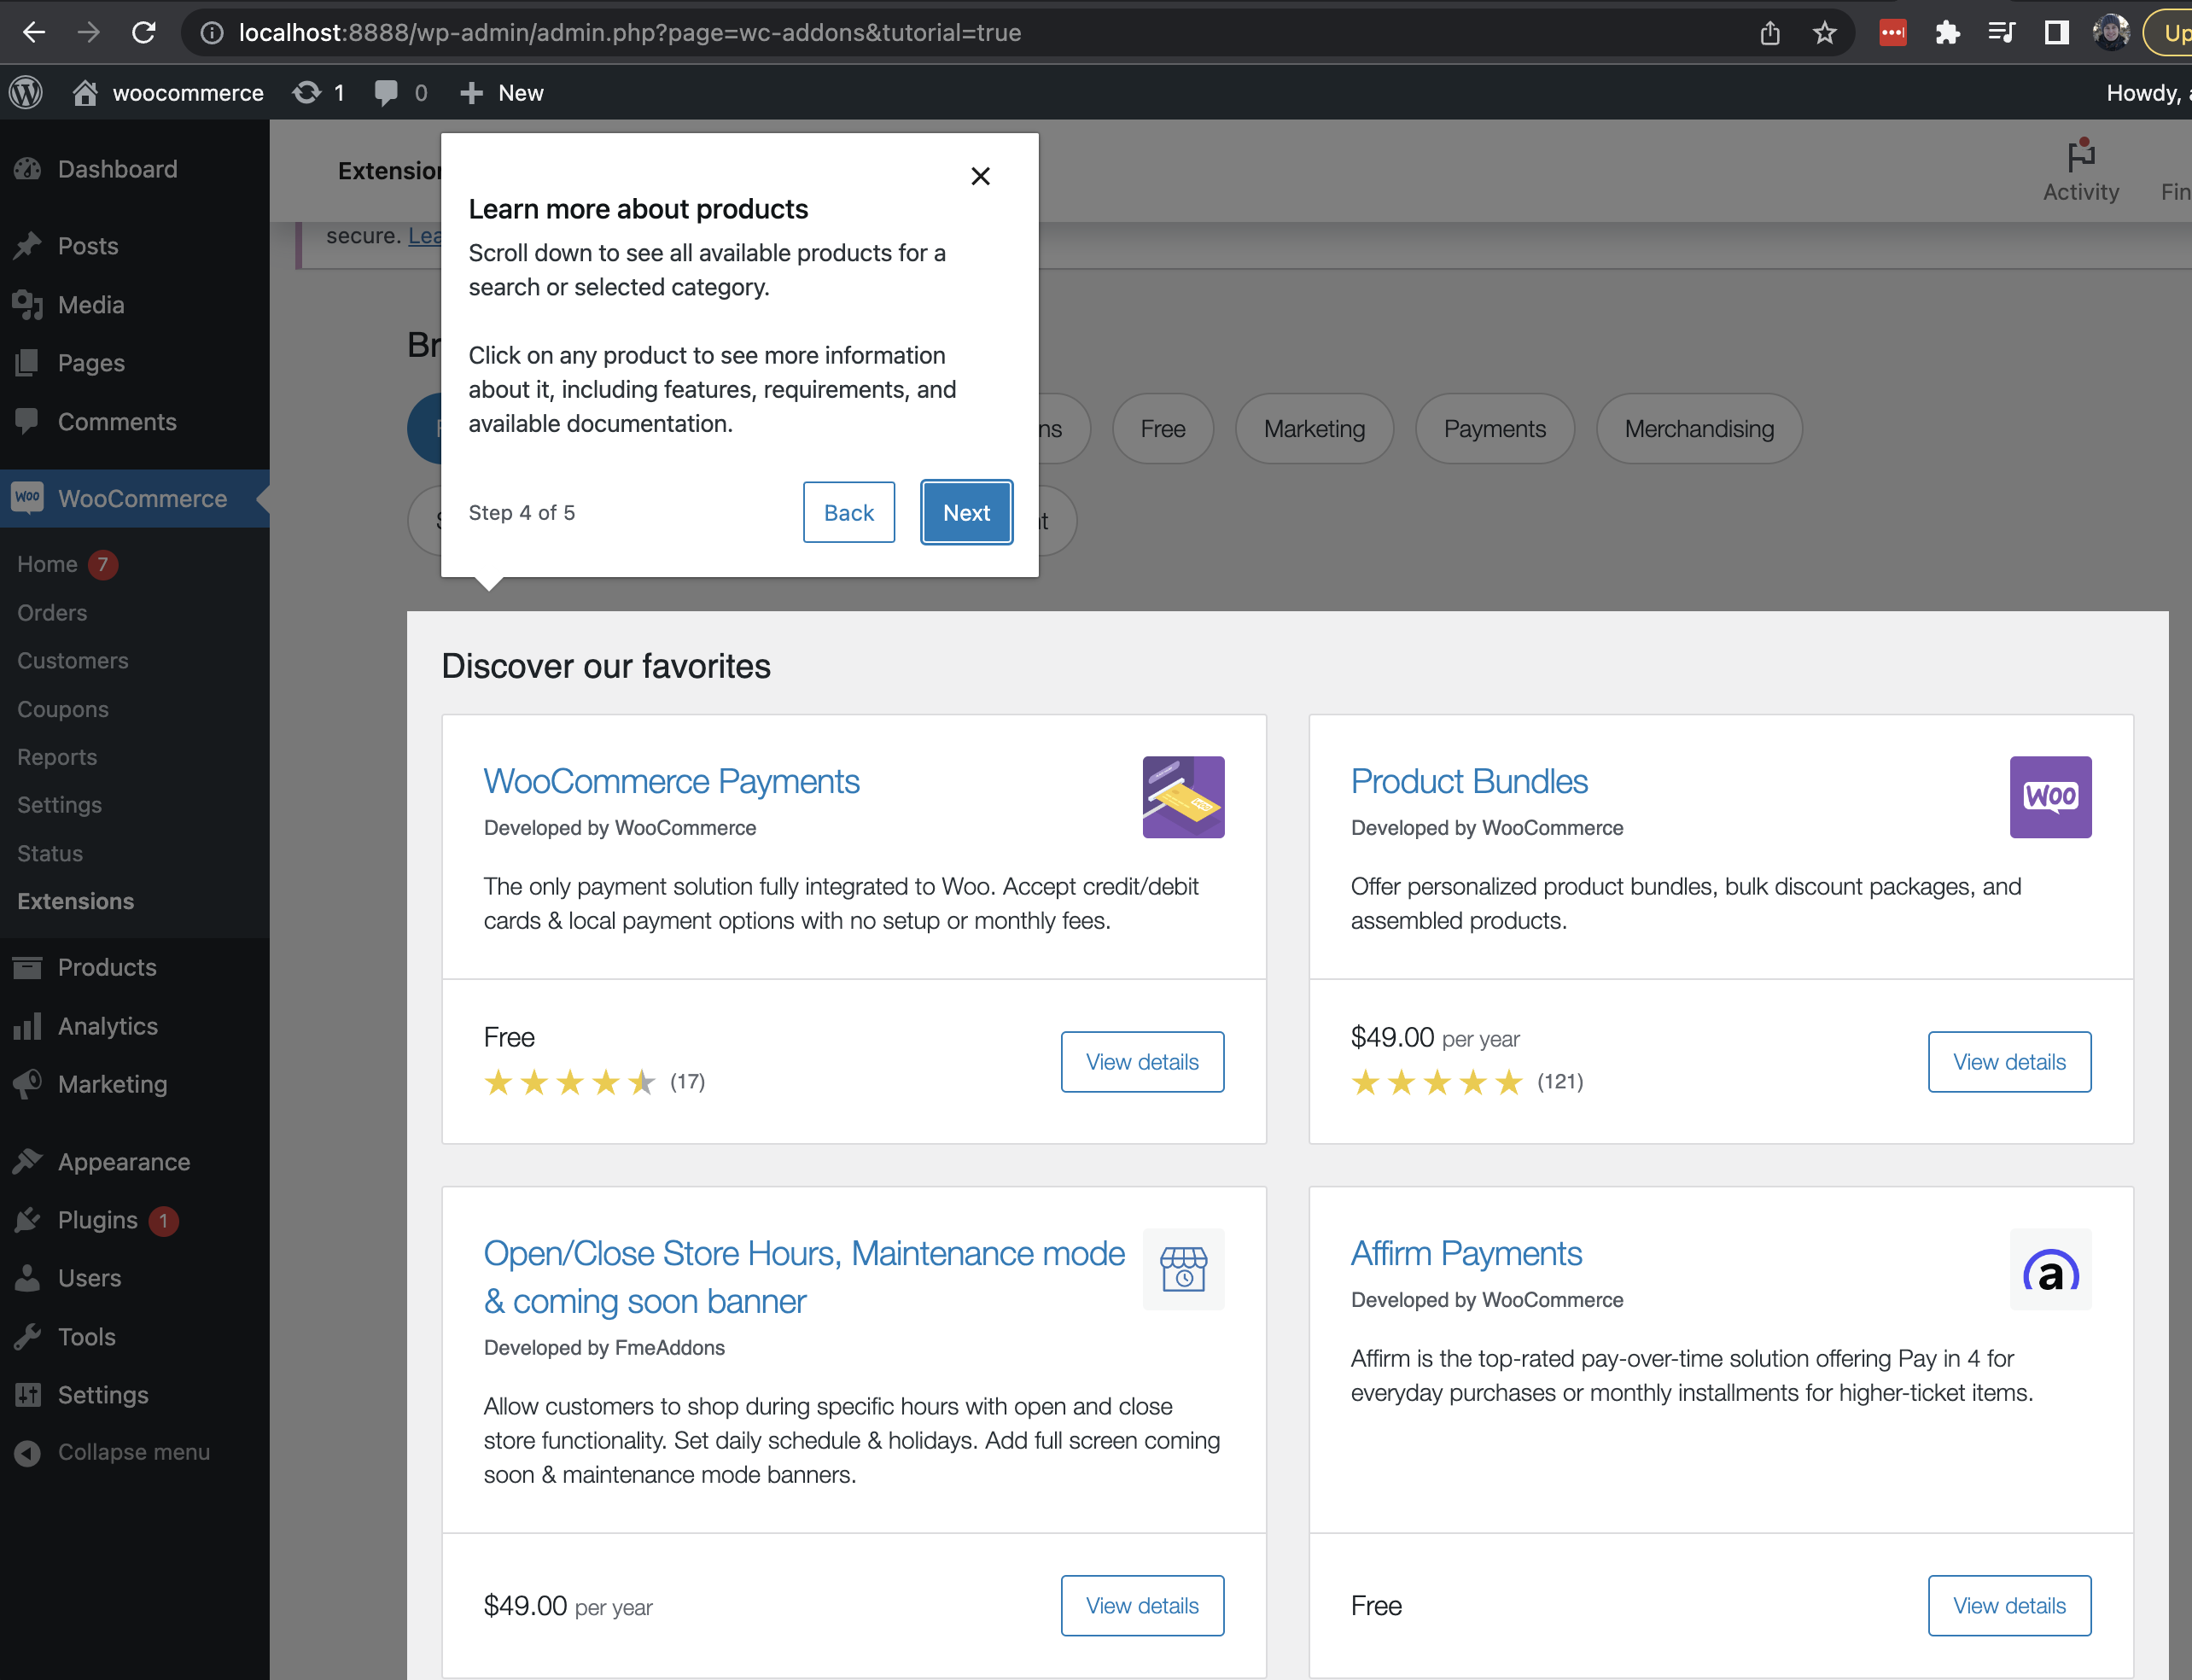
-
Open
WooCommerce > Home -
You should see a new Things-to-do task with the following title:
Discover where to find powerful store add-ons and integrations, with a WooCommerce Marketplace tour
-
Click by the task, you'll be redirected to WooCommerce In-App Marketplace page
-
You should see a guided tour UI, step 1 should contain the updated wording:
Power up your store by adding extra functionality using extensions, find a fresh new look with themes, or integrate your store with other software and services.
The WooCommerce Marketplace is your go-to for all of the above, and the only place you’ll find products that have been reviewed and approved by the WooCommerce team.
Whether you’re looking to improve your store or grow your business, you can find a solution here. There are hundreds of options available, and new products are added regularly.
The WooCommerce Marketplace is also available at WooCommerce.com.

-
Click next, content of step 2 was appended by
or solutionspart and should sum up to:Use the search box to find specific products or solutions.

-
Steps
3and4remain the same, so go to step5
-
The step
5was updated to haveWooCommercebeforeMarketplacein the last sentence (it's the only change there), as a whole it's:Products purchased from the WooCommerce Marketplace can be managed in My Subscriptions, either here or on WooCommerce.com.
Every purchase is backed by our 30-day money-back guarantee and includes email and live chat support.
That’s it! We hope the WooCommerce Marketplace helps you build the business of your dreams.

-
Finish the tour by clicking "Done"
-
Open Things-to-do tasks in WooCommerce Home, the In-App Marketplace tour task should be done

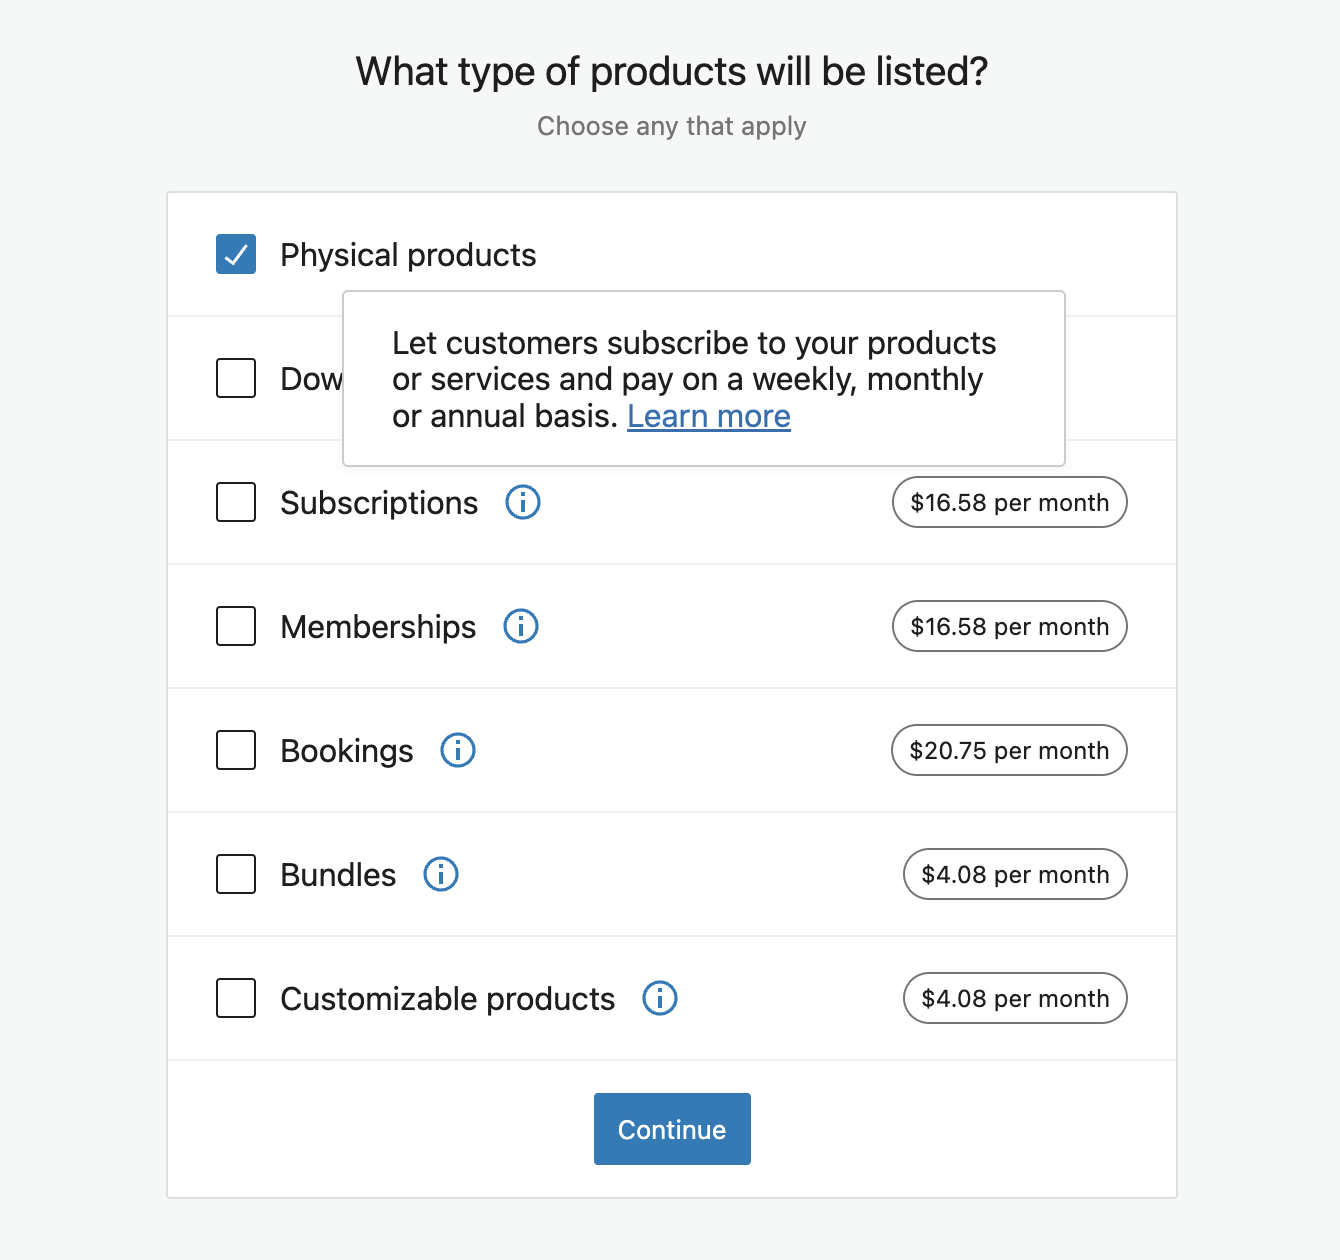
- Go to OBW
- Go to the Product types step
- Click on an info icon (i)
- Observe that tooltip shows contents properly.
- Navigate to WooCommerce > Settings > Advanced > woocommerce.com.
- Disable (untick) Enable tracking and Show Suggestions.
- Begin the onboarding, by triggering the Help menu and clicking Setup Wizard.
- Proceed through the onboarding. At the Business Details screen, ensure TikTok is NOT listed as a free feature under Grow Your Store.
Test this using a Block and non-block theme
- Install woocommerce-gutenberg-products-block.zip
- If you are testing a block theme, open the FSE editor and add the Mini Cart Block in the header, otherwise, open the widget area and put the Mini Cart in the footer. Save.
- Go to the frontend and add the product to the Cart. Be sure that on Mini Cart Block, any "notice" is visible on top.
- On the editor side, edit the product that you added and set it as out of stock. Save.
- On the frontend side, refresh the page. Go to the Cart page and see the notice.
- Open the Mini Cart block and be sure that the notice is visible. Please check on a WooCommerce page (
/shop) and a WordPress page (in case of a default installation, the homepage is fine).
| Theme | WooCommerce Page | WordPress Page |
|---|---|---|
| TT3 |  |
 |
| TT2 |  |
 |
| TT1 |  |
 |
| Twenty Twenty Ninteen |  |
 |
| Twenty Twenty Seventeen |  |
 |
Add a default placeholder title for newly added attributes and always show remove button for attributes #35904
-
Create a new product or edit an existing one.
-
Add at least two attributes.
-
Verify that the Remove button is always visible.
-
Verify that there's a placeholder title "Custom attribute"
-
Fill in the titles and verify that the placeholder gets updated
-
Test to see if no regressions occur in saving and re-ordering
Screen.Recording.2022-12-09.at.10.14.18.mov
- Add a product with variations using the old product experience
- Navigate to that product in the new experience. E.g.,
wp-admin/admin.php?page=wc-admin&path=/product/{product_id} - Click on "Options"
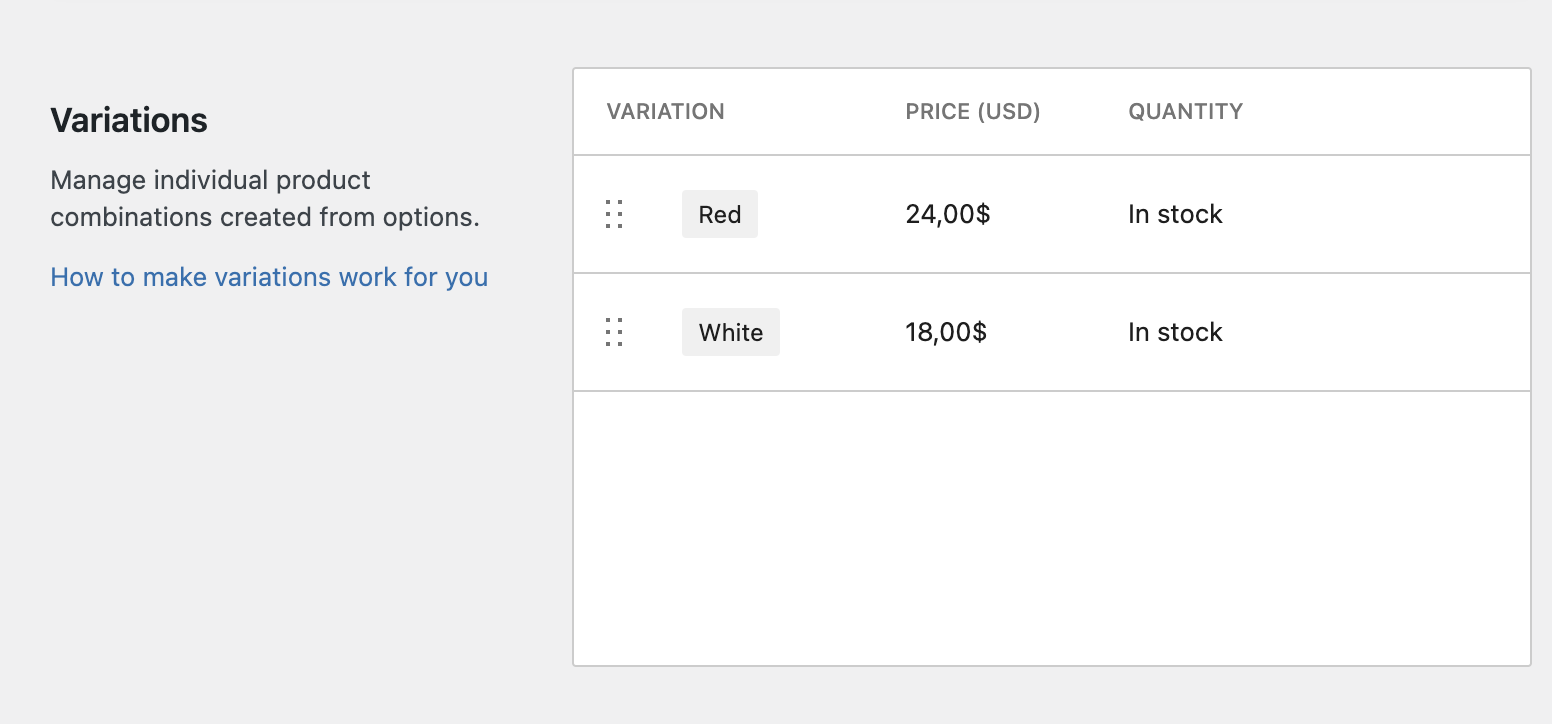
- Note that the variations section exists with the correct text and a working link
- Note that variations show a spinner until variations are loaded
- Note that variations appear with their attributes, price, and stock status listed
- In a new site, add some products.
- Export those products to a CSV file.
- Change the CSV file by adding a line break inside the key
Regular price. For example:ID,Published,"Regular price" 3011,1,168 - Change the price of some products in the CSV.
- Keep the columns: ID, Published, Regular price, and remove the others
- Go to the "Import Products" page (
/wp-admin/edit.php?post_type=product&page=product_importer) - Upload this modified CSV file in the "Upload CSV file" step, then proceed to "Column mapping".
- Map the 3 fields mentioned above.

- Proceed with the product import and wait for it to finish.
- After it is done, the price should be updated. Without the fix, prices won't be updated.
- Navigate to the new product management experience (
Products -> Add new (MVP)) - Click the various tabs in the header to navigate between product sections (General/Pricing/etc)
- Make sure that all content is shown and works as expected
- Narrow your viewport to make sure that the header placement works with various screen sizes
- Scroll down inside a given tab and then click another tab to make sure you're scrolled back to the top

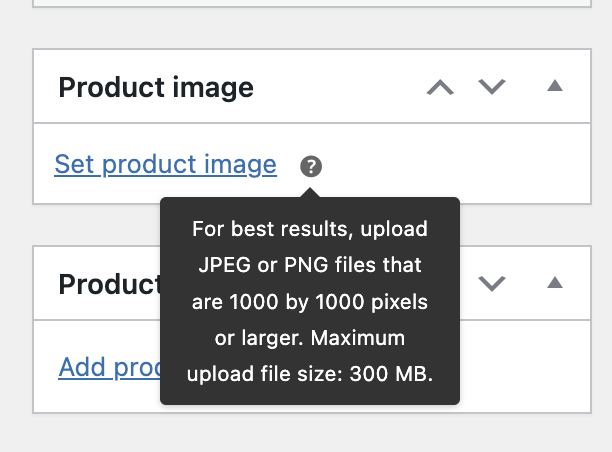
- Open Add/Edit product page.
- Verify the updated UI of the Product Image and Product Gallery meta boxes

- Go to
Products>Add new (MVP) - Verify the
Categoriesselect control renders properly.
- Create a new product in New Product Management Experience.
- Fill out all fields.
- Click on 'Publish'.
- You will be redirected to the Edit Product page.
- Change all/some of the fields data.
- Click 'Update'
- Check if the Update occurred successfully
- Make sure you have the
new-product-management-experiencefeature flag enabled. - Make sure you have tracks enabled and also outputted in the console: localStorage.setItem( 'debug', 'wc-admin:*' );
- Go to WooCommerce > Settings and make some changes
- Now go to another page like WooCommerce > Home and select Leave when it warns you about unsaved changes.
- A notice should show on the new page that allows you to share feedback, something to the affect of
⚙️ Did you find the right setting? - Click the share feedback and submit feedback, notice how the
wcadmin_ces_snackbar_view,wcadmin_ces_view, andwcadmin_ces_feedbackinclude theces_locationprop with theoutsidevalue. - The Modal description should say something to this effect:
We noticed you started changing store settings, then left. How was it? Your feedback will help create a better experience for thousands of merchants like you.You may also want to try dismissing the notice and see if the prop has been added towcadmin_ces_snackbar_dismiss - Now delete the
woocommerce_ces_shown_for_actionsoption and disable tracking under WooCommerce > Settings > Advanced > Woocommerce.com - Make sure the notice doesn't show up for the above anymore and that
customer-effort-score-exit-pagein local storage does not get updated, but stays empty.
- Make sure you have the
new-product-management-experiencefeature flag enabled (you can do so using the latest version of the Beta tester within the mono repo). - Go to Products > Attributes and add some attributes
- Go to Product > Add New and scroll down to the attributes field
- Select Add first attribute and select the attribute input field
- The menu should open with the initial list of attributes
- Select an attribute that contains a couple terms
- Once selected the attribute term field should auto focus and open, it might initially show a loading icon, but then a list of terms.
- go to Products > Add New (MVP)
- Click the Drag and drop area (not the
Choose imagesbutton). - A file picker should be visible. Pick an image.
- The selected image should be visible now in the gallery.
- The tracks event
wcadmin_product_images_add_via_file_upload_areashould be recorded - Continue with the product creation process. Confirm that it has been created correctly.

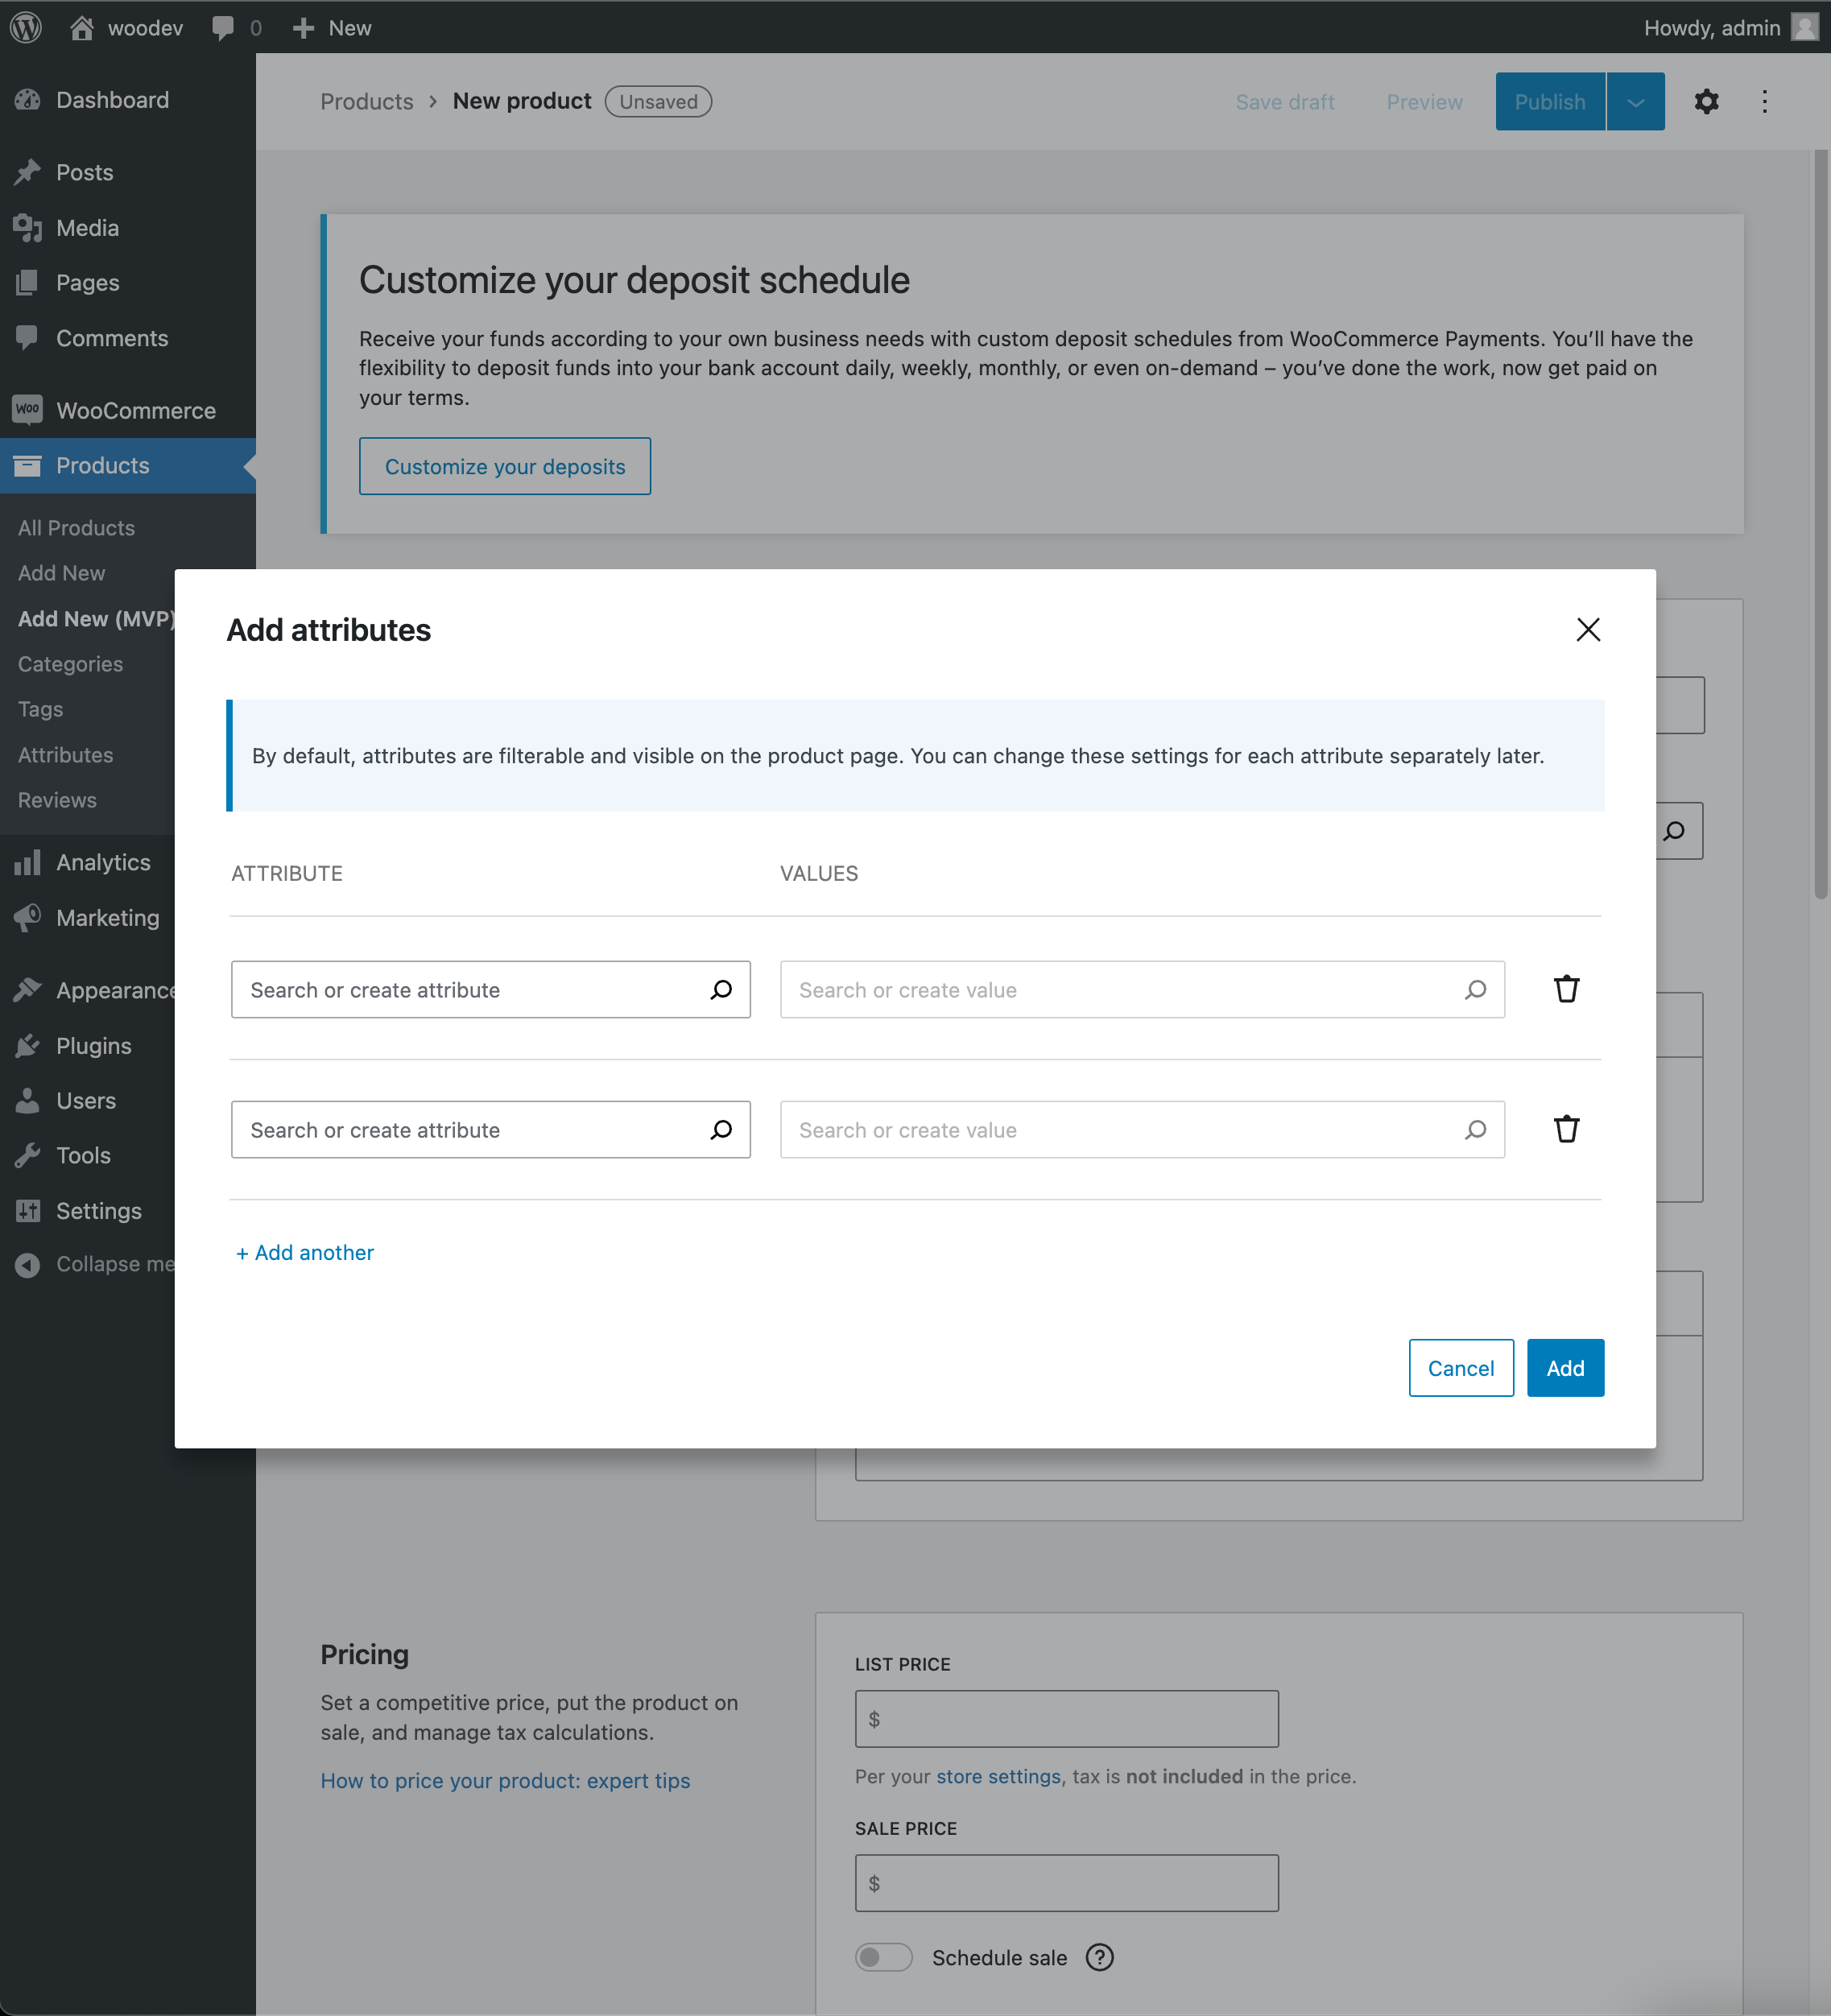
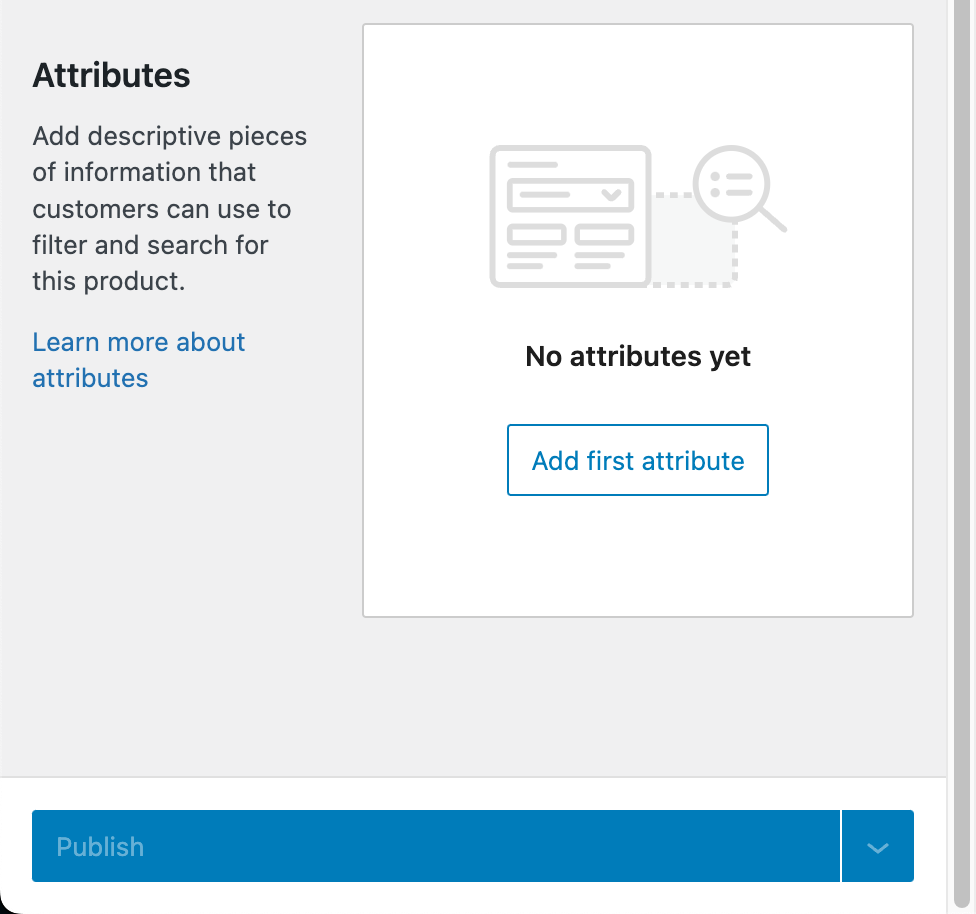
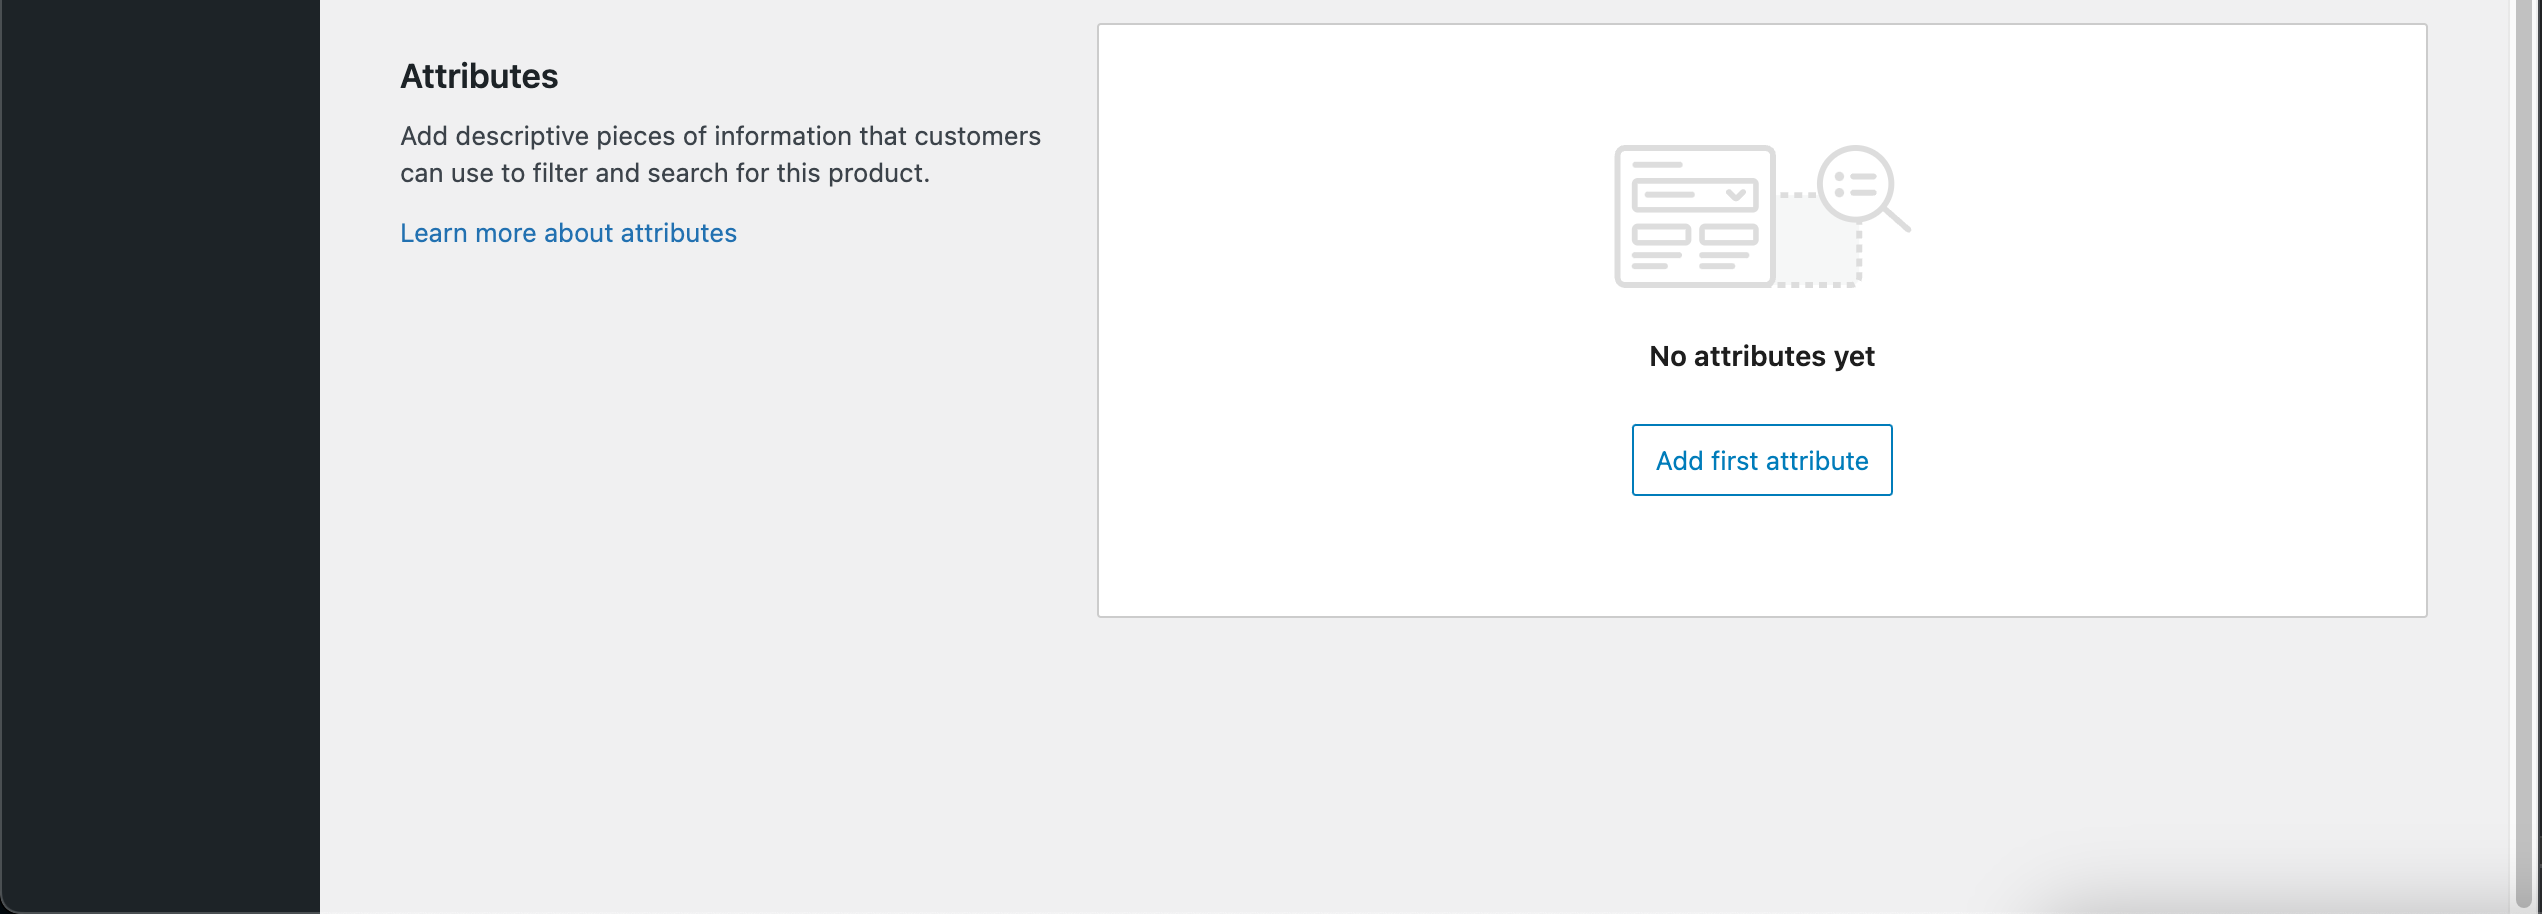
- Got to
Products -> Add New (MVP)page - Under Attributes section click
Add first attributebutton - The
Add attributemodal should be shown - When on mobile screen the table's header should be hidden, the attribute and values field have labels and are stacked in rows while the trash icon remains on the right with 8px margin right.
- When on tablet screen the table's header should be hidden, the attribute and values field have labels and are stacked in rows while the trash icon remains on the right with 8px margin right.
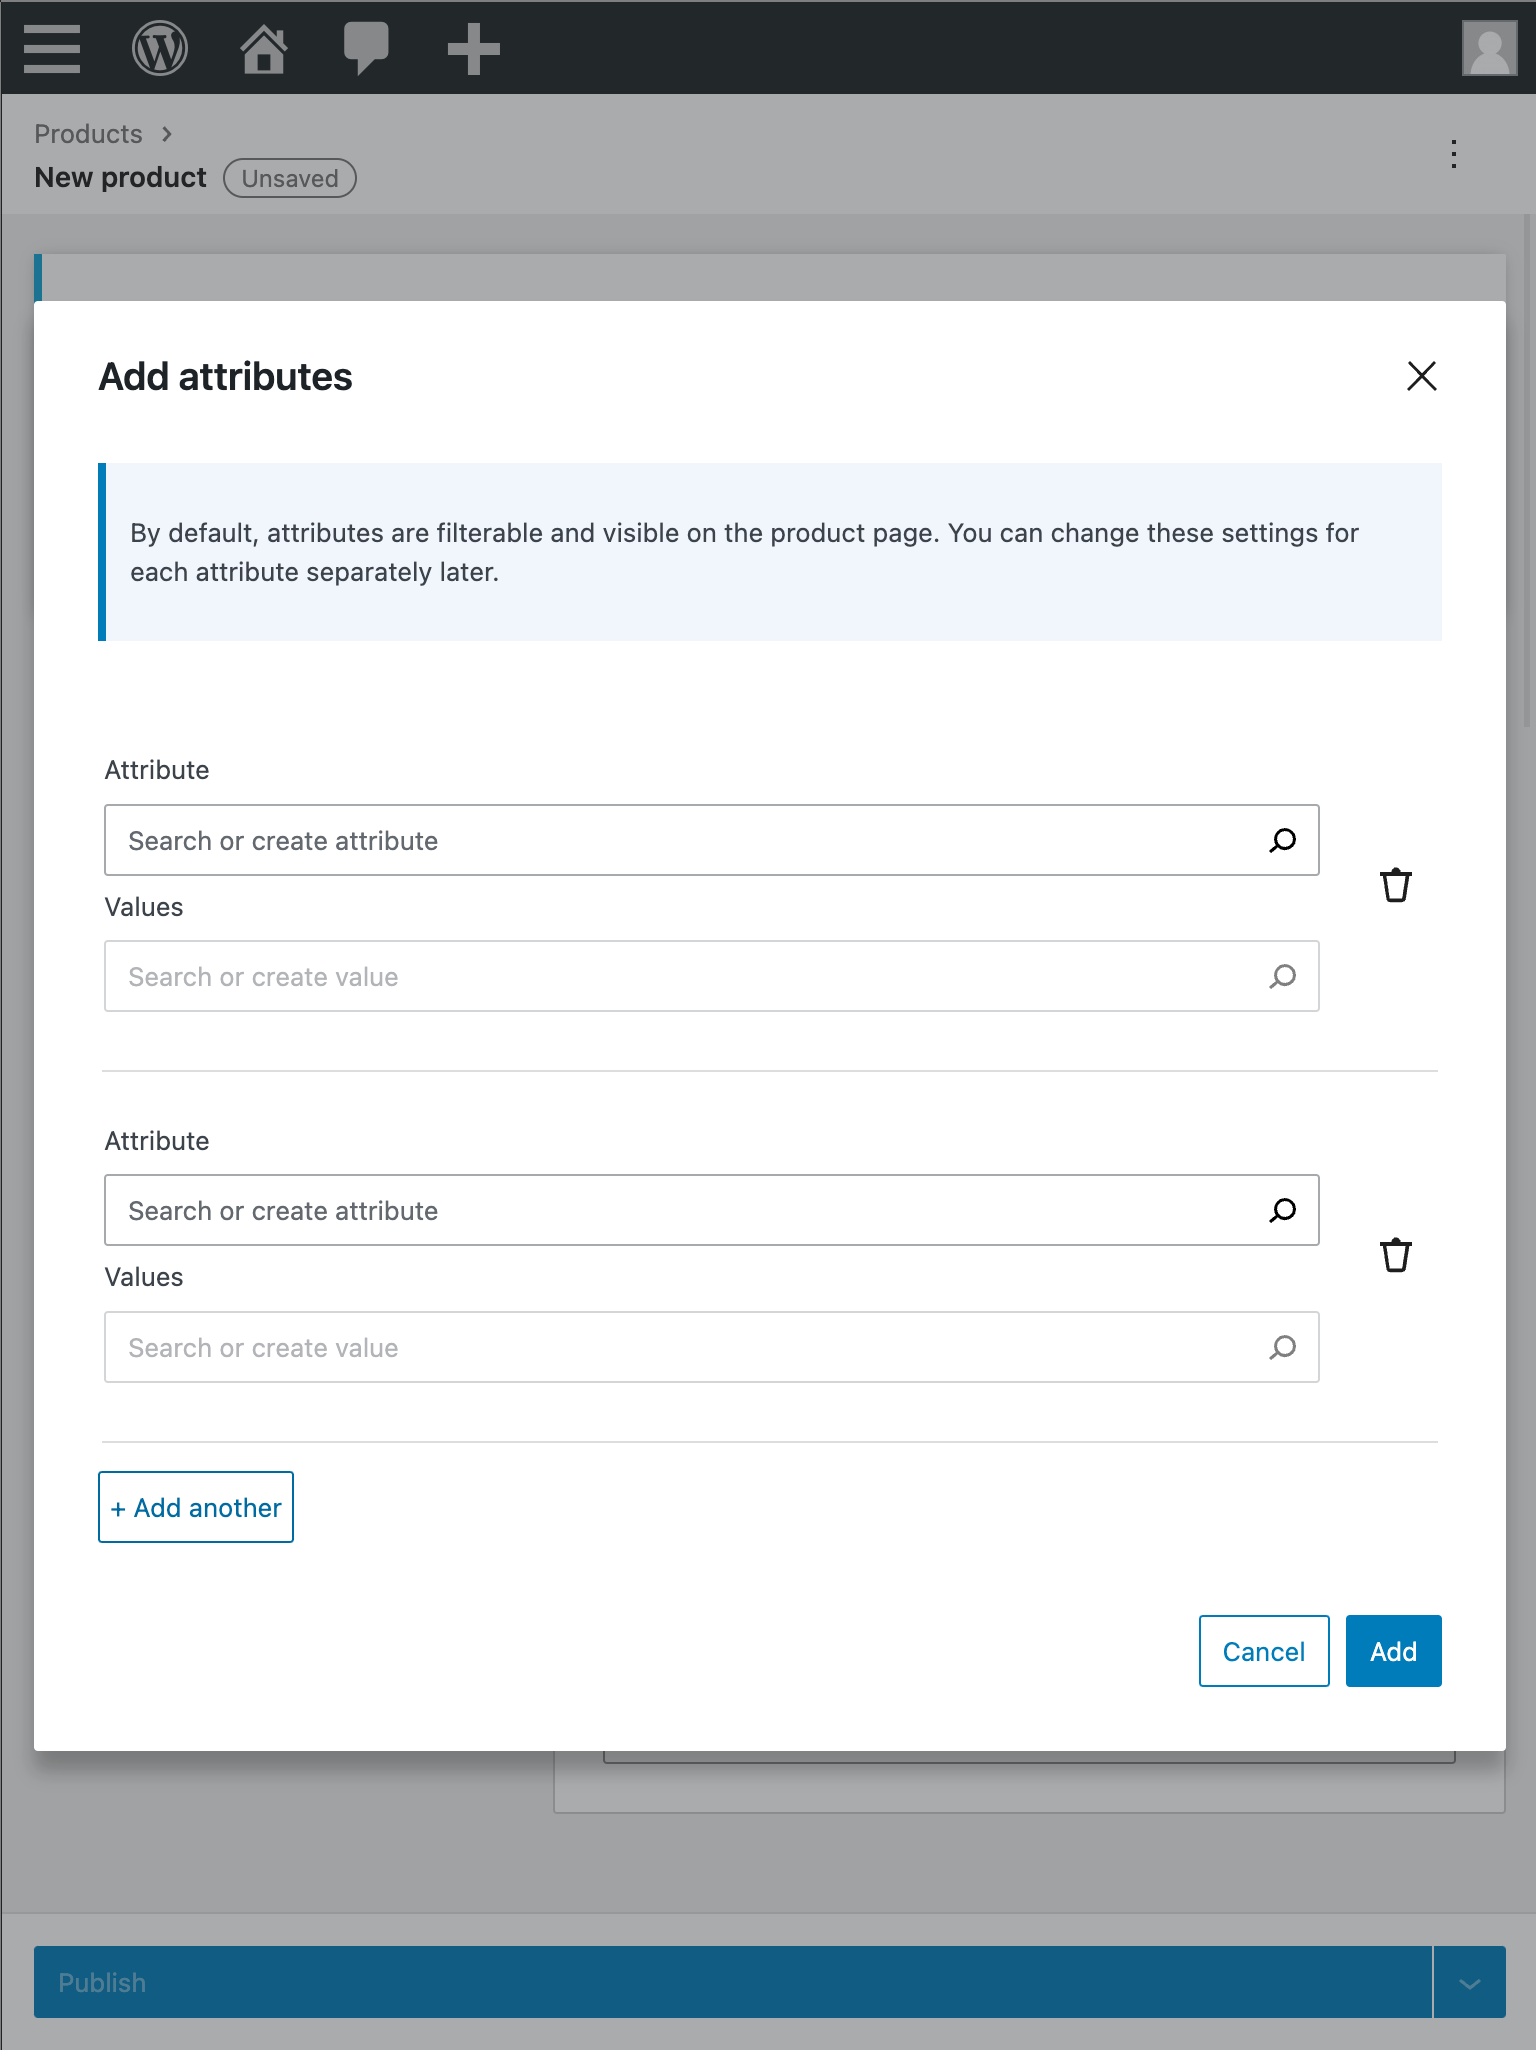
- When on desktop screen the table's header should be shown, the attribute and values field don't have labels and are stacked in columns as well as the trash icon that has 8px margin right.
- Make sure marketplace suggestion is turned off in WooCommerce Settings > Advanced > WooCommerce.com:
/wp-admin/admin.php?page=wc-settings&tab=advanced§ion=woocommerce_com. - Go to WooCommerce Onboarding Marketing task:
/wp-admin/admin.php?page=wc-admin&task=marketing. - The Google Listings and Ads icon should be the "Big G" icon.

-
make sure you have the
new-product-management-experiencefeature flag enabled (you can do so using the latest version of the Beta tester within the mono repo). -
Make sure you have tracks enabled and also outputted in the console: localStorage.setItem( 'debug', 'wc-admin:*' );
-
Go to Product > Add New and make some changes
-
Now go to another page like WooCommerce > Home and select Leave when it warns you about unsaved changes.
-
A notice should show on the new page that allows you to share feedback, something to the affect of
We noticed you started editing a product, then left.... -
Click the share feedback and submit feedback, notice how the
wcadmin_ces_snackbar_view,wcadmin_ces_view, andwcadmin_ces_feedbackinclude theces_locationprop with theoutsidevalue. You may also want to try dismissing the notice and see if the prop has been added towcadmin_ces_snackbar_dismiss -
Repeat steps 4-6 for all these pages: Product edit page, New product MVP page, edit product MVP page.
-
Now delete the
woocommerce_ces_shown_for_actionsoption and disable tracking under WooCommerce > Settings > Advanced > Woocommerce.com -
Make sure the notice doesn't show up for the above anymore and that
customer-effort-score-exit-pagein local storage does not get updated, but stays empty.Kapture.2022-11-25.at.11.16.31.mp4
- Use a fresh site
- Set
woocommerce_show_marketplace_suggestionsoption tono. - Go to OBW
- Select "UK" as the store country
- Complete OBW
- Set up WCPay
- Go to
WooCommerce > Home - Go to
Set up additional payment optionstask - Observe that
Amazon Payis displayed

- turn on the
new-product-management-experience. - Go to
Products>Add New (MVP)>Images. - Press
Choose imagesand select more than one image (by pressingcommandand selecting them). - The selected images should be added to the gallery in the image section.
- Repeated images won't be added.
- Verify that the storybook works correctly.

- Go to
Products -> Add New (MVP)page - The form has a fixed padding-bottom of 128 px on desktop and tablet/mobile.
Mobile/Tablet
Desktop
- Go to
Products -> Add New (MVP)page - All form field controls should have the same height (36px). Without the fix, the attribute dropdown's height differs from the value picker in the Attributes modal (31 vs 38 px) as shown below:

- Go to
Products -> Add New (MVP) - Any price input field should has
- Currency unit follows the store's locale
- The symbol aligned always left
- The symbol color now is
gray-700 - The value is aligned right
- Field formatting respects the store's setting, including thousand and decimal separators
- On blur, commas are added when the user enters a value
- On focus, we highlight the field's content
- On focus, the user can press the up and down arrow keys to increase or decrease the value by 1
- Enable the new product management form.
- Go to
wp-admin/admin.php?page=wc-admin&path=%2Fadd-product. - Verify that the copy in the summary section is as follows:
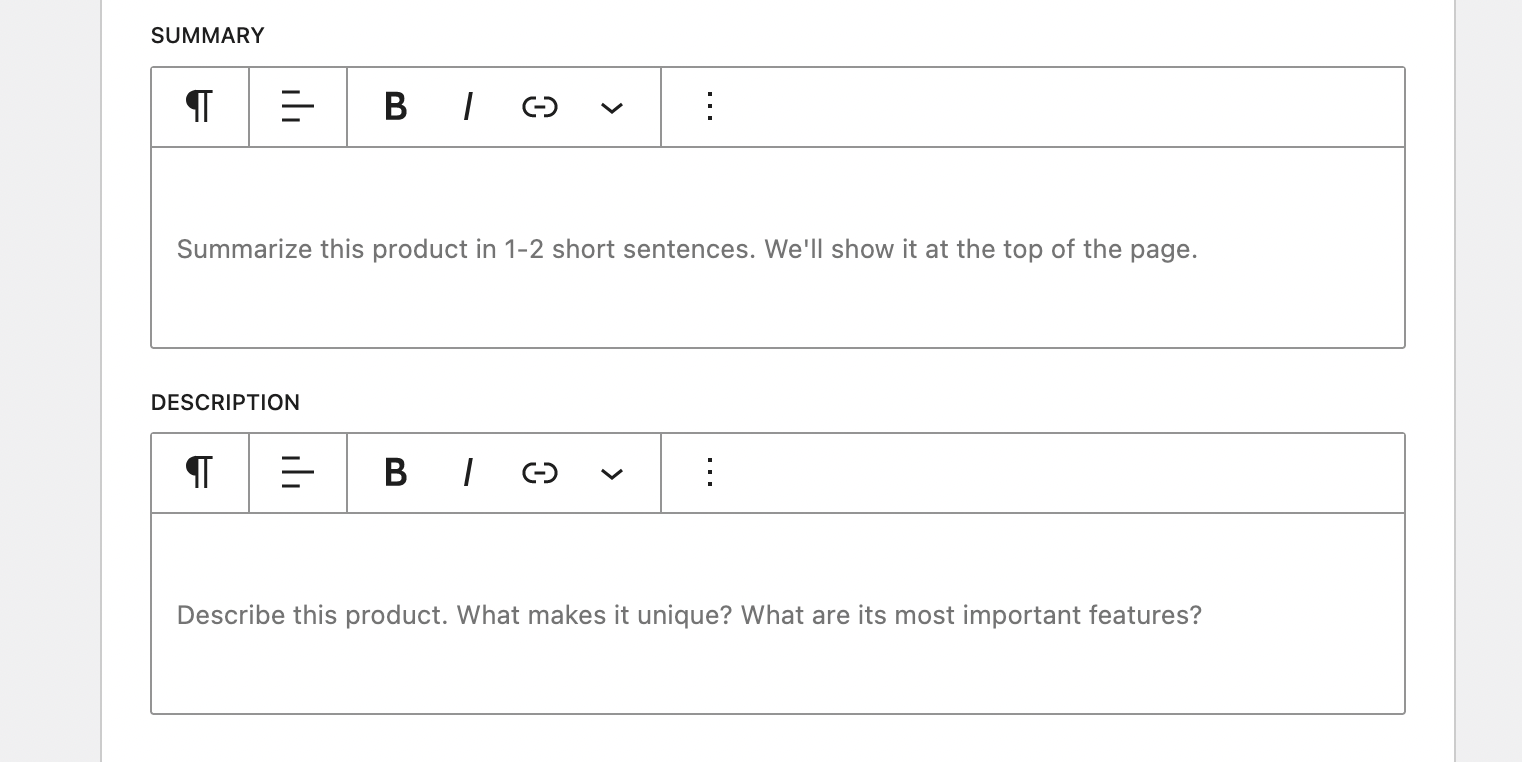
- Go to
Products>Add New (MVP)>Product details. - Verify that the gap between the icon and the text is
8px.
Before

After

- Load the new product management experience ("Products -> Add new (MVP)")
- On page load, make sure that the rich text editor toolbars are shown
- Make sure that neither of the editors are focused
- Make some changes inside an editor and make sure things continue to work as expected
- Go to
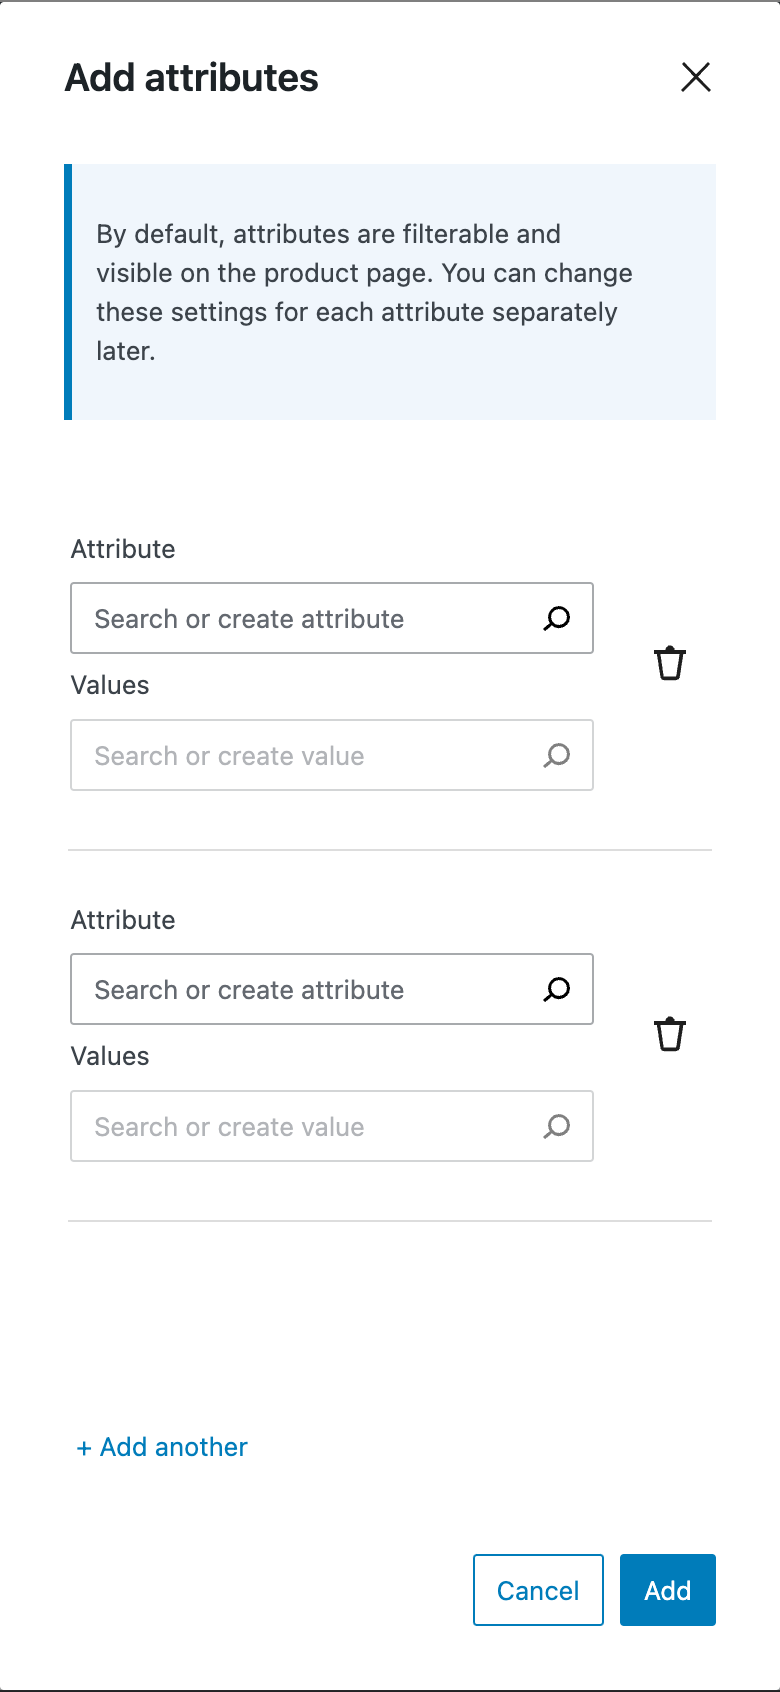
Products -> Add New (MVP)page - Under Attributes section click on
Add first attributebutton - The
Add attributesmodal should be shown. - By default if you don't select any attribute under the attribute search field then the attribute value field should be disabled and with 50% of opacity.
- After selecting an attribute from the search field the value field should become enable and with it's normal colors.

- Go to
Products -> Add New (MVP)page - Create, update, save as draft a product and a notice should be shown.
- If the notice message contains an emoji, it should has a visible blank space between the emoji and the message.
- Like:
🎉 Product successfully updated.
- make sure you have the
new-product-management-experiencefeature flag enabled (you can do so using the latest version of the Beta tester within the mono repo). - Make sure you have tracks enabled and also outputted in the console: localStorage.setItem( 'debug', 'wc-admin:*' );
- Go to Products > Add New (MVP)
- In the top right click the 3 dots and click the Share feedback button
- This should show the CES modal asking How's your experience with the product editor?
- Answer it with your console open, this should trigger a
ces_feedbacktrack with thenew_productaction. - Now check if the CES footer still works by making sure the
woocommerce_ces_product_mvp_ces_actionoption is removed - Save a product which should show the CES footer bar and click the Share feedback this should still correctly show the CES modal.

- Run
localStorage.setItem( 'debug', 'wc-admin:tracks' );in the console to view tracks events. - Complete the steps below to trigger each CES event, and then click "Give feedback" in the notice at the lower-left corner. Ensure that the modal appears as it does in the screenshot above, and the verbiage of the questions and title make sense for that event.
- For each event, observe the console and ensure that the tracks event
wcadmin_ces_feedbackfires with the correctaction,score,score_second_questionandscore_combinedproperties.
- Navigate to
WooCommerce -> Settingsand change any setting. - Click "Give feedback" in notice that appears in the bottom-left and complete steps 3-4 above.
- Go to Products > Attributes.
- Add a new attribute.
- Click "Give feedback" in notice that appears in the bottom-left and complete steps 3-4 above.
- Go to Products > Categories.
- Add a new category.
- Click "Give feedback" in notice that appears in the bottom-left and complete steps 3-4 above.
- Go to Products > Tags.
- Add a new tag.
- Click "Give feedback" in notice that appears in the bottom-left and complete steps 3-4 above.
- Go to Products > Add new.
- Create your first product and hit "publish."
- Click "Give feedback" in notice that appears in the bottom-left and complete steps 3-4 above.
- Go to Products > All Products.
- Click the product you just created.
- Update title or description in any way and hit "publish."
- Click "Give feedback" in notice that appears in the bottom-left and complete steps 3-4 above.
- Go to WooCommerce > Orders.
- Click "Add Order," add the product you just created, and change status to "processing."
- Click "Create."
- Click "Give feedback" in notice that appears in the bottom-left and complete steps 3-4 above.
- Go to Products > All Products
- Enter any term into search field in top-right and hit enter.
- Click "Give feedback" in notice that appears in the bottom-left and complete steps 3-4 above.
- Go to Products > All Products.
- Click the "Export" button at the top.
- Click "Generate CSV."
- Go to Products > All Products.
- Click the "Import" button at the top.
- Select the CSV you just generated, and click "Continue."
- Click "Run the importer."
- Click "Give feedback" in notice that appears in the bottom-left and complete steps 3-4 above.
- Go to Analytics > (any report)
- Enter any filter above and click "Up- Click "Give feedback" in notice that appears in the bottom-left and complete steps 3-4 above.date."
- Click "Give feedback" in notice that appears in the bottom-left and complete steps 3-4 above.
- Complete the setup task list on the Homescreen
- You should see this simple CES component displayed:

- Select a score of 1-2.
- Observe the CES modal open and complete steps 3-4 above.
- Go to
Products -> Add New (MVP)page - After change any product field you should publish the product and get redirected to product edit page without seen any prompt modal.
- Go to the checkout page to finish your order.
- Select Denmark as the billing (or shipping) country.
- Paste the postcode in the wrong format (like
DK-3900). - Try to complete the purchase.
- You get a notification about the wrong Postal code.
- Change the postal code to the valid one (like
1448orDK-1448). - You are able to complete the purchase.
- make sure you have the
new-product-management-experiencefeature flag enabled (you can do so using the latest version of the Beta tester within the mono repo). - Make sure you have tracks enabled and also outputted in the console: localStorage.setItem( 'debug', 'wc-admin:*' );
- Go to Products > Add New (MVP)
- Add a name and click Save draft
- A bar in the footer should show up saying:
You're using the new product editor (currently in development). How is your experience so far?and give the option to share feedback - Refresh the page, the bar should show up again after the product has been loaded.
- When clicking share feedback the CES modal should show up. You can fill it out and click Send
- This should trigger a track event with
new_productaction and the score. - The bar should stay put after submitting feedback
- Now click Publish and enter feedback again, this should trigger the
new_productaction once finished. - The feedback footer should still show up after, even after refresh.
- Now click the x or
Turn it offon the notice, the notice should not show up there after, also on refresh.
If you wanted to re-test you can delete the woocommerce_ces_product_mvp_ces_action option.
https://user-images.githubusercontent.com/2240960/203027445-7963d073-37a6-45ee-9e11-7a54678cd03c.mp4
- Create an order in WP Admin.
- In WooCommerce > Orders, in the order list, hover on the status button of the order.
- Verify that you can see that order note in the tooltip:
- Go to
Products -> Add New (MVP) - Change any field without saving it
- Try to leave the page
- A confirmation dialog should be shown preventing you from leaving the page without saving the changes first
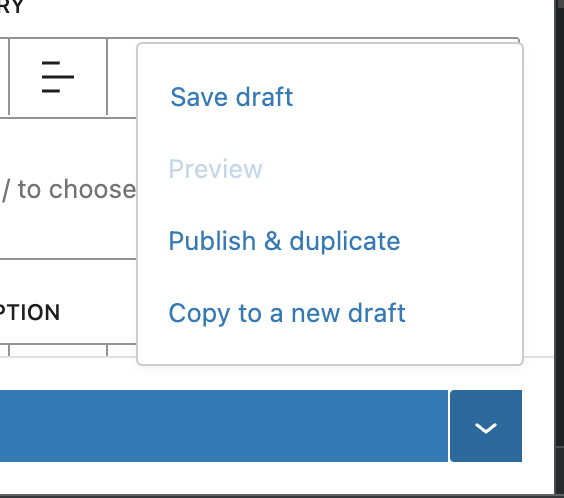
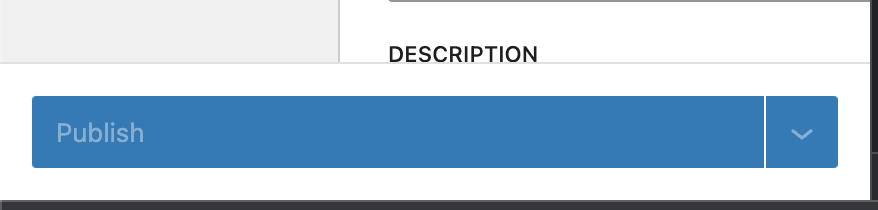
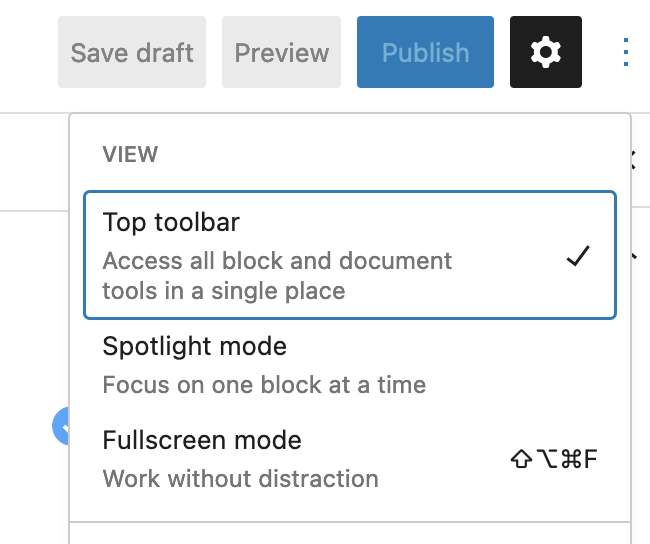
- Navigate to the new product page
Products -> Add new (MVP) - Check that the header is unchanged on larger screens
- Narrow your viewport to < 782px.
- Note the styling changes
- Under the "Publish" menu button group, check that Save draft / Switch to draft and Preview options are shown

Non-FSE theme
- Enable the
Storefronttheme (or any non-FSE theme). - Make sure on
/wp-admin/edit.php?post_type=product&page=product_attributesthat you have an attribute with theEnable archive?option checked. Otherwise, create one. - On
/wp-admin/edit.php?post_type=product&page=product_attributesaccess the attribute terms by clicking onConfigure terms. - If it does not have terms, create one.
- Click on the
Viewoption under your term to go to the frontend page of the attribute, you should see the default template loaded. - Go to your theme and add a template file on the root with the name
taxonomy-product_attribute.phpand add some identifiable content. Save the file. - Reload the page you opened on step 5. You should see the content of the new
taxonomy-product_attribute.phptemplate file you added to the theme.
FSE theme
- Clone and enable the
trunkversion ofwoocommerce-blocks(since the work on this PR is also needed https://github.com/woocommerce/woocommerce-blocks/pull/7660) - Enable the
TT2theme (or any other FSE theme). - Make sure on
/wp-admin/edit.php?post_type=product&page=product_attributesthat you have an attribute with theEnable archive?option checked. Otherwise, create one. - On
/wp-admin/edit.php?post_type=product&page=product_attributesaccess the attribute terms by clicking onConfigure terms. - If it does not have terms, create one.
- Click on the
Viewoption under your term to go to the frontend page of the attribute, you should see the default template loaded. - Go to your theme and add a template file inside the
templatesfolder of your theme calledtaxonomy-product_attribute.htmland add some identifiable content. Save the file. - Reload the page you opened on step 6. You should see the content of the new
taxonomy-product_attribute.htmltemplate file you added to the theme.
- Go the Add New (MVP) product page
- Click on Categories field
- A dropdown menu with the category list should be shown
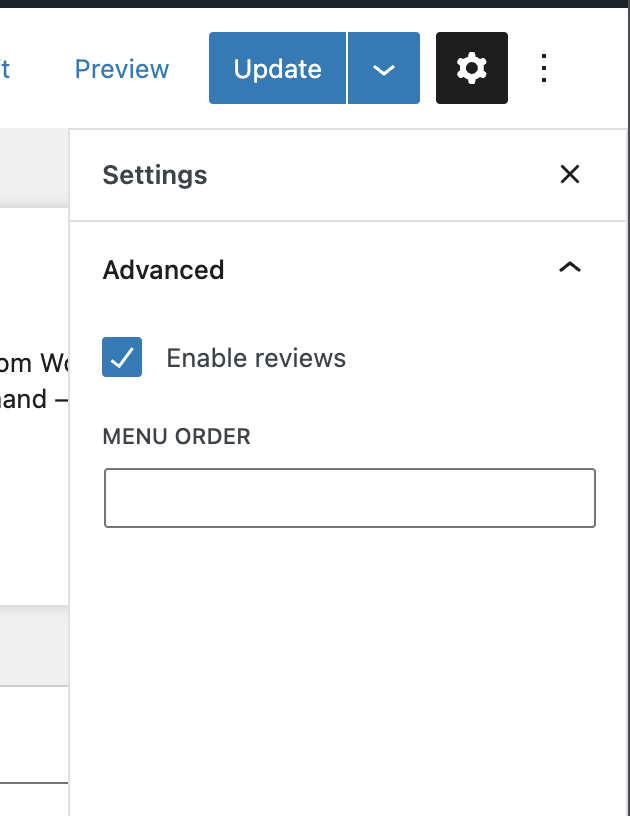
- Navigate to the new product management experience ( Products -> Add new (MVP) )
- Click on the Settings cog icon in the top right inside the header.
- Note the menu opens with the option to enable reviews and update menu order
- Toggle the “Advanced” section to make sure that it opens and closes as expected
- Attempt to close the settings menu with both the cross (“x”) and the settings cog button.
- Check that “Enable reviews” is checked by default on new products
- Update the “Enable reviews” and “Menu order” settings and update or publish the product
- Refresh the page and make sure that your settings persist.
- Go to the new Add Product page (/wp-admin/admin.php?page=wc-admin&path=%2Fadd-product)
- Check if the width of the pricing fields are 50% when the screen width is larger than 1032px
- Adjust the screen width to a smaller value and check if the width of the pricing fields turn into 100%

- Enable WooCommerce Multichannel Marketing experience in WooCommerce Settings > Advanced > Features (
/wp-admin/admin.php?page=wc-settings&tab=advanced§ion=features). - Go to Marketing page at
/wp-admin/admin.php?page=wc-admin&path=%2Fmarketing. - In the "Discover more marketing tools", find a plugin with "Install plugin" button, and click on the button.
- The button should become busy.
- All the other "Install plugin" and "View details" buttons should become disabled.
- The plugin should be installed and activated automatically.
- There should be a successful notice message in the bottom left corner.
- If there is an error, there should be an error notice message in the bottom left corner. You can try this out by hardcoding a non-existing plugin slug in the code.
- The plugin should then be removed from "Discover more marketing tools" card.
- The plugin should appear in the "Installed extensions" card.
- In the "Discover more marketing tools", find a plugin with "View details" button, and click on the button.
- The browser tab should navigate to the product page on WooCommerce.com
demo-pr-one-click-installation.mp4
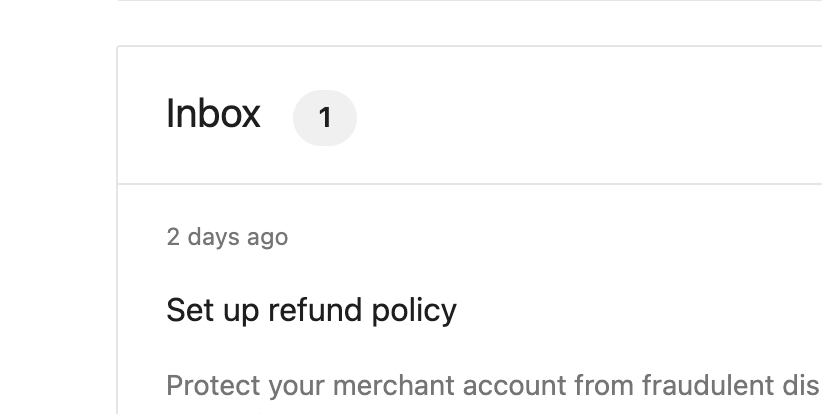
- Create a site with at least 1 or more unread notes
- Visit the home page and scroll down to see the notes
- Note that unread notes are marked as read on viewing
- Note that the count of notes in the inbox panel header reflects unread notes (all unread notes, not just the visible ones prior to loading the remaining notes).
- go to Products > Add New (MVP)
- Click the Drag and drop area (not the
Choose imagesbutton). - A file picker should be visible. Pick an image.
- The selected image should be visible now in the gallery.
- The tracks event
wcadmin_product_images_add_via_file_upload_areashould be recorded - Continue with the product creation process. Confirm that it has been created correctly.

- Visit the homepage with
from_calypsoappended to the URL.wp-admin/admin.php?page=wc-admin&from_calypso=1 - Install a plugin like WP Crontrol
- Under Tools -> Cron Events, run wc_admin_daily
- Make sure the note with a title of "Welcome to your new store management experience" has not been added
- make sure you have the
new-product-management-experiencefeature flag enabled (you can do so using the latest version of the Beta tester within the mono repo). - Go to Products > Add new (MVP) and fill out some of the initial details like name and price
- Scroll down and click Add first attribute in the attributes section
- Now write a random name in the attribute search field in the table, of an attribute that doesn't exist.
- The 'Create "your new attribute name"' should show as an option
- Click that and the new item should show as selected and the term field should focus
- With
localStorage.setItem( 'debug', 'wc-admin:*' );run prior, it should show that aproduct_attribute_add_custom_attributehas been fired. - Start adding attribute terms, this dropdown should initial be blank and any text you put in will show up as a
Create "text"option, allowing you to add several new items. - Click Add the custom attribute should show correctly in the main list, now hit
UpdateorPublish - Go to old product editor and load the same product you just saved, check the attributes tab and make sure the custom one's show up correctly.
Kapture.2022-10-14.at.11.23.36.mp4
Start with trunk/start without this change:
- Via Products ▸ Attributes, create some product attributes and terms.
- For at least two different attributes, apply custom ordering.
- Via the Configure Terms screen, go ahead and re-order the terms.
- Apply a range of those same terms (for at least two different attributes) to one of your products.
- If you visit the single product page and open the Additional Information tab, you should see these terms.
- The custom ordering you applied in the admin screen should be respected here (if you have applied the terms
aandb, butbhas been custom ordered to display beforea, that should also apply on the frontend).
Now switch to this branch:
- Create a new attribute and terms, apply some custom ordering, then apply this new attribute and some of those terms to the same product.
- Edit one of the existing attributes (that you worked on at the start), re-order some of its terms.
- Visit the single product page: ordering should be respected for the new attribute terms, the existing terms that you re-ordered, and the existing term where you did not change the order.
Some screenshots etc, in case helpful when trying to find some of the locations referenced above:
| Asset | Notes |
|---|---|
 |
Single product page: additional info tab |
 |
Admin screen: configure terms link |
| Screencast (how re-ordering terms works) |
- Enable tracking via WooCommerce ▸ Settings ▸ Advanced ▸ WooCommerce.com.
- Optionally, install and activate Query Monitor (makes it easy to see errors—but you can use some other tool or method if you prefer).
- If you do choose to use Query Monitor, you will probably also want to ensure you can see your admin toolbar while in the block editor.
- To do this, configure the editor so it is not operating in full-screen mode:
- Try adding a new post via Posts ▸ Add New.
- With this change, everything should be fine!
- Without this change, you may observe a warning about Undefined array key "post_type":

Fix product attributes lookup data and filter by attribute widget with non-ASCII named attributes #34432
- Start with PHP 8.
- Use Storefront theme.
- Install the Classic Widgets plugin.
- Make sure that you have product attributes lookup table enabled, including the option for direct updates (Settings - Products - Advanced).

- Create a global product attribute named 大きさ with these three terms: 中 大 小
- Go to Appearance > Widgets, and add a "Filter Products by Attribute" widget (not the "Filter by attribute" block) for the above anywhere in the shop (could be in the header, footer, sidebar, etc).
- Create a variable product that uses that attribute for variations (with all three terms), but create only one variation for 大
- Save the product.
- Create a second variable product that uses that attribute for variations, this time with only one variation for 小
- Go to Status - Tools and run "Regenerate the product attributes lookup table", either for the entire table or for each of the products you just created.
- Go to WooCommerce > Status > Scheduled Actions, and wait for the action
woocommerce_run_product_attribute_lookup_regeneration_callbackto be run and completed. - Go to the shop page, and verify that the widget shows correct information:

- Repeat this test on PHP 7.4.
- Set up an offline payment method like BACS.
- Create an order using the offline payment method.
- Open the received on-hold email sent to the customer.
