TOS switcher board
With this board you are able to:
- use four different TOS versions on your Atari ST. (e.g. TOS 1.0, 1.02 and 1.04 plus EmuTos)
- choose the TOS version from your keyboard with [Control][Alternate] and [F1]..[F4]
You have to desolder two TOS roms or ROM sockets from your mainboard!
You will need a programmer to program your EEPROMs
Download the TOS upgrade board Eagle and Gerber files
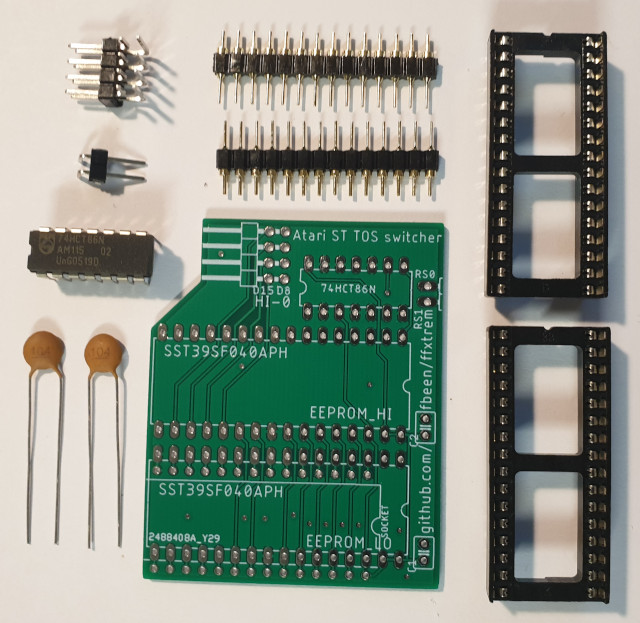
- Place the round header pins in a breadboard, lay the pcb over the pins and solder all pins. Make sure that the pins are straight so that they will fit in your Atari ST mainboard. The pins must be placed at the backside of the pcb!
- Solder the 74HCT86N in the right direction as indicated.
- Solder the two 32 pin sockets for the EEPROM HI and EEPROM LO.
- Solder the 2x4 (D8-D15) connector with 90 degrees bended pins
- Solder the 1x2 (RS0-RS1) connector with 90 degrees bended pins
- Solder the two 0.1 pF capacitors C1 and C2.
- Desolder the IC sockets or ROMs HI-0 and LO-0 from your Atari ST mainboard.
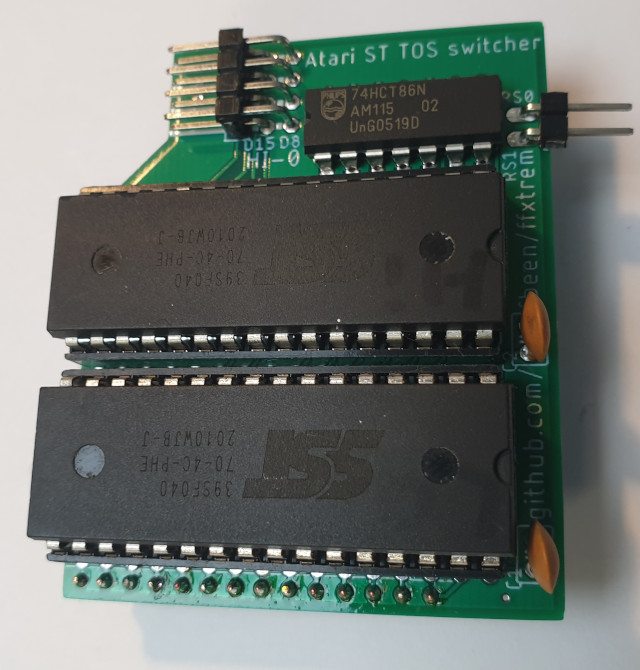
- Place the TOS upgrade board into the mainboard LO-0 pads. Don't place the board upside down! (See images)
- Solder the TOS upgrade board on the mainboard. Solder eight wires from the D0 .. D8 pads at the HI-0 ROM position (See images)
If you have six TOS ROMS on your mainboard (not counting sockets) then you must change the solder jumpers on the mainboard. Desolder the three 256K jumpers and solder the three 1M jumpers. (256K stands for 256 Kbit which is 32 Kbyte and 1M stands for 1 Mbit which is 128 Kbyte)
To flash the ROMs you will need a programmer like for example the TL866II Programmer. If you dont want to sell one you can possibly make one with an Arduino. Search on arduino parallel eeprom programmer. I will not explain how all these programmers work as there is plenty of information about them.
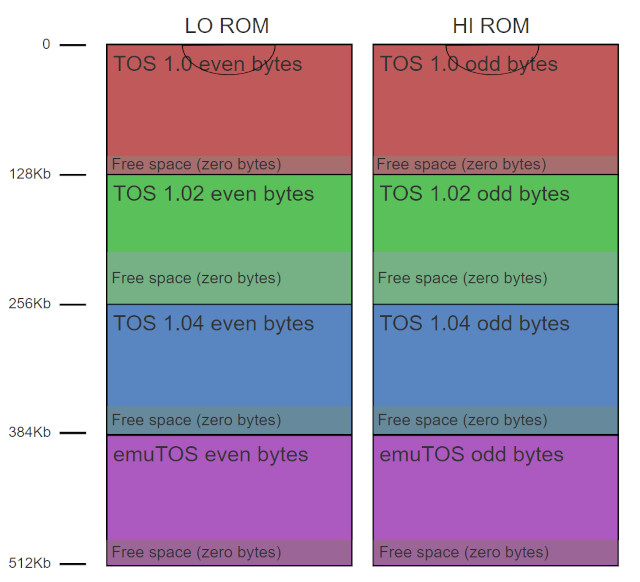
If you wish to create your own ROM files you must follow the next steps:
- Download (max) 4 ROMfiles of your choice from the TOS images collection
- From these images you have to separate the low and high bytes into different files. So the first byte goes to the low ROM, the second to the high ROM, the third to the low ROM and so on. There are tools available to split the image files like Cartman for Windows and ROMSPLIT.PRG for the Atari ST (or any emulator). Important is that you end up with 8 files that are 128Kb (131072 bytes) or less and that you know which file is which TOS and high (HI) or low (LO).
- If the files are smaller then the 128Kb you will have to append zero bytes at the end of the file and make them exactly 128Kb each. You might be able to do this with a Hex editor.
- Now you need to join the four LO files together to one 512Kb romfile. Do the same for the HI files in the same sequence.
- Flash the two 512Kb files to your SST39SF040 ROMs and mark them with HI and LO with a permanent marker.
- Place the Romfiles in their sockets, LO on EEPROM_LO and HI on EEPROM_HI.
Follow the wiring secion. Connections are:
- ROML to RS0
- ROMH to RS1