[EN] Settings for Jira
Jiraffe uses custom date and time fields in tasks to distribute them across the calendar.
If there are no fields, then you need to add them to projects that you plan to manage through Jiraffe.
The pictures show the cloud version of Jira, but similar actions are carried out with the server version.
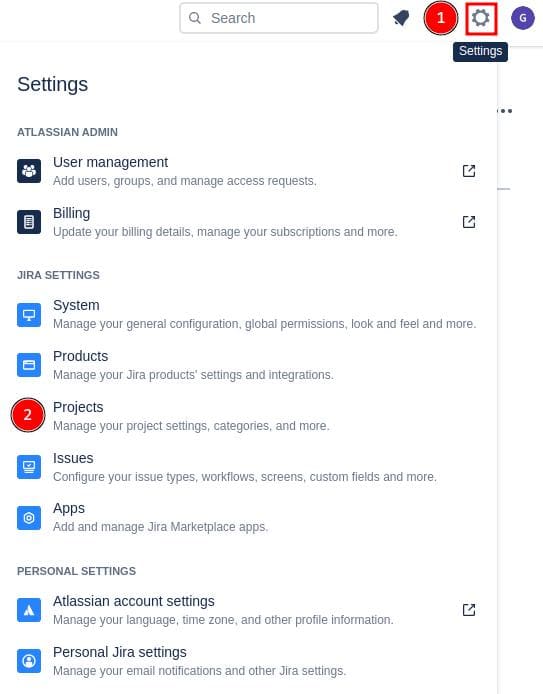
- Go to Jira, Settings, Projects:
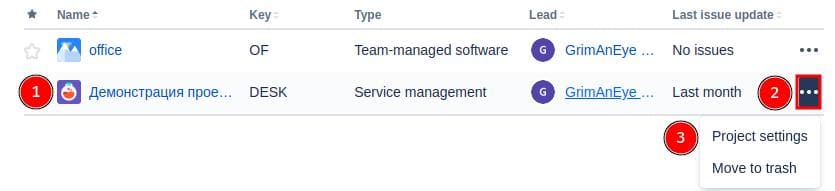
- Find the required project, project settings:
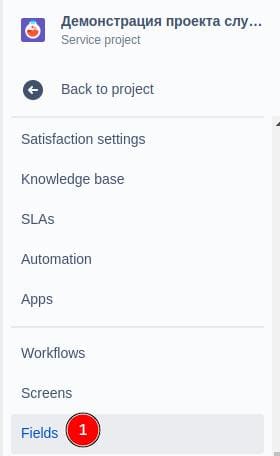
- Go to the "Fields" menu:
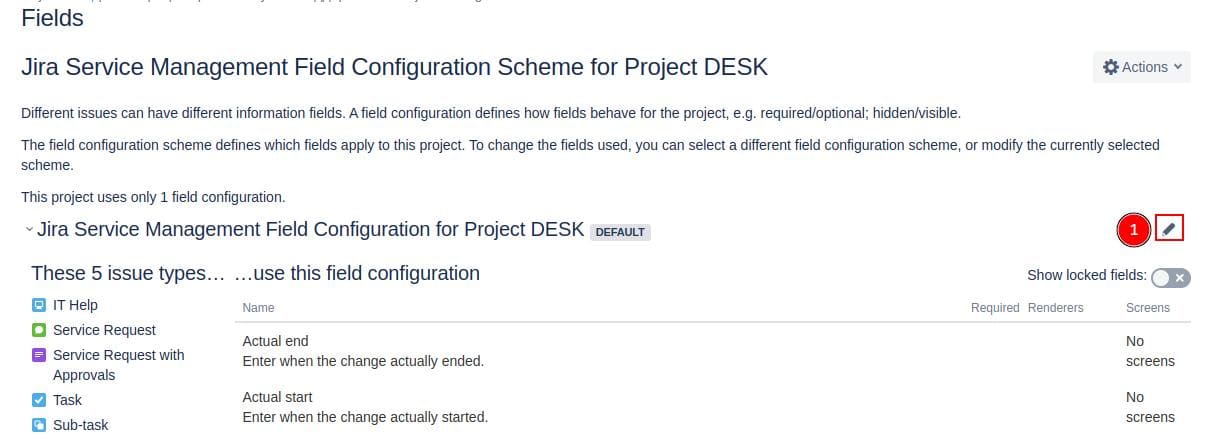
4.Edit those schemes of projects, the tasks of which will be tracked by Giraffe. If there are several of them, edit all the required ones:
- Go to custom fields:
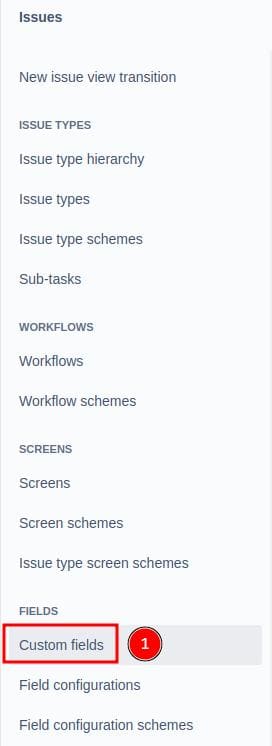
- Create a new field:

- I choose type - Date and time picker:
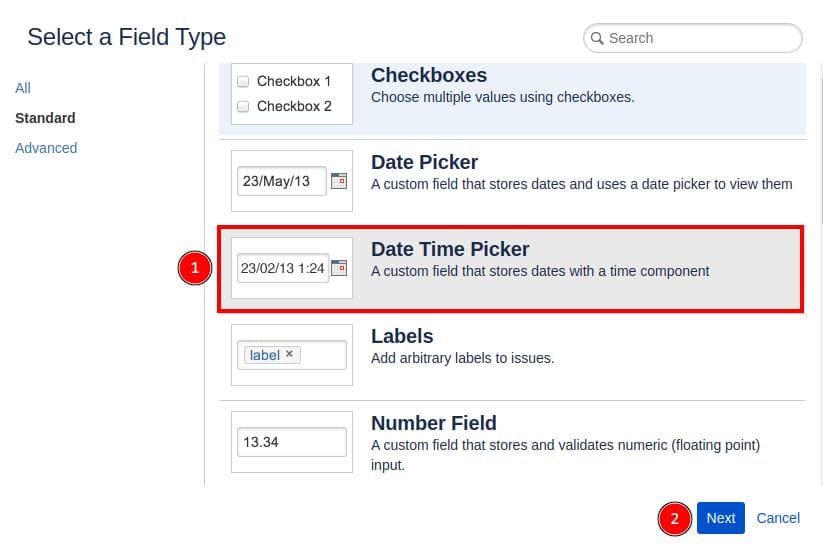
- I give a description. Any, for setting it is not important:
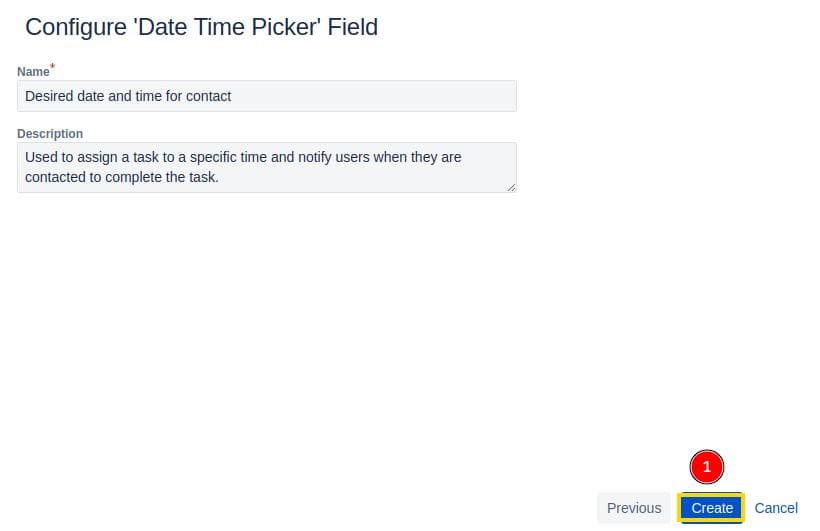
- Make associations with the required screens. In my case, I display it everywhere, but in fact, it may not be appropriate everywhere:
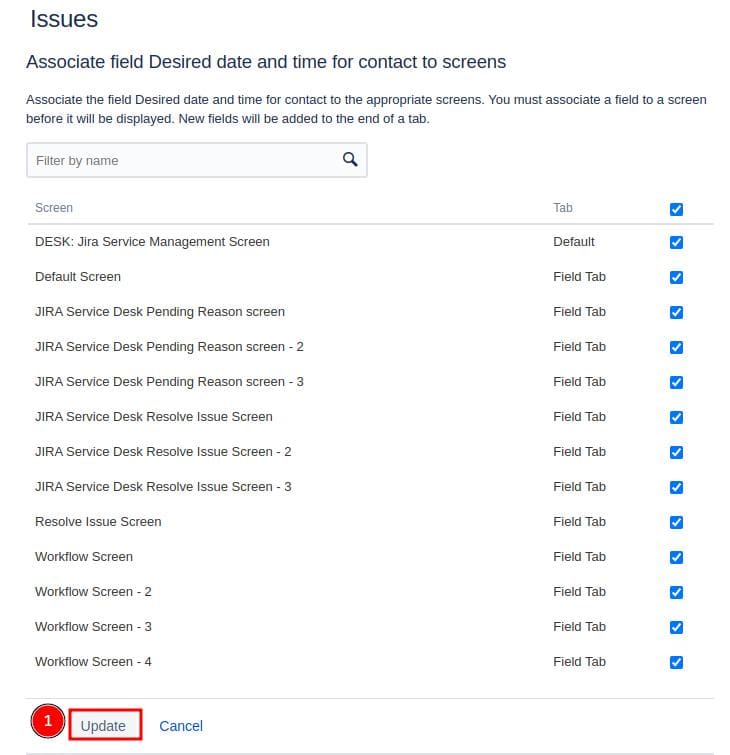
- As a result, the field appears in the general list. You need to find out its ID for use in the Giraffe. Click on the created field:

- I go to the Screens tab and hover over the Add or remove associated screens link. The browser will display customfield_XXXXX on the status bar, which is the field ID:

As a result:
- Jira now has a field that will be tracked by the Giraffe and known by its ID, for settings.