Extending and creating custom resolutions
A work queue consists of a list of potential issues that users can easily review, assign, and address. These issues are automatically identified and prioritized by the platform based on configuration by your organization administrator during onboarding, and can be updated as needed.
Resolutions are provided to guide users in bringing issues to closure. Sample work queues, resolutions, and actionable workflows are provided as starting points. You can extend and customize the samples or create new ones to pinpoint and address custom business needs.
For more information about how to use resolutions as a general user, see the Resolutions topic in the IBM Documentation site.
Sample resolutions are provided as starting points for you to customize and build upon. You can also create your own custom resolutions. For more information about creating, updating, and deleting resolutions via API, see IBM API Hub. Note: Resolutions are also referred to as Action Definitions in the APIs.
In addition to using the developer APIs to create and maintain your resolutions, you'll also soon be able to build and customize them directly in the Intelligence Suite.
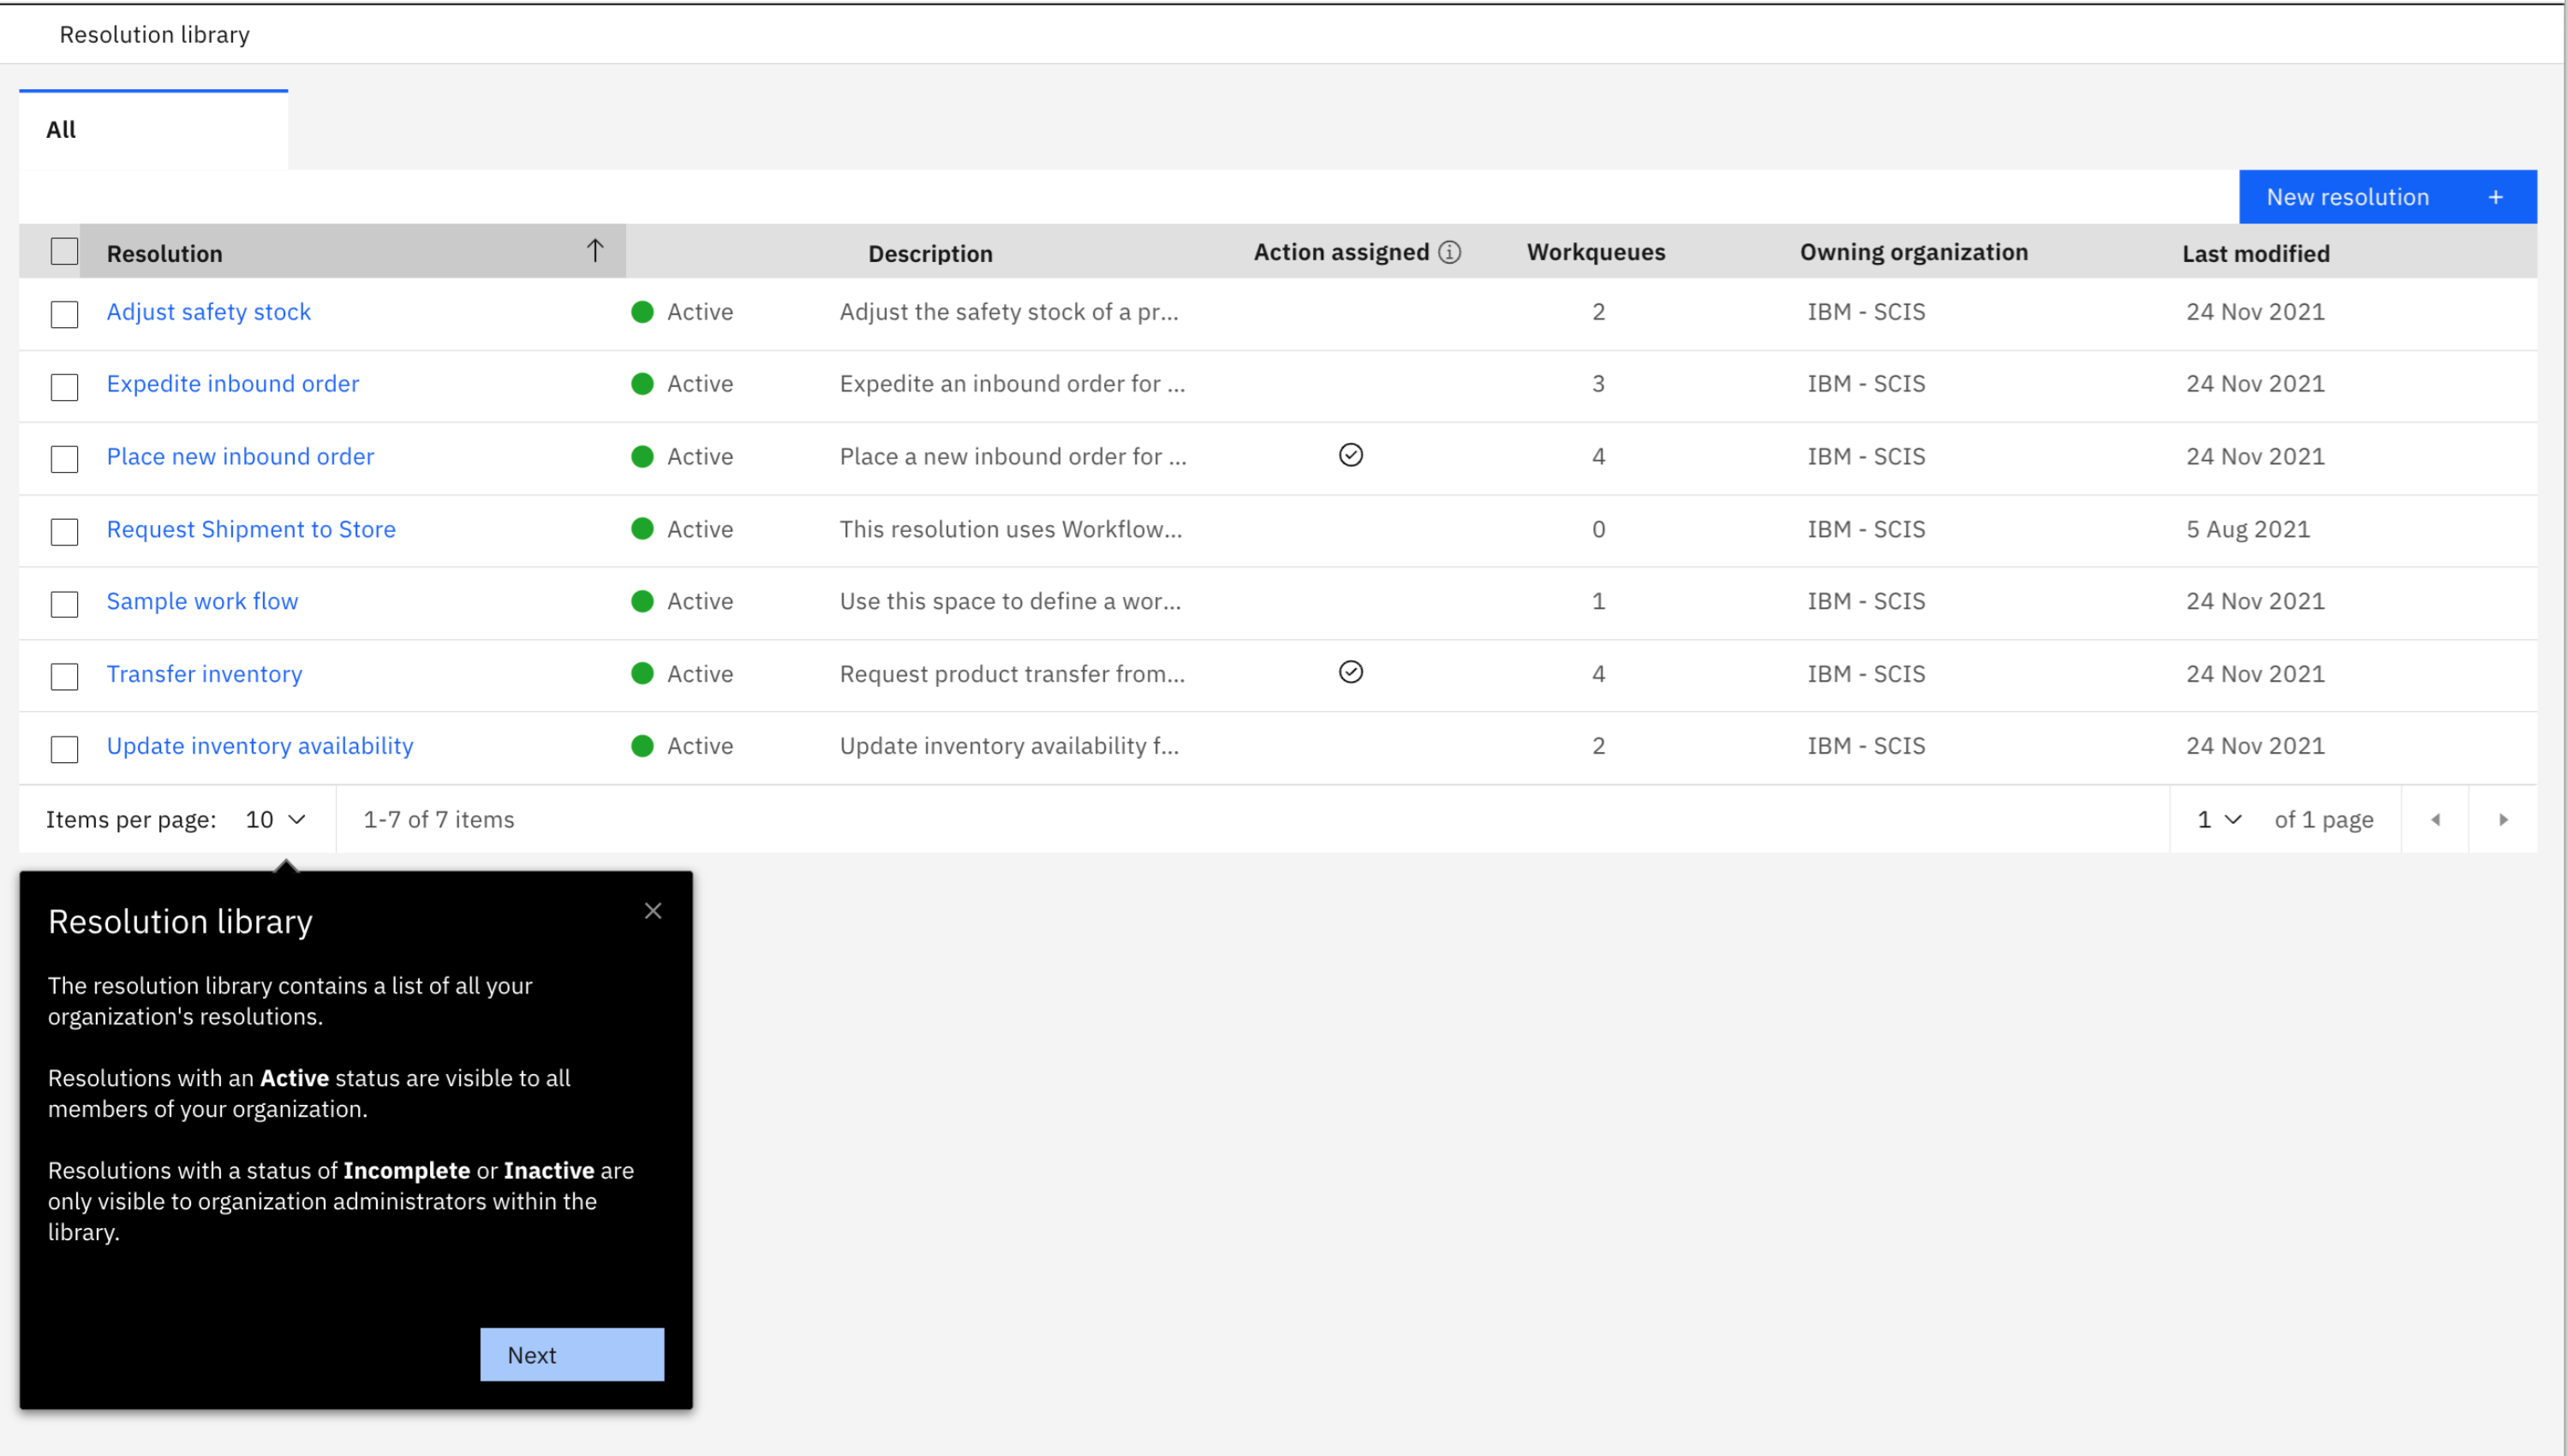
The resolution library contains a list of all your organization's resolutions. Resolutions with an Active status are visible to all members of your organization. Resolutions with a status of Incomplete or Inactive are only visible to organization administrators within the library.
Diagram 1: Listing your organization's resolutions
> Next step (customizing existing resolutions)
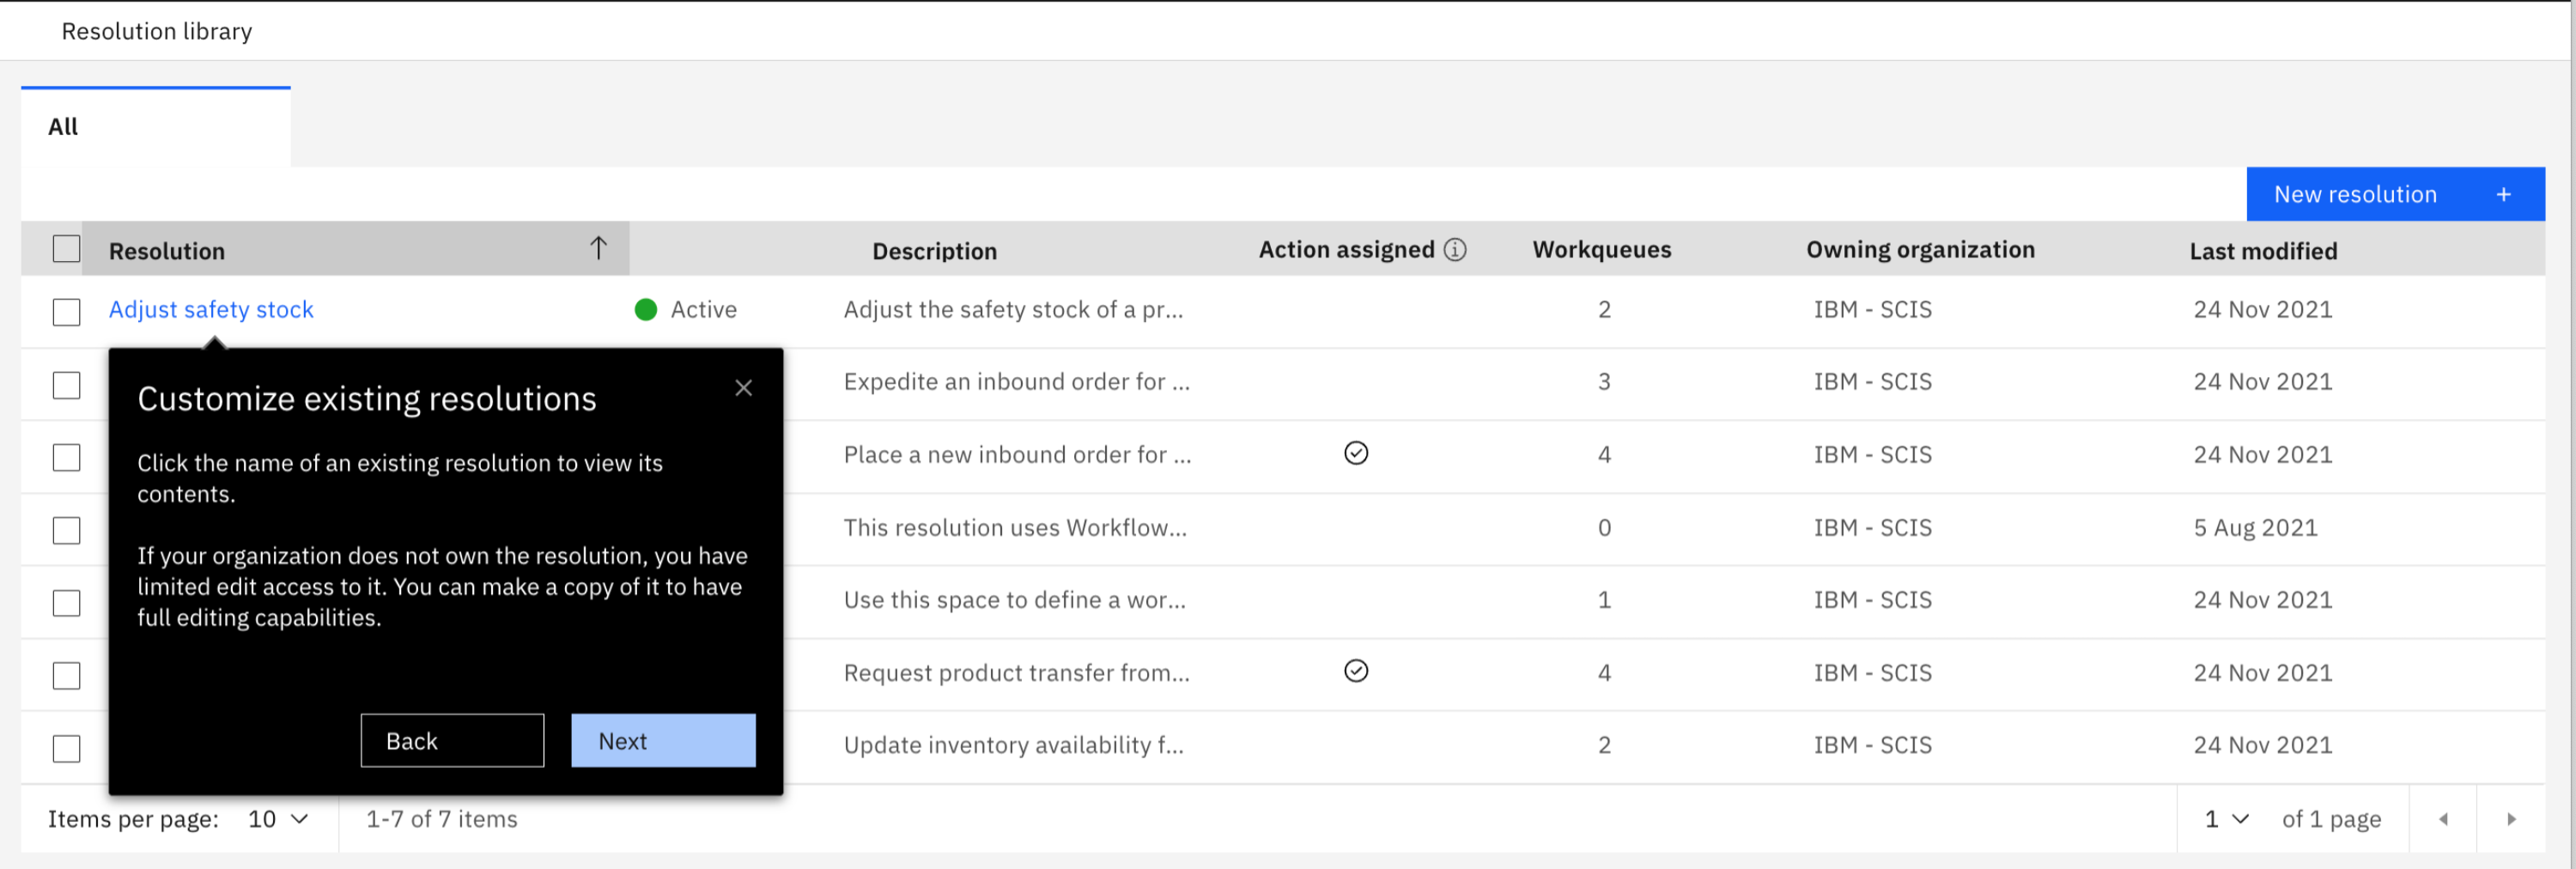
Click the name of an existing resolution to view its contents. If your organization does not own the resolution, you have limited edit access to it. You can make a copy of it to have full editing capabilities.
Diagram 2: Customizing an existing resolution
> Next step (creating resolutions)
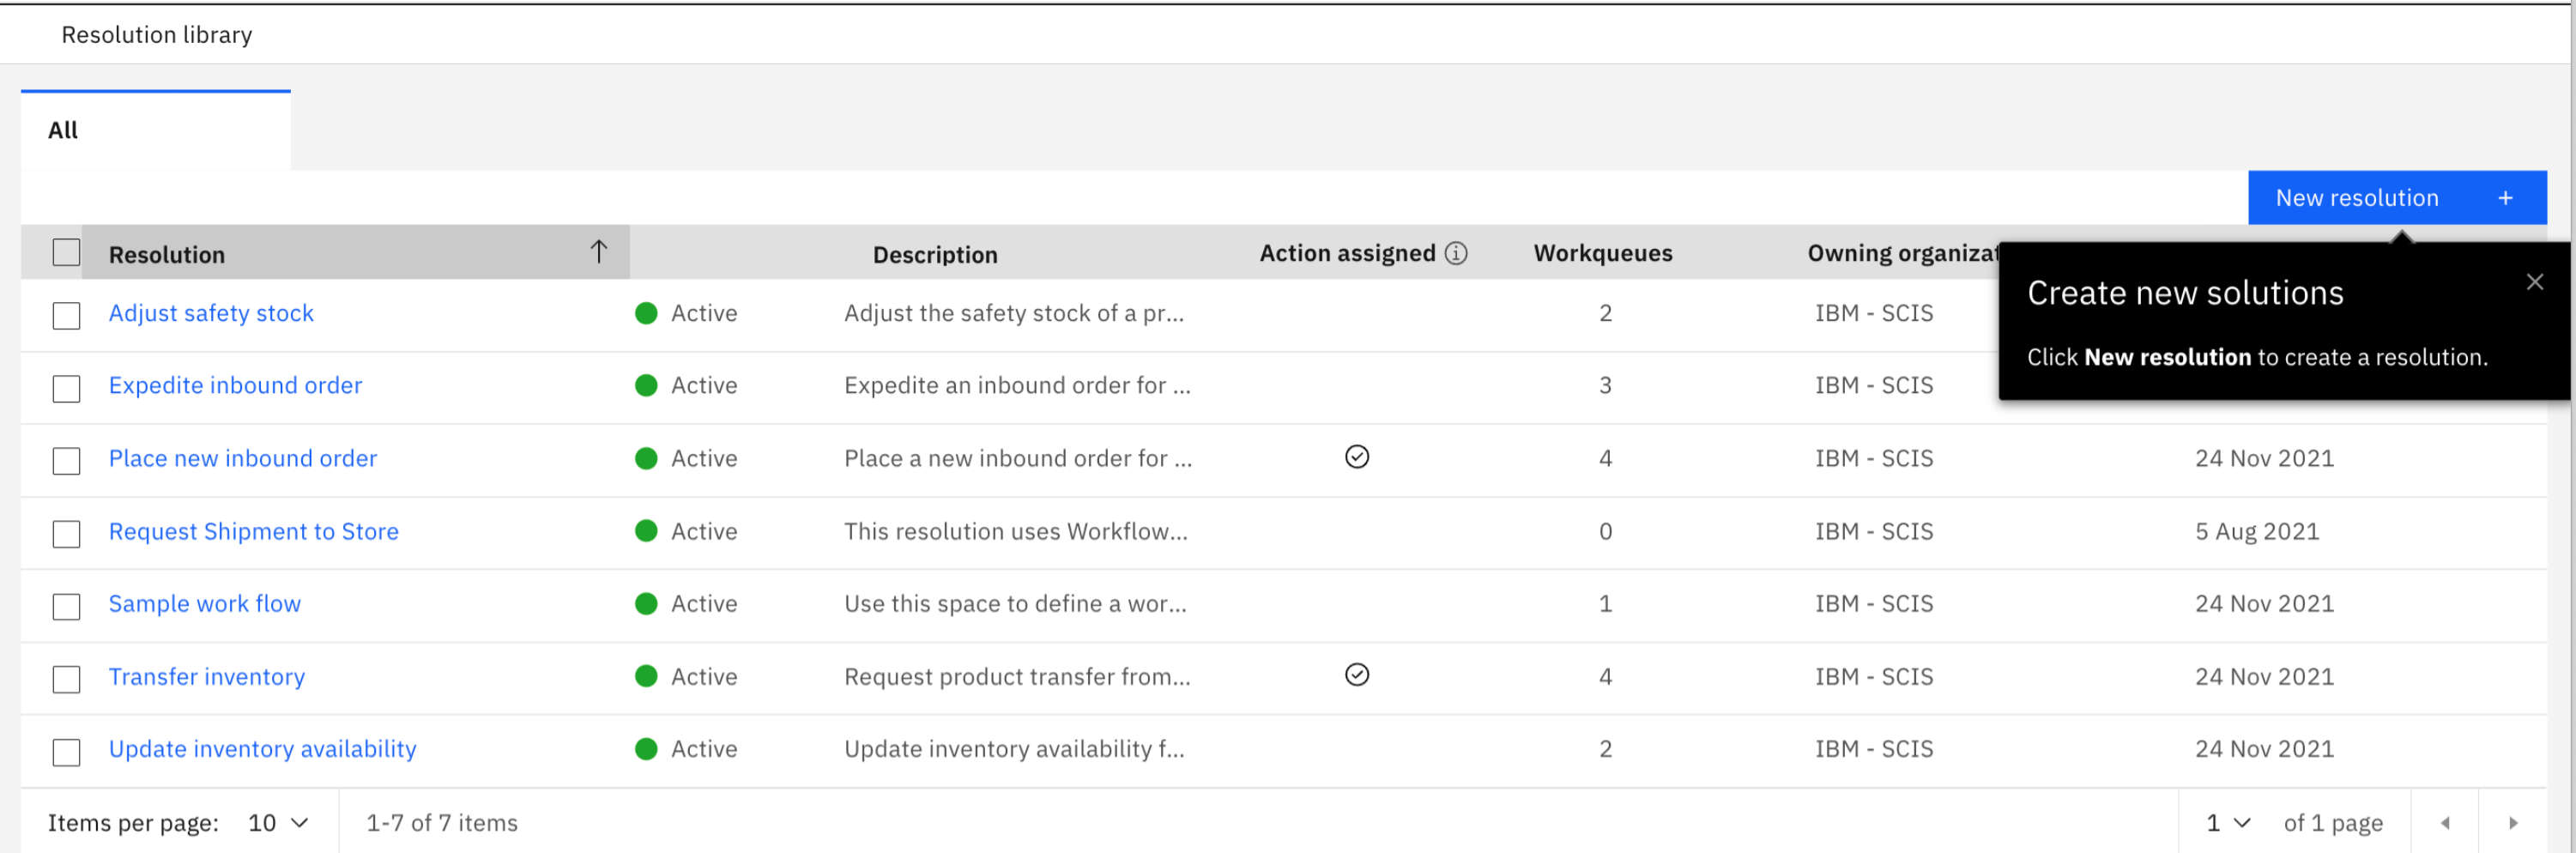
To create a resolution, you must define the resolution, configure its content, and then optionally assign actions.
To get started, click New resolution from the resolution library.
Diagram 3: Creating a new resolution
> Next step (defining a resolution)
-
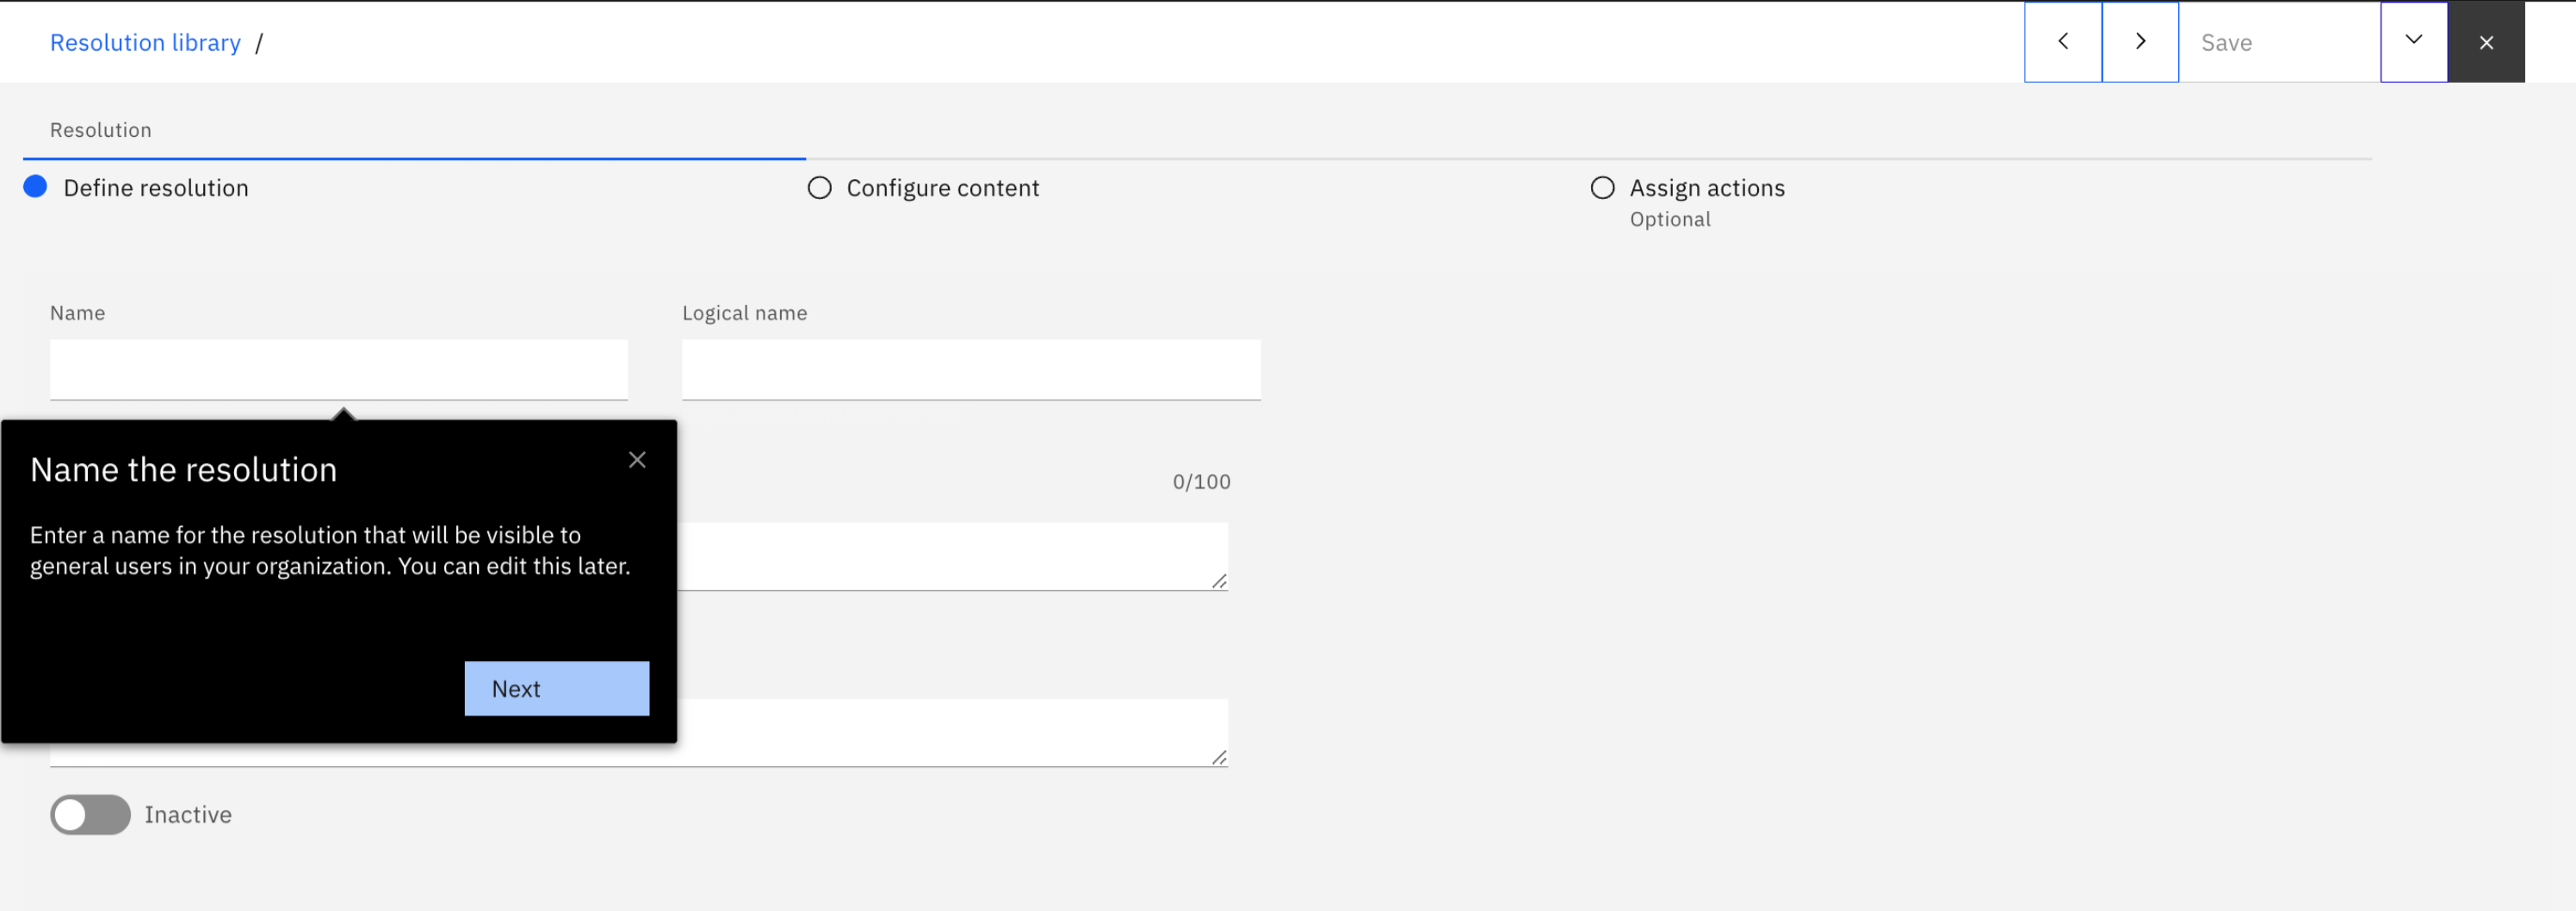
Enter a name for the resolution that will be visible to general users in your organization. You can edit this later.
Diagram 4: Give your resolution a name
-
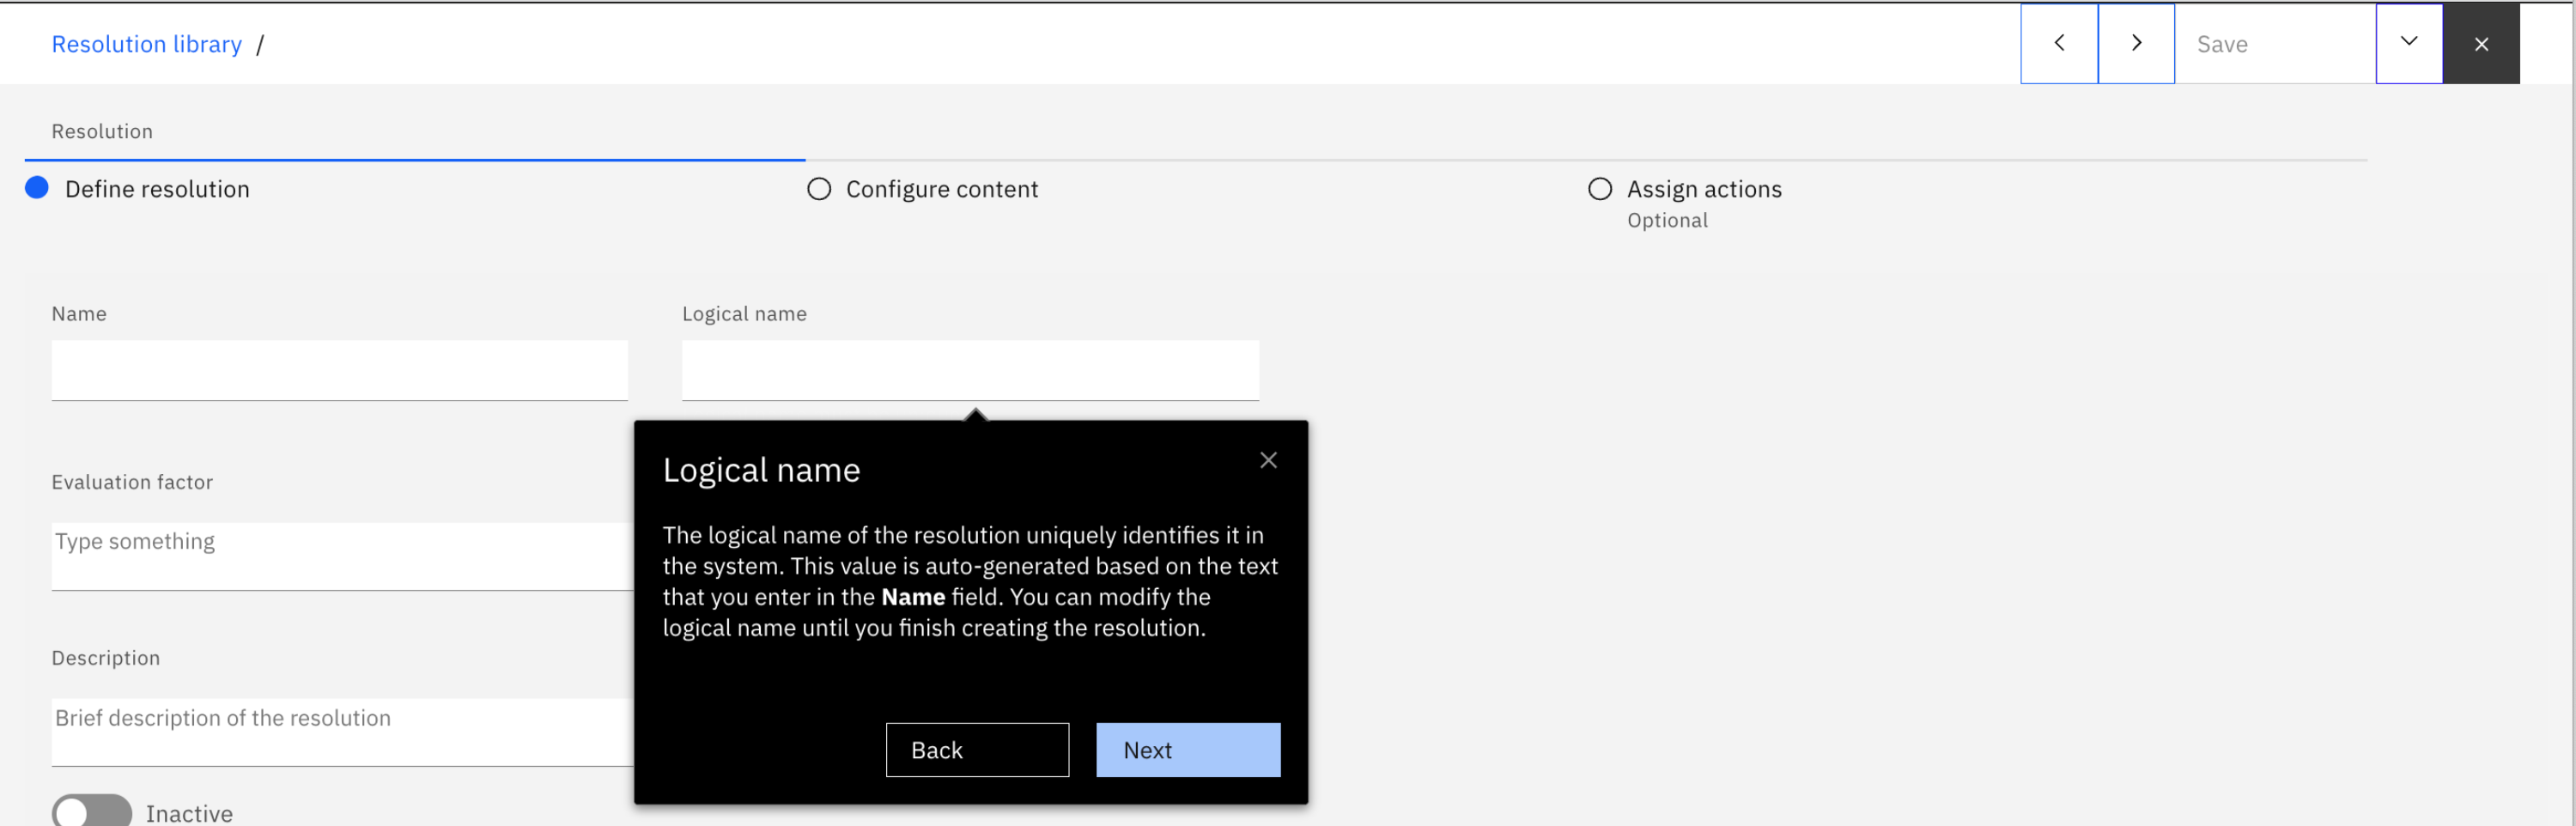
Review the logical name for reference. The logical name of the resolution uniquely identifies it in the system. This value is automatically generated based on the text that you enter in the name field. You can change the logical name up until you save it for the first time. The logical name must be unique.
Diagram 5: Give your resolution a logical name
-
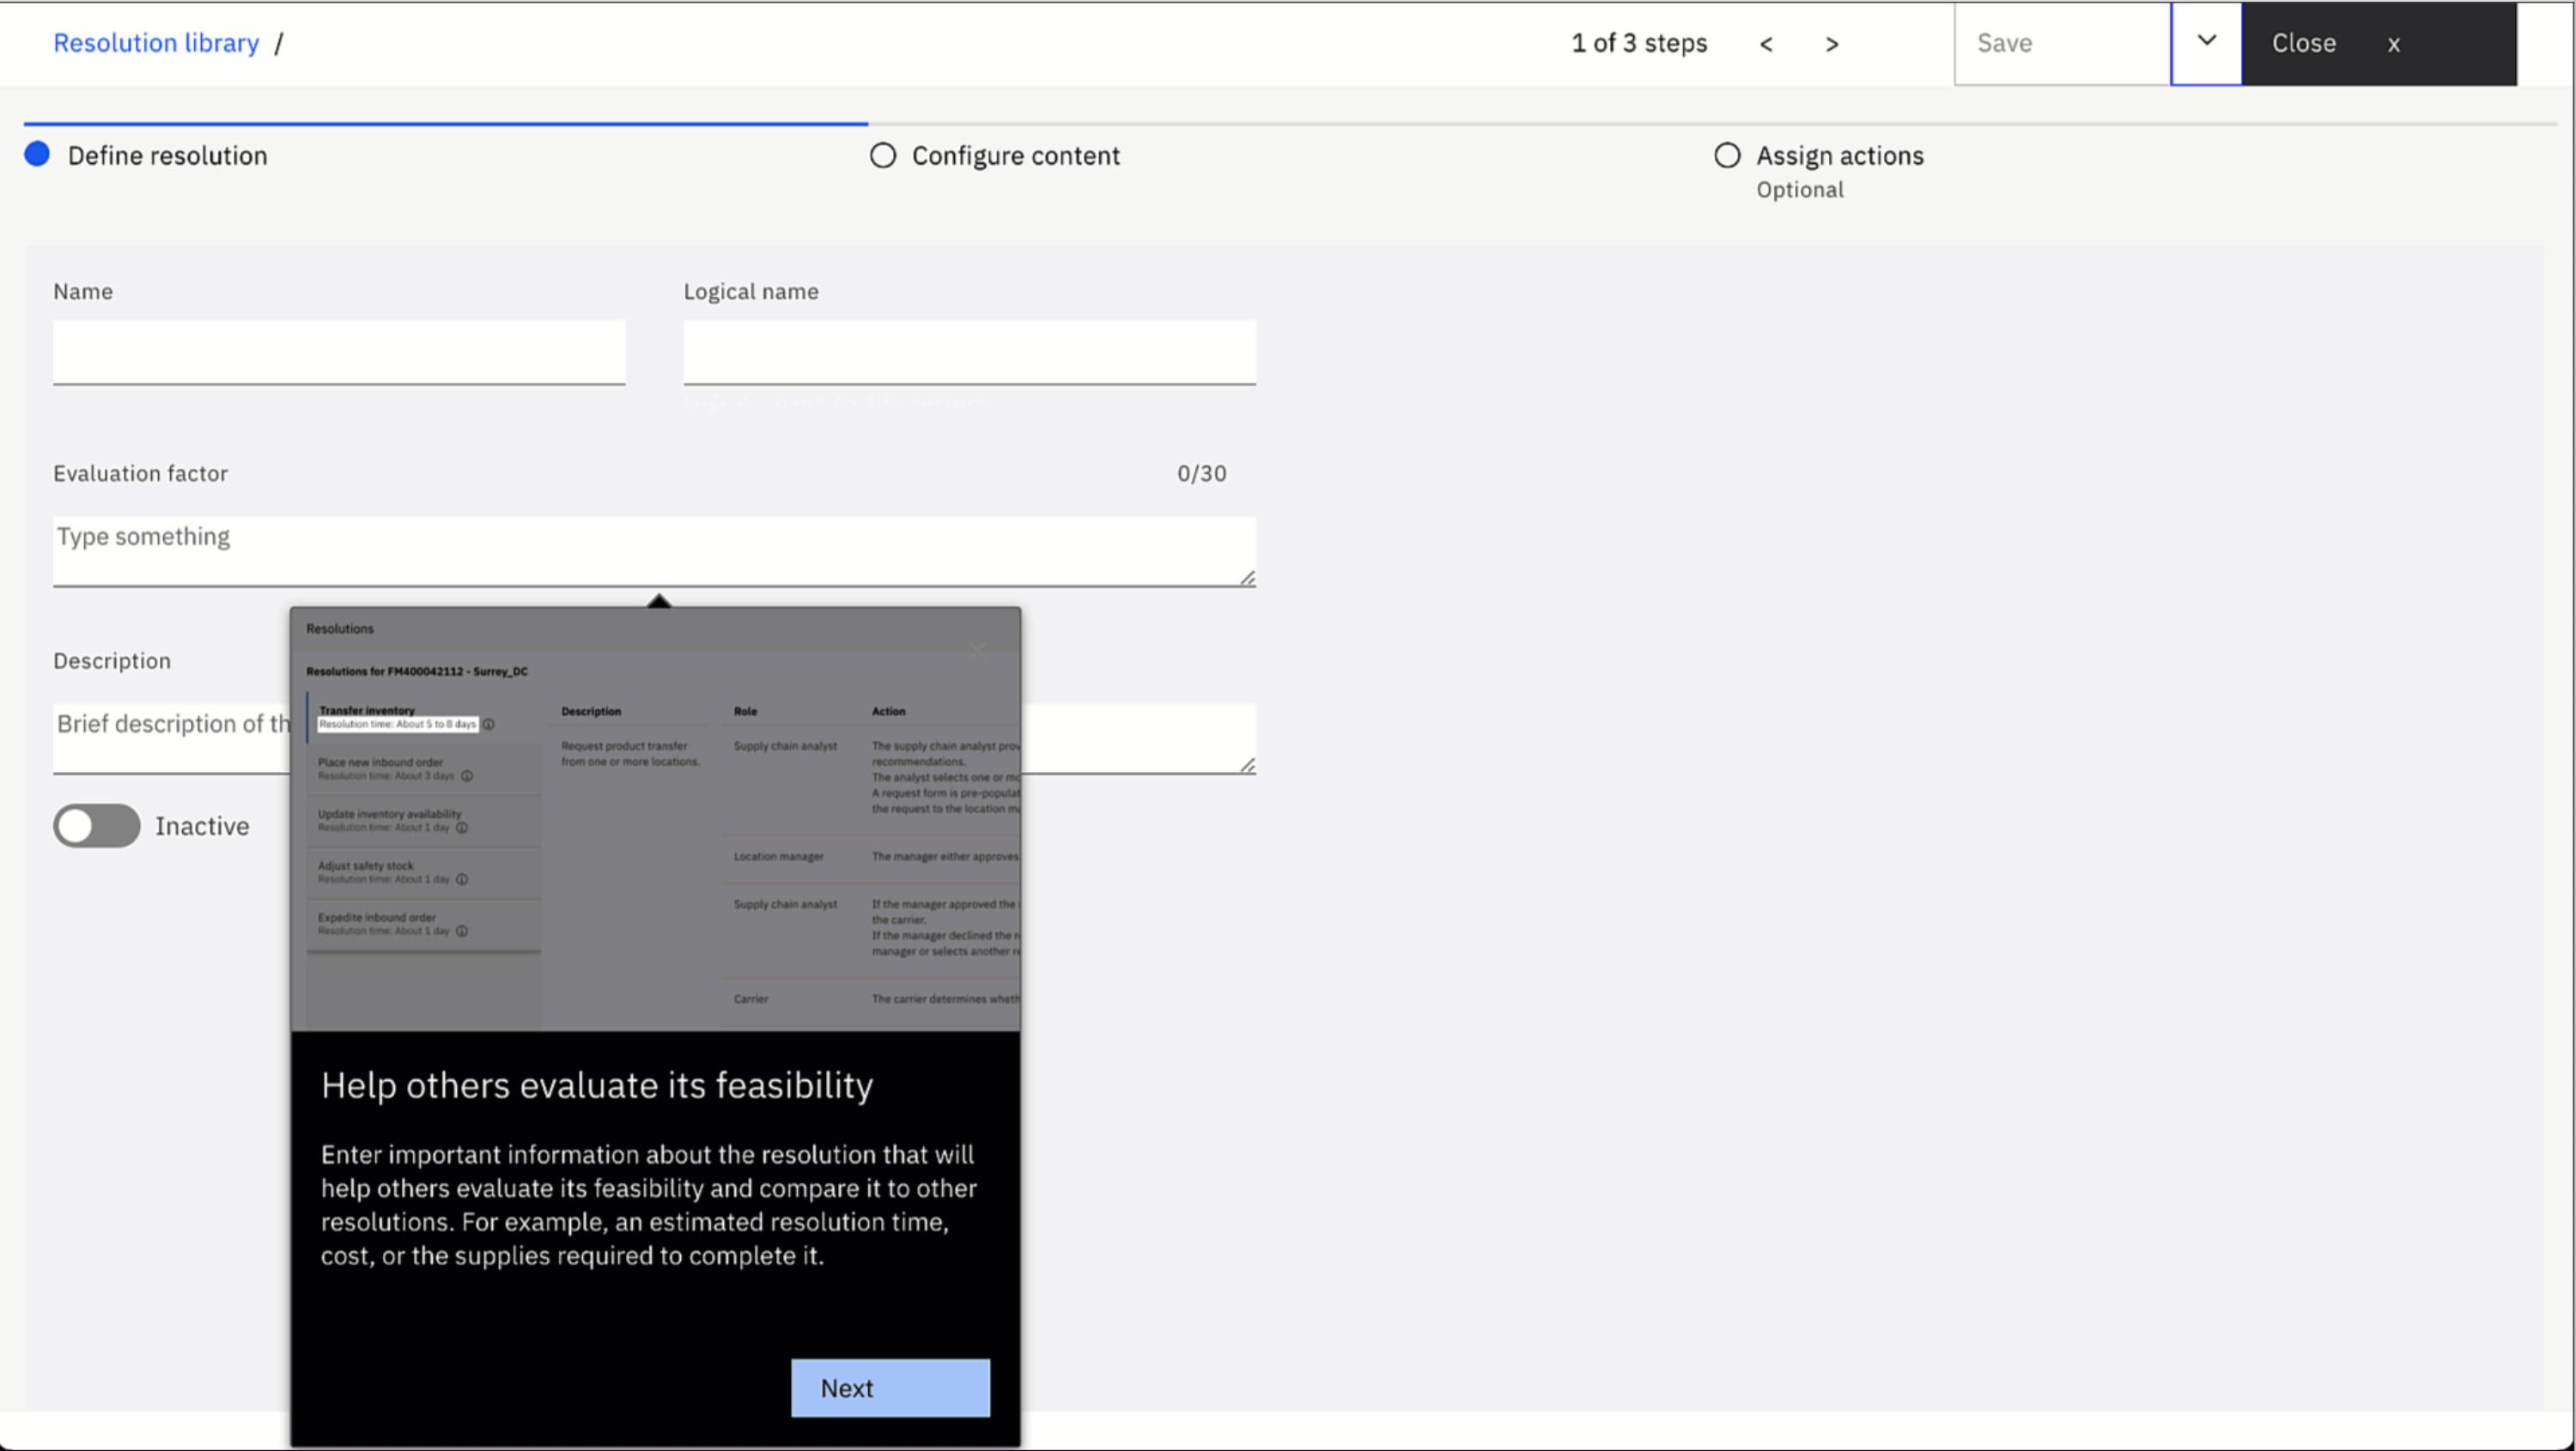
Enter an evaluation factor for the resolution. This should include important information to help others evaluate its feasibility. For example, an estimated resolution time, cost, or the supplies required to complete it.
Diagram 6: Give a description that estimates the time, cost or supplies for the resolution
-
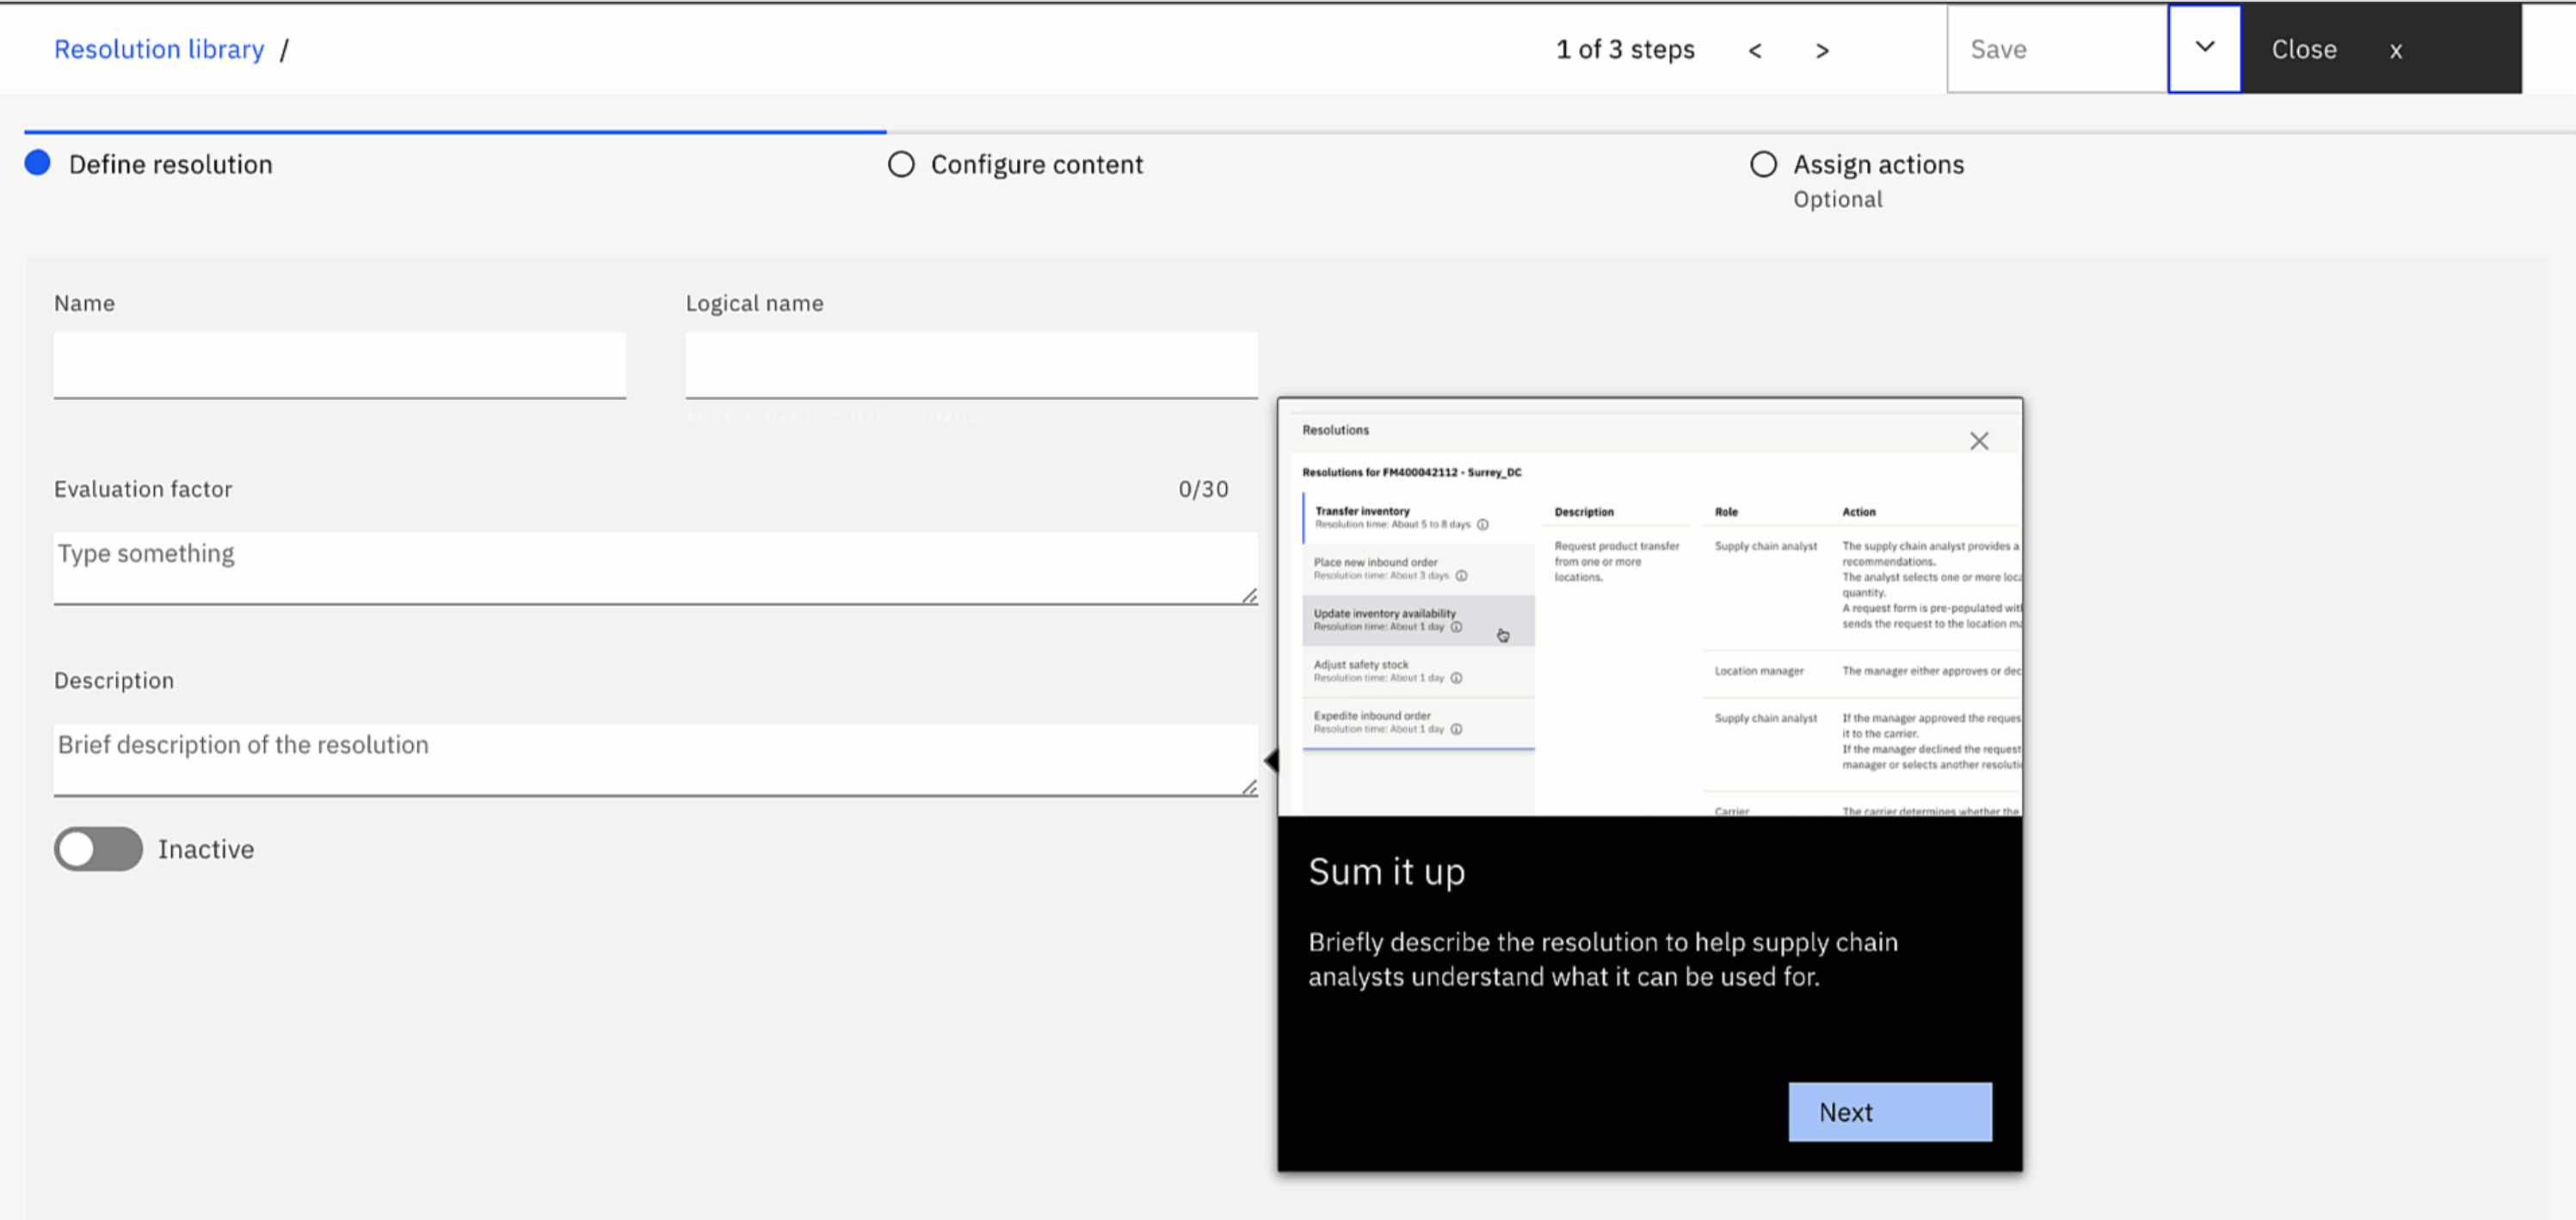
Enter a description for the resolution to help business analysts understand what it can be used for.
_Diagram 7: Describe the resolution to your users
-
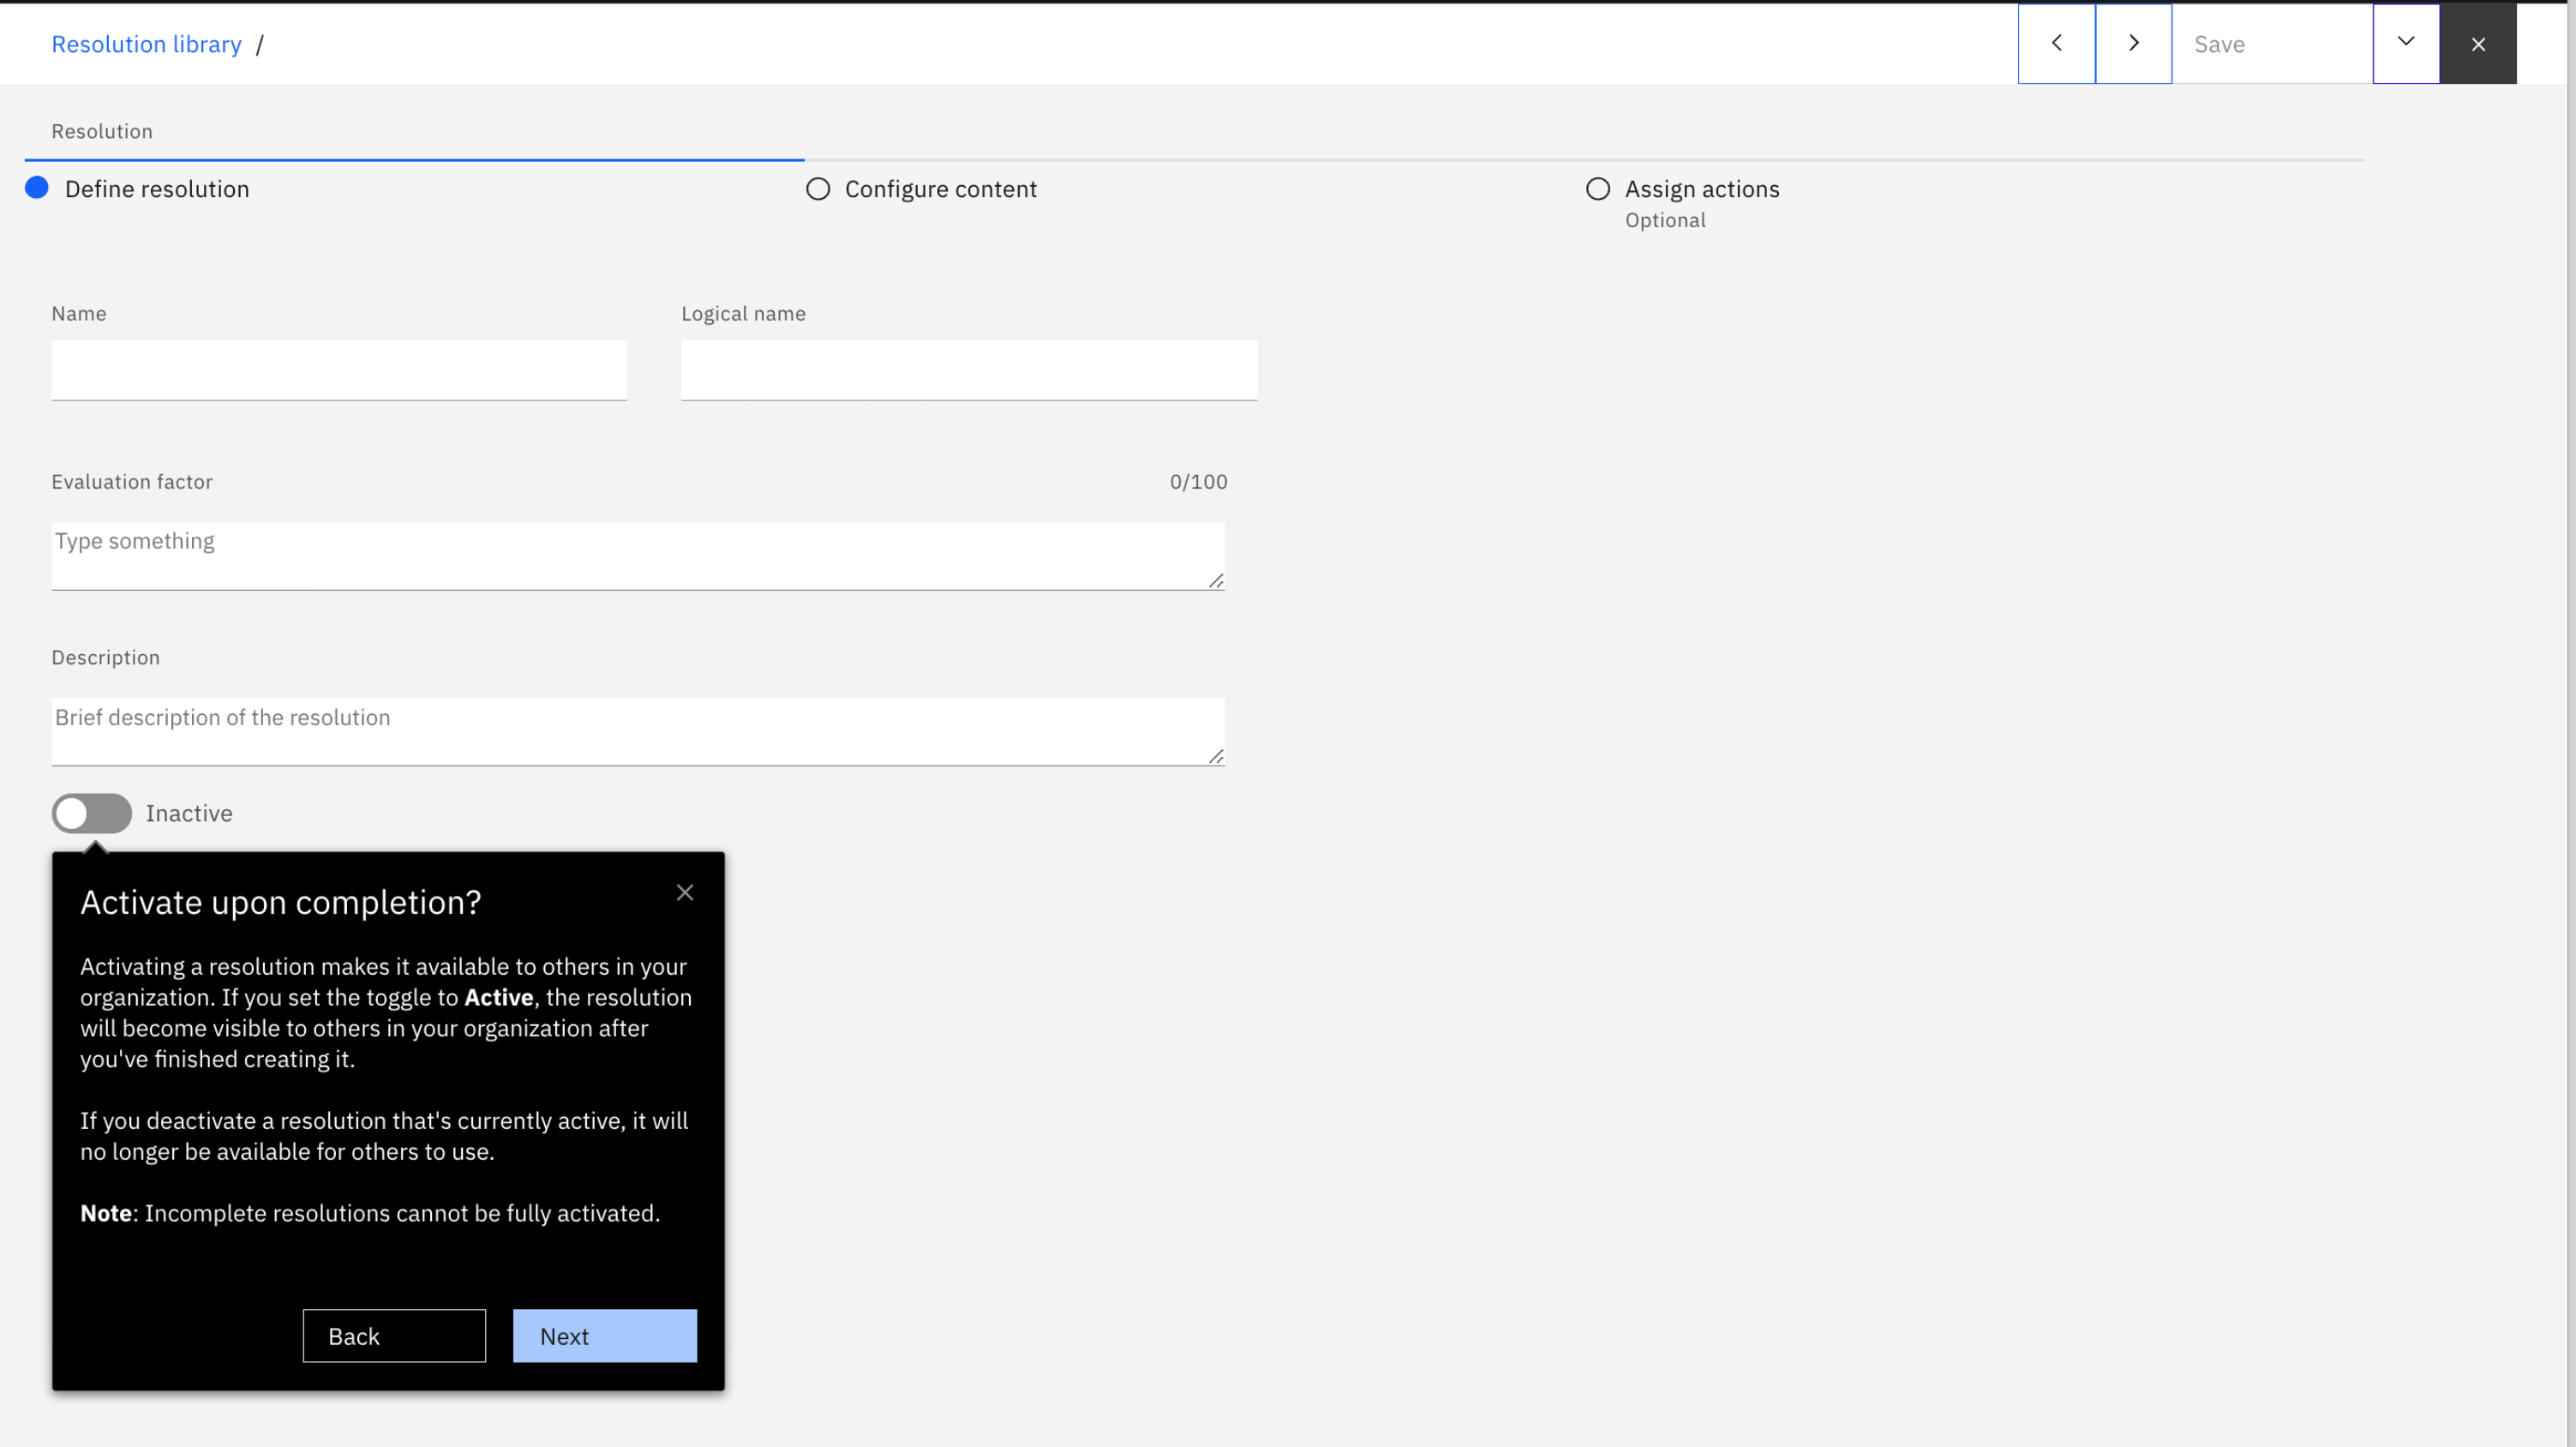
Optional: Activate the resolution by setting the toggle to Active. Activating a resolution makes it visible and available to others in your organization after you create it. Incomplete resolutions cannot be fully activated. If you deactivate a resolution that is currently active, it will no longer be available for others to use.
Diagram 8: Activate your resolution
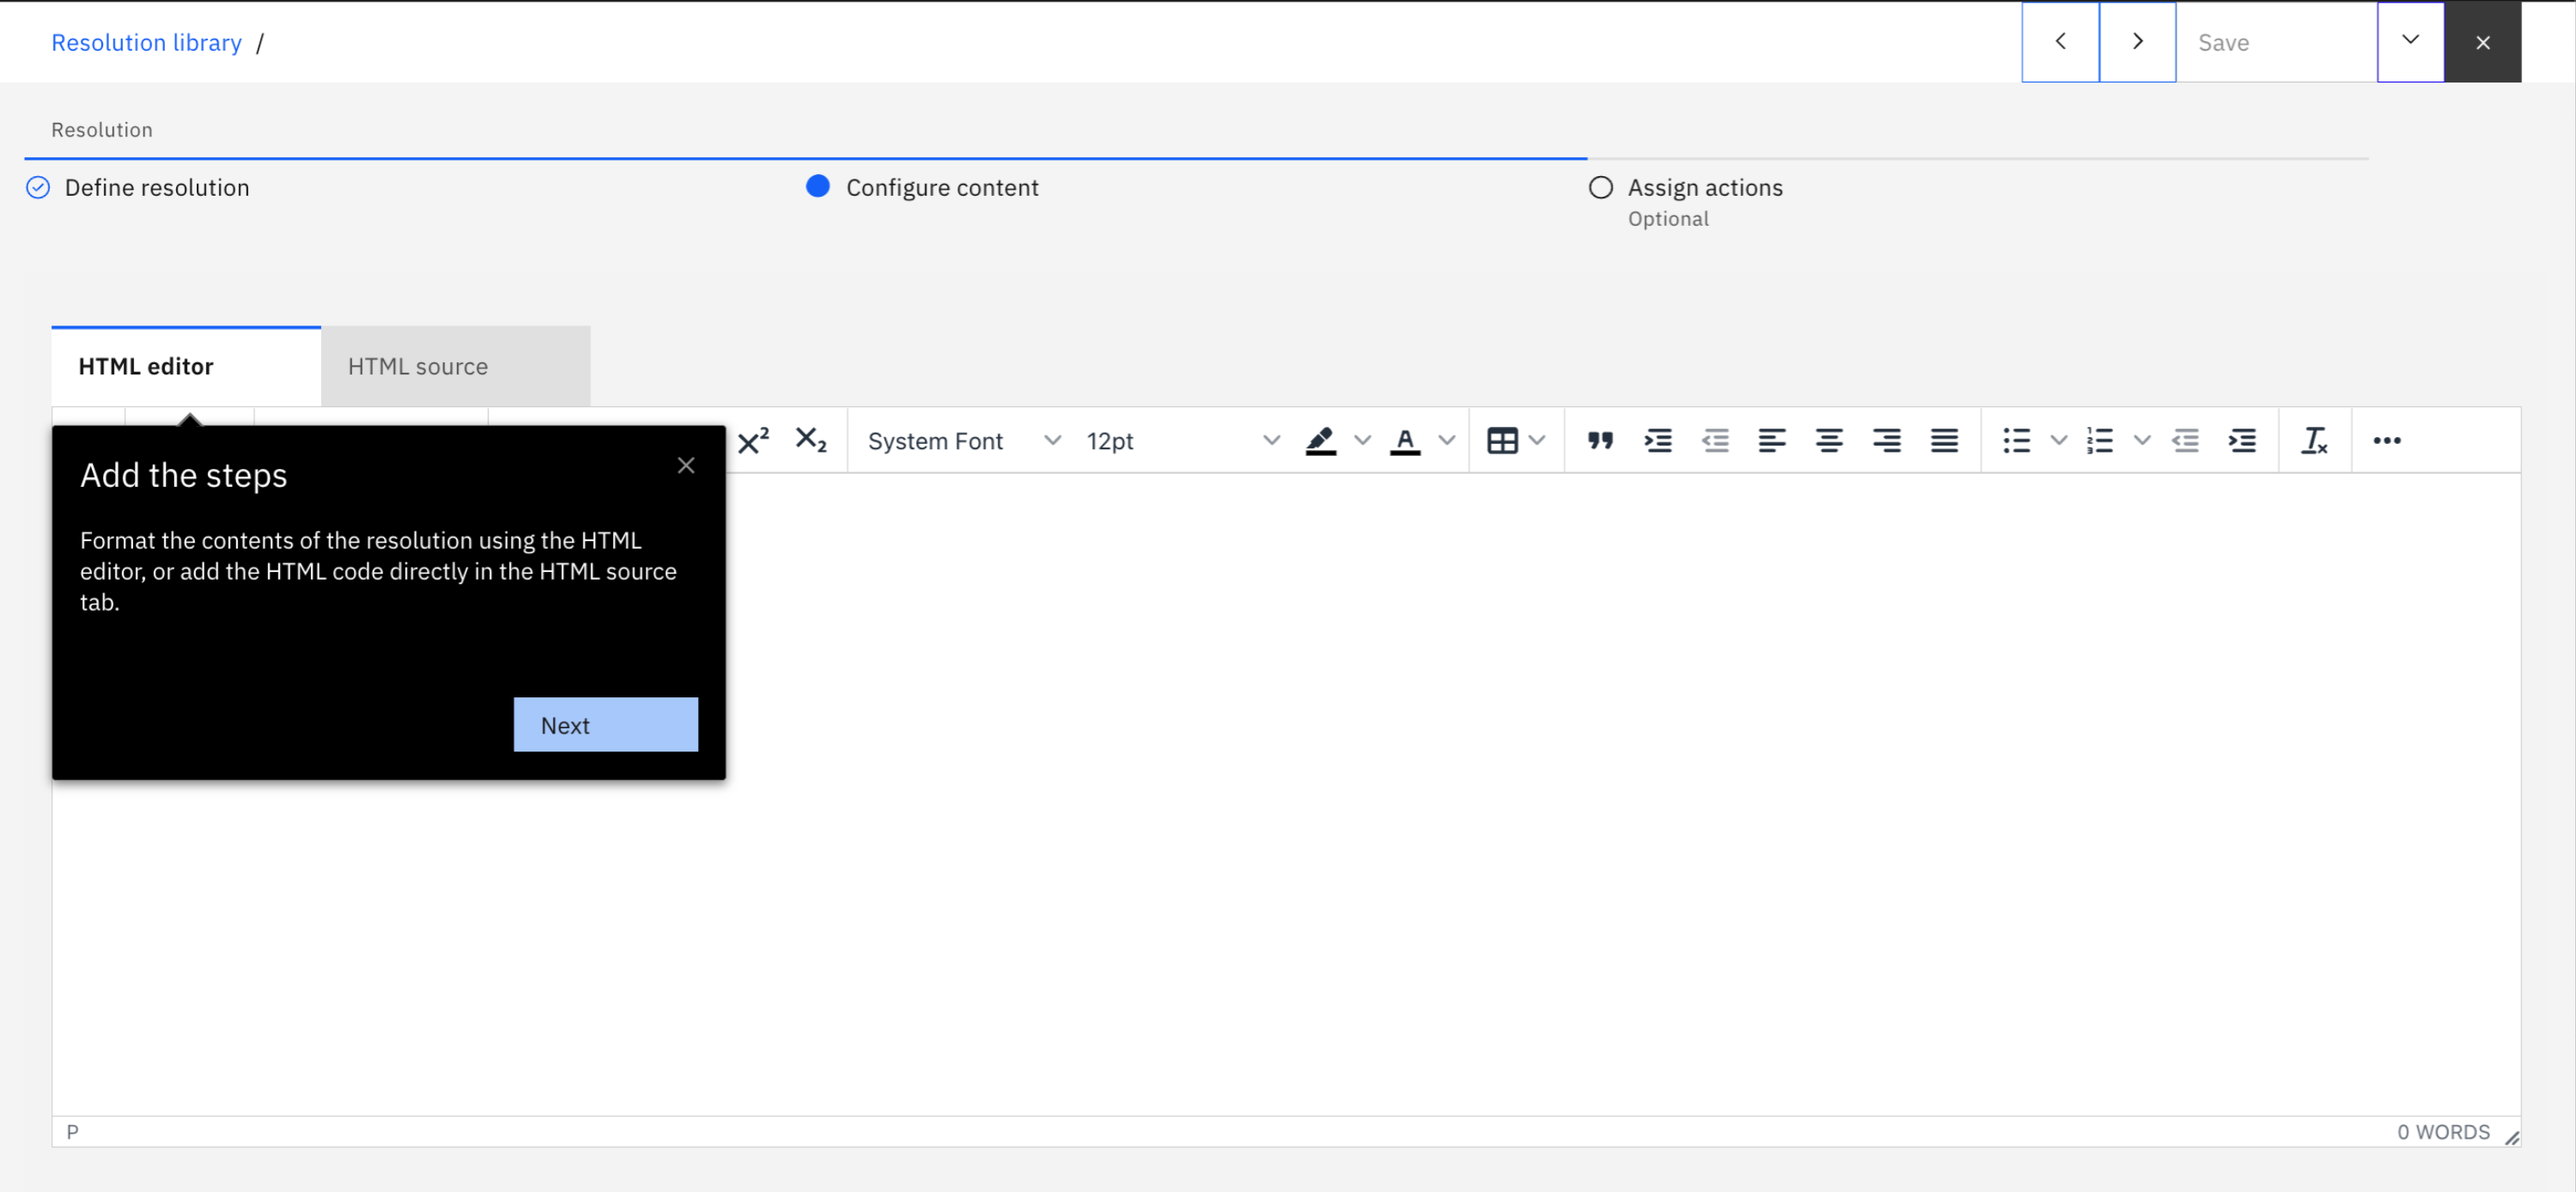
Add the steps for the resolution. Enter the contents of the resolution, either by:
-
Using the HTML editor tab, which is a rich text editor that lets you type and format your content in an easy and convenient way. Or,
-
Using the HTML source tab, which is a plain text HTML editor that lets you work directly with HTML to format your content.
Diagram 9: Provide your resolution content
-
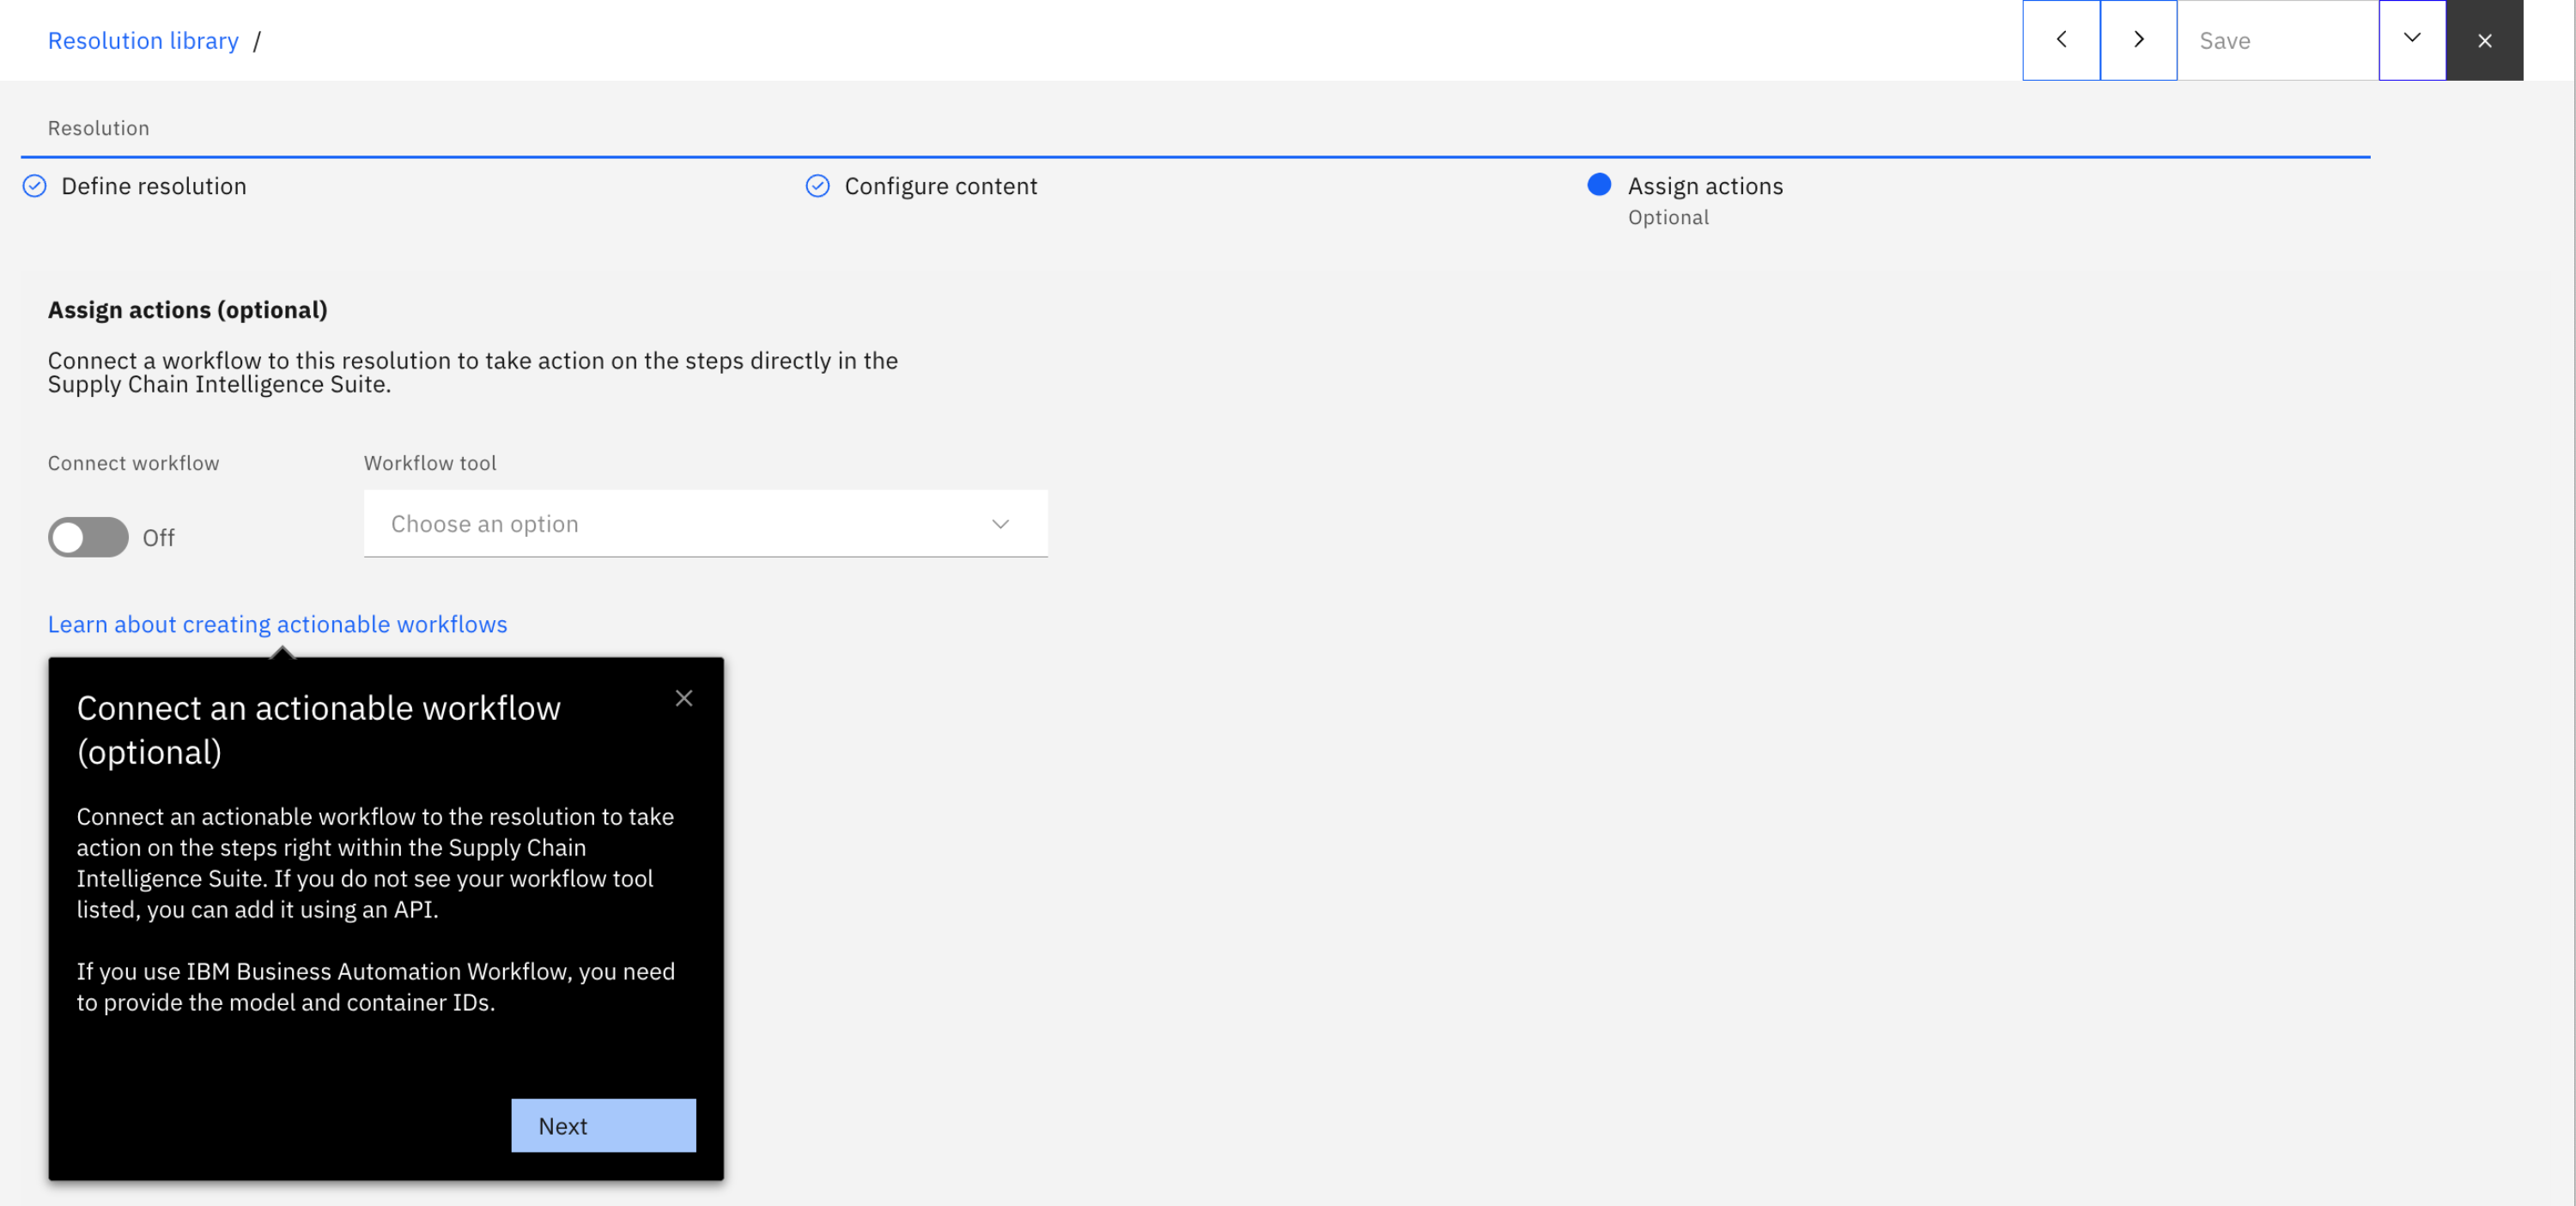
Toggle Connect workflow to connect an actionable workflow to the resolution. Then, select the workflow tool to apply to the action and resolution. If you do not see your workflow tool listed, you can add it by using an API.
-
If you use IBM Business Automation Workflow, you need to provide the model and container IDs.
Diagram 10: Assign actions
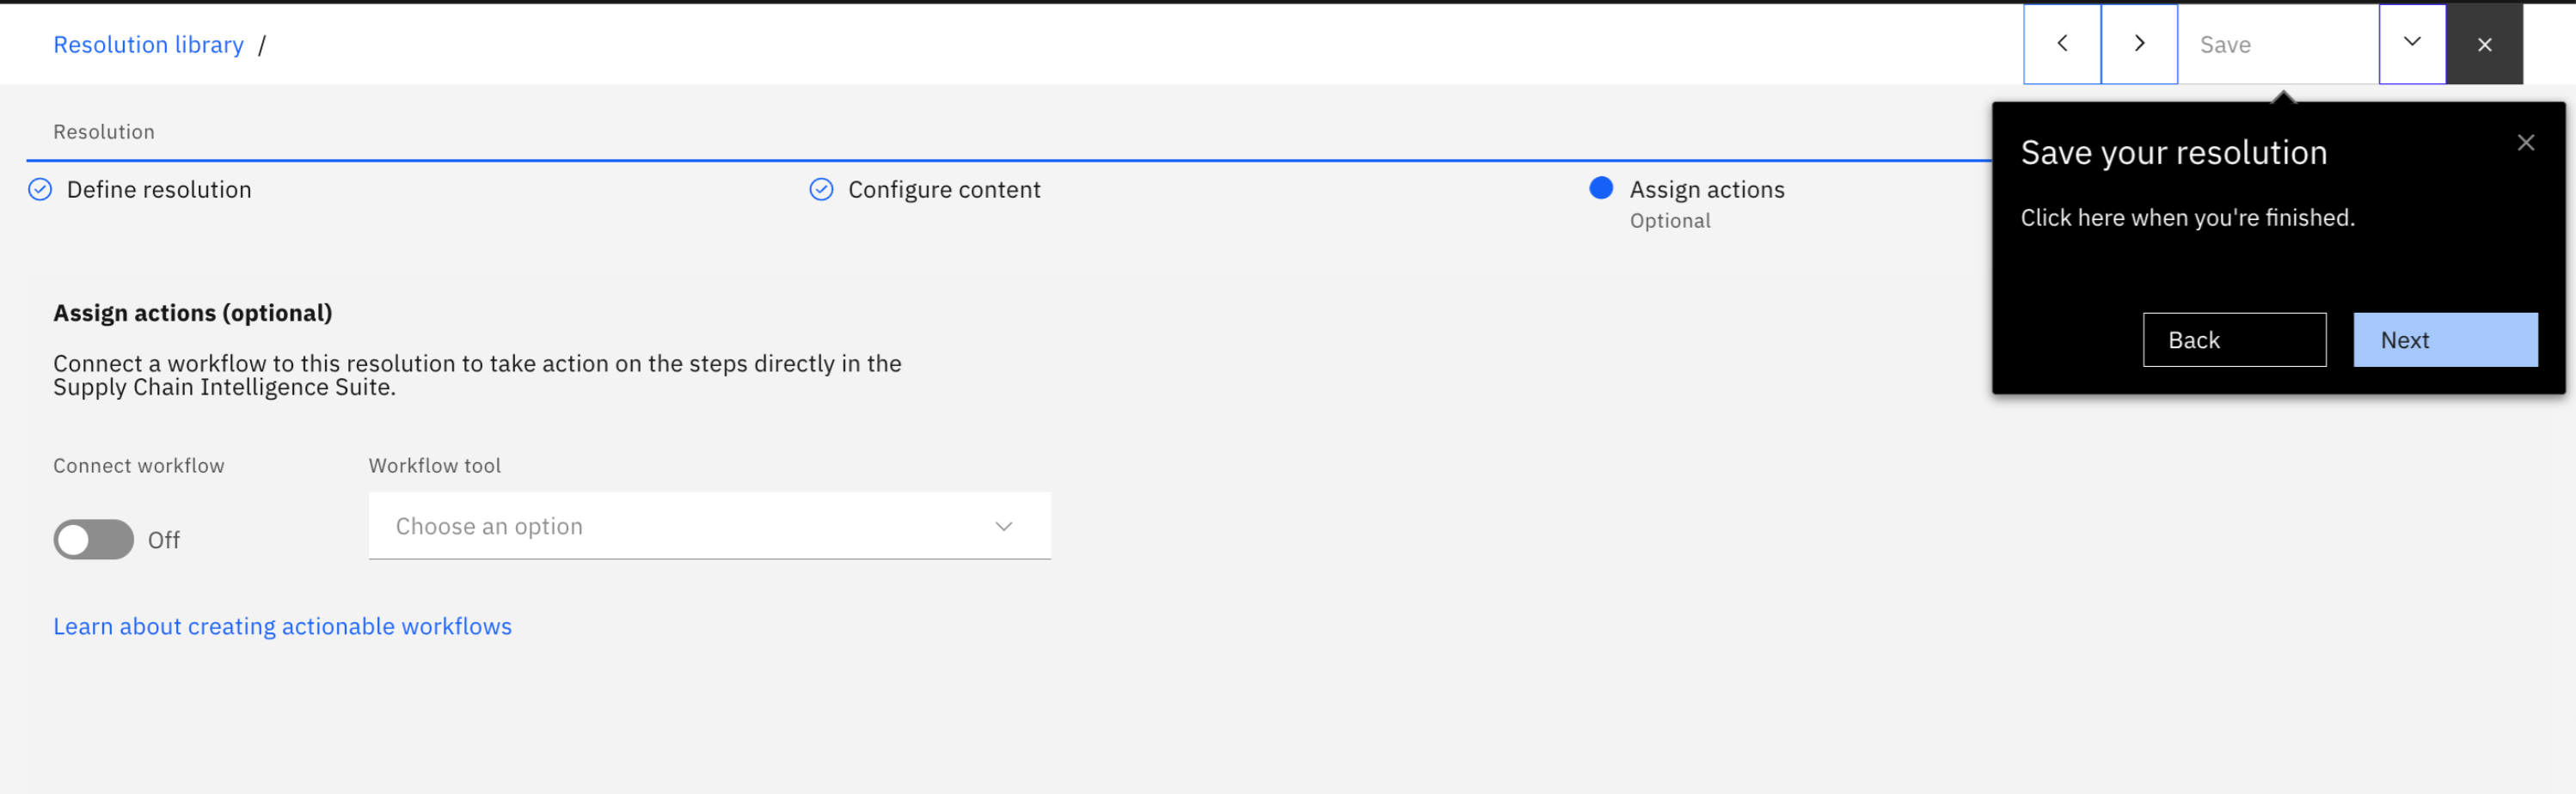
Finally, click Save to save the resolution.
Diagram 11: Save your resolution
Your work queue is now ready to be activated! Add it to you Work Queues and then go to the Work Queues section of the Intelligence Suite and test your resolution as a general user would use it.
-
Extending and creating custom actionable workflows
There are two types of resolutions: best practice recommendations and actionable workflows. Both resolution types contain information about each step that is required to complete a resolution, but actionable workflows allow you and other users in your organization to take action directly within the Intelligence Suite. Sample best practice resolutions are provided as starting points. You can extend and customize the samples or create new resolutions to address custom business needs.
-
Extending and creating a custom research assistant experience
The Watson Research Assistant is a resource that can help you resolve work items in your work queues. You can build your own dialog skills and have the assistant support your skills, so that the assistant can answer questions or requests that are specific to your business needs.