Extending and creating custom work queues
A work queue consists of a list of potential issues that users can easily review, assign, and address. These issues are automatically identified and prioritized by the platform based on configuration by your organization administrator during onboarding, and can be updated as needed. When you star a work queue, it appears on the Overview tab of the Dashboard so that you can easily access it.
For more information about how to use work queues as a general user, see the Work queues topic in the IBM Documentation site.
Sample work queues, resolutions, and actionable workflows are provided as starting points. You can extend and customize the samples or create new ones to pinpoint and address custom business needs. The following section describes how to extend the suite to meet your custom business requirements.
For more information about creating, updating, and deleting work queues via API, see IBM API Hub.
In addition to using the developer APIs to create and maintain your work queues, you'll also soon be able to build and customize them directly in the Intelligence Suite.
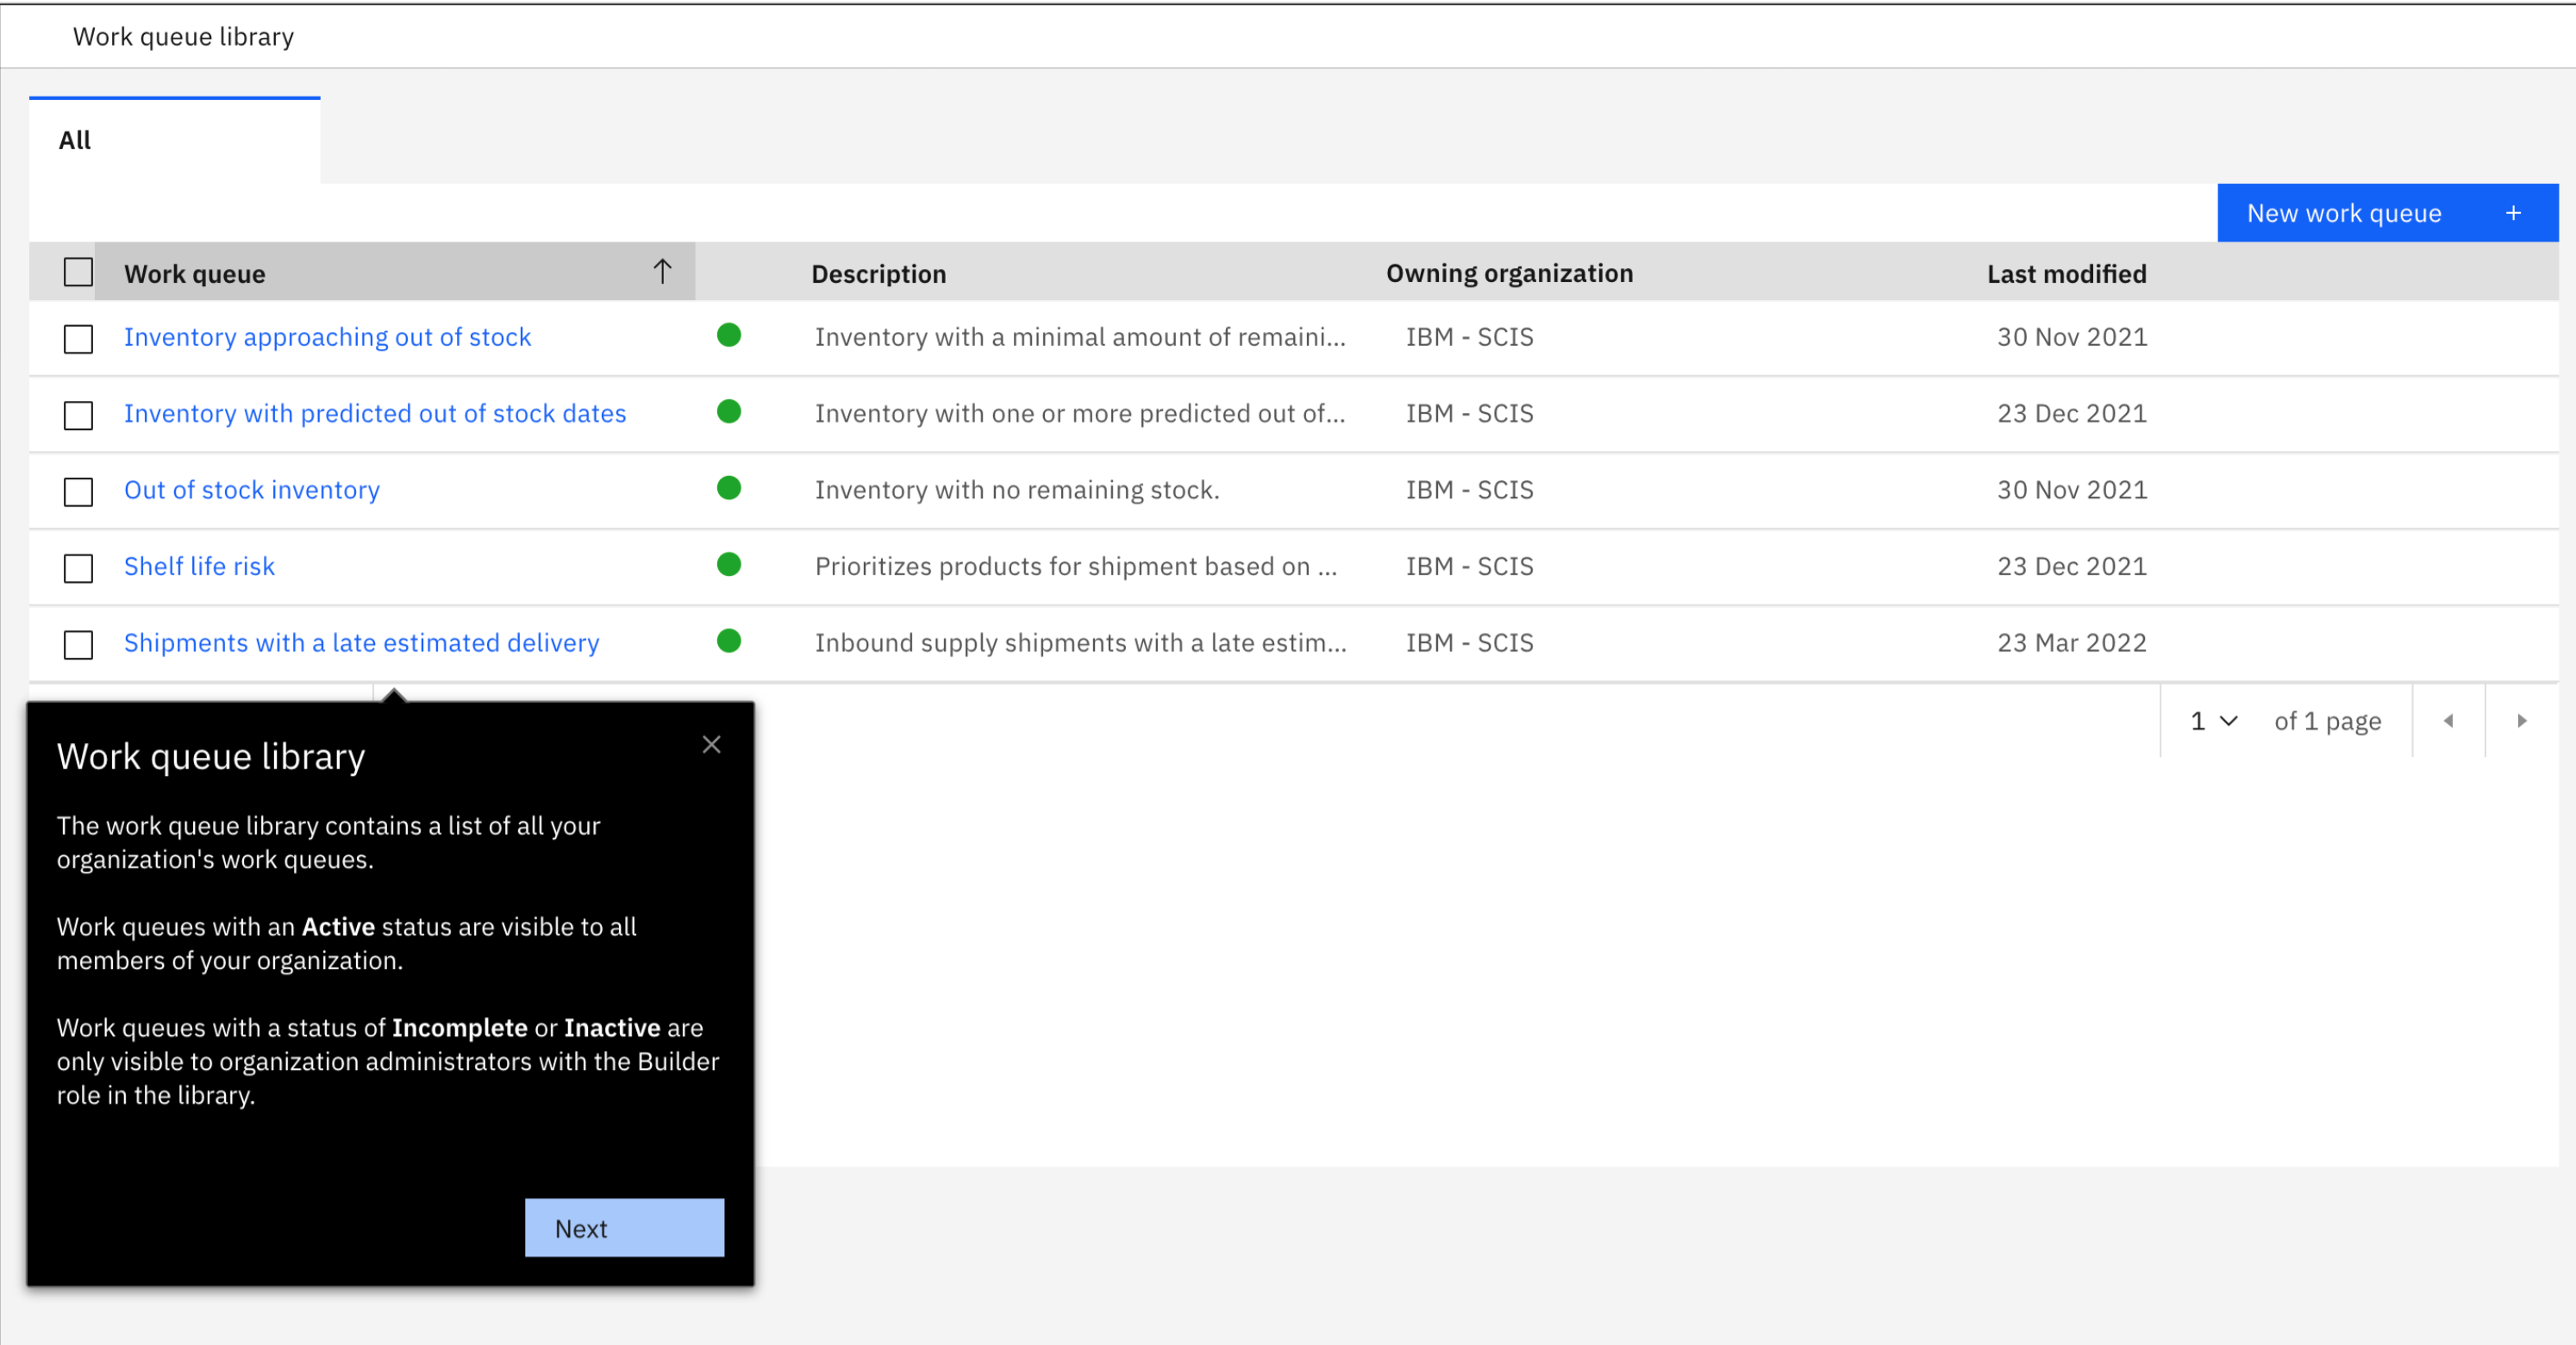
The work queue library contains a list of all your organization's work queues. Work queues with an Active status are visible to all members of your organization. Work queues with the status of Incomplete or Inactive are only visible to organization administrators with Builder and Administrator roles.
Diagram 1: Listing your organization's work queues
> Next step (customizing existing work queues)
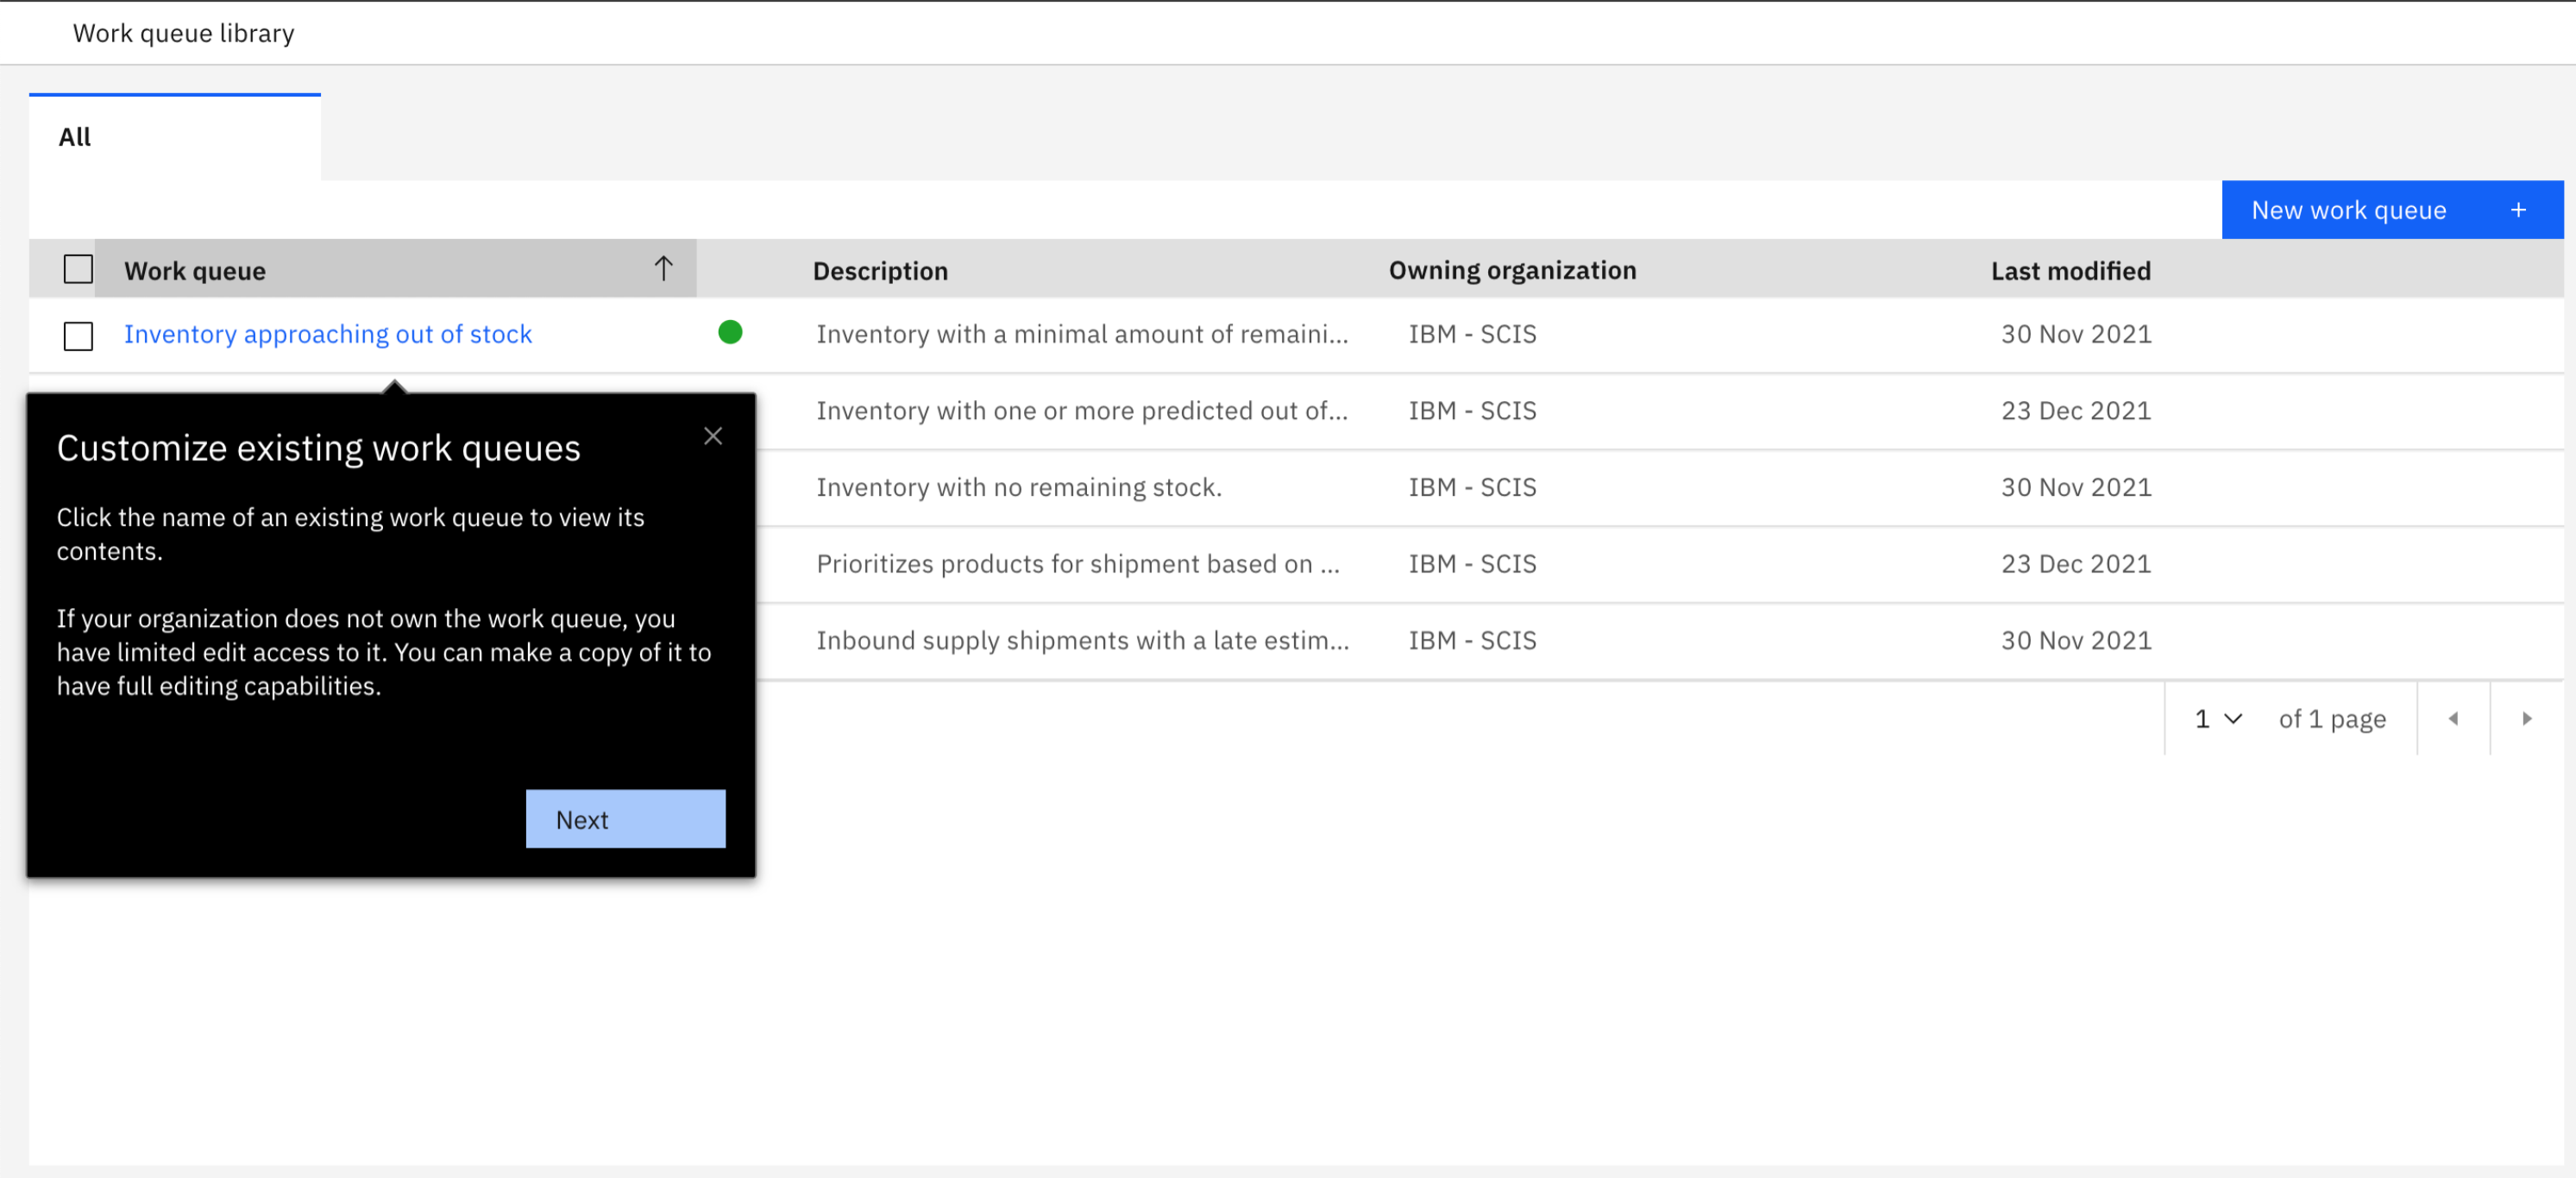
Click the name of an existing work queue to view its contents. If your organization does not own the work queue, you have limited edit access to it. You can make a copy of it to have full editing capabilities.
Diagram 2: Customizing or viewing existing work queues
> Next step (creating new work queues)
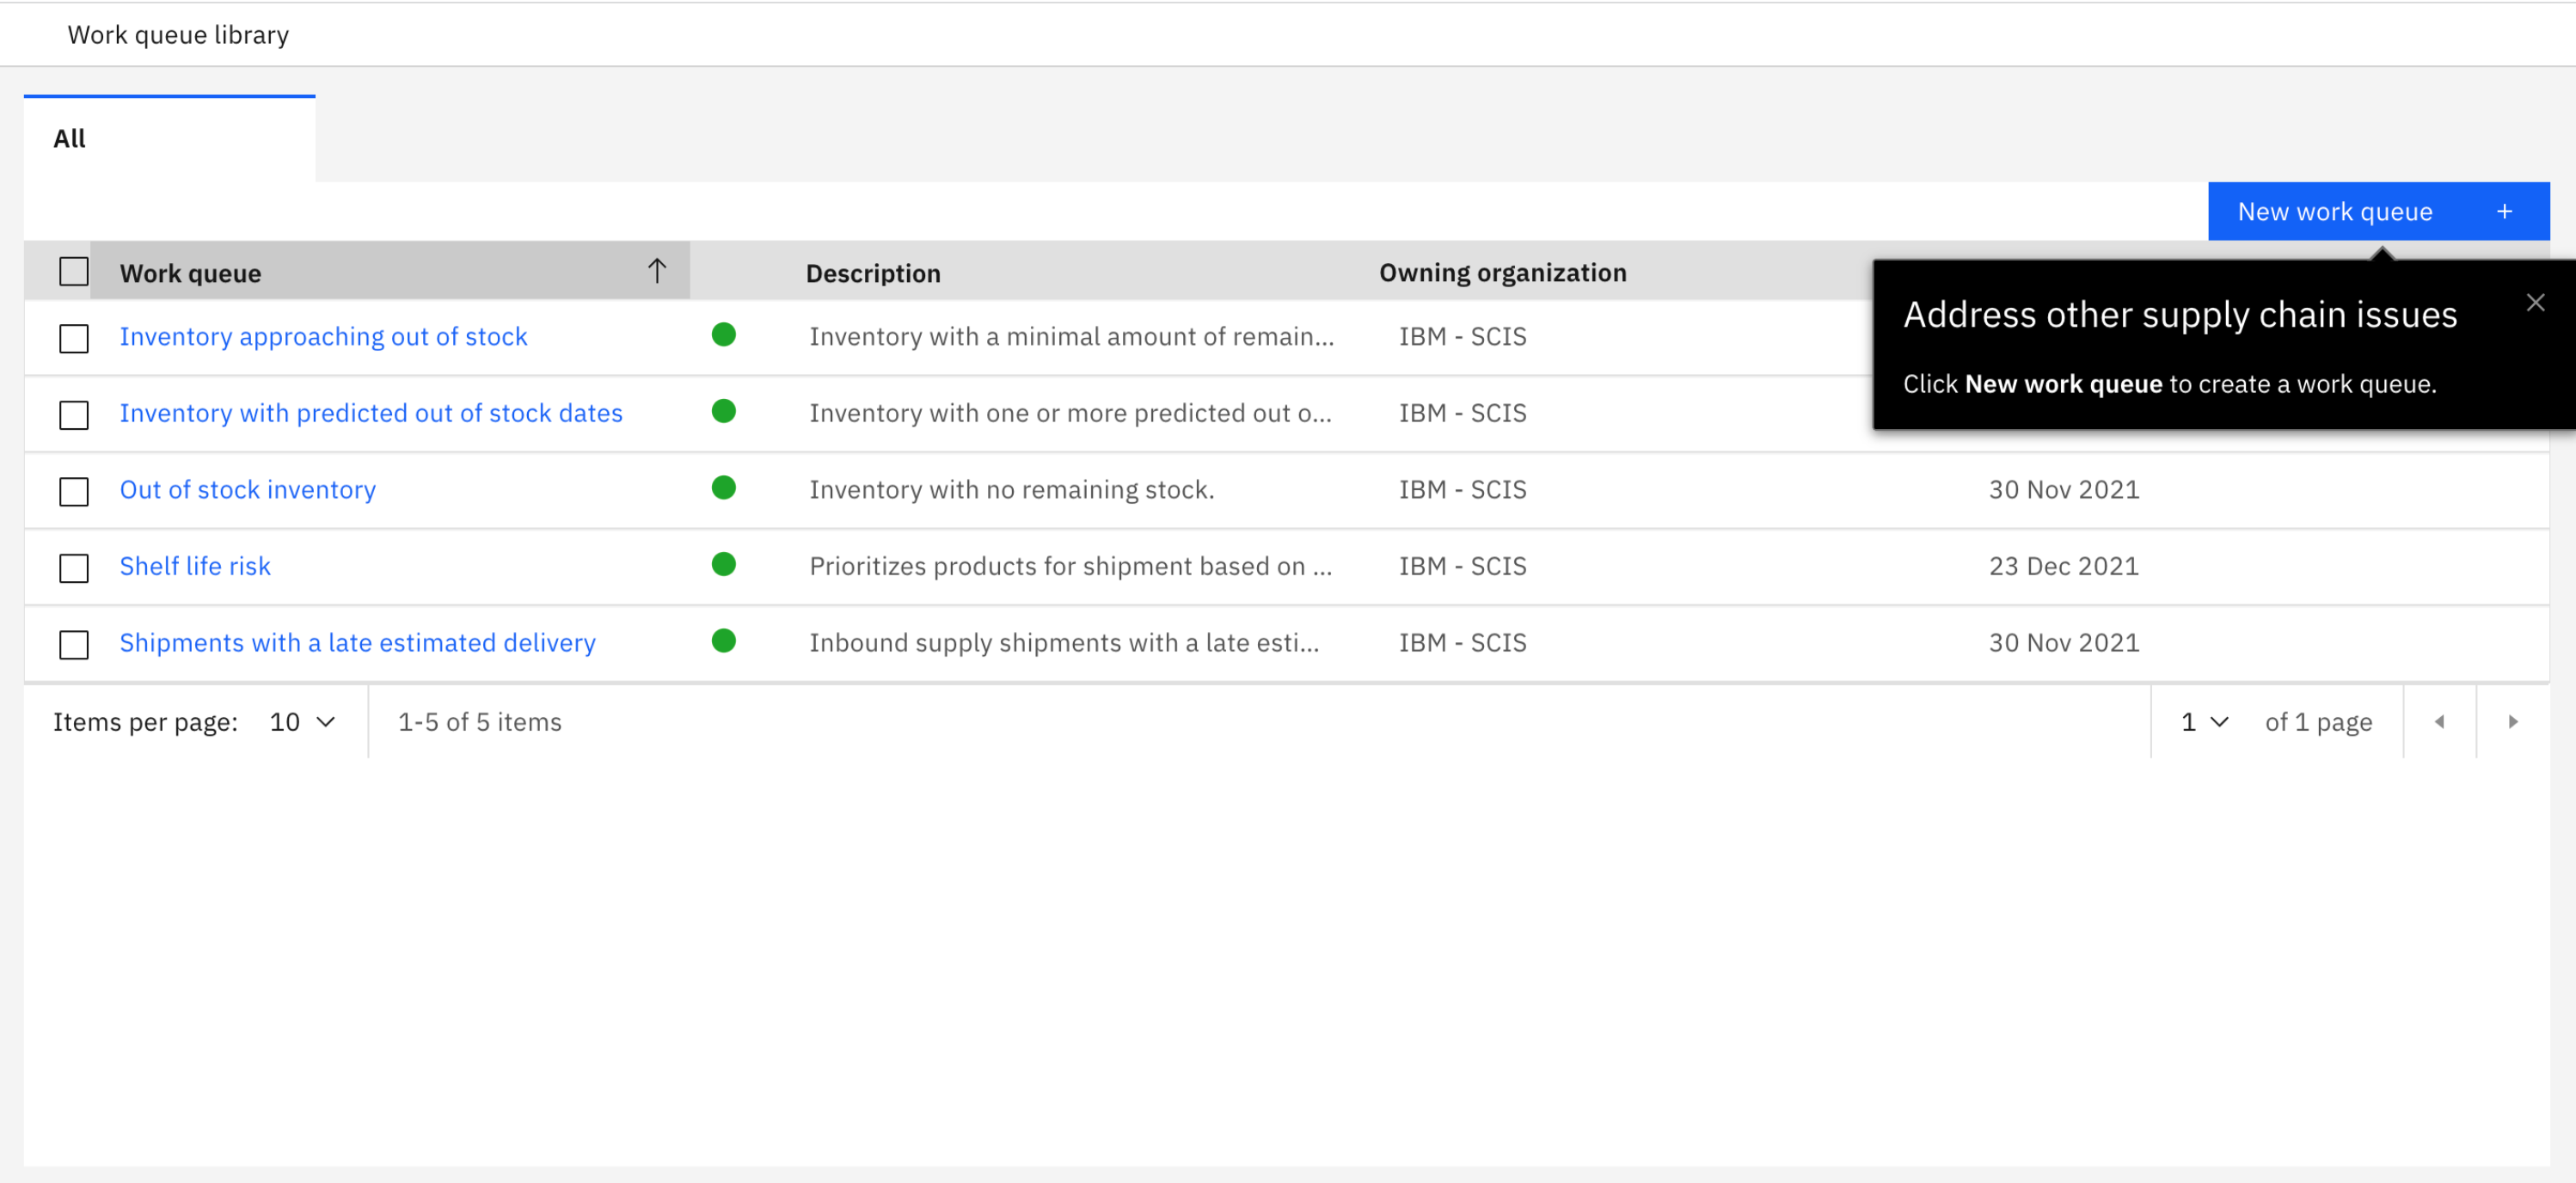
To create a work queue, you must define the work queue, configure its criteria, preview the work queue, and then configure its resolution page.
Diagram 3: Creating a new work queue
> Next step (defining the queue)
-
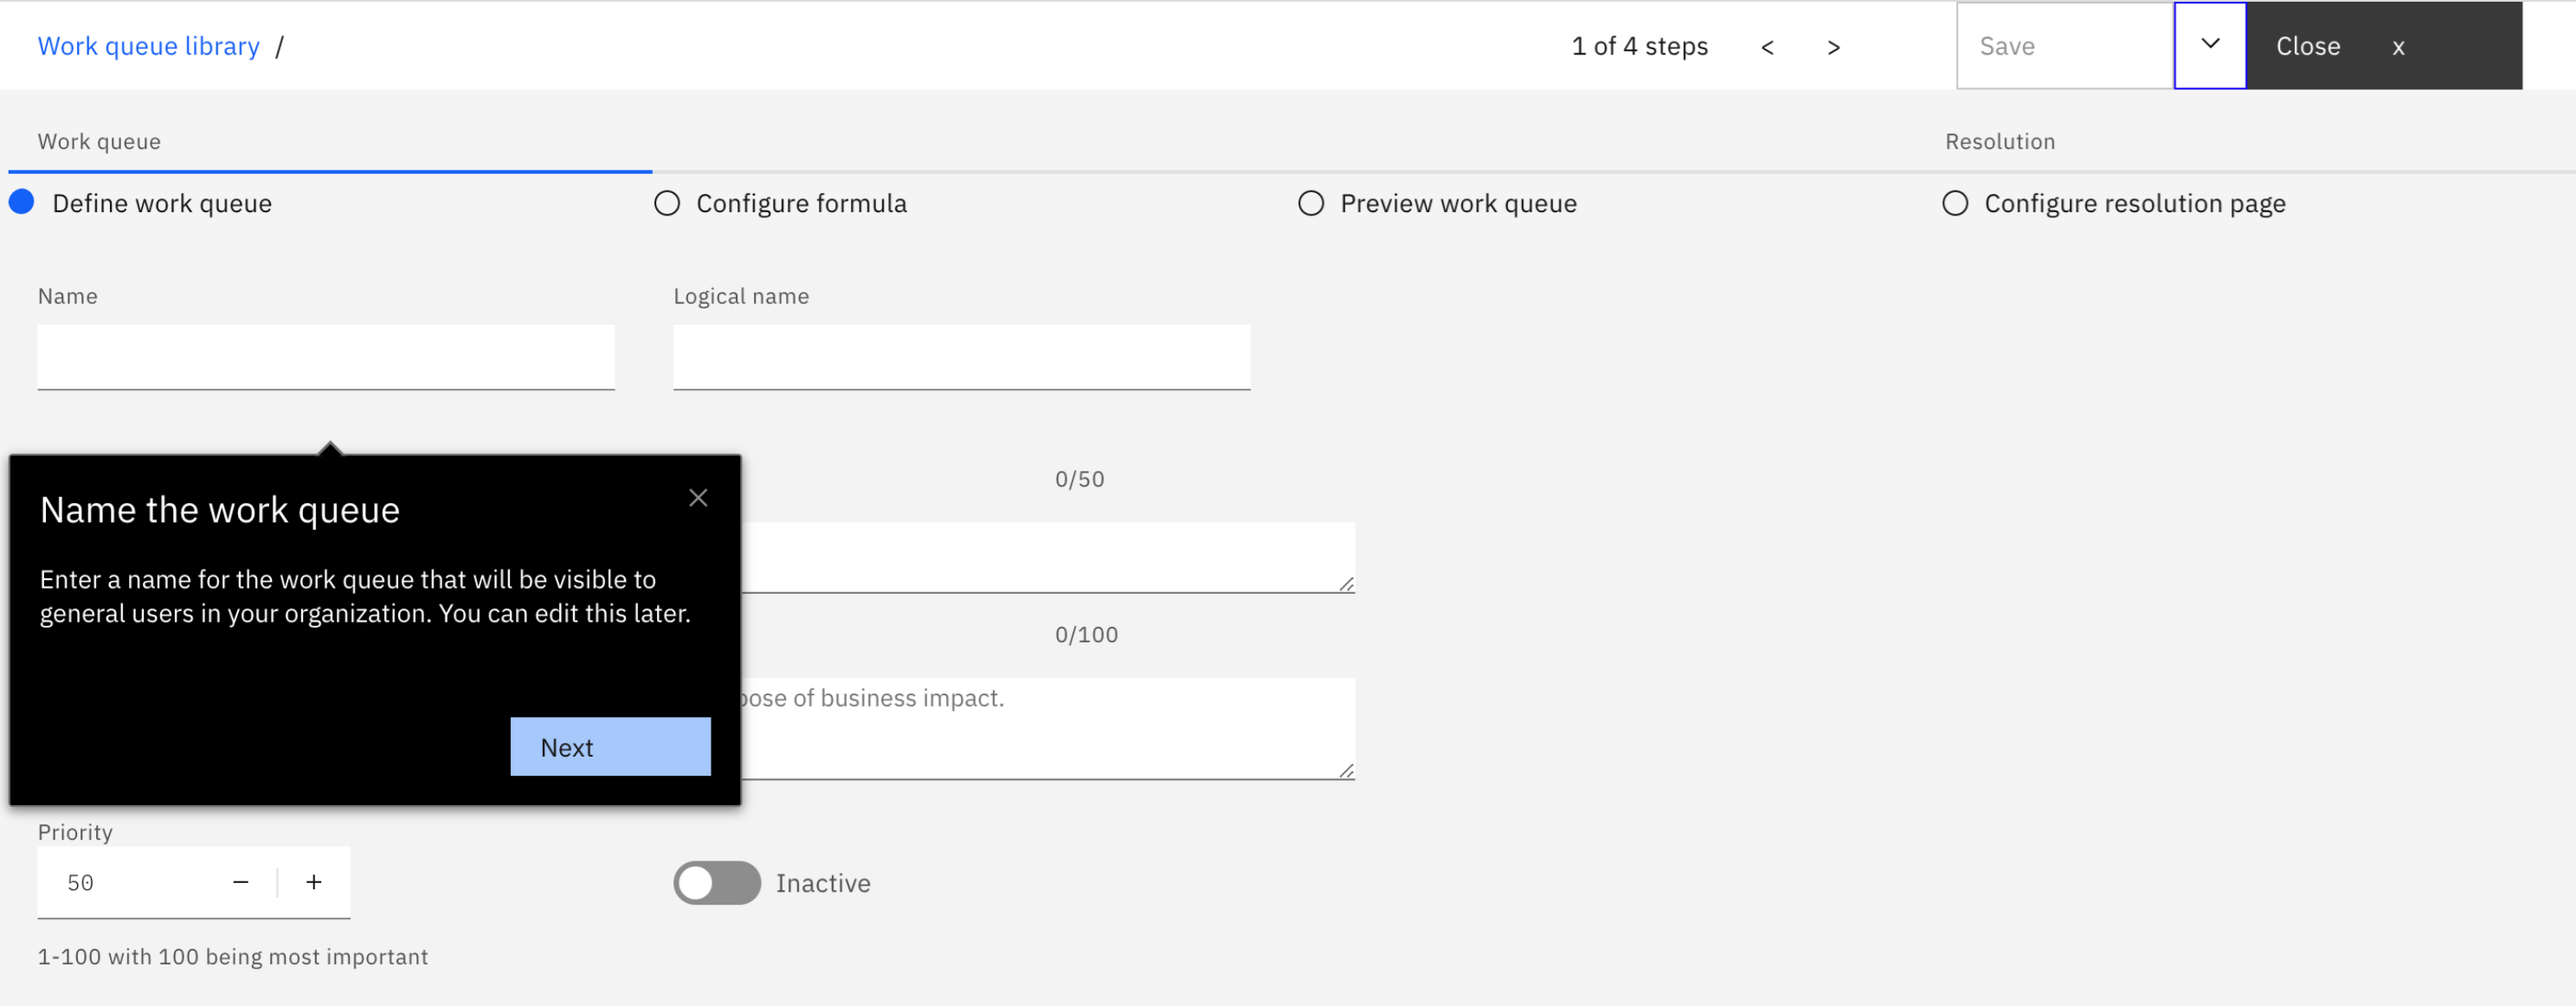
Enter a name for the work queue that will be visible to general users in your organization. You can edit this later.
Diagram 4: Give your new work queue a name
-
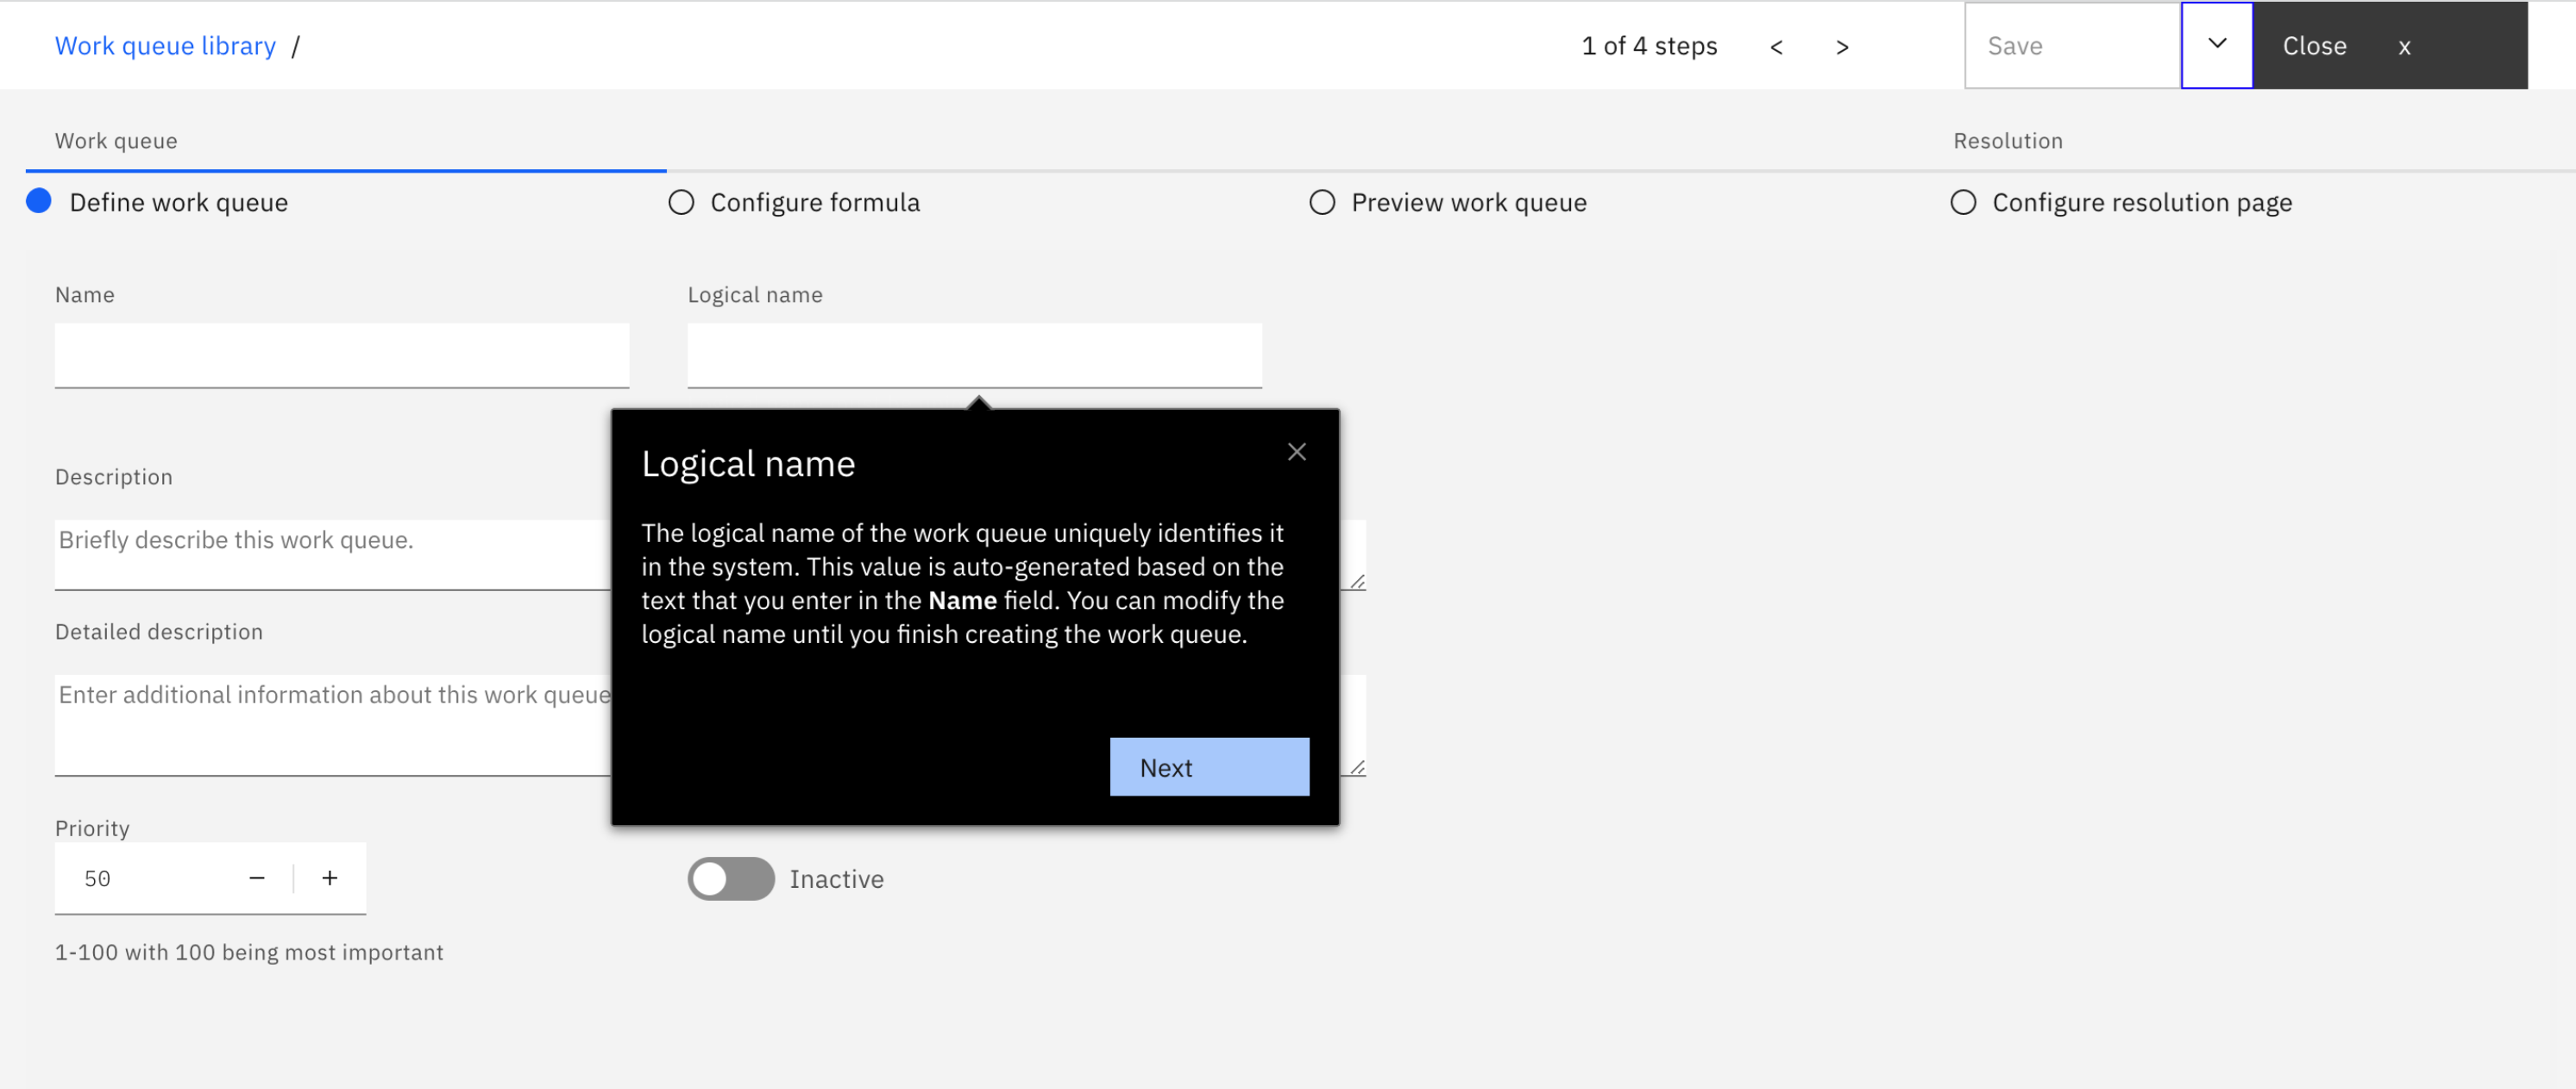
Review the logical name for reference. The logical name of the work queue uniquely identifies it in the system. This value is automatically generated based on the text that you enter in the name field, but you can change the logical name up until you save the work queue for the first time. The logical name must be a unique name.
Diagram 5: Give your work queue a logical name
-
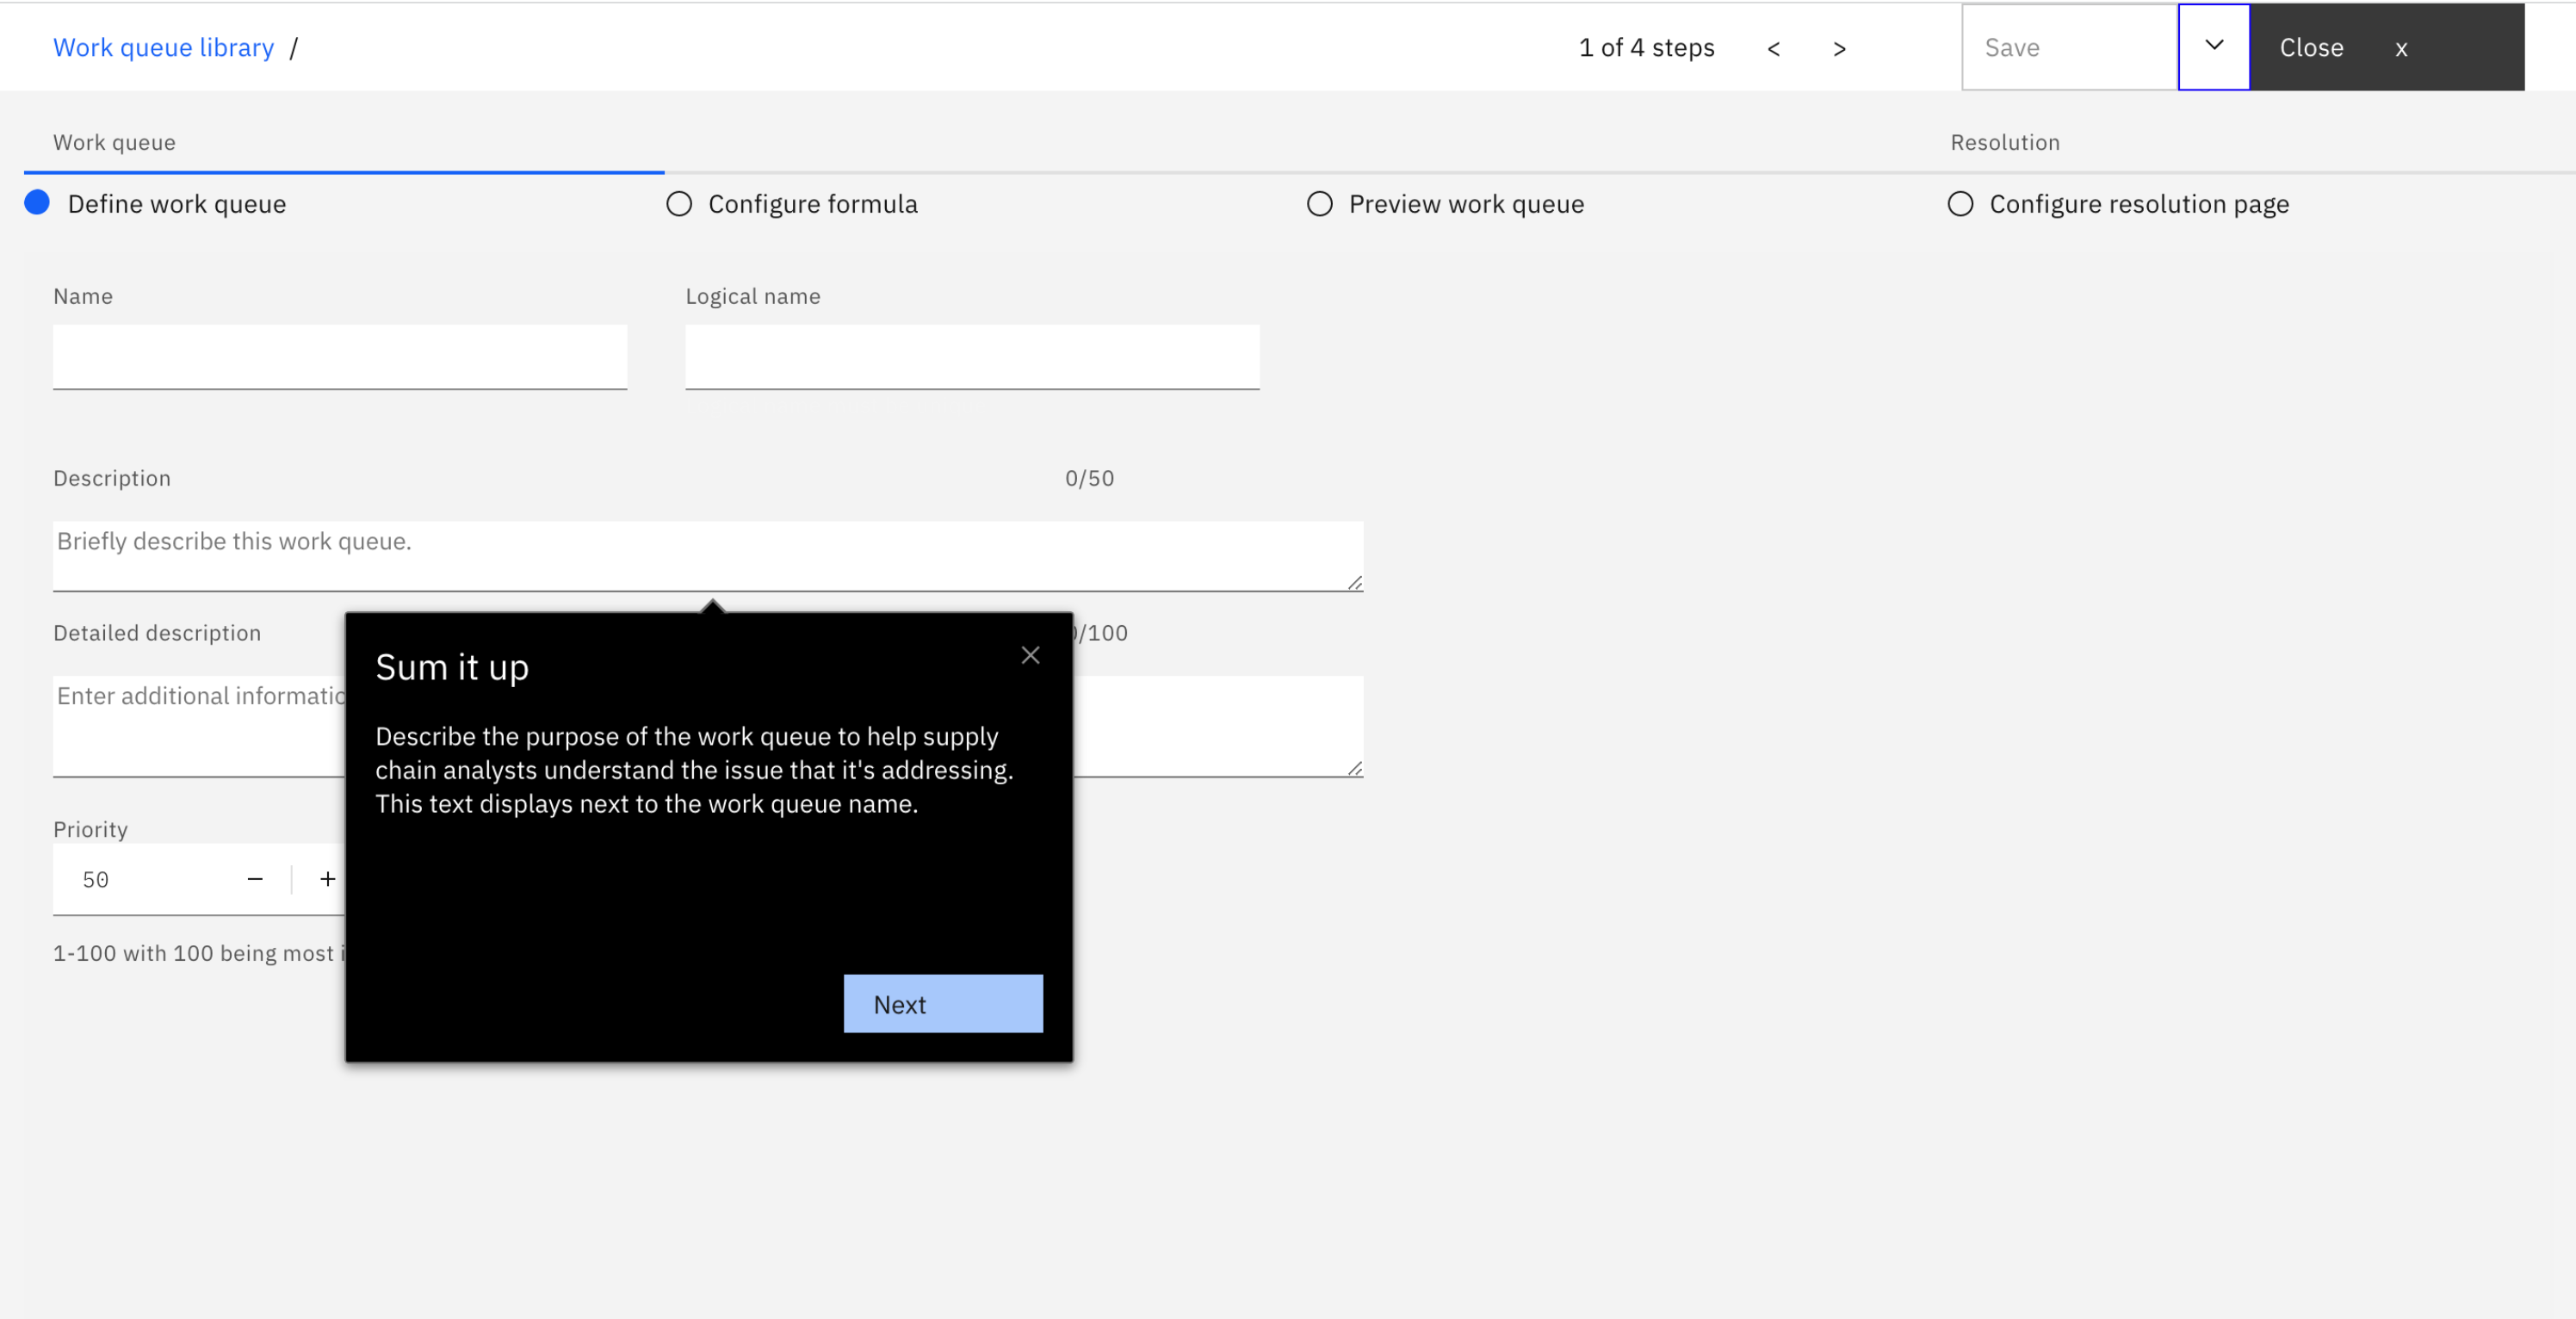
Enter a description for the work queue to help your users understand the issue that it is addressing. This text displays next to the work queue name in the work queue list and starred queues list for your general users.
Diagram 6: Describe your work queue to your users
-
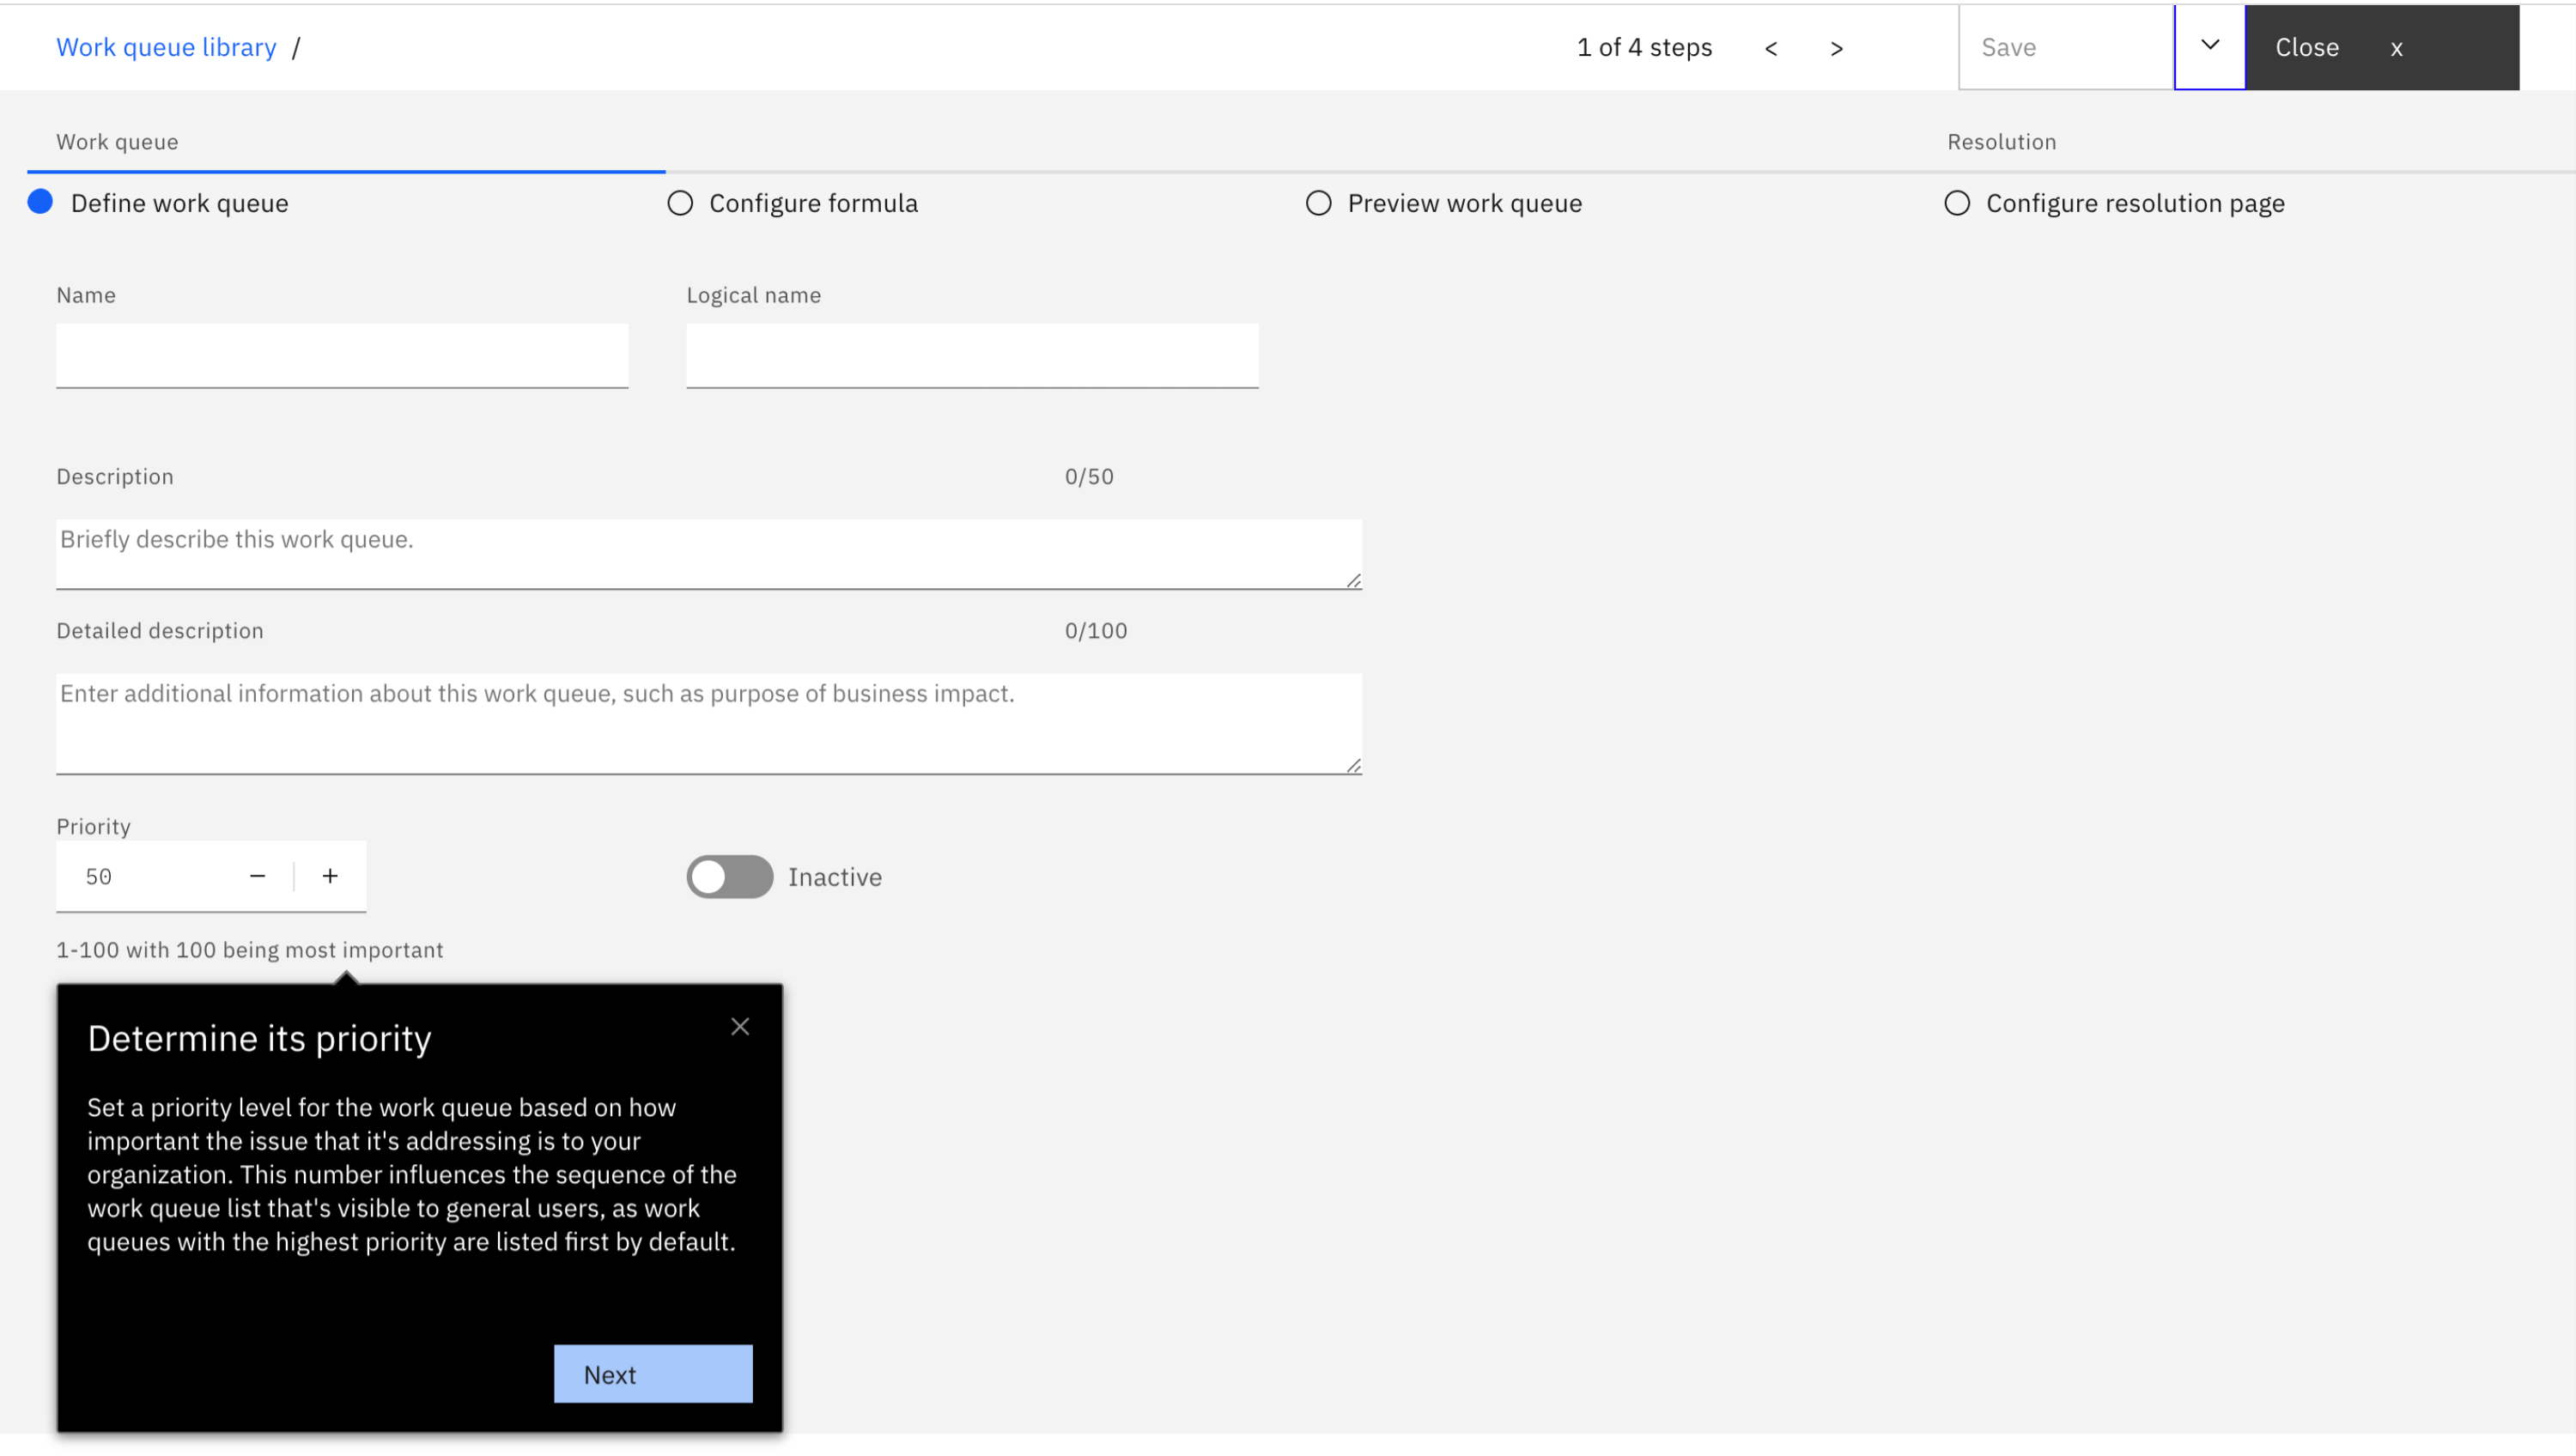
Set a priority level for the work queue based on how important the issue that it is addressing is to your organization. This number influences the sequence of the work queue list that is visible to general users. Work queues with the highest priority are listed first by default.
Diagram 7: Prioritize your work queue
-
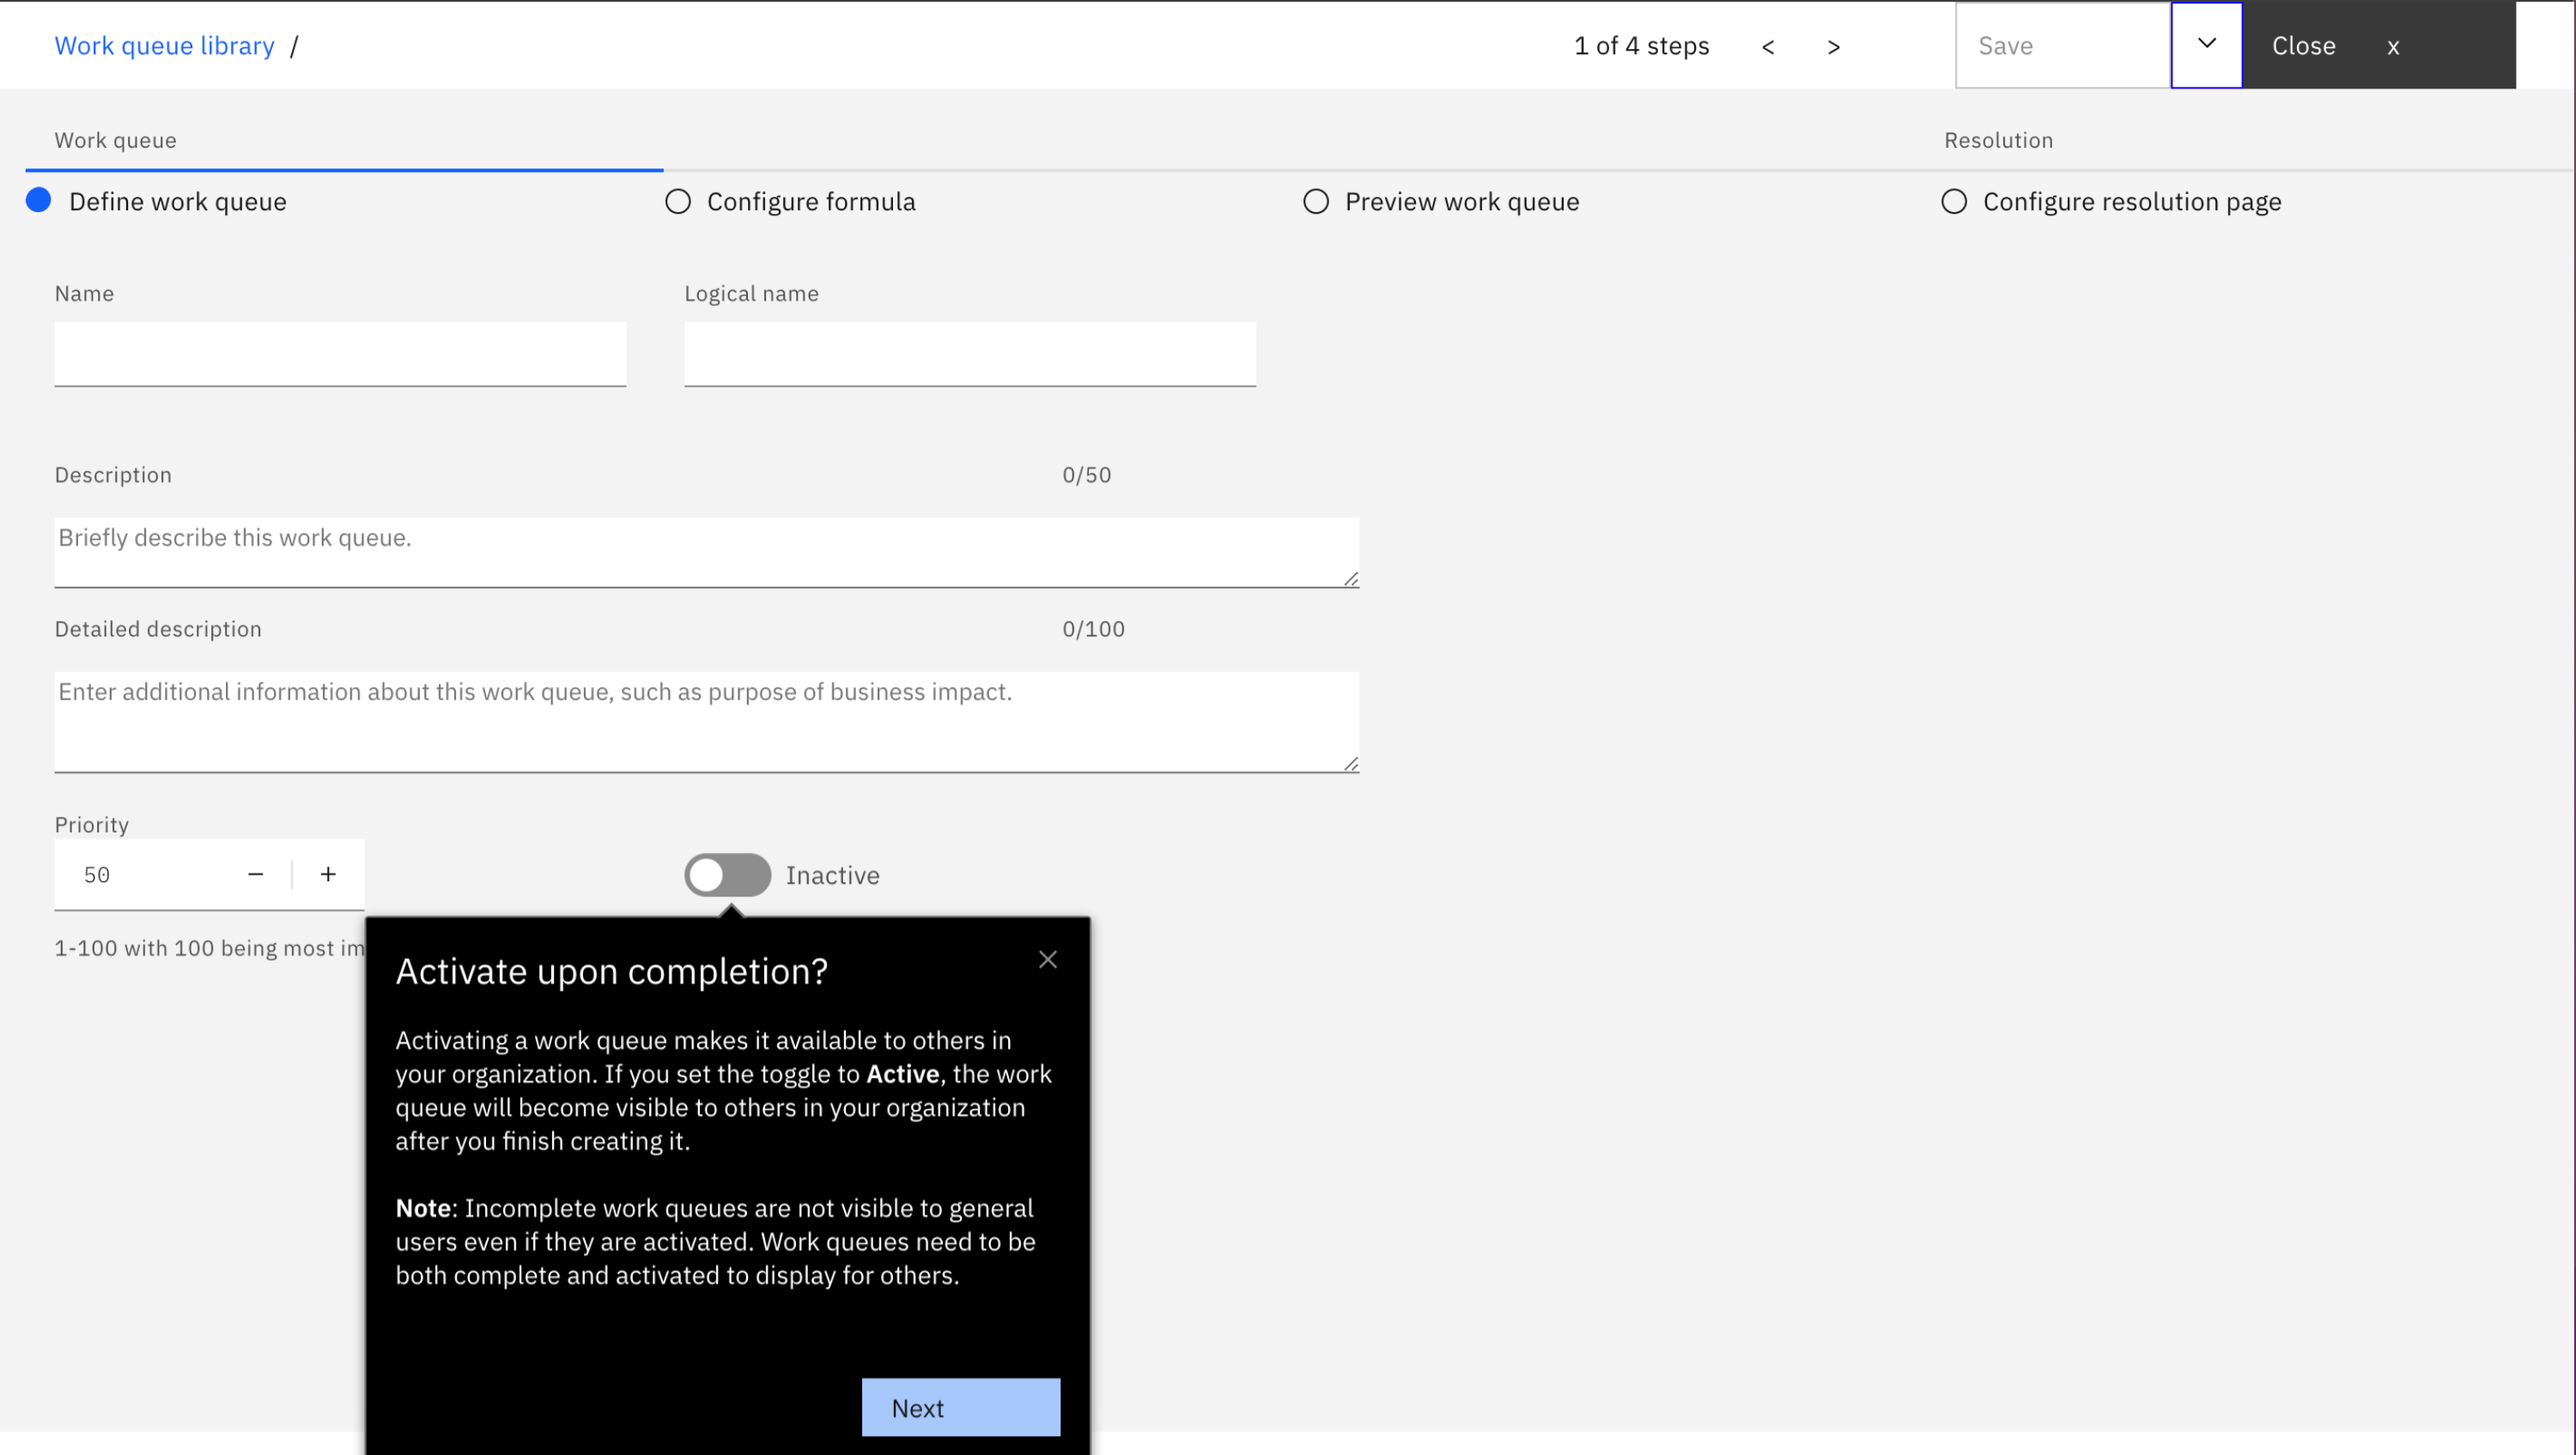
Optional: Activate the work queue by setting the toggle to Active. Activating a work queue makes it visible and available to others in your organization after you create it. Incomplete work queues are not visible to general users even if they are activated. Work queues must be both complete and activated to display for others. If you deactivate a work queue that is currently active, it will no longer be available for others to use.
Diagram 8: Activate your work queue
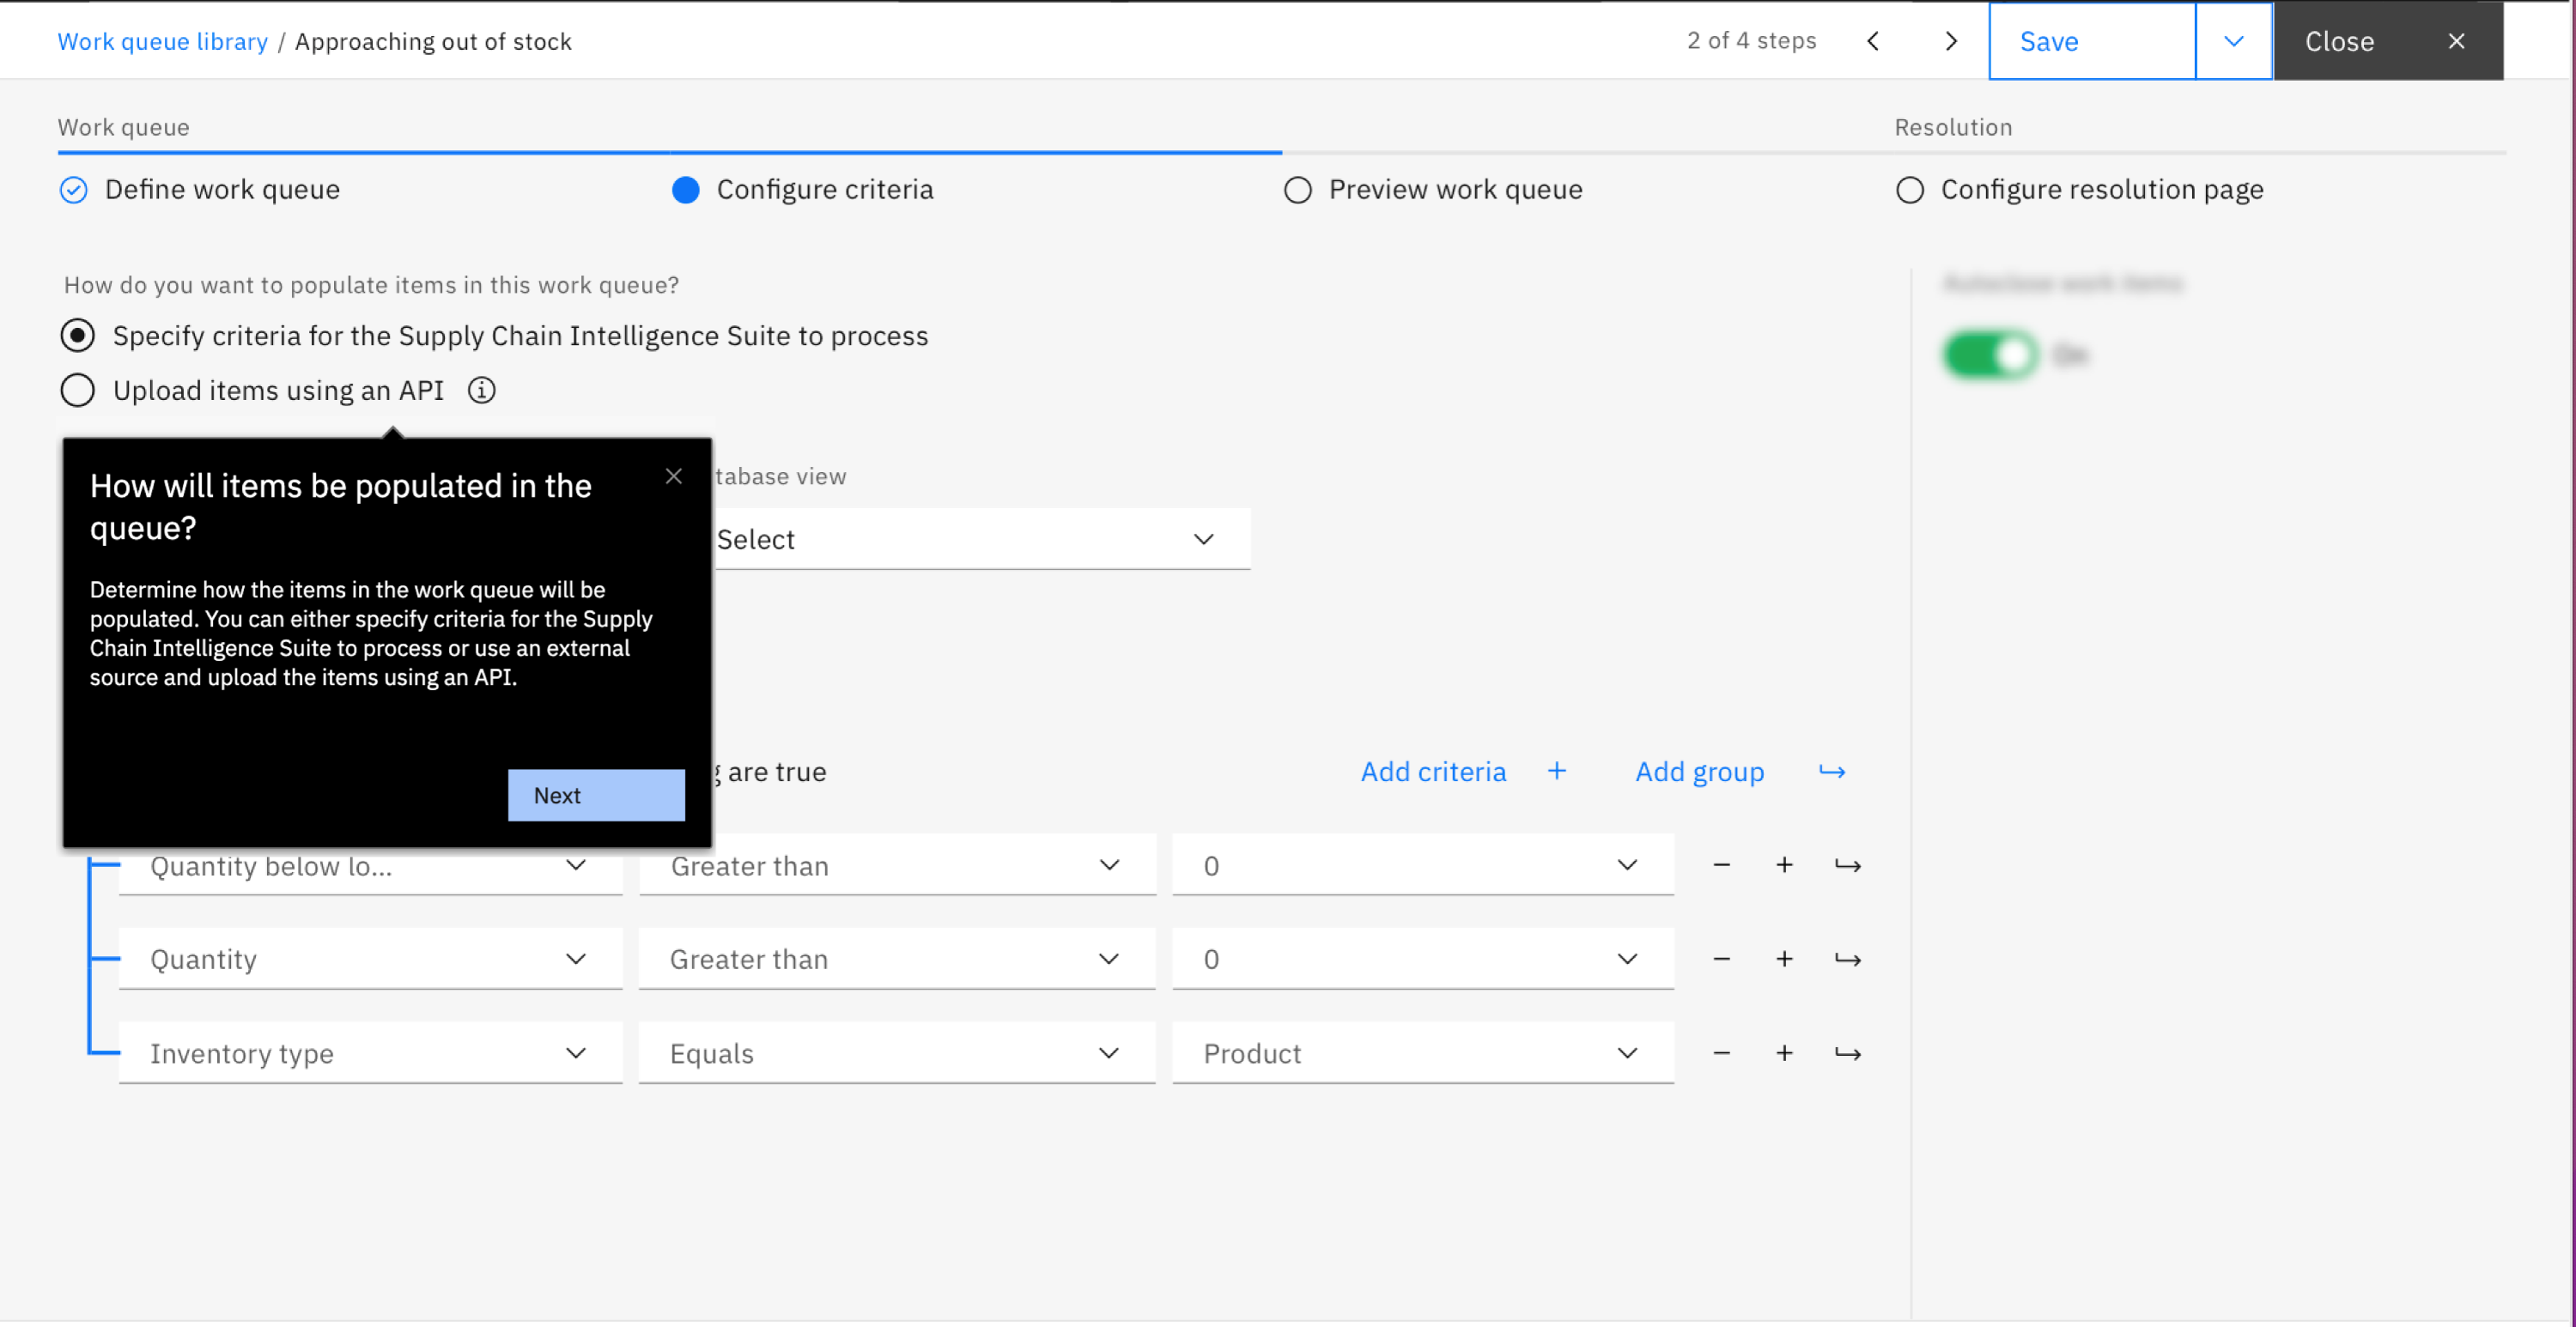
- Determine how the items in the work queue will be populated, either by:
-
Specifying criteria for IBM Intelligence Suite to process. Or,
-
Using an external source and uploading the items by using an API.
Diagram 9: How do you want to populate items in the queue
-
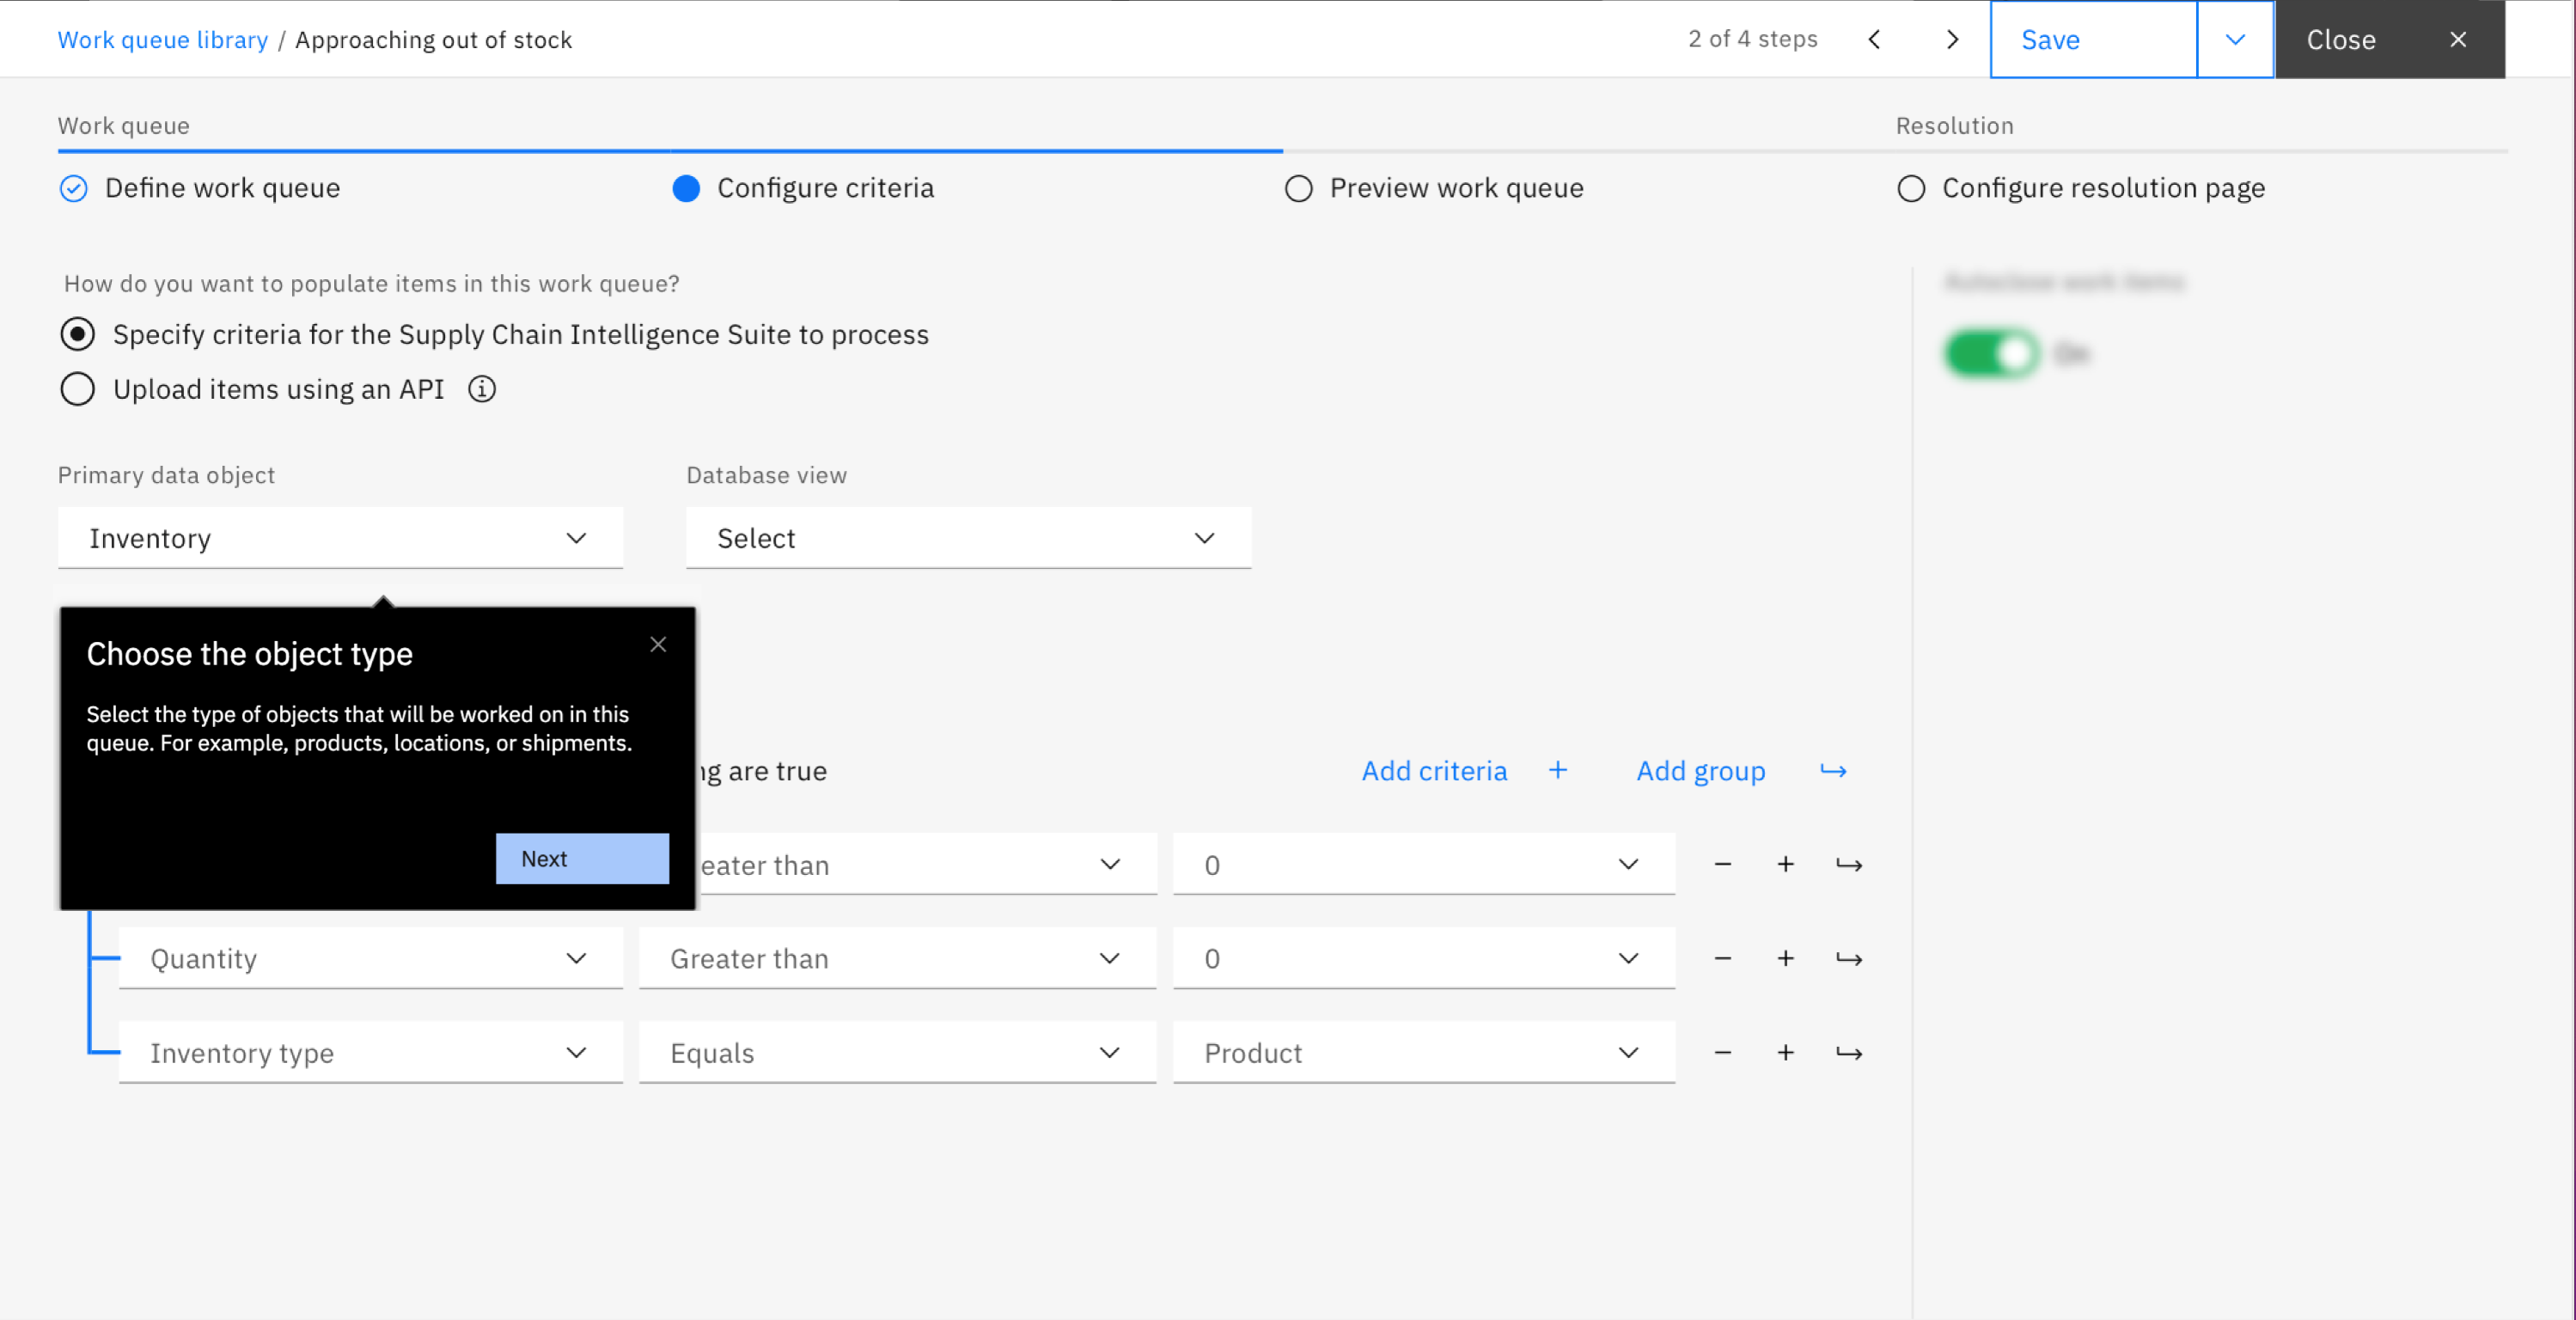
Select the type of objects that will be worked on in this queue. For example, products, locations, or shipments.
Diagram 10: Select a primary data object type
-
Select a database view. Graph is the default view for each work queue, but you can pre-configure other optimized views based on your organization's needs.
Diagram 11: Select a database view (advanced)
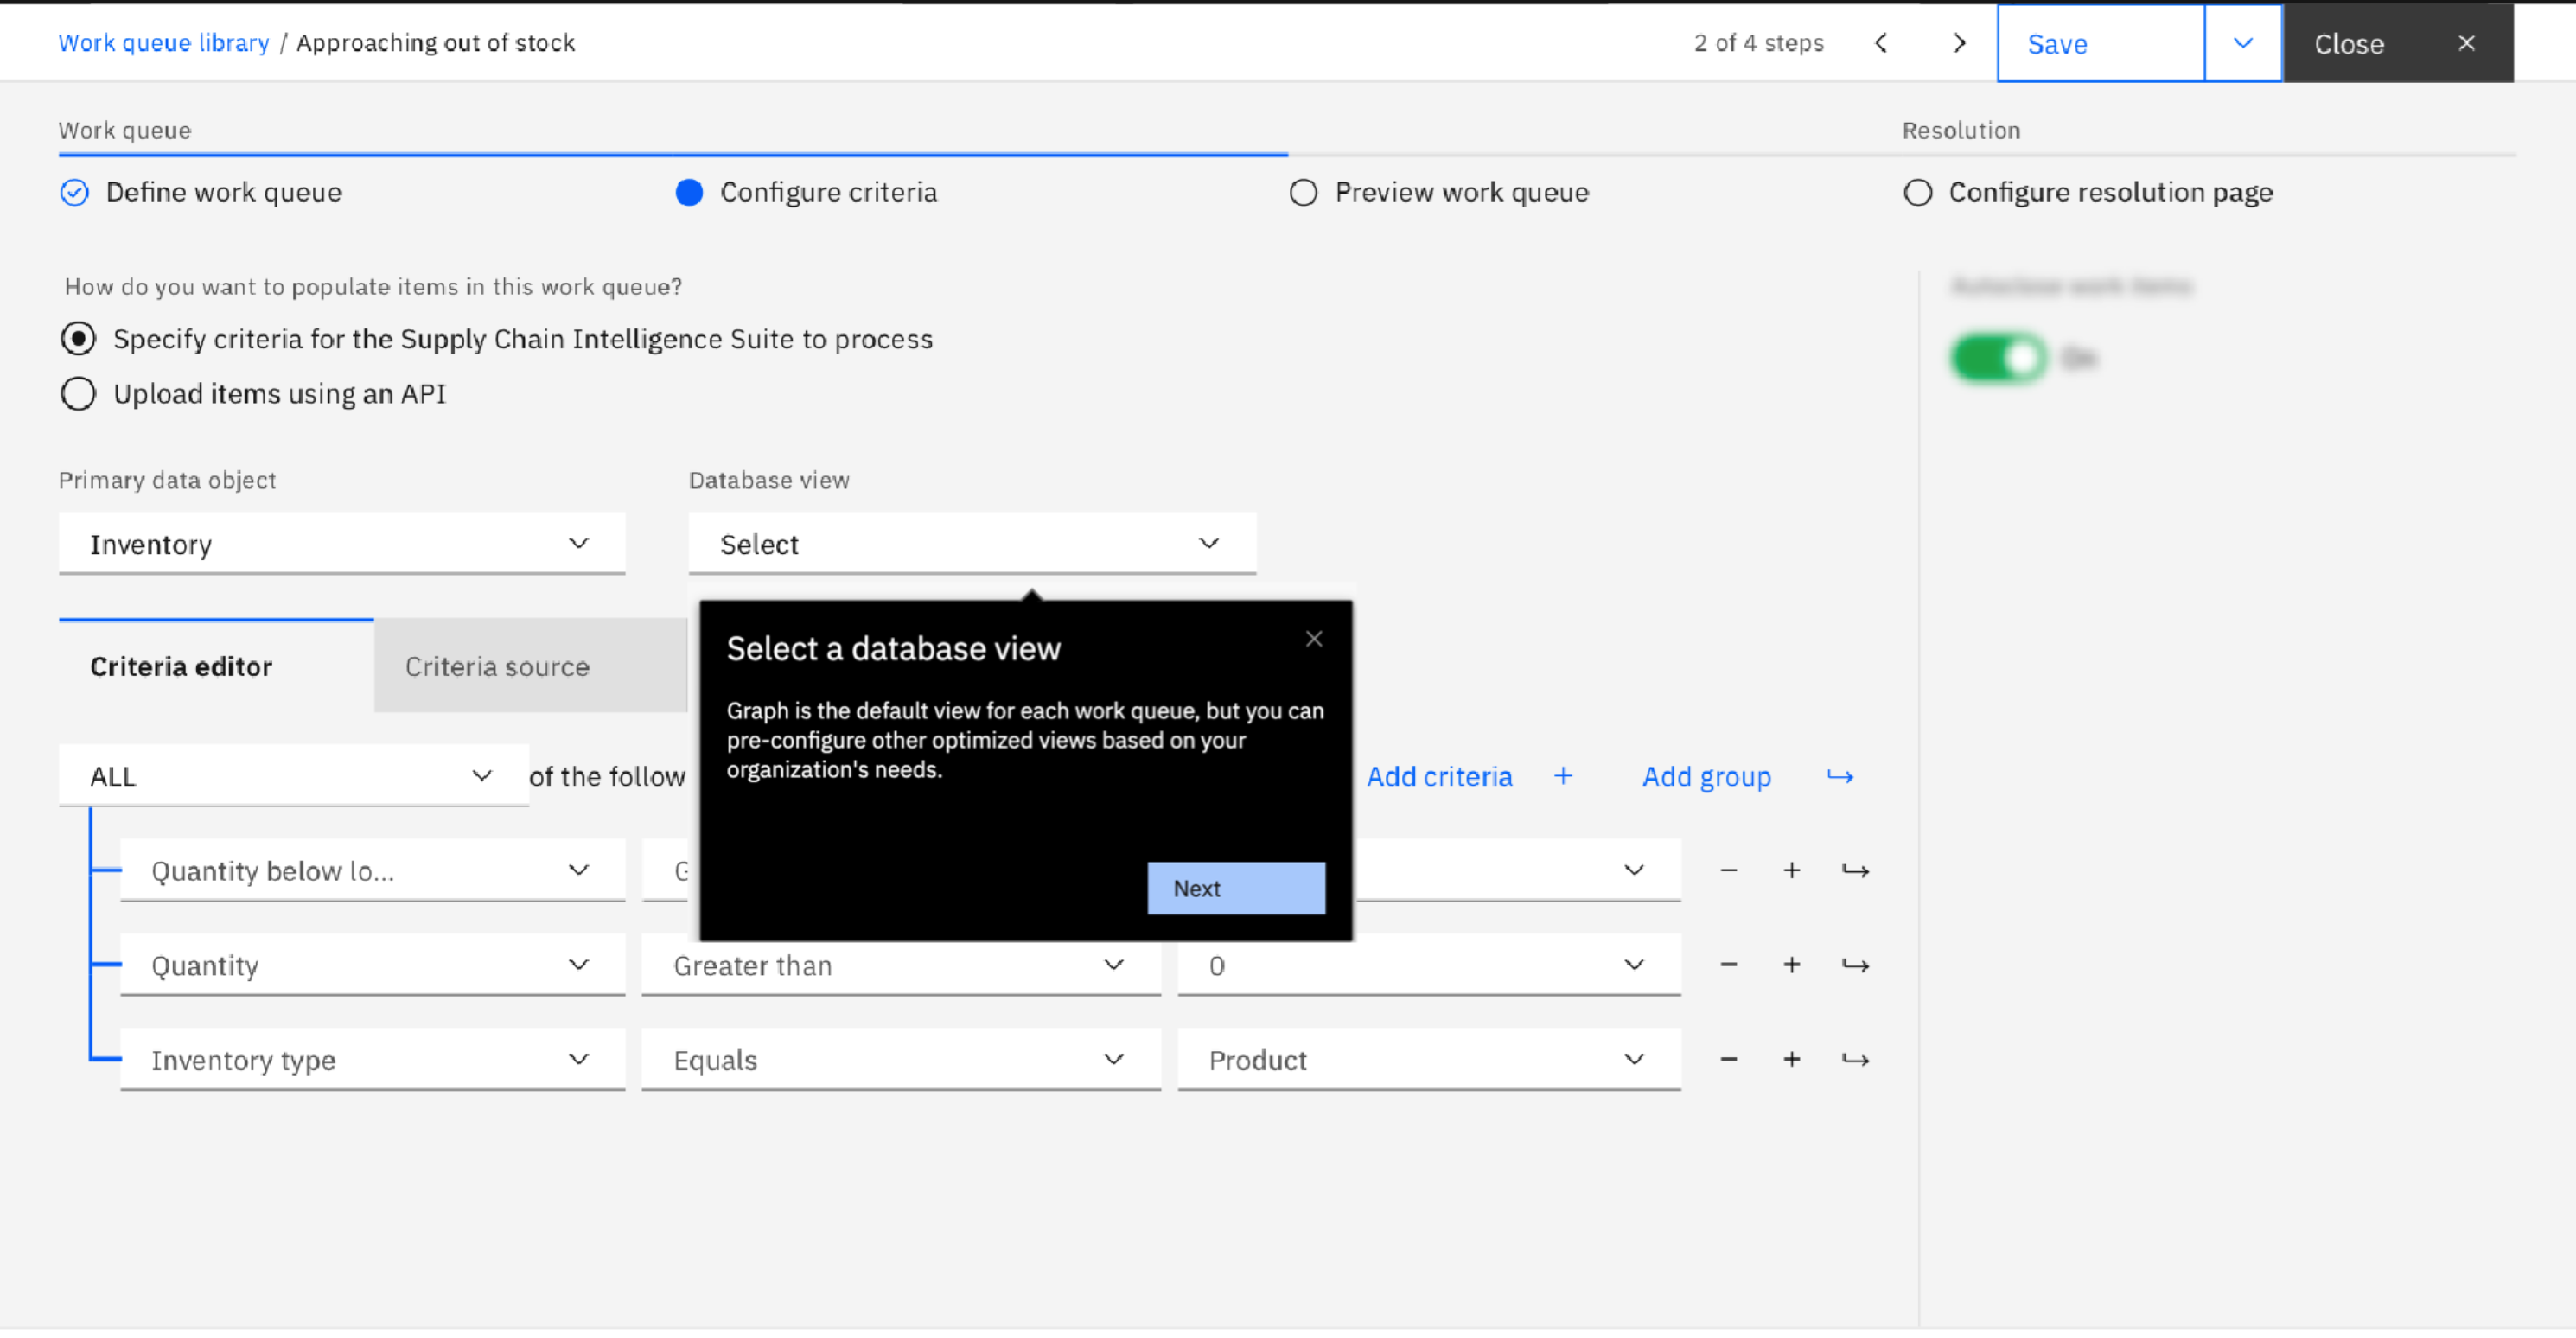
NOTE: database views are used when you find that the criteria you specified is complex and you find you want to optimize the corresponding query run by the Intelligence Suite when your users access your work queues lists of items. This is an advanced topic and the default graph view will suffice for most situations. Should you find the need to optimized the query, this setting can help you select a database view that is tailored to your needs.
-
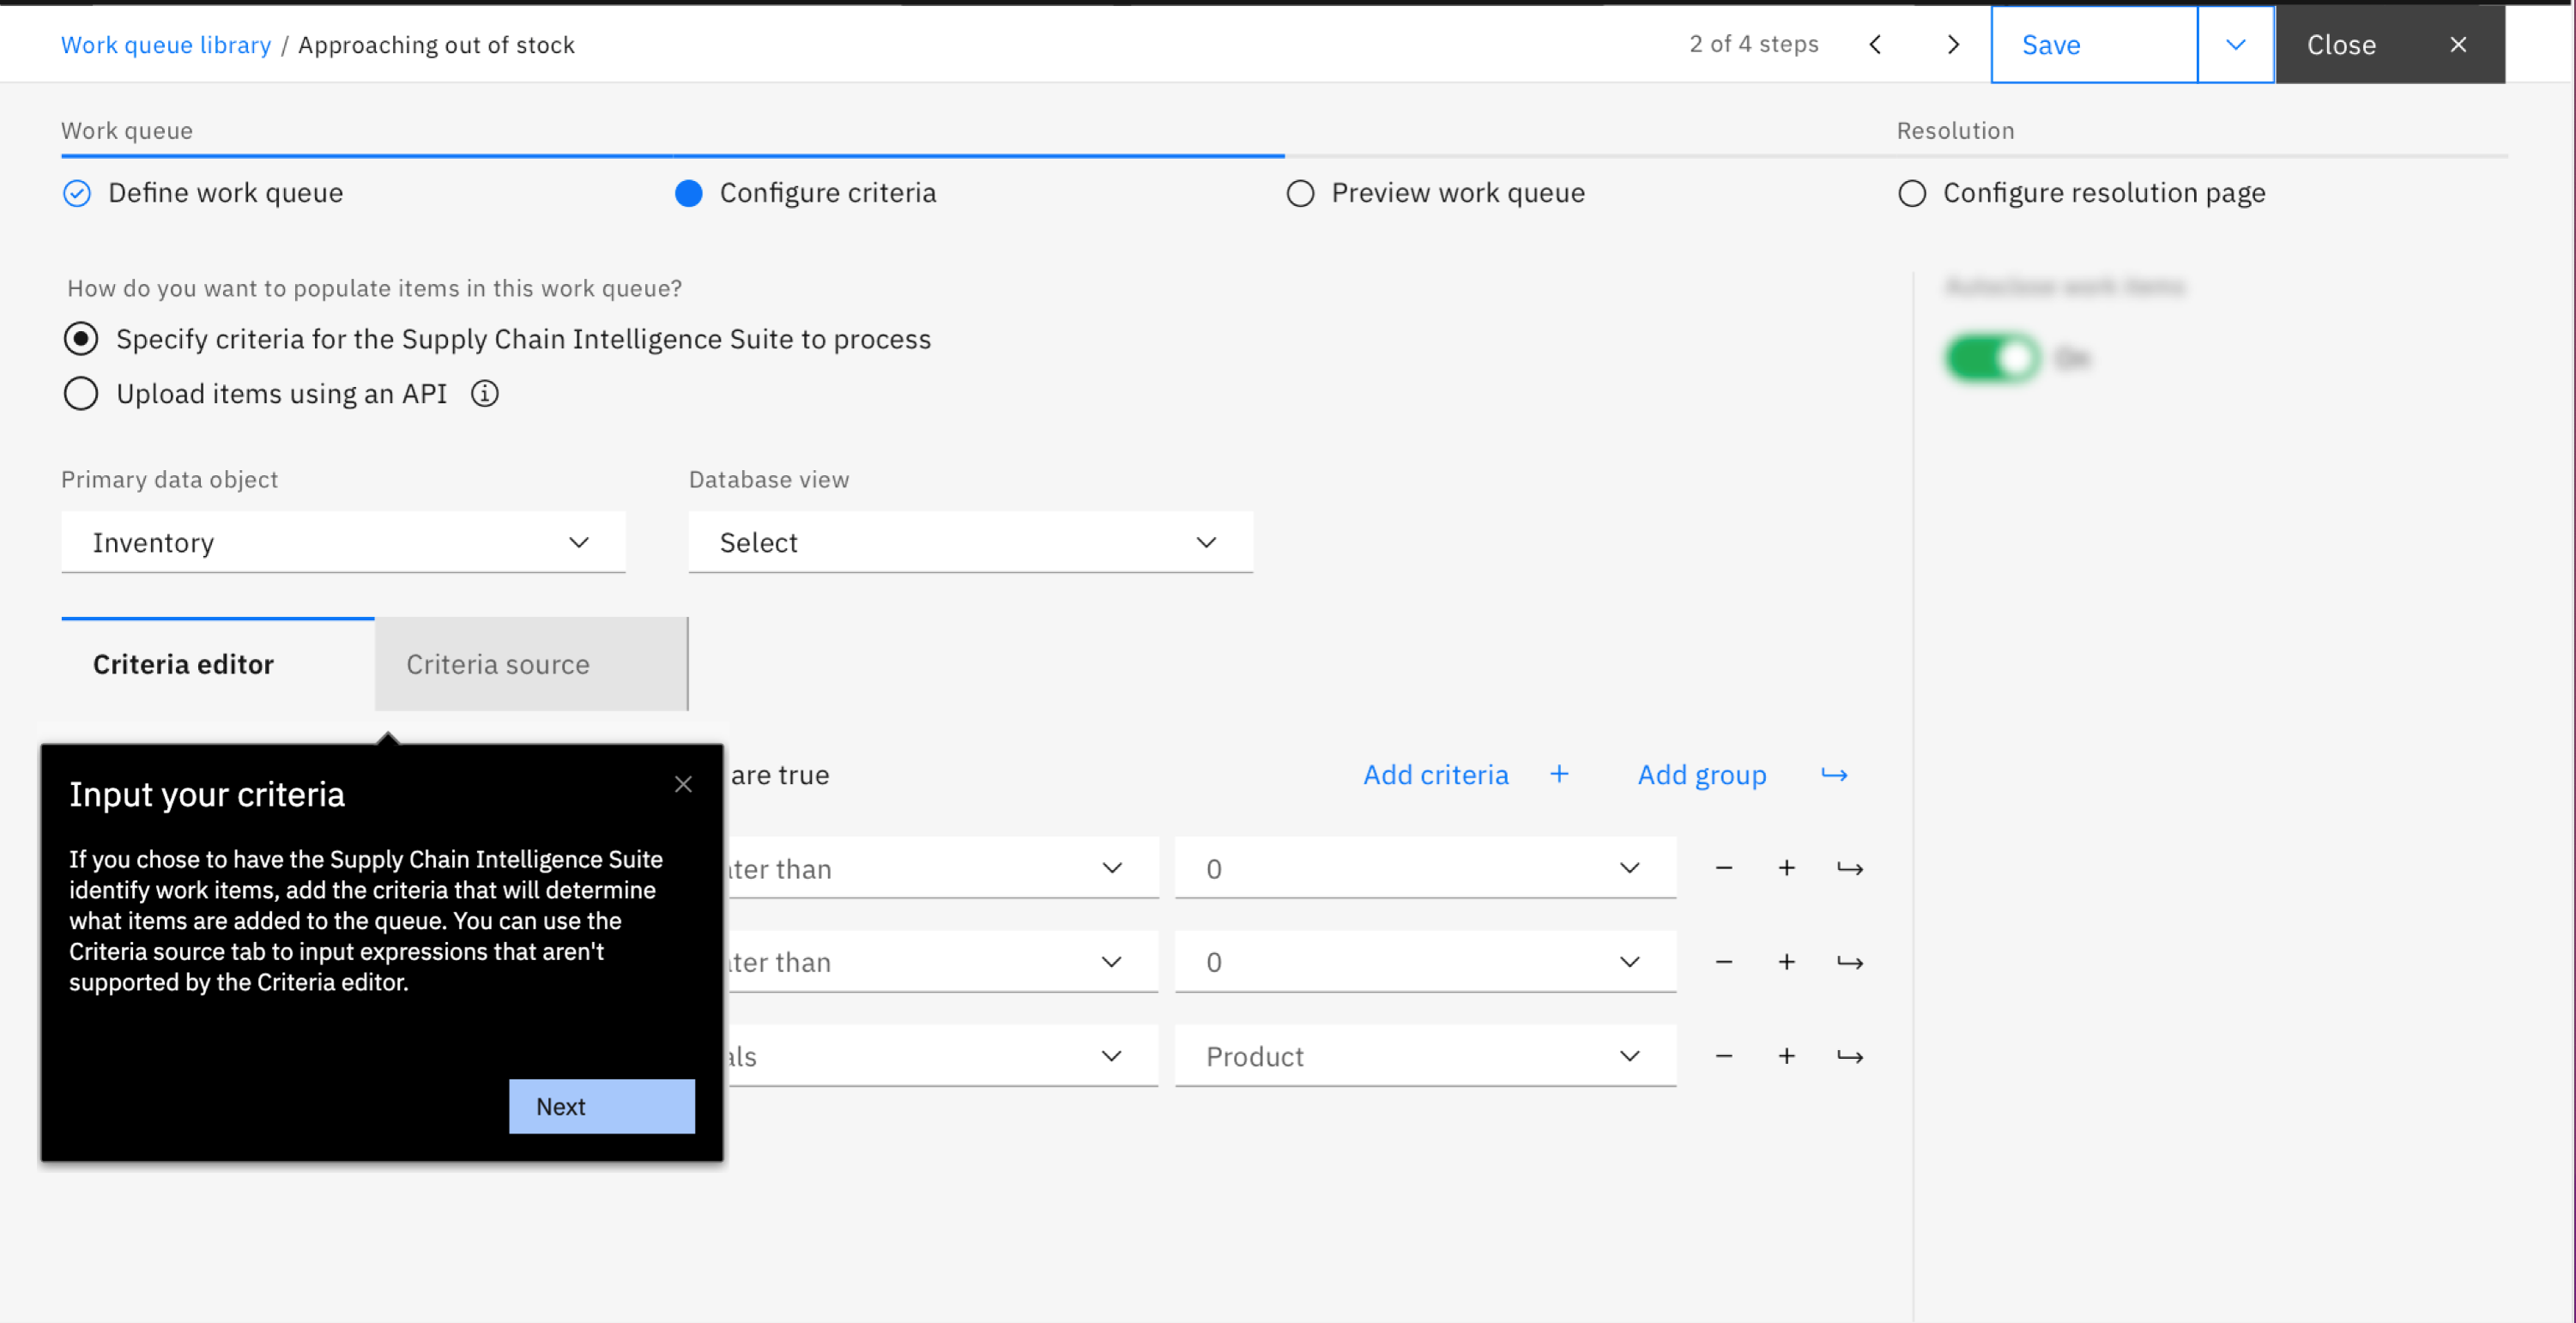
If you chosen to have the Intelligence Suite identify work items, specify criteria either by:
-
Using the Criteria editor tab, which is an easy to use tool that lets you build your criteria by entering conditions that are based on the fields available for each type of Business Object. Or,
-
Using the Criteria source tab, which is an advanced source view that lets you fine-tune and define your criteria by using operators and expressions that are not available to the criteria editor.
Diagram 12: Input your criteria
> Next step (previewing the queue)
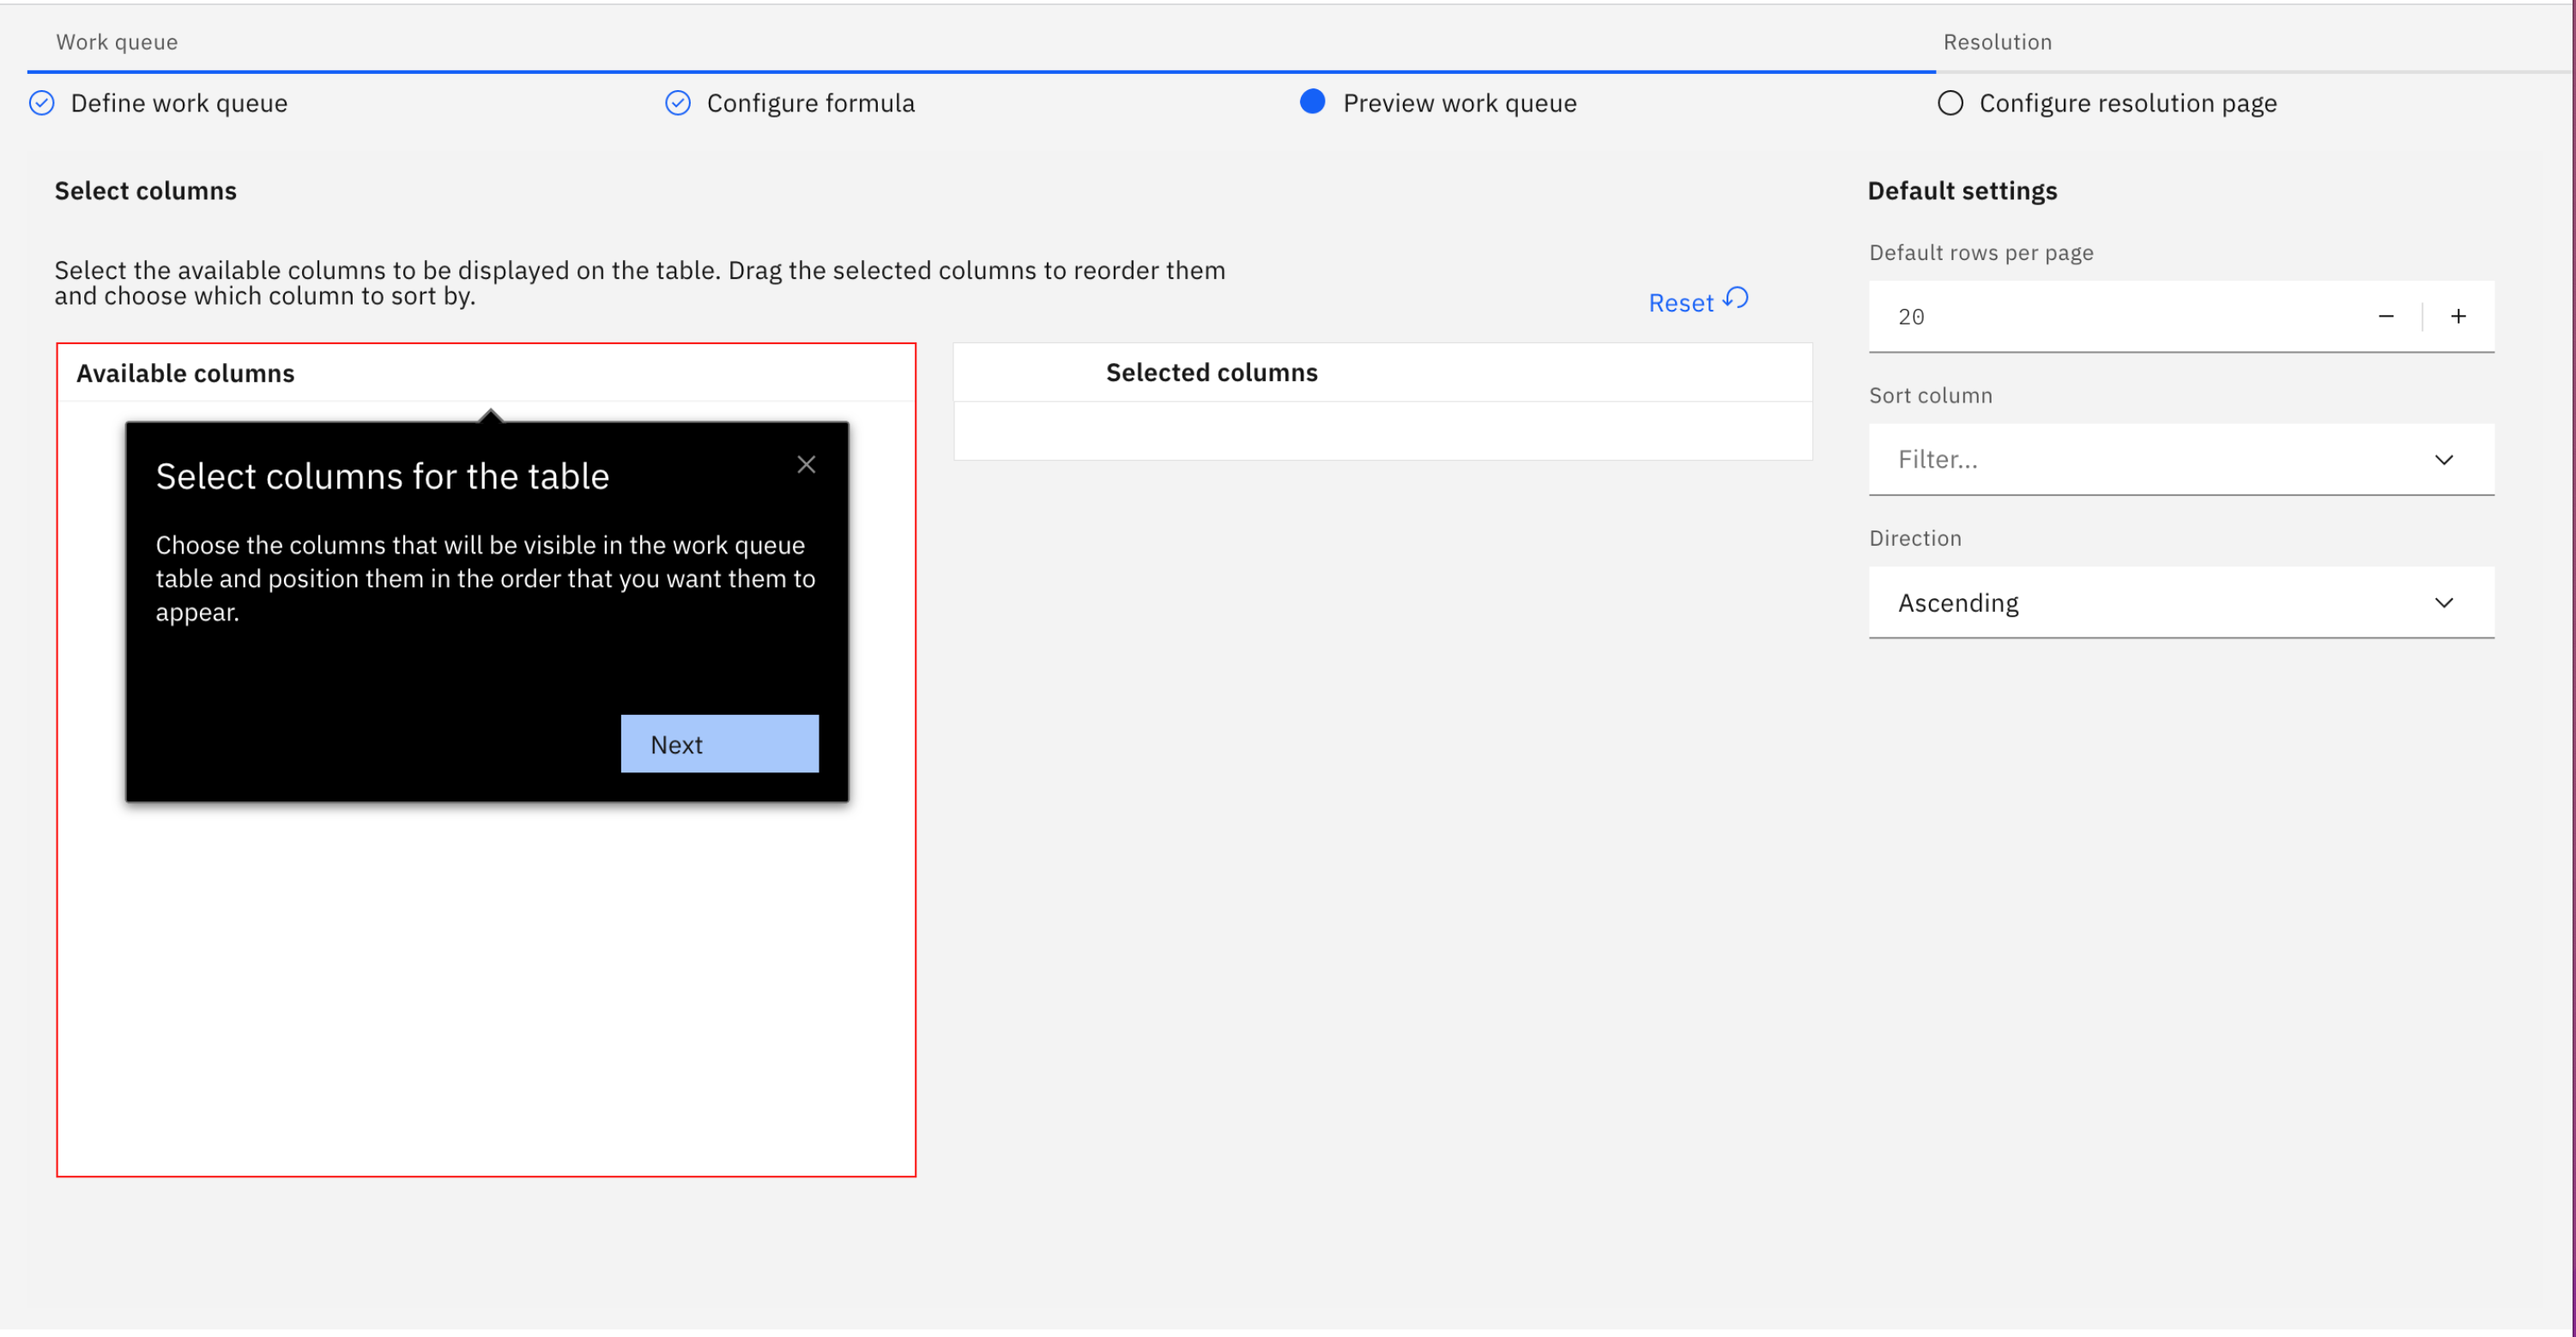
Select the columns that will be visible in the work queue table and position them in the order that you want them to appear.
Diagram 13: Select columns for the table
> Next step (configuring the resolution page)
-
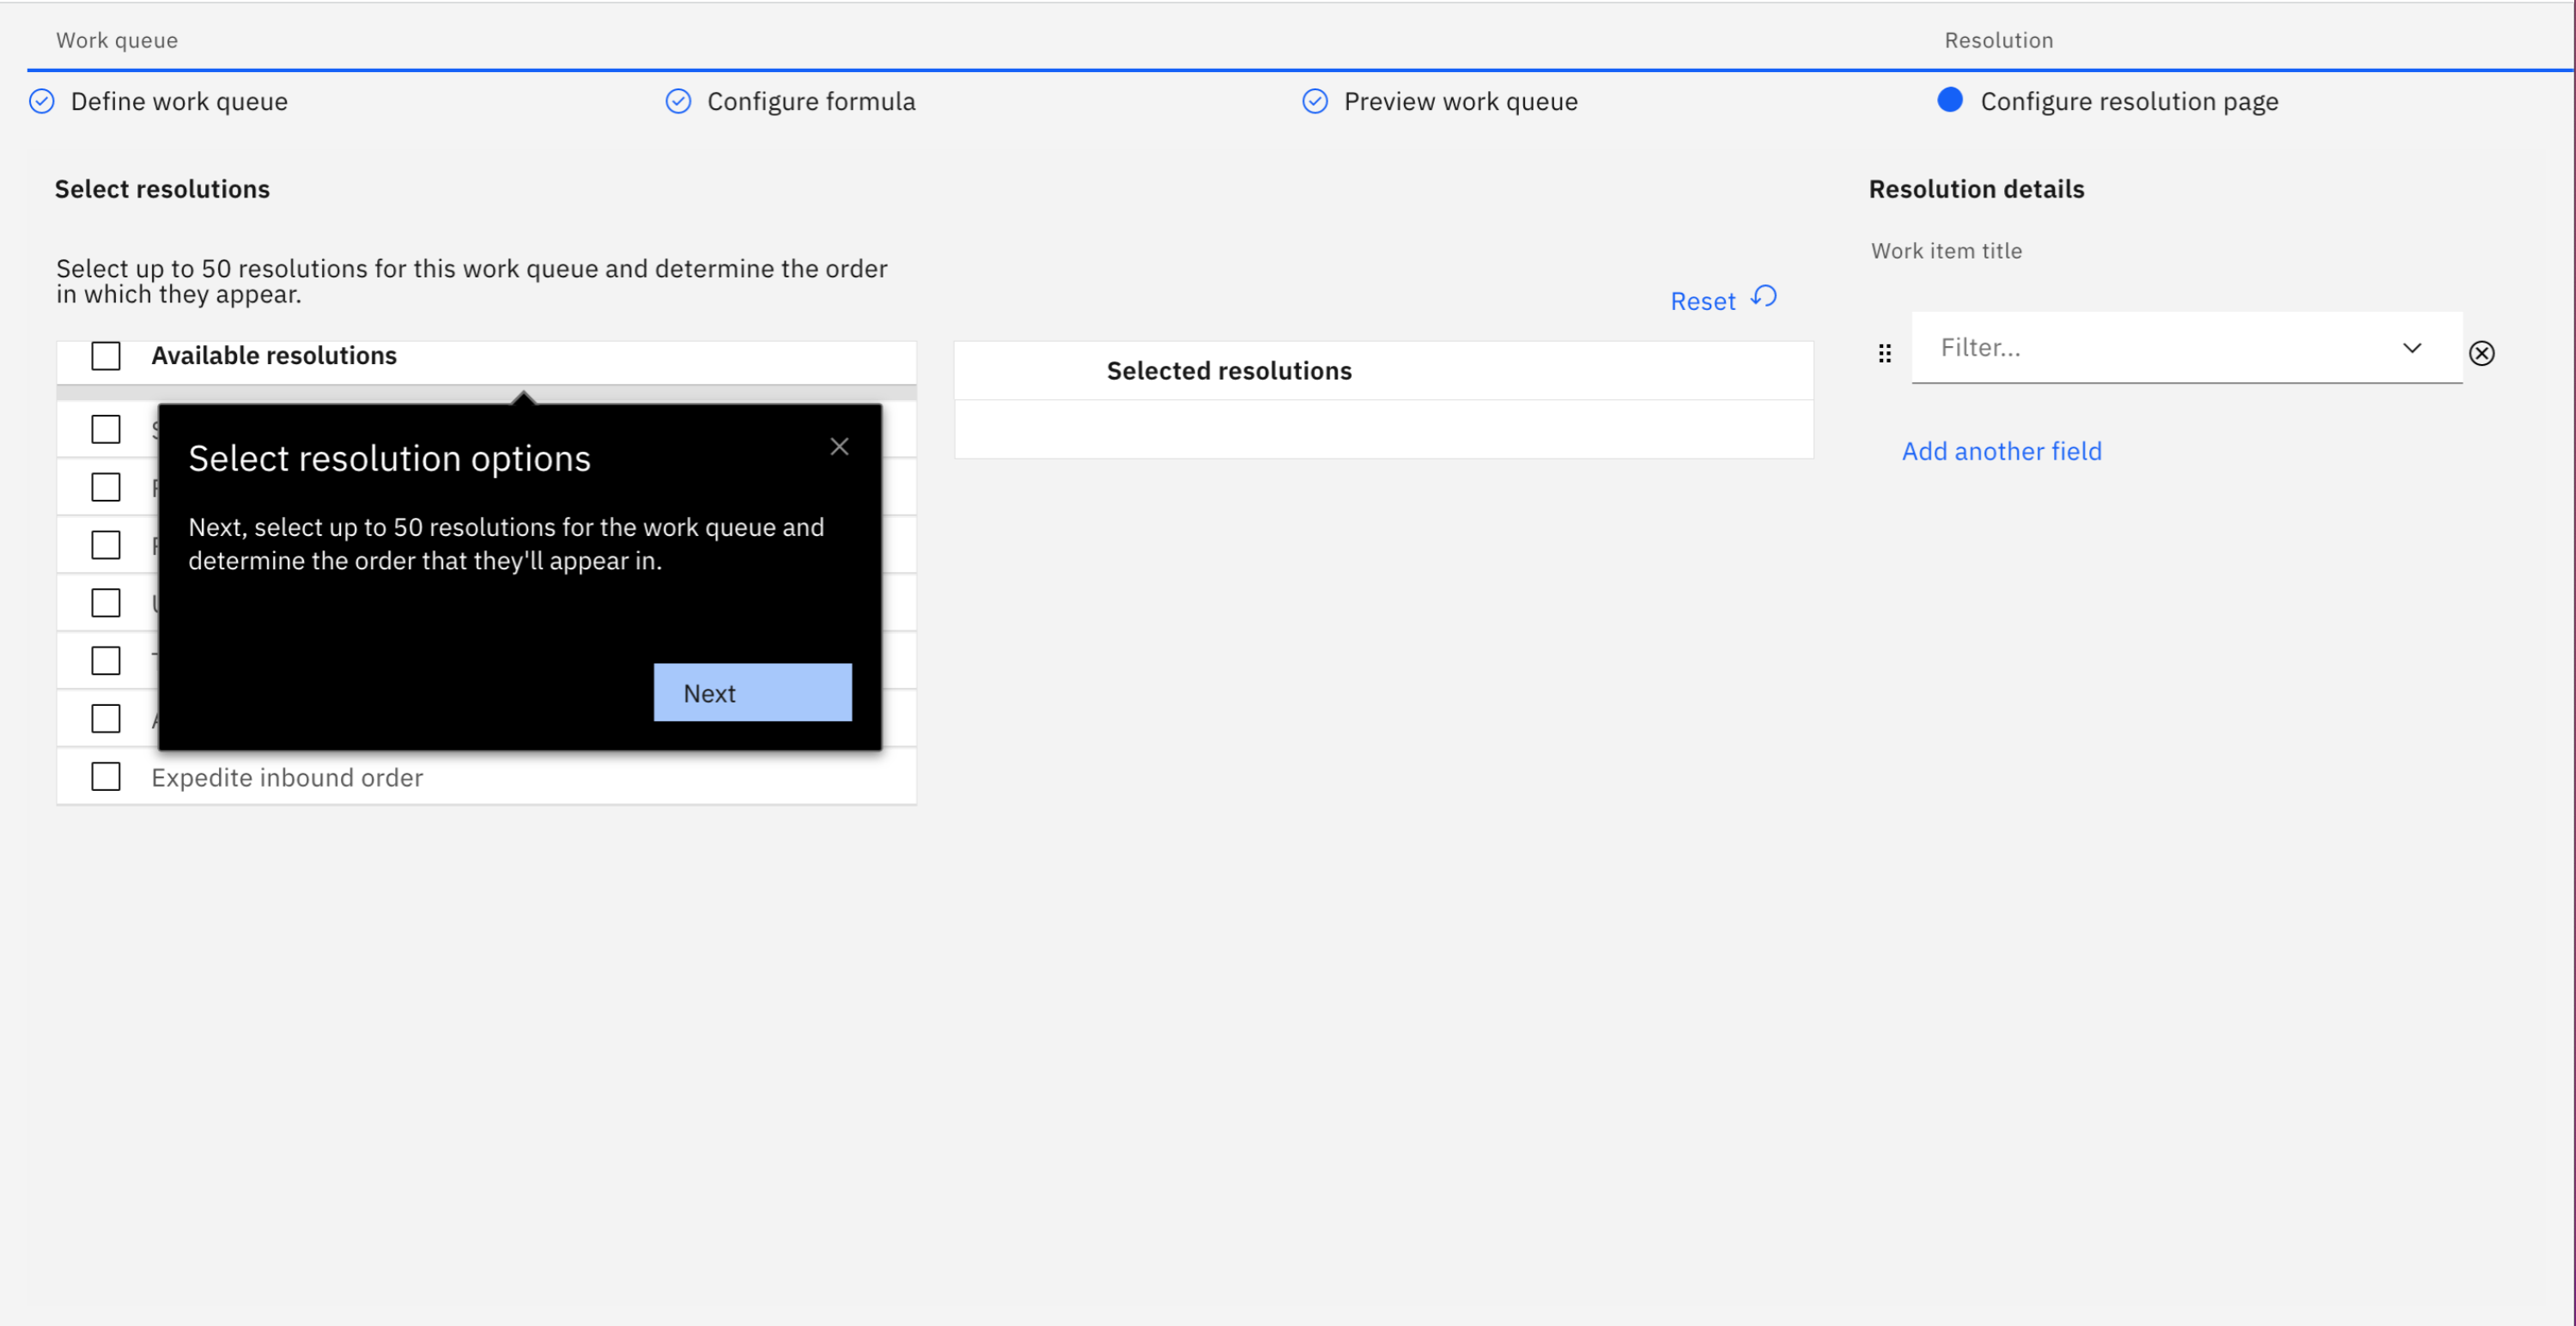
Select up to 50 resolutions for the work queue and determine the order that they will appear.
Diagram 14: Select resolution options
Once resolutions are selected they can also easily be reordered.
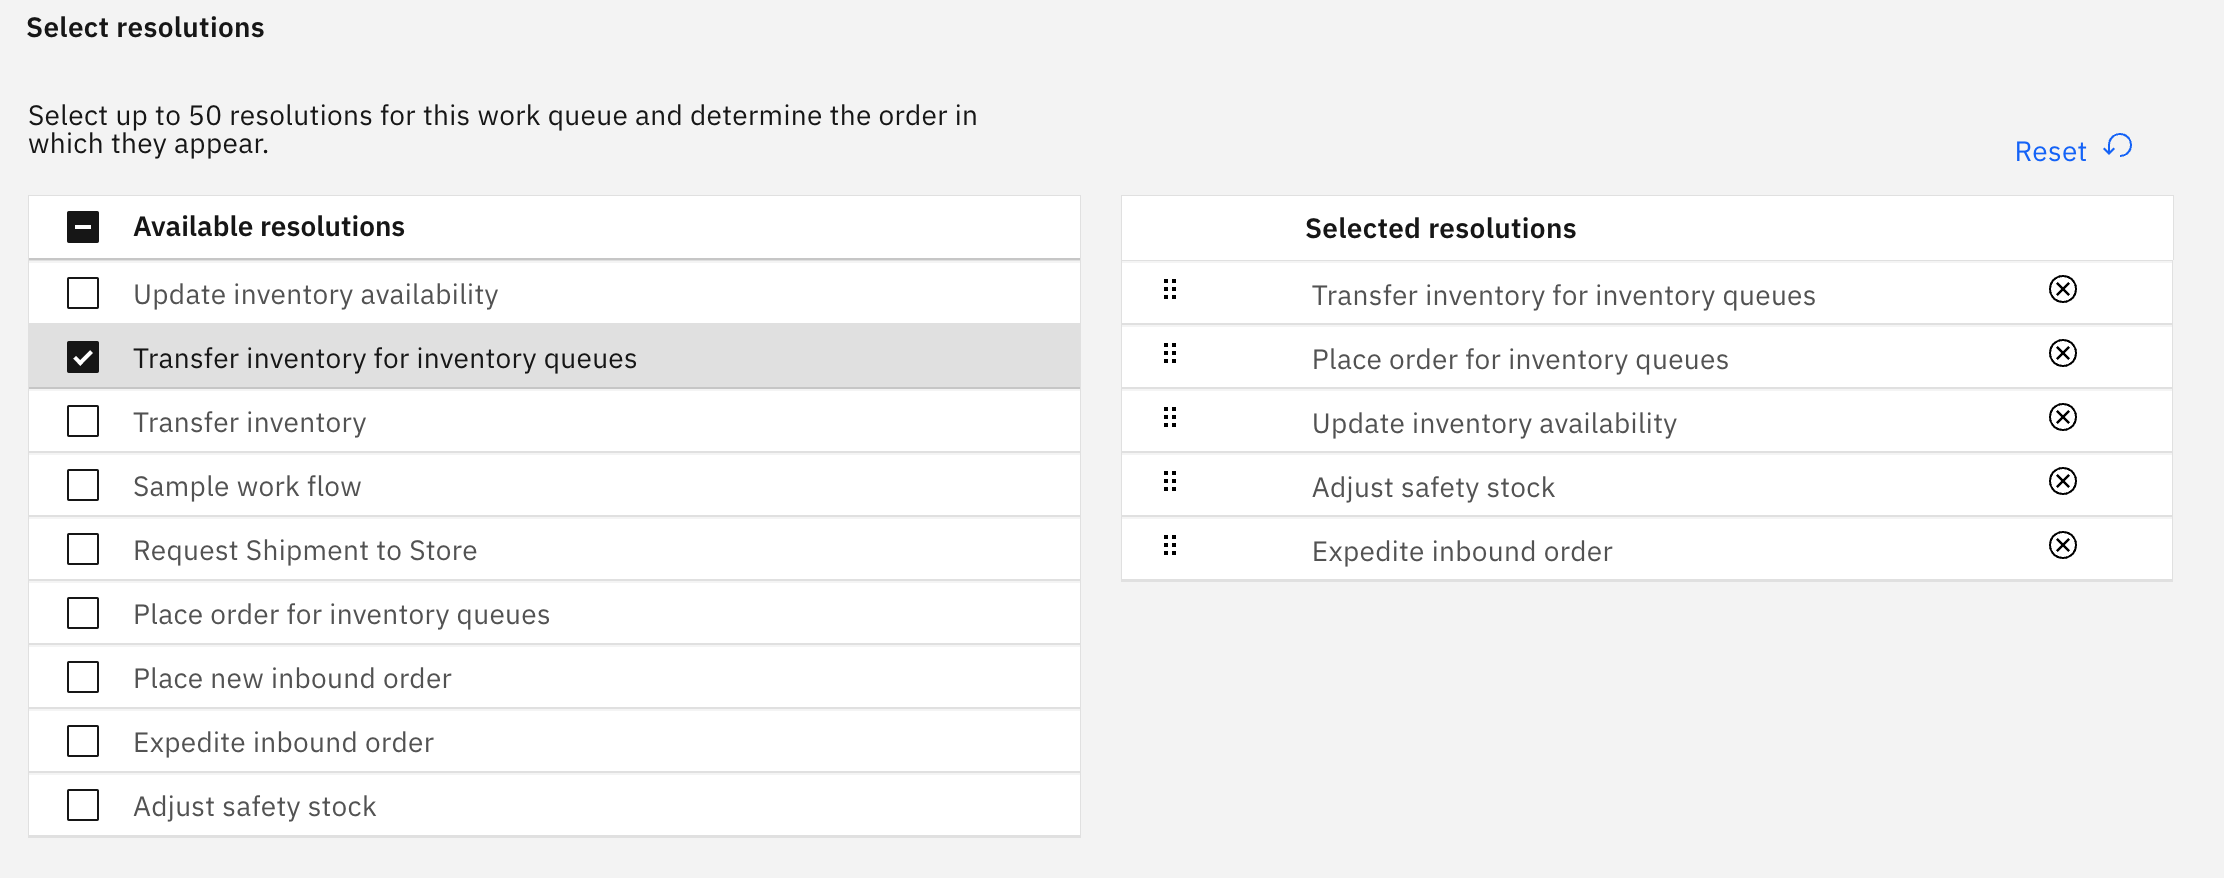
Drag the
 icon to change the order.
 -
Define the work item title by selecting which elements will compose the title of the work item on the resolution page. For example, a selection of product ID and location ID would result in a title of Resolutions for ProductID - LocationID.
Diagram 15: Define the work item title

-
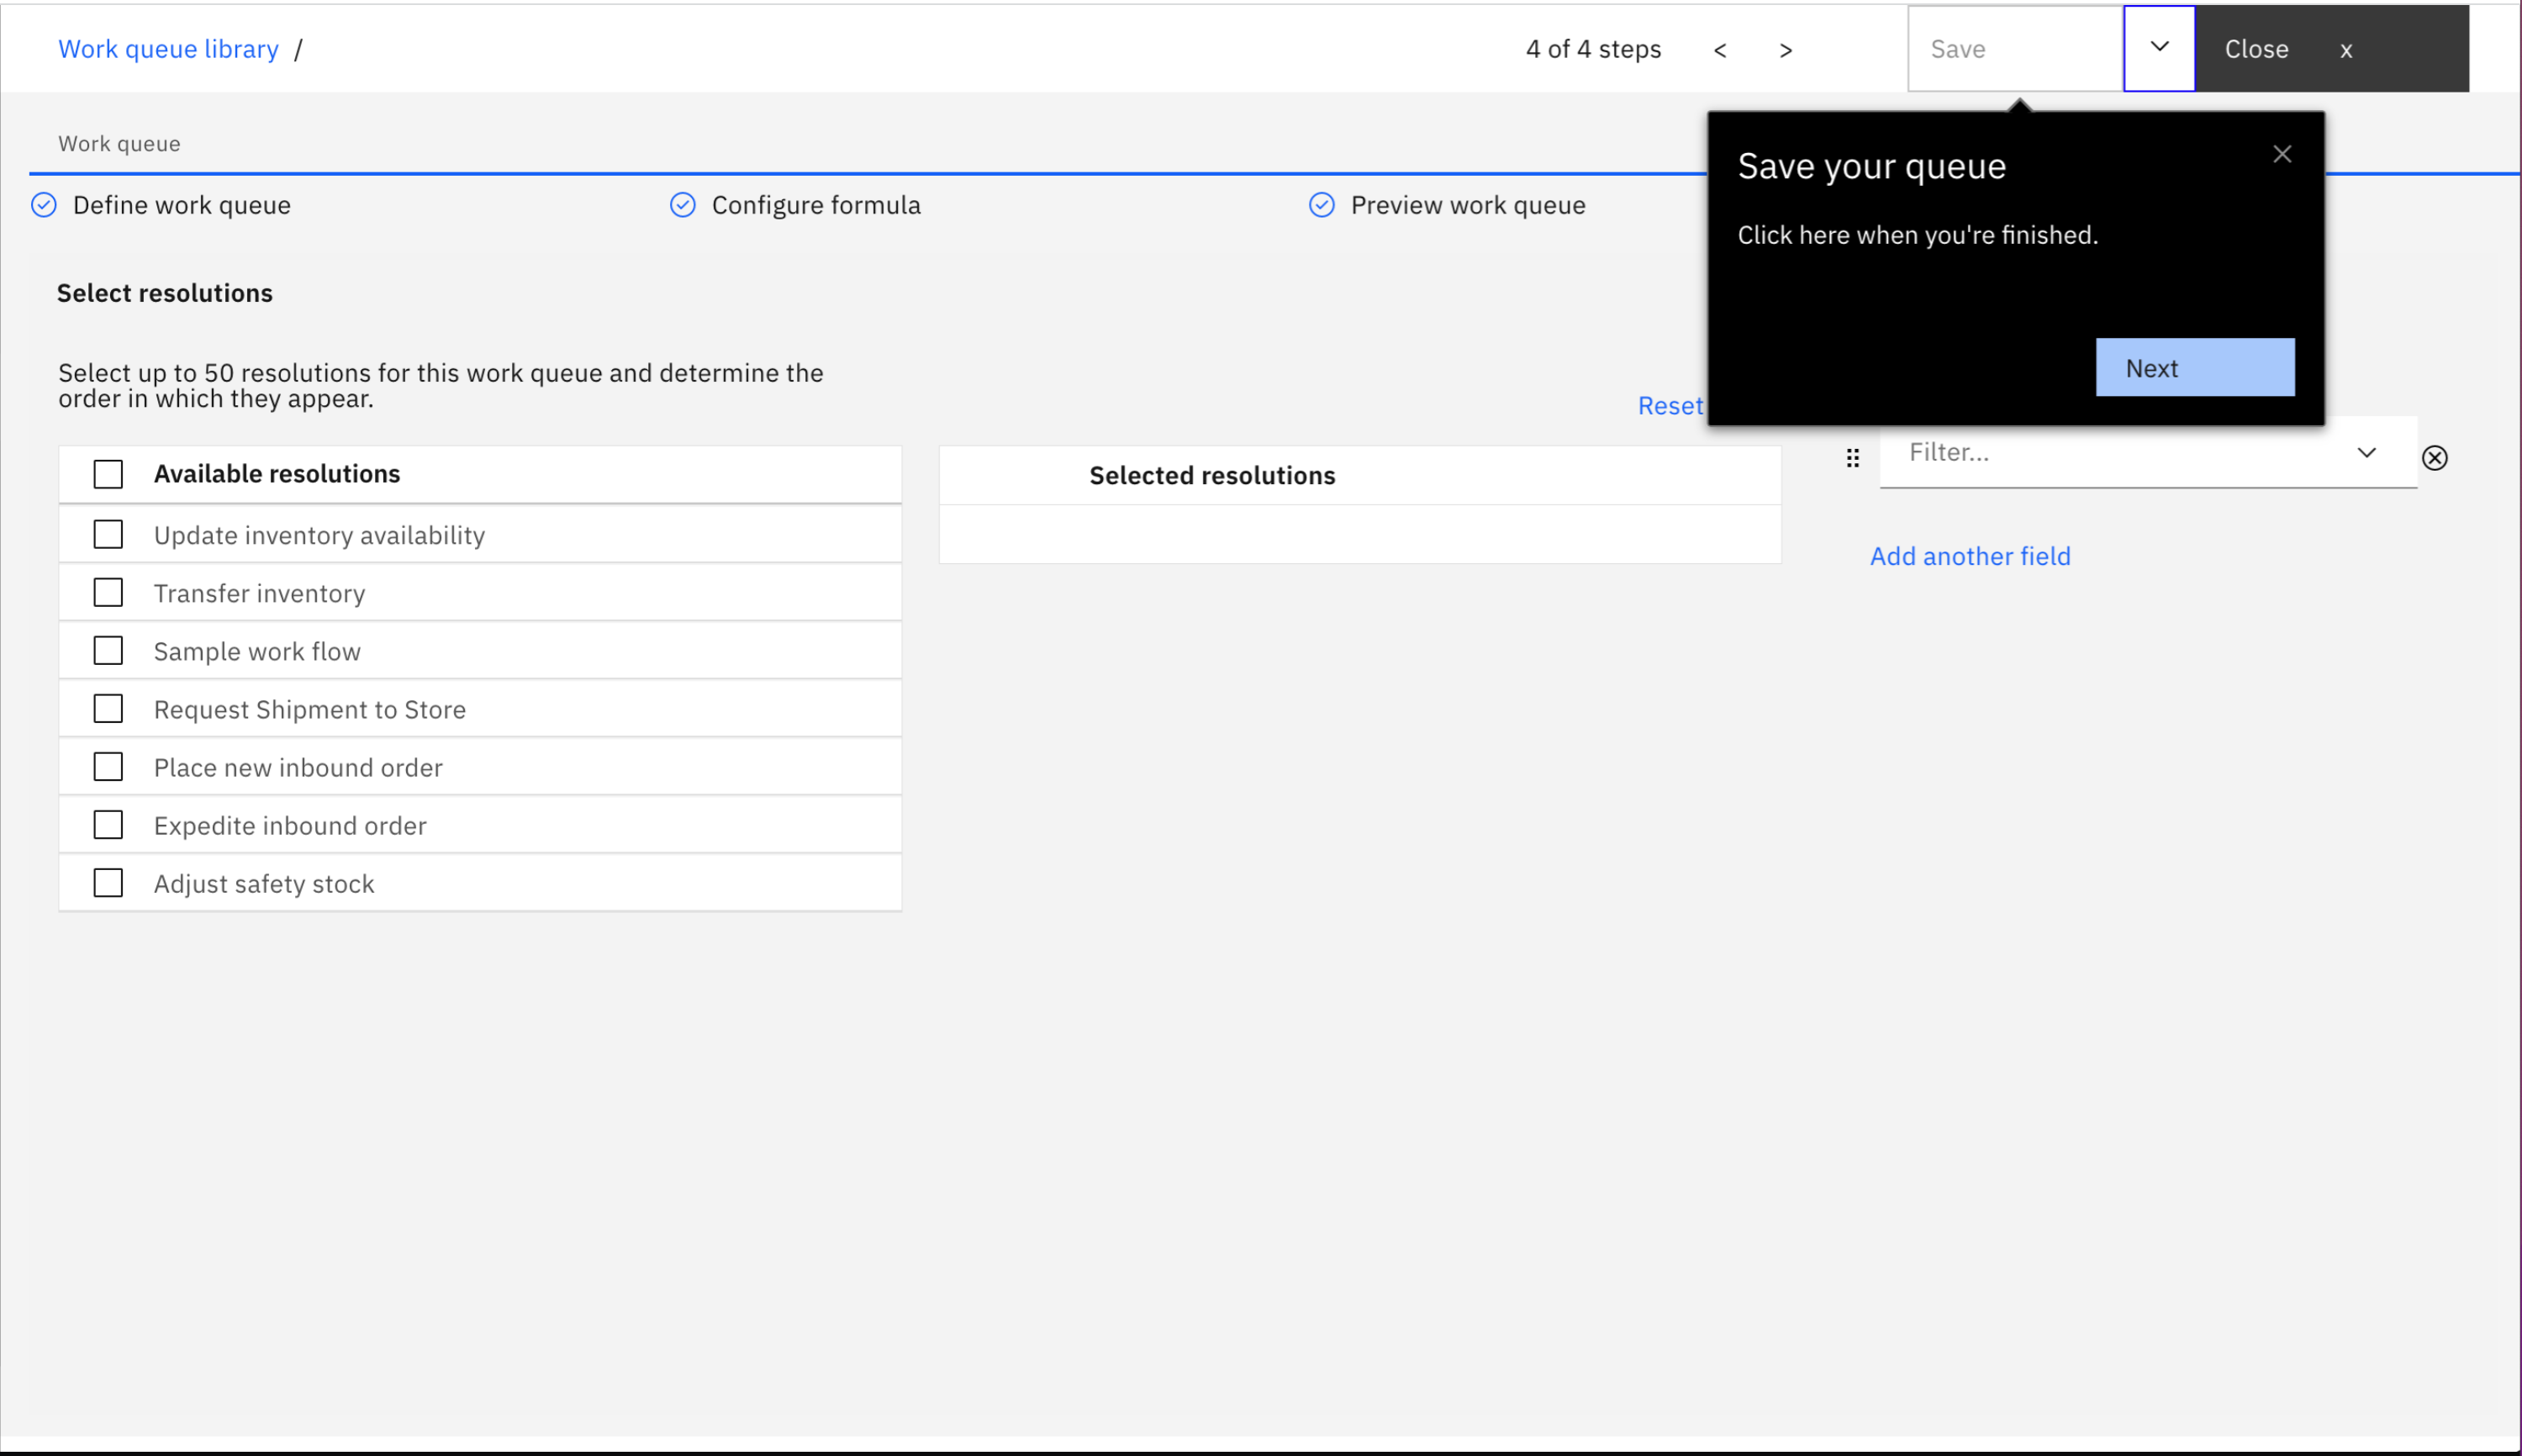
Finally, click Save to save the work queue.
Diagram 16: Save your queue
Your work queue is now ready to be activated! Once activated you can go to the Work Queues section of the Intelligence Suite and test your work as a general user would use it.
-
Extending and creating custom resolutions
Sample resolutions are provided as starting points for you to customize and build upon. You can also create your own custom resolutions.
-
Extending and creating custom actionable workflows
There are two types of resolutions: best practice recommendations and actionable workflows. Both resolution types contain information about each step that is required to complete a resolution, but actionable workflows allow you and other users in your organization to take action directly within the Intelligence Suite. Sample best practice resolutions are provided as starting points. You can extend and customize the samples or create new resolutions to address custom business needs.
-
Extending and creating a custom research assistant experience
The Watson Research Assistant is a resource that can help you resolve work items in your work queues. You can build your own dialog skills and have the assistant support your skills, so that the assistant can answer questions or requests that are specific to your business needs.