Getting Started 3 Add and Authorize
You need the portal prep from step 1 done first: a CarData Client created and subscribed to both CarData API and CarData Streaming. That applies to both setup paths below — the guided path only saves you copying the client ID by hand, it doesn't skip creating the client.
Start setup:
-
Settings → Devices & Services → Add Integration → BavarianData: Connect Home Assistant to BMW CarData.
-
Pick a setup path — Guided or Manual:
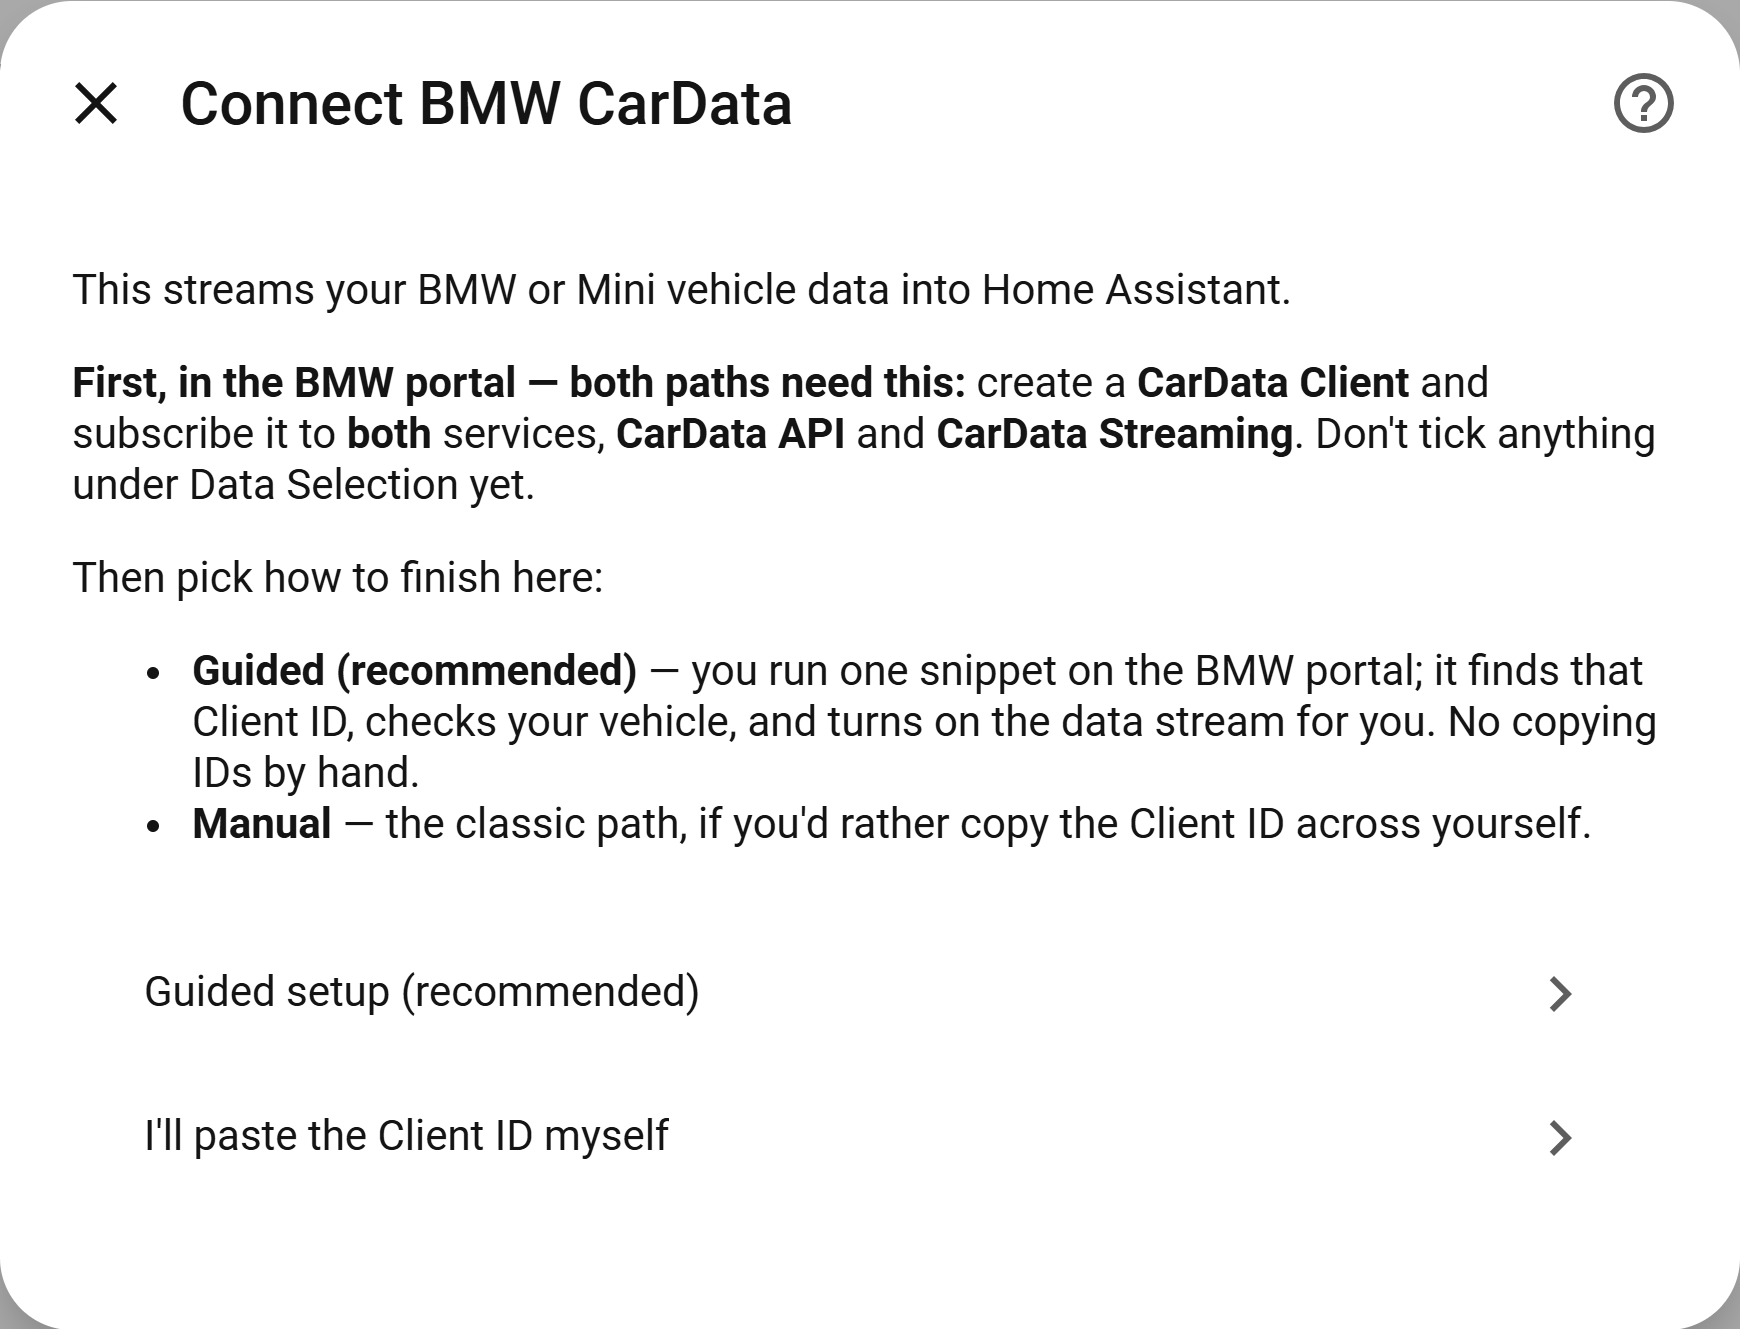
Both paths need the same portal client and both end the same way (device authorization → a live stream). They differ only in how the client ID gets in and how the stream is switched on:
| Guided (recommended) | Manual | |
|---|---|---|
| Client ID | discovered for you | you copy & paste it |
| Switching on the stream | one click — an Activate BMW data bookmarklet you run on the portal | pick clusters in Home Assistant, then run a console snippet on the portal's Data Selection page |
| Which fields turn on | a sensible default set (fine-tune later) | exactly the clusters you tick |
| Best when | you just want it working with no copying | you want to choose clusters up front, or the bookmarklet can't run in your browser |
You can always change the streamed clusters afterwards from Configure → Choose streamed data (which uses the same one-click activator) — see step 4.
-
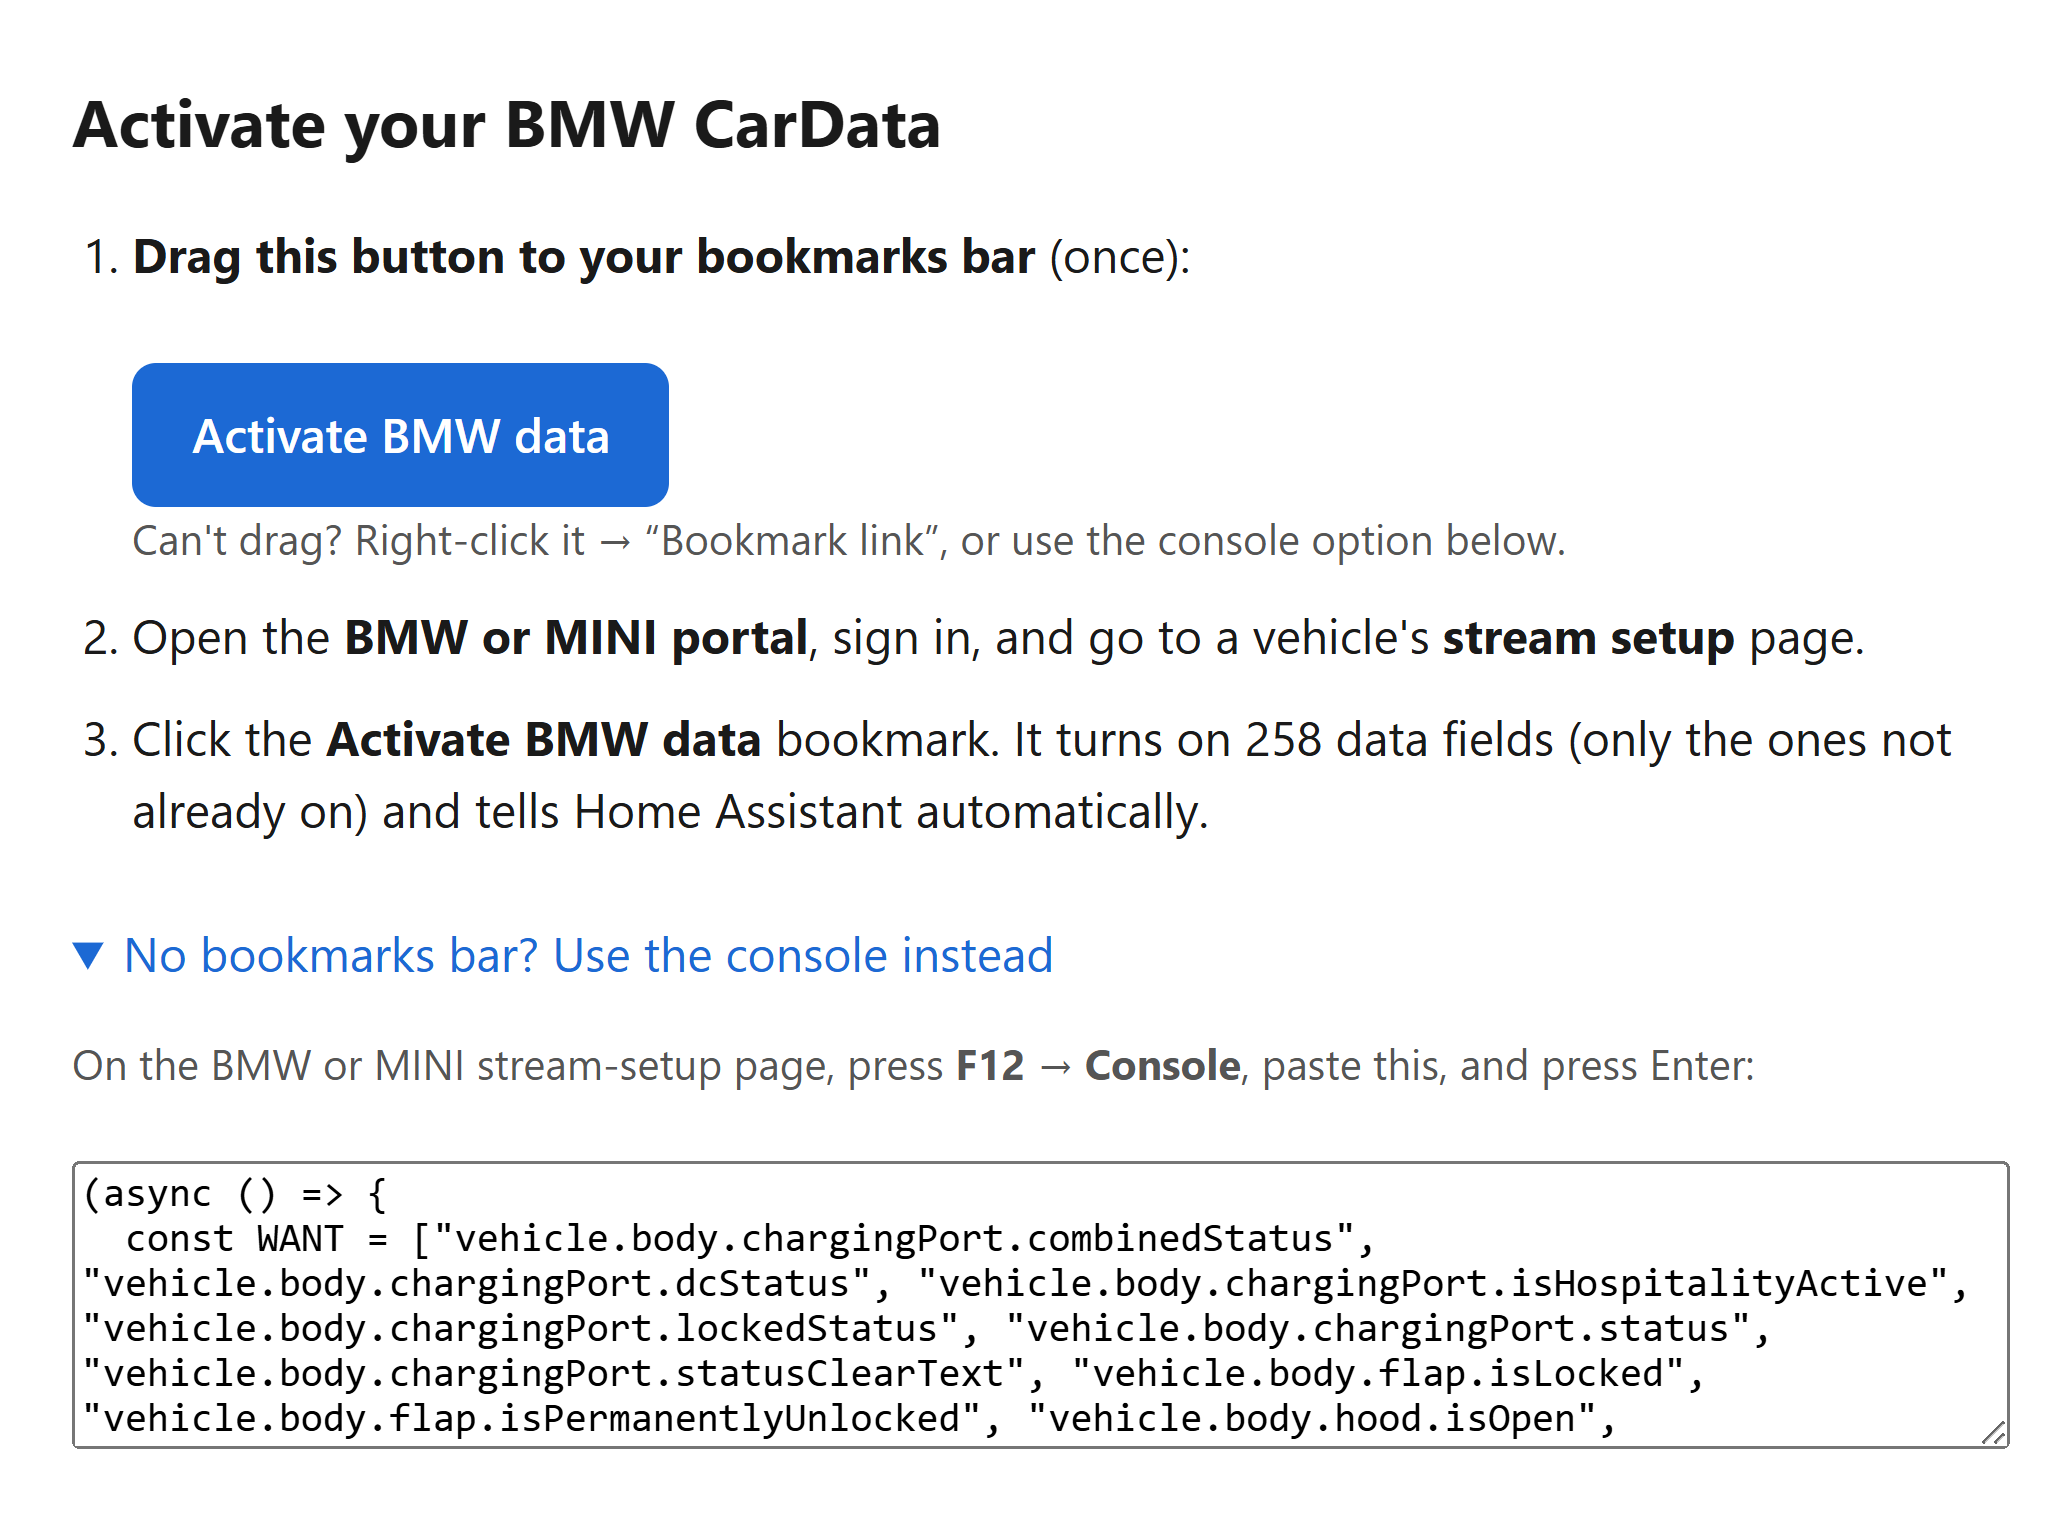
Choose Guided setup (recommended). Home Assistant serves a small activation page. Drag the Activate BMW data button to your bookmarks bar (once):
-
Open the BMW or MINI portal, sign in, go to a vehicle's stream setup page (BMW CarData → Change data selection), and click the Activate BMW data bookmark. This is the page it runs on:
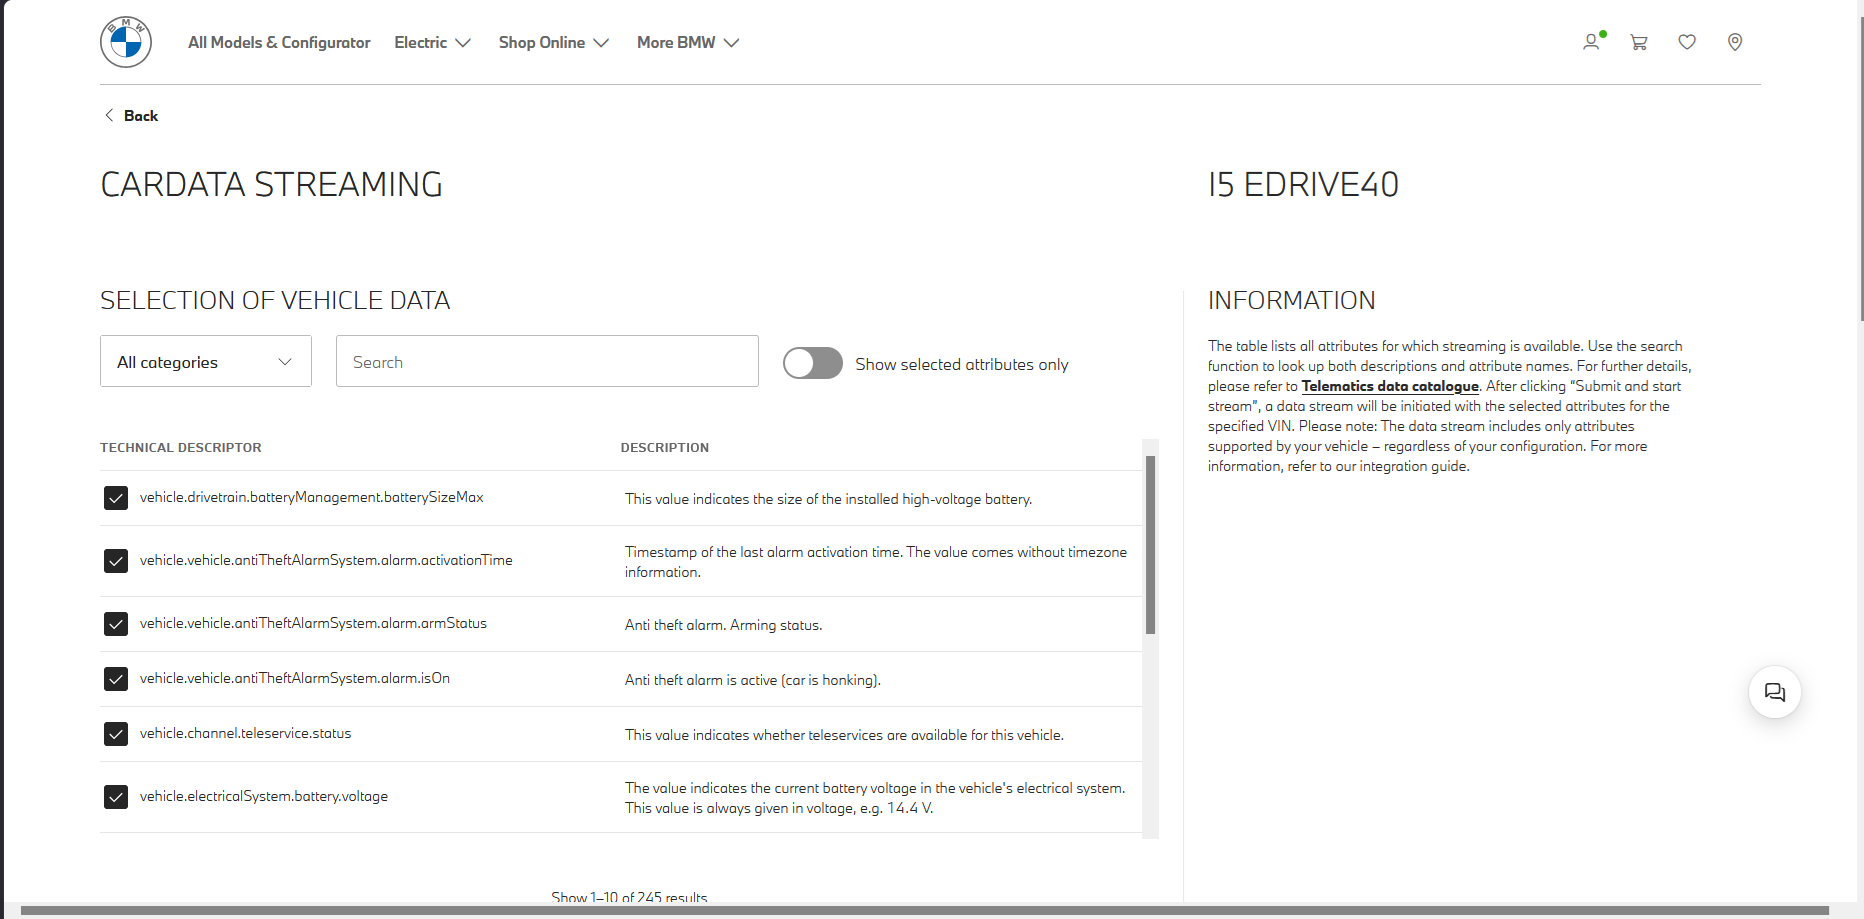
The bookmarklet finds your client ID, checks the vehicle, and turns on the default data fields — all in your own browser, so no password or session ever leaves it. You'll see it read the available fields…
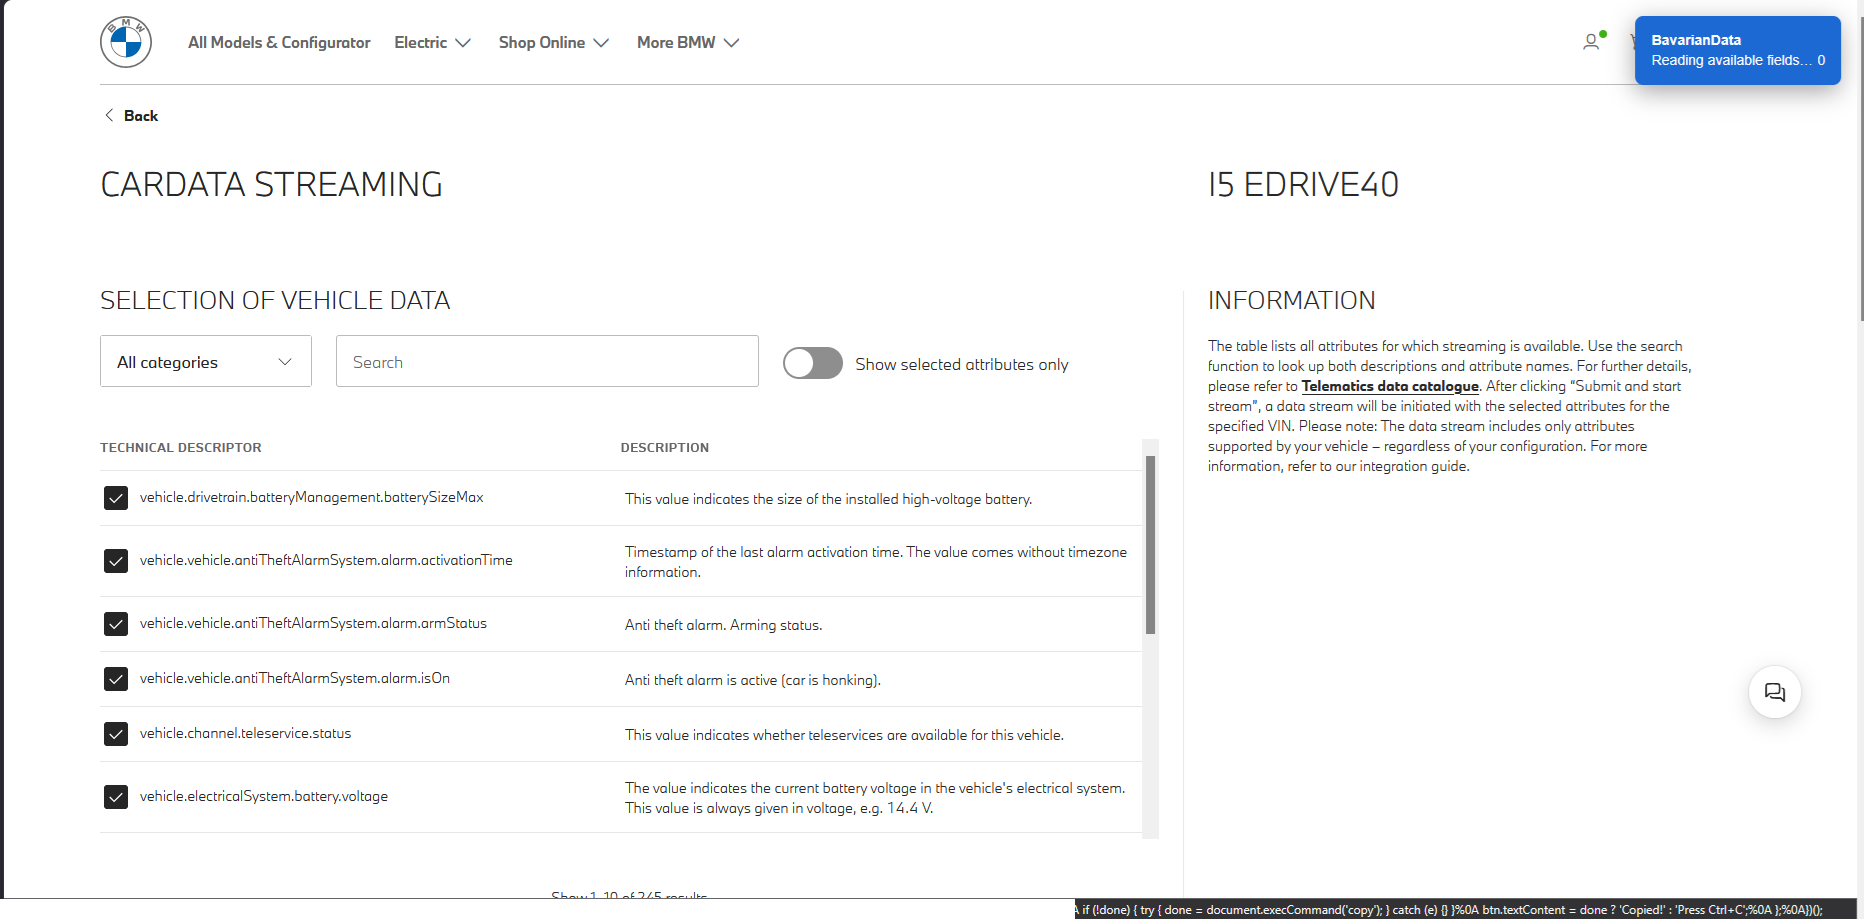
…then report how many are active:
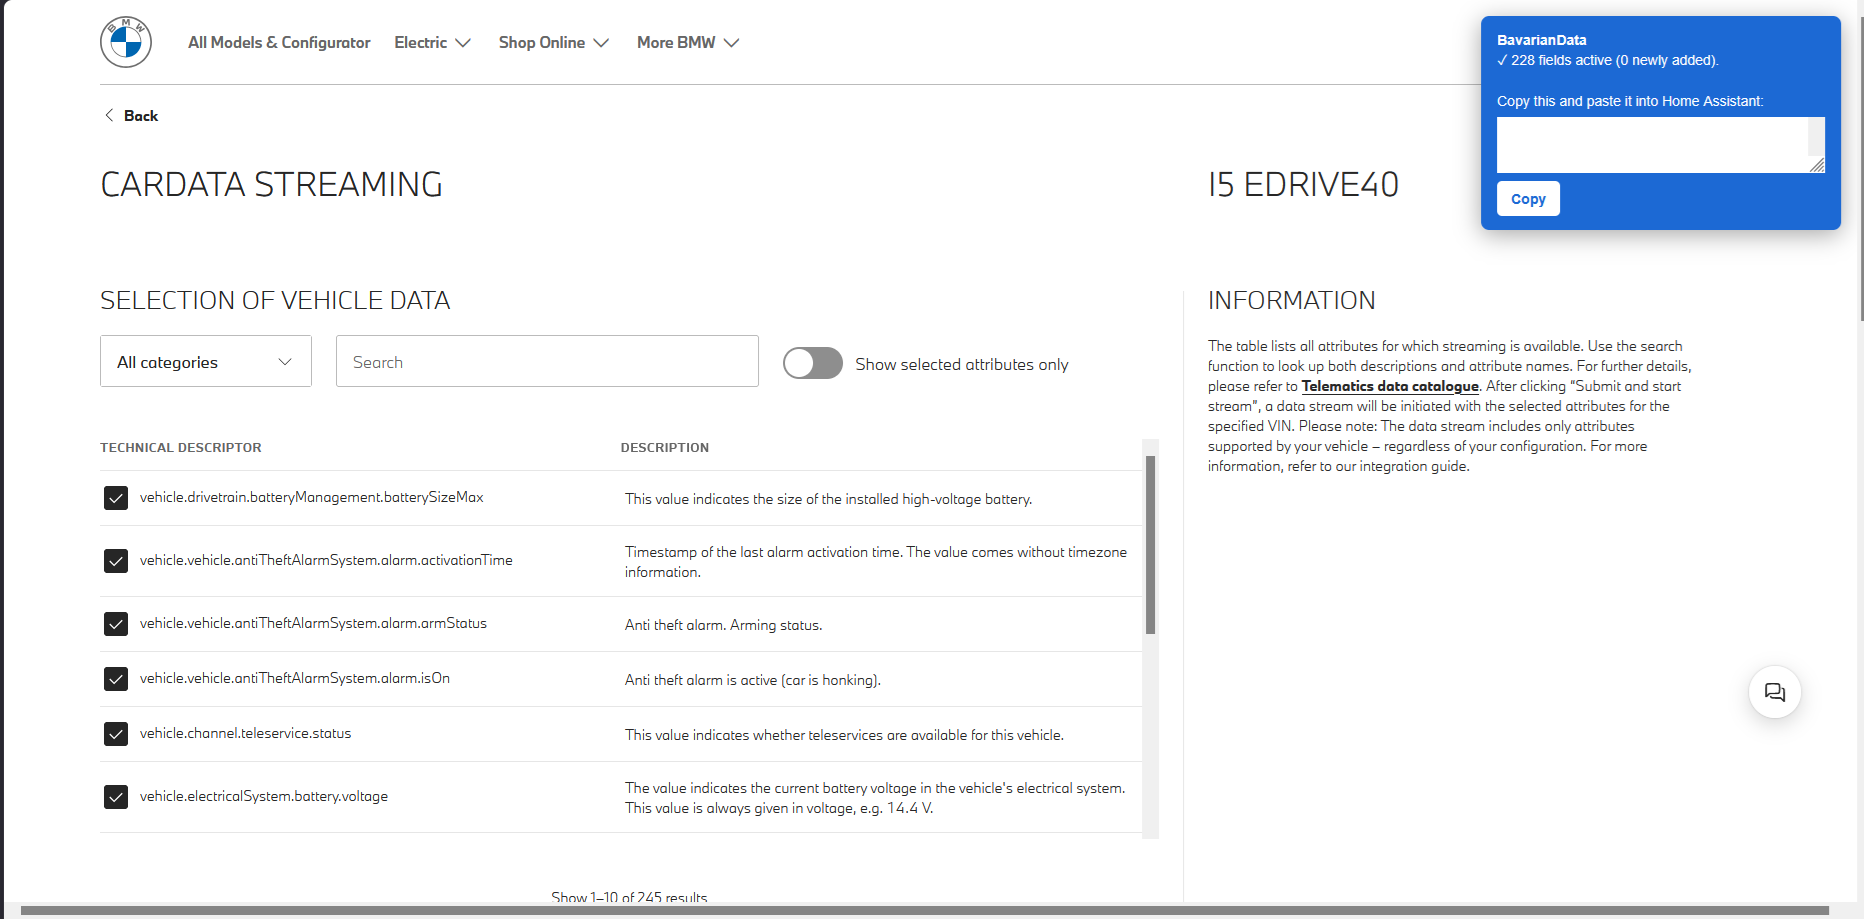
Back in Home Assistant, the guided screen waits for that result:
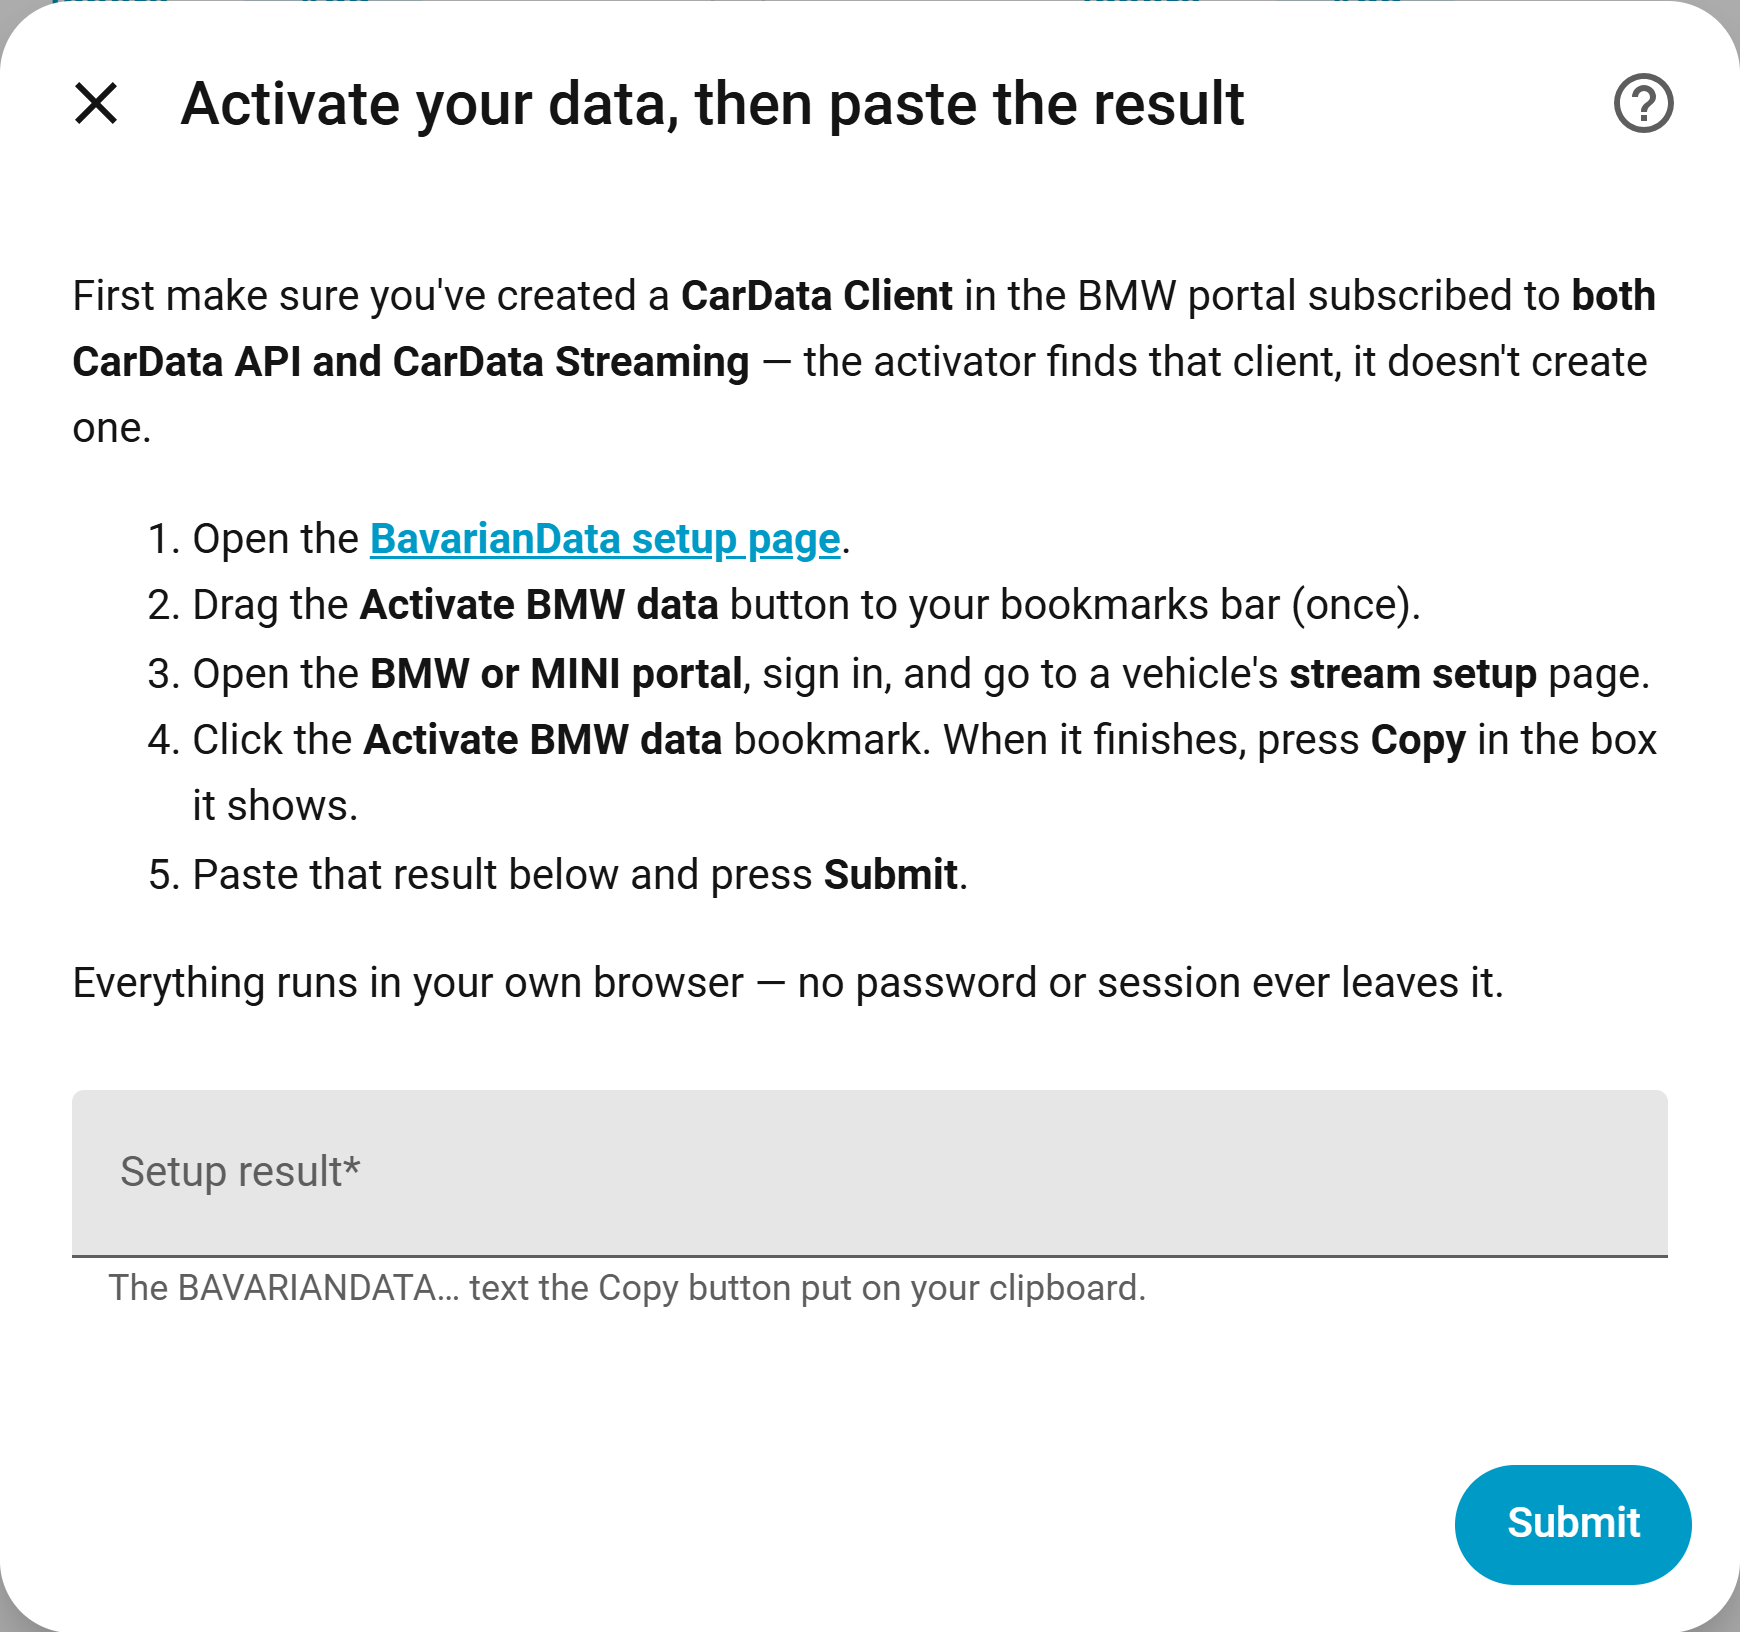
- On an https Home Assistant the activator reports back and setup continues on its own.
- On an http Home Assistant, press Copy in the box the activator shows (pictured above) and paste the short (non-secret) result into the field.
-
Continue with device authorization (below). When it finishes, the default clusters are already streaming — fine-tune them any time from Configure → Choose streamed data.
-
Choose I'll paste the Client ID myself and paste the client ID you copied from the portal.
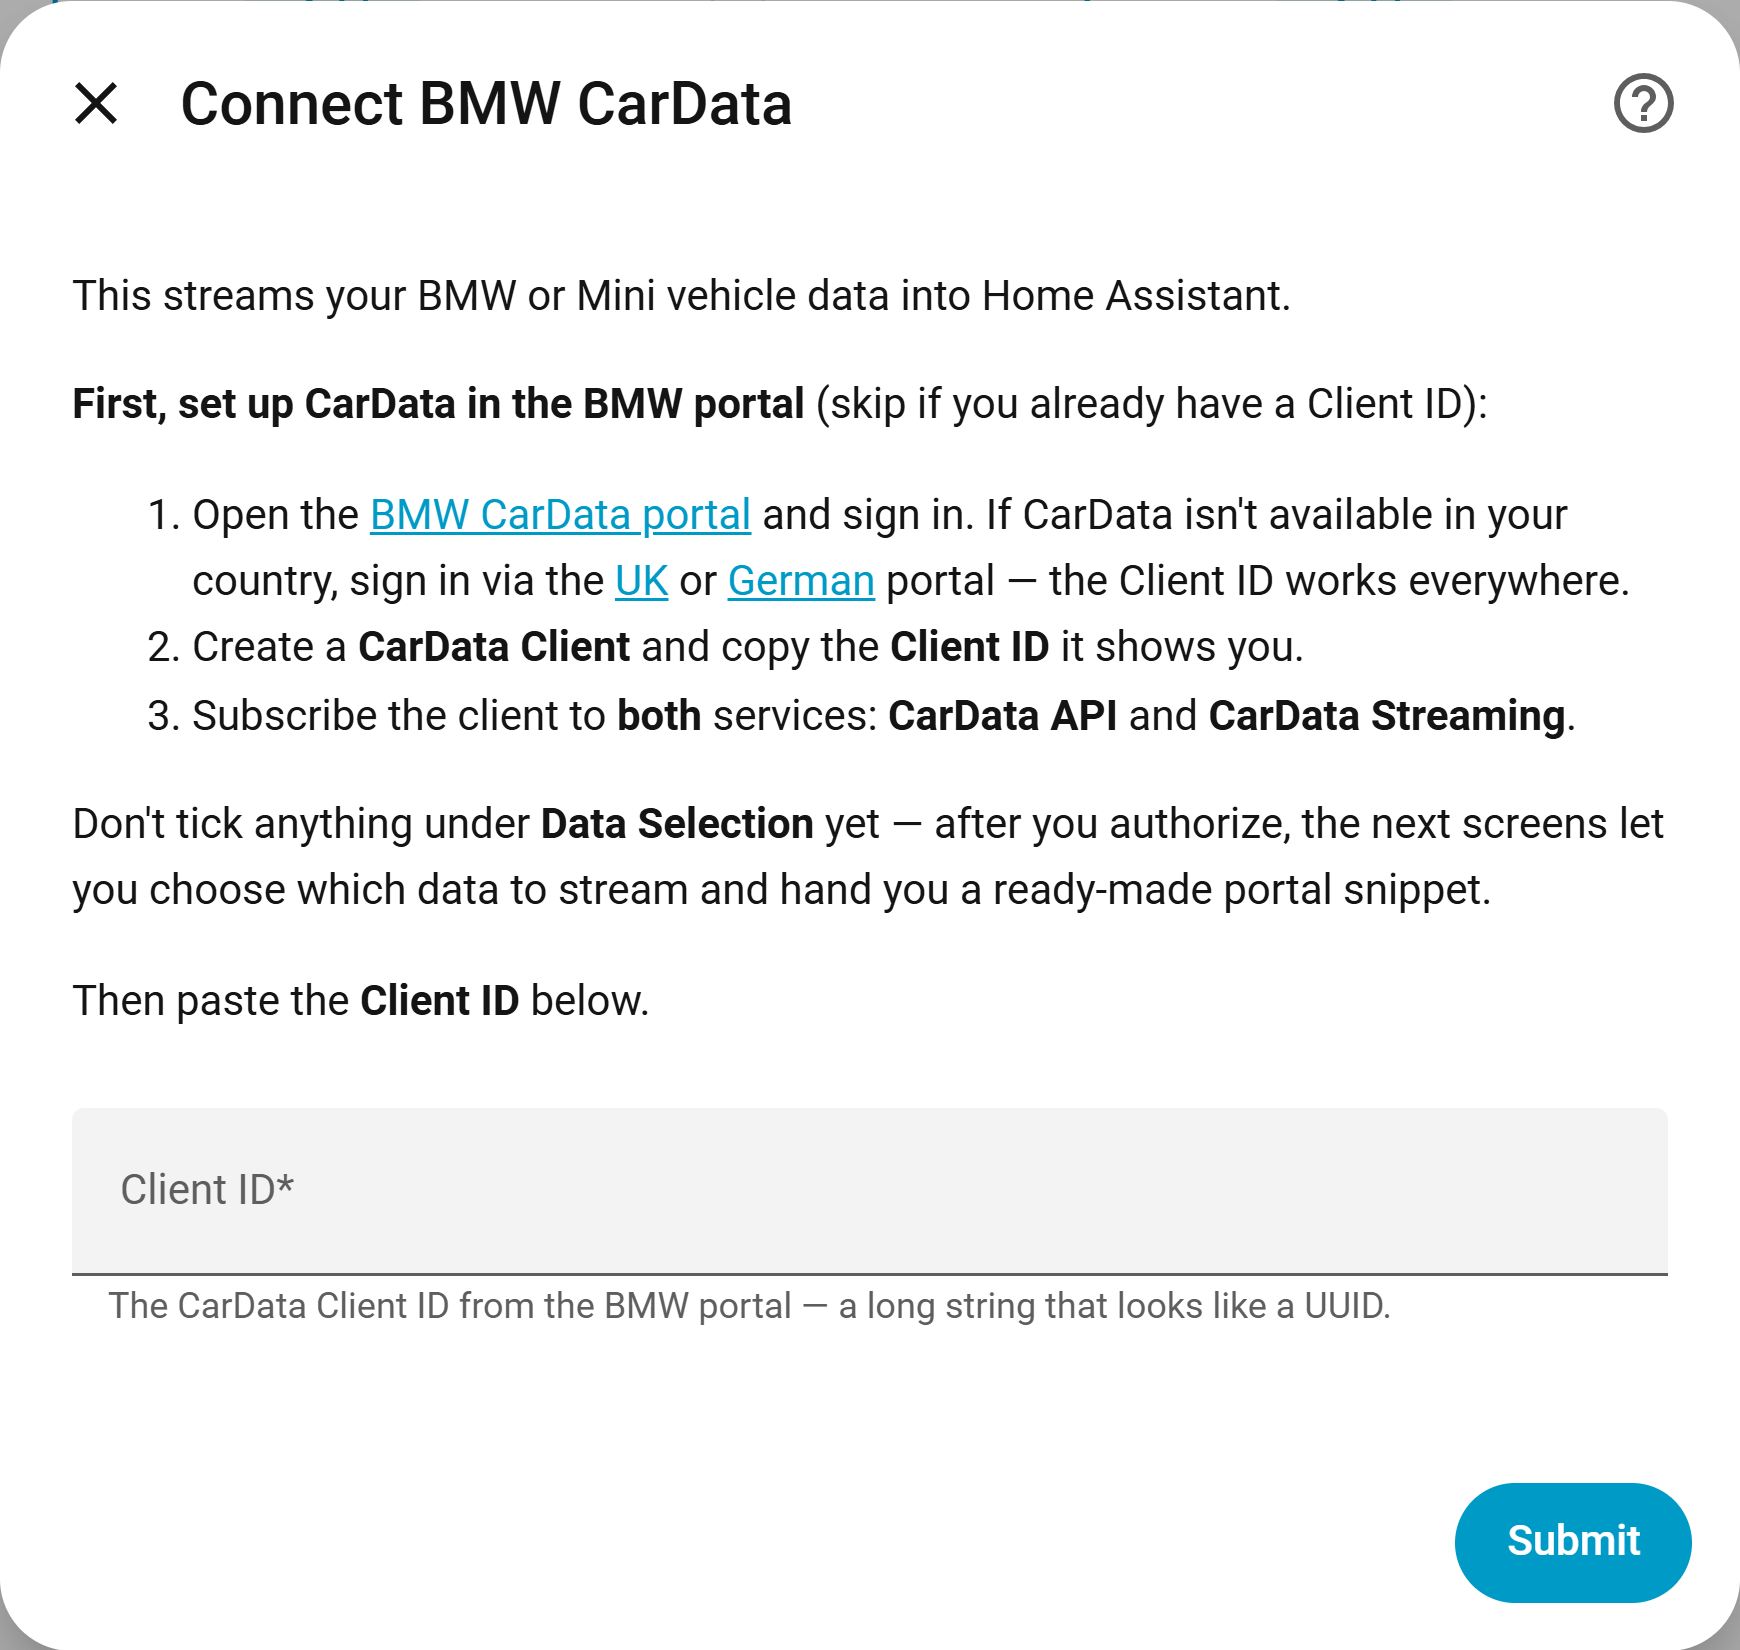
-
Continue with device authorization (below).
-
When authorization succeeds, setup moves straight into the cluster picker, where you choose clusters and get a ready-made snippet for the portal's Data Selection page. Continue with step 4.
Home Assistant shows a link and a code. Open the link, sign in, and approve the device on BMW's site. When BMW accepts the approval, the dialog continues on its own — there is nothing to click in Home Assistant. If the code times out, press Submit for a fresh one and try again.
BMW's authorization backend is sometimes flaky and can report access denied even though your login clearly worked and you never saw a consent page. This is a known BMW-side quirk, not a fault in the integration, and it has a reliable workaround — see Troubleshooting → "access denied".
If BMW later invalidates the token, run Configure → Re-authorize with BMW. Removing and re-adding the integration with the same client ID also works — the previous entry is cleaned up automatically.