Repository navigation
Chemical Reactor
A Chemical Reactor joins its crystal fittings into one shared reaction field. Fit at least one Field Stabilizer and one Reaction Focus.
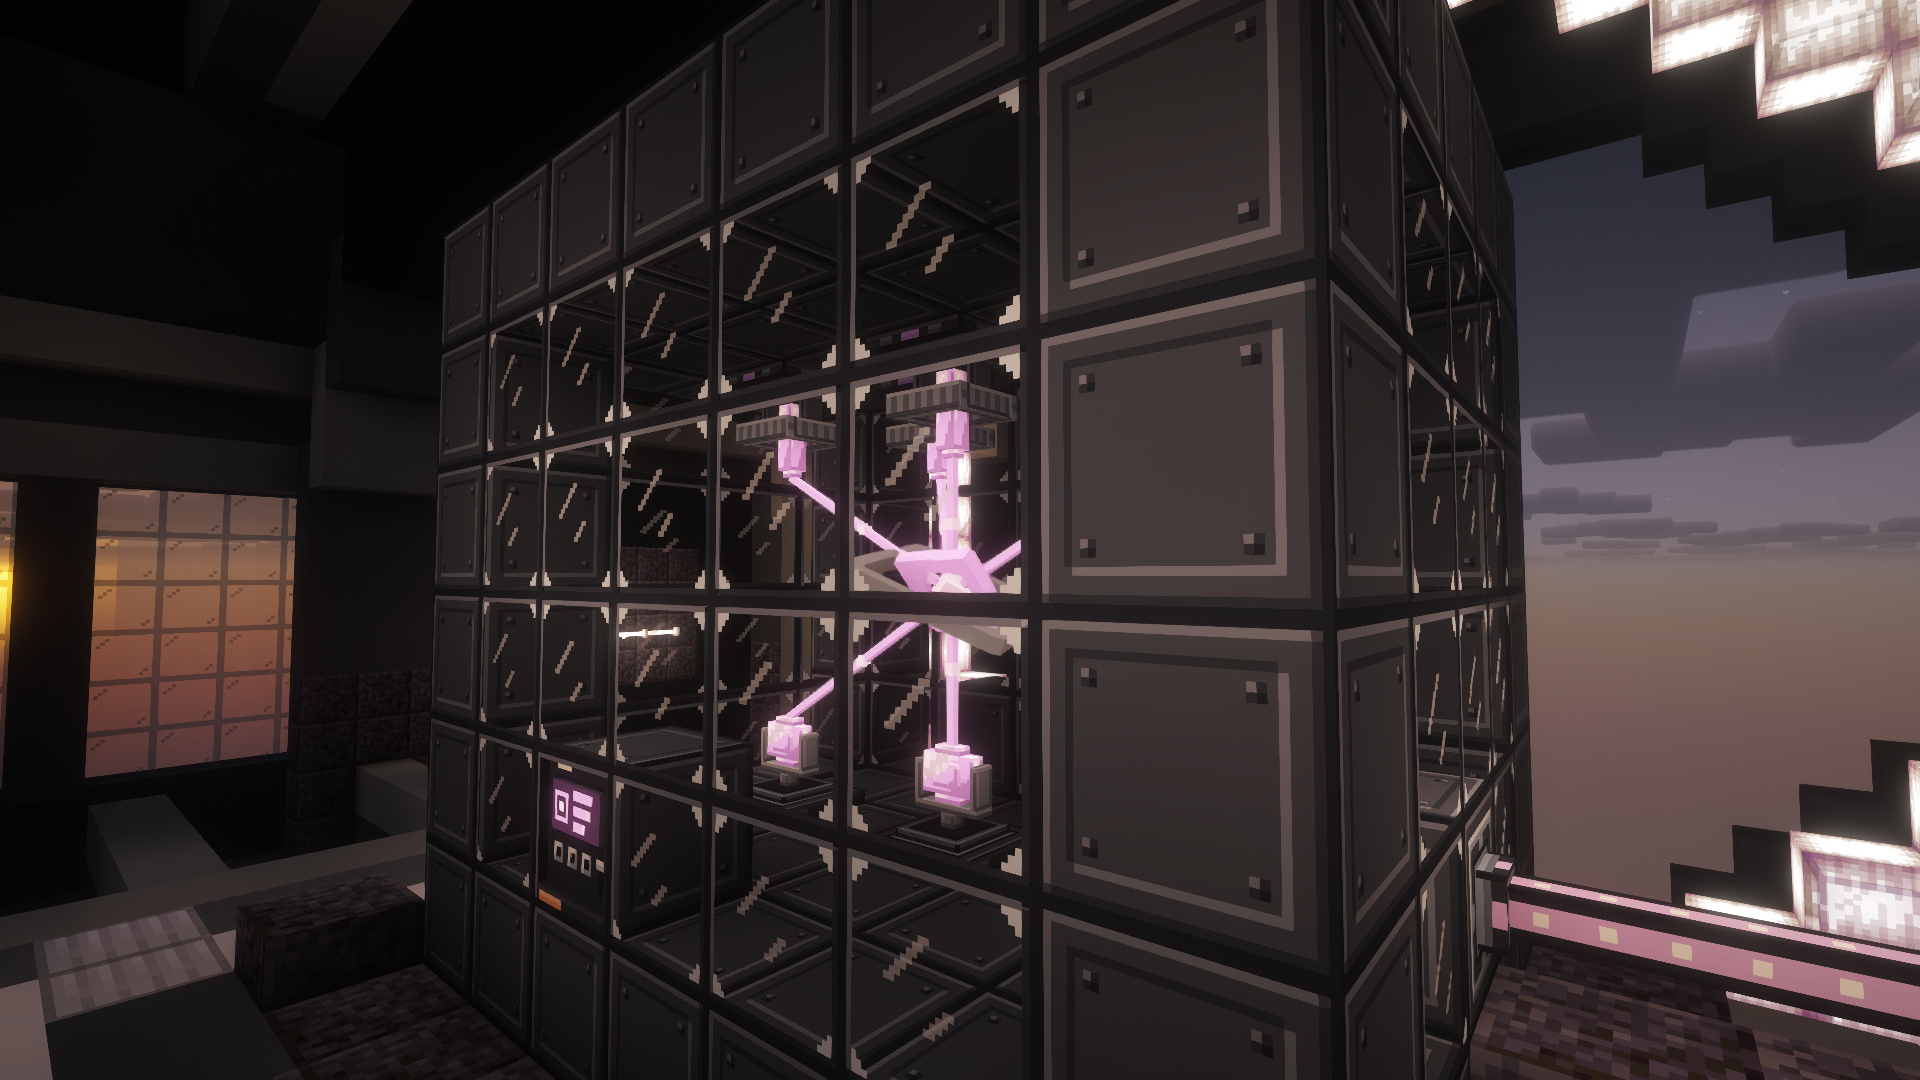
Both types can mount on either the inside floor or under the roof. Click the top face of a floor block or the underside of a roof block to turn the socket and point its crystal into the chamber. Sideways and unsupported placement are rejected.
Stabilizers use a crystal ring. Foci use one large focusing crystal. The same fitting looks mirrored at the ceiling. The field holds and transfers working material, so neither function relies on gravity. Keep the middle clear.
Recipes for Chemical Reactor Controller, Field Stabilizer, Reaction Focus.
Outer width and depth are 3–9 blocks. Height is 4–9, including floor and roof. Build the entire floor, roof, edges and corners from Reactor Casing. Fill the remaining wall panels with Reactor Glass or Reactor Casing and place at least two Machine Ports in those panels. The front controller sits one block above the base.
Recipes for Reactor Casing, Reactor Glass, Machine Port.
This 5 wide × 3 deep × 6 high example uses 46 Casings, 29 Glass, 2 Ports, 1 controller, 1 Stabilizer and 1 Focus. The Stabilizer is on the floor and the Focus is on the ceiling. Either type can use either mounting plane.
View the example one layer at a time
Read from the floor up. The first row of each layer is the front wall. Dots mark empty spaces.
@ Chemical Reactor Controller · C Reactor Casing · F Reaction Focus · G Reactor Glass · P Machine Port · S Field Stabilizer
Layer 1 (floor)
C C C C C
C C C C C
C C C C C

Layer 2
C G @ G C
P S . . G
C G G G C

Layer 3
C G P G C
G . . . G
C G G G C

Layer 4
C G G G C
G . . . G
C G G G C

Layer 5
C G G G C
G . . F G
C G G G C

Layer 6 (roof)
C C C C C
C C C C C
C C C C C
After formation, sneak-use the outside face of each Machine Port with an empty hand (or use a Matter Wrench in Ports mode) to set its mode. Supply FE at the Power Port and connect the Matter Port to a Matter Drive network. Keep at least one readable Cell in the Drive.
Select a permitted reaction and request a batch. Missing stock or FE waits safely. Inspect the controller's Field, input process room, speed, efficiency and active-job values.
Each Reaction Focus adds 16,000 u of simultaneous input room. Each Field Stabilizer adds Field. Advanced procedures require Field 4 or 8. Neither fitting adds a global speed bonus or an FE discount. See Reactor hardware.
Inputs and outputs stay exact. Each controller runs one batch, or up to four with Parallel Upgrades. Empty chamber space adds no throughput. Pause before moving parts. Breaking the shell restarts the unfinished batch when the chamber forms again.
The formed chamber's Casing, Glass, Ports and fittings can only be broken by players who may use its controller. A chamber never takes over a Machine Port inside another owner's chamber.
Open the controller and toggle the chamber blueprint preview in Settings → Structure to highlight missing, misplaced or obstructing blocks in the world. Press Auto-Build in Settings → Structure — or right-click an unformed controller with a Matter Wrench in Ports mode — to place missing Reactor Casing, Reactor Glass, Machine Ports and interior fittings directly from your inventory. Auto-Build checks the entire chamber first. If any block, fluid or entity obstructs construction, the controller places no blocks, a warning names the obstruction and the world preview turns on automatically.
Up to three Parallel Upgrades permit four fully paid jobs when chamber height and process room allow them. Speed, Efficiency and Parallel have separate industrial slots. All jobs share one controller transfer budget. Extra cables and ports do not add rates.