Repository navigation
Build options
Shared code is the 2P1V_Adafruit sketch in firmware and the RheoData notes in software.
The current DIY hardware is the flat 3D-printed panel.
RheoBoardOTS - DIY uses two air pumps, one valve, an ESP32 with BLE, and a Qwiic MicroPressure sensor. On command, it runs a REP (retraction-extrusion pulse) and streams the pressure trace.
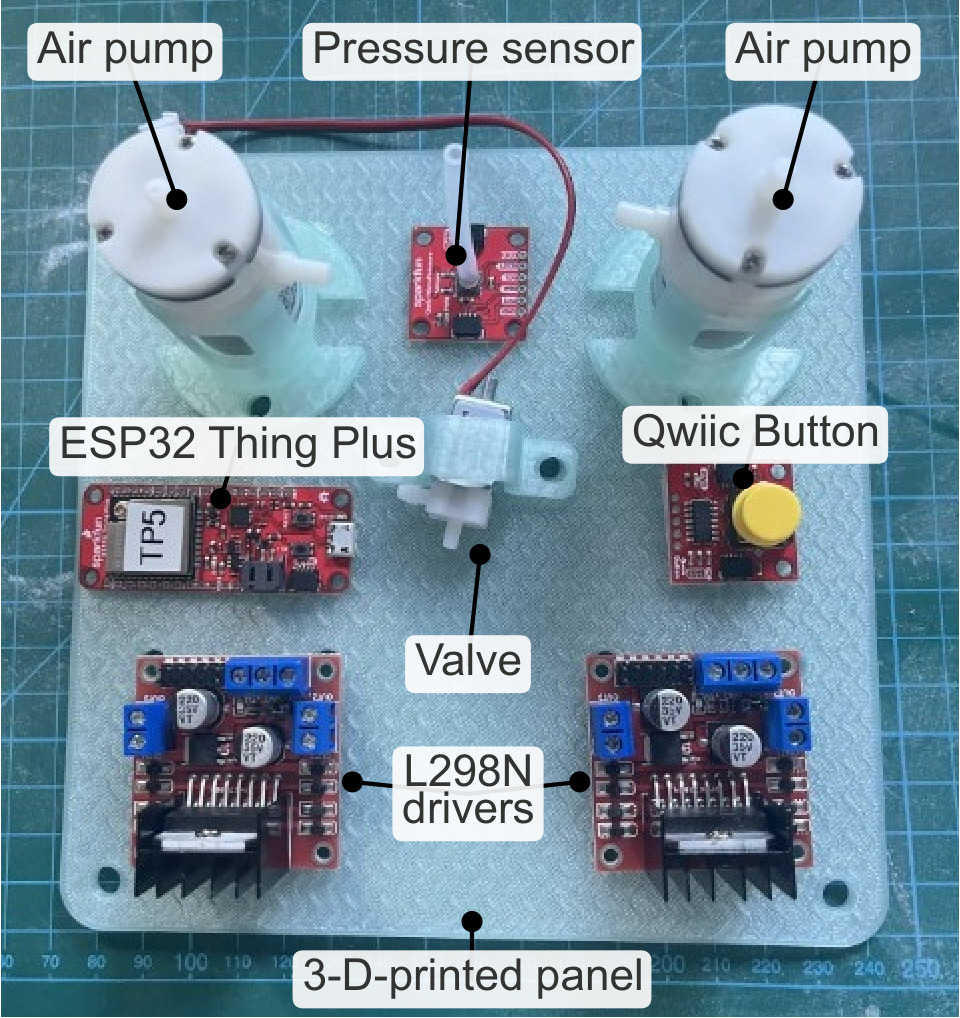
Next: Parts to buy.
This is a separate KiCad 10 board: schematic, layout, libraries, Gerbers, assembly BOM, and pick-and-place. Everyday wall power is a 12 V plug. The board is a 1.6 mm, two-copper-layer layout. It is a prototype.
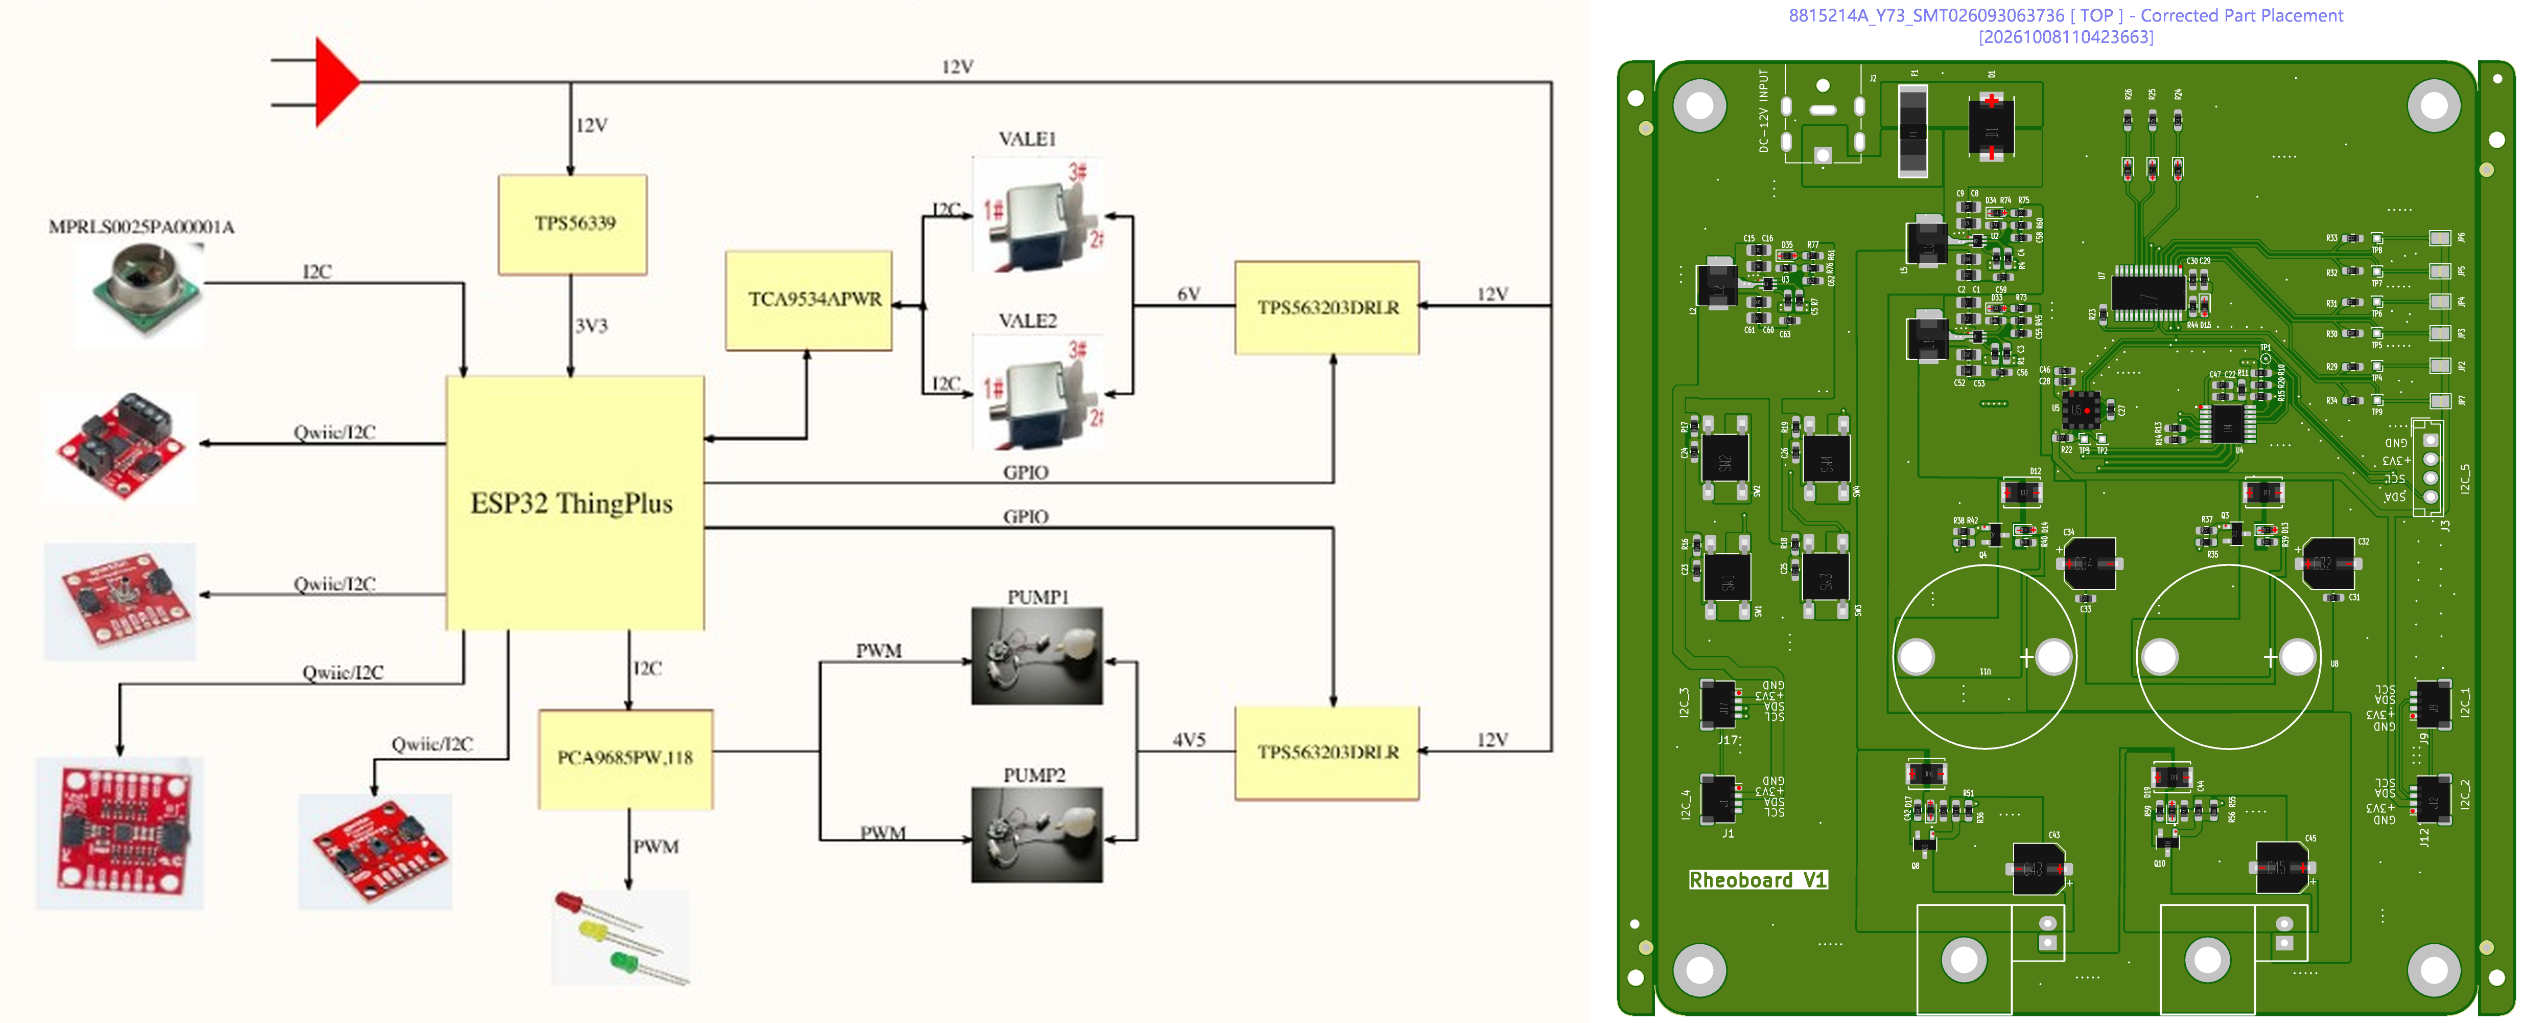
Left is the block diagram (12 V in, valves at 6 V, pumps at 4.5 V). Right is the submitted Rheoboard V1 placement, order 8815214A_Y73 / SMT026093063736.
Next: BOM.
The same firmware and RheoData notes apply. USB uploads firmware to the SparkFun ESP32 Thing Plus. After upload, USB may be disconnected. Portable power is a SparkFun Lithium Ion Battery 1500 mAh, IEC62133 certified (PRT-26059): nominal 3.7 V, and it plugs into that board's JST battery connector (schematic V_BATT, 4.2 V maximum).
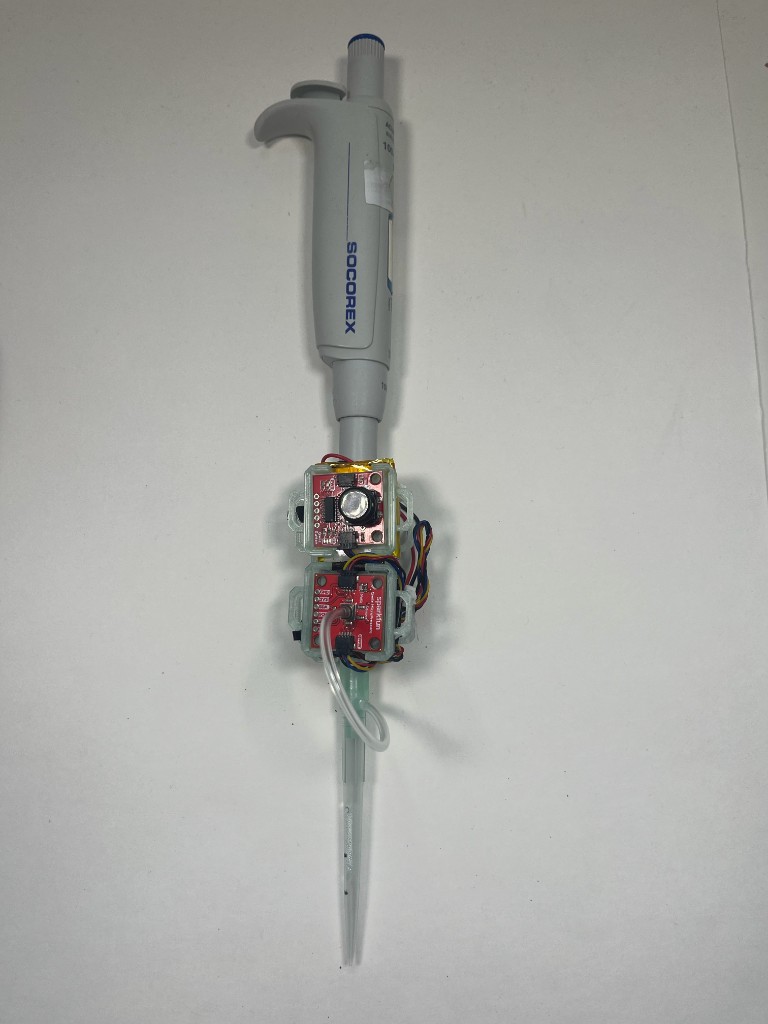
This is the current RheoPipette. Print files are on Portable parts to 3D print.
Next: Portable parts to buy.