Repository navigation
Chats
A chat is a conversation with one coding agent, working in one folder. This page covers the everyday work: sending messages, answering the agent, and finding old chats.
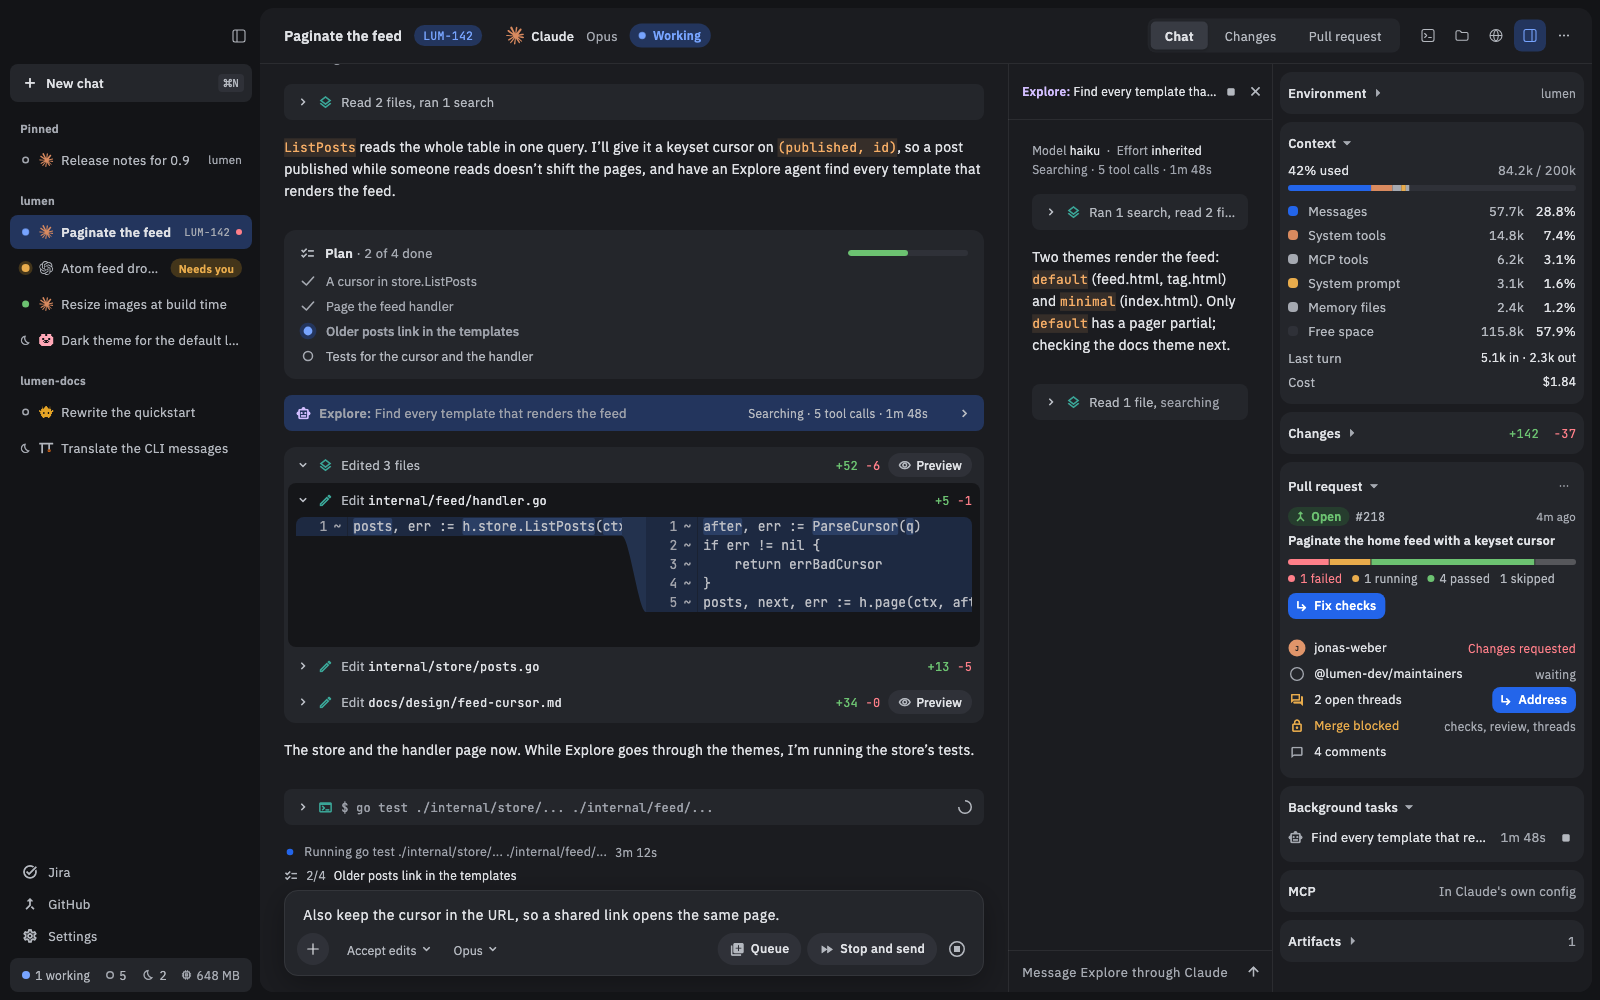
The shortcuts below are the Mac's. On Linux, use Ctrl where the Mac uses ⌘.
- Press ⌘N, or click the + next to a project in the sidebar.
- Pick an agent. The one you used last is already picked.
- Press Enter.
The sidebar lists your chats by project. Click one to open it.
Each project in the sidebar has a small square tile before its name. It shows the repository's own icon when it has one (an icon.png or logo.png, an app's icon, a site's favicon), and otherwise the folder's initials on a color.
To change a project's tile:
- Right-click the project's name.
- Pick Change tile….
- Type an emoji or one or two letters, pick a color, and click Save. Reset puts the tile back.
To use a picture of your own:
- Right-click the project's name and pick Change tile….
- Click Choose image… and pick a PNG, JPEG, GIF or WebP file (up to 16 MB; an animated one up to 4K, 3840 × 2160).
- To show only part of it, zoom in with the Zoom slider (or scroll, or pinch) and drag the picture in the square below it. The tile beside shows the result. Reset framing shows the middle again.
- To play only part of a GIF, drag the handles at the ends of the strip of frames under it. Click Play to watch the part you kept; drag the line between the handles to look at one frame.
- Click Save.
A GIF plays while the pointer is on the tile, framed and trimmed the same way. The picture itself isn't changed, so you can frame or trim it again later: drag the handles back to the ends to keep every frame. To take the picture off, open Change tile… again and click Remove image, then Save. Nushi keeps its own copy of the picture, so the file you picked can be moved or deleted.
To add a project before it has a chat, click the Arrange button at the top of the sidebar, pick Add project… and pick its folder.
Press **⌘**, or click the sidebar button at the top left of the window, right of the window's own buttons. The chat takes the whole window. The button stays in the same place, so the same click brings the sidebar back.
To glance at the sidebar while it's hidden, point at the sidebar button (or rest the pointer on the window's left edge). The sidebar slides in over the chat: pick a chat or use its menus there. It slides away when the pointer leaves it. Click the button while it's out to keep it shown.
The < and > buttons right of the sidebar button go back to the chat you had open before, and forward again, as a browser's Back and Forward do. Jira and GitHub count as places too. A chat you've since deleted or archived is skipped.
- ⌘[: Back (on Linux, Alt+Left).
- ⌘]: Forward (on Linux, Alt+Right).
- ⌥⌘↑ and ⌥⌘↓: the chat above or below in the sidebar (on Linux, Ctrl+Page Up and Ctrl+Page Down).
The project rail is a column of larger tiles at the sidebar's left, one for each project. It's off at first.
- Open Settings, then Appearance.
- Turn on Project rail.
- Click a project's tile. The sidebar shows only that project's chats.
- Click All projects, the tile at the top, to see every project again.
To change the projects' order, drag a tile up or down the rail. The sidebar's list takes the same order, as dragging a project's header there changes the rail.
A number on a tile counts that project's chats that need you. Hover over a tile for the project's name and folder. While the rail is on, the sidebar can't be dragged narrower than the rail needs. The rail isn't there in a very narrow window, or while the sidebar is grouped by something other than Project; its setting then says why.
Each project can sort its chats its own way. The rest keep the order set in the Arrange menu's Sort by.
- Point at the project's name in the sidebar.
- Click the ⇅ button beside its +.
- Pick Last updated, Date created, Name or Manual (the order you drag them into), and which way.
The ⇅ stays, in color, while the project sorts its own way. Pick Sidebar’s sort to go back.
Nushi comes with its own fonts. You can use any font installed on your computer instead, one for the app's text and one for code.
- Open Settings, then Appearance.
- Under Fonts, click App font and pick a font. The whole window changes at once.
- Click Code font and pick a font for code in chats, diffs and files.
The list is long: type a few letters to find a font. To go back, pick the first font in the list, the one marked bundled. On a Mac, System is the font macOS itself uses.
The terminal has its own font, in Settings, then Terminal. The phone always uses Nushi's own fonts.
Type in the box at the bottom and press ⏎ to send. ⇧⏎ starts a new line.
You don't have to click the box first: start typing anywhere in the chat and the letters go into it (a menu, a dialog or another text field keeps them).
- Attach files or images: click the + in the box and pick Add files or photos (⌘U), drop files on the chat, or paste a picture.
-
Mention a file: type
@and pick one. -
Slash commands: type
/to see the agent's commands.
No need to wait for the agent to finish. Type your message, then:
- ⏎, or the Queue button, puts it in line, as a pill over the box. An agent that takes input mid-task gets it right away; otherwise it goes when the current turn ends. You can edit or remove a pill, or send it now.
- ⌘⏎, or the Stop and send button, stops what the agent is doing and sends your message at once.
Press Esc, or click the round red Stop button at the end of the box's row. Queued messages wait until you send again.
In the box's bottom row, after the +, are the agent's own options (in a side chat and on the phone they're under the box):
- First, the mode. The agent's permission mode (for example Auto or Plan) decides what it may do without asking. It's the only permission control; Nushi has none of its own.
- Then the model and its effort. Click to switch; the menu also has Effort and More models.
- The ⋯ button holds any other options the agent offers.
A chat remembers your picks, and a new chat starts with the ones you last picked for that agent.
When the agent asks permission to run something, or asks a question, the chat needs you:
- A card shows in the chat: a Permission card with the agent's choices (such as Allow or Deny), or a question card with Submit and Skip.
- The chat's dot in the sidebar turns amber and its row says Needs you, and Nushi's app icon shows how many chats need you.
- If you've scrolled up, a Needs you chip takes you down to the card.
Nushi never answers for you.
Nushi notifies you when a chat needs you, a turn ends, or a turn fails. Click one to open its chat. Pick which you get, and the sound, in Settings › General › Notifications.
Point at one of your messages, click its rewind button (Rewind to here), then click Rewind to confirm. Or press Esc twice in the box and pick a message: that rewinds at once.
The agent forgets everything from that message on, and the message goes back in the box to edit. Files are not rewound: the agent's changes on disk stay.
Press ⇧⌘B to open a side chat beside the main one. It knows the conversation but doesn't add to it, so you can ask "why did you do that?" without sidetracking the agent. ⇧⌘B hides it again; Keep as chat makes it a chat of its own.
× ends it at once. If it has messages, it's archived rather than deleted, and a toast says Archived side chat:
- Click Undo in the toast (within ten seconds) to bring it back beside the chat, as it was.
- Later, find it in Archived as "Side chat of" the chat's title. Delete it there if you don't need it.
If Undo can't bring it back (the chat was deleted or archived, or has another side chat open), the toast says so.
To keep a chat's work apart from your checkout, click New worktree under the box before the first message. It shows only when the chat's folder is a git repository. The chat gets its own git worktree, on a new branch named after the chat. Review its work in the Changes tab: see Reviewing changes.
- ⌘K finds any chat by title.
- Settings › Chat history lists past chats, searchable by title and folder. Click a title to open it.
- For a session you started in a terminal, press ⌘N, highlight the agent and click Sessions (or →).
- Chats belong to your agent. Each is the agent's own session, so its own resume command, run in the chat's folder, picks it up in a terminal.
- Quitting Nushi doesn't stop your agents. A background helper (the daemon) keeps them and the chat's terminals running. More on terminals in Previews and terminals.
- The card at the bottom of the sidebar counts the agents that are working, awake and asleep, and shows the memory Nushi takes. Click the memory to see each awake chat's, with Sleep beside it.
- Idle chats sleep after 30 minutes: the agent stops, and your next message wakes it. Change it in Settings › General › Sleep idle chats.
- Rewind and side chats show only for agents that support them.
- Don't use a session in Nushi and a terminal at once: both write to it.