User Manual
Don't like reading watch our video tutorial
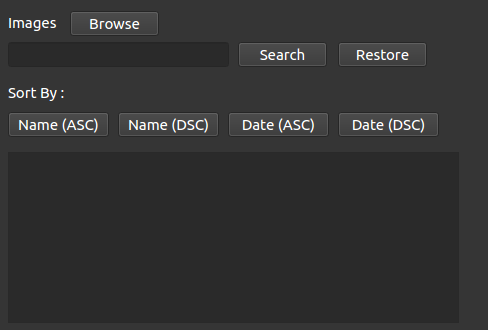
To open a folder using the image file browser simply click the browse button next to the Images label, this will open up your default OS file browser, simply select the folder you want to open and its content should appear in the appropriate list if the folder contains any images.
Simply input the name of the file you want to search for in the text box to the left of the Search button and after that's done simply click the Search button. To restore all files in the file list click the Restore button.
To sort the image files simply click on one of the button options above the file list.
Name (ASC) will sort the images by name in ascending order.
Name (DSC) will sort the images by name in descending order.
Date (ASC) will sort the images by date in ascending order.
Date (DSC) will sort the images by date in descending order.
By selecting an image in the image list you can load an image to the display view.
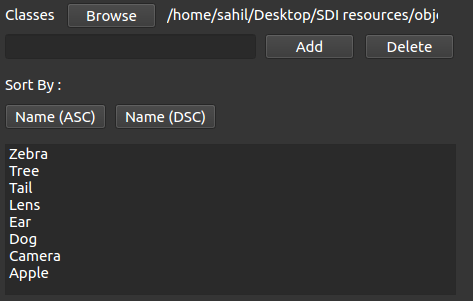
To open a class file click on the browse button next to the Classes label, this should open up the default OS file browser, click on the .names file you want to select. A names file is simply a text file with text separated by a new line.
To add a class to the selected file simply fill the text box next to the Add button and click the Add button.
To remove a class from the selected file select the class you want to remove from the class file list and click on the Delete button.
To sort the classes simply click on one of the button options above the file list.
Name (ASC) will sort the images by name in ascending order.
Name (DSC) will sort the images by name in descending order.
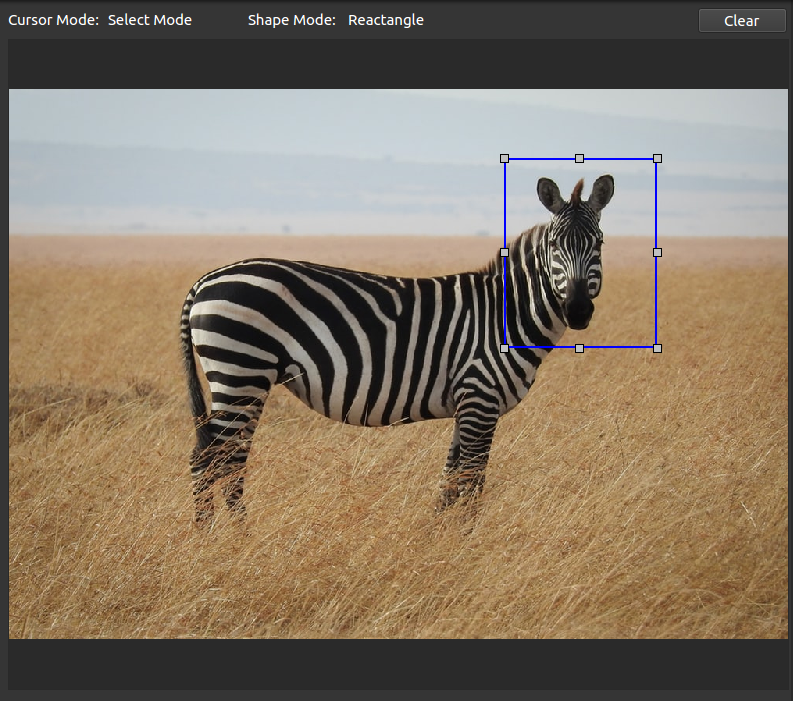
Make sure your cursor mode is in drawing mode and your shape mode is on rectangle. This can be done by selecting Label->Mark Object and Shape->Rectangle from the menu window.
While clicking the left button on your mouse simply drag on the area you want to annotate.
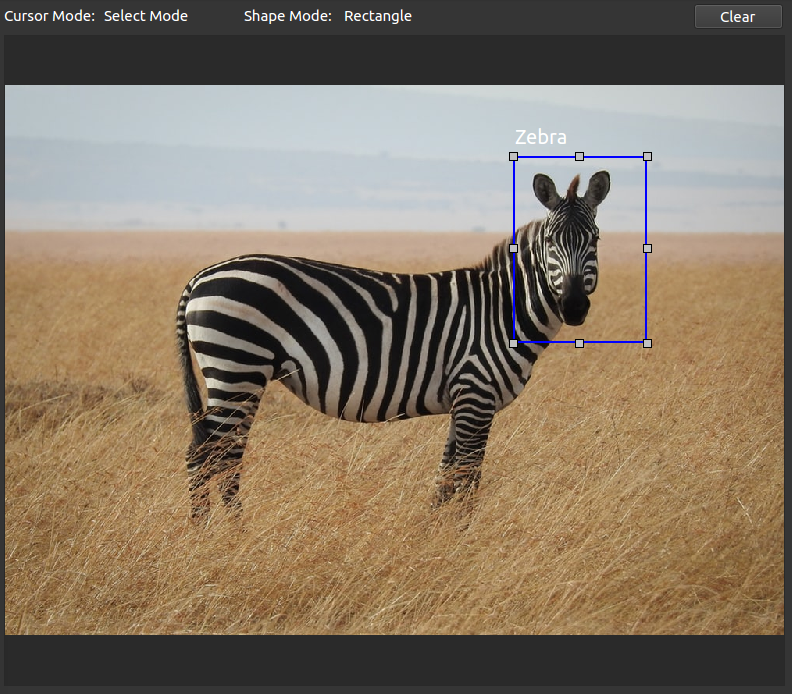
Make sure your cursor mode is on adding text mode. This can be done by selecting Label->Add Text from the menu window. Additionally, ensure you have the classes file open to be able to select a text you want to add to the image.
Select a text from the classes file list, then simply click on the area on the image you want to add the text.
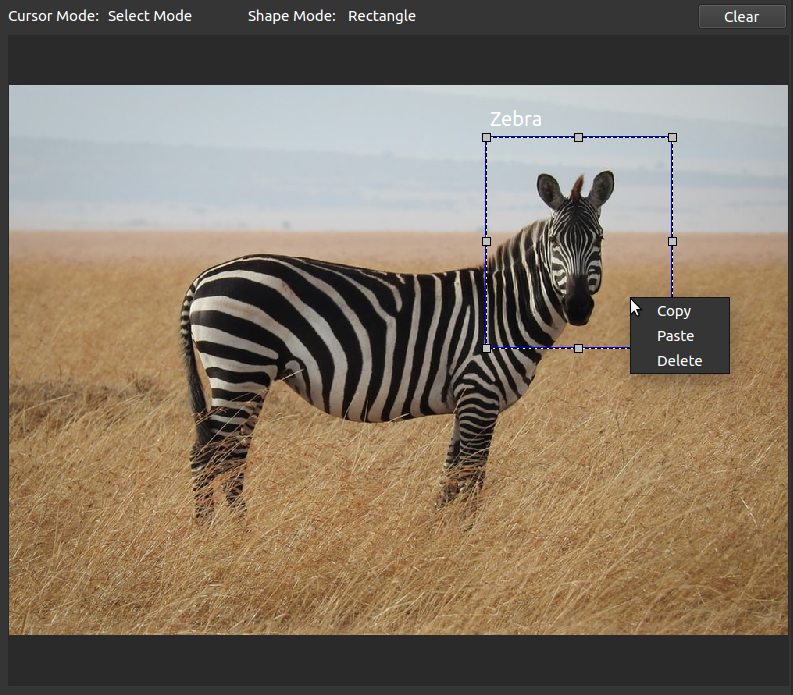
Make sure your cursor mode is on select mode. This can be done by selecting Label->Select from the menu window.
To resize an annotation point the cursor to the grey points on the various points of the rectangle, then click and drag the points around till you cover the area you desire with annotation.
To move an annotation or label, click anywhere inside it and once selected click and drag the object anywhere you want. You can also deselect an object by left-clicking anywhere on the image.
To copy and paste an annotation or label select an object and once selected right-click to open the context menu. You can press copy to copy to the clipboard, you can dismiss the clipboard by left-clicking anywhere on the image, you can also deselect an object the same way. Once you have copied an object you can right-click to open the context menu again and click on paste to paste the object wherever you want.
You can also use keyboard shortcuts, such as Ctrl+C to copy and Ctrl+V to paste. For mac users instead of Ctrl, it is the Command key. You can also you the options available under the edit section in the menu window to do the same.
To delete an annotation or label select an object and once selected right-click to open the context menu and click delete.
You can also use the delete key to delete an annotation or label. You can also you the options available under the edit section in the menu window to do the same.
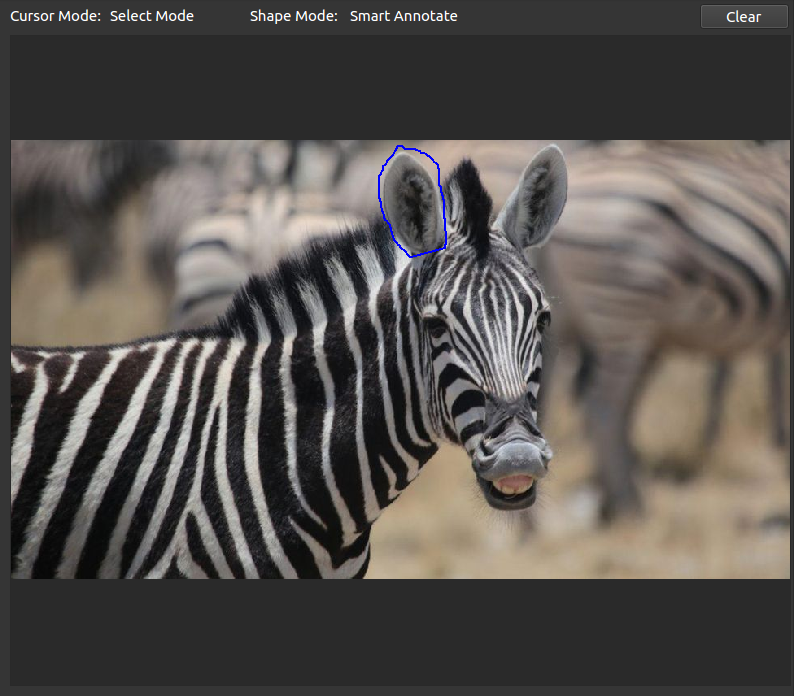
Smart annotate is a really powerful tool that lets you annotate images with extreme precession. Make sure your cursor mode is in drawing mode and your shape mode is on Smart Annotate. This can be done by selecting Label->Mark Object and Shape->Smart Annotate from the menu window.
Simply click and draw over the area you want to annotate, when you are close to the end you can simply release the cursor to auto-complete the annotation. This feature better with styluses and drawing tablets.
You can move, copy-paste and delete the annotation like any other.
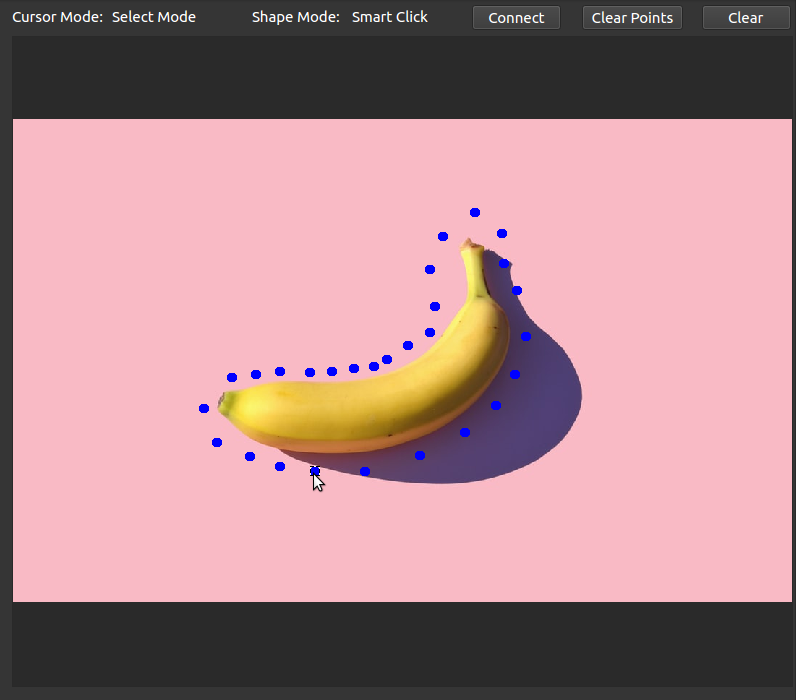
Smart click is another really powerful feature that lets you annotate images with good precession and generate a smaller annotations file. Make sure your cursor mode is in drawing mode and your shape mode is on Smart Click. This can be done by selecting Label->Mark Object and Shape->Smart Click from the menu window.
Click over the area you want to annotate that will later connect to form a polygon. Once you are done covering the area you want to annotate, click the connect button on top of the image viewer to connect the points. You can alternatively click clear points to clear all points.
To edit individual points, change the cursor mode to Select Mode then you can move and delete the point like any other object.
You can move, copy-paste and delete the annotation like any other.

To clear all annotations and labels on an image, click on the clear button on the right-hand corner of the image viewer.
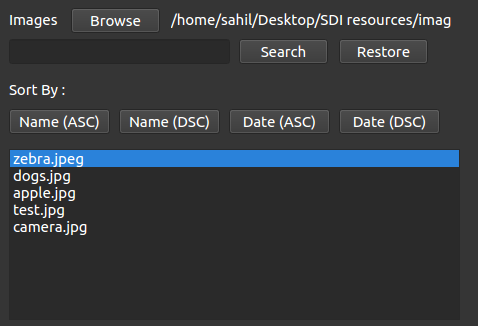
To work with multiple files use the image file list to switch the file you are working with. You can also work with multiple folders by simply opening another folder with the browse option. All your work from the current session or the annotation file will remain on the image.

To save all your work click the save button, this will open the default file explorer of your OS to help you save your file. To open an existing annotations file click on the browse button next to the Annotation File label, then using the file explorer open your annotation file. Your work is auto-saved every thirty seconds if you have an annotations file opened
Tip 1: Save or open an empty annotation file to auto-save your work every thirty seconds to be on the safe side.
Tip 2: Open annotation files one after the other to combine work from multiple annotation files.