Getting Started
English · 한국어
Click the coffee icon in the ribbon, or run the command Open Brewing View. The brewing panel opens in the right sidebar.
- Turn on the Acaia Pearl S and make sure no other app is connected to it (close the Acaia app on your phone — the scale accepts one connection at a time)
- Click Connect Scale at the top of the brewing view
- The plugin scans, connects, and shows Connected with the live weight readout
If the connection drops mid-session, the plugin retries automatically (up to 3 attempts). You can also use the Connect / Disconnect Scale command.
The brewing view walks you through five accordion steps:
- Brew Method — Filter or Espresso; each has its own parameter set
- Bean Selection — pick from your active beans; the previous brew's settings are shown for reference
- Brew Variables — grinder, grind size, RPM, dose, water temperature, and dripper/filter (Filter) or basket/drink (Espresso). Dose can be auto-filled from the scale
- Brewing — press Start Brewing; the live weight chart records your pour. For espresso, press Done when the shot finishes
- Memo — add notes and save. The bean's remaining weight is reduced by the dose automatically
| Command | What it does |
|---|---|
| Open Brewing View | Opens the sidebar panel |
| Connect / Disconnect Scale | Toggles the BLE connection |
| Tare Scale | Zeroes the scale |
| Auto-fill Weight | Fills the dose field from the current scale reading |
| Proceed / Start / Stop / Save | Advances the brew flow — handy on a hotkey so you never touch the mouse mid-pour |
| Power Off Scale | Turns the scale off |
Three code blocks render live widgets in your notes:
-
```beans— bean inventory hub. Add it to any note (e.g. a "Coffee Dashboard"); one per vault is enough. Shows active/finished beans, roast days, remaining weight, and a + New Bean button -
```brews— per-bean brew history table. Auto-inserted into new bean notes; requirestype: beanfrontmatter -
```brew-day— daily brew records. Add it to a daily note namedYYYY-MM-DD.md
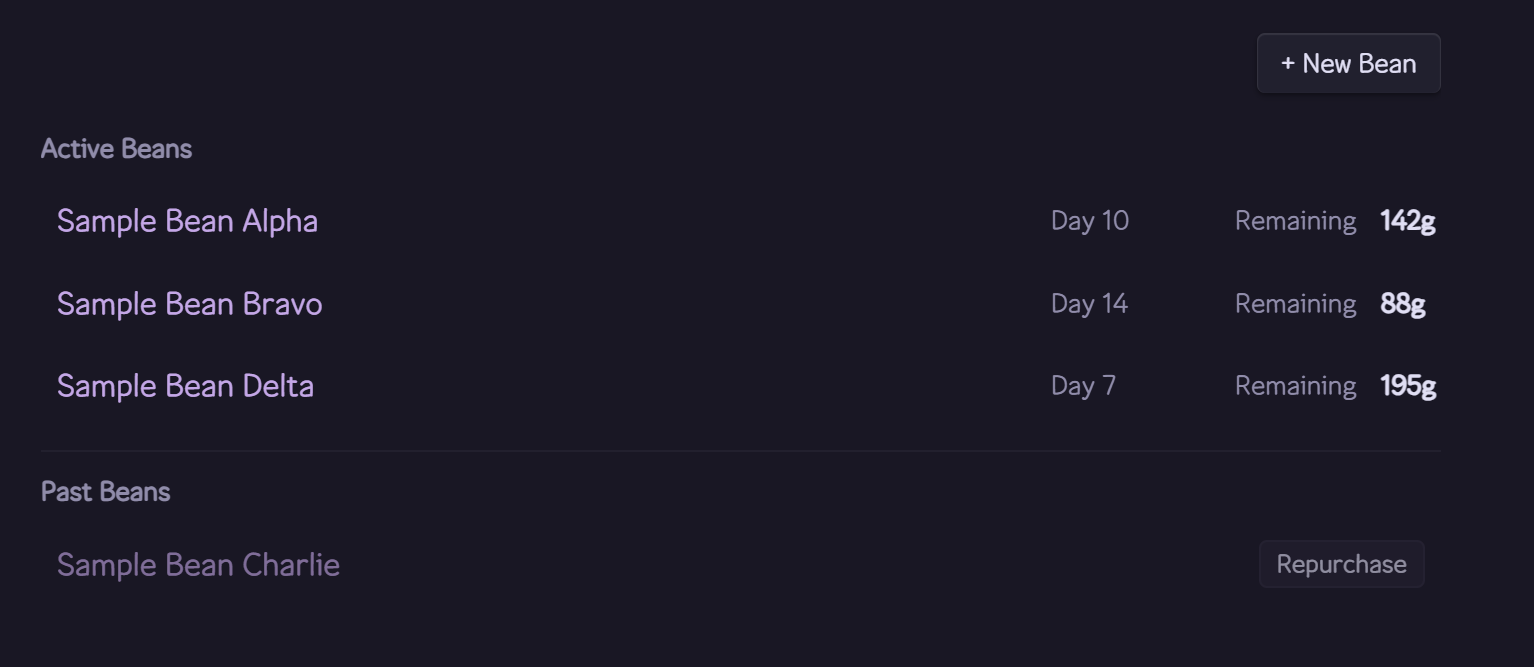
Bean inventory — roast days, remaining weight, and status tracking per bean
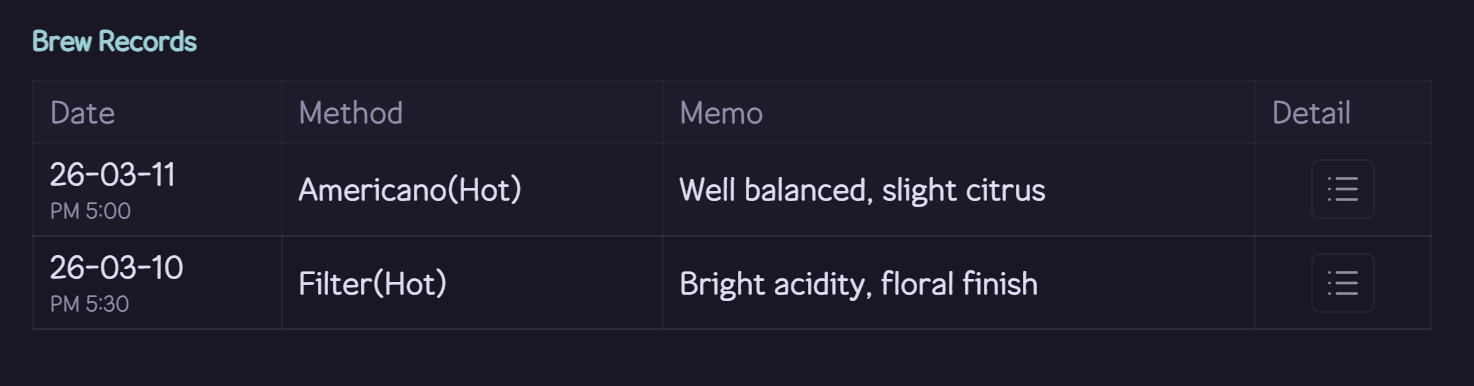
Per-bean brew history table
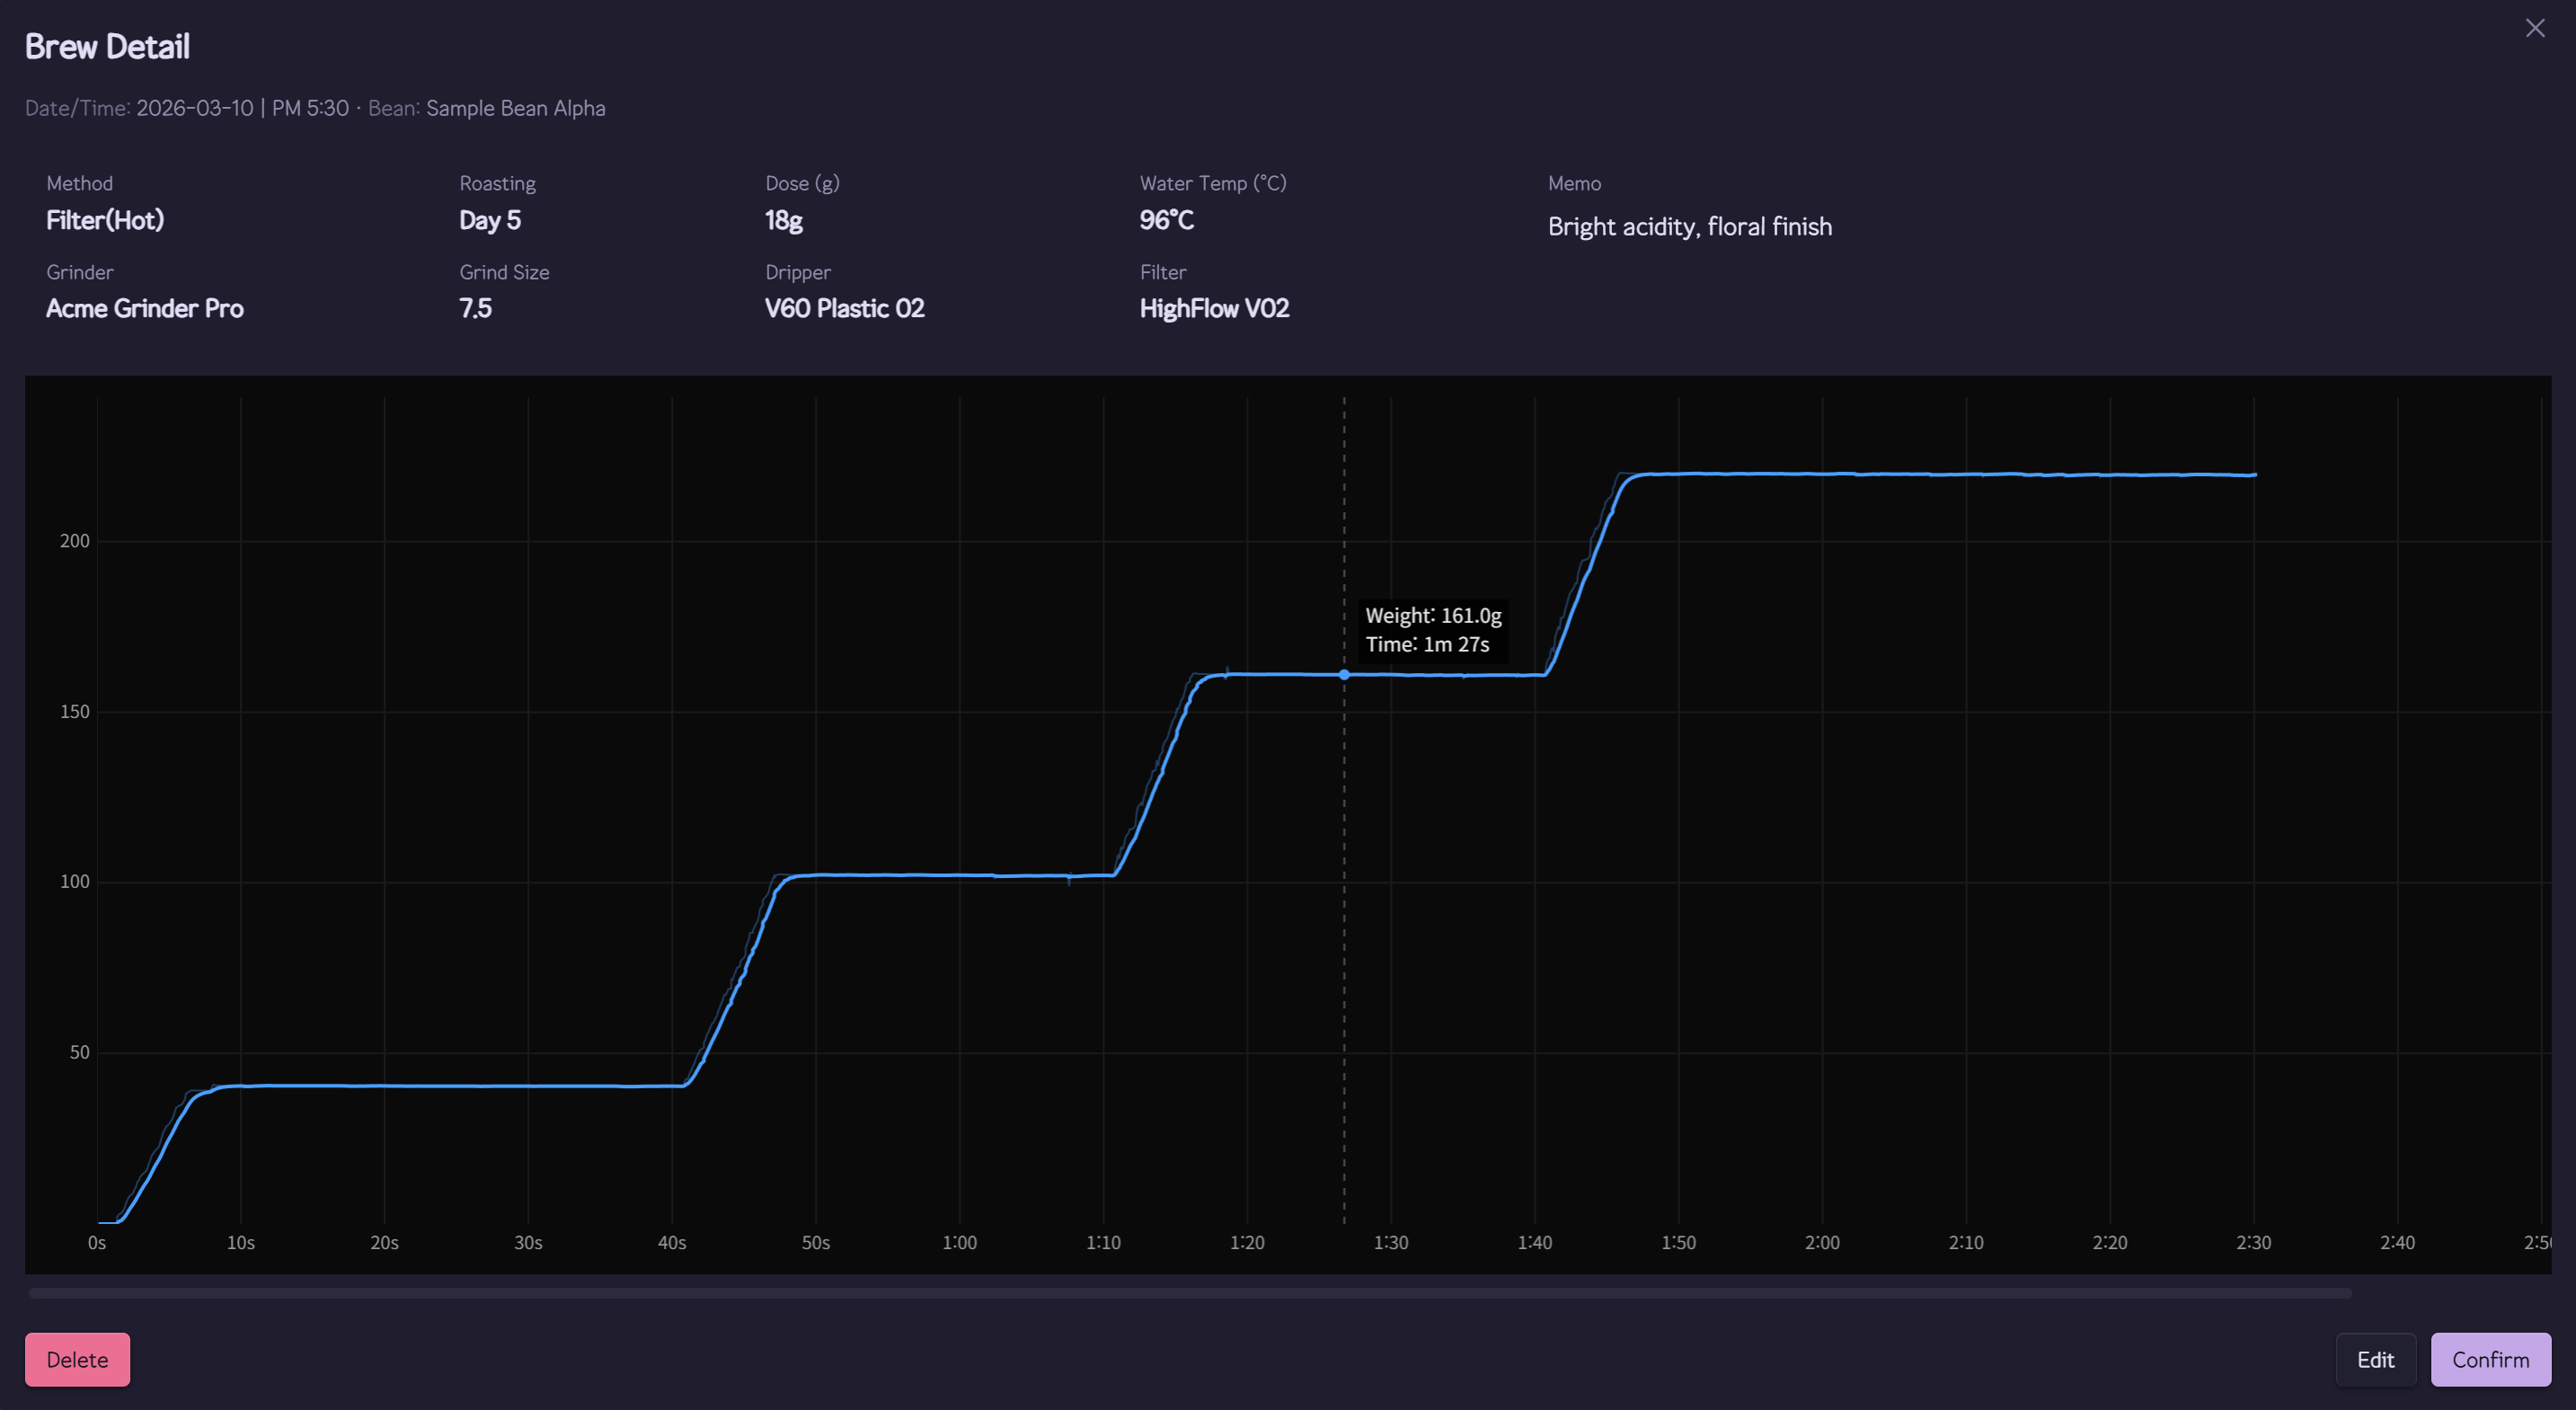
Brew detail — extraction parameters and weight-over-time profile chart
Bean notes are regular notes with frontmatter — no special folder structure required:
---
type: bean
roaster: My Roaster
status: active
roast_date: 2026-03-01
weight: 200
---- Bean Folder — where new bean notes are created
- Language — English or Korean (restart Obsidian to apply)
- Debug Log — writes a plugin log file, useful for bug reports (see Troubleshooting)
Everything is stored as plain files inside your vault, so Obsidian Sync and backups just work:
| Data | Location |
|---|---|
| Bean notes | Your Bean Folder (regular markdown notes) |
| Brew records | cubicj-brewing/brew-records.json |
| Brew profiles (weight curves) | cubicj-brewing/brew-profiles/*.json |
| Equipment & plugin settings | .obsidian/plugins/cubicj-brewing/data.json |