n8n Integration
Connect CloudBeaver to n8n to automate your database workflows. Build workflows that execute SQL queries, select rows, insert data, update records, and delete data across your configured connections.
The CloudBeaver node is a verified n8n community node. It lets your workflows run database operations through CloudBeaver's GraphQL API.
Gather the necessary details before you build your workflow.
-
Deploy CloudBeaver.
For instruction on deployment, see CloudBeaver Deployment.
-
Create a CloudBeaver access token or use local credentials.
-
Find your database connection ID.
Tip: To find your connection ID, right-click the database in the CloudBeaver Database Navigator, select Open, and copy the ID from the connection window.
Connect your node to your server:
-
Open your n8n workflow editor and click + in the top right to open the Nodes panel.
-
Search for
CloudBeaverand install the node.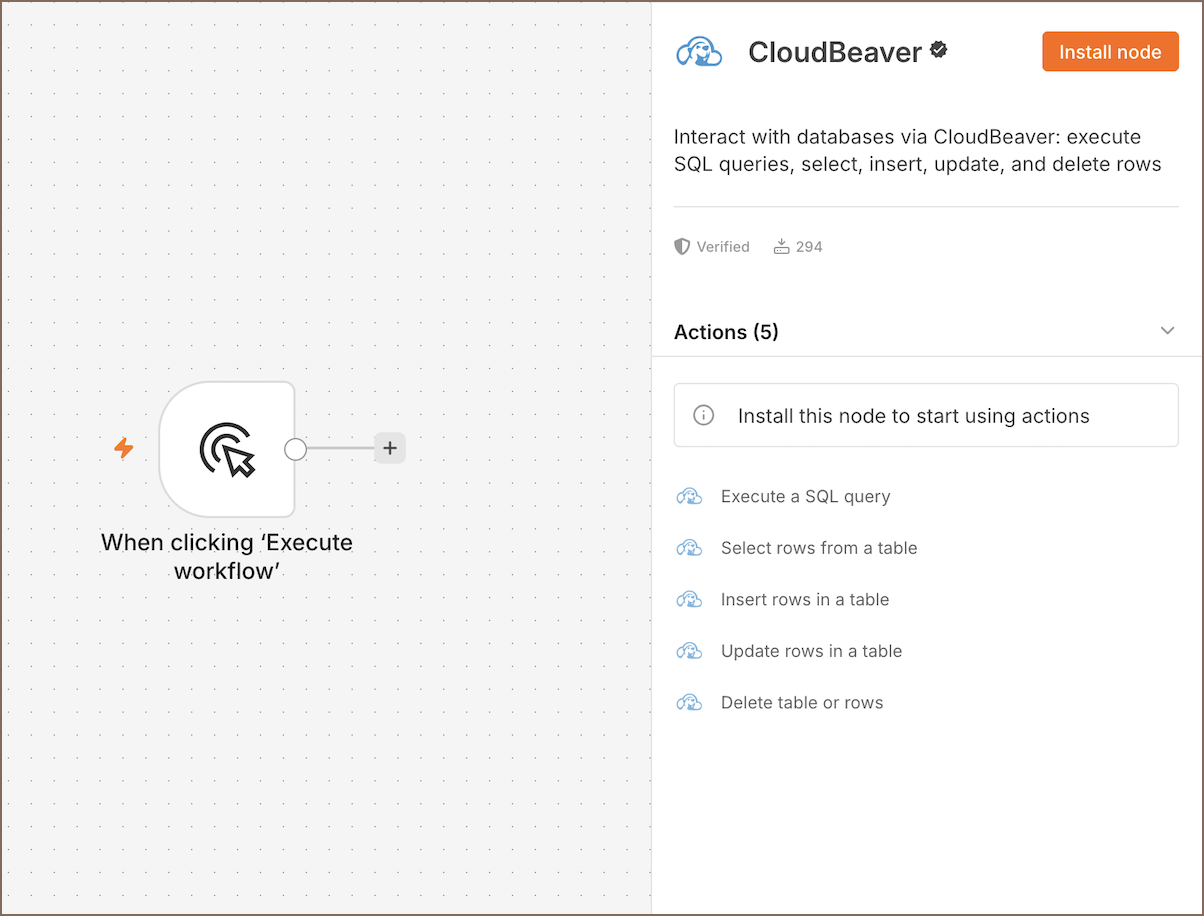
For more details, see how to work with nodes in the n8n documentation.
-
Choose an action and create credentials:
-
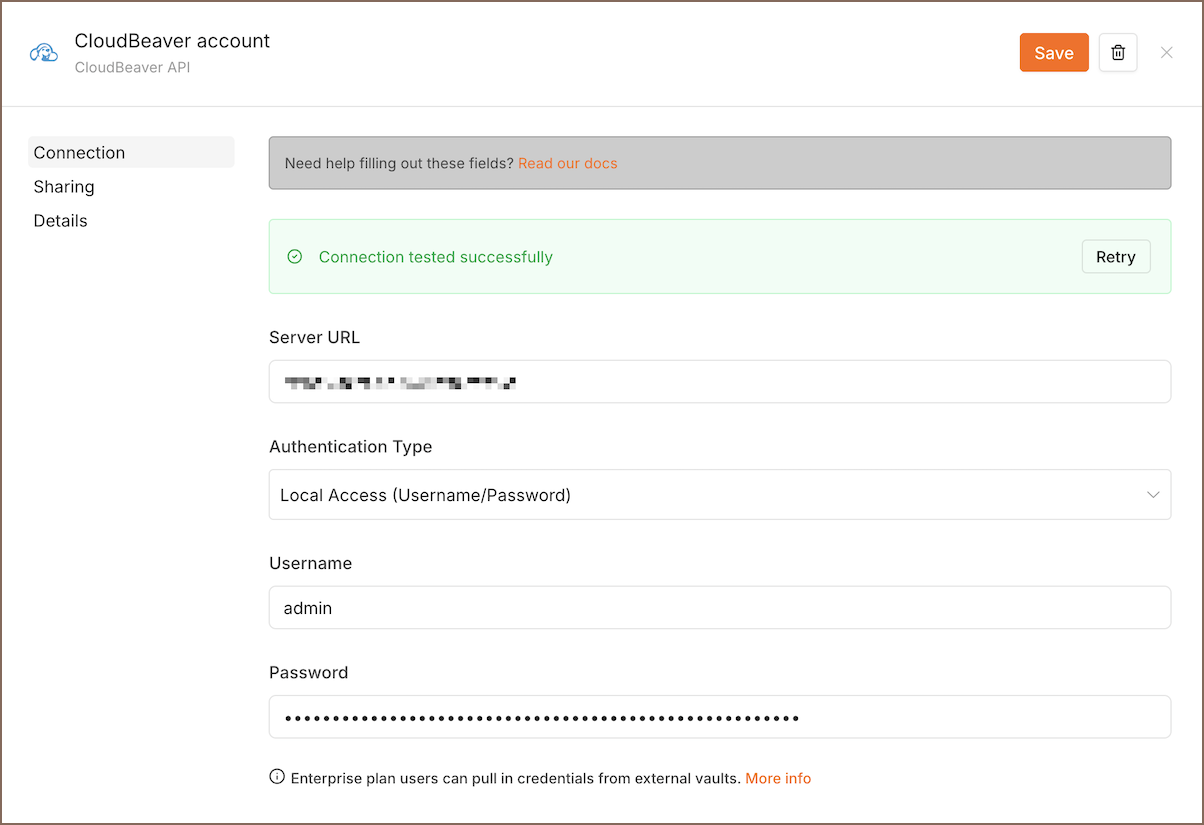
Select your authentication type.
-
Enter your CloudBeaver server URL.
-
Provide your credentials or access token.
-
Save your connection settings.
-
Click Save to test your connection. You'll see a
Connection tested successfullymessage if it works.
Learn more on how to create and edit credentials.
-
- Execute SQL Query: run custom SQL statements.
- Select Rows: retrieve rows from a table without writing SQL.
- Insert Rows: add records to a table.
- Update Rows: modify existing records.
- Delete: remove rows, truncate a table, or drop a table.
Use CloudBeaver to pull database records and feed them into other apps in your n8n pipeline.
- Add a Schedule Trigger node to run your workflow automatically.
- Connect the trigger node to the CloudBeaver node.
- Configure the CloudBeaver node with your connection ID and target database name.
- Add your query to the SQL Query field.
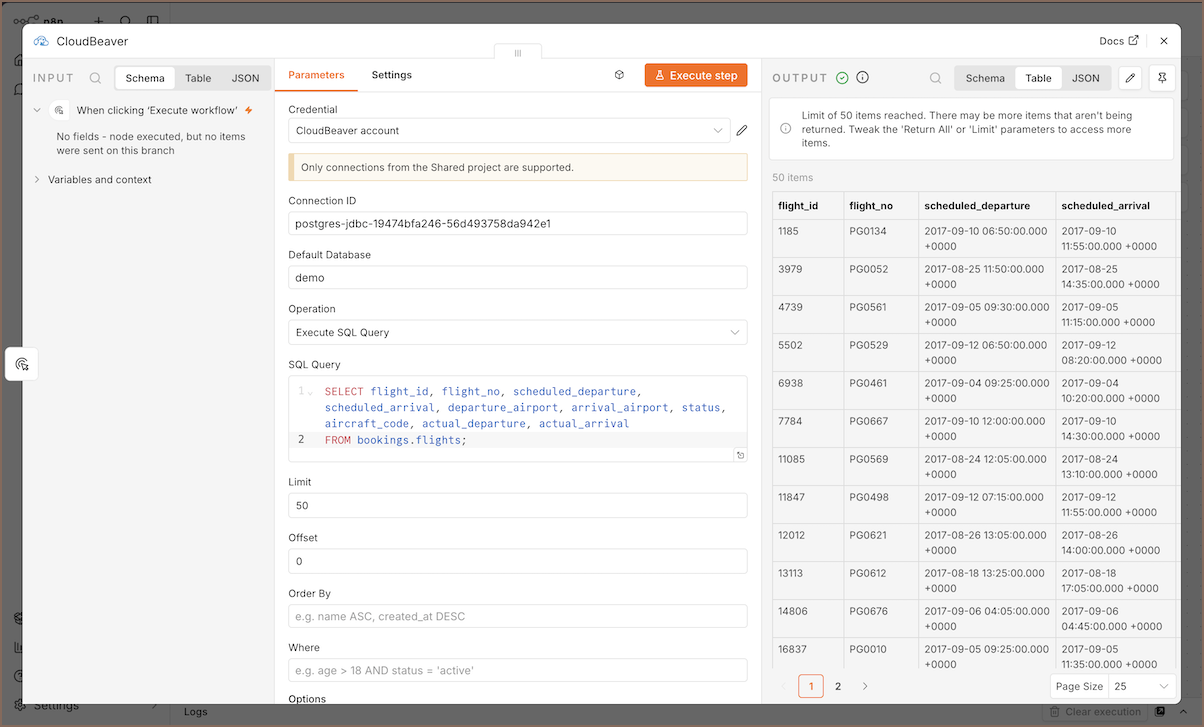
- Click Execute step to test the query and preview the results.
Use the output from the CloudBeaver node in any downstream n8n node, for example to filter data, send notifications, or trigger additional actions.
For information on creating workflows, see the official n8n documentation.
- Getting started
- Create connection
- Connection network options
- Supported databases
-
Drivers management

- Database authentication methods
- Database navigator
- Properties editor
- Data editor
- SQL editor
-
Entity relation diagrams
- Cloud services
- Data transfer
- General user guide
- Administration
- Server configuration
-
Server security and access configuration
- Authentication methods
- Access management
- Proxy configuration
-
Secret management
- Logs
-
Query manager
- Workspace location
- Command line parameters
-
Session manager
- Deployment options
- CloudBeaver Editions
- FAQ
- Development