Branding and Customization
Third Party Patcher is the part of your management stack that users actually see. It asks them to quit apps, tells them updates are waiting, and sits in their menu bar. Every one of those surfaces can carry your organization's name, colors, and icons, so to your users it looks like a tool from their own IT team and not an unfamiliar third-party utility.
That matters more than it might seem. A prompt that clearly comes from your team, in your colors, with your help desk's phone number on it, gets read and acted on. A generic one gets dismissed, or reported to the security team as suspicious.
This page is a tour of what you can make your own. For the exact syntax of every key, see Preference Keys and User Prompts.
Third Party Patcher shows up in four places. Each can be branded independently, but they share most of their settings, so a handful of keys gives you a consistent look everywhere.
| Surface | When users see it | What you can brand |
|---|---|---|
| Patching prompts (swiftDialog) | When updates are ready, while they install, and when an open app is in the way | Title, banner color, title color, main icon, badge icon, support contact |
| PatcherMenu | Always, in the menu bar | Menu bar icon, support contact, which sections and actions appear |
| Available Software | When users open the self-service catalog | Company name, title, header icon, Dock/Finder app icon, per-app icons, featured apps |
| Notifications (PatcherNotifier) | Background installs, or when you choose the notification-only style | Your title as the subtitle line; each notification shows the updated app's own name and icon |

Out of the box, Third Party Patcher calls itself "Third Party Patcher." Most organizations rename it to something their users already recognize: "Acme IT Updates," "Mac Software Updates," or the name of an existing self-service brand.
| Key | Shows up as |
|---|---|
AppTitle |
Title of every patching prompt and progress window, the subtitle in Available Software, and the subtitle line of notifications |
CompanyName |
Bold heading at the top of the Available Software sidebar |
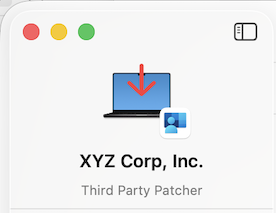
Tip: Pick a name and use it everywhere: in these keys, in your onboarding docs, and in your help desk scripts. When a user calls to ask about "the Acme Updates window," your team should know exactly what they mean.
Two keys set the color scheme of the patching prompts. They fill the banner across the top of the deferral and blocking-app prompts, and color the text in the side panel of the apply progress window.
| Key | Default | What it colors |
|---|---|---|
BrandColorBackground |
blue |
Banner background |
BrandColorFont |
white |
Banner title and side-panel text |
Both accept a simple color name (blue, green, purple, and so on) or an exact hex value like #00A4C7. Use your brand's hex values for an exact match.
Tip: Check contrast. The title sits directly on the banner color, so a light brand color usually wants a dark font (and the reverse). Test it on both a light-mode and a dark-mode Mac.
Icons do most of the work in making a prompt feel familiar. There are several, each with its own job.
This is the large icon on every patching prompt, and it also heads the Available Software sidebar. It's the single most visible piece of branding you have.
- Your logo: an absolute path to a PNG or ICNS file you deploy to the Mac.
-
An SF Symbol:
SF=<symbol name>, with optional swiftDialog styling such asSF=arrow.down.app,palette=white,blue. - Left empty: Third Party Patcher draws a picture of the user's own Mac model with a red download arrow on it, which works well if you'd rather not use a logo.
A small badge sits in the corner of the main icon. By default Third Party Patcher detects your MDM agent (Jamf, Intune, Company Portal, Kandji, Workspace ONE, Addigy, FileWave) and uses its icon. Users who already trust that agent then recognize the prompt as legitimate.
Point OverlayIcon at your own image to use a logo or department badge instead, or set UseOverlayIcon to false for a clean, single icon.
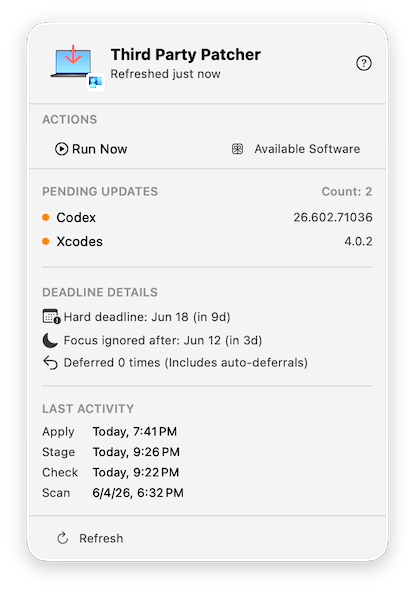
PatcherMenu's menu bar icon can be any SF Symbol name (shield.fill, gear) or a path to your own PNG. Custom PNGs are rendered as template images: macOS recolors them to match the menu bar in light and dark mode. A simple, single-color logo shape on a transparent background works best. An orange dot is added automatically when updates are ready.

Replaces the Available Software app icon in the Dock, Finder, and app switcher with your own PNG or ICNS. Use this if Available Software is your organization's self-service app.
Available Software uses icons from the Installomator Metadata project by default. To use your own artwork for a specific app, place a PNG named after its label in /Library/Application Support/Patcher/Managed/Icons/ (for example zoom.png). Your icon takes priority. See Available Software — App Icons and Metadata.
Tip: Deploy your icon files with the same package or MDM policy that delivers your configuration profile, to a stable location such as
/Library/Application Support/<YourOrg>/Branding/. Every icon key takes an absolute path, and a missing file falls back to the default.
When users have questions, they should know who to ask. Your support details appear in the ? help panel of the apply progress window, and in the help popover in both PatcherMenu and Available Software.
| Key | Default |
|---|---|
SupportTeamName |
IT Support Team |
SupportTeamEmail |
support@company.com |
SupportTeamPhone |
None (hidden) |
SupportTeamWebsite |
None (hidden) |
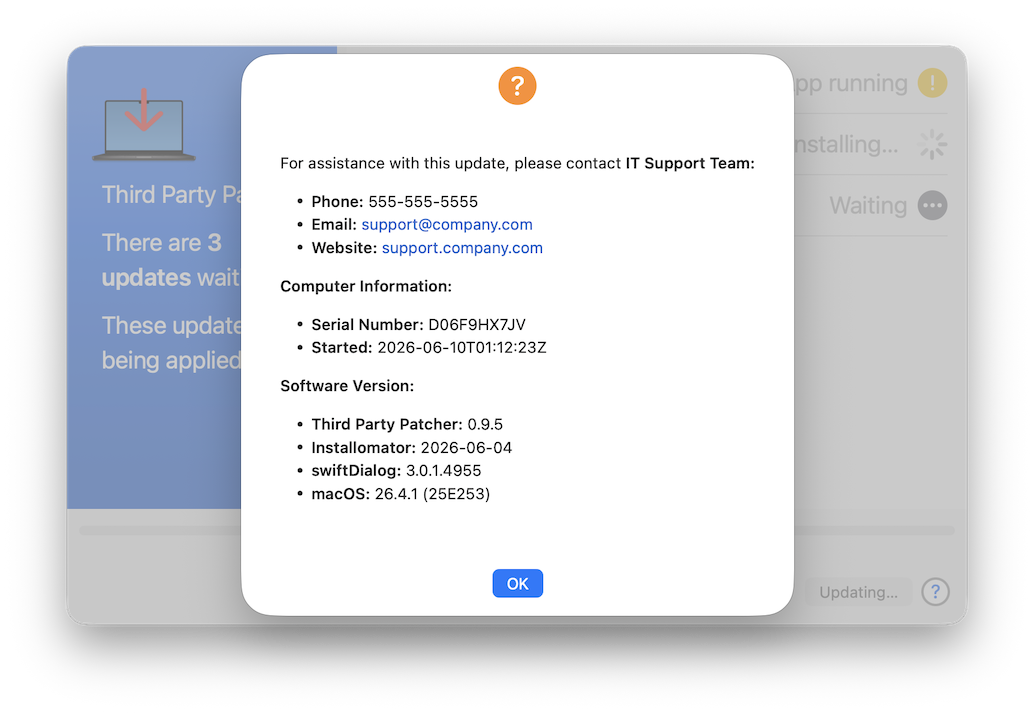
Tip: At minimum, change the email. The
support@company.comdefault is the most obvious sign of an unconfigured deployment.
Branding is more than logos. It also covers how assertive the patching experience is. Third Party Patcher can be anything from nearly invisible to front-and-center, and the right setting depends on your culture.
| If you want it to feel… | Consider |
|---|---|
| Quiet and out of the way |
ApplyDialogSize = compact for a small corner window, or notifications to use macOS notifications only. QuietApplyEnabled installs anything not in use without asking. |
| Clear and present (the default) | The full-size apply window in the center of the screen, kept on top with DialogOnTop. |
| Hard to miss |
DialogBlurscreen blurs everything behind the prompt, and DialogHideotherapps hides other apps while it's up. Save these for environments where patching really is the priority. |
Window placement is adjustable too. DialogScreenPosition sets where the deferral prompt and full-size apply window appear, and DialogScreenProgressPosition sets where the smaller progress windows go. Both take named positions like center or bottomright, or exact screen coordinates for identical-hardware setups. Set DialogMoveable to false to pin them in place.

PatcherMenu and Available Software can also be trimmed down so users see only what makes sense for your organization:
-
Hide PatcherMenu entirely with
ShowMenuBarApp=falseif you'd rather not have a menu bar presence. -
Simplify the Run Now menu by hiding the more technical actions (
ShowMenuScanAction,ShowMenuCheckAction,ShowMenuDownloadAction). -
Hide the activity history with
ShowActivitySection=falsefor a cleaner popover. -
Curate the catalog.
OptionalLabelscontrols which apps appear in Available Software, in the order you list them, so you can feature your organization's core apps at the top.
Here's what a fully branded configuration might look like for a fictional company, Northwind:
<key>AppTitle</key>
<string>Northwind Mac Updates</string>
<key>CompanyName</key>
<string>Northwind Traders</string>

<key>BrandColorBackground</key>
<string>#0B3D5C</string>
<key>BrandColorFont</key>
<string>#FFFFFF</string>

<key>DialogIcon</key>
<string>/Library/Application Support/Northwind/Branding/logo.png</string>
<key>OverlayIcon</key>
<string>/Library/Application Support/Northwind/Branding/it-badge.png</string>
<key>MenuBarIcon</key>
<string>/Library/Application Support/Northwind/Branding/menubar.png</string>
<key>CustomAppIconPath</key>
<string>/Library/Application Support/Northwind/Branding/selfservice.icns</string>

<key>SupportTeamName</key>
<string>Northwind Service Desk</string>
<key>SupportTeamEmail</key>
<string>servicedesk@northwind.example</string>
<key>SupportTeamPhone</key>
<string>x4357</string>
<key>SupportTeamWebsite</key>
<string>https://help.northwind.example</string>
Those twelve keys change the name, colors, icons, and contact details on every surface. Everything else can stay at its defaults until you have a reason to change it.
You don't need to wait for a real patch cycle to see your branding:
- Set the keys locally with
sudo defaults write /Library/Preferences/com.gilburns.patcher …on a test Mac before building the profile. - Open Available Software to check the sidebar header, app icon, and help popover right away.
- Once updates are staged, choose Run Now → Apply pending updates in PatcherMenu to see the progress window with your title, colors, and icons.
- In Available Software, hold Control+Option+Shift and click the app icon in the About panel to list every preference currently in effect, which is useful for confirming that your MDM profile arrived.
- Preference Keys: every key, type, and default
- User Prompts: each prompt in detail, with screenshots
- PatcherMenu: menu bar app sections and icon states
- Available Software: the self-service catalog