Author Guide
Author mode is where blockings are built. Tap the floor, drop marks, attach lines, save, share. This guide covers the full creation workflow.
When you launch Understudy on iPhone for the first time, the role picker offers Author as the middle card. You can switch in later via Settings → Mode.
In Author mode you'll see:
- A live AR camera feed behind a faint dark gradient
- The current blocking title in the top bar with an "AUTHOR" badge
- A Drop kind picker (Actor / Camera) under the top bar
- A floating hint card in the centre when the stage is empty (or a small pill once marks exist)
- Export / Import / Clear controls at the bottom
The core gesture is tap the floor.
Point the phone's camera at a spot on the ground and tap the screen. A glowing cyan disc appears at that point in the room. The mark gets a sequence number (1, 2, 3…) and is added to the running order.
You can:
- Drop as many marks as you want — the camera doesn't have to be exactly over the floor for the raycast to find a horizontal surface
- Tap an existing mark to open its editor
- Drag marks via the editor's position fields (the AR view itself doesn't yet support drag-to-move)
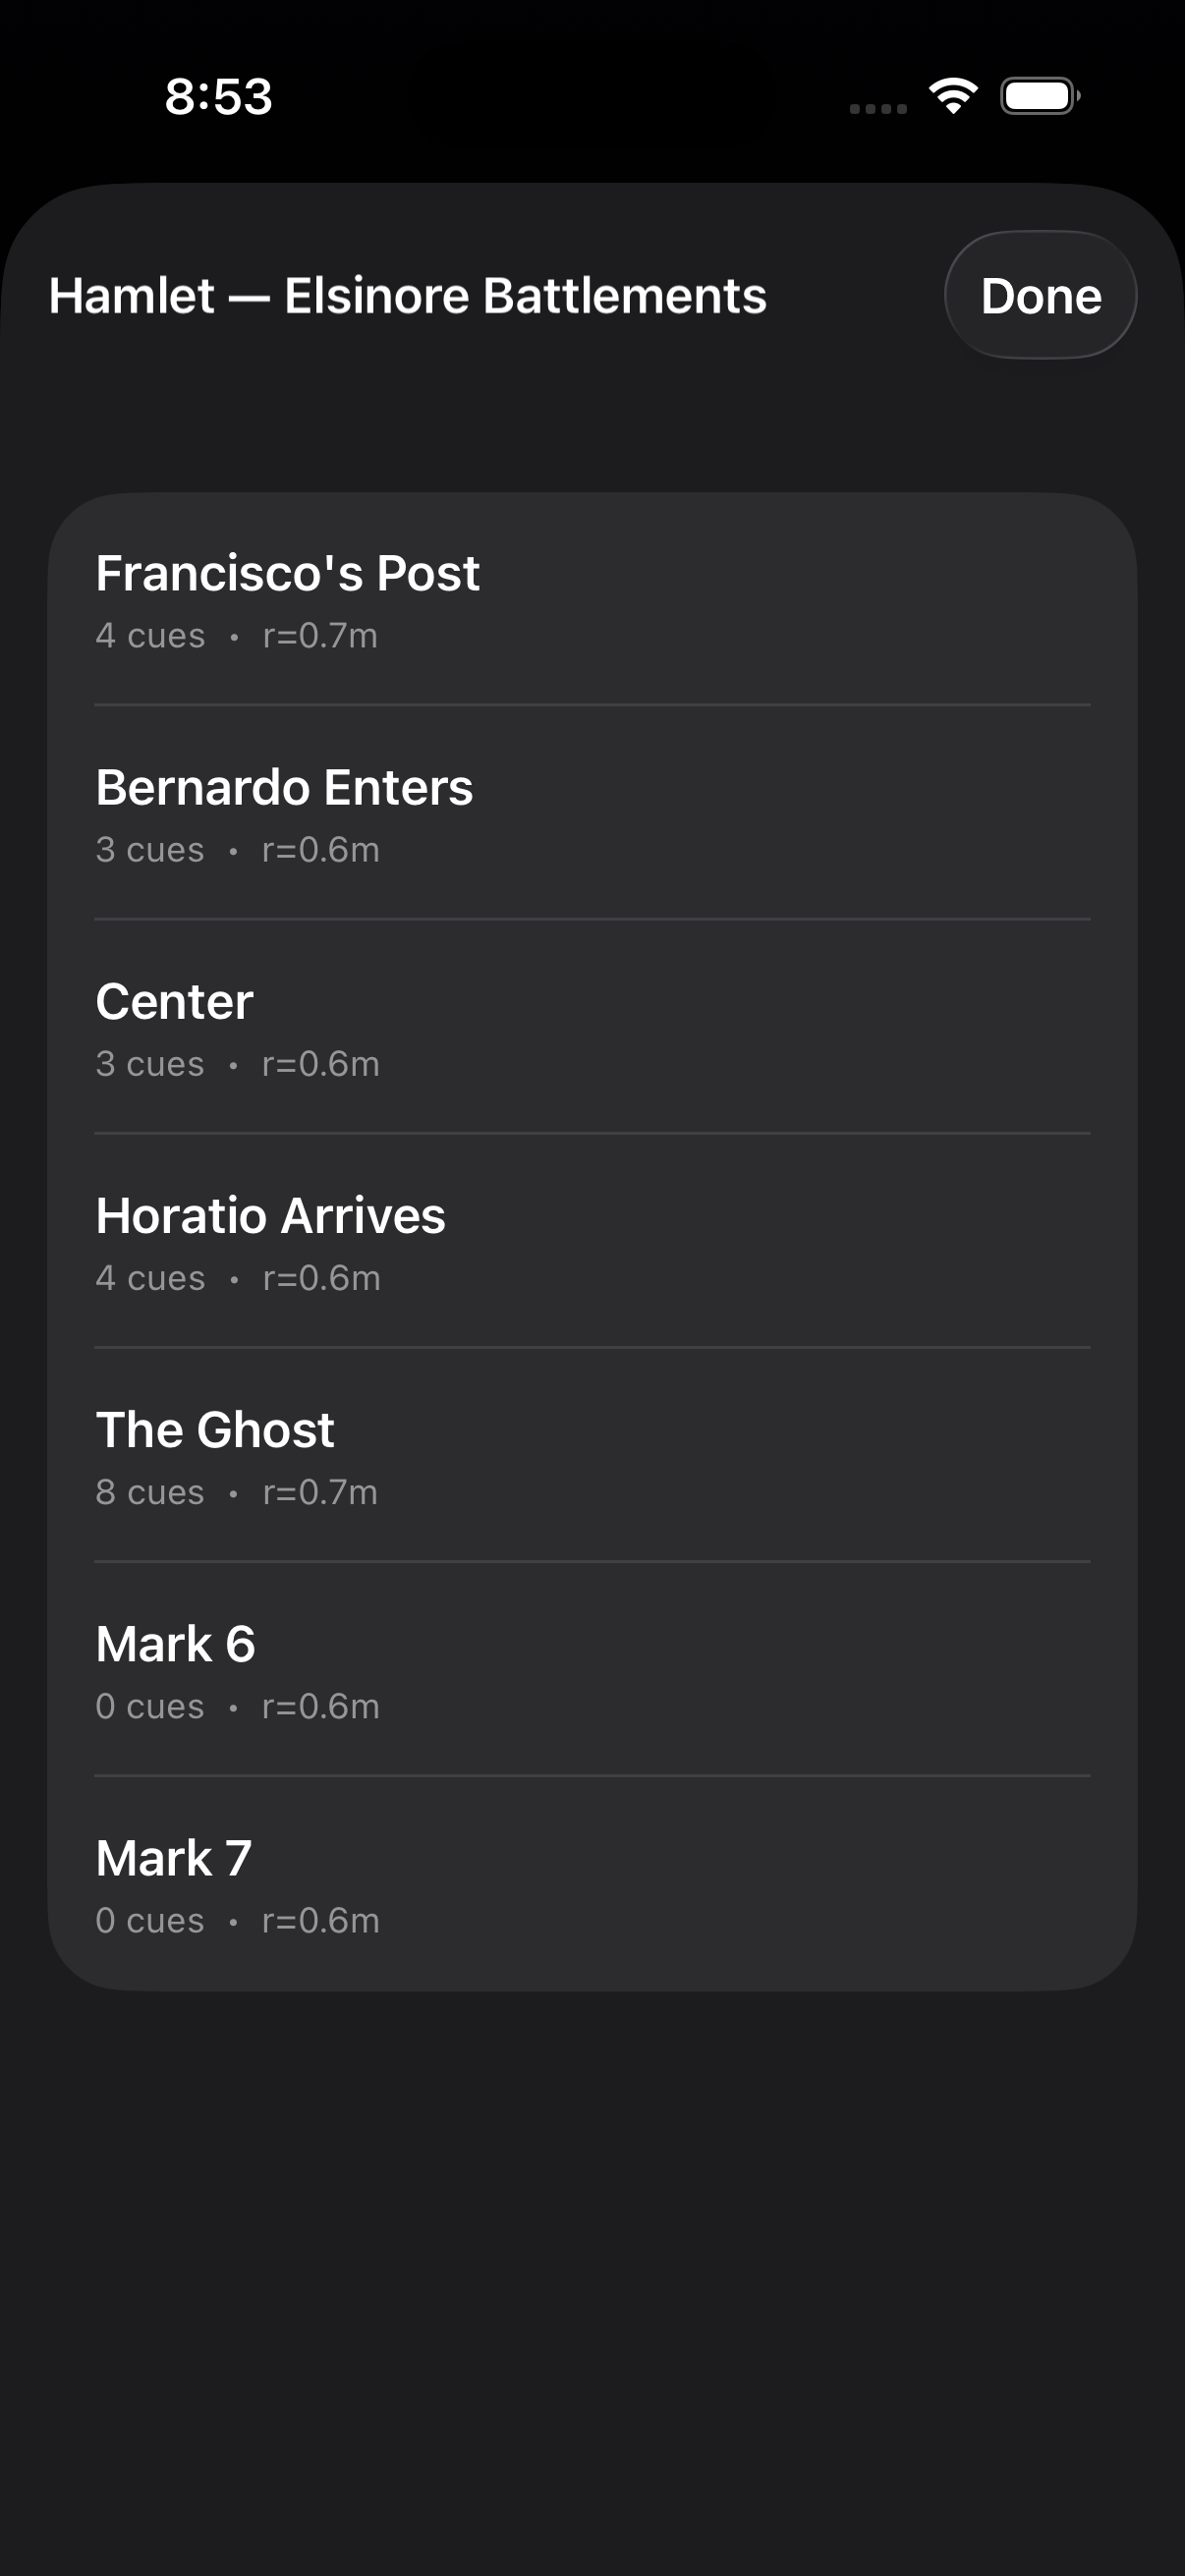
The bundled Hamlet demo loads on first launch. Five marks across an Elsinore-battlements blocking — Francisco's Post → Bernardo Enters → Centre → Horatio Arrives → The Ghost. To start fresh, open Settings → Blocking → New Blocking…
Tap any mark to open the editor sheet. The editor has six sections:
- Name — what shows on the floor card and in the marks list
- Radius — how close a performer needs to be to "arrive" on the mark (0.2 – 3.0 m)
- Position — read-only x/z (in metres from the stage origin)
- Pick from script… — opens the script browser to attach lines from the bundled plays. See below.
- Add Custom Line — type a character name + line for marks not in any of the bundled plays.
Pick from five preset SFX names (bell, thunder, chime, knock, applause) and tap Add Sound Cue. They play through iOS system sounds — no audio files to manage.
Pick a colour + intensity, tap Add Light Cue. The screen flashes when the cue fires. If you have DMX configured, real fixtures fire too.
A wait cue — a programmed pause. Useful when the director wants the performer to hold for a moment before the next line.
Free-text director notes. Audiences never see these; performers only see them in their own private teleprompter.
The complete running order for this mark, in firing order. Tap the ▷ next to any cue to preview it immediately. Useful for hearing what a sound cue actually sounds like before rehearsal.
Tap Pick from script… in the Lines section. The Script Browser slides up.
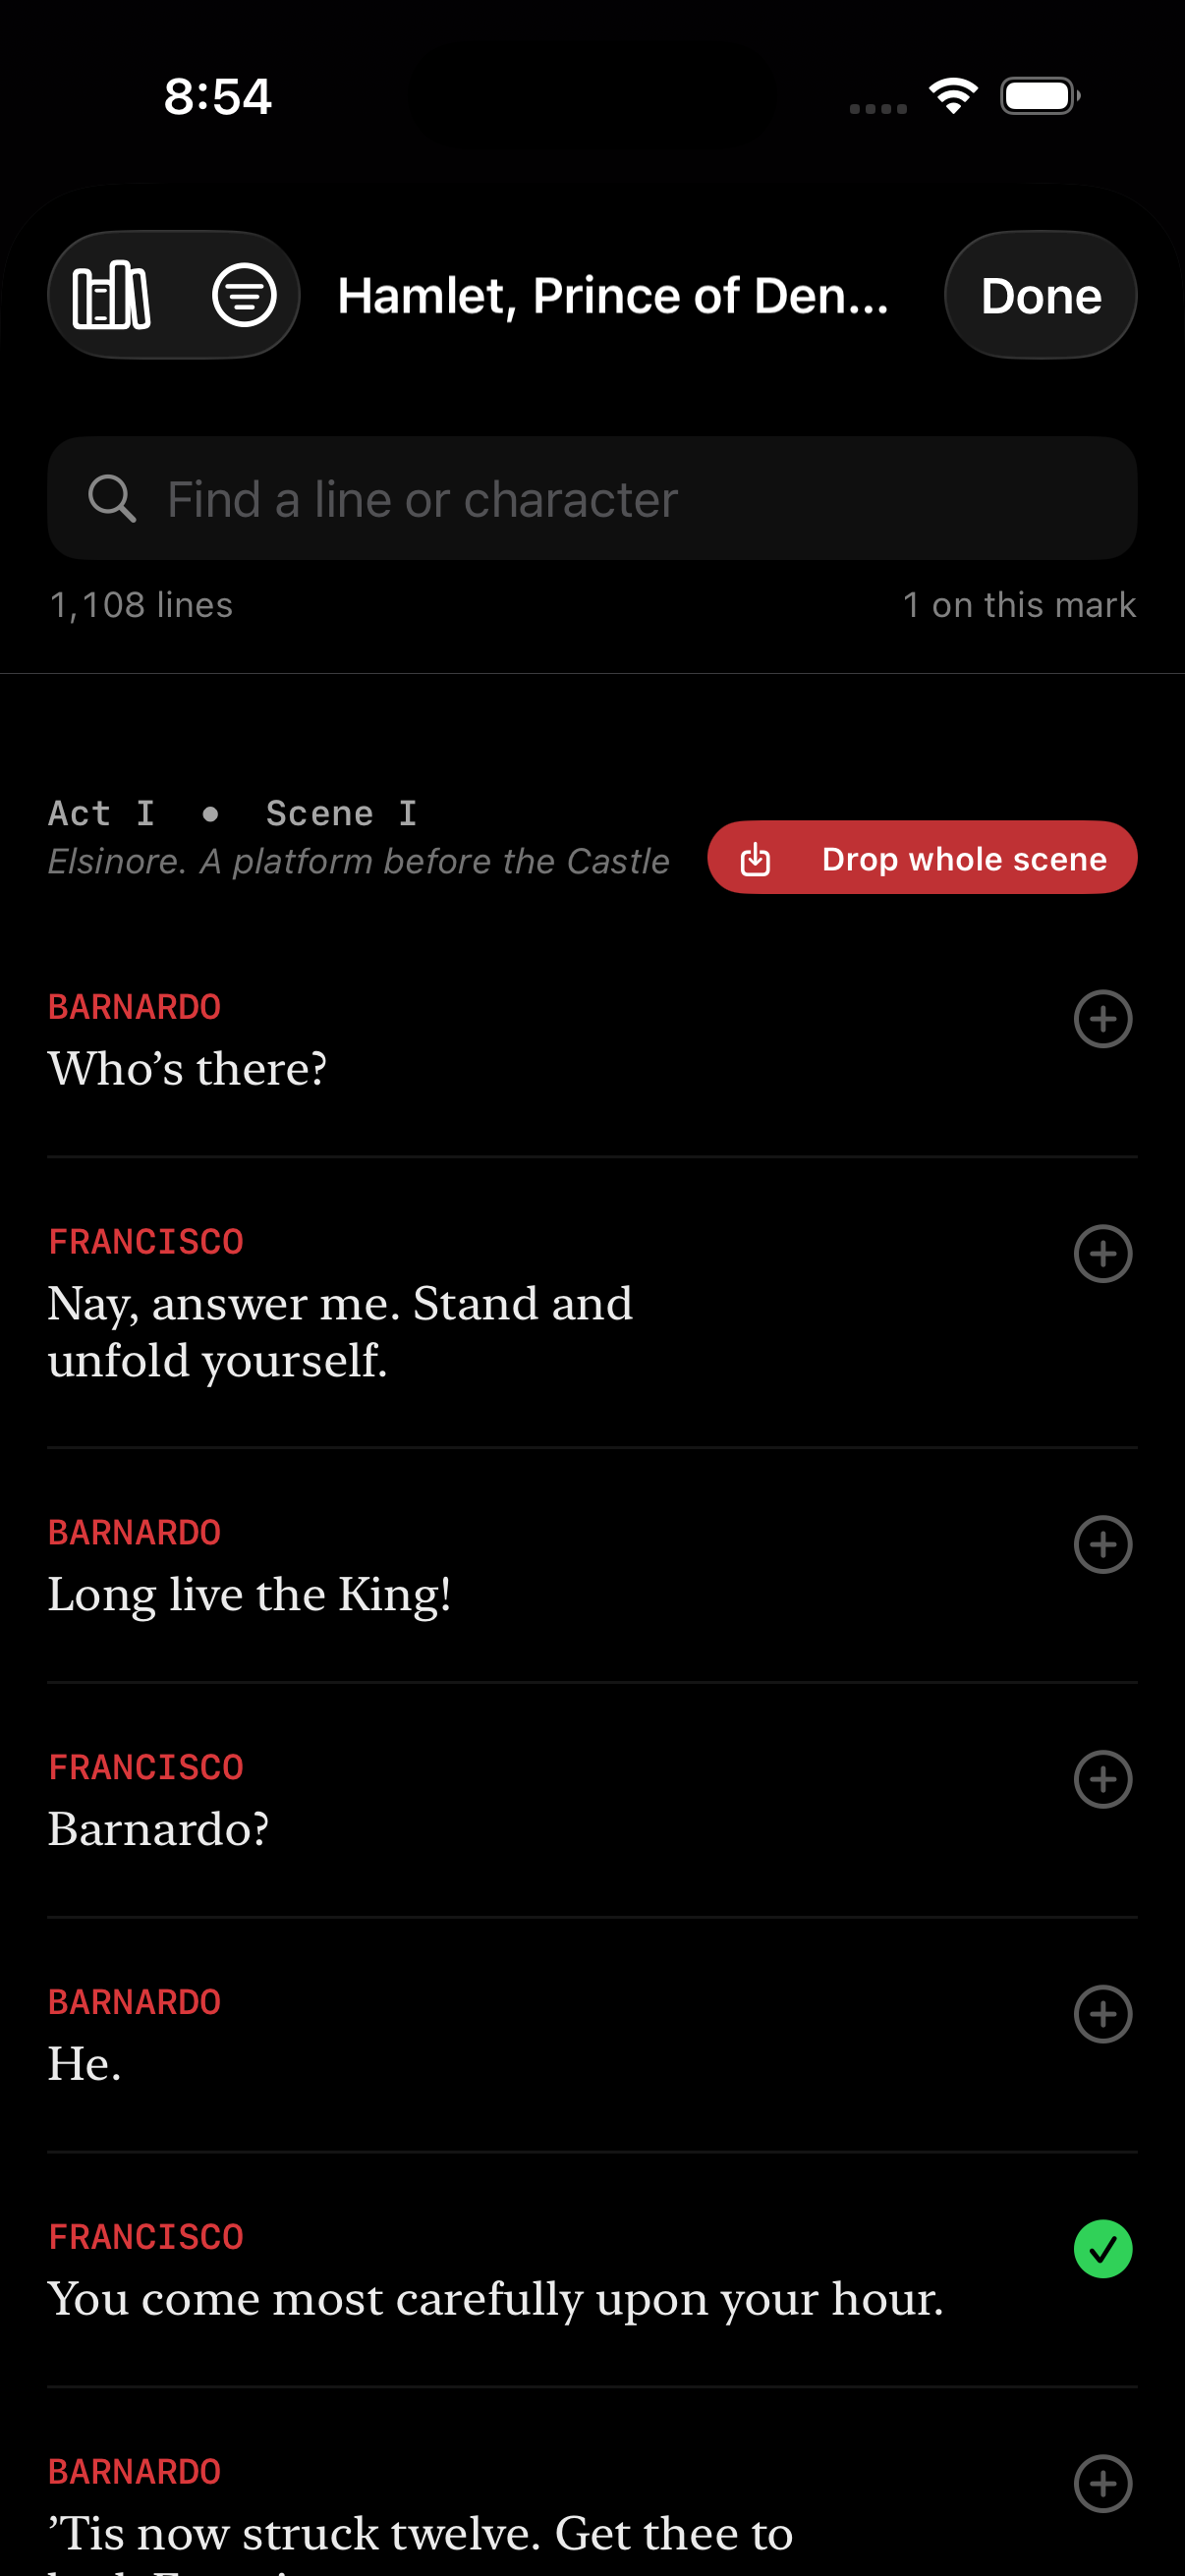
Top of the dialog:
- Play picker — switch between Hamlet, Macbeth, Midsummer, The Seagull, Cherry Orchard, Three Sisters, Uncle Vanya, Earnest, Salomé, Ghosts.
- Scene picker — filter to a specific Act / Scene.
- Search — case-insensitive substring across speaker names + line text.
Tap a line to attach it. Already-attached lines get a green check.
The hardest-working button in the Script Browser. Each scene header has a Drop scene chip. Tap it, confirm, and Understudy auto-lays out a zig-zag path of marks with every line pre-populated.
The layout algorithm:
- One mark per speaker turn (so a stretch of dialogue between two characters becomes a 1-mark, 2-mark, 1-mark, 2-mark zig-zag)
- Up to 4 lines per beat (long monologues stay on one mark)
- 1.2 m forward spacing, 0.8 m lateral offset alternating sides
- Yaw points each mark towards the next beat
                       ↑ upstage

  Speaker A:  ●──────────────►●──────────────►●
              M1   1.2 m      M3   1.2 m      M5
               ╲                ╲               ╲
                ╲ 0.8 m          ╲ 0.8 m         ╲
  Speaker B:    ●──────────────►●──────────────►●
                M2   1.2 m      M4   1.2 m      M6

                       ↓ downstage
A 20-beat scene becomes a walkable blocking in under a second. Adjust by dragging marks individually after the fact.
The 10 bundled plays cover 7,000+ dialogue lines. Shakespeare, Chekhov, Wilde, Ibsen — all public domain. See Bundled-Plays for full list with edition notes.
Toggle the Drop kind picker from Actor to Camera.
The picker reveals a row of lens-preset pills: 14mm, 24mm, 35mm, 50mm, 85mm, 135mm. Pick one. A live viewfinder overlay appears on the camera feed showing exactly what that lens would frame from the phone's current viewpoint:
- A framing rectangle with corner ticks
- Rule-of-thirds grid
- Lens + HFOV chip ("35mm · 54°")
- Dimmed exterior so the framing reads cleanly
Tap the floor. A small amber tripod-style mark drops at that point with the lens spec embedded. Camera marks bypass the walk sequence (sequenceIndex: -1) so they don't mix into the performer teleprompter — they're scout references, not cue points.
In the visionOS director view, camera marks render as virtual tripods with translucent FOV wedges spreading from each lens. A director walks through the room and sees four shot positions at once — a 3D shot list in midair.
See Camera-and-Film-Mode for the deep dive.
Every mark add / edit / delete autosaves to UserDefaults. Quit the app, relaunch — your blocking comes back.
Tap the share-up icon in the bottom bar. A standard iOS share sheet opens. The blocking exports as a .understudy file — pretty-printed JSON that's identical to the wire format. Save to Files, AirDrop to a collaborator, email it.
Tap the share-down icon. Pick a .understudy (or .json) file. The current blocking is replaced. Performers in the same room receive a blockingSnapshot over the wire so everyone gets the same document.
The red trash icon in the bottom bar removes every mark in the current blocking but keeps the title and any recorded reference walk. Useful for re-blocking the same scene.
To fully start over (new title, no marks, no reference), use Settings → Blocking → New Blocking…
If your stage manager has a cue sheet in a spreadsheet — name,note per row — you can import it directly. In the visionOS director panel, tap the CSV button in the marks header (this feature lives in the director window, not iPhone Author yet — that's a v0.31 item).
Each row becomes a mark at x=0, spaced 0.8 m apart on the z axis. The note becomes a .note cue. Useful for porting an existing show document into Understudy.
- Pick a published play first. The fastest way to see Understudy click is to drop Hamlet Act I Scene I, walk it once, and feel the loop. Then come back to your own work.
- Don't aim for perfect blocking on the first pass. The reason Understudy exists is iterative refinement — drop rough marks, walk them, drag them, tap to add lines, walk again.
- Use Drop Whole Scene to bootstrap. Even if you'll re-block from scratch, the auto-layout gives you 20 marks with lines attached in 1 second. Faster to delete what you don't need than to type from scratch.
- The viewfinder overlay (camera mode) makes location scouting feel like a video game. Toggle through 14 / 35 / 85 mm and see how each frames a real space.
-
Export early. Even though autosave is reliable, keep a
.understudyfile in iCloud or your Files for safety. Today there's no version history — exports are your version control.
- Camera & Film Mode — virtual cameras with real lens specs.
- Director's Guide — what your director sees in Vision Pro.
- Bundled Plays — the script library.
- Multiple Devices — sharing blockings live across devices.
- Room Scanning — capturing a venue with LiDAR.