Repository navigation
Recitation 00 Environment Setup
By the end of this session you will have:
- A copy of the
GraphicsLab2026repository on your machine. - A Visual Studio solution generated by CMake.
- A program that builds, runs, and prints
Hello CMaketo the console.
Every recitation, lab and assignment in this course builds on this setup, so do not leave today without a working build.
You need three tools: CMake, Visual Studio Community 2019 and Git.
CMake is a cross-platform tool that generates build files from a script called CMakeLists.txt. You describe the project once, and CMake produces a Visual Studio solution on Windows or a Makefile on macOS and Linux. That is how one repository works on all three systems. Visual Studio gives you the MSVC compiler and the debugger. Git is version control, and it is how you get the code.
Everything is already there. CMake is installed on the lab machines, and Visual Studio and Git are installed or available through AppsAnywhere. You have nothing to configure.
If a program is not in the Start menu, go to appsanywhere.smu.ca, sign in with your SMU account, find it in the catalog and click Launch. The first launch of Visual Studio streams a lot of data and can take several minutes. It has not frozen, so let it finish.
Skip to Section 2.
Visual Studio and Git are free to you through AppsAnywhere, on your own laptop, on or off campus. Go to appsanywhere.smu.ca, sign in with your SMU account, and launch them from the catalog. Do this rather than hunting for downloads or paying for anything.
The lab machines run Visual Studio 2019 Enterprise, which is what AppsAnywhere gives you. If you would rather install Visual Studio yourself, Visual Studio Community 2019 (download) is free and works identically for this course. Either way, in the installer select the Desktop development with C++ workload on the Workloads tab. That one workload gives you the compiler, the Windows SDK and the debugger, which is everything the labs need. You do not need any other workload.
Install Visual Studio 2019, not a newer version. That is what the lab machines run, and it is what the starter code and build settings are tested against.
CMake is the one you download yourself, since it is not on AppsAnywhere. Get version 3.21 or newer from cmake.org. Pick the 64-bit Windows installer and tick Add CMake to the system PATH during install.
The lab machines are Windows PCs, and all starter code and assignments are tested only on Windows. Windows is the recommended platform. macOS and Linux users, see Section 7.
The project uses Eigen, GLFW, GLEW and OpenCV. You do not need to download any of them. All required headers and pre-built libraries are already (or will be uploaded) in the external/ folder inside the repository, and CMake finds them automatically.
The one exception is macOS and Linux, where the pre-built Windows binaries do not apply. See Section 7.
Go to the folder where you want the project to live, for example C:\Users\<YourUsername>\Documents. Do not use C:\Program Files or the root of C:\, because you may not have write permission there.
Right-click and choose Git Bash Here, then run:
git clone https://github.com/jijup/GraphicsLab2026 Figure 1: Cloning the repository.
If cloning fails for any reason, download the repository as a ZIP from the GitHub page and extract it into that folder instead. Make sure you actually extract it rather than browsing inside the ZIP viewer, or the build will fail with missing-file errors.
GraphicsLab2026/
├── CMakeLists.txt      <- top-level build script (you edit this today)
├── external/           <- Eigen, GLFW, GLEW, OpenCV (will be uploaded later)
├── common/             <- shared helper code and images
└── hello/
    ├── CMakeLists.txt  <- build script for this exercise
    └── main.cpp        <- your starter code for today
Each exercise folder has its own CMakeLists.txt describing that exercise's source files and its output executable. The top-level CMakeLists.txt pulls them in. More detail is in the official CMake tutorial.
The top-level CMakeLists.txt in the repository is deliberately incomplete. Open it in any text editor and edit it so that it reads exactly:
# Declaring the used CMake version is mandatory
cmake_minimum_required(VERSION 3.10)

# This defines the name of our project
project(GraphicsLab2026)

# C++ standard
set(CMAKE_CXX_STANDARD 14)
set(CMAKE_CXX_STANDARD_REQUIRED True)

# Pull in the first exercise
add_subdirectory(hello)
The add_subdirectory(hello) line is the one that matters. Without it, CMake never looks inside the hello folder and no executable is produced.
Save the file before moving on. CMake reads it in Section 6.
Open hello/main.cpp. For those of you new to C++, here is the whole file with comments on what each part does:
///========================== main.cpp ==========================
/// iostream provides basic input and output functionality (cout)
#include <iostream>

/// iostream lives in the "std" namespace. The keyword "using" lets us
/// write cout instead of std::cout throughout the file.
using namespace std;

/// main is the entry point of your program. It must be defined, and it
/// must have this signature. argc and argv carry command line arguments.
int main(int /*argc*/, char** /*argv*/){

    /// @todo print "Hello CMake" to the terminal

    /// The return value tells the operating system whether the program
    /// finished correctly. 0 means success.
    return 0;
}
Replace the @todo line so the program prints exactly Hello CMake to the console, followed by a newline. Note the capital M: the text must match Hello CMake character for character.
Save the file.
1. Open the CMake GUI. Go to the Start menu and type cmake.
2. In Where is the source code, enter the path to the repository, for example C:\Users\<YourUsername>\Documents\GraphicsLab2026. You can copy the path from the address bar in File Explorer.
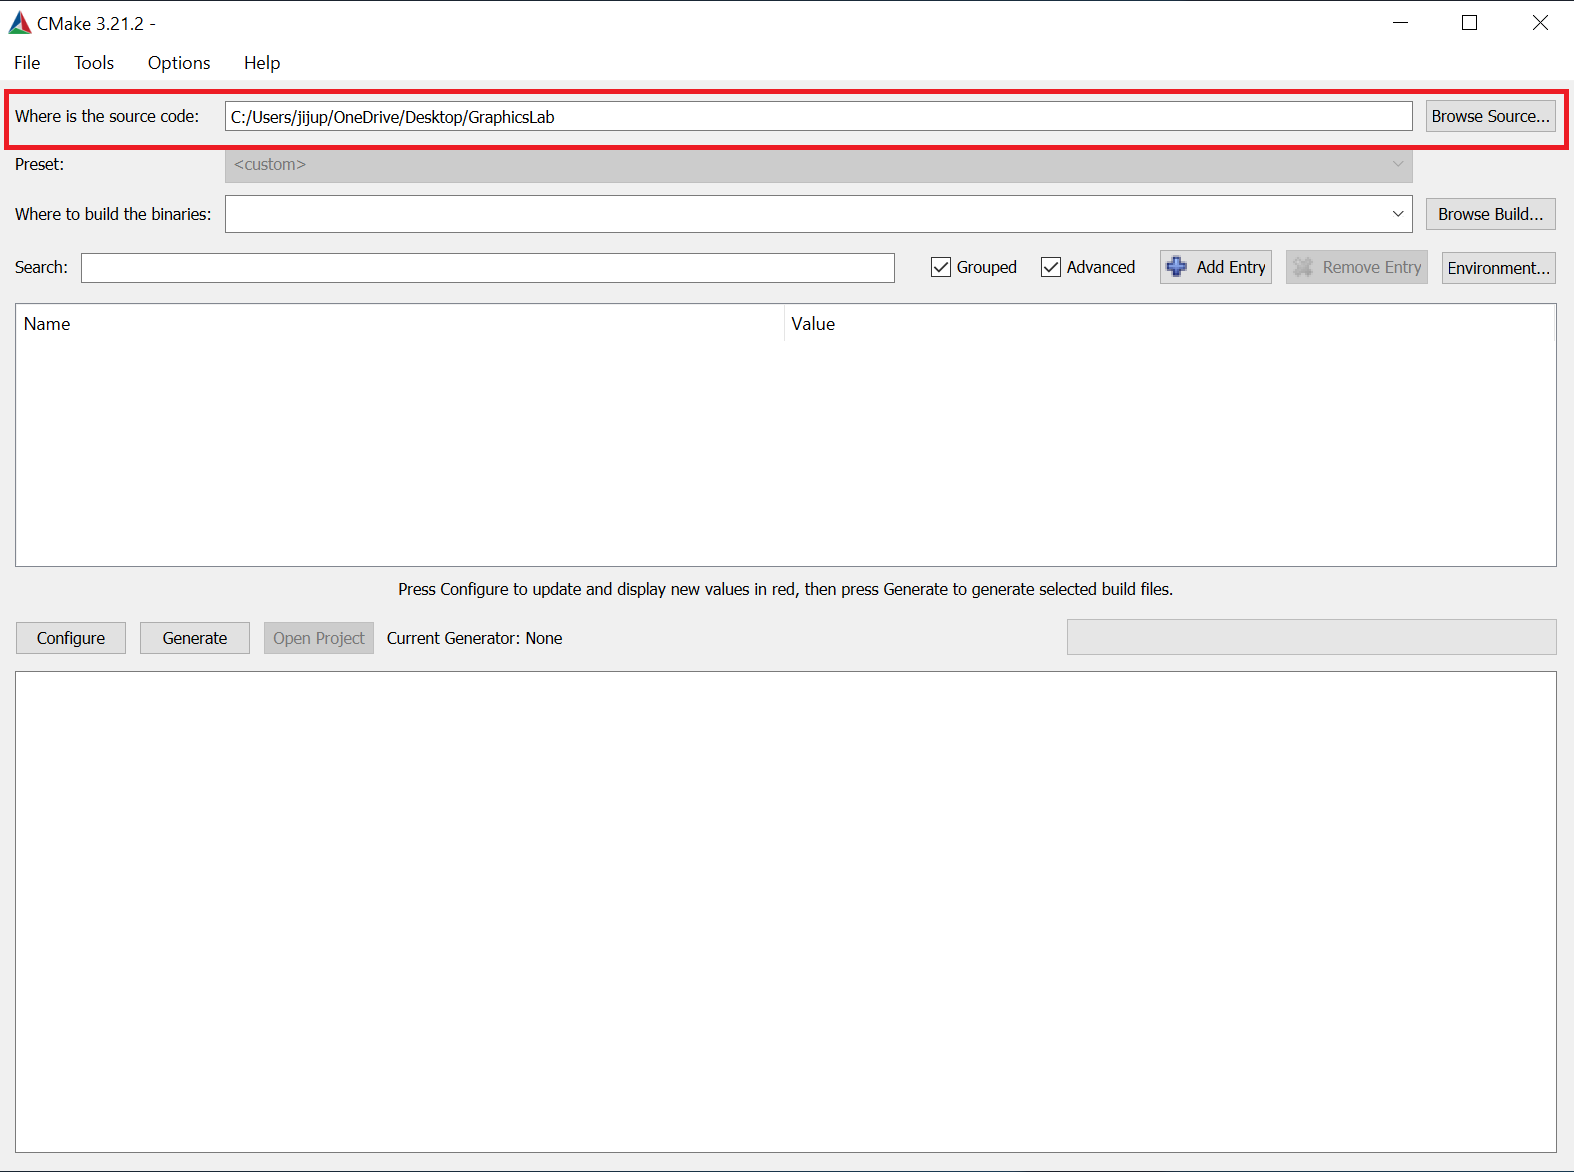 Figure 2: Specifying the source code folder.
3. Create an empty folder named build inside GraphicsLab2026. This is where CMake puts everything it generates, which keeps generated files separate from your source code.
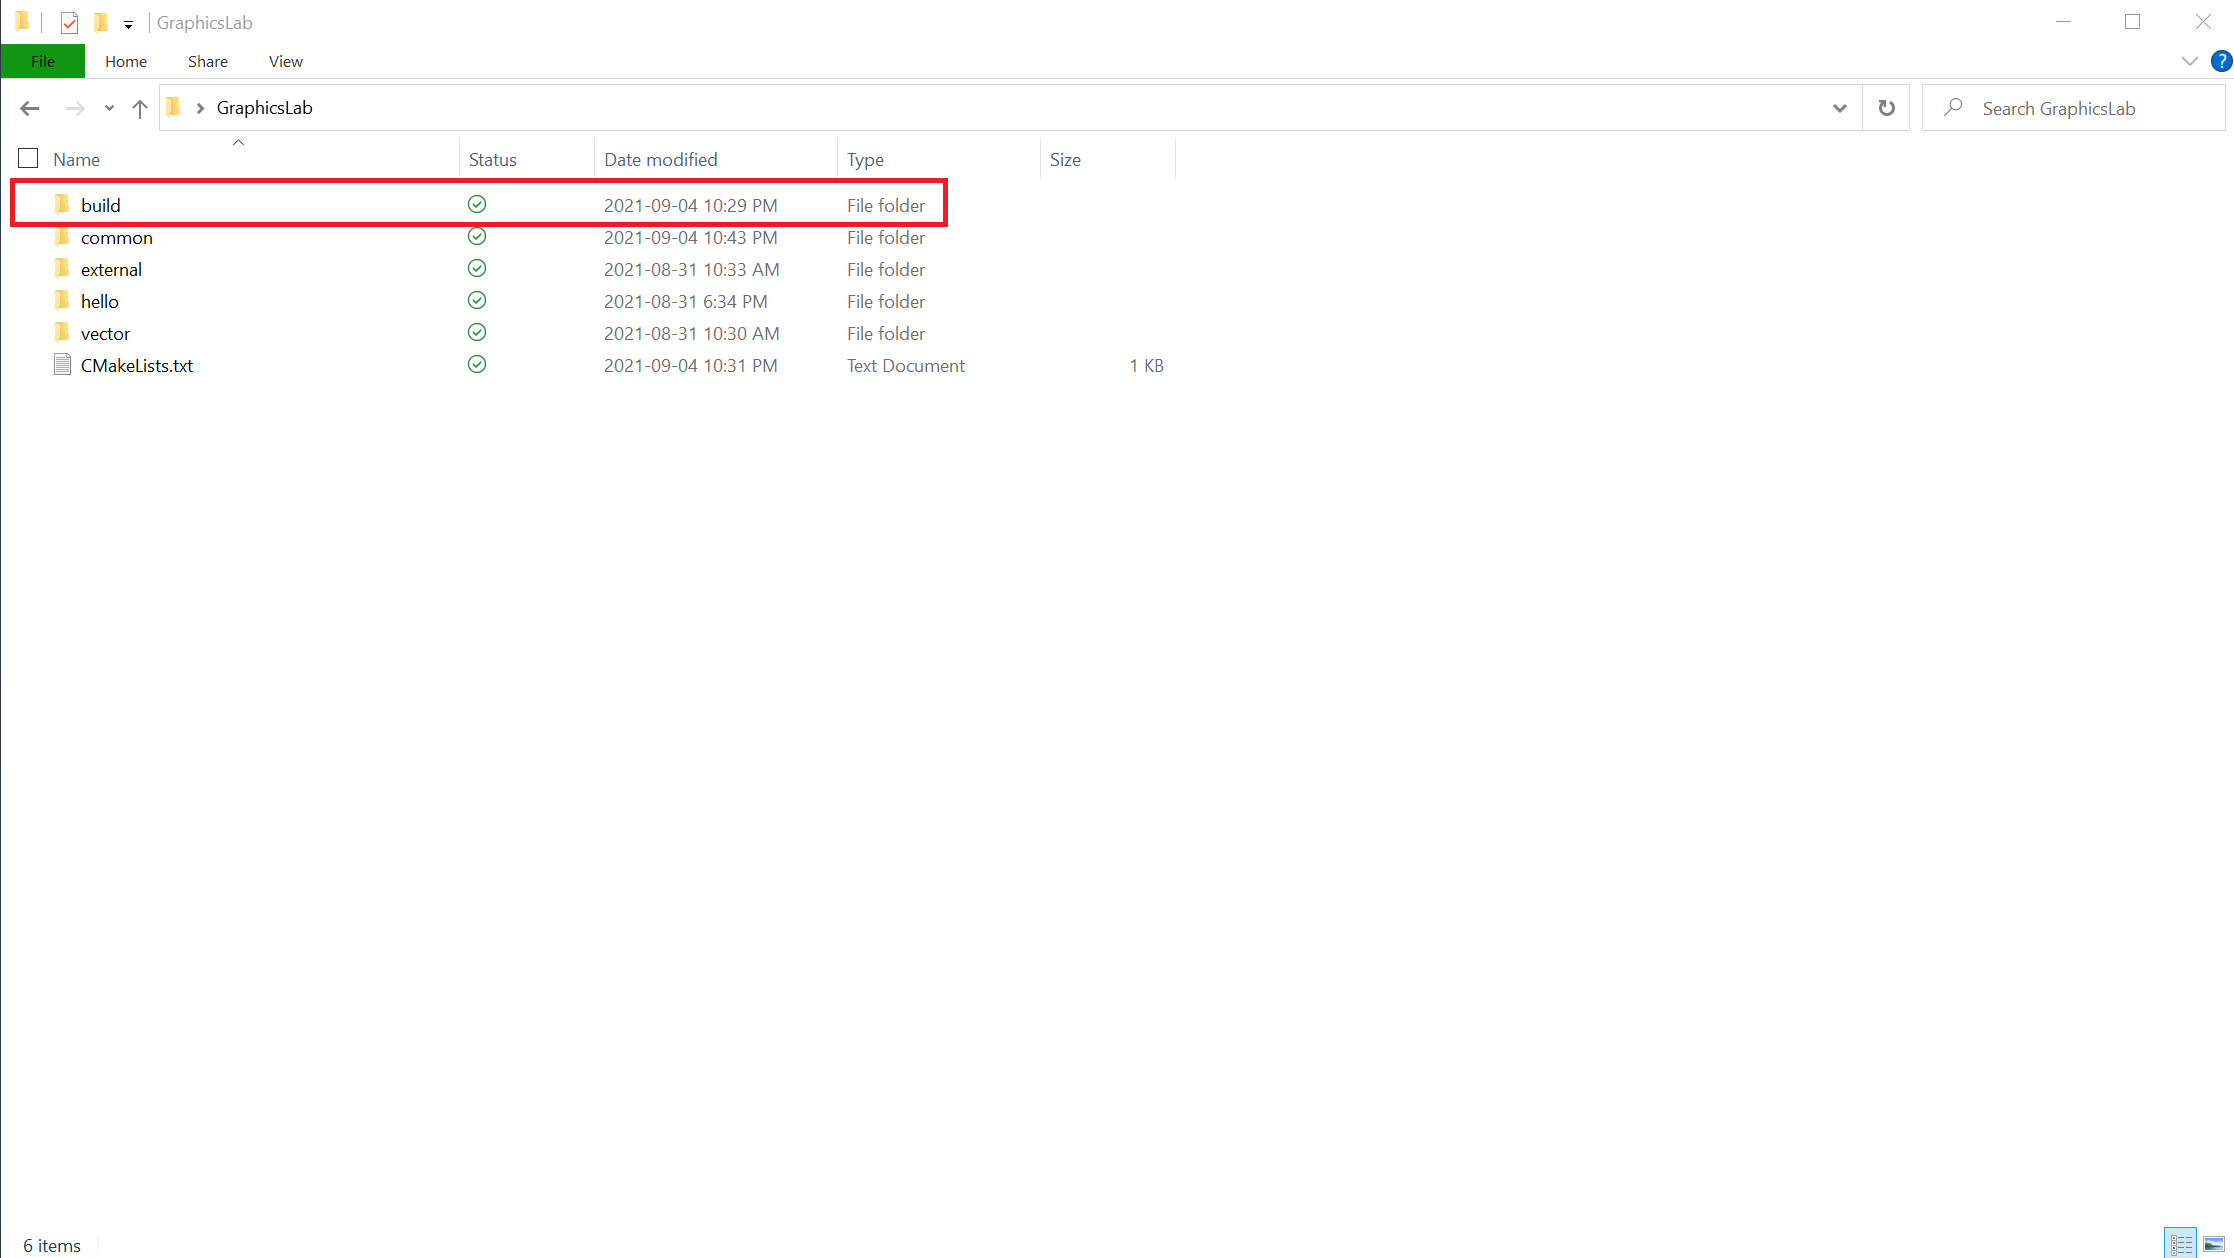 Figure 3: The project build folder.
4. In Where to build the binaries, enter the path to that folder, for example C:\Users\<YourUsername>\Documents\GraphicsLab2026\build.
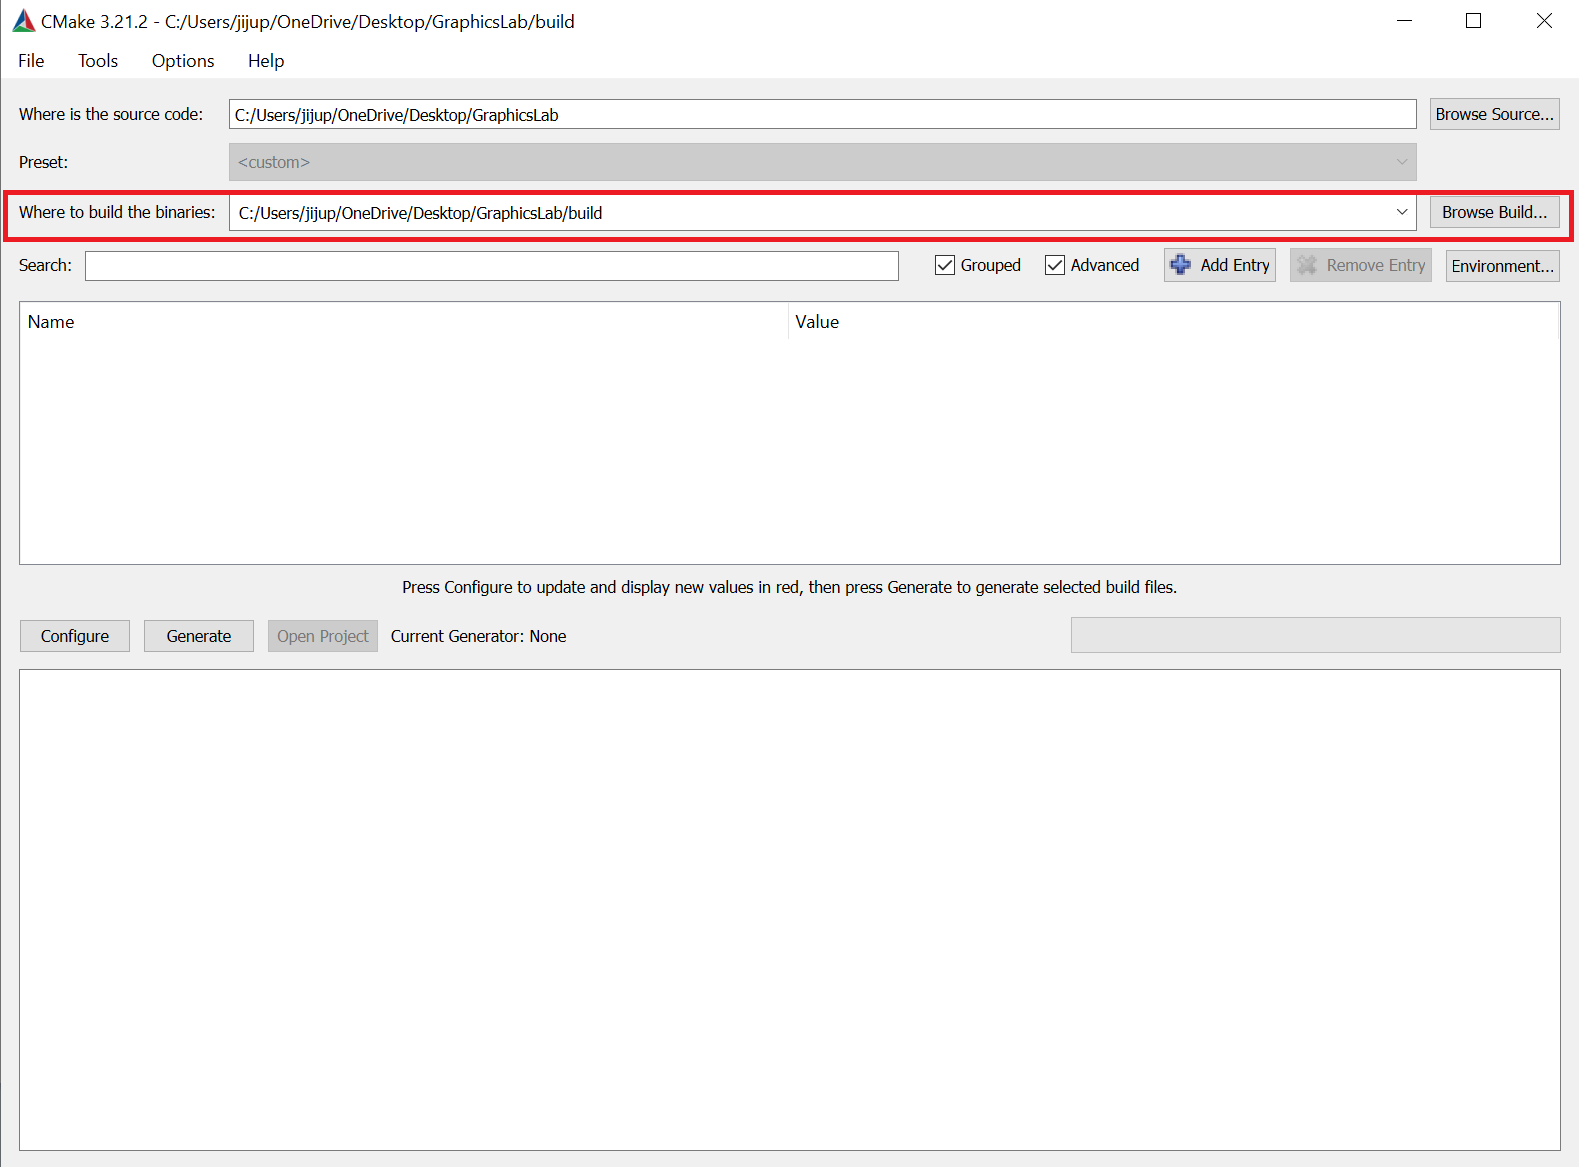 Figure 4: Specifying the build folder.
5. Click Configure. A pop-up asks whether to create the directory, so say yes. A second pop-up asks for the generator: pick Visual Studio 16 2019. Leave the platform at x64 and the option set to Use default native compilers, then click Finish.
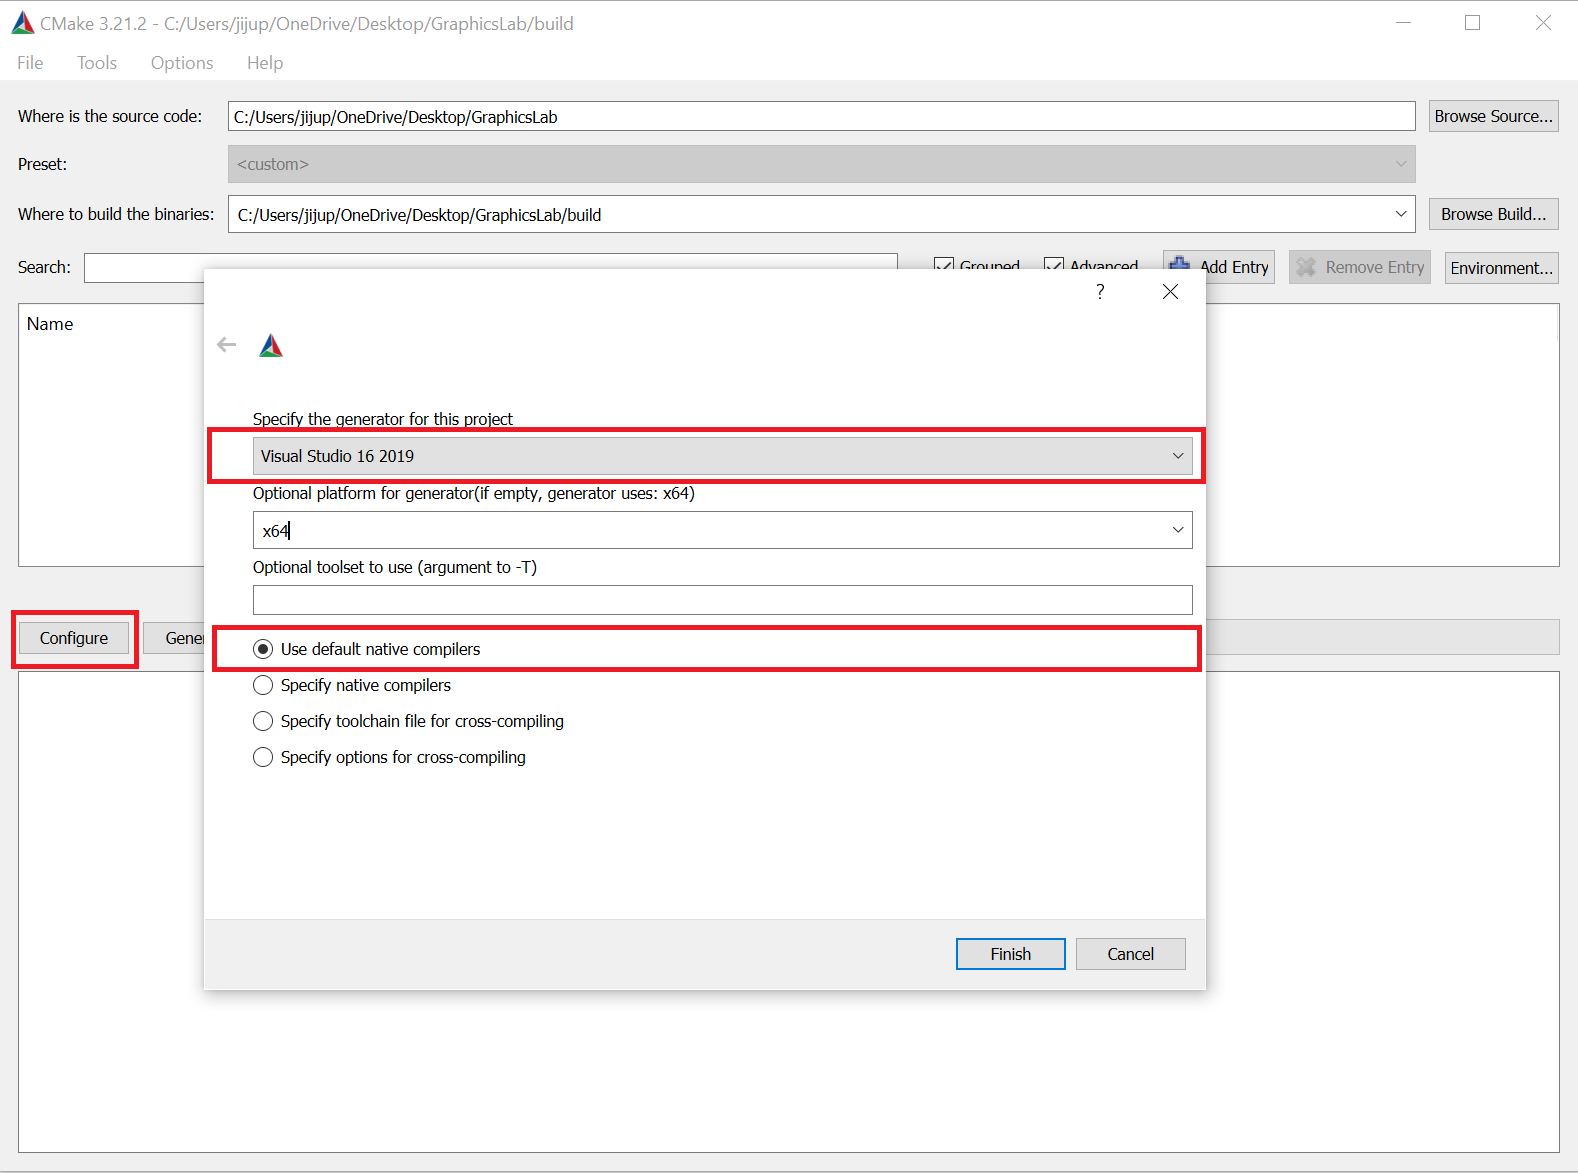 Figure 5: The configure step.
6. If there are no red ERROR lines, click Generate. Red text is not always an error, so read it: CMake prints ordinary progress messages in red too. Look for the word Error.
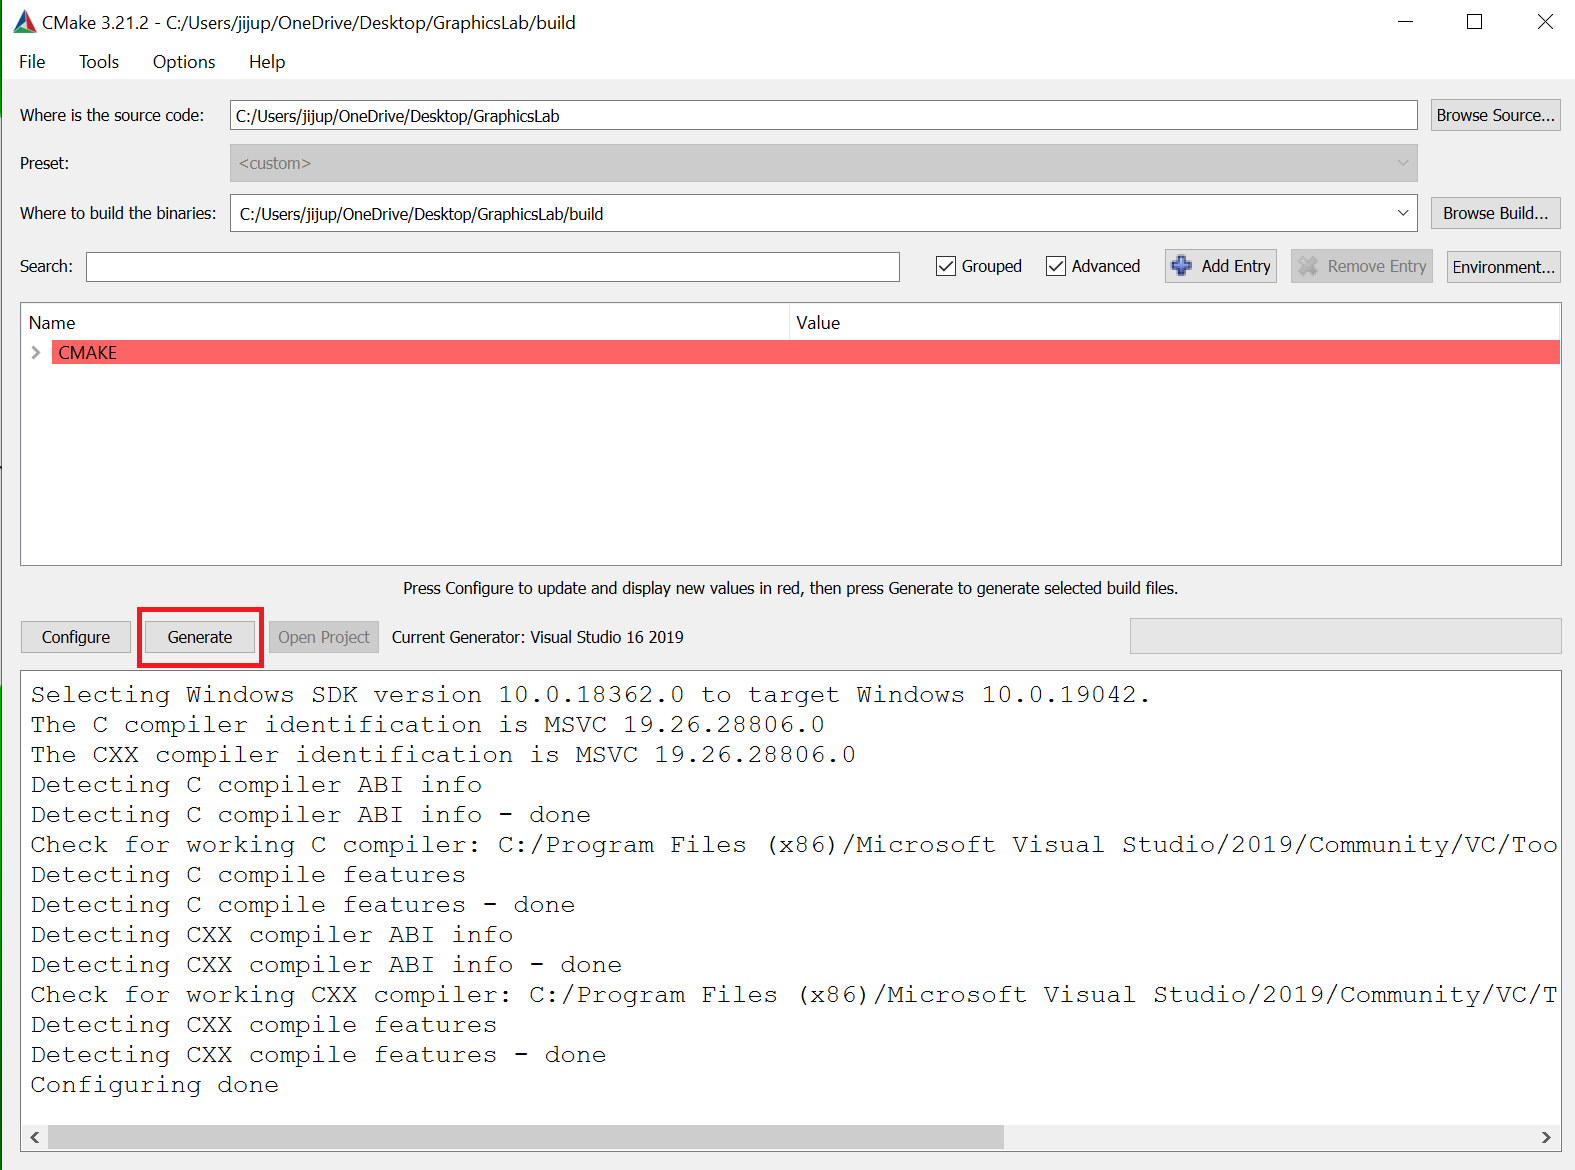 Figure 6: Generating the solution file.
7. Open the build folder and double-click GraphicsLab2026.sln. This opens the solution in Visual Studio 2019.
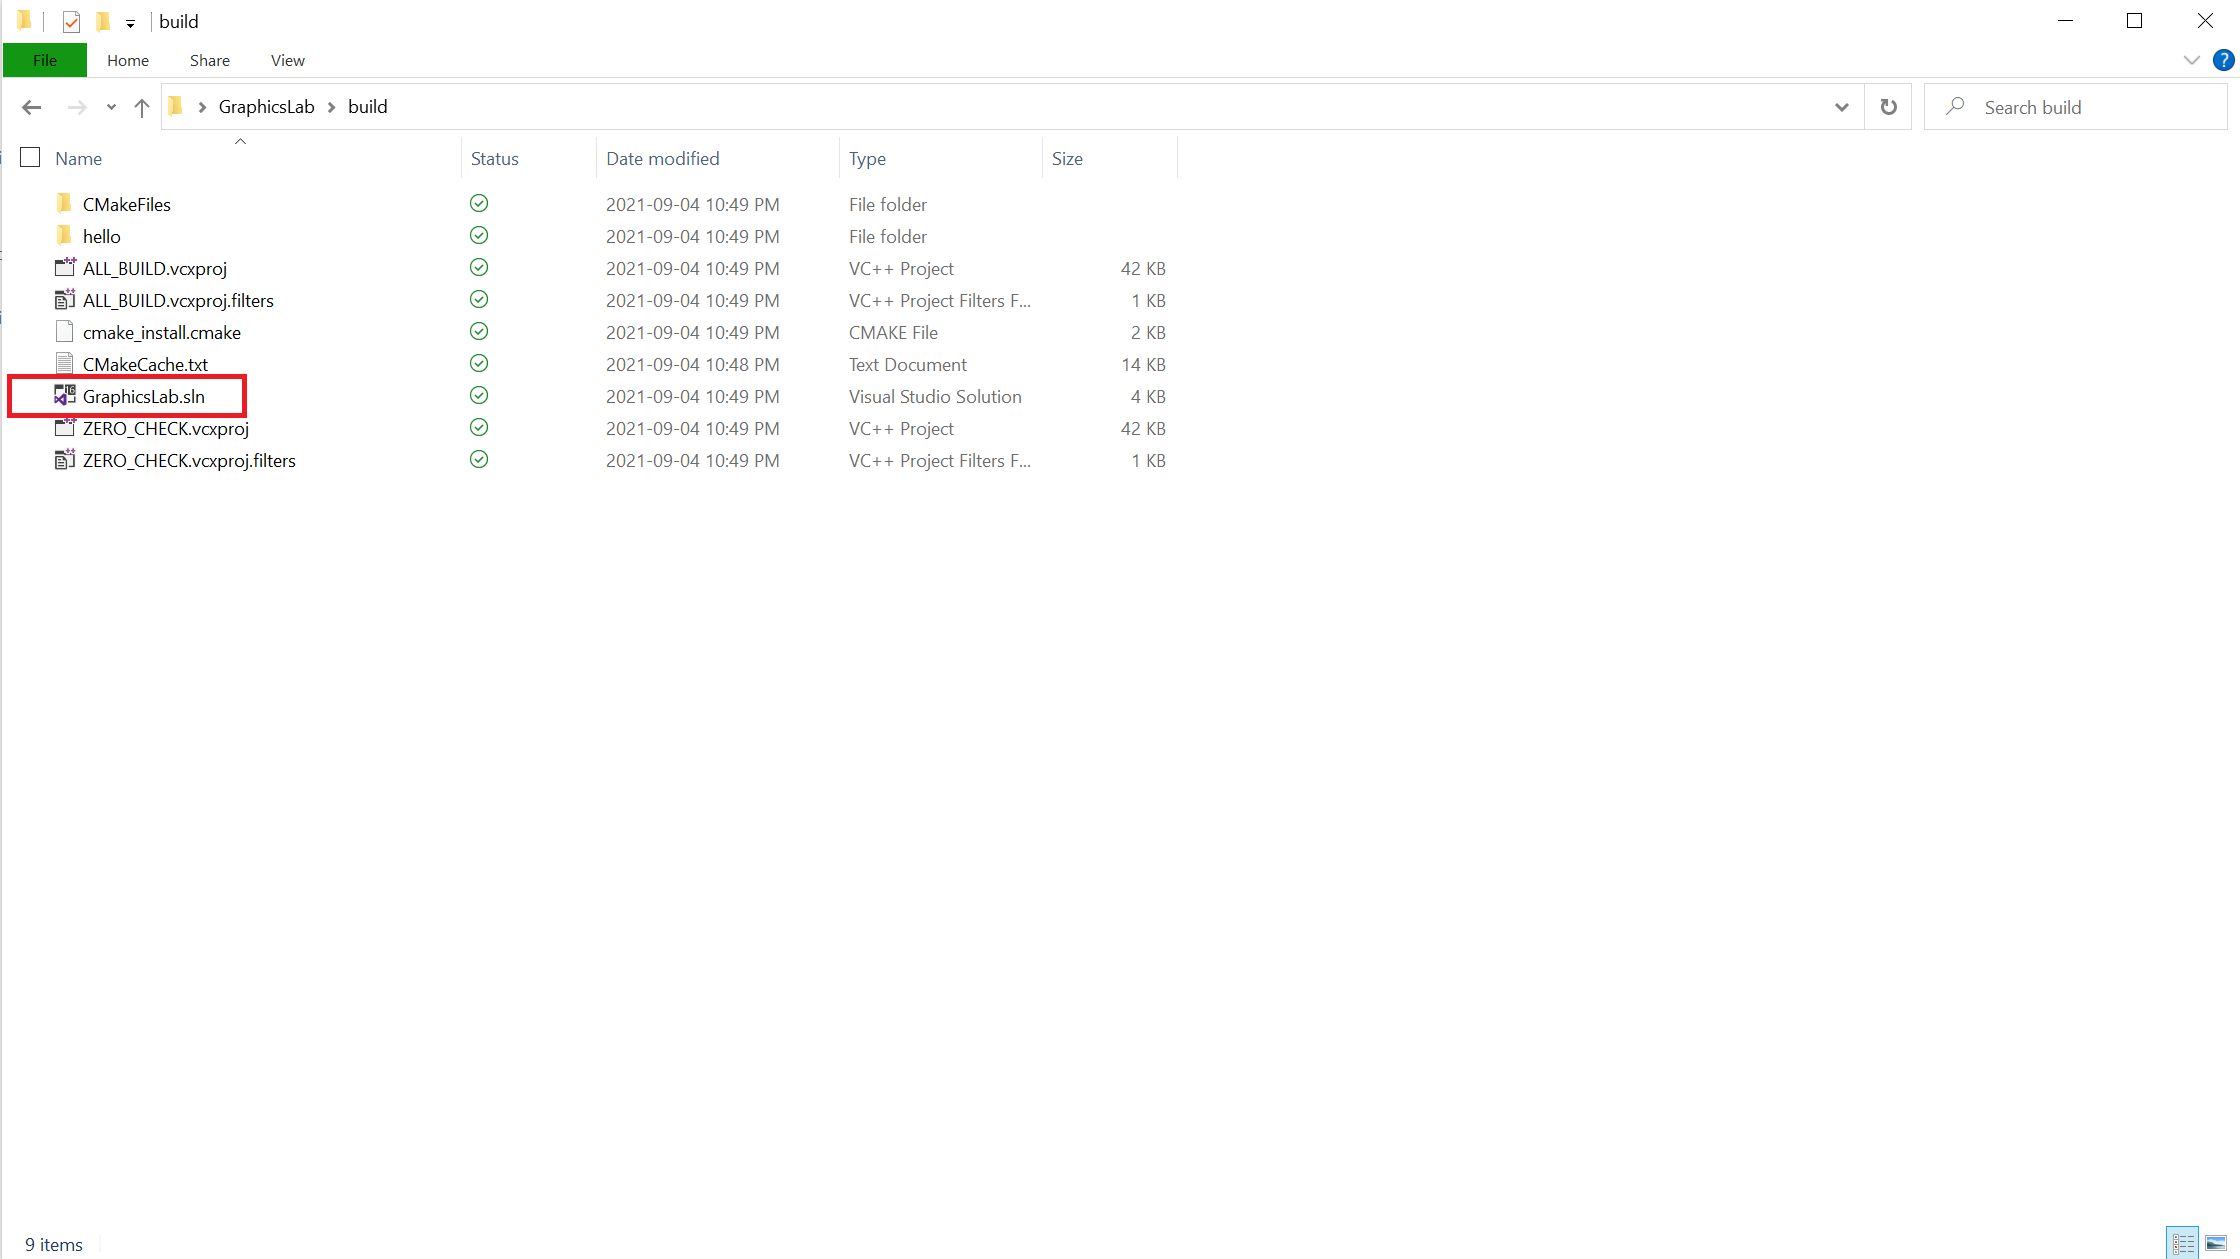 Figure 7: The .sln file in the build folder.
8. In the Solution Explorer, right-click the hello project and choose Set as Startup Project. Then press Ctrl+F5 to build and run.
Use Ctrl+F5 (Start Without Debugging) rather than F5. With F5, the console window closes the instant the program ends and you will not see your output.
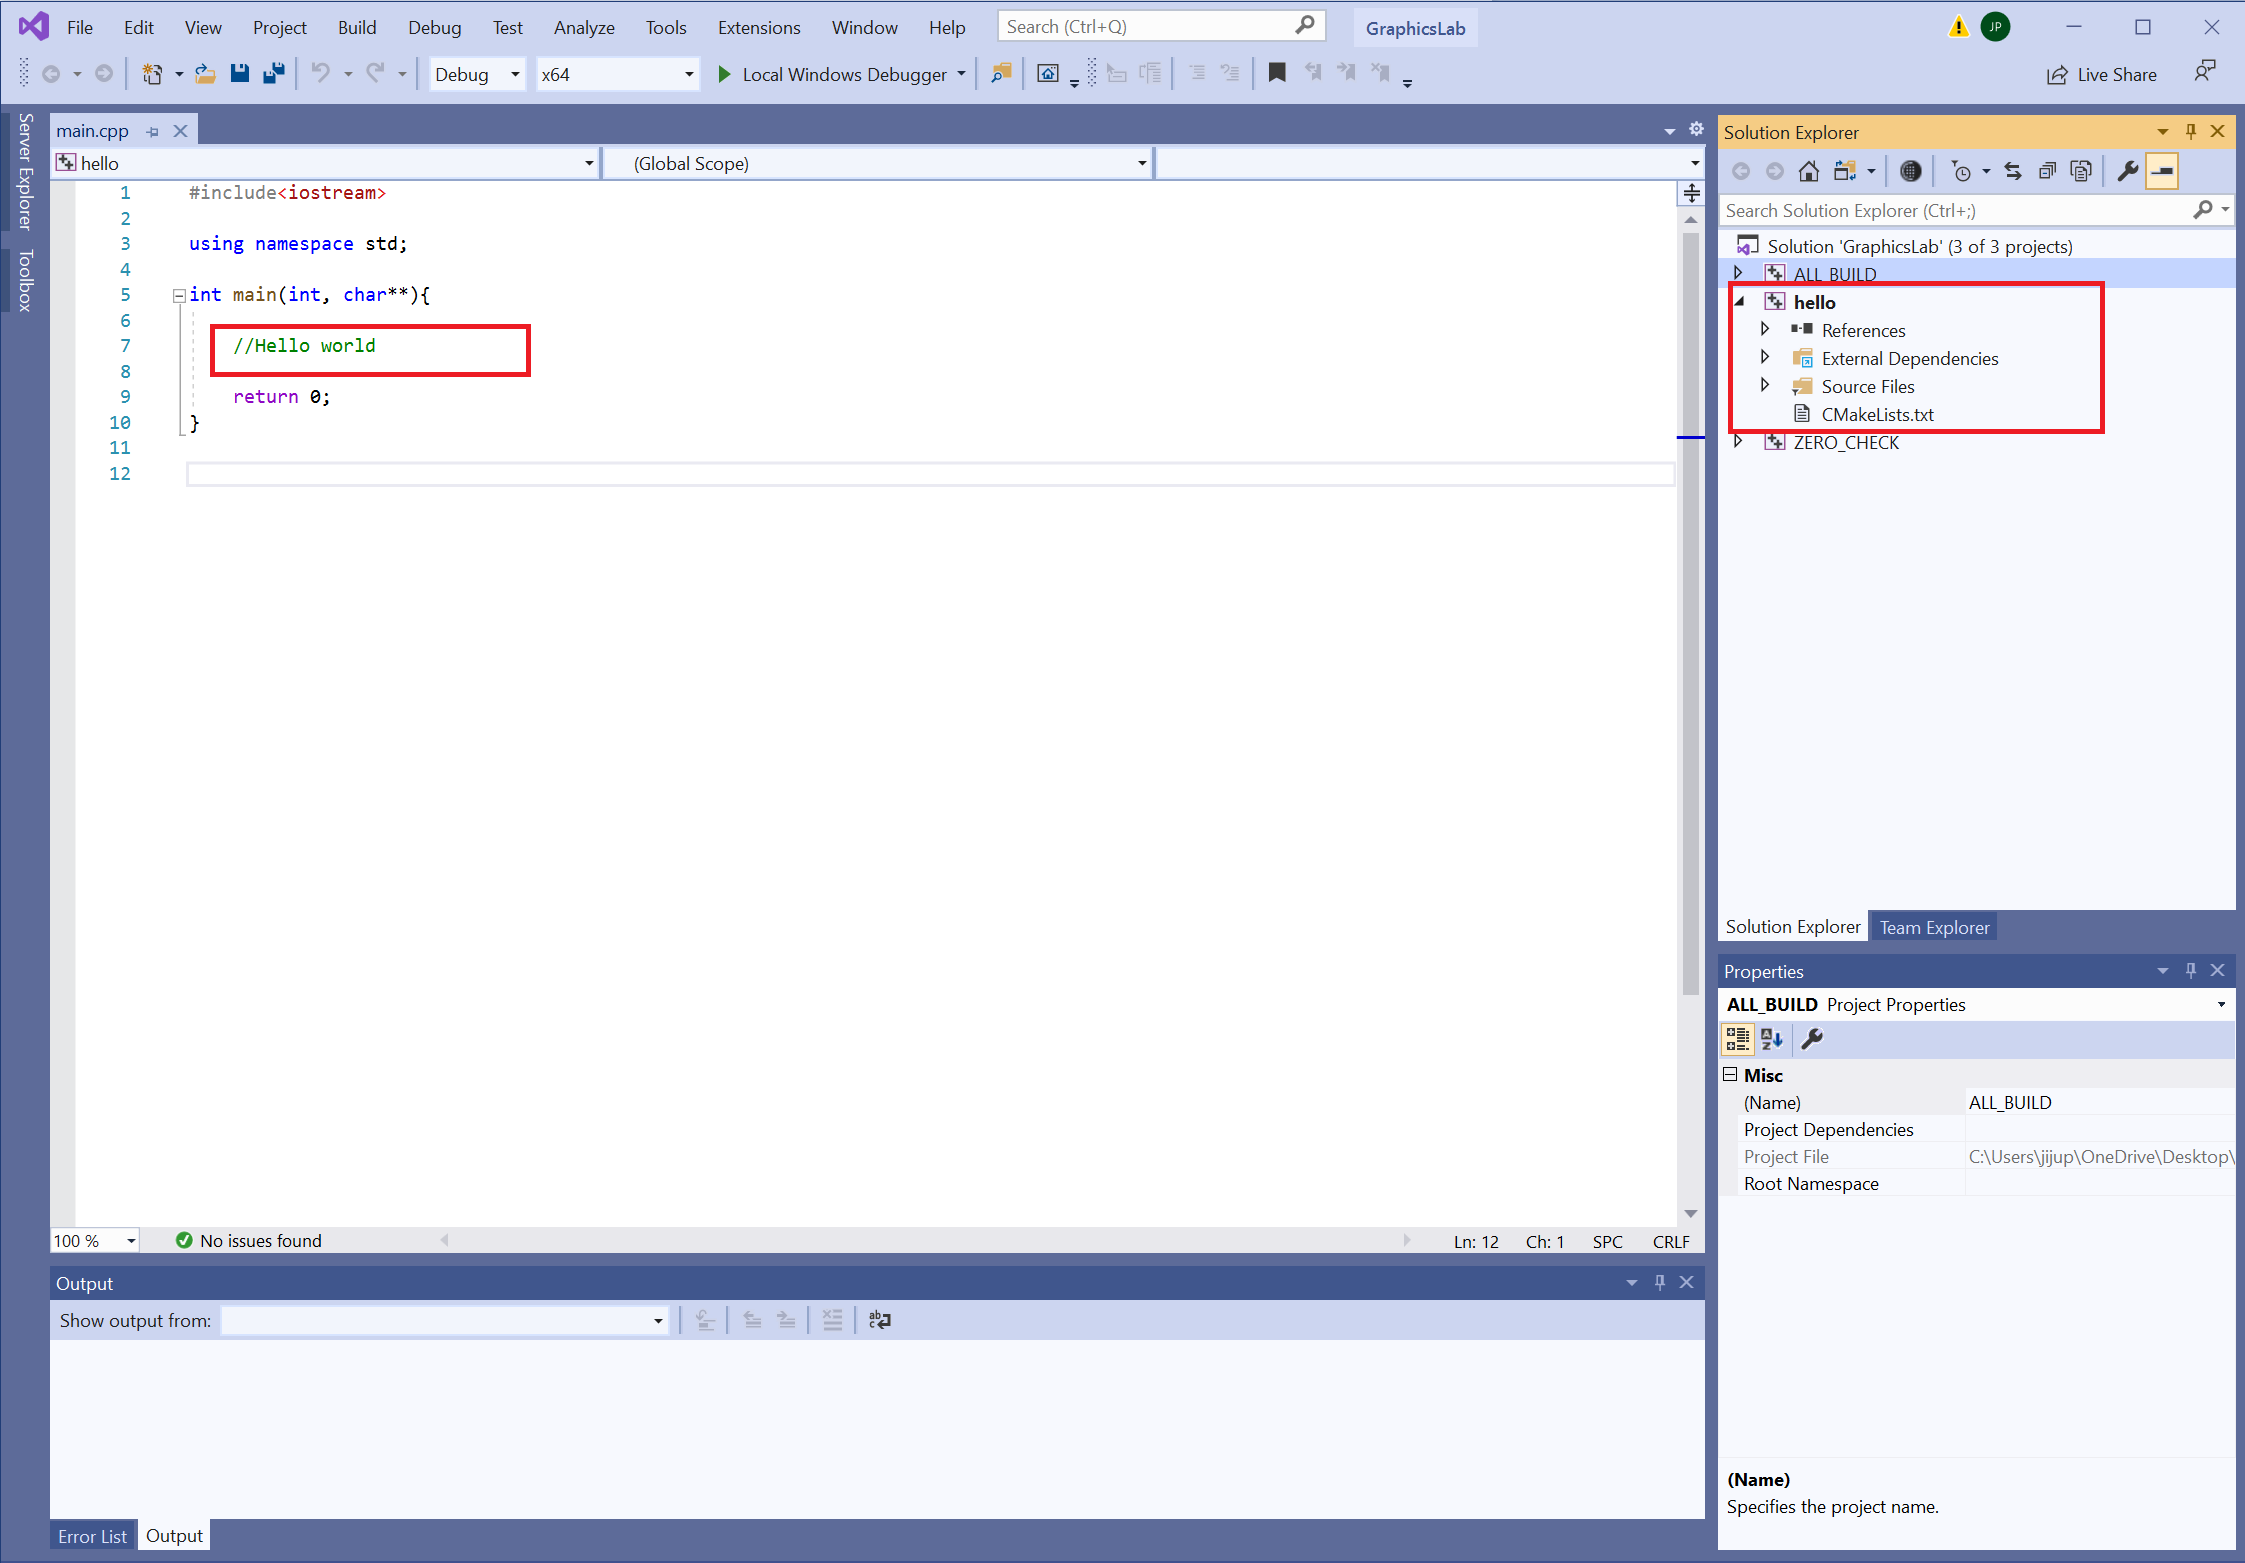 Figure 8: Coding, compiling and testing in Visual Studio.
A console window appears showing:
Hello CMake
You only run the CMake GUI once. From now on, edit your code in Visual Studio and press Ctrl+F5. You need to return to the CMake GUI and hit Configure and Generate again only if you change a CMakeLists.txt file or add a new source file to the project.
macOS and Linux are supported on a best-effort basis. The code should build, but you are responsible for your own environment, and I cannot guarantee a fix if something breaks on your setup the night before a deadline.
Install Xcode from the App Store, then open a terminal and run:
xcode-select --installThis installs the Command Line Tools, which give you clang, make and git. Then install Homebrew and use it for the rest:
brew install cmake
brew install eigen
brew install pkg-config
You need these two only once we start on OpenGL, which comes after the ray tracing unit:
brew install glfw
brew install glewOn Debian or Ubuntu:
sudo apt update
sudo apt install build-essential git cmake
sudo apt install libeigen3-dev libglfw3-dev libglew-dev
On other distributions the package names differ, but the set is the same: a C++ compiler, Git, CMake, Eigen, GLFW and GLEW.
Do Sections 2, 3, 4 and 5 as written, then from the GraphicsLab2026 folder:
mkdir build
cd build
cmake ..
make
./hello/hello
CMake generates a Makefile here instead of a Visual Studio solution. Same script, different output.
You are done when all of these are true:
-
GraphicsLab2026is on your machine, outside of any ZIP file, in a folder you can write to. - Configure and Generate both complete with no errors.
-
GraphicsLab2026.slnopens and thehelloproject builds with no errors. - Running it prints
Hello CMake.
Nothing is submitted for this session and it is not graded. It exists so that your environment works before the next recitation exercise depends on it. If you cannot tick all four boxes before you leave, flag me down.
"The source directory does not appear to contain CMakeLists.txt"
You pointed CMake at the wrong folder. It must be the folder that directly contains CMakeLists.txt, not its parent and not build.
Configure and Generate succeed, but there is no hello project in the solution
You almost certainly skipped add_subdirectory(hello) in the top-level CMakeLists.txt. Fix it, then hit Configure and Generate again.
"Unable to find a build program corresponding to Visual Studio 16 2019"
On your own machine, Visual Studio 2019 is not installed, or the Desktop development with C++ workload is missing. Reopen the Visual Studio Installer, click Modify, tick that workload, install, then delete the build folder and start Section 6 again. If you get this on a lab machine, tell me, because something is wrong with that machine rather than with your setup.
"No CMAKE_C_COMPILER could be found" (Windows) Same cause and same fix as above.
"No CMAKE_C_COMPILER could be found" (macOS)
The Command Line Tools are missing. Run xcode-select --install, delete the build folder, and run cmake .. again.
"No CMAKE_C_COMPILER could be found" (Linux)
No compiler is installed. Run sudo apt install build-essential, delete the build folder, and run cmake .. again.
The console window flashes and disappears
You pressed F5 instead of Ctrl+F5. Use Ctrl+F5.
Errors mentioning Eigen, GLFW, GLEW or OpenCV
Check that the external/ folder is present and not empty. If you downloaded a ZIP, you may have extracted only part of it, or extracted it into a nested folder. Re-extract.
Anything with stale or wrong paths in it
Delete the build folder entirely and redo Section 6. CMake caches aggressively, and clearing the cache fixes a surprising number of problems. Deleting build never touches your source code.
Never commit the build folder to Git. It contains machine-specific paths and is regenerated from scratch every time.
Post your problem on the Issues tab of the course repository. Include:
- your operating system,
- whether you are on a lab machine or your own machine,
- the exact error text, copied as text rather than described.
Posting there rather than emailing means other students hitting the same problem can see the fix. I monitor it and will respond as quickly as I can. Email me directly only if your question is personal rather than technical.