Actor: johnvc/google-lens-api · Input schema
This repo shows two ways to use the Google Lens API on Apify: a Python quick start and MCP installs for five AI clients. Give it any public image URL and get back visually similar results, shoppable product matches with prices, or every page carrying the exact same image, which is the bulk reverse image search photographers use for attribution checks.
The google lens api takes an image_url plus a search_type. visual_matches is the general reverse image search and returns about 59 rows per lookup with title, source, url, thumbnail and the full image link. products returns shoppable listings with price, currency and inStock. exact_matches returns up to 400 pages carrying the identical file, which powers the stolen-photo check recipe in this repo. Exact-match coverage varies run to run at the source, so an empty result finishes clean rather than erroring; retry or switch type.
You need Python 3.11+ and a free Apify API key: sign up at apify.com, then copy your token from Console Settings.
git clone https://github.com/johnisanerd/Apify-Google-Lens-API.git
cd Apify-Google-Lens-API
uv sync
cp .env.example .env   # then paste your APIFY_API_TOKEN
uv run python google-lens-api-example.py
Run a specific recipe:
uv run python google-lens-api-example.py --example stolen_check- Three search types behind one input: visual matches, products, exact matches
- Real destination URLs with source site names for every match
- Product matches carry price, currency and stock where the retailer publishes them
- Up to 400 exact-match rows per lookup for attribution and licensing sweeps
- Country and language targeting when you need regional results
The example script ships ready-made recipes that mirror this API's main use cases:
- Check if a photo is being reused (
--example stolen_check): Runs exact matches over one image and lists every page carrying it. - Visual product search (
--example product_match): Turns a product photo into shoppable listings with prices.
Schedule tip: save any of these inputs as a task in the Apify Console and attach a schedule. A daily or weekly run turns a one-off pull into a pipeline with zero manual work.
Basic input:
{
  "image_url": "https://i.imgur.com/HBrB8p0.png",
  "search_type": "visual_matches",
  "max_results": 10
}
Advanced input:
{
  "image_url": "https://i.imgur.com/HBrB8p0.png",
  "search_type": "exact_matches",
  "max_results": 200,
  "country": "us"
}| Parameter | Type | Required | Default | Description |
|---|---|---|---|---|
image_url |
string | yes | none | REQUIRED. |
search_type |
string | no | "visual_matches" |
What kind of matches to return. |
query |
string | no | none | Optional. |
max_results |
integer | no | 50 |
How many matches to return. |
country |
string | no | none | Optional two letter country code such as us, gb or de. |
language |
string | no | none | Optional two letter language code such as en, es or fr. |
One row from a real run:
{
  "resultType": "match",
  "searchType": "visual_matches",
  "position": 1,
  "title": "File:Danny DeVito by Gage Skidmore.jpg - Wikimedia Commons",
  "source": "Wikimedia Commons",
  "url": "https://commons.wikimedia.org/wiki/File:Danny_DeVito_by_Gage_Skidmore.jpg",
  "thumbnail": "https://encrypted-tbn2.gstatic.com/images?q=tbn:ANd9GcR0rTF6u7bB7aTW",
  "image": "https://upload.wikimedia.org/wikipedia/commons/thumb/2/21/Danny_DeVito.jpg",
  "imageWidth": 1280,
  "imageHeight": 1024
}Available as an n8n community node, n8n-nodes-google-lens-api. In n8n: Settings, Community Nodes, install n8n-nodes-google-lens-api, then use it in any workflow (it also works as an AI Agent tool).
Yes: pay per result on Apify, and an Apify free account includes monthly platform credit, so small lookups cost nothing out of pocket.
Run the quick start here: uv sync, set your token, pass an image URL. Three lines of client code, JSON back.
Loop the client over a URL list, or point an AI agent at the MCP server below and hand it the list. Each image is one lookup.
The source returns only a thumbnail plus pixel dimensions for exact matches. Visual and product matches carry the full image link.
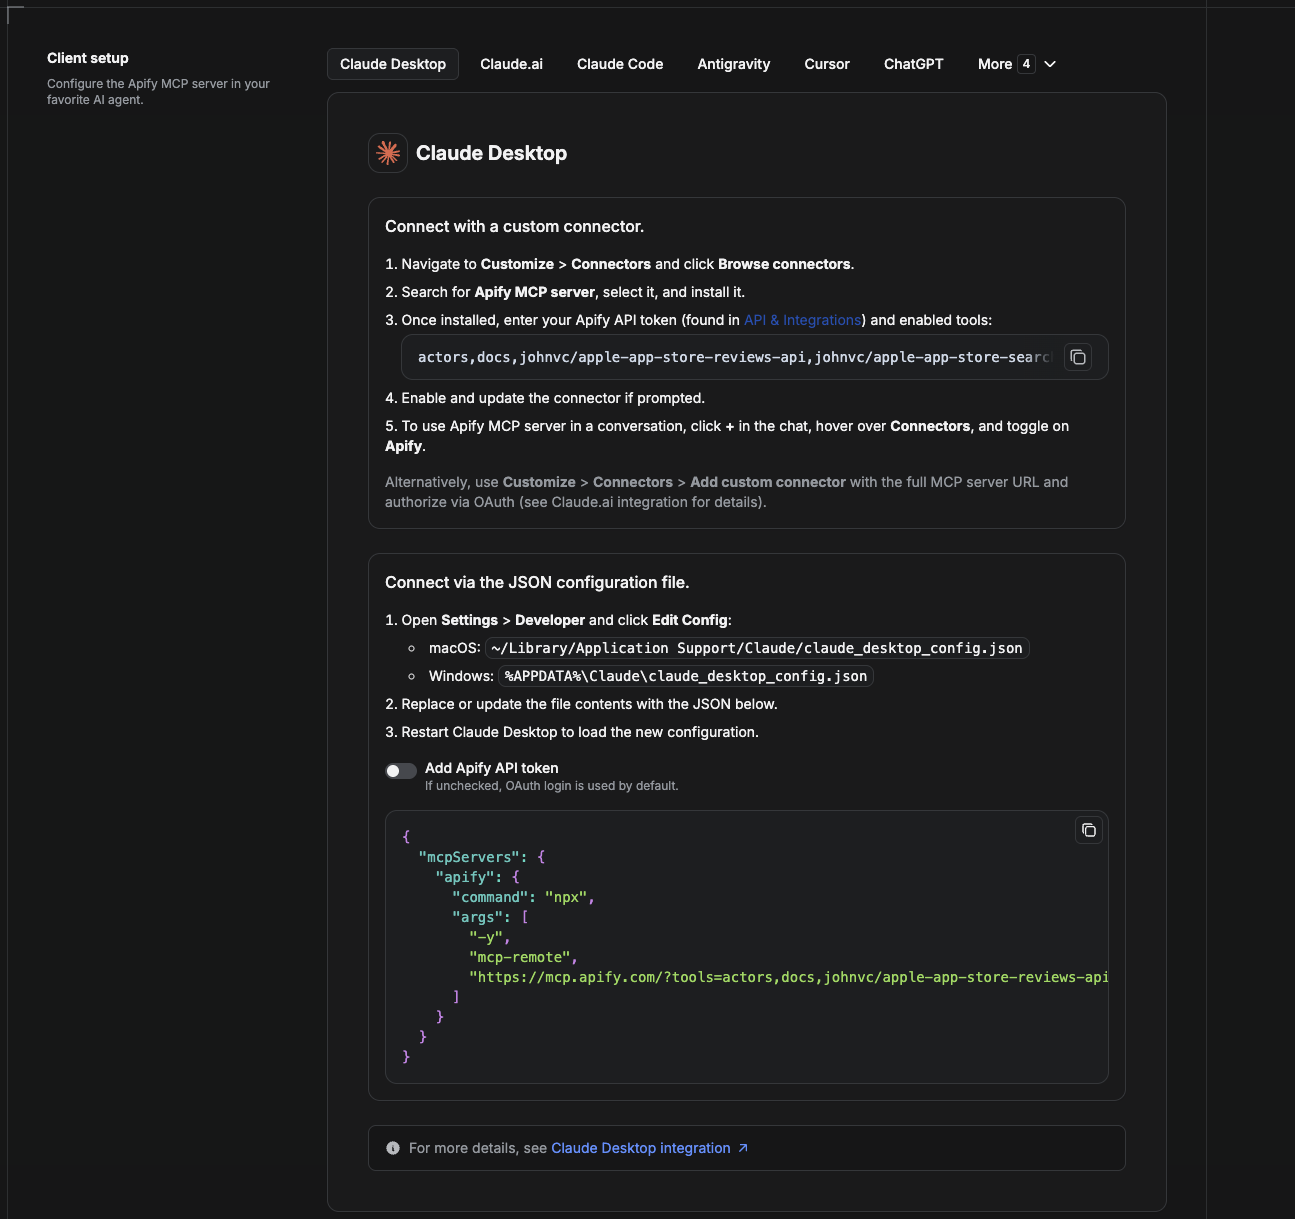
Cowork is the desktop app's automation mode. To give it the Google Lens API as a tool, add the Apify MCP server as a connector.
- Open the Claude desktop app and go to Settings -> Connectors (or Settings -> Developer -> Edit Config to edit
claude_desktop_config.jsondirectly).- macOS:
~/Library/Application Support/Claude/claude_desktop_config.json - Windows:
%APPDATA%\Claude\claude_desktop_config.json
- macOS:
- Add the Apify MCP server, preloaded with only this Actor:
{
  "mcpServers": {
    "apify": {
      "command": "npx",
      "args": [
        "-y",
        "mcp-remote",
        "https://mcp.apify.com/?tools=actors,docs,johnvc/google-lens-api"
      ]
    }
  }
}- Restart the app. When Cowork first calls the tool, complete the OAuth prompt in your browser, or add your Apify API token in the connector settings to skip OAuth.
- In a Cowork chat, confirm the tool is available and ask it to run the Google Lens API.
Download the desktop app and start a free trial: https://claude.ai/referral/uIlpa7nPLg More help: https://docs.apify.com/platform/integrations/claude-desktop
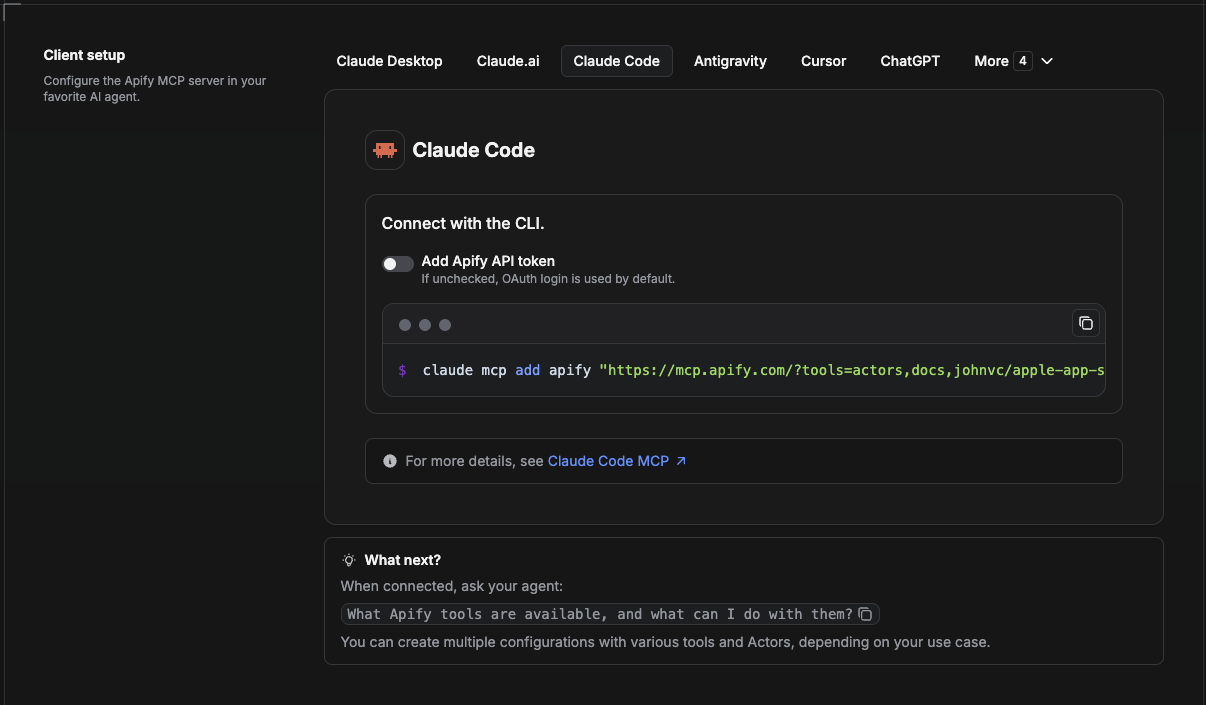
Claude Code is the command-line tool. Add the Actor's MCP server with one command:
claude mcp add --transport http apify \
  "https://mcp.apify.com/?tools=actors,docs,johnvc/google-lens-api"
To use a token instead of browser OAuth:
claude mcp add --transport http apify \
  "https://mcp.apify.com/?tools=actors,docs,johnvc/google-lens-api" \
  --header "Authorization: Bearer YOUR_APIFY_TOKEN"
Then verify with claude mcp list, or run /mcp inside a session. Ask Claude Code to call the Google Lens API.
Try Claude Code free: https://claude.ai/referral/uIlpa7nPLg Claude Code MCP docs: https://code.claude.com/docs/en/mcp
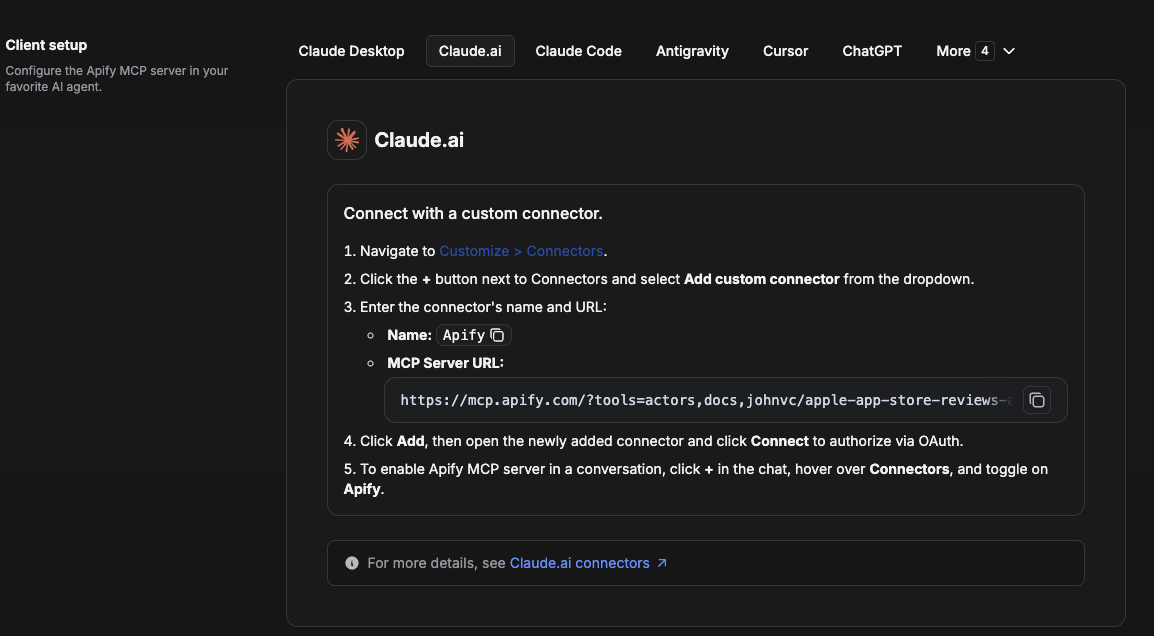
On claude.ai you add Apify as a connector, then enable just this Actor's tool.
- Go to Settings -> Connectors -> Browse connectors and search for Apify MCP server. Install it (enable or update if prompted).
- When connecting, authenticate with your Apify API token, and enable the tool
johnvc/google-lens-api. - In any chat, open + -> Connectors and turn on Apify.
- Alternatively, choose Add custom connector and paste the full MCP URL
https://mcp.apify.com/?tools=actors,docs,johnvc/google-lens-api, using OAuth when prompted. - Ask Claude to run the Google Lens API.
Open Claude on the web: https://claude.ai
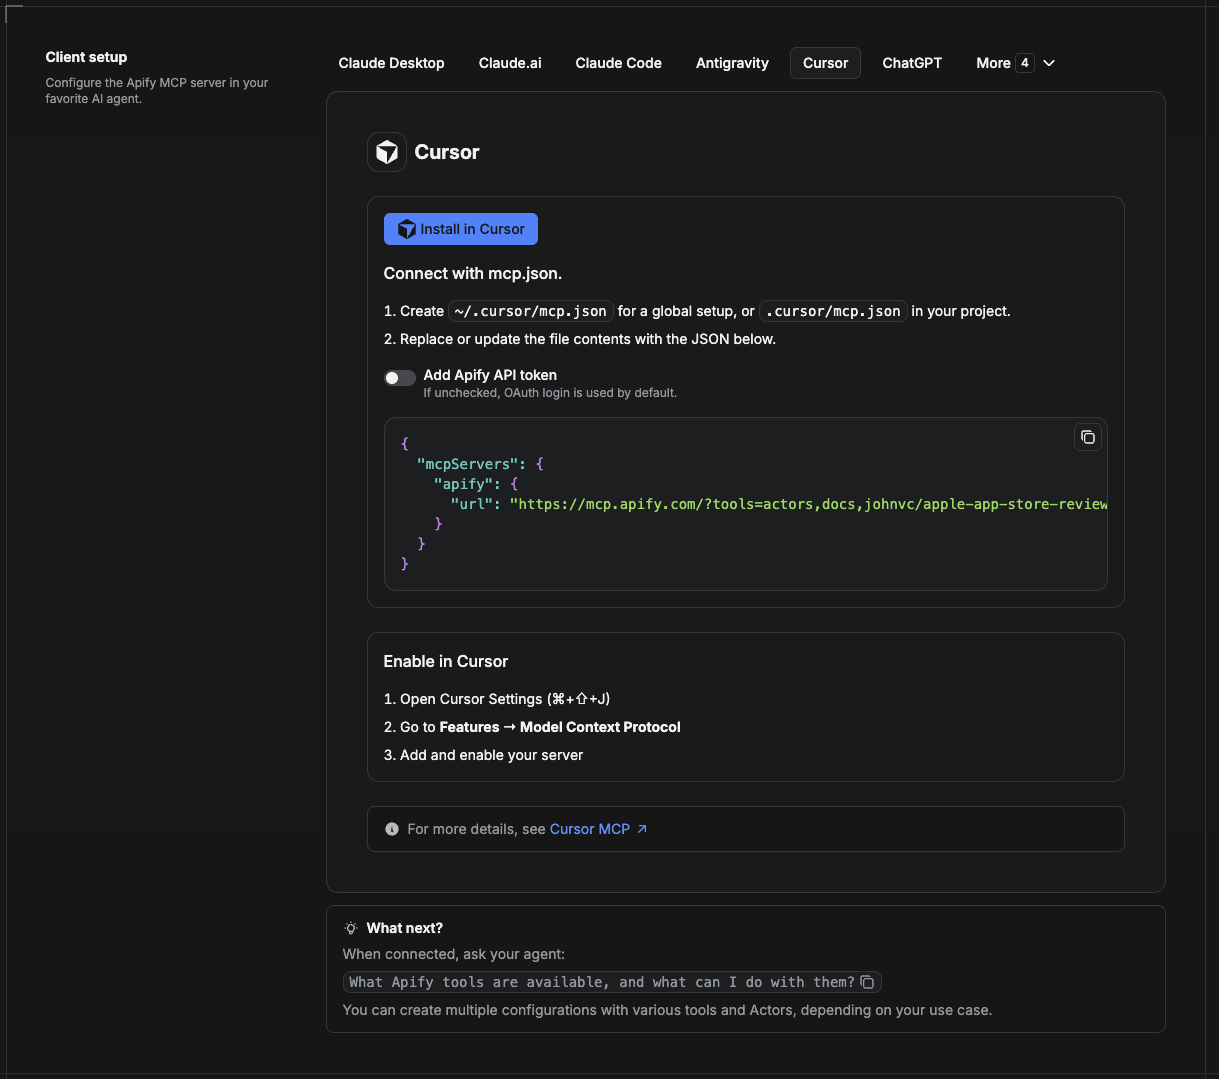
Cursor reads MCP servers from a project file at .cursor/mcp.json.
- In your project, create
.cursor/mcp.json:
{
  "mcpServers": {
    "apify": {
      "url": "https://mcp.apify.com/?tools=actors,docs,johnvc/google-lens-api"
    }
  }
}- If you prefer token auth over browser OAuth, add a header:
{
  "mcpServers": {
    "apify": {
      "url": "https://mcp.apify.com/?tools=actors,docs,johnvc/google-lens-api",
      "headers": { "Authorization": "Bearer YOUR_APIFY_TOKEN" }
    }
  }
}- Open Cursor -> Settings -> MCP and confirm the apify server is connected (green dot).
- In Composer or Chat, ask Cursor to call the Google Lens API.
New to Cursor? Get it here: https://cursor.com/referral?code=XQP4VBLI3NNX
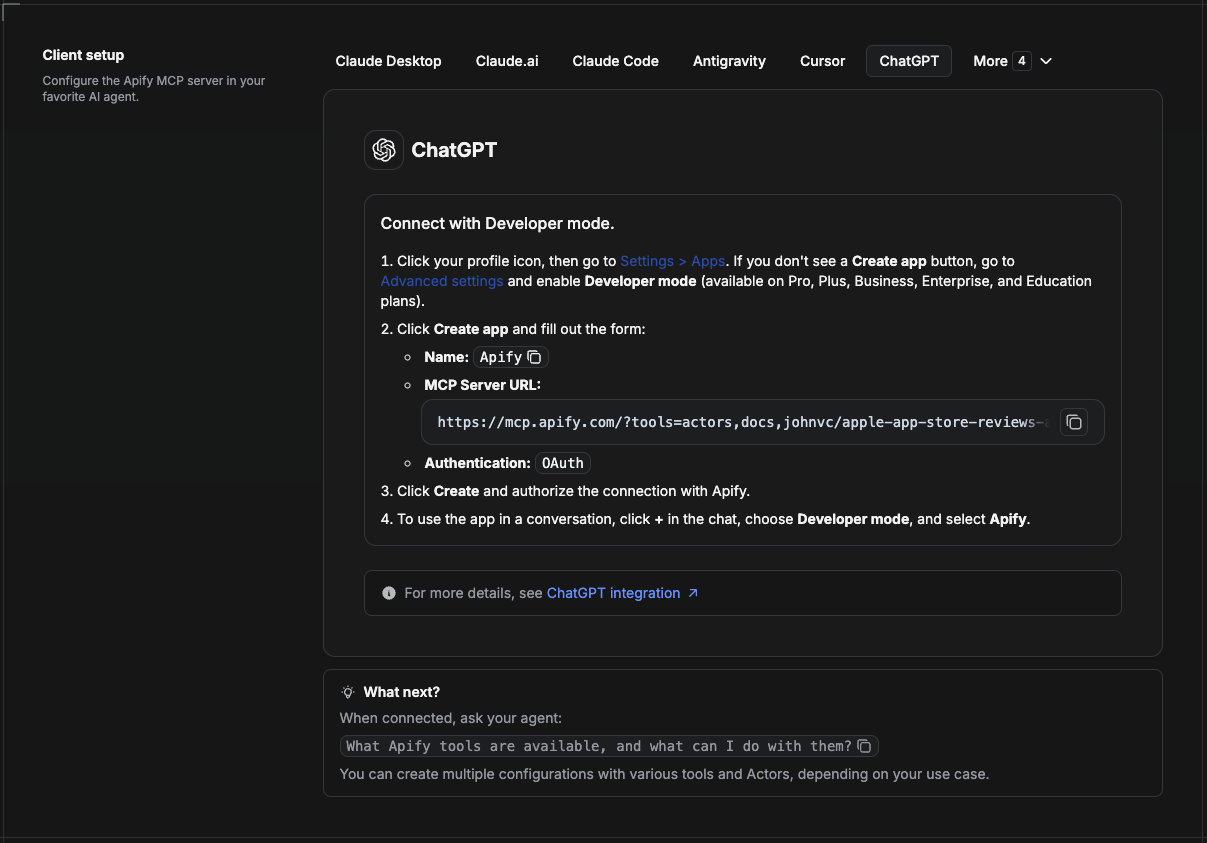
ChatGPT connects to the Apify MCP server through Developer mode (available on ChatGPT Pro, Plus, Business, Enterprise, and Education plans).
- Click your profile icon, then go to Settings > Apps. If you do not see a Create app button, open Advanced settings and enable Developer mode.
- Click Create app and fill out the form:
- Name: Apify
- MCP Server URL:
https://mcp.apify.com/?tools=actors,docs,johnvc/google-lens-api - Authentication: OAuth
- Click Create and authorize the connection with Apify.
- To use the app in a conversation, click + in the chat, choose Developer mode, and select Apify.
More help: https://docs.apify.com/platform/integrations/mcp
Made with care by johnvc on Apify. This example repo is part of Alpha OSINT, toolset of financial and operations data sources and APIs.
Last Updated: 2026.08.06