Repository navigation
Batch
Batch gives many photos the same treatment in one go: a look or preset, a new size, a watermark, a new format and new names.
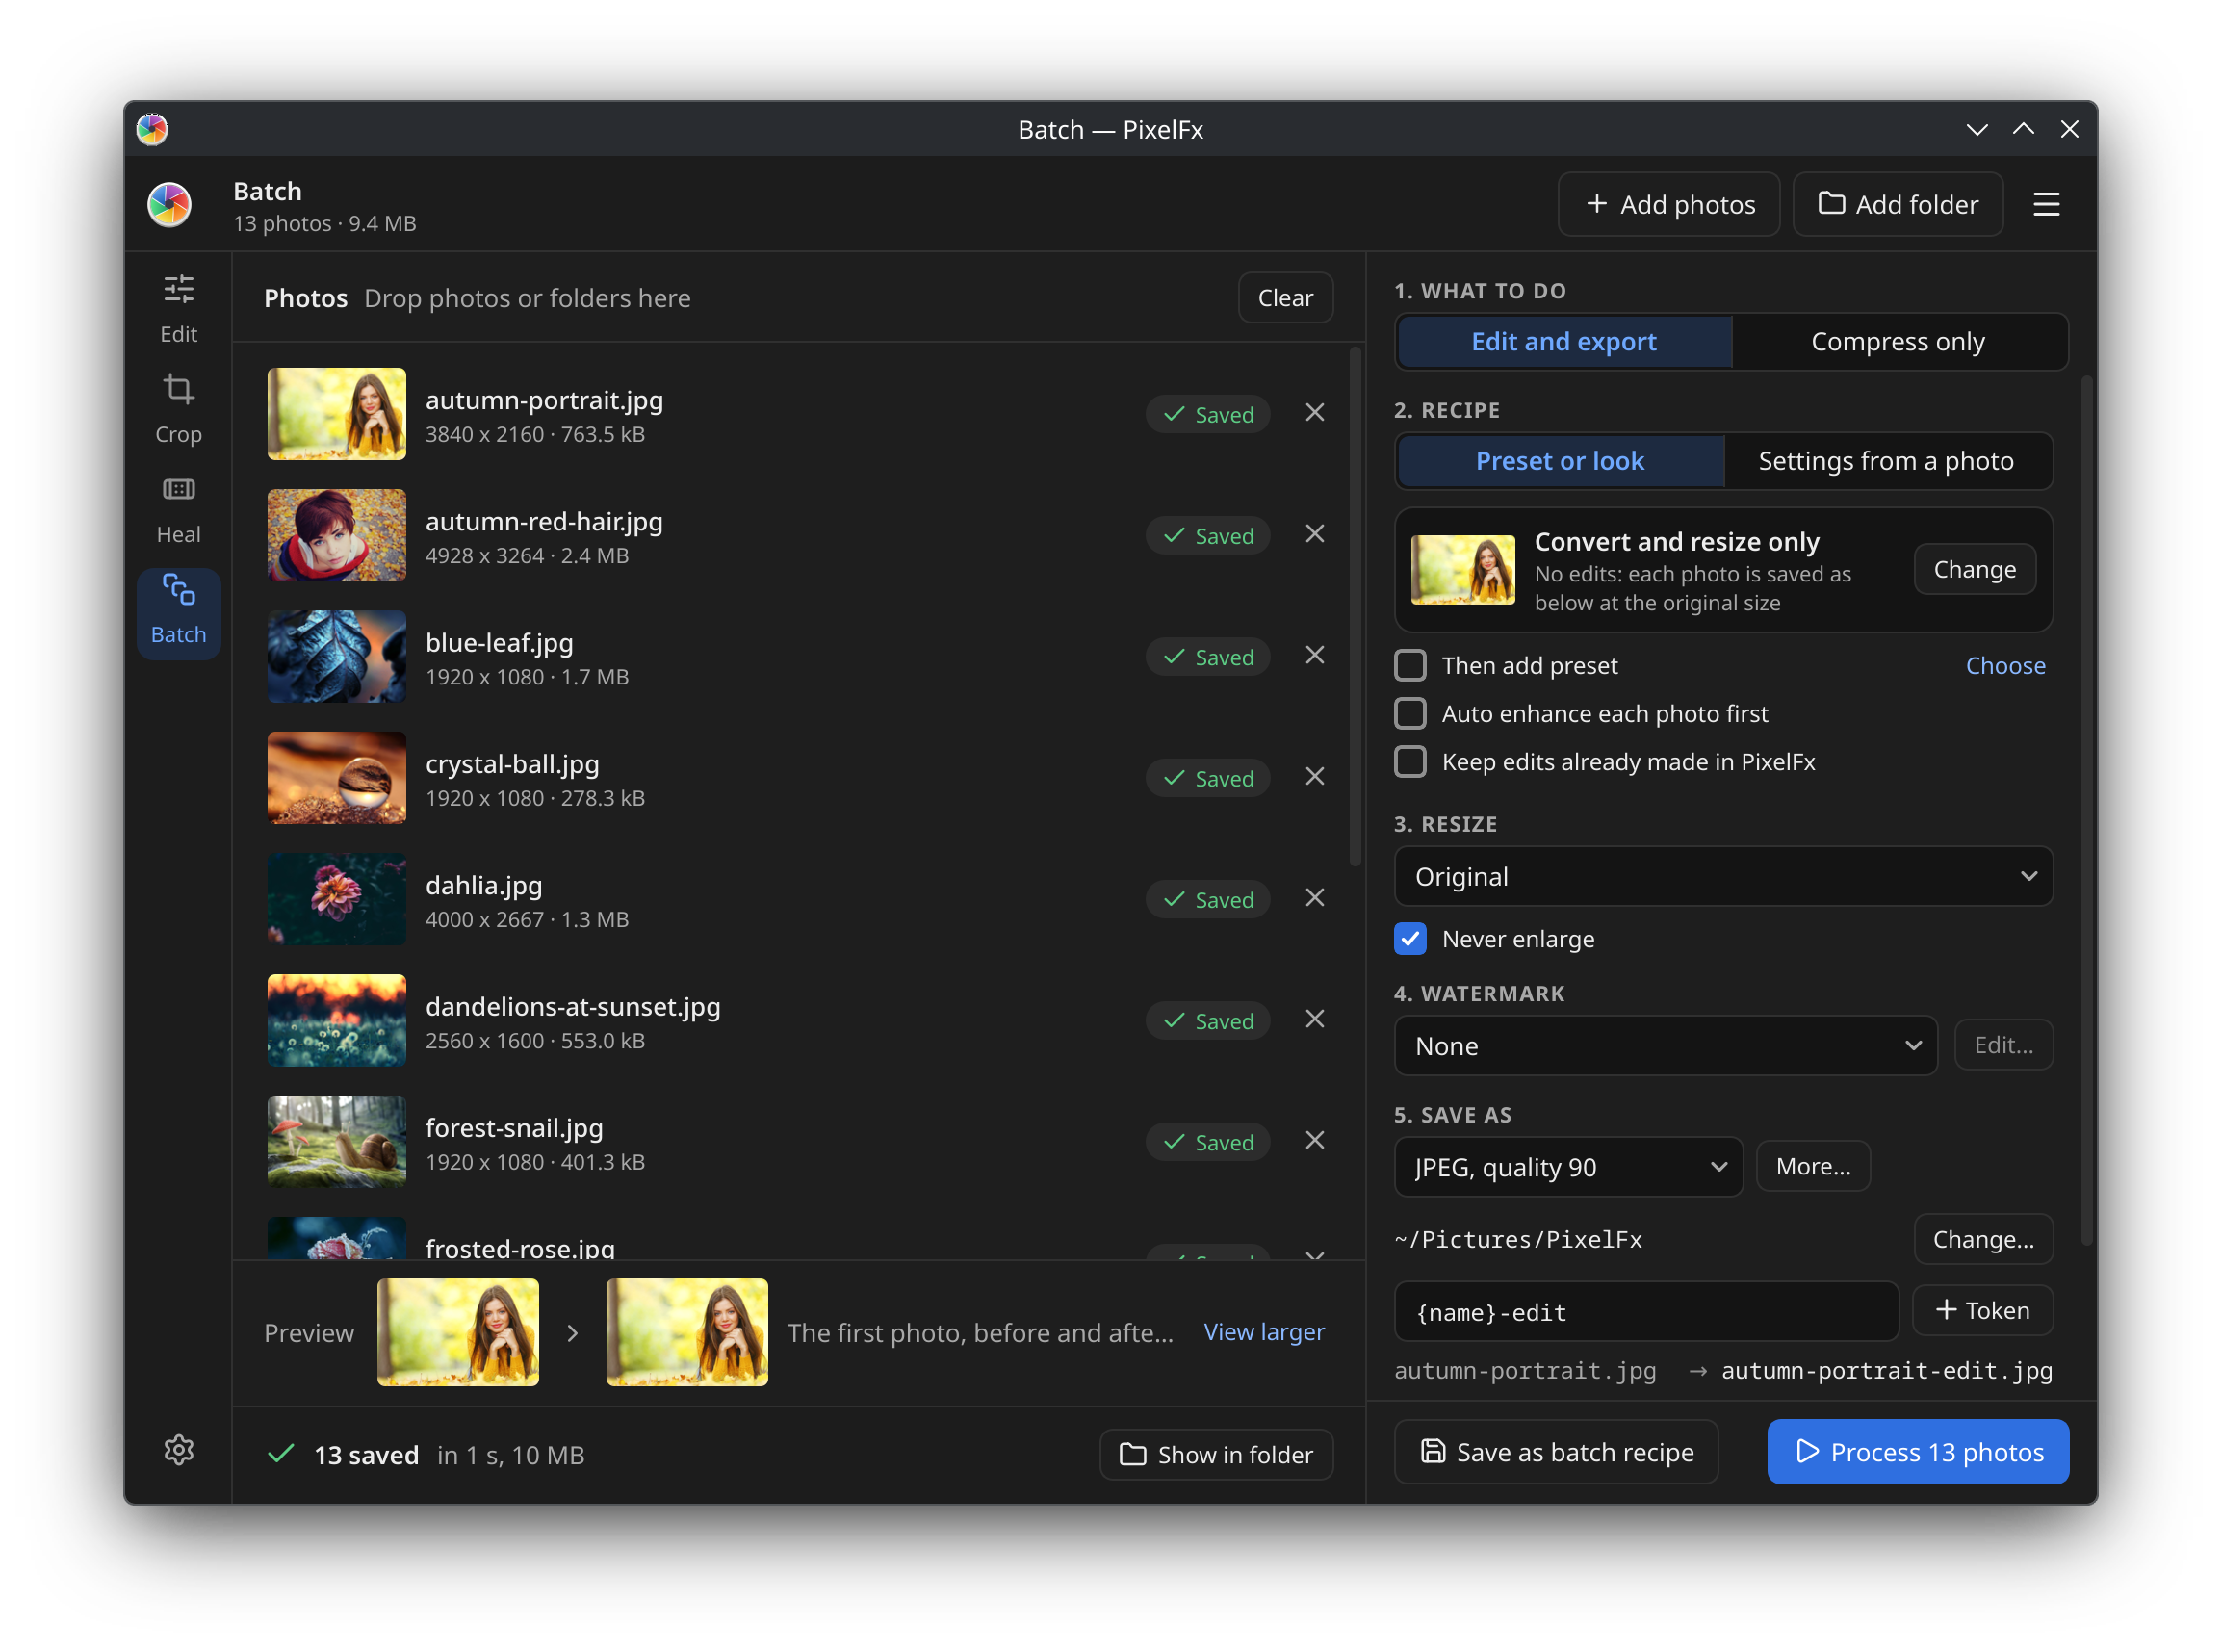
- Click Batch in the mode rail on the left, or press
B. - Choose Open folder (
Ctrl+Shift+O) from the welcome page or the main menu. The folder's photos go straight to Batch. - On the welcome page, Convert and resize opens Batch with no edits, and Compress photos opens it in Compress only.
- Add photos picks single files.
- Add folder brings every photo in a folder, subfolders included.
- Drag photos or folders onto the page. A folder dropped anywhere in the PixelFx window also goes to Batch.
Each photo appears as a row in the list. A file PixelFx cannot read says so in its row right away. Click a row's remove button to take it off the list, or Clear to empty the list. Your files stay where they are.
At the top of the right panel, 1. What to do has two modes:
- Edit and export: each photo gets a recipe (a look, a preset or settings), then is resized and saved as you choose.
- Compress only: each photo is made smaller without being edited. See Compress only below.
In Edit and export, 2. Recipe decides how each photo is edited.
- Preset or look: click Change on the recipe card to pick one of your Looks or Presets. You can search, and see each one on the first photo of the batch before you choose. Pick No look or preset to only convert and resize.
- Then add preset: tick this to stack a second preset on top of the first choice. For example, a film look first, then a preset that warms the photo.
- Settings from a photo: uses the settings of the photo open in the editor. Open a photo in the editor first, then come back to Batch. Its crop and heal spots are left out.
- Auto enhance each photo first: works out a good starting point for each photo before the recipe goes on.
- Keep edits already made in PixelFx: starts from each photo's remembered edits instead of the original. This needs Remember edits turned on in Settings.
With no look or preset and nothing on top, the card says Convert and resize only: each photo is only resized and saved. This is the quick way to turn HEIC photos into JPEGs, or to shrink a folder for email.
The Preview shows the first photo before and after the recipe. View larger shows every photo of the batch, before and after, at a larger size.
3. Resize picks the size of every saved photo:
- Original keeps each photo's size.
- Long edge: 3840, 2048, 1600 or 1080 pixels on the longer side.
- The same named sizes as Export: Instagram portrait, Instagram square, Instagram and Facebook story, Facebook post, X post, Web, Email, 4K wallpaper, and prints at 300 dpi (10 x 15 cm, 13 x 18 cm, 20 x 25 cm).
Never enlarge keeps a photo that is smaller than the long edge at its own size, so small photos never get blurry.
4. Watermark puts the same mark on every photo. Pick a saved watermark from the list, choose New watermark... to make one, or Edit... to change the one you picked. In the watermark sheet you can preview the mark on the batch's own photos: under Preview on, choose Batch photos and click to see the next one. The watermark sheet is described in the Watermark section of Export.
5. Save as decides the file:
- Format: the formats your PixelFx can write, such as JPEG, PNG, TIFF and WebP. Lossy formats show their quality, for example "JPEG, quality 90".
- More... opens Save options: Quality, 16 bits per channel (for lossless formats such as PNG and TIFF), Sharpen for (None, Screen, Print), Color space, Metadata (Keep camera details and copyright, Keep location) and If it exists (Add a number, Overwrite, Skip). These work as in Export.
- Save to: click Change... to pick the folder. Or tick Next to each original, in a subfolder to save into a folder named PixelFx beside each photo.
The name field builds each new file name from text and tokens. Click Token (with the plus sign) to insert one at the cursor. The menu shows what each token means, with an example from your first photo.
| Token | Becomes | Example |
|---|---|---|
{name} |
the photo's own file name | IMG_0412 |
{n} |
its number in the batch, with leading zeros to fit the count | 001 |
{taken} |
the day it was taken (today if the photo does not say) | 2026-07-14 |
{date} |
today's date | 2026-11-08 |
{camera} |
the camera model, or its make | X-T5 |
{w}x{h} |
the saved width and height | 2048x1365 |
{preset} |
the name of the recipe (edit when there is none) |
golden-hour |
Anything else you type is kept as it is, so you can add a prefix or a suffix. The default is {name}-edit. Some examples:
-
{name}-webturnsIMG_0412.HEICintoIMG_0412-web.jpg -
trip-{n}givestrip-001.jpg,trip-002.jpg, and so on -
{taken}-{camera}-{n}gives2026-07-14-X-T5-001.jpg
Under the field, the first three photos show how they will be named: IMG_0412.HEIC → trip-001.jpg. If every photo would get the same name, a warning tells you that numbers will be added, and suggests {n} to choose where they go. Characters a file name cannot hold become a hyphen.
If If it exists is Overwrite and the names would replace your original photos, PixelFx asks before it starts.
Click Process (it shows the count, such as Process 24 photos). While the batch runs:
- The status line says Saving 3 of 24 and about how long is left.
- Each row shows its status: Waiting, Saving, Saved, Skipped or Not saved. A photo that was not saved or was skipped says why, in place of its size.
- Pause holds the batch, and Resume carries on.
- Stop ends the run. Process the rest then carries on with the photos the batch did not reach.
When it ends, the status line says how many were saved, how long it took and how much it wrote, for example "24 saved, in 38 s, 41 MB". Retry failed tries the photos that were not saved again. Show in folder opens the folder with the new files.
If PixelFx is in the background when the batch ends, you get a Batch done notification. Clicking it brings PixelFx back to Batch.
Compress only makes files smaller without editing them.
- 2. Compression: for JPEG, choose Lossless or Target quality with a quality slider. For PNG, choose Lossless or Fewer colours with a quality slider. WebP, GIF and TIFF are made smaller without loss when they can be. Remove location and embedded previews strips those too; camera details and copyright stay.
-
3. Save: Into a folder, with a name field (all the tokens above except
{w}x{h}and{preset}), or Replace the originals, which asks first. Keep the original if the result is not smaller avoids files that grow. - Click Compress to start.
Each row shows its old and new size and how much it saved, such as "Saved 42%". The status line shows the total, for example "Saved 54 MB of 108 MB (50%)". Sort orders the list by Biggest saving, Name or Size. Select a row to compare before and after at 100% zoom on the same spot.
After a run, Compress again runs the same photos with your new settings, replacing what the last run saved.
Save as batch recipe at the foot of the panel keeps the whole page as a .pfxbatch file: the looks and presets, the size, the watermark (with its logo inside) and the save options. It works on another computer too.
To use one again, choose Open batch recipe... from the main menu, or drop the file onto the Batch page.
In Settings, under Performance, Photos at a time sets how many photos Batch works on at once: Automatic (2, or 4 for Compress only), 1, 2, 4 or 8. More at once is faster with many small photos but needs more memory. A 24 megapixel photo takes about 1 GB while it is edited.
You can run a saved batch recipe without opening the window:
pixelfx --batch recipe.pfxbatch photo1.jpg photo2.jpgPixelFx prints a line for each photo, with where it was saved or why it was not, then a summary. It ends with an error code if any photo was not saved, which is handy in scripts.
See also Export for single photos and Files and folders for where things are kept.