Repository navigation
Editing controls
This page explains the adjustments panel on the right of the Edit mode, group by group.
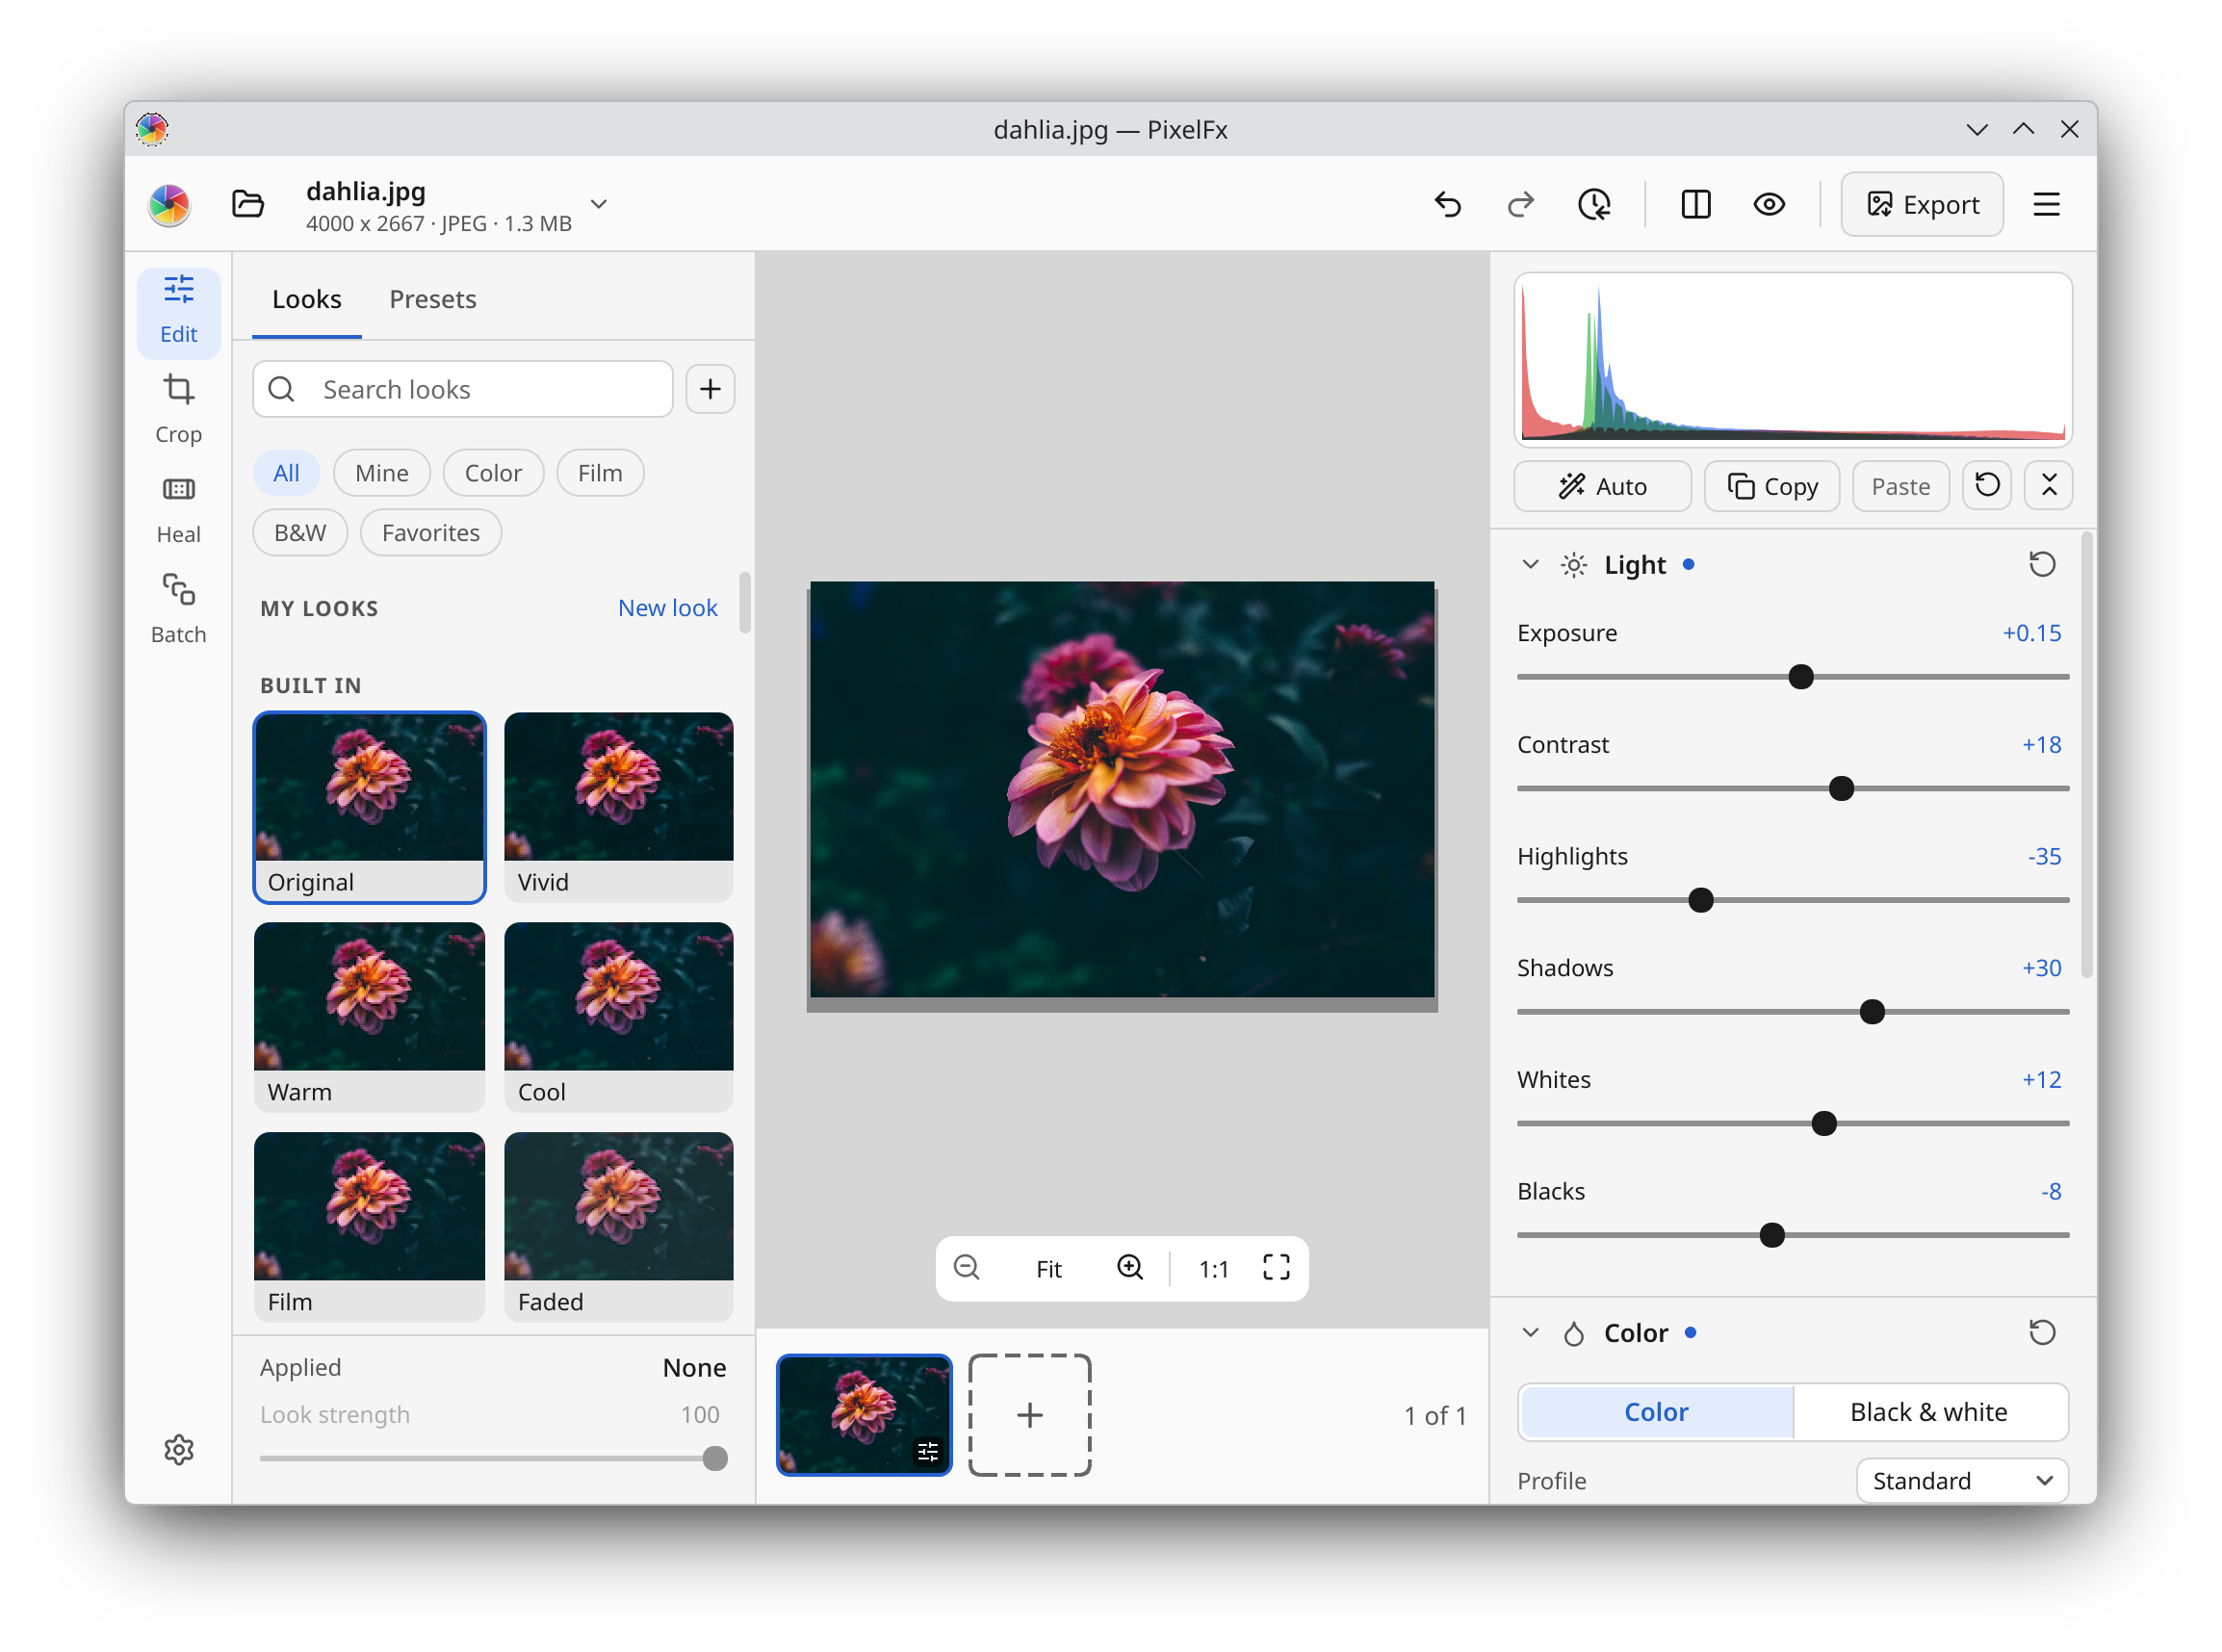
- Drag a slider to change the photo. You see the result live while you drag.
- Click the number at the right of a slider to type a value.
Enterkeeps it,Escgoes back, and theUpandDownkeys nudge it. - Click a group's name to open or close it. A small dot next to the name tells you the group has changes.
- Some groups have a More link at the bottom, with finer settings most photos do not need.
- Right-click a group's name for Collapse all, Expand all, One group open at a time and Open only this group.
Alt+click on a name also opens only that group.
Exposure, Contrast, Highlights, Shadows, Whites and Blacks. Start here: Exposure sets the overall brightness, Highlights and Shadows bring back detail in bright and dark areas, and Whites and Blacks set the brightest and darkest points.
-
Color or Black & white: switch the whole photo to black and white with one click, or press
V. Vibrance and Saturation keep their values for when you switch back. - Profile: Standard or Vivid. For camera RAW photos there is also Camera.
- White balance: As shot keeps the camera's colours, Auto removes a colour cast, and Custom is what you get after moving the sliders. RAW photos also offer light sources such as Daylight, Cloudy, Shade, Tungsten, Fluorescent and Flash.
- The picker next to White balance (
W) lets you click something in the photo that should be grey or white. - Temperature and Tint warm, cool or shift the colours. For RAW photos, Temperature is shown in Kelvin.
- Vibrance boosts muted colours gently. Saturation changes all colours equally.
Change one colour range at a time. Pick Hue, Saturation or Luminance at the top, then one of the eight colour swatches: Reds, Oranges, Yellows, Greens, Aquas, Blues, Purples and Magentas. The slider below changes that colour.
Pick a colour on the photo is the target button next to the swatches (T). Turn it on, then drag up or down on the photo: PixelFx finds the colour under the pointer and changes it. Press Esc to stop.
In black and white, this group becomes the B&W mix: each colour slider makes that colour lighter or darker in the grey picture. The on-photo picker works here too.
Tint the shadows, midtones and highlights with different colours. Choose Shadows, Midtones, Highlights or Global at the top, then drag on the colour wheel: the direction picks the colour and the distance from the middle sets how strong it is. Double-click the wheel to set it back.
Each range has its own Luminance slider. Blending sets how far the ranges run into each other, and Balance moves the point where shadows end and highlights begin.
- Points: click on the curve to add a point, drag a point to move it, and double-click a point to remove it. Choose RGB for brightness, or R, G or B for one colour channel.
- Regions: four sliders, Highlights, Lights, Darks and Shadows, lift or lower ranges of tones. Drag the marks under the curve to move where the regions meet.
Texture, Clarity, Dehaze, Sharpen, Noise reduction and Color noise. Under More you find the sharpening Radius, Detail and Masking, and finer settings for both kinds of noise reduction.
Vignette darkens or lightens the corners, Grain adds film grain, and Fade gives a soft, washed look. Under More: the vignette's Style, Midpoint, Roundness, Feather and Highlights, and the grain's Size and Roughness.
- Use lens profile corrects distortion, colour fringes and dark corners as measured for your lens. It shows when your copy of PixelFx has the lens profiles installed. PixelFx reads the lens from the photo and names it under the check box. When a profile is in use, Distortion and Vignetting set how much is corrected: 100 is as measured, 0 is none.
- Remove chromatic aberration removes colour fringes along edges far from the middle.
- Defringe: Purple and Green remove coloured edges. Under More you can choose which hues count as purple or green.
Calibration has a Shadows tint and the hue and saturation of the red, green and blue primaries. It is closed at first, as most photos do not need it.
Geometry has Straighten, rotate and flip buttons, and Crop and perspective, which opens the Crop mode. See Crop, straighten and fix.
Click Auto at the top of the panel, or press Ctrl+Shift+A. PixelFx looks at your photo and sets Light and Color for it. You can then change any slider as you like.
The histogram at the top of the panel shows the spread of tones in red, green and blue, from dark at the left to bright at the right. The camera settings (ISO, aperture, shutter speed and focal length) show under it when the photo has them.
Clipping warnings (J, also in the View menu and in Settings) mark the parts of the photo that are pure white in red and pure black in blue, so you can see where detail is lost.
-
Before and after (
\, or the button in the header bar) splits the photo: the original on one side and your edit on the other. Drag the divider to move the split. - Side by side in the View menu shows the two versions next to each other instead.
- Hold
Space, or hold the Show the original button in the header bar, to see the original for as long as you hold it.
- One slider: double-click it, or double-click its name.
- One group: click the reset button that appears at the right of a changed group's name.
-
Everything: the reset button at the top of the panel, or Reset all (
Ctrl+R).
Every reset is a step in History, so you can undo it with Ctrl+Z.
- On a photo you like, click Copy at the top of the panel, or press
Ctrl+Shift+C. The crop is not copied. - Go to another photo and click Paste, or press
Ctrl+Shift+V.
To paste onto several photos at once, select them in the filmstrip first (Ctrl+click or Shift+click). PixelFx then asks which parts to paste. Parts you leave out keep what each photo already has.
Editing several photos needs Remember edits to be on in Settings. It is on unless you turned it off.
For a set of settings you use often, save a preset instead: see Presets. To edit a large folder in one go, see Batch.