Repository navigation
Presets
A preset is a saved set of settings that you can put on any photo with one click.
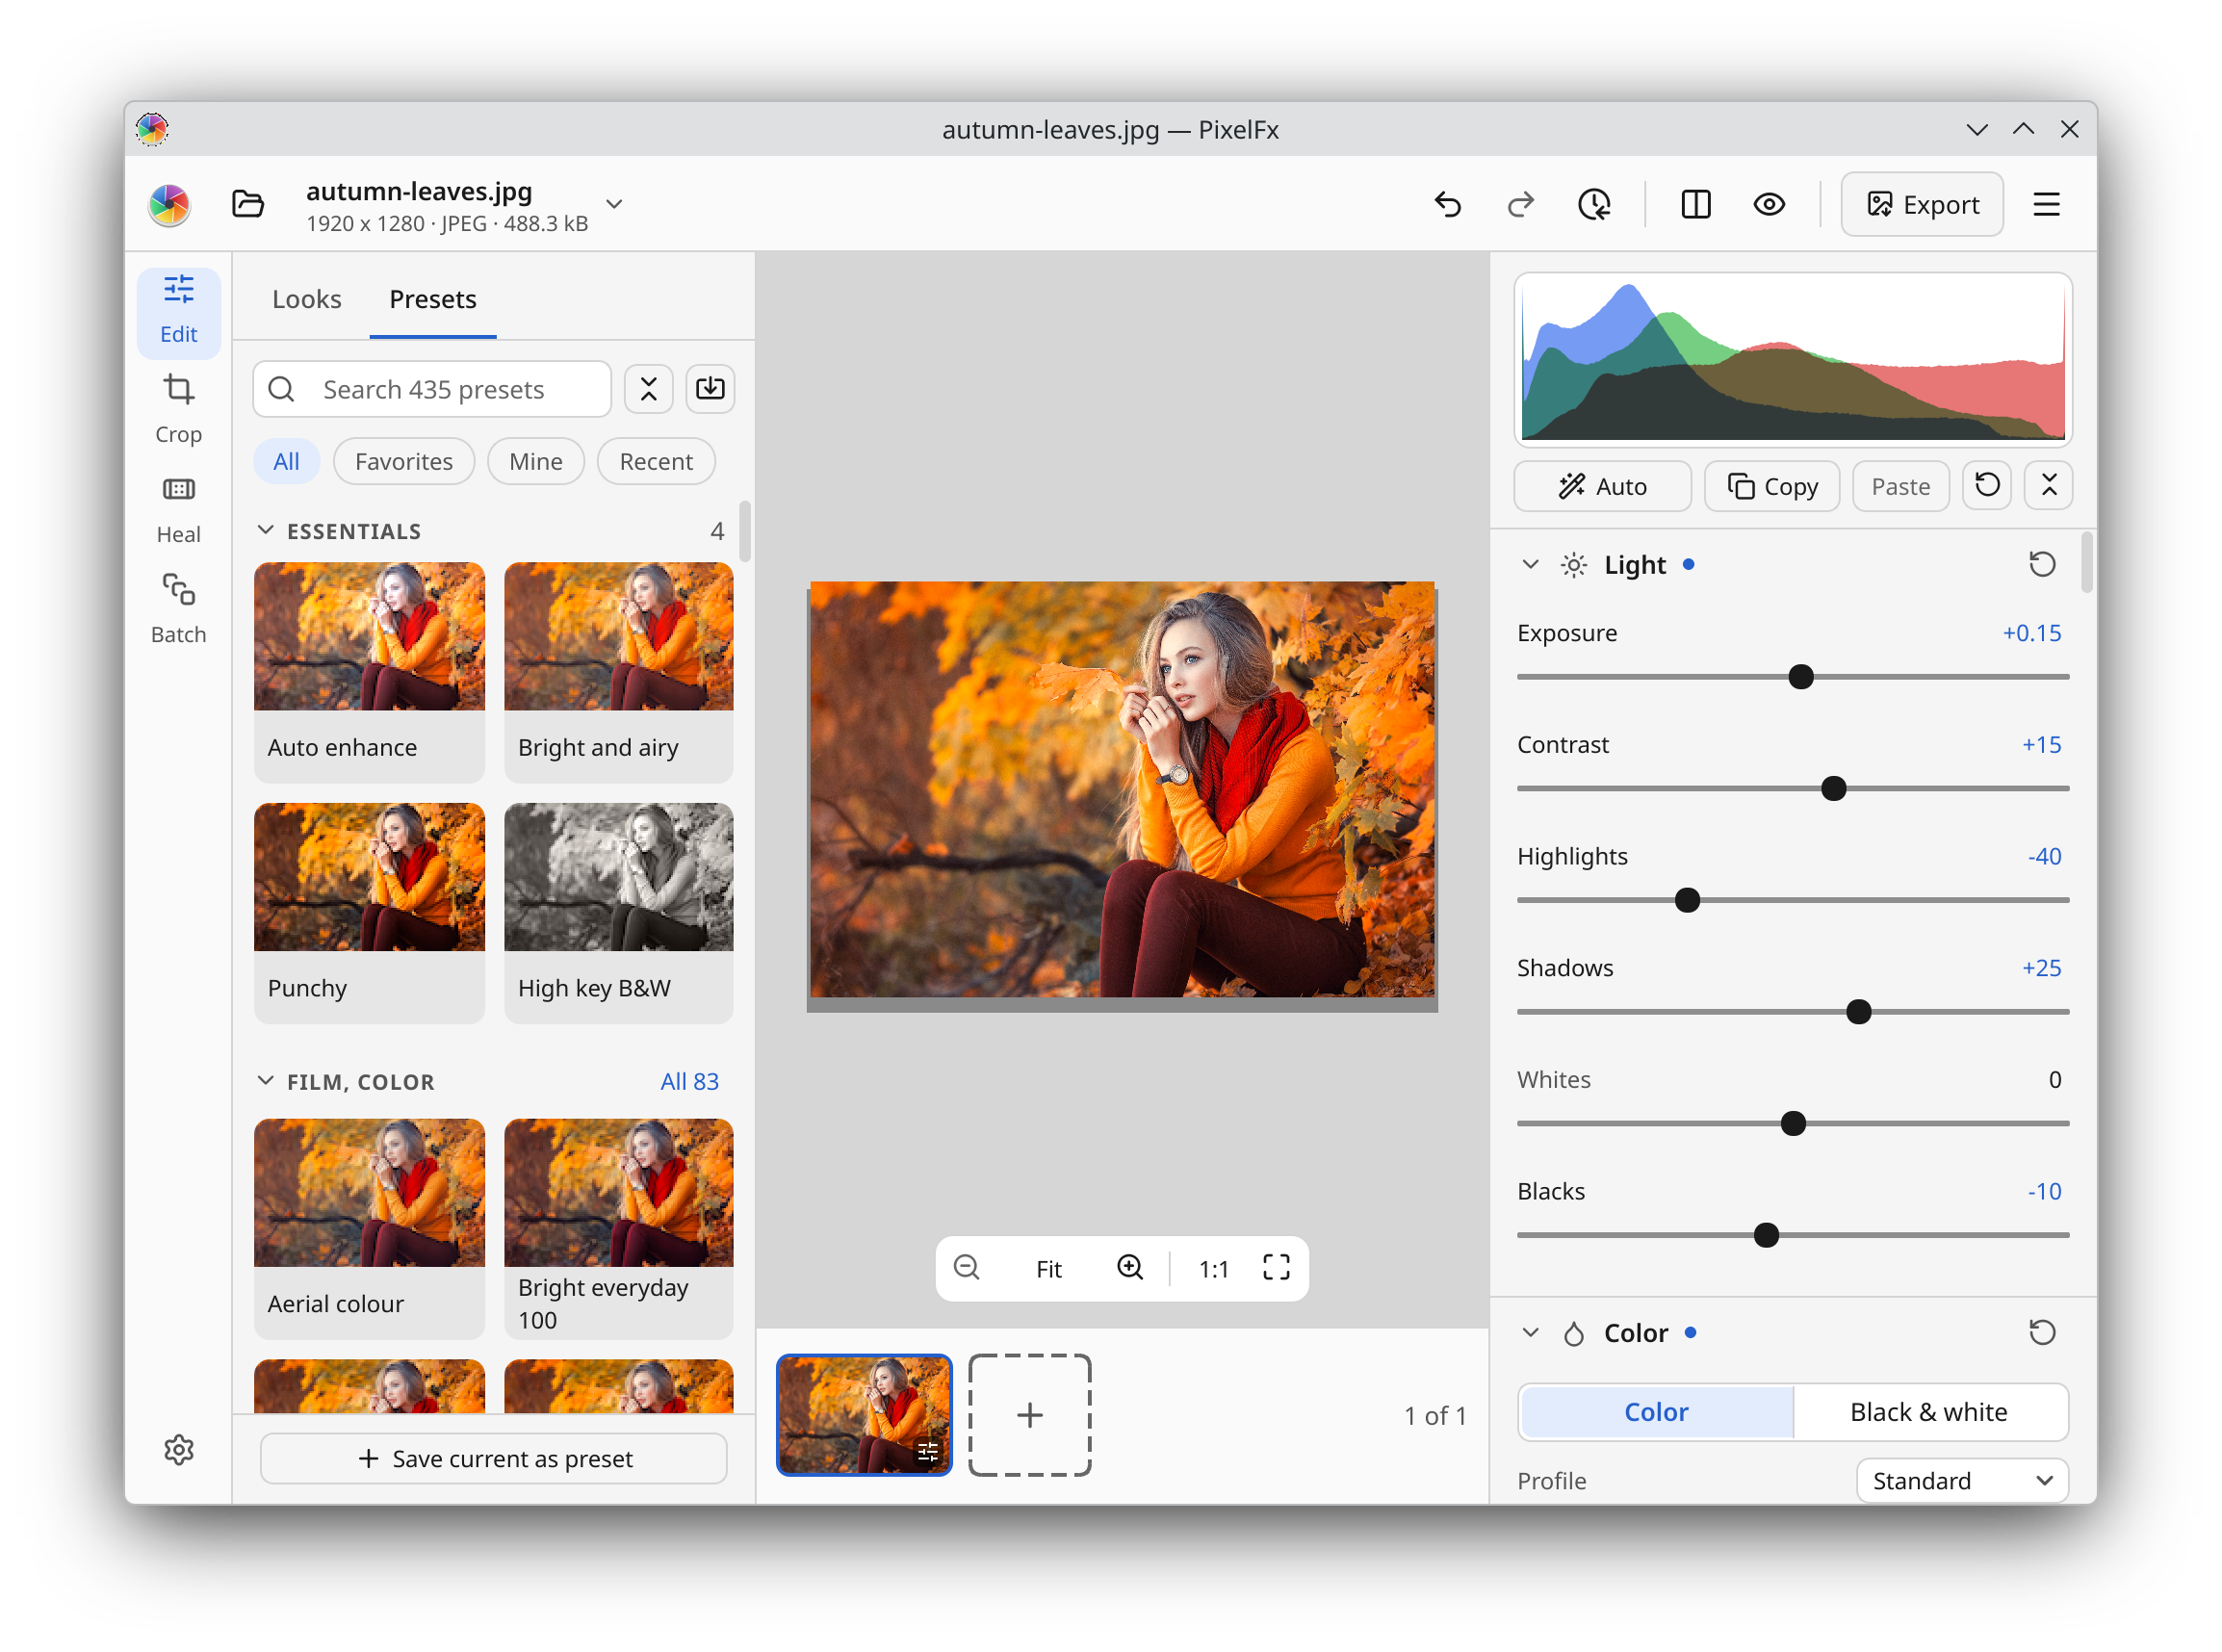
A preset can hold your whole edit, or only part of it. One preset might set light, colour and grain. Another might only warm up the white balance.
The parts a preset leaves out stay as they are on your photo. This means presets stack: you can put a colour preset on top of a light preset, and both stay.
Presets never change your original photo. Every preset you apply is one step in your history, so Ctrl+Z takes it off again.
Open the Presets tab next to Looks in the panel on the left of the photo. Each preset is a small tile that shows your own photo with that preset on it, so you can compare them at a glance.
Click a tile to apply that preset.
At the top of the tab you find:
- Search presets: type part of a name, a category or a description to find a preset.
- All, Favorites, Mine and Recent: chips that choose which presets you see.
- Close all categories: folds every category, so the list is short and easy to scan.
- Import presets: brings in presets from files (see below).
The first category, Essentials, has four quick starting points:
- Auto enhance: works out light and colour for each photo on its own.
- Bright and airy: lighter, open shadows, a soft fade.
- Punchy: more contrast, richer colour, crisp.
- High key B&W: bright black and white, soft highlights.
Below Essentials is a large catalog of more than 400 presets, in these categories:
- Film, color
- Film, black and white
- Slide film
- Cinematic
- Vintage and processes
- Portrait
- Landscape and nature
- Food and product
- Seasons and festivals
- Places
- Social
- Tools
Tools holds small, practical presets that each do one job: exposure steps, white balance (Daylight, Cloudy, Shade and more), sharpening, noise reduction, grain, vignettes, and resets for parts of your edit.
Click a category heading to open or close it. Each open category shows its first few tiles; click All next to the heading to see every preset in it. All presets (or Backspace) takes you back. Right-click a heading for Close all and Open all.
To keep a preset close at hand, right-click its tile and choose Add to Favorites, or press F while the tile has the keyboard focus. A star marks it. The Favorites chip then shows only your favourites.
The Recent chip shows the presets you applied lately.
Rest the pointer on a tile for a moment. A bar fills along the tile, then the big photo shows that preset. Move the pointer away and your photo goes back as it was. Nothing changes until you click.
After you apply a preset, its name shows under Applied at the bottom of the tab, with an Amount slider:
- 0 is your photo as it was before the preset.
- 100 is the preset as it was made.
- Up to 200 goes further than the preset.
Double-click the slider to go back to 100. The Amount belongs to the preset you just applied. Once you undo, or move to another photo, it goes away. Auto enhance has no Amount.
Select more than one photo in the filmstrip: Ctrl+click or Shift+click the photos, or press Ctrl+A to select all of them. The tab then says Applies to and the number of photos. Click a tile and the preset goes on every selected photo.
Right-clicking a tile also offers Apply to the selected photos.
- Edit a photo until you like it.
- Click Save current as preset at the bottom of the Presets tab.
- Give it a Name and pick a Group, or choose New group... to make one.
- Under Include, tick the parts the preset should hold, such as Light, Color, White balance, Curves, Detail, Effects, a Look, or Crop and rotate. Changed only ticks the parts you changed, All ticks every part, and None unticks them all.
- Click Save preset.
Leave a part unticked and each photo keeps its own setting for it. A preset with only Color, for example, stacks nicely on top of another one.
Save to file... in the same window also writes a .pfxpreset file that you can share with a friend.
Your own presets show under the Mine chip.
Right-click any tile, or press the Menu key on it, to open its menu.
For your own presets:
- Apply: puts the preset on your photo.
- Rename...: gives the preset a new name.
- Update with current settings: replaces what the preset holds with the settings of the photo you see. PixelFx asks first.
- Duplicate: makes a copy you can change.
-
Export...: saves the preset as a
.pfxpresetfile. - Show file: opens the folder that holds the preset file.
- Delete...: removes the preset. PixelFx asks first, because this cannot be undone.
Built-in presets cannot be renamed or deleted, but you can choose Copy to My presets and change the copy. The menu also says what the preset changes.
PixelFx can read presets made for Lightroom and Camera Raw, saved as .xmp files.
- Click Import presets at the top of the Presets tab, or choose Import presets and looks... in the main menu.
- Pick one or more
.xmpfiles.
The presets land in the Imported group, with "Lightroom:" before their names.
PixelFx reads every global setting these presets use, such as the basic light and colour sliders, curves, colour mixer, black and white, colour grading, detail, grain, vignette, calibration and the lens profile. The result looks the same kind of way, but it is not an exact copy of what Lightroom shows.
Some things have no match in PixelFx, such as masks and other local adjustments, manual lens corrections, and creative or camera profiles PixelFx does not have. After the import, a message lists the settings that were left out, so nothing goes missing without you knowing.
You can also drag preset files from your file manager and drop them anywhere on the PixelFx window. PixelFx imports .pfxpreset and .xmp presets this way, and looks and .cube LUTs too (see Looks).
To see where your presets are kept, choose Show presets folder in the main menu, or read Files and folders.