Repository navigation
Looks
Looks give your photo a whole style in one click, and you can make your own.
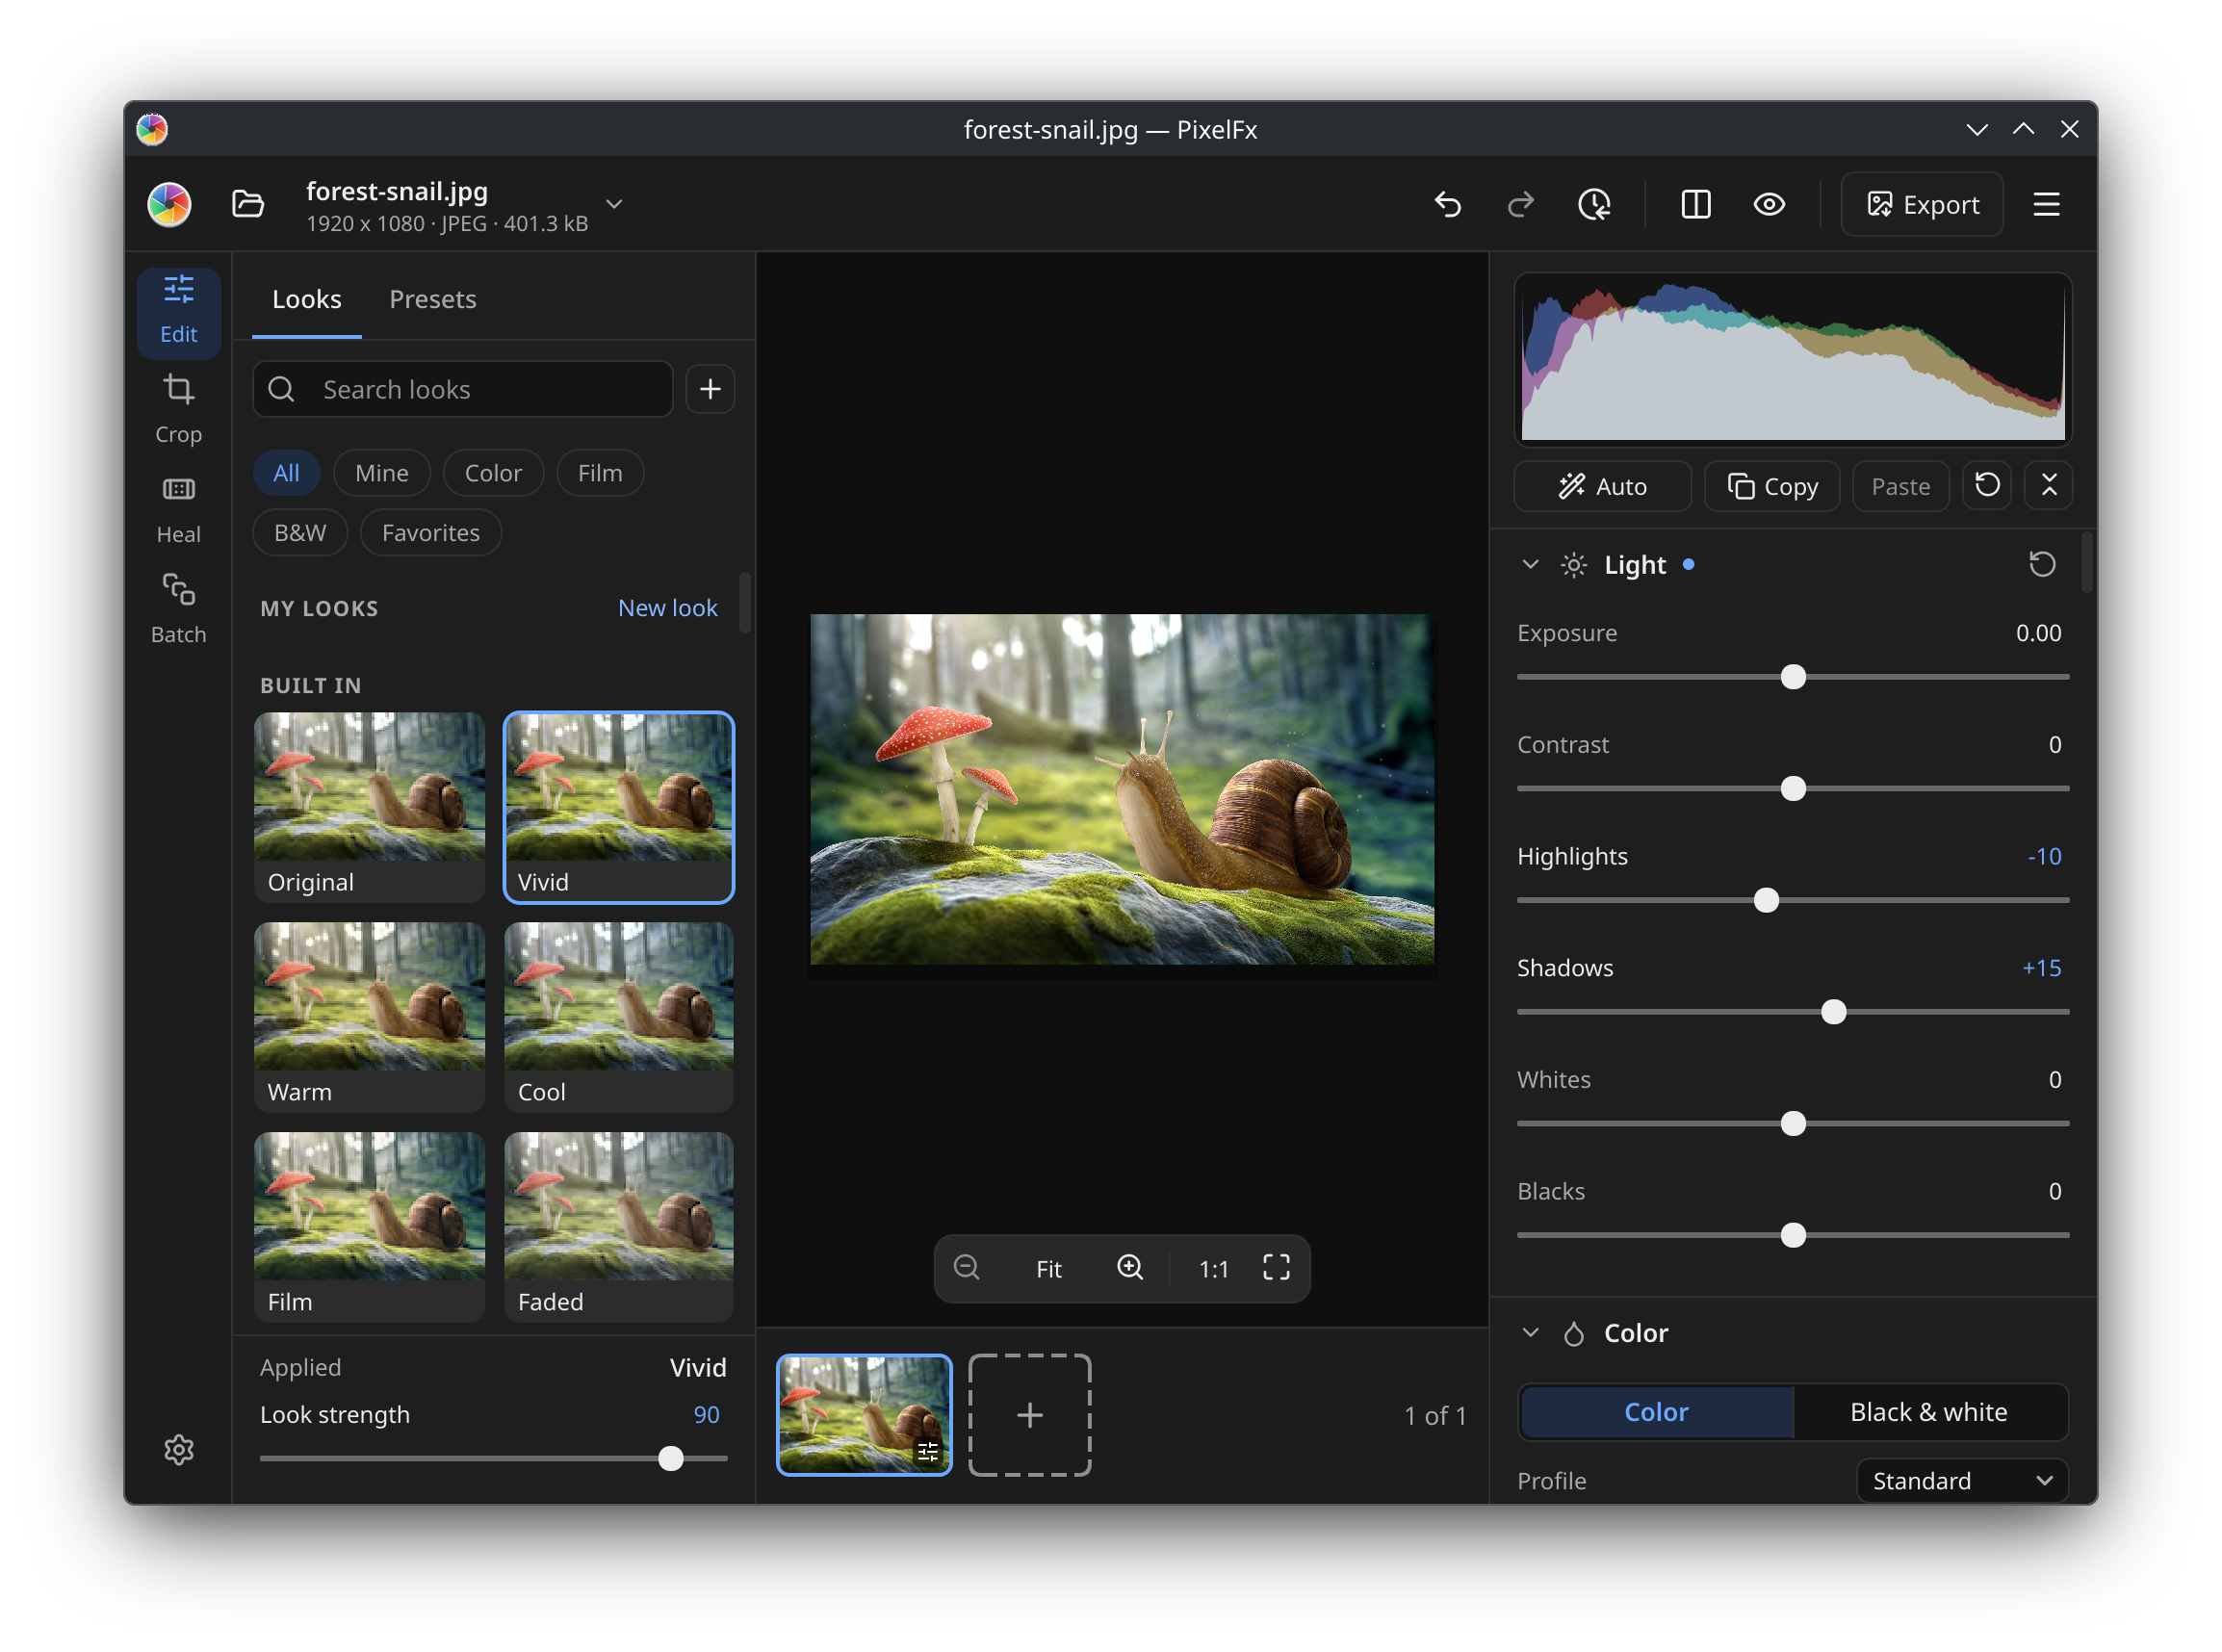
A look is a ready-made style, like a filter in a phone app. Inside, it is a short list of steps, such as a warmer white balance, a tone curve and some grain, applied one after the other. Every look has one Look strength slider, so you can make it as strong or as subtle as you like.
A look sits on top of your own adjustments. You can still change any slider in the adjustments panel after choosing a look, and the look stays.
PixelFx comes with these looks:
| Color | Film | B&W |
|---|---|---|
| Vivid | Film | Mono |
| Warm | Faded | Noir |
| Cool | Matte | Sepia |
| Golden hour | ||
| Teal and orange | ||
| Dramatic | ||
| Pastel |
Open the Looks tab in the left panel. Each tile shows your own photo with that look, so you see the result before you click. The Original tile, first in the list, shows the photo with no look.
-
Try before you choose: rest the pointer on a tile for a moment and the look shows on the big photo. Move away, or press
Esc, to go back. -
Choose: click a tile. You can also move to a tile with the keyboard and press
EnterorSpace. - Remove the look: click Original.
- Categories: the chips above the tiles filter the list: All, Mine (your own looks), Color, Film, B&W and Favorites.
- Search: type in Search looks to find a look by name.
-
Favourites: right-click a tile and choose Add to Favorites, or press
Fon a tile. A star marks it, and the Favorites chip lists all your favourites. Choose Remove from Favorites to take it off.
The bottom of the Looks tab shows the look in use, next to Applied, and the Look strength slider from 0 to 100. Each look starts at its own strength, chosen to suit it. Drag the slider to change it for this photo; you see the result while you drag. Double-click the slider to go back to the look's own strength.
Select the photos in the filmstrip with Ctrl+click or Shift+click (or Ctrl+A for all of them), then click a look. Each selected photo gets it. This needs Remember edits to be on in Settings, which it is unless you turned it off.
To give a look to a whole folder and save the results, use Batch.
Open the look editor in one of these ways:
- click the + button next to Search looks;
- click New look next to the My looks heading;
- press
Ctrl+Shift+N.
In the look editor:
- Give the look a Name and choose its Category: Color, Film or B&W.
- Click Add step and choose what the step does, for example Exposure, Tone curve, Color mixer, Split toning, Vignette, Grain or Fade. There are also creative steps such as Sepia, Colorize, Threshold, Invert, Blur, Pixelate, Emboss and Edges.
- Click a step to show its settings, then adjust them. The preview updates as you go.
- Click Import LUT to add a LUT file as a step. A LUT step has a Mix slider to blend it in.
- Steps are applied from top to bottom. Drag a step to reorder it, or use its menu for Move up, Move down, Duplicate and Remove.
- Use the switch on a step to turn it off for a moment and see the difference, without removing it.
- Set the Default strength: how strongly the look applies when you choose it.
- Click Save look.
Under Preview on, choose This photo to check the look on your photo, or Ramp to see it on a strip of every colour and a grey scale. Double-click the preview for a larger one.
Your new look appears under My looks in the Looks tab. To change it later, right-click its tile and choose Edit look.... The same menu has Export look... and Delete.
PixelFx reads LUTs in two formats:
-
.cubefiles (1D and 3D) - HaldCLUT pictures (
.pngor.tif)
To turn a LUT into a look, open the main menu and choose Import presets and looks..., then pick the file. You can also drop a .cube file onto the PixelFx window. The LUT becomes a new look under My looks, named after the file.
To use a LUT as one step among others, use Import LUT inside the look editor instead.
-
Export look...: in the look editor, or by right-clicking a tile in My looks. This saves a
.pfxlookfile you can send to a friend or keep as a backup. The LUTs inside the look are saved with it. To add a.pfxlookto PixelFx, use Import presets and looks... or drop the file onto the window. -
Bake to .cube...: in the look editor. This saves the look as a
.cubeLUT for other apps and video editors. A LUT can only hold colour changes, so steps such as Grain, Vignette or Blur are left out, and PixelFx tells you which ones.
- Presets: saved settings, including a large built-in collection.
- Editing controls: every slider in the adjustments panel.
- Files and folders: where your looks are kept.