Quickstart
← Home
Install Solarxy, open a model, place your first review marker - in five minutes.
This is the shortest path through the viewer for someone who just installed Solarxy. Each step links to the deeper reference. For the full GUI tour, see Interface and Inspection; for the Review System in depth, see Review System.
- Before you start
- 1. Install
- 2. Grab a sample model
- 3. Open the model
- 4. Look around
- 5. Place a review marker
- 6. Save the sidecar
- Where to go next
You need:
- Solarxy installed (the next step covers it).
- A 3D model in
.obj,.stl,.ply,.gltf, or.glb. If you don't have one handy, step 2 walks through grabbing a Khronos sample asset.
Pick the channel for your OS. The full matrix lives at Installation.
| OS | Channel | Command |
|---|---|---|
| macOS | Homebrew Cask | brew install --cask marko-koljancic/solarxy/solarxy |
| Linux | Flathub | flatpak install flathub dev.koljam.solarxy |
| Windows | winget | winget install Koljam.Solarxy |
Direct downloads (DMG / MSI / AppImage) live on the GitHub releases page.
Verify the install:
solarxy-cli --aboutYou should see the version, repo URL, and license print. If you get
command not found, see
Installation → First launch on macOS
for PATH and Gatekeeper troubleshooting.
The Khronos glTF Sample Assets repository ships a curated set of CC0 / BY-compatible models that exercise the full v0.6.0 feature set. Pick any one; this guide uses Damaged Helmet because its materials, normals, and emissives give every inspection mode something to show:
curl -LO https://raw.githubusercontent.com/KhronosGroup/glTF-Sample-Assets/main/Models/DamagedHelmet/glTF-Binary/DamagedHelmet.glbThe file is about 4 MB. Other good models in the same repo: FlightHelmet
(multi-mesh, external textures - good for the Outliner), BoomBox (clean PBR
showcase), Sponza (a stress test for scale).
solarxy -m DamagedHelmet.glbThe viewer launches, frames the model automatically, and lights it with the default 3-light rig. The bottom status bar shows the filename, format, validation counts, ms/fps, and the GPU backend Solarxy chose (Vulkan / Metal / DirectX 12).

The camera is mouse-driven, mode-driven from the keyboard:
| Action | Input |
|---|---|
| Orbit | Left-drag |
| Pan | Middle-drag, or Shift+left-drag |
| Zoom | Scroll wheel |
| Frame the model | H |
| Top / Front / Left / Right preset view |
T / F / L / R
|
Cycle through a few inspection modes to see what's there. Press the number keys:
-
1Shaded (default PBR) -
2Material ID - a flat per-material colour -
3UV Map - the pane flips to 2D UV space -
4Texel Density - a heat map of texture pixel density across the surface
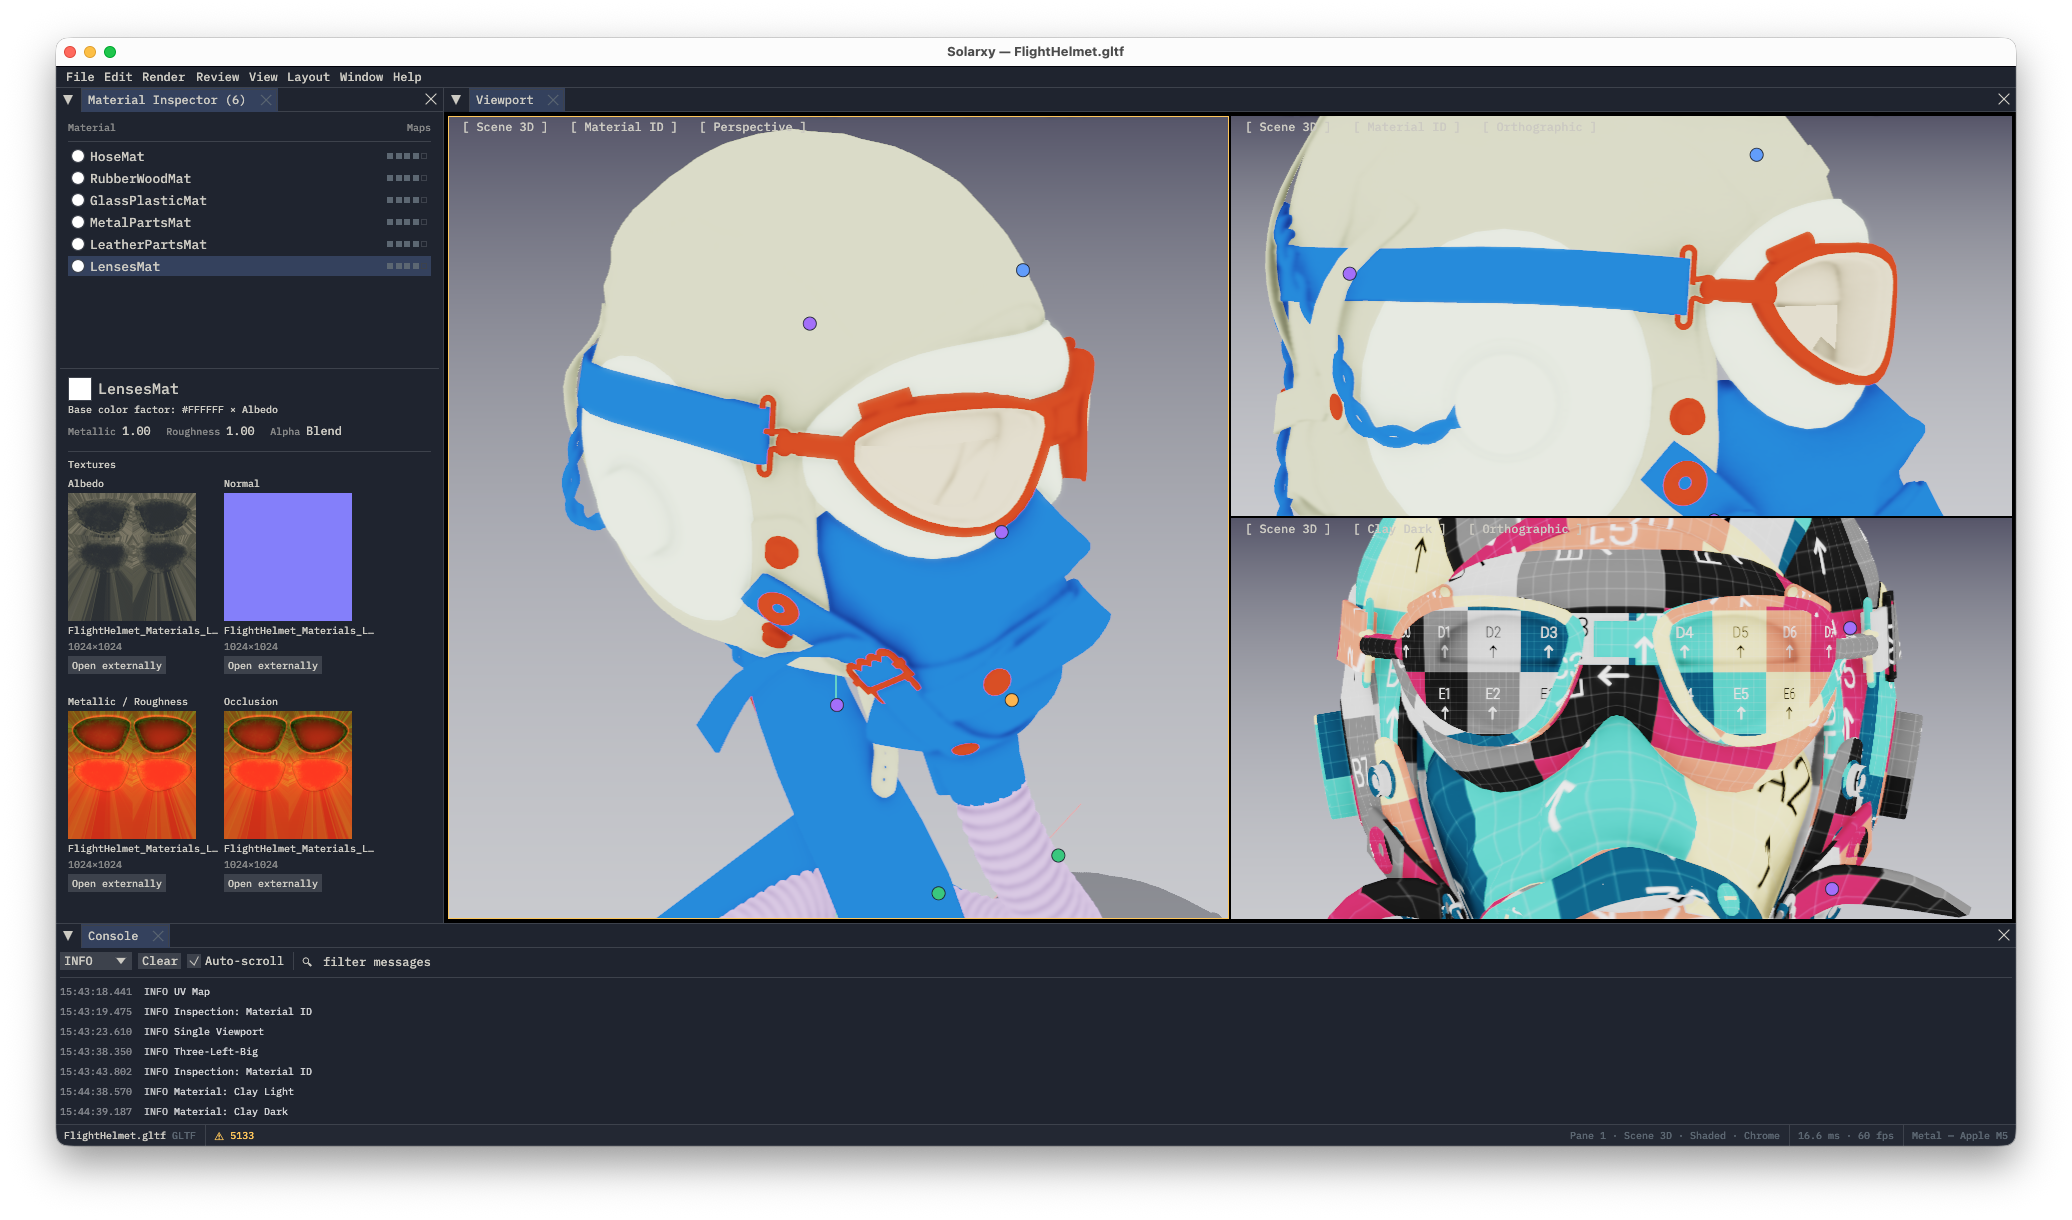
Press 1 to return to Shaded. The full set of bindings lives on
Keyboard Shortcuts; the full inspection-mode reference
is on Inspection.
Press Shift+R to enter review mode. The Review menu label gains an
amber dot (● Review); the Review Panel opens automatically if it wasn't
already visible.
Click anywhere on the model surface. A small popup opens at the cursor:
- Leave the category as Question (review conversations are usually questions first; it's the default).
- Type a short note, for example "Are the rivets meant to be this rough?"
- Press
Cmd/⌘+Enterto save the marker.
The marker stays anchored to that exact triangle as you orbit the camera.

To exit review mode, press Shift+R again or hit Esc.
Press Cmd/⌘+S while review mode is still active. Solarxy writes a
.solarxy-review.json file next to the model:
DamagedHelmet.glb                   <- the model
DamagedHelmet.solarxy-review.json   <- the sidecar with your marker
The sidecar is plain JSON and is meant to be checked into Git alongside the asset. See Review System → Sidecar file format for the full schema, and Review System → Anchor stability for the contract that lets markers survive a re-export.
| If you want to... | Read |
|---|---|
| The full GUI tour | Interface |
| The shading / inspection / lighting reference | Inspection |
| The Review System in depth (anchors, threading, sidecar) | Review System |
| Run a structured first review session | Tutorial: First review session |
| QA a glTF before delivery | Tutorial: Inspect a glTF for delivery |
| Wire validation into a CI pipeline | Tutorial: Validate in CI |
| Author a project-specific validation policy | Tutorial: Build a custom validation policy |
See also: Installation · Interface · Inspection · Review System · Keyboard Shortcuts