MacCLI
Note
These instructions were verified against the current online documentation and release files (July 2026) but have not been tested on a physical Mac.
The screenshots come from an older macOS version and may look different on your computer.
Feedback and corrections are welcome, please PR or create an issue.
This guide explains step by step how to program your M5Stack with the ESPTool utility (Arduino not required).
Connect the M5Stack device to your computer with the USB cable, open a terminal (Applications > Utilities > Terminal) and enter:
ls /dev/cu.*
Recent macOS versions (Catalina 10.15 and later) recognize most M5Stack devices without installing any driver. Depending on your device you should see a new port appear such as:
-
/dev/cu.usbserial-XXXX(CP2104 chip, built-in macOS driver) -
/dev/cu.wchusbserial-XXXX(CH9102 chip) -
/dev/cu.usbmodem-XXXX(CoreS3, which uses native USB and never needs a driver) -
/dev/cu.SLAB_USBtoUART(CP2104 chip with the SiLabs driver installed)
Take note of the port name, you will need it later.
If a new port appears, no driver is needed: skip to Download the latest release.
-
Go to the M5Stack download page https://docs.m5stack.com/en/download, section USB Driver, and download the driver matching your device:
-
CH9102 chip (most recent Basic and Core2 units):
CH9102_VCP_SER_MacOS(take the M1 Silicon version if your Mac has an Apple Silicon processor). On macOS 13 and later you must then allow the driver in System Settings > General > Login Items & Extensions > Driver Extensions. Reconnect the device: the port appears as/dev/cu.wchusbserial-XXXX. The same driver is also available from the manufacturer WCH at https://github.com/WCHSoftGroup/ch34xser_macos. -
CP2104 chip (older Basic and Core units):
CP210x_VCP_MacOS.
-
CH9102 chip (most recent Basic and Core2 units):
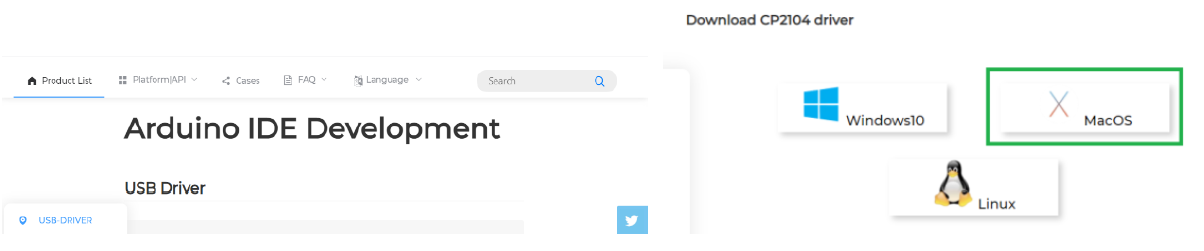
- Go to SiLabs https://www.silabs.com/developer-tools/usb-to-uart-bridge-vcp-drivers and download the macOS version.
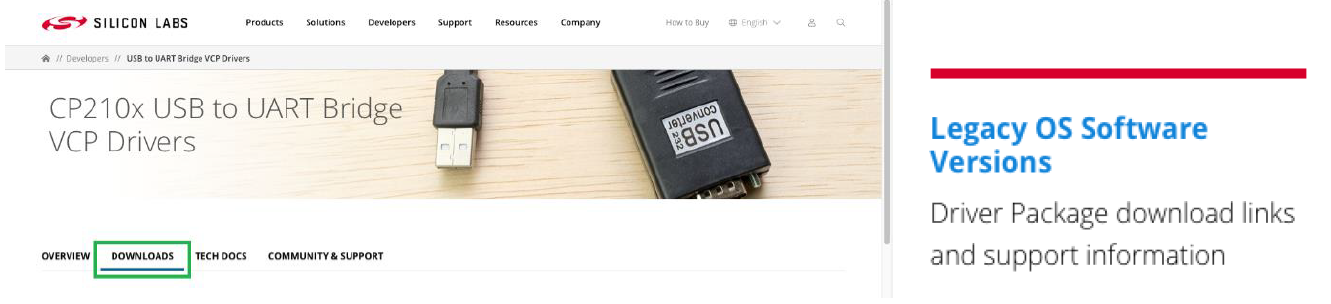
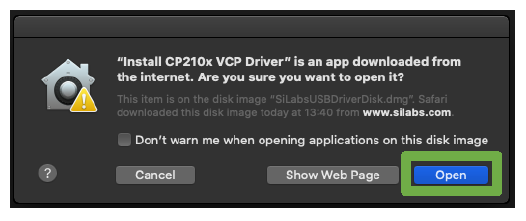
Allow download and open finder to Downloads, folder Mac_OSX_VCP_Driver, double click the SiLabsUSBDriverDisk.dmg. The disk will extract on your desktop. Open it and run the installer.

Select Open
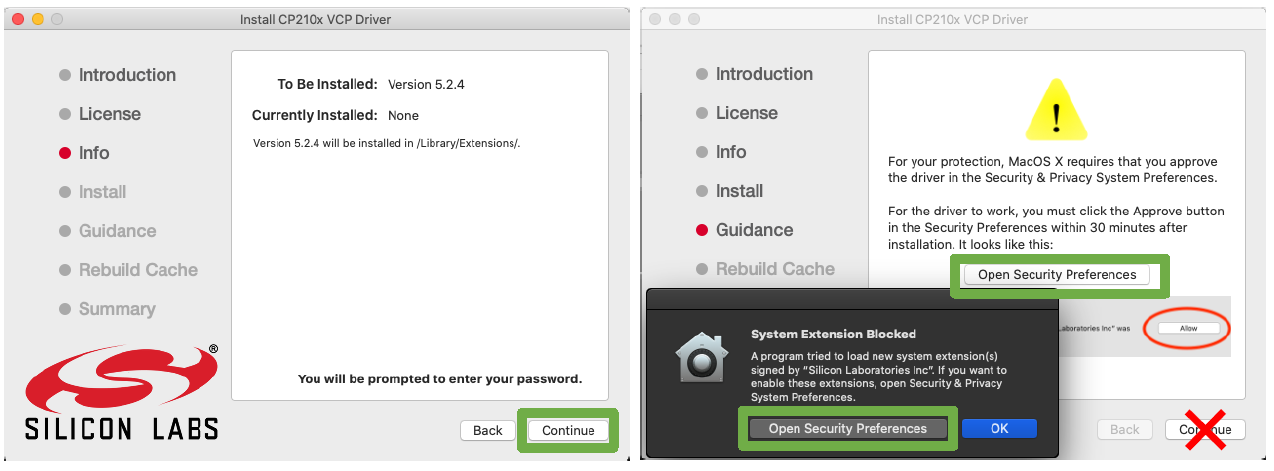
Click Continue, Continue, Agree to license…
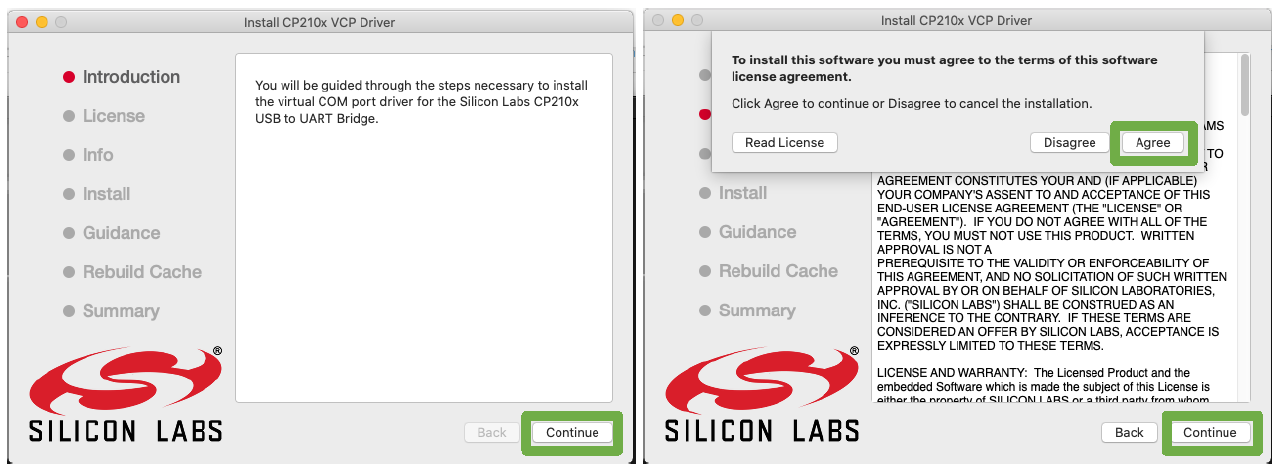
Continue, enter your password, Continue, Open Security Preferences
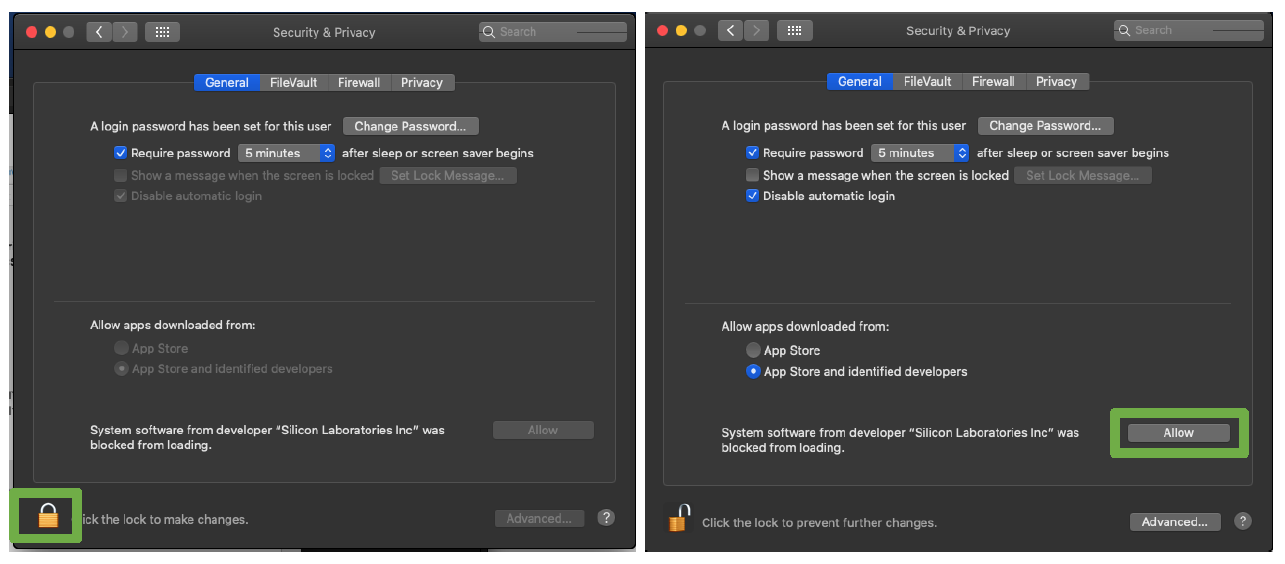
Unlock the panel (enter your password) and allow the driver, close Security & Privacy
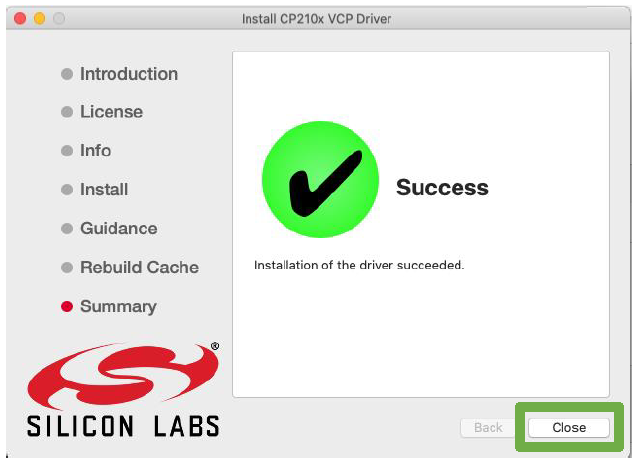
Wait until the install completes and close.
Reconnect the M5Stack device and check the port again with ls /dev/cu.*
Open a terminal, copy and paste:
/bin/bash -c "$(curl -fsSL https://raw.githubusercontent.com/Homebrew/install/HEAD/install.sh)"
Enter your password when required, press RETURN to continue. It will take some time, be patient.
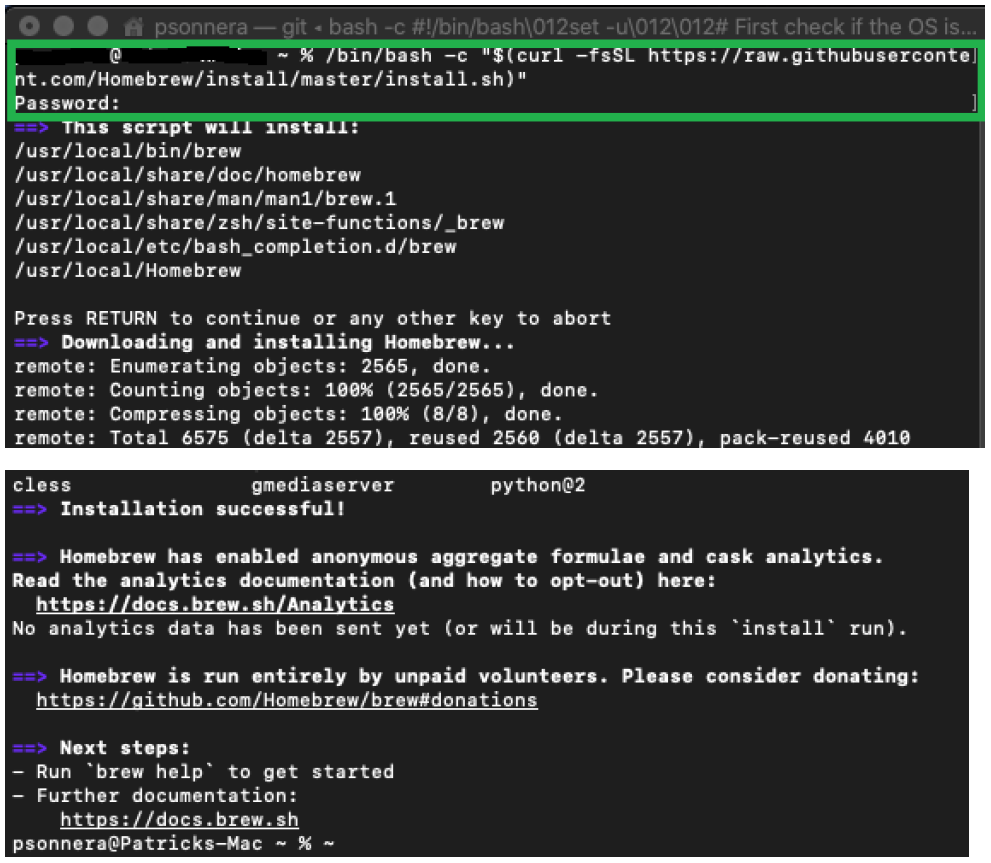
Then enter:
brew install esptool
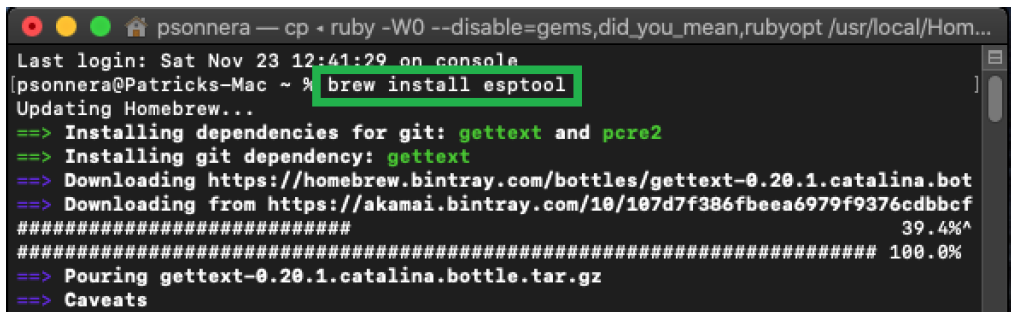
Wait until the command completes.

With your M5Stack connected to a USB plug of your Mac, enter:
esptool flash-id
If your device is recognized correctly you will get the path of the serial port:
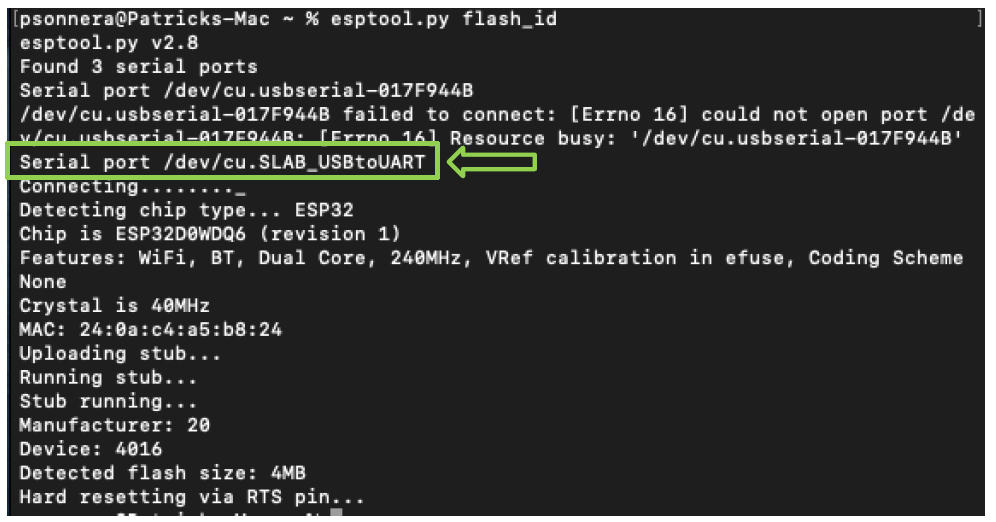
Take note of the port, it should be the same one you noted before, for example /dev/cu.usbserial-XXXX (yours might be different)
Note: older versions of esptool use the command esptool.py flash_id instead.
Open this link in a new tab https://github.com/psonnera/M5_NightscoutMon/releases
Download the zip containing all versions: Note: take the latest release and not the one from the example below
Allow downloads on "github.com" if required.
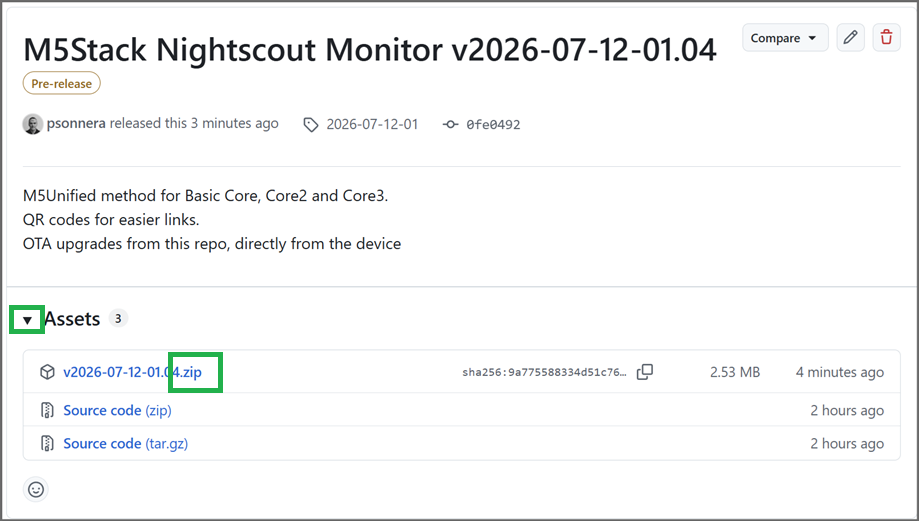
Once completed open your Download folder and double click the .zip file to extract it. Navigate inside M5Burner_NightscoutMon to the firmwares folder.
Note: the M5Burner.exe program inside the zip is for Windows only, you can ignore it on a Mac.
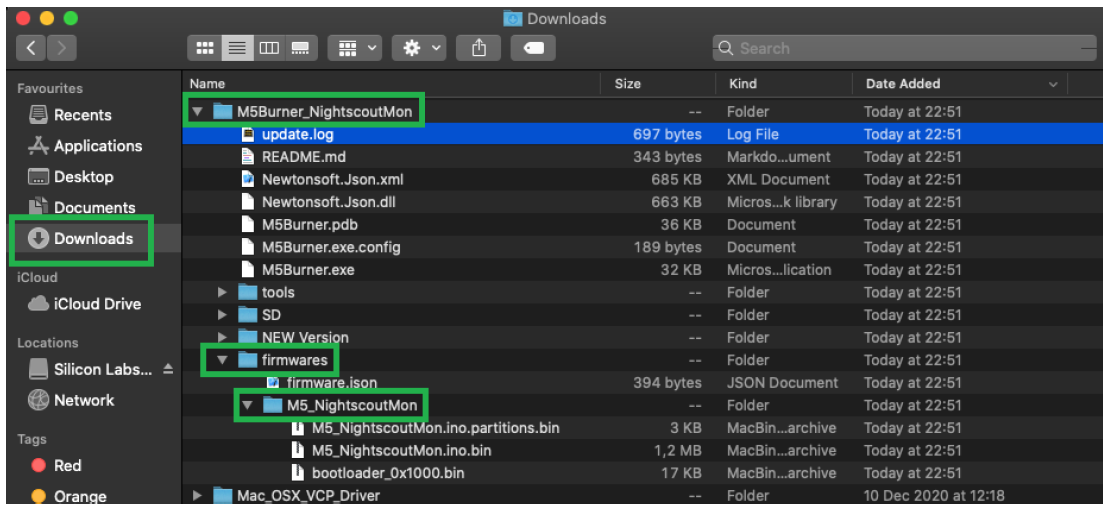
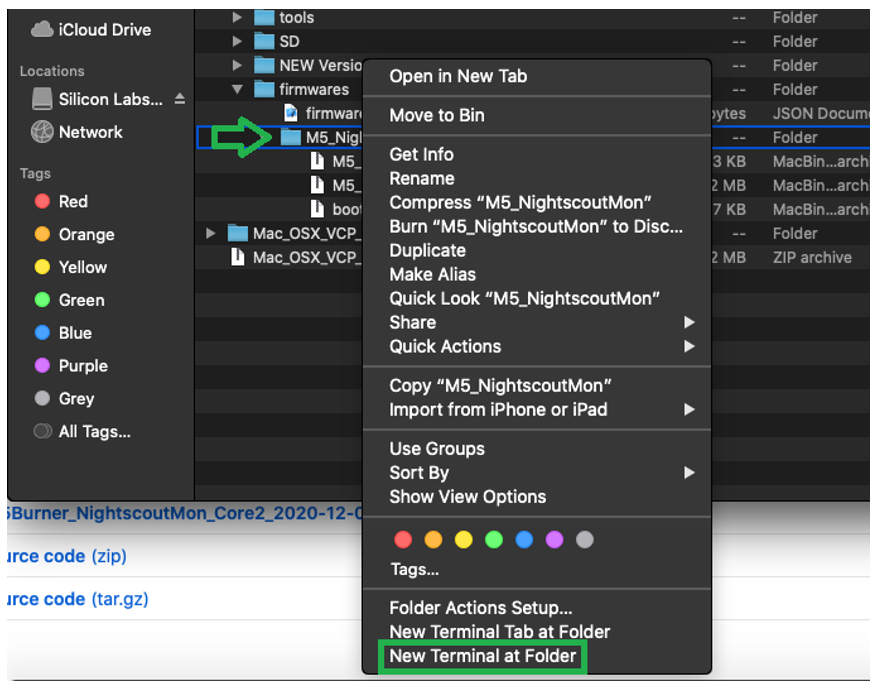
Right click on the firmware folder matching your device.
- If you have an old M5Stack Core Basic (model prior to May 2020) -> Select Basic_4MB.
- If you have a newer M5Stack Core or a Core 2 model -> Select ESP32_16MB.
- If you have an M5Stack Core 3 model -> Select CoreS3.
Select New terminal at folder. A new terminal will open.
Copy and paste the command below matching your device, verifying the port is identical to the one you noted before.
For Basic_4MB or ESP32_16MB:
esptool --chip esp32 --port /dev/cu.usbserial-XXXX --baud 921600 --before default-reset --after hard-reset write-flash -z --flash-mode dio --flash-freq 80m 0x1000 M5_NightscoutMon.ino.bootloader.bin 0x8000 M5_NightscoutMon.ino.partitions.bin 0x10000 M5_NightscoutMon.ino.bin
For CoreS3:
esptool --chip esp32s3 --port /dev/cu.usbmodem-XXXX --baud 921600 --before default-reset --after hard-reset write-flash -z --flash-mode dio --flash-freq 80m 0x0 M5_NightscoutMon.ino.bootloader.bin 0x8000 M5_NightscoutMon.ino.partitions.bin 0x10000 M5_NightscoutMon.ino.bin
Wait until the command completes
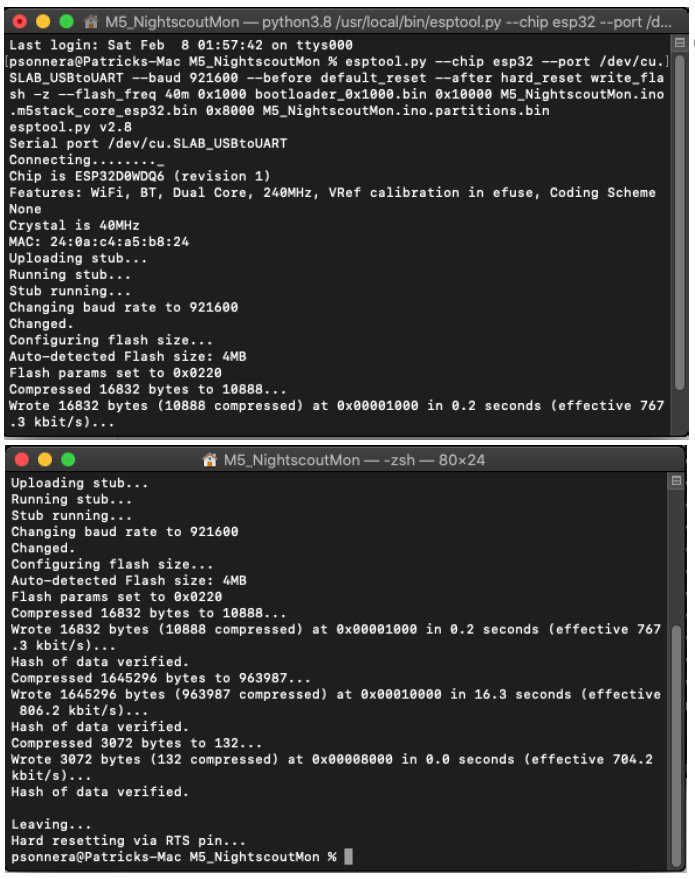
Congratulations, you programmed your M5Stack.
Continue with the setup here.