Windows
This guide explains step by step how to program your M5Stack with the M5Burner utility (Arduino not required).
- Go here: https://docs.m5stack.com/#/en/arduino/arduino_development and download the driver.
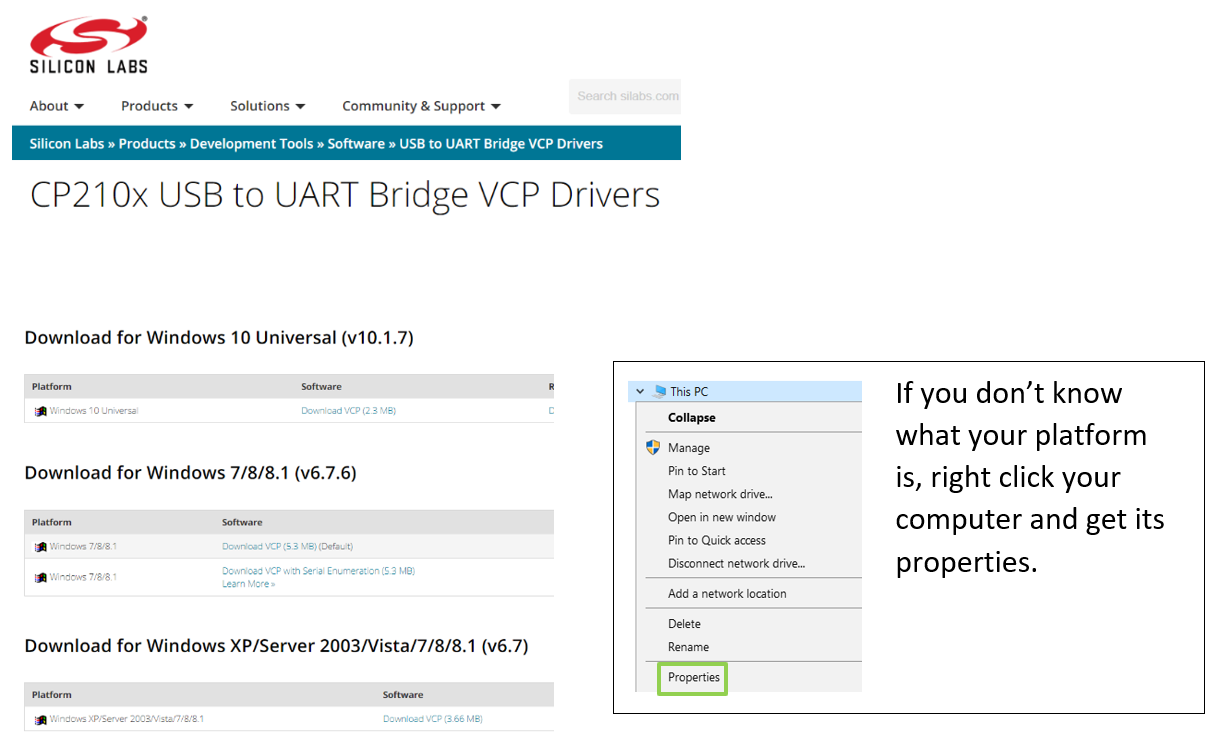
- Go to of SiLabs https://www.silabs.com/products/development-tools/software/usb-to-uart-bridge-vcp-drivers and choose the version matching your operating system.
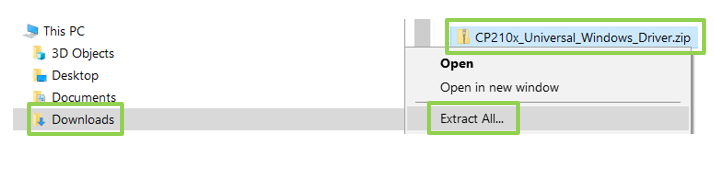
In the Downloads folder, extract the .zip file
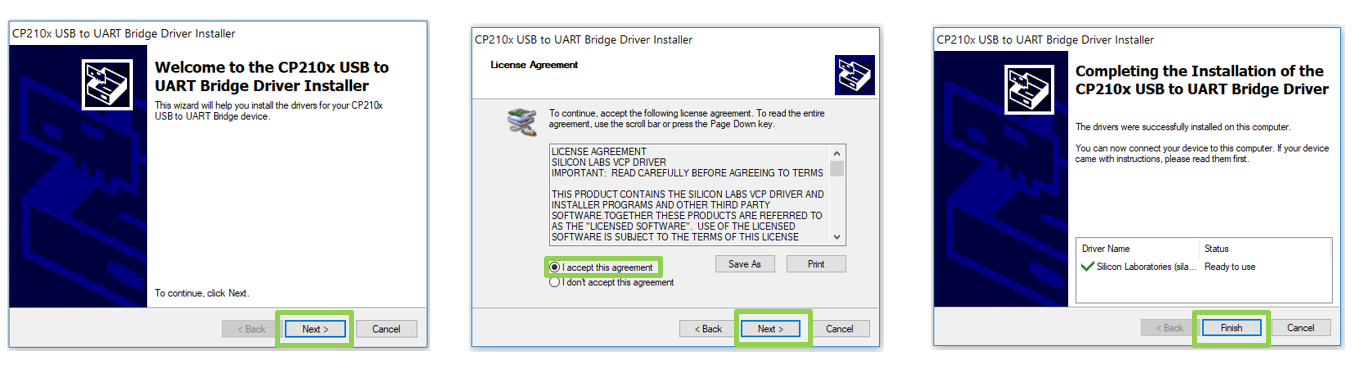
Open the extracted folder and run the installer for the correct platform type of the driver.
Next, Accept, Next, Finish.
Connect your M5Stack device and wait a moment to make sure your computer recognized it.
NB: If you have previous versions of SiLabs drivers you might need to remove them in order to see the M5Stack serial port.
Open this link in a new tab https://github.com/psonnera/M5_NightscoutMon/releases
Download the zip containing all versions: Note: take the latest release and not the one from the example below
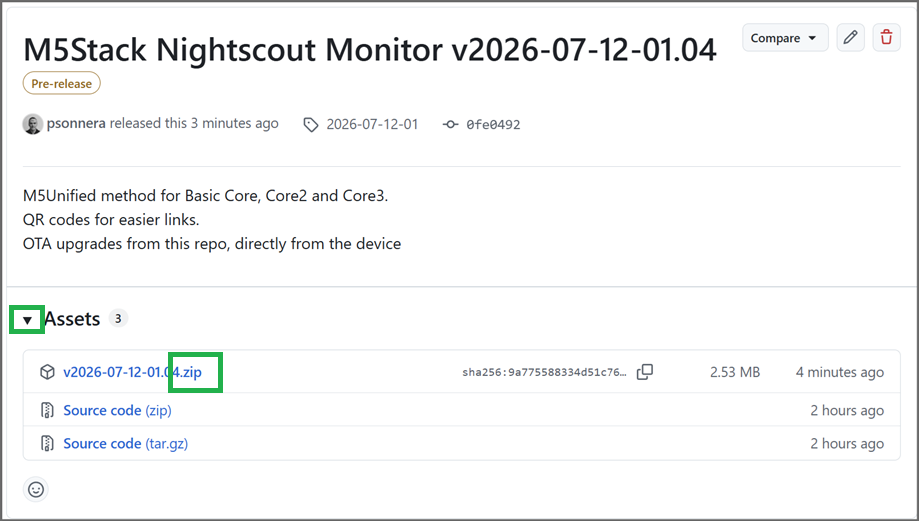
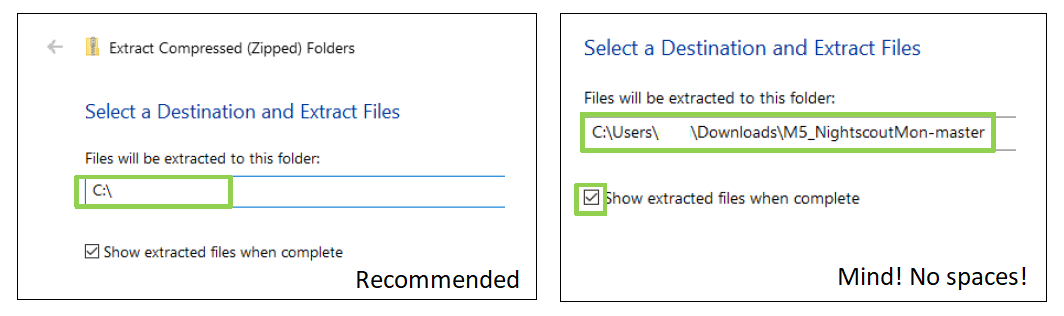
From the Downloads folder, extract the .zip file to C:\
You can extract it wherever you want, but avoid a path name with spaces inside.
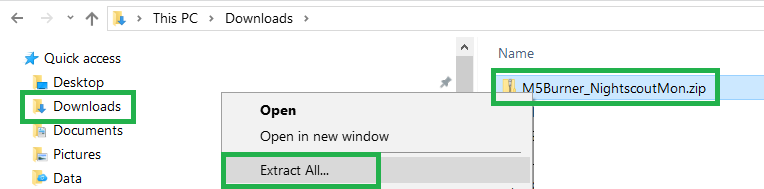
Click Extract
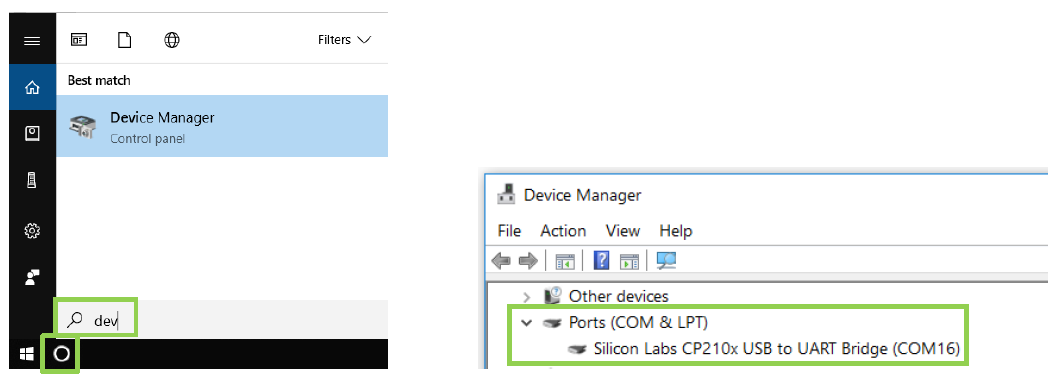
Open the device manager and check:
- M5Stack is there
- Which COM port it uses
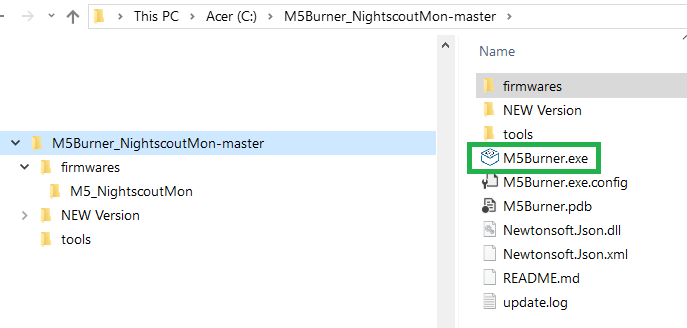
From the folder C:\M5Burner_NightscoutMon-master (or the other folder you selected when extracting the .zip file) run the program M5Burner.exe
If your computer uses Windows Defender you will need to authorize it to run.
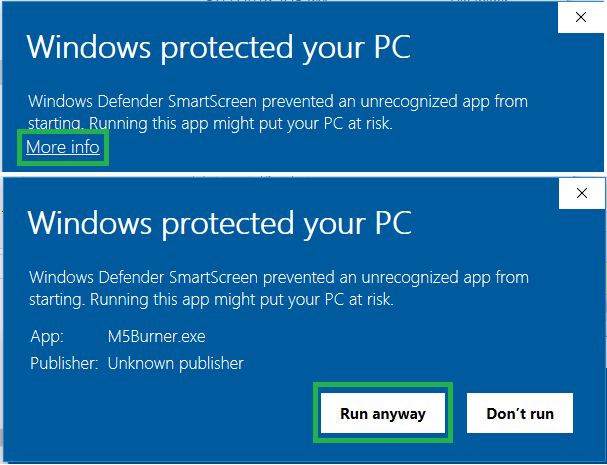
This program was provided directly from M5Stack (Shenzhen Mingzhan Information Technology Co., Ltd.) with authorization to redistribute. We consider it as safe to run.
The application opens, select your COM port, and make baudrate 921600.
Note: I removed the COM number to avoid confusion since it might be different.
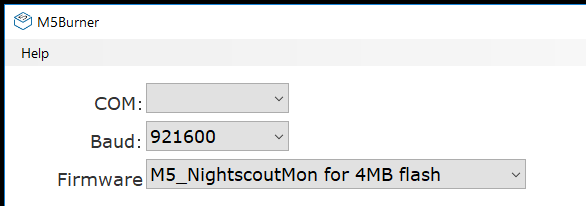
select the M5_NightscoutMon firmware, matching your device:
- If you have an old M5Stack Core Basic (model prior to May 2020) -> Select the first line.
- If you have a newer M5Stack Core or a Core 2 model -> Select the second line.
- If you have an M5Stack Core 3 model -> Select the third line.

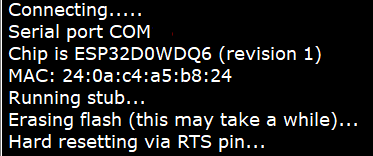
Click Erase, you should see messages in the window.
If you don't see error messages but the operation doesn't seem to complete, skip this step.
Click Burn
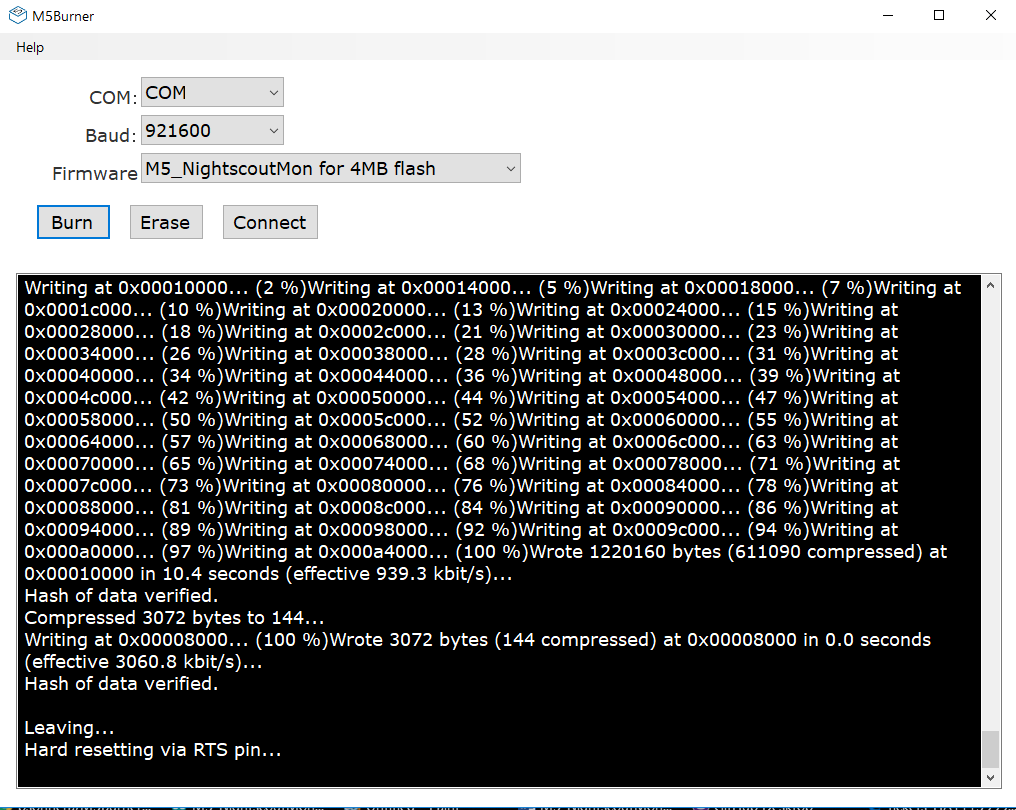
Congratulations, you programmed your M5Stack.
Continue with the setup here.