Nx Witness: Event Rule Setup
The following guide assumes you've already installed and configured Nx Witness for traditional use.
NxBot can receive motion events from Nx Witness in the form of HTTP requests. When configuring NxBot, you can specify the HTTP port that it listens on: HTTP_IP_PORT (env) / http_ip_port (yaml).
See the main Wiki for more help configuring NxBot.
The following guide will walk you through setting up Nx Witness to send motion events for a single camera. To setup multiple cameras, simply repeat this process for each additional camera.
-
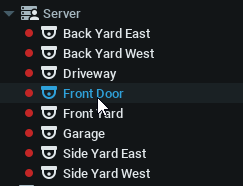
Obtain the ID for the camera you wish to send motion events
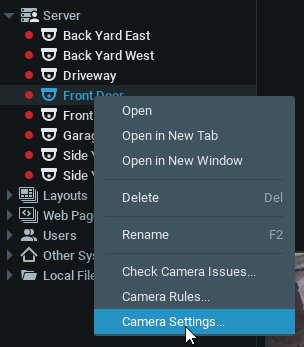
Right click and choose "Camera Settings"
Click the "Advanced" tab

NOTE: If you haven't already configured your motion zone/sensitivity, do so via "Motion" tab on this window.
The "Camera ID" is listed at the top of this screen, click the copy icon and paste the camera ID for use later in the guide.

NOTE: Keep this camera window open for the next step
-
Create the Event Rule
NOTE: Each camera will need it's own event rule
From the already open camera window, click "Camera Rules..." located at the bottom of the window

Click the "+ Add" button

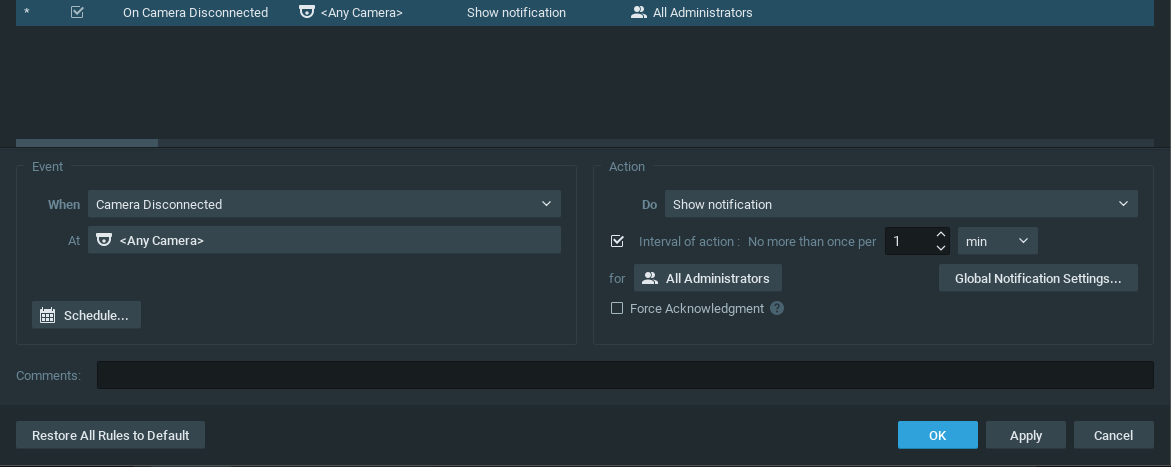
A new event rule will be added and, by default, will look like this:
-
Configure the Event Rule
Starting on the left side, "Event" section...
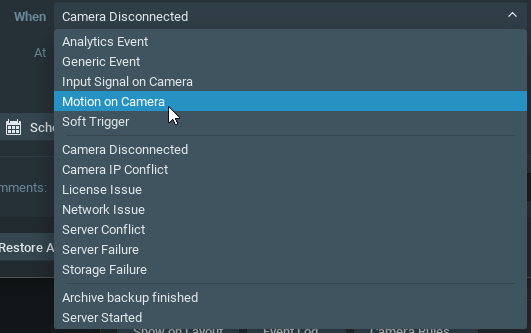
Change the "When" drop-down to "Motion on Camera"
Make sure "Starts" is selected to the right of "Motion on Camera"Click the "At" drop-down that says ""
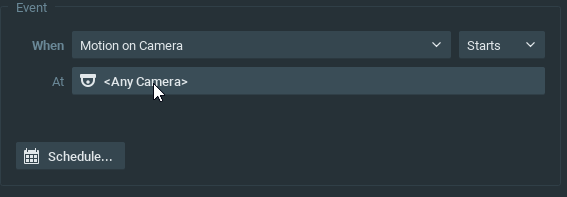
From this window, click the check-box next to the camera we identified in the first step, then, click "OK".

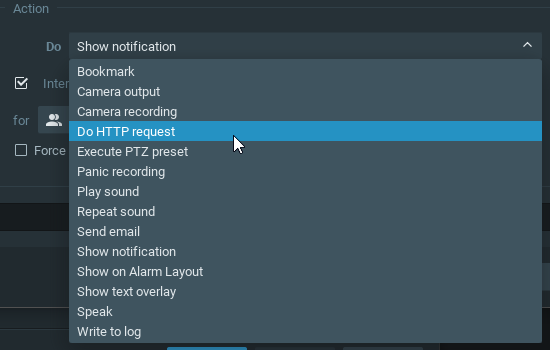
On the right side, "Action" section...
Click the "Do" drop-down and select "Do HTTP request"
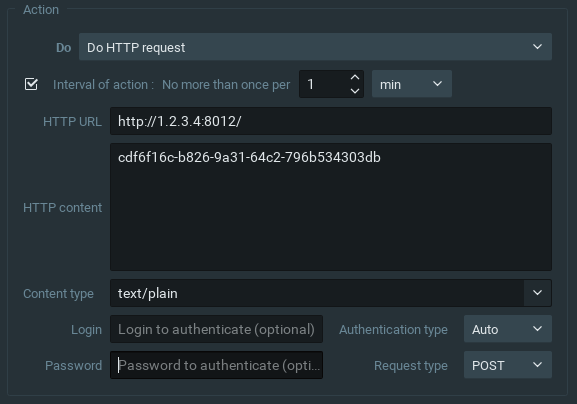
Fill out the following values for the action:
-
HTTP URL:
http://<your-nxbot-ip>:<port>/
This is theHTTP_IP_PORT(env) /http_ip_port(yaml) config value from the NxBot config -
HTTP content:
<camera-id>
This is the camera ID that we copied down in the first step -
Content type:
text/plain -
Request type:
POST
Everything else can be left at default value
Optionally, you can add a comment to the bottom "Comments:" field, like "NxBot Front Door Motion".
Click "Apply" then "OK".
The event is now successfully configured and should be up and running.
-
HTTP URL: