



Integration for GE WiFi-enabled appliances into Home Assistant. This integration currently supports the following devices:
- Fridge
- Oven
- Toaster Oven
- Dishwasher / F&P Dual Dishwasher
- Laundry (Washer/Dryer)
- Whole Home Water Filter
- Whole Home Water Softener
- Whole Home Water Heater
- A/C (Portable, Split, Window, Built-In)
- Range Hood
- Advantium
- Microwave
- Opal Ice Maker
- Coffee Maker / Espresso Maker
- Beverage Center
Forked from Andrew Mark's repository.
Unfortunately, I'm pretty much at the end of what I can do without assistance from others with these devices that can help provide logs. I'll do what I can to make updates if there's something broken, but I am not really able to add new functionality if I can't get a little help to do so.
NOTE: GE has started building their official version of the SmartHQ integration, which can be found here. It leverages the new Digital Twin API and service-based discovery of appliance functionality. You may want to consider switching to that integration if it meets your needs.
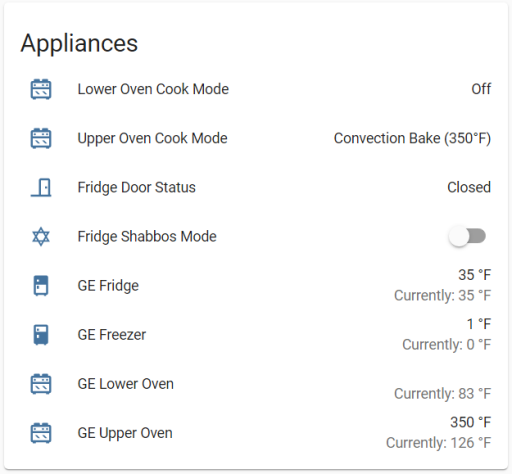
Entities card:
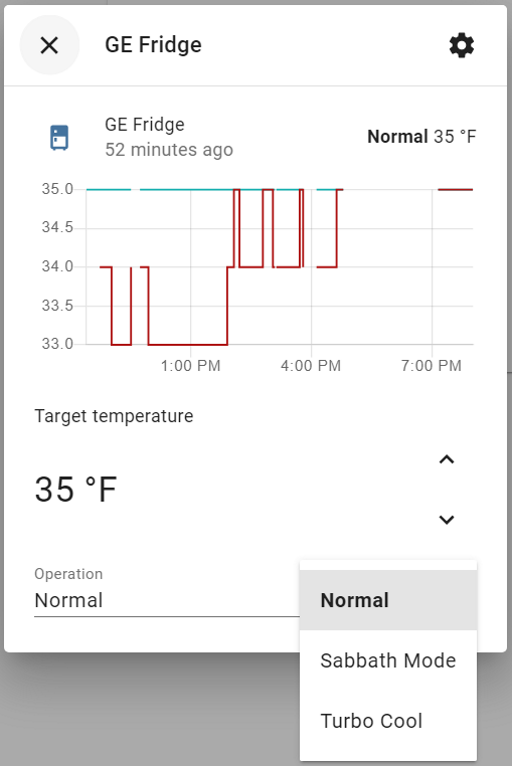
Fridge Controls:
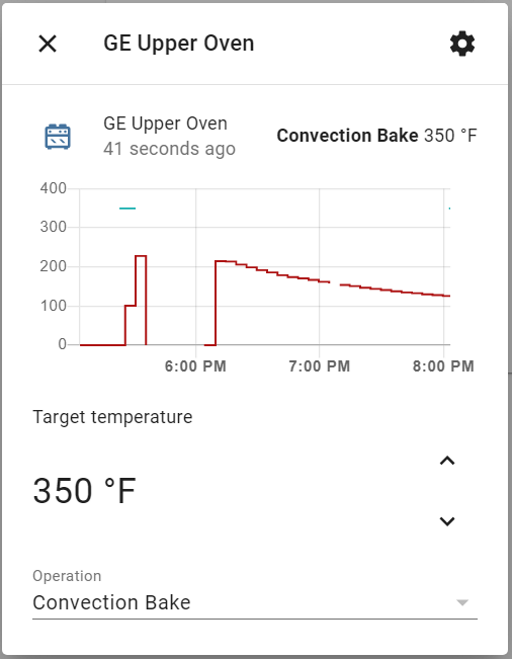
Oven Controls:
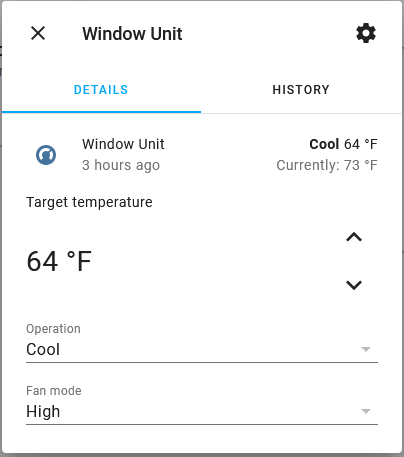
A/C Controls:
Range hoods expose native fan and light entities when the appliance reports hood fan speed and light level controls. These entities are intended to work better with Home Assistant dashboards, voice assistants, and the HomeKit Bridge than the lower-level select entities. Hood fans expose low, medium, and high as regular fan speeds; boost is exposed as a preset mode when available.
The existing hood fan speed and light level select entities remain available for compatibility, but are disabled by default for new entity registry entries. Re-enable them from the entity settings if you use them in dashboards, scripts, or automations. For the best HomeKit experience, expose the fan and light hood entities to the HomeKit Bridge and exclude any helper switches or select entities that were previously used to represent individual hood modes.
- Using the tool of choice open the directory (folder) for your HA configuration (where you find
configuration.yaml). - If you do not have a
custom_componentsdirectory (folder) there, you need to create it. - In the
custom_componentsdirectory (folder) create a new folder calledge_home. - Download all the files from the
custom_components/ge_home/directory (folder) in this repository. - Place the files you downloaded in the new directory (folder) you created.
- Restart Home Assistant
- In the HA UI go to "Configuration" -> "Integrations" click "+" and search for "GE Home"
Please follow directions here, and use https://github.com/simbaja/ha_gehome as the repository URL.
Configuration is done via the HA user interface. You need to have your device registered with the SmartHQ website.
Once the HACS Integration of GE Home is completed:
- Navigate to Settings --> Devices & Services
- Click Add Integration blue button on the bottom-right of the page
- Locate the GE Home (SmartHQ) "Brand" (Integration)
- Open a new browser tab and navigate to https://accounts.brillion.geappliances.com where you can verify your username/password (helpful) but more importantly Accept the TermsOfUseAgreement (required!)
- If your account has multi-factor authentication (MFA) enabled, the integration will prompt you for the verification code emailed by SmartHQ during setup, so no app interaction is needed. MFA is only required once; the integration then reconnects automatically using a stored refresh token.
- If terms acceptance is required, a specific error message will guide you to accept the terms in the SmartHQ app before retrying.
- Click on the integration, and you will be prompted to enter a Username, Password and Location (US or EU)
- Enter the email address you used to register/connect your device as the Username
- Same with the password
- Select the region you registered your device in (US or EU).
- Once you submit, the integration will log in and get all your connected devices.
- You can define in which area you device is, then click Finish
- Your sensors will appear using the configured device identifier (see below), for example:
- Serial-first:
sensor.fs12345678_dishwasher_cycle_name - MAC-first:
sensor.aa_bb_cc_dd_ee_ff_dishwasher_cycle_name
- Serial-first:
Entity unique_ids and friendly names are derived from a device identifier. You can change this at any time after setup via Settings --> Devices & Services --> GE Home (SmartHQ) --> Configure.
There are two modes, and each falls back to the other when the preferred value is unavailable:
| Mode | Primary | Fallback | Default for |
|---|---|---|---|
serial_or_mac (Serial number, fallback MAC) |
Serial | MAC | Existing installations (unchanged behavior) |
mac_or_serial (MAC address, fallback serial) |
MAC | Serial | New installations |
Existing installations are automatically kept on serial_or_mac so nothing changes on upgrade. New installations default to the more stable mac_or_serial.
Consequences when changing the setting:
- Changing the mode reloads the integration and recomputes all entity
unique_ids and friendly names. - Automations and dashboards referencing old
entity_ids may need to be updated. - Switching modes can leave duplicate/orphaned entities that must be removed manually from the entity registry.
serial_or_mac: entity IDs can change if serial availability changes (restart, bad ERD, non-printable serial).mac_or_serial: more stable across restarts, but MAC-based names are harder to recognize in the UI.
Please click here for change information.