English
🏠 Wiki home — 🇩🇪 Deutsche Version
This page walks through reshaping your Creative menu, step by step. For a quick reference see the README.
Type /creativemenu open in chat (short: /crm open). This opens the Creative menu editor:
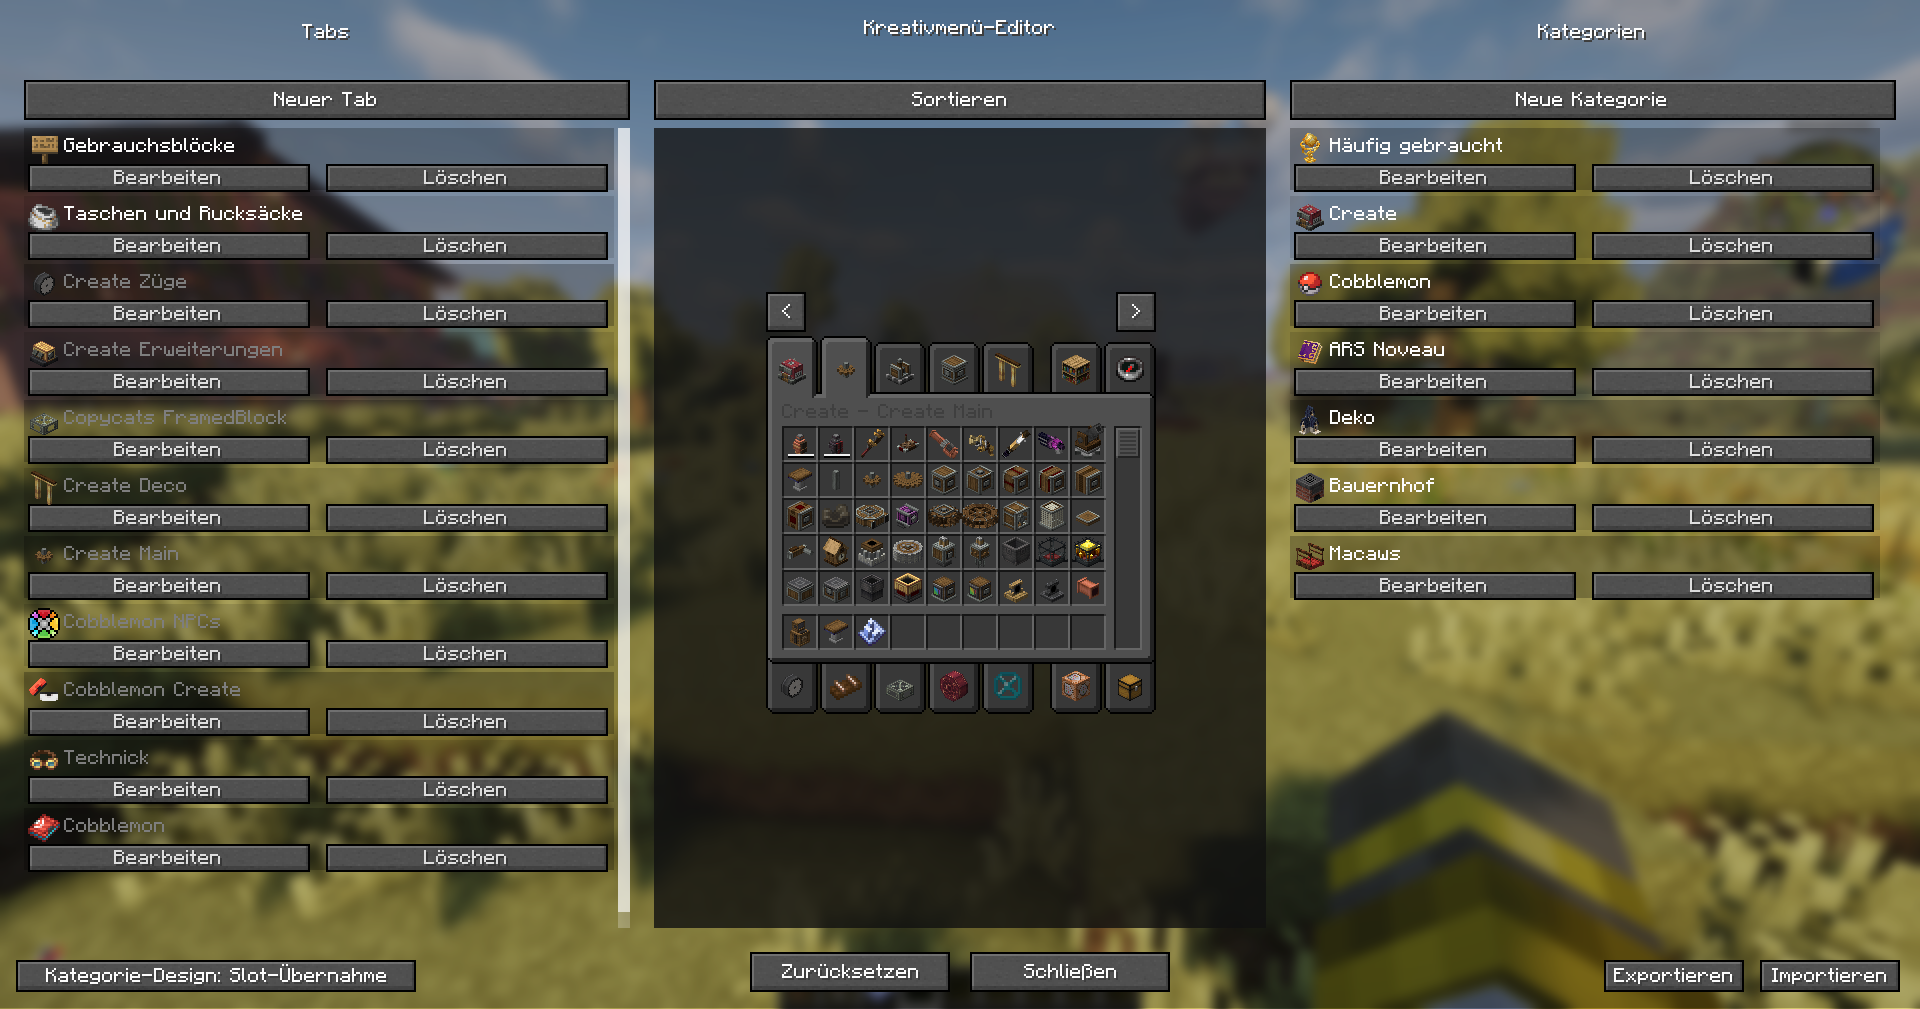
Three columns:
- Left "Tabs": every existing tab (real mod tabs AND your own custom tabs), each with "Edit" and "Delete." Grayed-out entries are currently hidden.
- Middle: a real, clickable live preview of your Creative menu — feel free to try out how it looks (the item slots themselves aren't interactive here, but switching tabs and flipping pages works).
- Right "Categories": your category tabs (several tabs grouped into one collapsible tab) — also with "Edit"/"Delete."
At the bottom: "Sort" opens the sorting screen (see below), "Reset" clears your entire local configuration (with a confirmation prompt), "Export"/"Import" copies your whole configuration to/from the clipboard — handy for backing it up or sharing it with someone else.
Click "New Tab" on the left. This opens the tab editor:
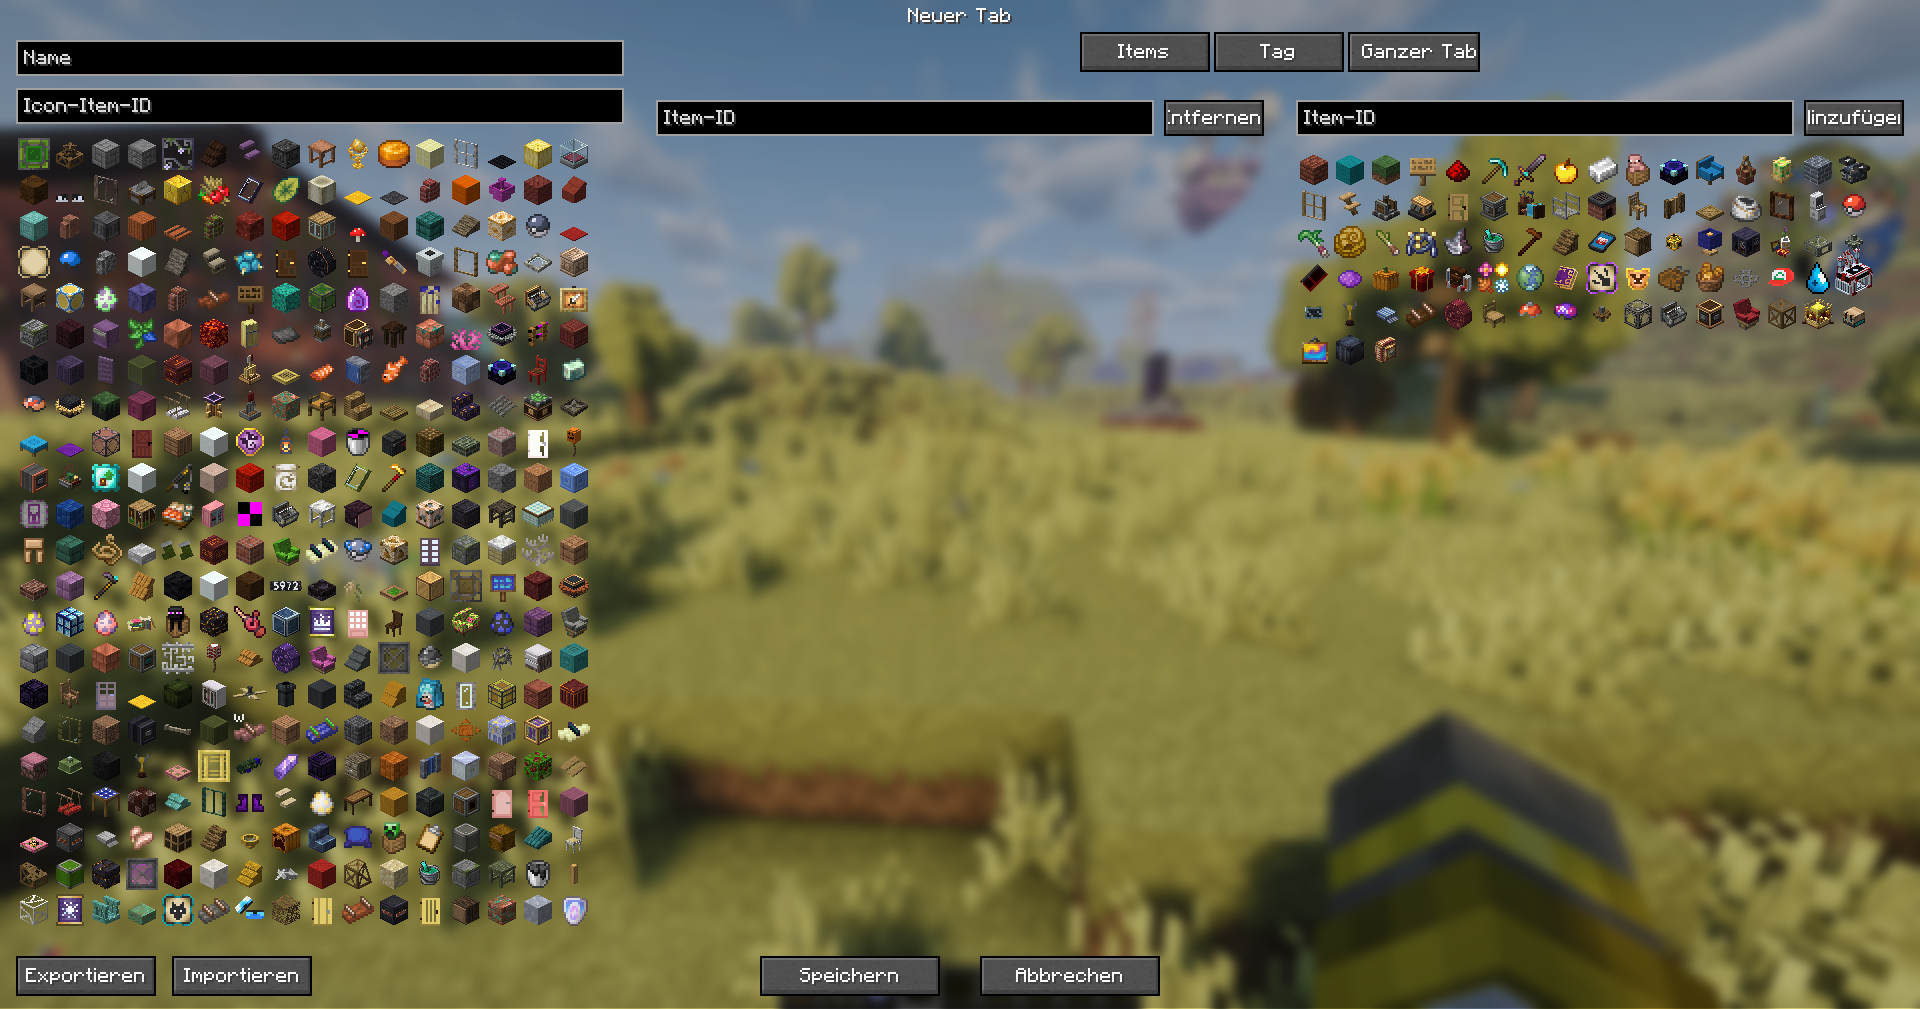
1. Name and icon: enter a name at the top left, and below it the item ID for the tab icon
(e.g. minecraft:diamond_sword) — as you type, the icon tile list below filters live, so you can
also just click a matching tile instead of knowing the ID by heart.
2. Choose a content source (top middle, three buttons):
- "Items": a fixed list of individual items you put together yourself.
-
"Tag": every item belonging to a Minecraft/mod tag (e.g.
#minecraft:logs) — resolves itself automatically, even for items added to the tag later. - "Whole Tab": takes over the complete contents of one or more existing tabs (multi-select possible), each keeping its own internal order.
All three sources can actually be COMBINED — the buttons only control which panel is currently visible; the actual content of your tab is always the union of everything you've entered across all three areas.
3. Adding items: the right panel shows every available item as a tile list — click one to add it to your tab (or drag it in). Items already included are automatically hidden from this selection list so you don't add duplicates.
4. Save — done, your new tab shows up immediately in the list/preview on the left.
The sorting screen shows a real preview of the Creative menu, page by page:
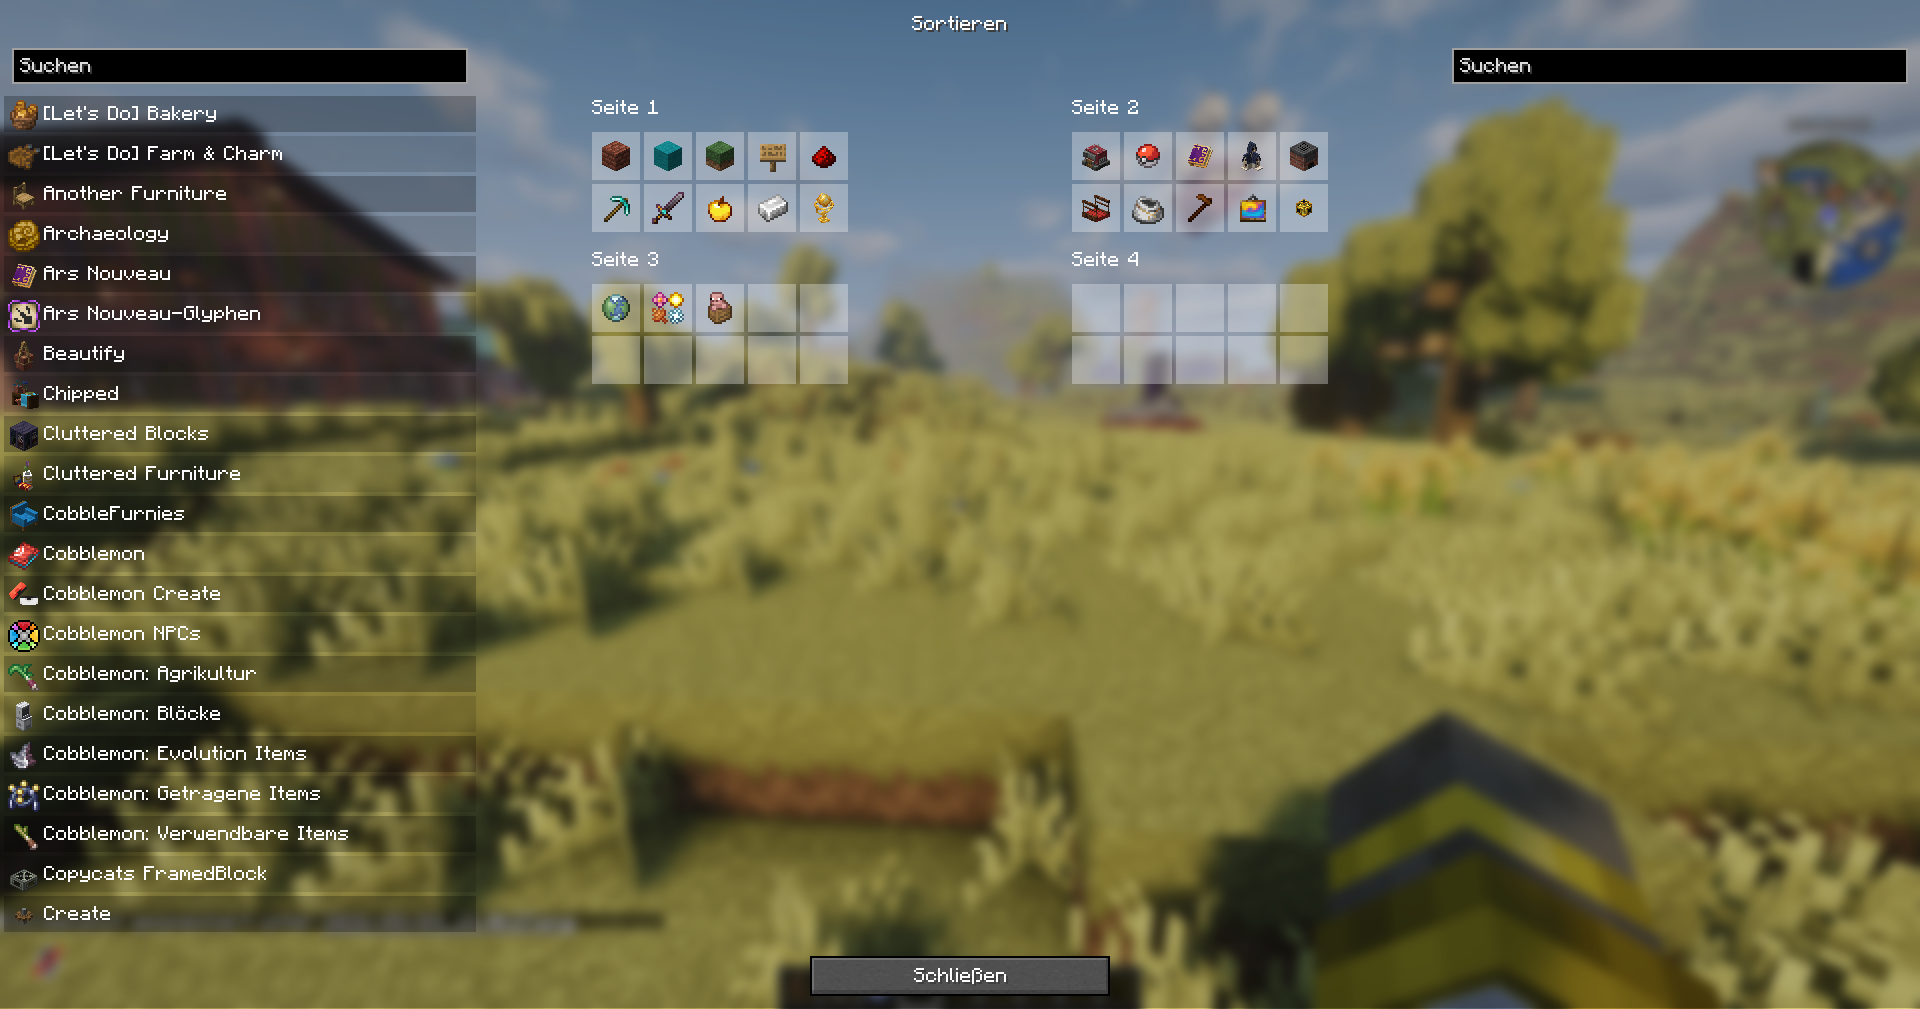
- Left: a searchable list of hidden tabs.
- Middle: the visible pages as clickable tile blocks (a 5×2 grid per page, exactly like the real Creative menu).
- Right: a second, independently searchable list — tabs you want to hide end up here.
Drag a tile from either list into one of the page blocks to make it visible and slot it in at exactly that spot. Drag a tile from the page area back into either list to hide it.
As a server operator, you can enforce a unified Creative menu for all players, tiered by permission level (OP level 0-4).
The very first admin on a fresh server: once, via the server console (no leading slash):
creativemenu admin YourPlayerName
After that, in in-game chat:
-
/creativemenu serveropens the server prescriptions editor (same layout as your personal editor, but applies to every player at or above the chosen OP level). -
/creativemenu server resett trueresets the entire server configuration. -
/creativemenu permissions getshows the minimum OP level required for players to add/remove, show/hide, and sort themselves. -
/creativemenu permissions set <addremove|showhide|sort> <0-4>changes one of those three thresholds.
Resetting your own settings (for any player, not just admins): /creativemenu resett true
(yes, with a double "t" — that's really the command).