Getting started
Java 11 or higher must be installed.
The application comes as single-file-application and can be started from command-line with the following command (replace %VERSION% with the version of your downloaded artifact).
java -jar simple-oauth-server-%VERSION%.jar
After the application has been started it's accessible via http://localhost:8080. Check it with curl
curl -I -X GET http://localhost:8080
The output should be something like
HTTP/1.1 401
Vary: Origin
Vary: Access-Control-Request-Method
Vary: Access-Control-Request-Headers
X-Content-Type-Options: nosniff
...
After the first start the application folder layout should look like
simple-oauth/
├── data/ (Database, Private & Public Keys for signing the JWT-token)
├── log/  (Server-Logs)
└── simple-oauth-server-VERSION.jar (App-Executable)
After the start the application has an empty database without any application or user registration. The configuration of the system is implemented by a simple REST interface that is protected by the server's OAuth mechanism itself, so the first step is to create an initial application-registration for the configuration API, so that you can use the OAuth Client-Credential-Flow to obtain an access token. With this access token you can access the REST-configuration API.
If you install the application make sure to have an empty data folder. The download of the software does not come with any predefined secrets, private or public keys. Be sure that they are generted when initializing the application.
simple-oauth-server provides a console-application to configure any instance of the software. To download the console-application visit the simple-oauth-client-configurator Project and download the latest release to connect to your instance.
To create the initial application you have to send the OAuth server a request to get the client_id and the client_secret with the following command.
initialize --endpoint http://localhost:8080
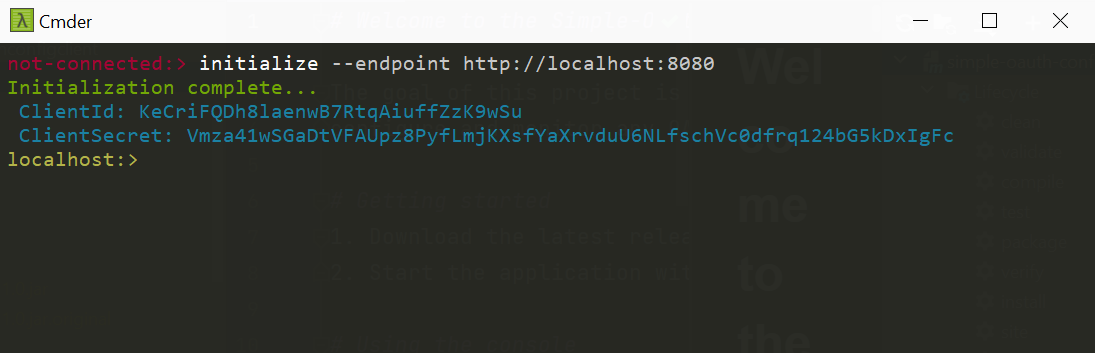
With this command the simple-oauth-server will be initialized with an initial account that enables further configuration of users, applications and scopes. The command shows a client_id and a client_secret that is used to authorize any configuration-actions on the server.
Save this two values. If you loose this values you won't be able to gain access to the simple-oauth-server Configuration API without access to the underlying database.
Now you're ready to obtain your first access token via the Client-Credential Flow (for Details see Section 4.4 of the OAuth-Protocol-Spec). With the following command you can obtain an access-token
curl -v -l -X POST http://localhost:8080/auth/oauth/token -H "Content-Type: application/x-www-form-urlencoded" --data-urlencode "grant_type=client_credentials" --data-urlencode "client_id=z9xFcvjA4lVmvWXzekcAzODqRhuqQ5z4" --data-urlencode "client_secret=0r7aLo7qFE1NAY4sdvGJjzlaAssDrUy8i2BSm74kDf0CLGnsHlEaYgtbykRYxiyv" --data-urlencode "scope=data.superadmin"
Make sure to set the client_id and the client_secret to the values that were returned with the initial setup-call. The result is a response specified in Section 4.4.3.
{
    "access_token":"eyJhbGciOiJSUzI1NiJ9.eyJzdWIiOiJ6OX...",
    "token_type":"Bearer",
    "expires_in":604800
}
Congratulations. You have authenticated with OAuth. With this access-token you can now use the simple-oauth-server Configuration API to setup your Authentication & Authorization backend.