User Guide
This guide covers day-to-day operation: the first run after assembly, the TFT menu, the web UI, and what to do when something looks wrong.
If the device is not built and flashed yet, start with the Assembly Guide and the Setup Guide. The Setup Guide owns build, flash, and first-time configuration; this page picks up once the device is on the network and calibrated.
The Setup Guide covers flashing and the configuration steps in the web UI. Once that is done, the first thing worth doing is a full pass on the device itself, because it confirms the hardware independently of the network.
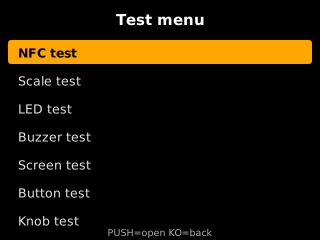
A freshly assembled unit can pass a web UI check and still have a cold solder joint on the encoder or a buzzer wired backwards. The device has a hidden test menu for exactly this.
To open it: from the idle screen press PUSH to reach the Device menu, turn to System info, press PUSH to open it, then hold PUSH for about 3 seconds. A confirmation beep means the test menu is open.
The gesture is deliberately awkward. System info is already two deliberate steps from idle, so a held PUSH there will not fire by accident, and holding a single button is reliable in a way that a two-button combination is not on this hardware.
 |
 |
|---|---|
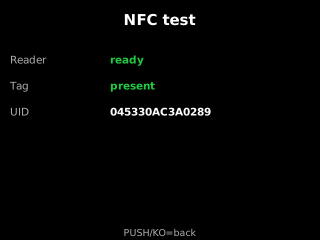
NFC test — reader initialises, tag detected, UID read. Reader must show ready; a tag on the platform shows present plus its UID. |
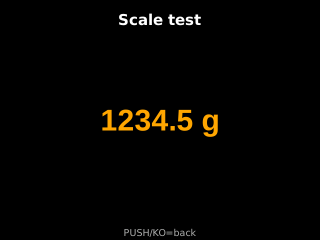
Scale test — load cell and HX711 respond. Press the platform: the number must move and return. |
 |
 |
|---|---|
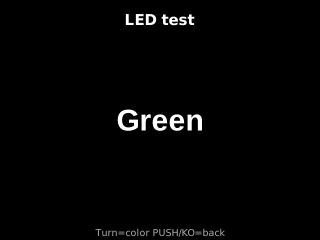
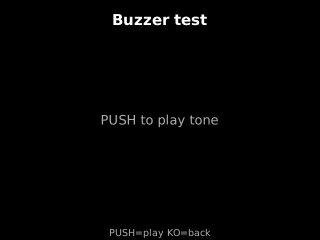
| LED test — turn to step Red/Green/Blue/White/Off. Both WS2812 must show the same colour; if they differ, they are not sharing the LED helper. | Buzzer test — PUSH plays the test tone. Silence here with the buzzer enabled means a wiring fault. |
 |
 |
|---|---|
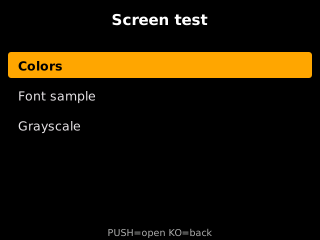
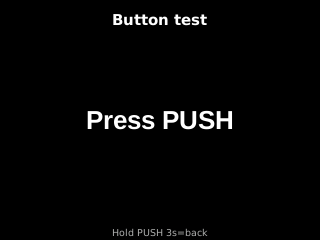
| Screen test — three pages: full-screen colours, font sample, grayscale ramp. Catches dead pixels and colour-order faults. | Button test — guided: press PUSH, then KO. Confirms both buttons are wired and debounced. |
 |
|
|---|---|
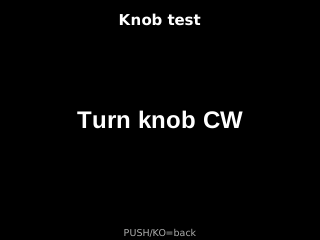
Knob test — guided: turn CW, then CCW. If the directions are reversed, swap A and B on the encoder. |
Inside a sub-test, hold PUSH again to return to the test list; from the list, hold PUSH to leave. Button and Knob tests need this because they consume normal presses as test input and so have no short-press way back.
- Put a tagged spool on the platform.
- If the tag is blank, write it from the web UI: NFC → Write ID to tag.
- The device reads the tag, looks the spool up, and offers Load into printer or Save weight.
If the lookup fails, see Troubleshooting below — the message on screen distinguishes the cases.
The whole interface is three inputs.
| Input | Action |
|---|---|
| Turn knob | Move the selection |
| PUSH (knob press) | Confirm / open |
| KO (second button) | Back / cancel |
Every screen that takes input shows its own hint line at the bottom, so the current meaning of each control is always on screen.
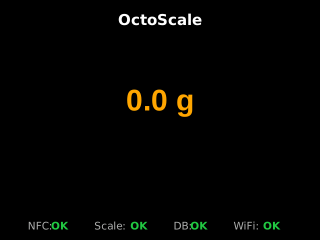
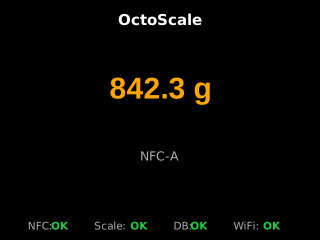
The resting state shows the live weight in large digits, with a status footer for NFC, Scale, DB, and WiFi. A tag on the reader adds its carrier type (NFC-A, NFC-V, …) under the weight.
| No tag | Tag present | Not yet calibrated |
|---|---|---|
 |
 |
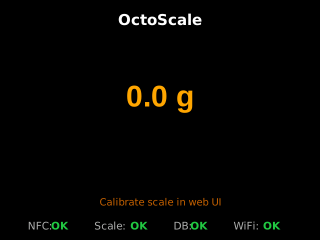 |
If the scale has never been calibrated, the idle screen carries a Calibrate scale in web UI warning. The weight shown before calibration is not meaningful.
After a period with no input the display steps down through three stages, all configurable in the web UI under System → Display:
-
Dim — backlight drops to the dim level (default after
timeoutseconds). - Screensaver — a bouncing logo, default after 60 s.
- Off — backlight fully off, default after 300 s, if enabled.
| Boot splash | Screensaver |
|---|---|
 |
 |
Any input or any state change (a tag arriving, for instance) returns to the normal display.
Placing a tagged spool on the platform starts the flow automatically.
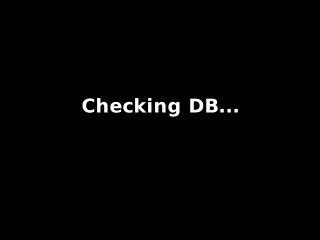
- Checking DB… — the spool is looked up by tag ID, or by UID for a foreign tag.
-
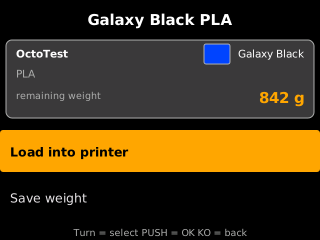
Spool found — vendor, material, colour swatch and remaining weight, then a choice:
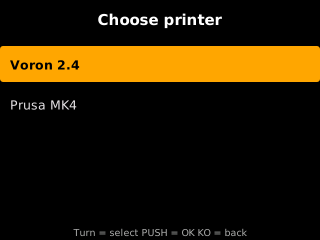
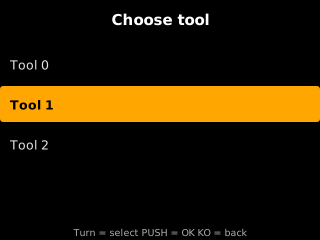
- Load into printer → choose printer → choose tool → Loaded
- Save weight → Saved
- Both paths end on a result screen that returns to idle.
| 1. Lookup | 2. Spool found | 3a. Choose printer |
|---|---|---|
 |
 |
 |
| 3b. Choose tool | 4a. Loaded | 4b. Saved |
|---|---|---|
 |
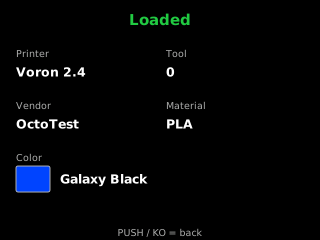 |
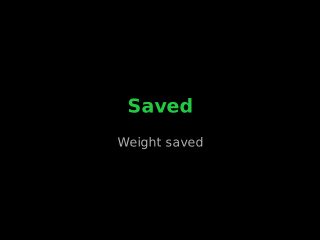 |
The Save weight path is also the unload path. It shows Put on scale with a live reading and the expected remaining weight, so you can confirm the spool is seated before PUSH commits the value.
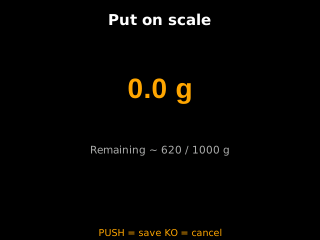
PUSH or KO from idle opens the Device menu.
| Item | Effect |
|---|---|
| Tare | Zeroes the scale; confirms with Tared and returns automatically |
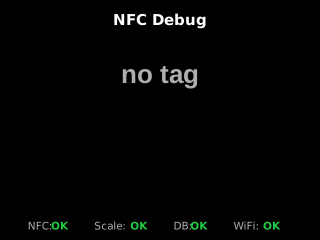
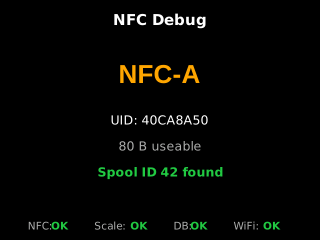
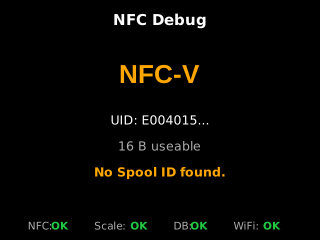
| NFC debug: ON/OFF | Replaces the idle screen with a live tag readout — carrier, UID, usable bytes, and whether a spool ID resolved |
| Buzzer: ON/OFF | Master buzzer switch |
| Theme: Dark/Light | Display theme, independent of the web UI theme |
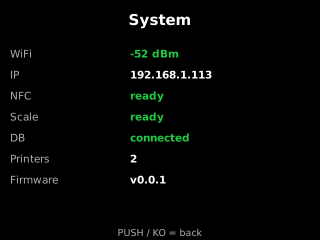
| System info | WiFi signal, IP, NFC/Scale/DB status, printer count, firmware version |
| Device menu | System info |
|---|---|
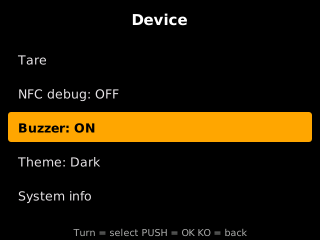 |
 |
NFC debug is the fastest way to tell an unreadable tag from an unassigned one: it shows the carrier and UID even when no spool ID could be resolved.
| No tag | Spool found | No spool ID |
|---|---|---|
 |
 |
 |
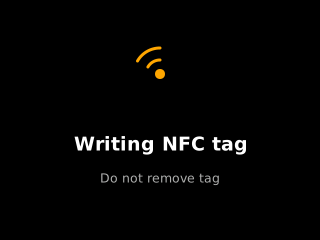
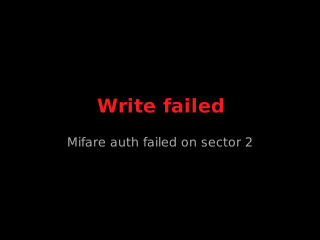
Writes are started from the web UI but the device takes over the screen while one runs, showing Writing NFC tag / Erasing NFC tag with Do not remove tag.
| Writing | Erasing |
|---|---|
 |
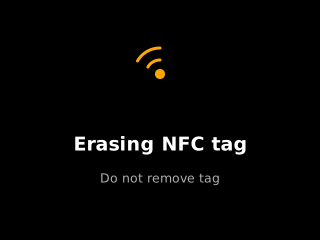 |
Take that literally. A write is not instant — an NTAG Extended write can take some seconds — and lifting the tag mid-write leaves it partially written. The status LED blinks blue for the whole operation, however long it takes.
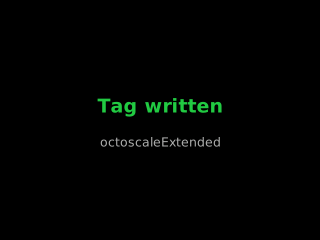
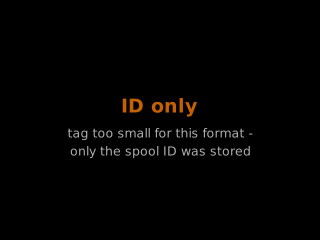
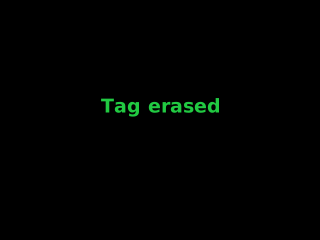
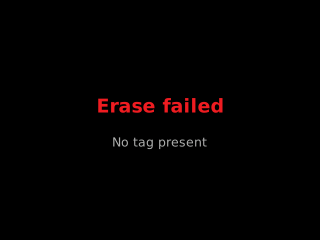
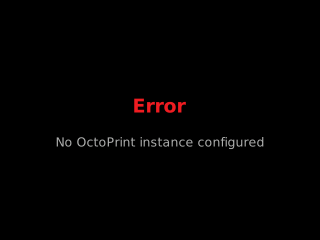
Results are shown for a few seconds:
 |
 |
 |
|---|---|---|
| Tag written — complete success; the format used is named underneath | ID only — the tag was too small for the chosen format, so only the spool ID was stored | Write failed — the reason is shown (auth failure, tag removed, verify mismatch) |
 |
 |
 |
|---|---|---|
| Tag erased — erase completed | Erase failed — no tag present, or the erase errored | Error — any other flow step failing; the cause is named |
ID only is a warning, not a failure. The tag will still resolve to the right spool, but the extra fields are not on it — the database supplies them instead.
The status LED is two WS2812 driven as one: one on the ESP32-S3 board, one on the enclosure top. They always show the same status.
The patterns below animate — the timings are the firmware's own, so what you see here is what the device does.
 |
 |
 |
|---|---|---|
| Breathing green — connected and idle, the normal resting state. Deliberately faint so an event flash stands out against it. | Solid blue — booting, or still joining the saved WiFi network. |
Solid orange — no network reachable; the OctoScale-Setup portal is open. |
 |
 |
 |
|---|---|---|
| Blinking blue, 1 s — software update running. Do not power off. | Blinking blue, 0.5 s — tag write, erase, or raw dump. Do not remove the tag. | Solid cyan — database lookup in flight. |
 |
 |
 |
|---|---|---|
| Green — spool recognised, or write succeeded. | Amber — write succeeded but fields were dropped (the ID only case). | Red — write failed, no printer configured, or a missing reference weight. |
Blue always means do not interrupt. Brightness for both WS2812 is a single slider in the web UI (System → Status LED); it scales the level only, never the colours or patterns. The ESP32-S3's onboard WS2812 can be disabled in the web UI (System → Status LED).
The buzzer tones are matched to the LED, which blinks in lockstep with each tone segment. Frequencies and durations below are exactly what the firmware plays.
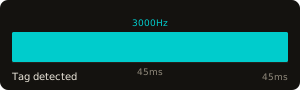 |
Tag detected — the lightest signal, just "something happened". |
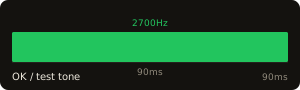 |
OK, and the web UI's test tone. |
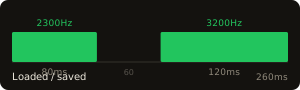 |
Spool loaded or weight saved — two rising beeps. |
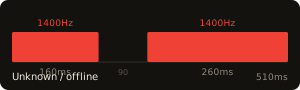 |
Unknown spool or database offline — a low double tone. |
The buzzer can be switched off entirely in the Device menu or web UI (System → Buzzer); Volume is adjustable there as well. The LED timing stays the same either way.
Open http://<device-ip>/. The interface is six tabs; the device only polls for data belonging to the tab you are actually looking at, and stops entirely when the browser tab is hidden.
| Tab | Purpose |
|---|---|
| Operate | Live weight, tare, and the current spool |
| NFC | Read, write, and erase tags; raw dump for unknown tags |
| Scale | Calibration and HX711 diagnostics |
| Setup | OctoPrint instances, spool database selection, WiFi |
| System | Display, LED, buzzer, themes, firmware update, config backup |
| Debug | Live NFC and HTTP log |
Live weight with a tare button, mirroring the device's idle screen. Use this to confirm a reading without walking to the device.
Write ID to tag is the common case: it writes the spool ID in the format chosen for that tag type. Everything else on the tag is optional — the database remains the source of truth.
Two results are worth understanding:
-
droppedFields— the data did not fit on this tag. Expected on small tags; the spool still resolves. -
unsupportedFields— the chosen format has no representation for that field at all. Changing tags will not help; changing format might.
Raw dump reads a tag sector by sector without interpreting it, which is what to reach for when a tag reads as unknown and you need to know whether it holds data at all.
One-point calibration needs a single known reference weight. Two-point calibration uses a light and a heavy reference and checks linearity, which catches a load cell mounted under strain.
The calibration factor lives in NVS and survives reboots and OTA updates. The HX711 panel shows chip readiness, the raw ADC value, and noise; unstable noise here is a wiring or supply problem, not a calibration problem.
Add each OctoPrint instance with name, host, port, and API key (OctoPrint → Settings → API), then select which instance holds the spool database. Instances sharing an external database can fail over for each other; instances on local SQLite cannot, since each has its own separate records.
Display brightness and the three idle timeouts, LED brightness, buzzer mode, and both themes. Firmware updates can be uploaded directly or pulled from a URL.
Configuration backup exports as AES-256-CBC encrypted JSON. API keys are never written in plaintext, so a backup file is safe to keep off the device — but it is also unreadable without the passphrase, so store that somewhere durable.
The file covers the whole configuration: the calibration factor, every OctoPrint instance with its database selection and selection timeout, and all device settings — display brightness and the three idle timeouts, the screensaver, both themes, buzzer mode, volume and pitch, LED brightness and routing, the debug console, and the online firmware check. Restoring applies them immediately; no reboot is needed. A setting you have never changed is left out of the file rather than exported at its current default, so restoring an old backup onto newer firmware keeps that firmware's defaults instead of freezing yesterday's. For the same reason, a backup written before a setting existed simply leaves it alone. WiFi credentials are the one exception — WiFiManager stores them separately and they are not part of the file, so a restored device still needs its network set up.
Restart device reboots the hardware. Nothing is cleared: calibration, printers, API keys and every setting live in NVS and survive it. It is refused while a firmware update is running, since a restart there would leave an incomplete image in the flash partition. The device is unreachable for roughly twenty seconds; the page reconnects on its own once it answers again, so no reload is needed. A weighing or tag write that happens to be in flight is lost — the spool weight in the database is not, because it is written before the tag is.
A live log of NFC reads and HTTP calls. This polls at a high rate and only runs while the Debug tab is open and the browser tab visible, so leaving it open in a background window costs nothing.
Almost always the power supply path, not the firmware. Check in this order:
-
Are all three capacitors fitted? 470 µF at the PN5180, 1500 µF at the ESP32-S3
5Vpin, 100 µF at the Mini-360 output. The 470 µF one is what lets the PN5180 raise an RF field at all; the other two absorb WiFi transmit bursts. See the Assembly Guide. - Is anything chained into the 5 V path? USB switches, power meters, and extension cables each add contact resistance. A supply that measures a healthy 5 V at idle can still collapse under a current burst. Short, thick, and direct.
- Check the reset reason in the Debug tab. A brownout and a firmware fault look identical from the outside but report differently — the Development Guide explains how to read it.
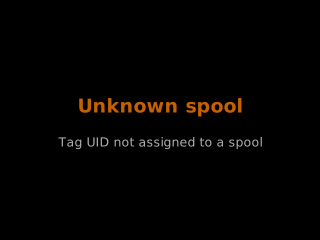
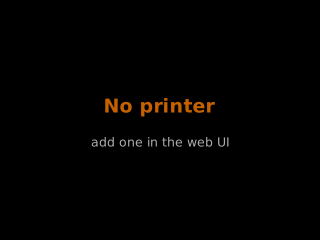
The message on screen distinguishes the cases, and they have different fixes:
 |
 |
|---|---|
| Unknown spool — the tag was read fine, but its ID is not in the database. Assign the spool in SpoolManagerExtended, or write a fresh ID. | No printer — a spool resolved, but no OctoPrint instance is configured. Add one in the web UI under Setup. |
| Message | Meaning | Fix |
|---|---|---|
| Unknown spool | The tag was read fine, but its ID is not in the database | Assign the spool in SpoolManagerExtended, or write a fresh ID |
| Unreadable tag | Data was found but no supported format could parse it | Check the raw dump; the tag may be foreign or partially written |
| No reaction at all | The tag was never detected | Reposition it, then check NFC debug or the NFC test |
A tag that reads intermittently by position is usually the 470 µF capacitor missing or too far from the PN5180.
- Negative when loaded — the load cell wires are swapped. Exchange white and green at the HX711.
- Drifting or noisy — check the HX711 noise value in the Scale tab. Steady noise with a stable supply points at a mechanical problem: the load cell must be able to flex freely, bolted at one end only.
- Consistently off by a factor — recalibrate, preferably two-point.
Weighing, taring, calibration, and reading, writing, and erasing tags all work without OctoPrint. Lookup, printer and tool selection, and weight updates need OctoPrint-SpoolManagerExtended reachable and configured with a valid API key. Check the DB indicator in the idle footer and the spool-ID lookup test in Setup.
Swap A and B on the encoder. Confirm with the Knob test.
Check the device's System info screen for its IP; the router may have issued a new one. Use the IP rather than octoscale.local — mDNS is unreliable here, and it is also why OTA updates should be addressed by IP.
For implementation details, the HTTP API, and the tag format internals, continue with the Development Guide.