[EN] IPs and TPlink
| IPv4 | Associated device |
|---|---|
| 192.168.0.1 | TP-Link router (web, pwd: RO505050) |
| 192.168.0.10 | Bridge computer TP-Link <-> Eduroam (user: ro50, pwd: ro50) |
| 192.168.0.102 | Raspberry Pi pro_1 (SSH, user: ubuntu, pwd: turtlebot4) |
| 192.168.0.103 | Raspberry Pi lite_1 (SSH, user: ubuntu, pwd: turtlebot4) |
| 192.168.0.104 | Raspberry Pi pro_2 (SSH, user: ubuntu, pwd: turtlebot4). If the address doesn't work, try 192.168.0.111 |
| 192.168.0.107 | Create3 pro_1 |
| 192.168.0.108 | Create3 lite_1 |
| 192.168.0.109 | Create3 pro_2 |
| 172.23.4.1 | Main Eduroam DNS |
| 172.23.4.2 | Secondary Eduroam DNS |
Connect to the TP-Link network (TP-Link_4B3E or TP-Link_4B3E_5G). Access its configuration page by typing the following address in your browser nav bar: 192.168.0.1. The password is RO505050.
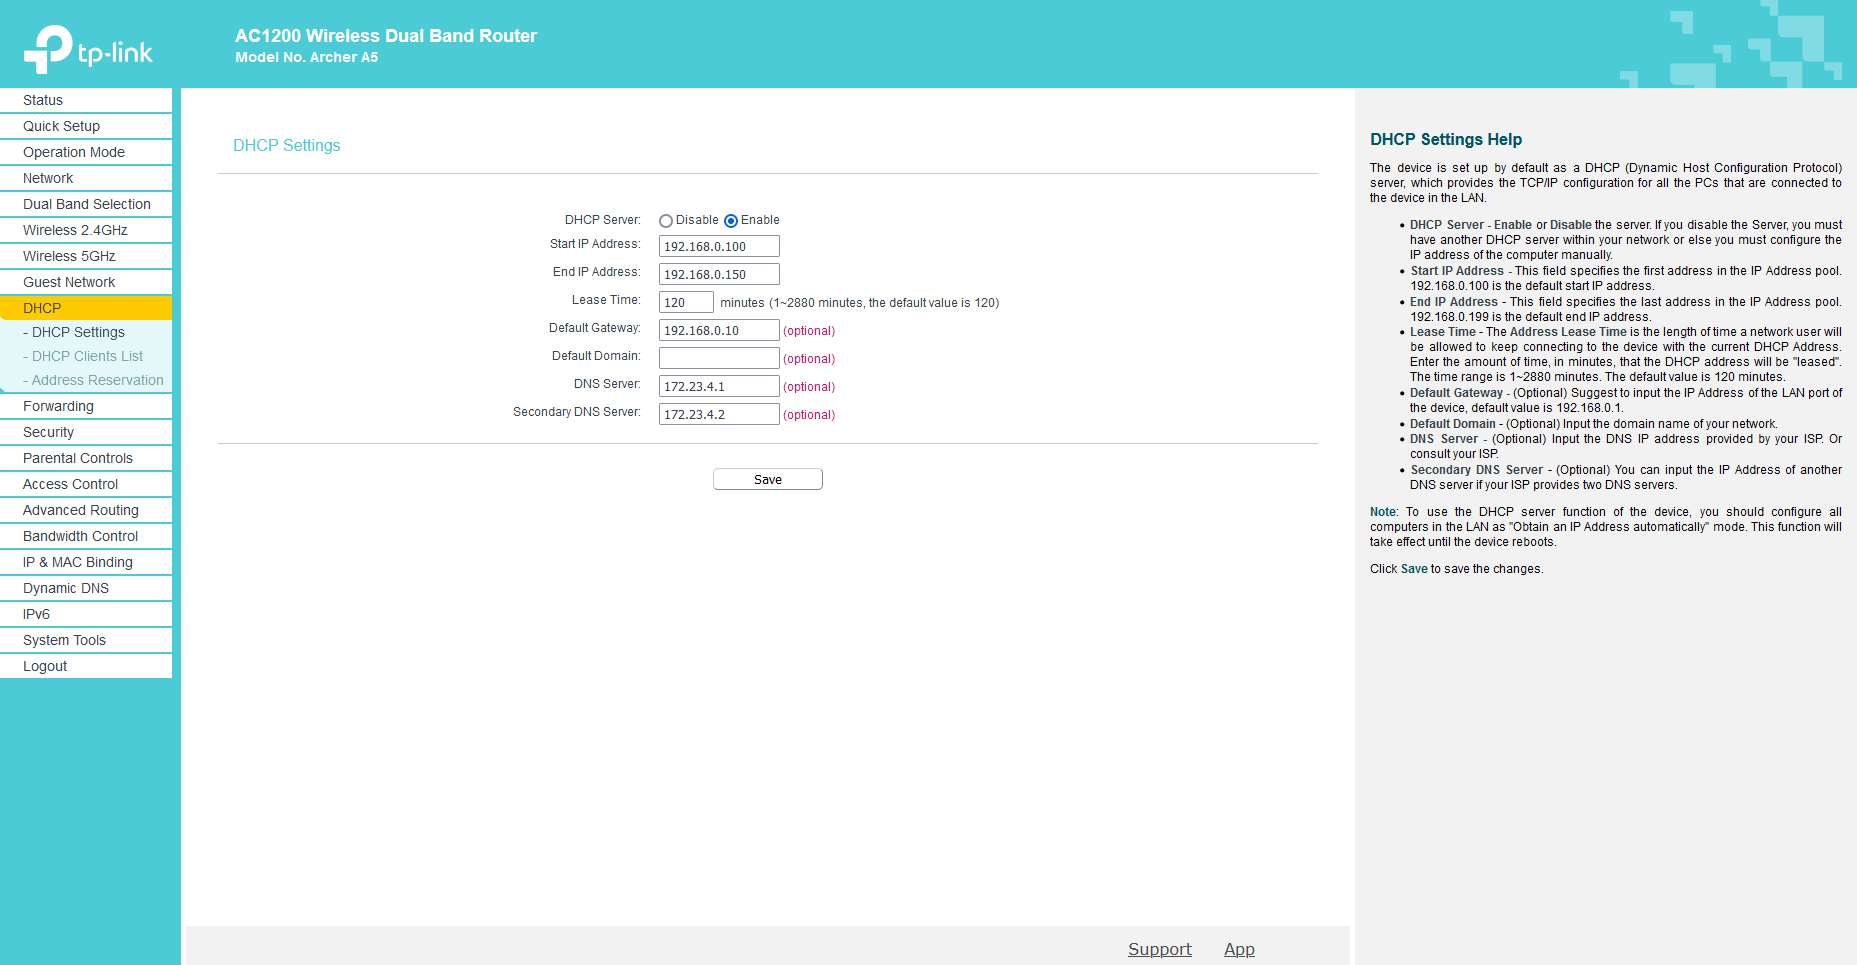
Here is how to configure DHCP to communicate with the Eduroam bridge computer:
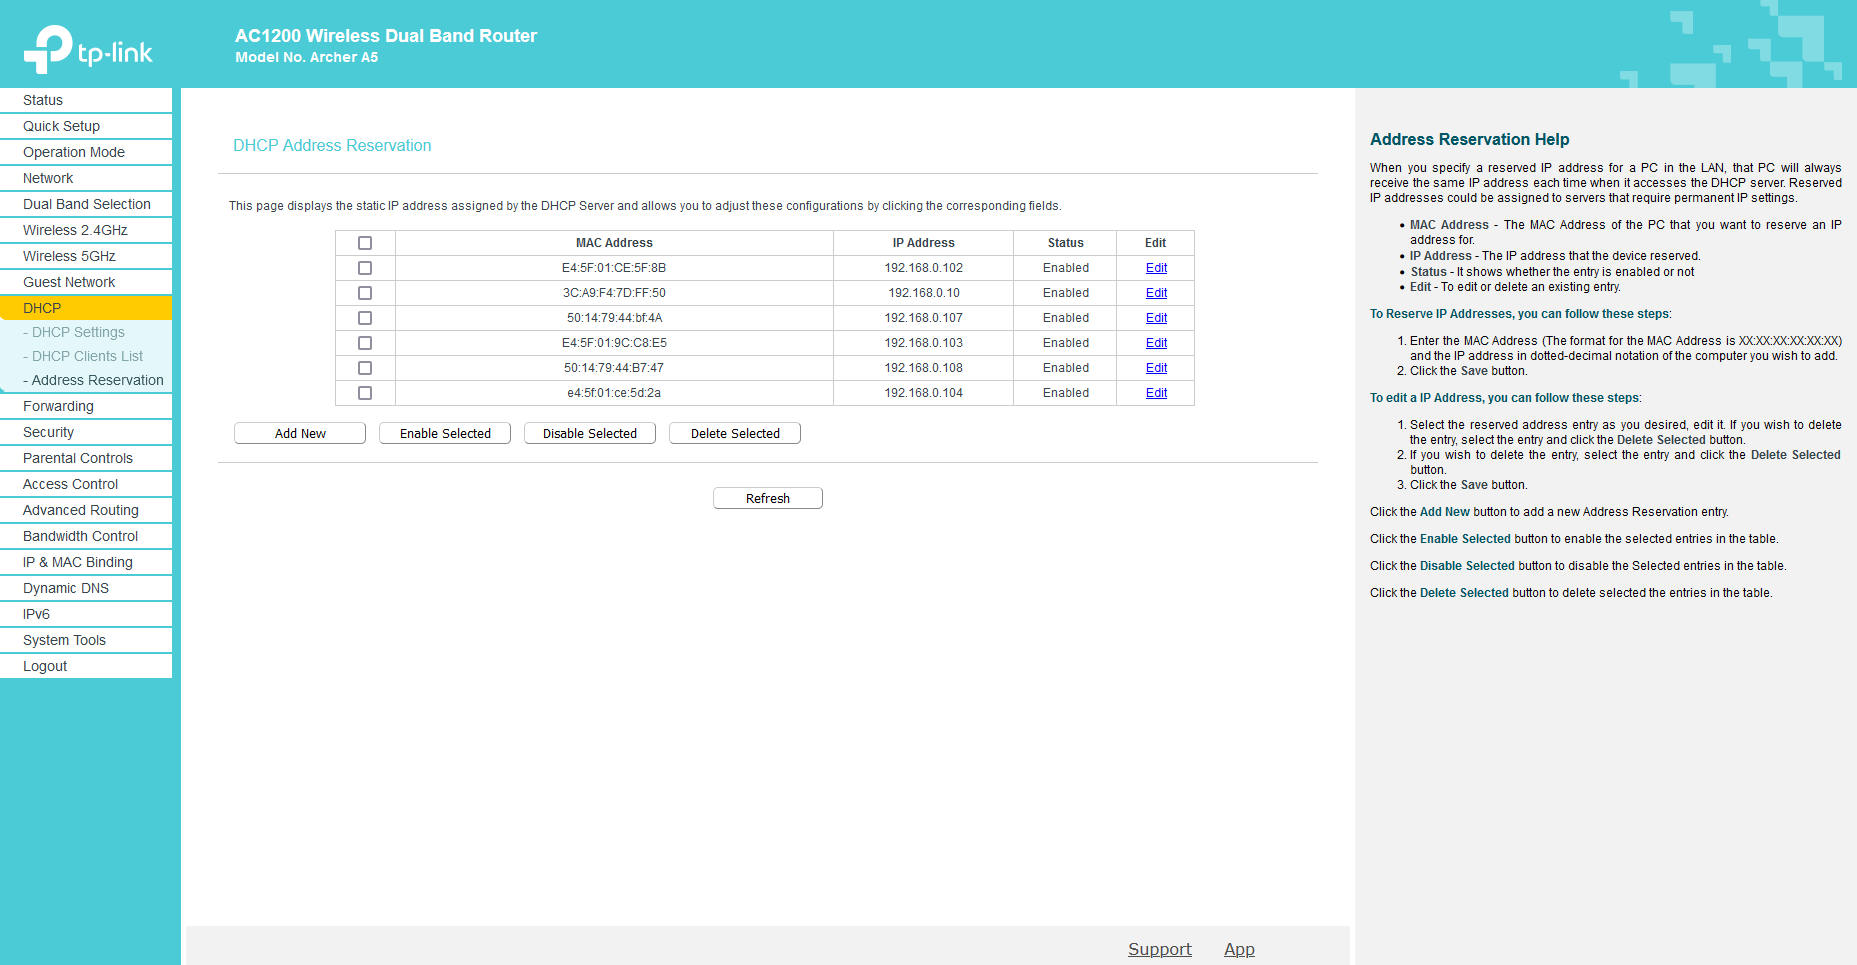
Don't forget to assign static IPs to the bots and other devices you will need to have on the TP-Link (see table at the top). You can do that from this page:
Connect the TP-Link router and the bridge computer using an ethernet cable plugged in on the router's LAN1 port.
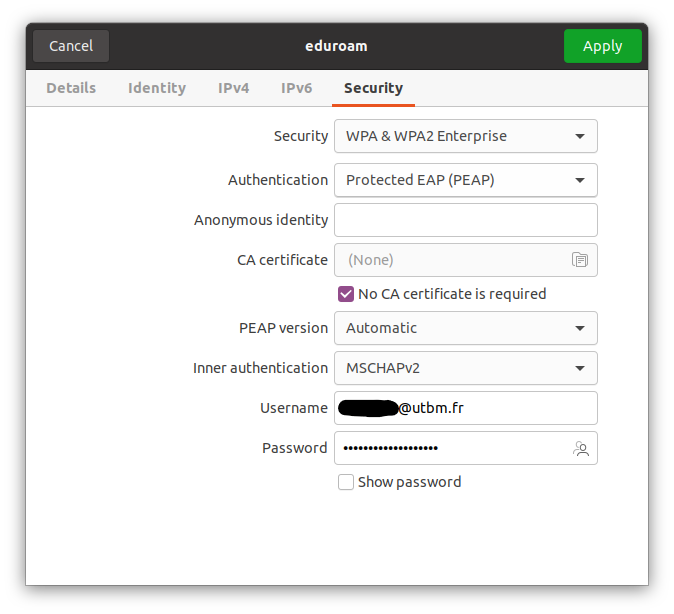
You then have to connect the computer to Eduroam.
Here is how to configure it:
Finally, you have to tell the computer that packets received from the TP-Link have to be redirected to Eduroam.
M. CARRARA did this part for us, by using a hook on the session manager (at the end of the session launch) to apply routing rules automatically upon computer start.